We’ll start by building the drumhead, which is composed of two square wooden frames, each 1/2″ wide and 1″ deep. These nesting frames will hold our x-ray film tight, so it can be stretched taut against the bucket while still vibrating freely. One frame (the outer frame) has an external width of 12″ and an internal width of 11″. The other (predictably, the inner frame) has an external width of 11″ and an internal width of 10″. Making these requires using a miter box.
A miter box (shown in Figure 9-3) guides the saw so that you can accurately cut precise angles. There are lots of specialty miter boxes available with different angles, but even the most basic miter box has slots for cutting 90-degree and 45-degree angles. Framing the drumhead calls for 45-degree cuts. Since we are making a square frame, each side will have a 45-degree cut at either end, so that each piece of the frame is a skinny trapezoid with a long edge that is 1″ longer than its short edge.
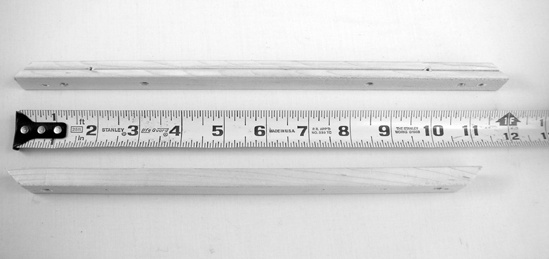
Using the miter box as a guide, cut four pieces of wood that are 12″ long, with a 45-degree angle at either end (like the example at the top of Figure 9-4); these are for the outer frame. Then cut four similar pieces that are 11″ long (like the example at the bottom of Figure 9-4) for the inner frame. Note that each piece has a 45-degree angle at either end and that the angles are not parallel.
Note
Measure twice! Cut once! Before you pull the saw, ask yourself, “Have I oriented this piece of wood properly? Am I cutting across the 1/2″ face of the board, so that I can have a 1″ deep frame?” It seems like I’m senselessly belaboring this point, but rest assured: If this is your first time, you are going to reverse one of those cuts and kick yourself. Cut the longer pieces first, since you can transform a screwed-up long piece into a workable short piece.
Mock up the outer frame, then install the 1″ corner braces around the outside of the frame using 1/2″ screws. It’s easy to accidentally split these thin strips of wood; to avoid splitting, carefully drill 1/8″ guide holes for each screw before screwing it in.
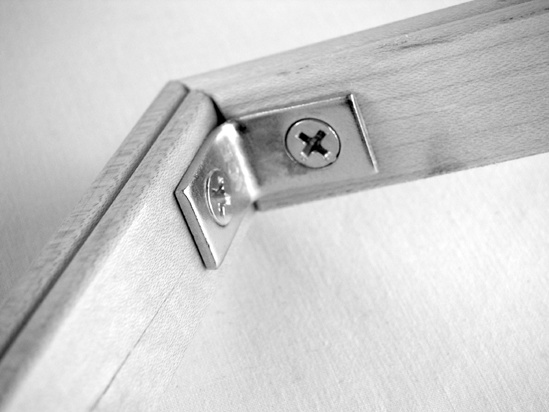
Now build the inner frame. This time you’ll mount the 3/4″ braces on the inside of the frame (as shown in Figure 9-5), securing them with 1/2″ screws (again, drill guide holes for each screw in advance).
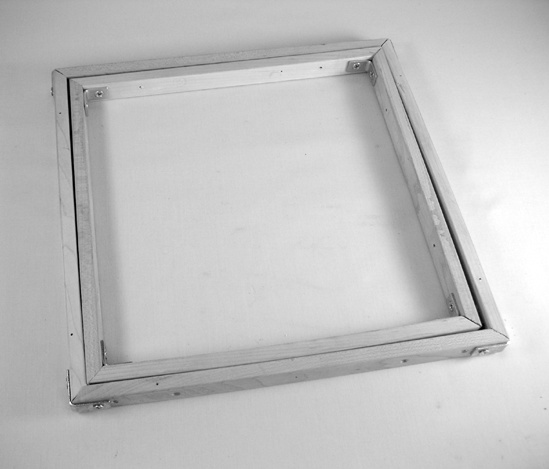
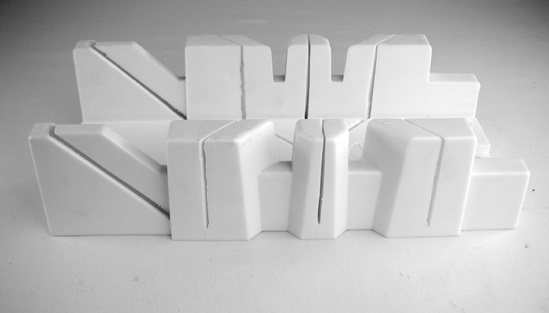
Test to make sure that the inner frame fits snugly in the outer frame (as in Figure 9-6) and that the inner frame will easily fit around the lip of your bucket.
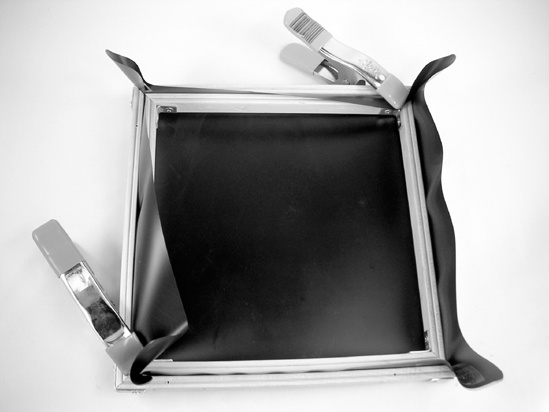
Place the outer frame on the workbench, lay a large x-ray film over it, center the inner frame within the outer frame, and push hard, sandwiching the x-ray between the two. Once the inner and outer frames are flush, clamp them together as shown in Figure 9-7.
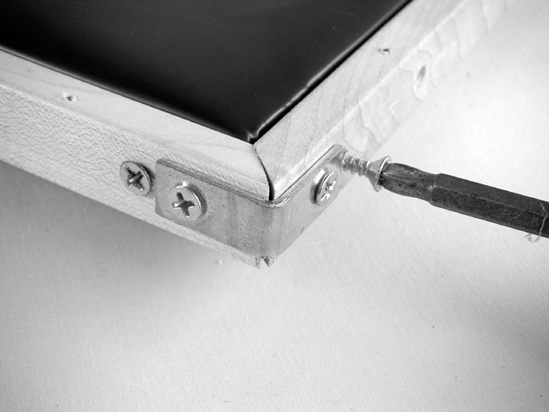
Now that the frame is temporarily secure, drill a 1/8″ hole through the outer frame, x-ray, and inner frame right next to an exterior corner brace. Drive a 1″ screw through all three, securing the two frames and trapping the x-ray between them (illustrated in Figure 9-8). Repeat this on the other end of this side, then the opposite side and each of the adjacent sides. When you’re done, you will have installed eight 1″ screws.
Remove the clamps, then measure and mark 3″ in from each corner (Figure 9-9). These marks show the positions for the last eight 1″ screws (which will serve as secondary securing screws).
In order to keep as much strain as possible off of the screws that are piercing the x-ray, we need to make sure that the inner frame is as snug to the outer frame as possible. Flip the drumhead over and remove the interior corner braces (which are no longer necessary). Drill guide holes and install the last eight 1″ securing screws at the points you marked in Step 7. Finally, remove and re-drive the first set of 1″ securing screws (the ones right next to the exterior corner braces), so that the inner and outer frame are drawn together as tightly as possible.
Flip your drumhead face down and trim the x-ray film. You’ll likely have a reasonably tight drumhead; hold the wooden frame and give the head a few fingertip beats. This kind of simple, shallow drum (sometimes called a lollipop drum in kids’ music classes) is similar to an Irish bodhrán and pleasing in its own right. If your drumhead doesn’t sound at all drum-like at this stage, don’t panic: the drumhead ultimately gets its tension from being drawn taut against the lip of the bucket. Nonetheless, since the x-ray film is so rigid, it’s highly likely you’ll have a serviceable drum in hand at this step.
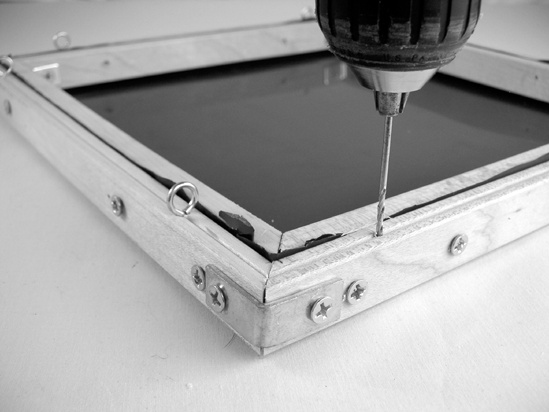
Next, install mounting hardware. Find your slimmest drill bit, and use it to drill eight holes on the underside of the outer frame, 2″ from each corner (Figure 9-10). Screw the eyes into these holes, being sure that they are fully seated and oriented so that the eyes look down the edge of the frame, not out. Set aside the drumhead.
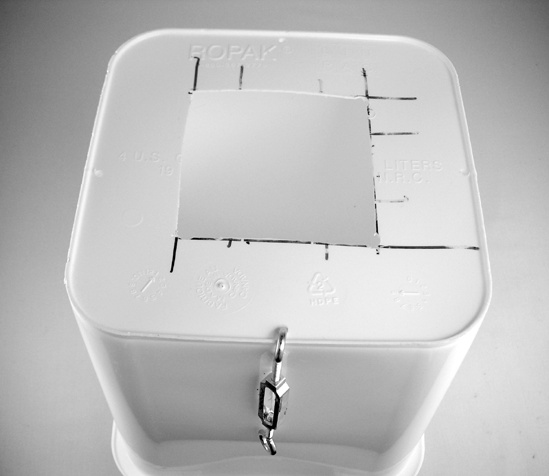
Get out the 4-gallon bucket and flip it over. Draw a 4″ square in the middle of the bottom, drill a 1″ hole in each corner of that square, and saw between the holes. Then, drill a 1/8″ hole in the middle of each edge of the bucket’s bottom, as shown in Figure 9-11. Fully extend your four turnbuckles and slide the hooked end of each into its 1/8″ hole.
Stand the bucket up (the turnbuckles should sit snugly in the 1/8″ holes, making this a relatively painless operation). Place the drumhead on top of the bucket, face up.
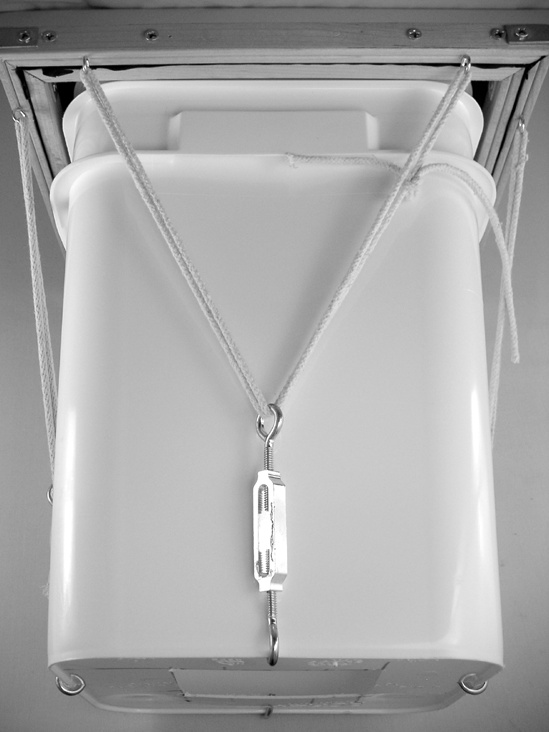
Run a 3 1/2′ piece of clothesline in a loop from one screw eye, down to the eye on the turnbuckle, to the other screw eye, and back through the turnbuckle. Tie it off with a square knot, taking up as much slack as you can (Figure 9-12). Repeat on each side, then trim the excess cord.
To tune the drum, give one turnbuckle four clockwise half-turns, then do likewise with the opposite turnbuckle, then with one adjacent turnbuckle, and then with its opposite. Repeat this three or four times, until the head begins to become taut (e.g., the turnbuckles will no longer rattle against the body when you lightly tap the drumhead). Fine tune the drum by turning each turnbuckle one half-turn, working around the perimeter of the drum in a circle rather than by tightening opposites, until you get a tone you like. Too much tension will deaden the tone, and if you keep going, will deform the bucket. It could even begin to tear the drumhead within the frame, although that’s unlikely if you are tightening the turnbuckles evenly.
(optional) You can also add a piezo pickup (like the one in the next project, the Thunderdrum) to the X-Ray Talking Drum; here it’s best to glue the pickup to the body of the drum, rather than the head. Distortion effects, especially a heavy-metal oriented stomp box like a BOSS Metal Zone, can be pretty wicked awesome on a drum.