
In this chapter, we'll add some polish to our game prototype by integrating some animated Head-up Display (HUD) elements, and we will make some modest improvements to the gameplay in the process. We will learn how to:
- Create a layer of HUD actors that sit statically on top of our game levels
- Animate the Dynamic Cursor
- Represent the game data dynamically through HUD elements
- Communicate between multiple actors within a scene using actor attributes
- Make an actor follow the position of the mouse cursor
- Switch between scene and screen space, using anchoring
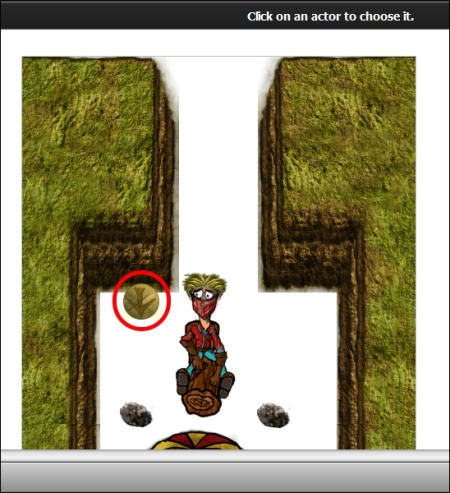
One of the most important HUD elements in our game prototype is the dynamic cursor. Put simply, this is a special-purpose actor that we will create to replace the regular mouse cursor. It changes the animation, depending on the current movement state of the Player Character, hence the designation dynamic. To create the dynamic cursor, perform the following steps:
- Create a new Actor Type, and name it
Dynamic Cursor. - Select the Click here to add a frame button to import your first frame. Navigate to and select
Game AssetsGraphicsGUI Elementsdown.png. - Change the Name of the animation to
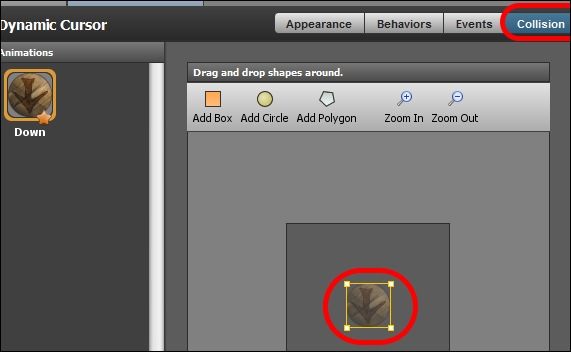
Down. - Switch to the collisions context. Select the default collision box, and hit on Delete, as we will not need to calculate the collisions for this actor, as shown in the following screenshot:
- Duplicate the Down animation, as shown in the following screenshot:

- Change the new animation's name from Copy of Down to
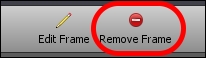
Left. - Remove the redundant frame that is carried over from the Down animation, as shown in the following screenshot. You should have no frames in the Left animation after this:
- Select the Click here to add a frame button to import your first frame. Navigate to and select
Game AssetsGraphicsGUI Elementsleft.png. - Duplicate the Left animation, and change the name from Copy of Left to
Right. - Delete the redundant frame.
- Select the Click here to add a frame button to import your first frame. Navigate to and select
Game AssetsGraphicsGUI Elements
ight.png
. - Now let's add our fourth and final animation for the dynamic cursor. Let's repeat the same pattern as before and duplicate the Right animation.
- Change the Name from Copy of Right to
SlowDown. - Delete the redundant frame.
- Select the Click here to add a frame button to import your first frame. Navigate to and select
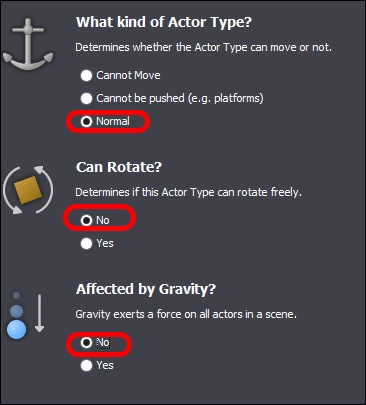
Game AssetsGraphicsGUI Elementsslow down.png. - Finally, we must disable all physics parameters for the actor. Switch to the Physics context, and configure the basic settings to match those shown in the following screenshot:
- Now bring up the Advanced settings, and change the Actor Mode from Normal to Simple, as shown in the following screenshot:

Brilliant! All of the animations have been imported, and the basic settings have been configured. Now, we need to write the code that controls our Dynamic Cursor. To do so, perform the following steps:
- Go to the Dashboard tab, open up Level 1, and add a copy of the Dynamic Cursor actor to the scene.
- Back in the Player Handler behavior, create a new attribute of type Actor, name it
Cursor, and leave it unhidden. - Go back to Level 1, and click on File/Reload Document.
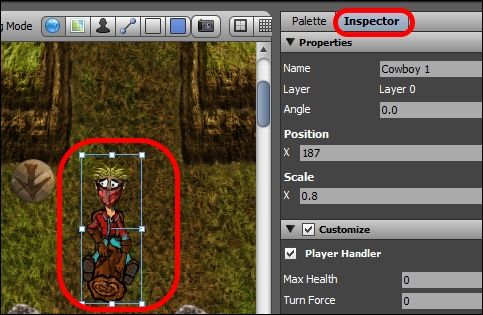
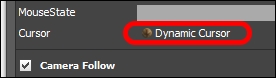
- Click on the Cowboy actor, and bring up the Inspector, as shown in the following screenshot:
- Tick Customize, and click on Choose Actor... for the Cursor attribute we added earlier, as shown in the following screenshot:

- Select the Dynamic Cursor from the window that ensues, as shown in the following screenshot:
- If all went well, you should see that the Cursor attribute now has the value Dynamic Cursor, as shown in the following screenshot:
What we've just done is assigned the Dynamic Cursor in the scene to the Cursor attribute, which we created in our Player Handler. This means that we can now interact with the Dynamic Cursor actor directly for that behavior, which is very useful indeed!
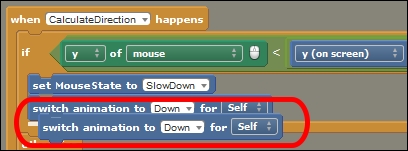
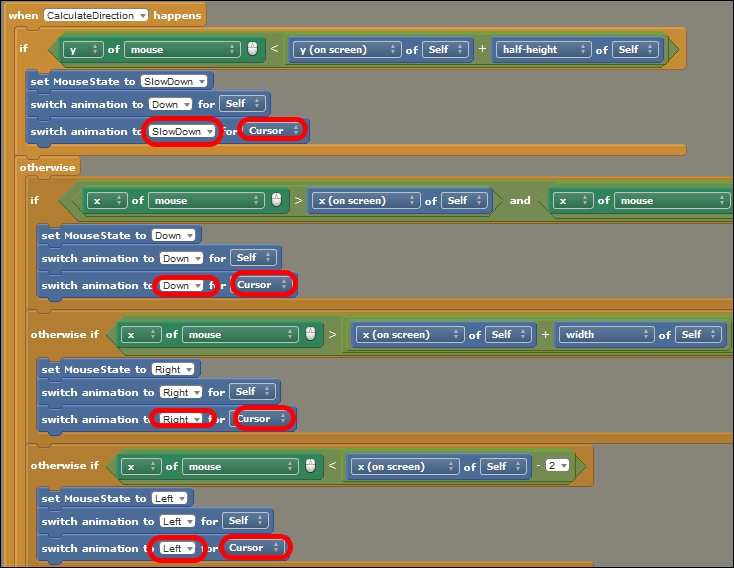
- Let's switch back to the Player Handler again, and go to Calculate Dir in the events pane.
- In the first if block, make a duplicate of the switch animation to Down for the Self block by holding Alt, then clicking and dragging it below, as shown in the following screenshot:
- Navigate to Self | Choose Attribute, as shown in the following screenshot:
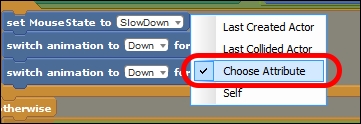
- In the ensuing menu of the Actor attributes, select the Cursor attribute to which we assigned the Dynamic Cursor in Level 1 earlier in the chapter. Click on OK to commit.
- Now copy this switch animation block over to all the other if and otherwise if blocks, then change the animations for all the four of these blocks to SlowDown, Down, Right, and Left. As you do this, you may have to repeat the process of switching the target of this block from Self to Cursor for each copy, as we did earlier, as shown in the following screenshot:
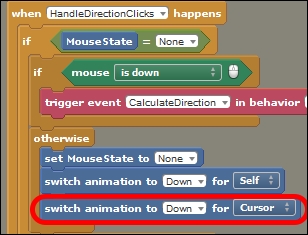
- Switch to Handle Dir Clicks in the events pane.
- Add a switch animation to Down for Cursor block to the otherwise block, as we did earlier, as shown in the following screenshot:
- Next, we need to make the cursor follow the mouse position exactly. To do this, go to the Dashboard tab and create a new Actor Behavior. Name it
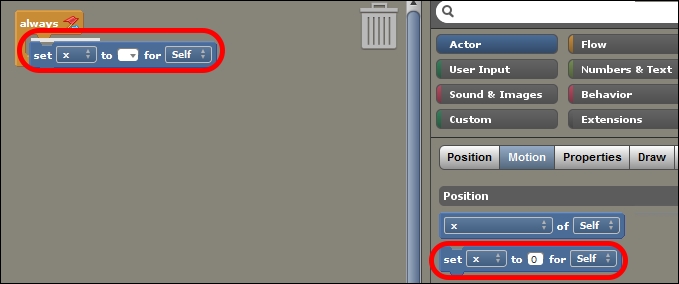
Cursor Handler, and click on Create. - Navigate to Add Event | Basics | When Updating to insert an always event into the new behavior.
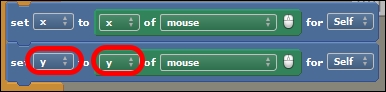
- In the blocks palette, navigate to Actor | Position, and add a set x to block to our new always event, as shown in the following screenshot:
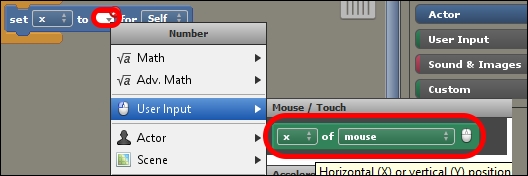
- For the to field, click on the little downward grey arrow, and navigate to User Input | Mouse & Touch | x of mouse, as shown in the following screenshot:
- Duplicate this block, then change x to y, and x of mouse to y of mouse, as shown in the following screenshot:
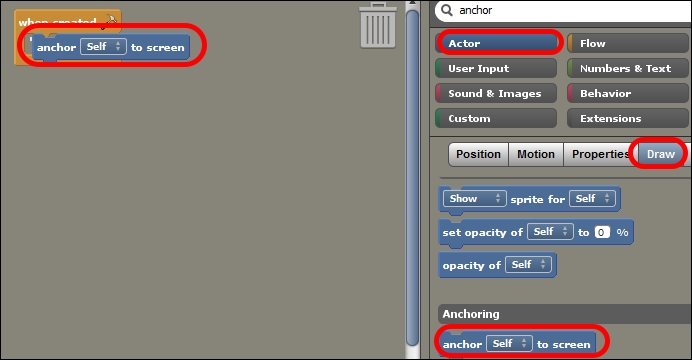
- Navigate to Add Event | Basics | When Creating.
- In the blocks palette, navigate to Actor | Draw | Anchoring, drag out and add an anchor Self to screen block, as shown in the following screenshot:
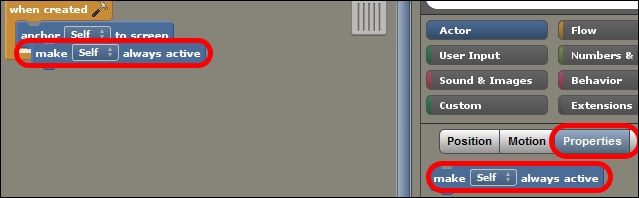
- Next, switch to Properties, and add a make Self always active block, as shown in the following screenshot:
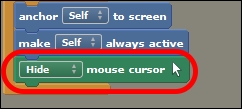
- We also need to hide the mouse cursor. Navigate to User Input | Keyboard & Mouse | Mouse / Touch, and add a Hide mouse cursor block, as shown in the following screenshot:
- Finally, click on Attach to Actor Type, select the Dynamic Cursor, and click on Choose.
Great work! Now when you test the game, you will see the Dynamic Cursor following the position of the mouse and adapting its appearance to the input of the player. In very little time, you've learned the basic process of adding an animated HUD element to a Stencyl game!