Let's begin by adding the avatar, which will symbolize the player in the game, in game development parlance. The actor that represents the player in-game is generally referred to by the acronym PC (Player Character). Having established this, we will use this abbreviation from time to time henceforth. Perform the following steps for adding our first actor:
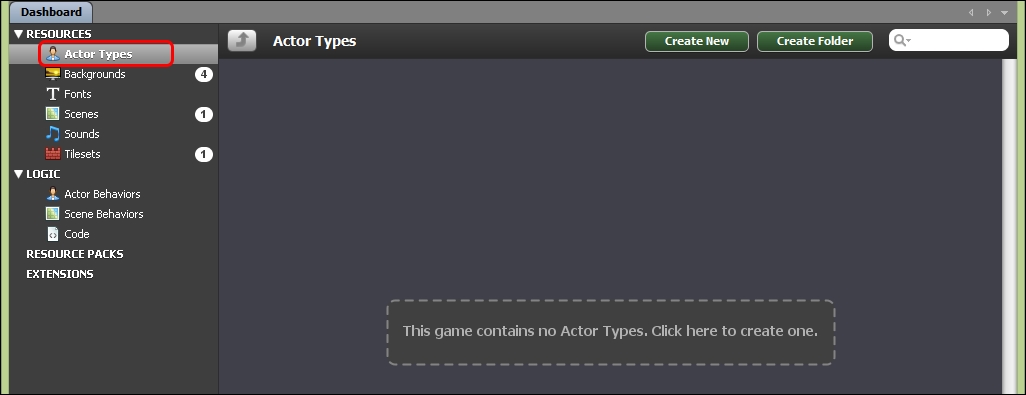
- Go to the Dashboard, and take a look at the now familiar RESOURCES pane on the left-hand side of the screen. Select Actor Types, which just so happens to be at the top of the list, as shown in the following screenshot:
- You can see that there is a cut-out styled button in the main view that contains the text This game contains no Actor Types. Click here to create one. Do as it says, and the Create New… window will pop up, as shown in the following screenshot. We are not complete strangers to this window, as it is the same window we used to create our Backgrounds, foreground, and Tilesets in Chapter 3, Backgrounds and Tilesets. We must provide a name next to the Name box to proceed to the Actor Type Editor. Let's simply call this actor
Cowboy: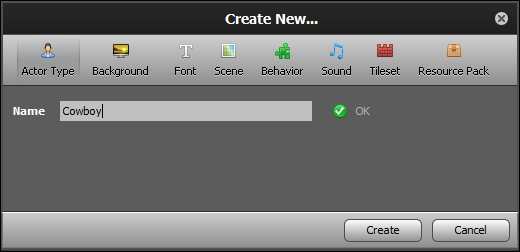
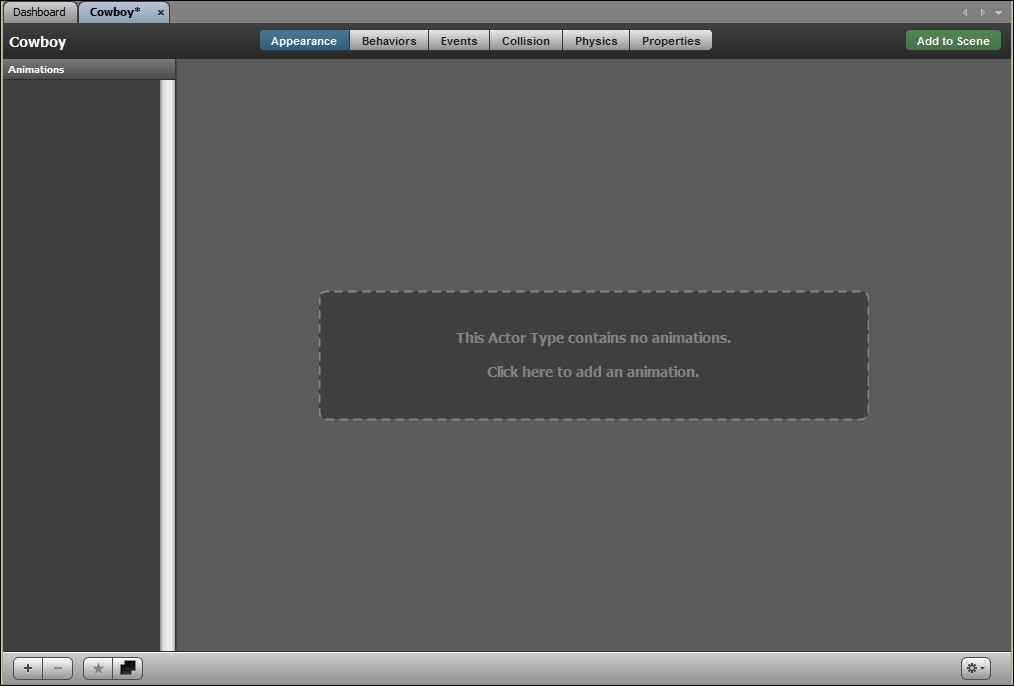
- Click on Create. The Actor Type editor will now open up. What you should see is a screen as shown in the following screenshot:
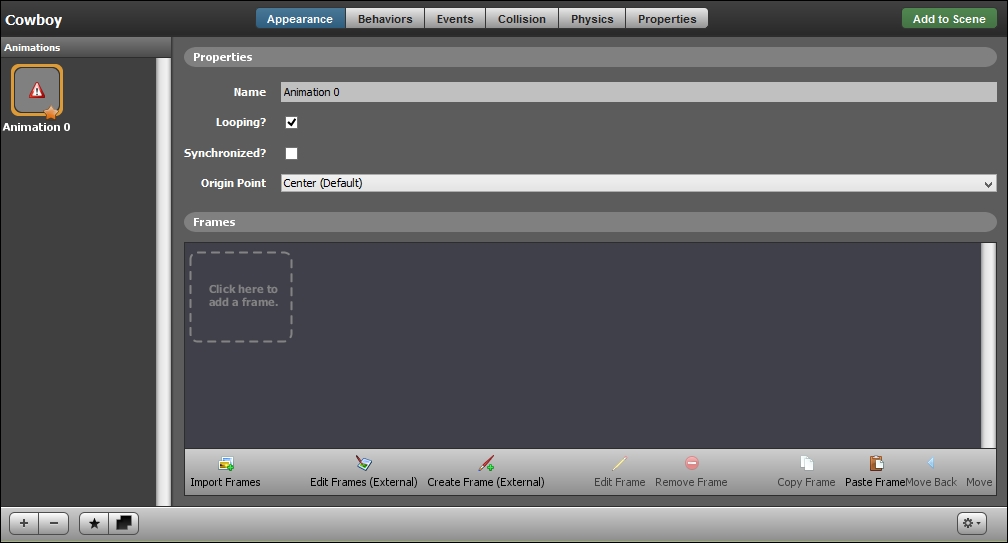
One of the first things that we'll need to do, now that we've created the shell of our Actor Type, is import a few animations so that the actor has a visual representation within the game. Perform the following steps:
- You should see the This Actor Type contains no animations. Click here to add an animation. button at the center of the main view, as shown in the preceding screenshot. Click on it to add the first animation. You will be presented with a blank animation called Animation 0, as shown in the following screenshot:
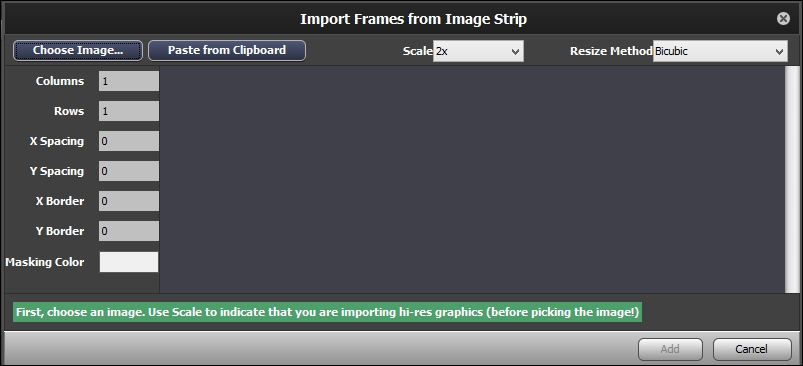
- In the main view, under Frames, you will see a Click here to add a frame. button. Click on it, and the Import Frames from Image Strip window will pop up, as shown in the following screenshot:
- Change Scale to 4x, as we did in Chapter 3, Backgrounds and Tilesets, when importing the graphics for the Backgrounds and Tilesets game resources. It is important that we always do this, lest our graphics import at incorrect scales.
- Now click on Choose Image… to open the file explorer.
- Navigate to and select
GameAssets/Graphics/Actor Animations/cowboy down.png.
Having completed the preceding steps, you should now be able to see the selected graphic appear in the Import Frames from Image Strip window, as shown in the following screenshot:
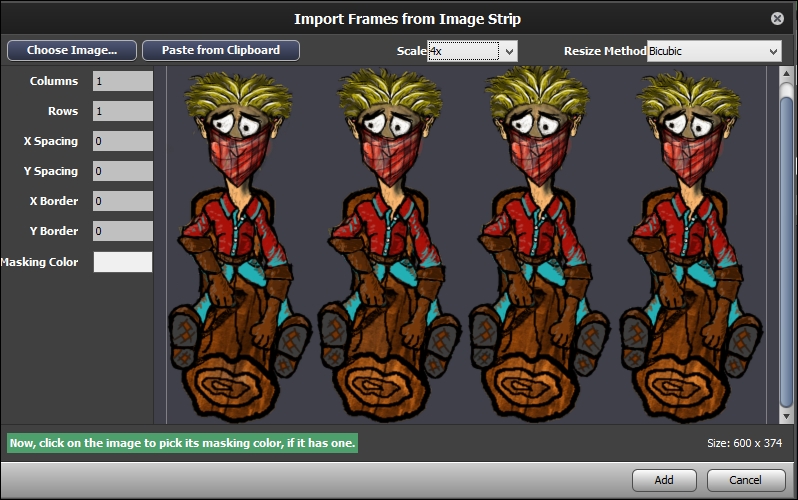
Clearly, this animation contains four horizontal frames. Hence, before clicking on Add, we must perform the following steps:
- Change Columns to
4. - Leave all of the other fields unaltered, and click on Add.
- You will see that we have successfully added our first animation. Well done! At this point, it is important to change the name of the animation to something more meaningful. The Animation 0 name doesn't say much about the aesthetic or functional role of the animation. Change the Name to
Down, as shown in the following screenshot:
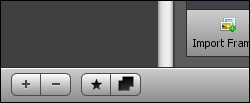
The other fields, Looping, Synchronized, and Origin Point are ideally configured by default in this case, so we need not change them. We have two more animations to import for this Actor. On the left-hand side of the screen, at the bottom of the Animations pane, you will see a number of buttons, as shown in the following screenshot:
The names of these buttons appear on the screen when you hover the mouse cursor over them. These are, from left to right, as follows:
- Create Animation: This button adds a new animation to this Actor Type
- Remove Animation: This button removes the selected animation from this Actor Type
- Set as Default Animation: This button makes the selected animation the default animation
- Duplicate Animation: This button duplicates the selected animation
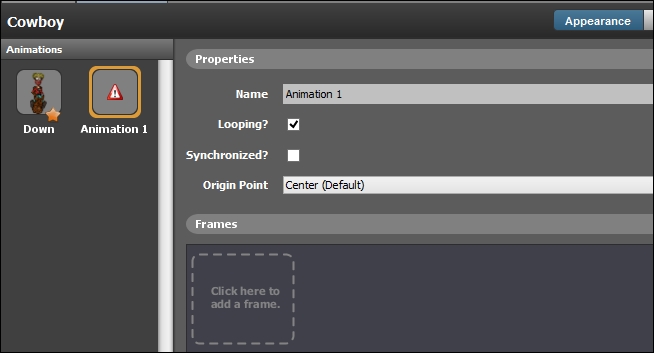
Now let's click on the Create Animation button to add our second animation. You will see, as shown in the following screenshot, that there are now two animations in our Animations pane. The new animation is called Animation 1 and is still blank, as we have not yet imported the frame sheet. Change the Name to Left, and select the Click here to add a frame. button, as shown at the bottom center of the following screenshot:
The Import Frames from Image Strip window will open once again. Perform the following steps:
- Set the Scale to 4x.
- Set Columns to
4. - Click on Choose Image….
- Navigate to and select
Game AssetsGraphicsActor Animationscowboy left.png. - Click on Add.
If you have followed the steps correctly, you should see something like the following screenshot:

If this is not what you see, click on the Remove Animation button (alternatively, you can select the Left animation in the Animations pane, and press Delete on your keyboard), and repeat the aforementioned steps carefully so that you can achieve the desired result.
We have one more animation to import for this actor. Let's follow all the same steps as follows:
- Click on Create Animation.
- Change the new animation's Name to
Right. - Select the Click here to add a frame. button.
- The Import Frames from Image Strip window appears. Change Scale to
4x, and Columns to4. - Click on the Choose Image… button.
- Navigate to and select
Game Assets/Graphics/Actor Animations/cowboy right.png. - Click on Add.
As mentioned earlier, if you have followed the steps correctly, you should see three functional animations looping in the Animations pane at this point (the animations are subtle, but if you take a look at them closely, you should see them looping), as shown in the following screenshot:
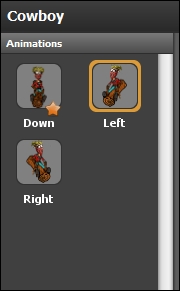
You will notice that one of the animations (Down) has a star on it. This indicates that it is the default animation. If any or all of these animations are not looping, make sure that you have checked the Looping checkbox for each individual animation (it is usually checked by default), as shown in the following screenshot:
Each animation has its own collision shape, so it's important to take a little time to configure this properly. We'll start by selecting the Down animation from the Animations pane, then switching to the Collision context. Take a look at the options shown in the following screenshot:
You will see that, by default, your actor has a collision box, which encompasses the entirety of the graphic, as shown in the following screenshot:
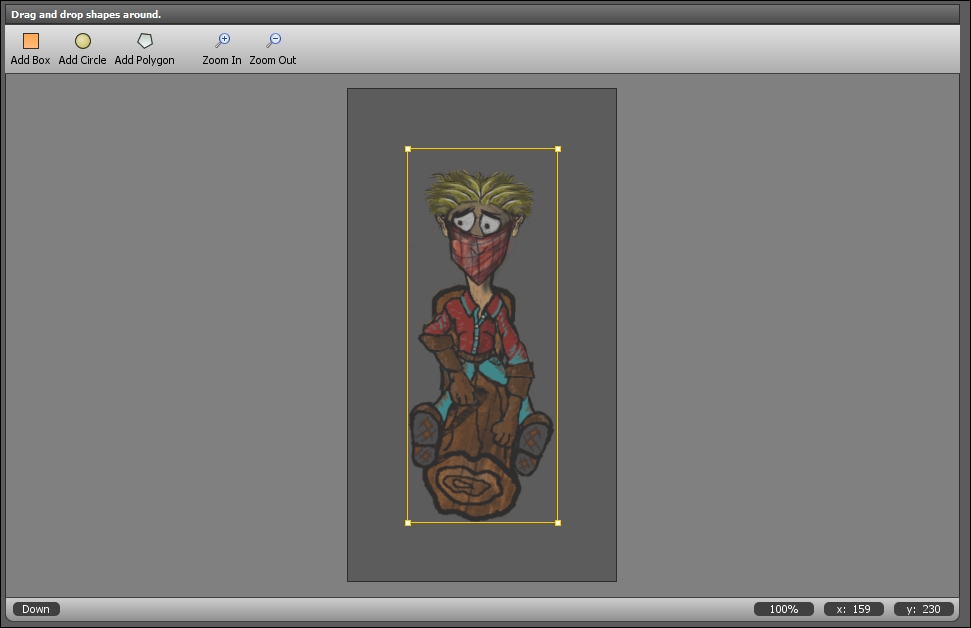
While we do want to use a box-shaped collision for this particular animation, we must customize its position and its dimensions to fit a certain area of the graphic. At the top right of the screen, you will see a pane called Current Shape.
Take a look at the following screenshot:

Let's alter the following values to better suit this animation:
- Set X Position (Left) to
18. - Set Y Position (Top) to
68. - Set Width to
34. - Set Height to
90.
You should now be able to see the updated collision shape to fit the desired collision area on our Animation preview:
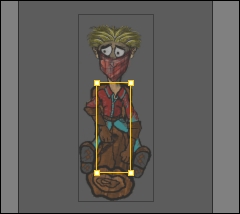
Excellent work! You have successfully configured the collision settings for your first animation. Let's get started with the other two animations. In the Animation pane on the left-hand side of the screen, switch to the Left animation. You will see a box collision shape, which encompasses the entire graphic, as before. This time, you must perform the following steps:
- Select the collision box.
- Press the Delete key on your keyboard.
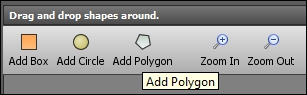
We are going to add a polygonal collision shape to this animation. Click on the Add Polygon button shown in the following screenshot:
The Create a Polygon… window will appear on the screen as shown in the following screenshot:
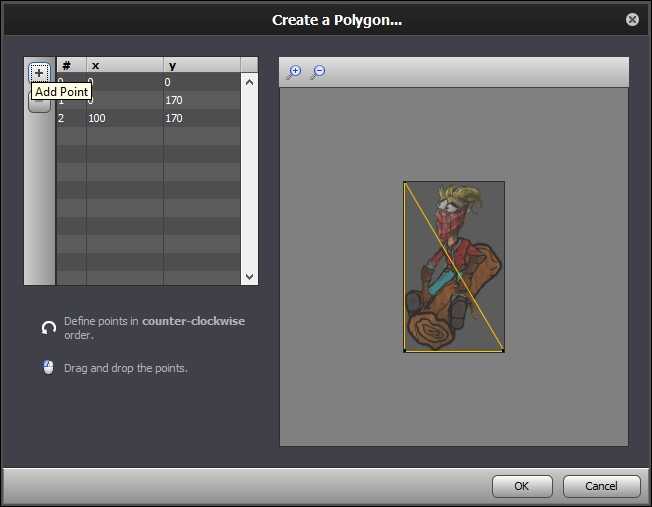
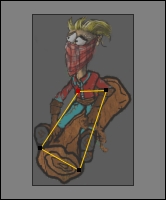
This polygon has only three points by default. We need four to create the intended shape, so let's add an extra point. Click on the Add Point button at the top-left section of the window (it looks like a plus symbol). You should see an additional point appear in the preview on the right-hand side of the window. Finally, let's move the points around to create the shape, as shown in the following screenshot, simply by clicking-and-dragging them around in the preview. The goal here is to approximate the visual area of the log (be aware that the concave collision shapes are prohibited and will not be accepted), as shown in the following screenshot:
When you have succeeded in creating this shape, click on OK to commit and add this shape to the animation. Now, we must create the inverse shape for the Right animation:
- Select the Right animation from the Animations pane on the left-hand side of the screen.
- Select the existing collision box shape and press Delete on your keyboard to get rid of it.
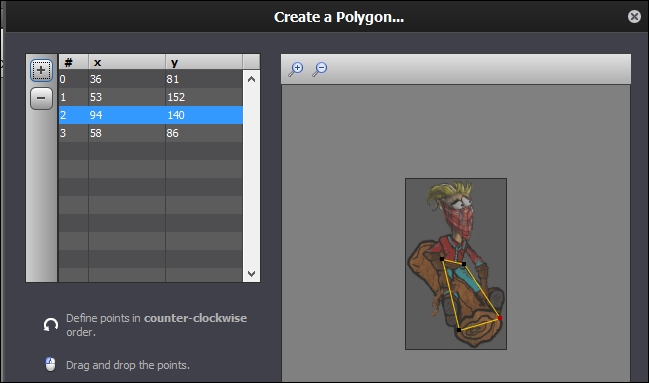
- Click on Add Polygon to open the Create a Polygon… window.
- Click on Add Point (which looks like a plus symbol) to increase the number of points from three to four.
- Manipulate the positions of each point by clicking and dragging them in the preview, until you have a shape that looks the same as or very similar to the following screenshot:
- Click on OK to commit this collision shape to the animation.
Congratulations! You've successfully added both the basic and advanced collision shapes to your animations! Now, we just need to finalize some of the Physics settings for this Actor Type. Switch to the Physics context, as shown in the following screenshot:
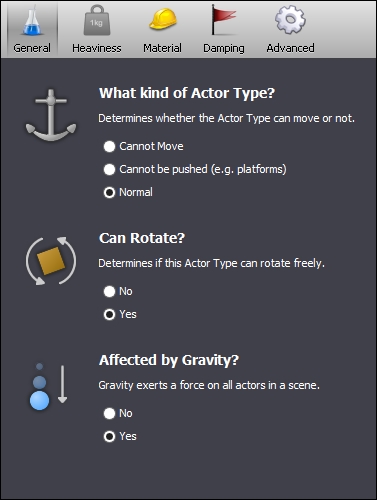
Under the General settings, you will see the following options:
- Set What kind of Actor Type? to Normal
- Set Can Rotate? to No
- Set Affected by Gravity? to Yes
Take a look at the following screenshot that shows the options shown in the General settings:
Well done! You've successfully configured all of the fundamental settings for the Cowboy actor! This Actor Type now has useable animations and is capable of detecting and reacting to the physical interactions within our game levels using Collision shapes!
We must add one more actor to our game, which will be easy now that we've learned the process, before moving on to the next chapter, where we'll begin by writing Behaviors to make our actors do things in-game. This time, we'll add an obstacle in the form of a falling rock. Perform the following steps:
- Go back to the Dashboard.
- In the RESOURCES menu on the left-hand side of the screen, select Actor Types.
- Click on the button that says Click here to create a new Actor Type.
- Set the Name to
Rockand then click on Create. - Click on This Actor Type contains no animations. Click here to add an animation.
- Select the Click here to add a frame. button to import our animations using the Import Frame from Image Strip window.
- Set Scale to 4x, then click on Choose Image…, and navigate to and select
Game AssetsGraphicsActor Animationslarge rock.png. Set Columns and Rows to1, Resize Method to Bicubic, and then click on Add. - Change the Name of the new animation from Animation 0 to
Default. - Change the context in the top menu from Appearance to Collision.
- Select the default collision box and press Delete on the keyboard. Then, click on Add Circle, and in the ensuing window, set the fields X Position (Left) to
4, Y Position (Top) to0, and Radius to16. Then, click on OK to commit this collision shape to the animation, as shown in the following screenshot: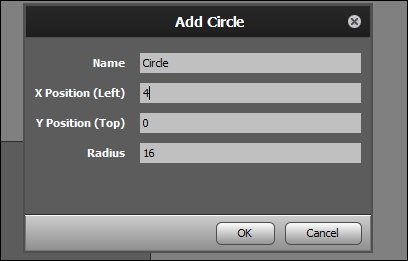
- Switch back to the Appearance context in the top menu, and then select the Duplicate Animation button (which looks similar to overlapping squares) at the bottom of the Animations window on the left-hand side of the screen.
- The new animation is named Animation 1 by default and will have the same collision shape as the animation we copied it from. Duplicating has allowed us to avoid the time-wasting act of recreating it over and over again for each animation. Change the Name of this animation to
Cracked. - Select the Click here to add a frame. button. Click on Choose Image…, then navigate to and select
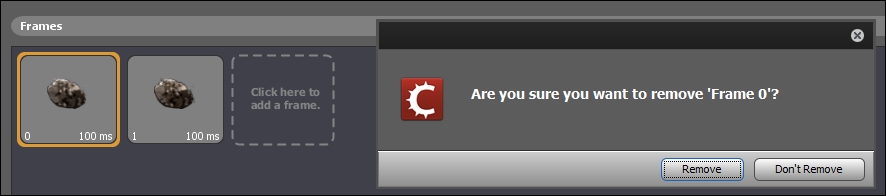
Game AssetsGraphicsActor Animationslarge rock cracked.png. Click on Add. - Select the first frame of this animation to appear in the Frames pane. This is the leftover from the animation that we copied, and it must be removed. Press Delete on the keyboard to remove it (be careful not to delete the second frame by mistake):
- Select the Duplicate Animation button one more time, and this time, change the Name of the newly created animation to
Exploding. - Once more, select the Click here to add a frame. button. Click on Choose Image…, then navigate to and select
Game AssetsGraphicsActor Animationslarge rock exploding.png. Set Columns to3, then click on Add. - As we did for the previous animation, select the first frame of this animation to appear in the Frames pane. This is the leftover from the animation that we just copied, so it must be removed. Press Delete on the keyboard to remove it.
What you will now see in the Animations pane should be an Actor Type with three animations, which is similar to the one shown in the following screenshot:

Finally, let's switch our editing context from Appearance to Physics in the top menu:
Then, perform the following steps:
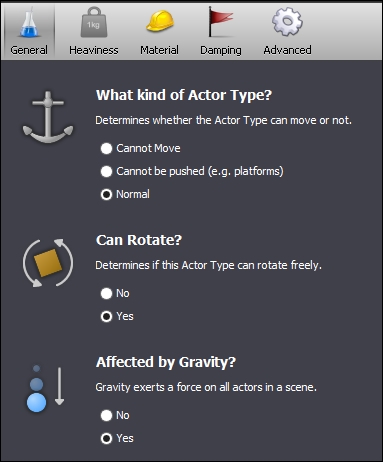
- Set What kind of Actor Type? to Normal.
- Set Can Rotate? to Yes.
- Set Affected by Gravity? to Yes.
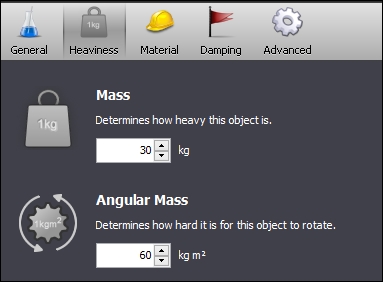
- Now, switch from the General settings to the Heaviness settings.
- Set Mass to
30. - Set Angular Mass to
60, as shown in the following screenshot: