In this chapter, we will begin using Stencyl's signature visual programming interface to create logic and interaction in our game. We will create this logic using a WYSIWYG (What You See Is What You Get) block-snapping interface. By the end of this chapter, you will have the Player Character whizzing down the screen in pursuit of a zigzagging air balloon! Some of the things we will learn to do in this chapter are as follows:
- Create Actor Behaviors and attach them to Actor Types
- Add Events to our Behaviors
- Use If blocks to create branching and conditional logic to handle the various states within our game
- Accept and react to the input from the player
- Apply physical forces to Actors in real time
One of the great things about this visual approach to programming is that it largely removes the unpleasantness of dealing with the syntax (the rules of the programming language), and the inevitable errors that come with it when we're creating logic for our game. This allows us to focus on the things that matter the most in our games: smooth, well-wrought game mechanics and enjoyable, well-crafted gameplay.
The first behavior that we are going to create is the Player Handler. This behavior will be attached to the Player Character (PC) that exists in the form of the Cowboy Actor Type. This behavior will be used to handle much of the game logic and will process the lion's share of the player input.
It's time to create our very first behavior! Go to the Dashboard, under the LOGIC heading, select Actor Behaviors, as shown in the following screenshot:
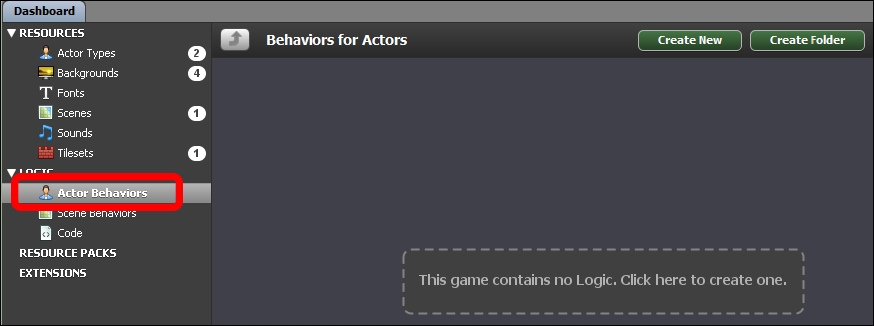
Click on This game contains no Logic. Click here to create one. to add your first behavior. You should see the Create New... window appear:
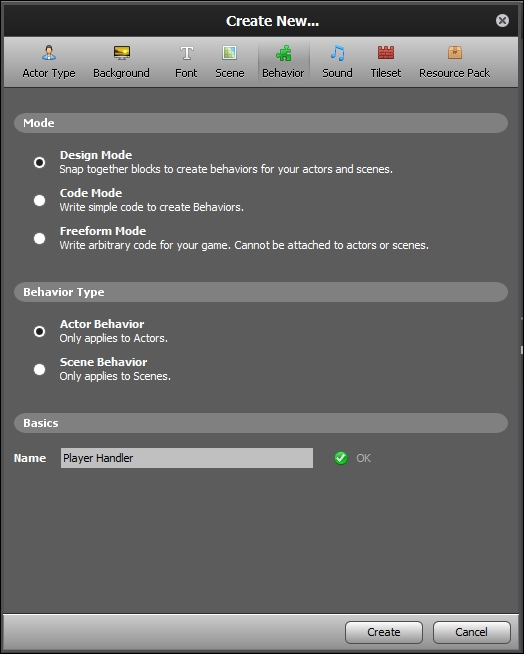
Enter the Name as Player Handler, as shown in the previous screenshot, then click on Create. You will be taken to the behavior designer window, as shown in the following screenshot:

Let's take a moment to examine the various areas within the behavior designer window. From left to right, as shown in the preceding screenshot, we have the following:
- Events Pane: In this area, we can add, remove, and move between the events in our behavior.
- Canvas: On the center of the screen, the canvas is where we can drag the blocks around in order to click on our game logic together.
- Blocks Palette: This is where we can find any and all of the various logic blocks that Stencyl has to offer. Simply navigate to your category of choice, then click and drag the block onto the canvas to configure it.
Perform the following steps:
- Click on the Add Event button, which can be found at the very top of the events pane.
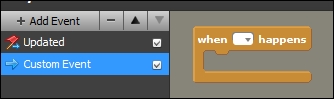
- In the menu that ensues, go to Basics and click on When Updating, as shown in the following screenshot:
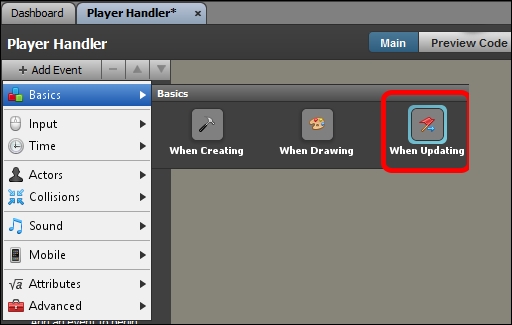
You will notice that we now have an event in our events pane, called Updated, along with a block called always on our canvas. In Stencyl events lingo, always is synonymous with When Updating. Take a look at the following screenshot:
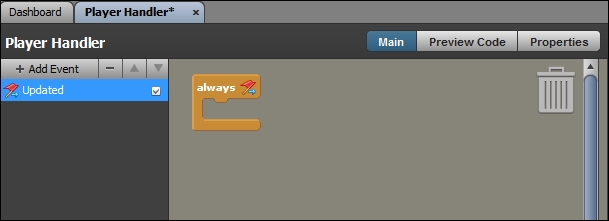
Since this is the only event in our Behavior at this time, it will be selected by default. The always block (which is a yellow block with a red flag) is where we will put the game logic that needs to be checked on a constant basis for every update of the game loop (this will be commensurate with the frame rate at runtime, around 60 fps, depending on the game performance and system specs). Before we proceed with the creation of our conditional logic, we must first create a few attributes.
Switch to the Attributes context in the blocks palette, as shown in the following screenshot:
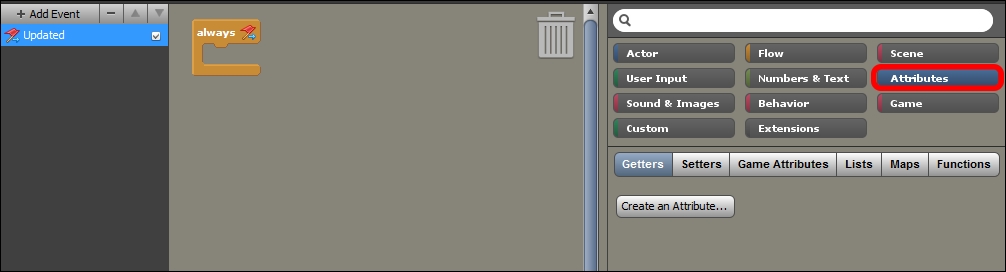
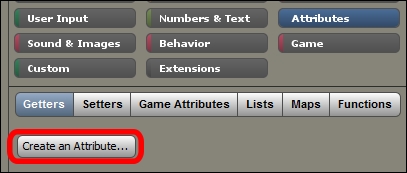
There are currently no attributes associated with this behavior. Let's add some, as we'll need them to store the important information of the various types, which we'll use later on to craft the game mechanics. Click on the Create an Attribute... button, as shown in the following screenshot:
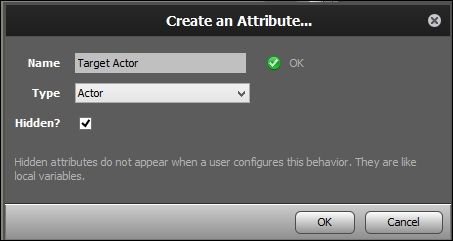
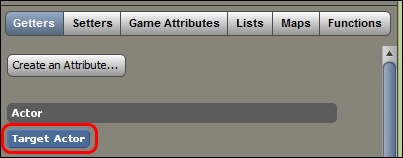
In the Create an Attribute… window that appears, enter the Name as Target Actor, set Type to Actor, check Hidden?, and click on OK, as shown in the following screenshot:
Congratulations! If you take a look at the bottom of the blocks palette window, you will see that you have added your first attribute, Target Actor, of type Actor, and it is now available for use in our code, as shown in the following screenshot:
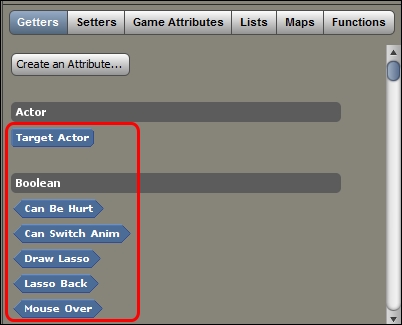
Next, let's add the five Boolean attributes. A Boolean is a special kind of an attribute that can be set to either true or false. These are the only two values that it can accept. First, let's create the "Can Be Hurt" Boolean, by performing the following steps:
- Click on Create an Attribute...
- Enter the Name as
Can Be Hurt. - Change the Type to Boolean.
- Check Hidden?
- Click on OK to commit and add the attribute to the behavior.
- Repeat steps 1 through 5 for the remaining four Boolean attributes to be added, each time substituting the appropriate name with the following:
Can Switch AnimDraw LassoLasso BackMouse Over
If you have done this correctly, you should now see six attributes in your attributes list; one under Actor and five under Boolean, as shown in the following screenshot:
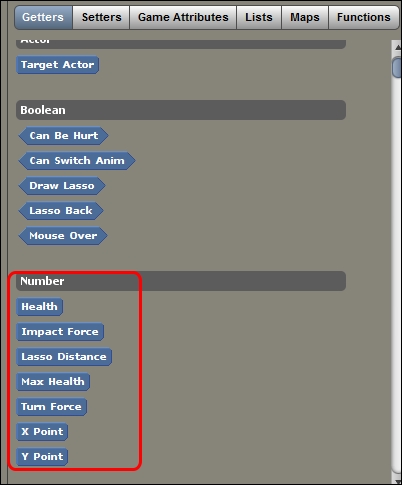
Now let's follow the same process to further create seven attributes, only this time, we'll set the Type for all of them to Number. The Name for each one will be as follows:
Health(set to Hidden?)Impact Force(set to Hidden?)Lasso Distance(set to Hidden?)Max Health(don't set to Hidden?)Turn Force(don't set to Hidden?)X Point(set to Hidden?)Y Point(set to Hidden?)
If all goes well, you should see your list of attributes updated according to the following screenshot:
We will add just one additional attribute. Click on the Create an Attribute… button again and perform the following steps:
- Name it
Mouse State. - Change its Type to Text.
- Do not hide this attribute.
- Click on OK to commit and add the attribute to your behavior.
Excellent work! At this point, you have created all of the attributes you will need for the Player Handler behavior!
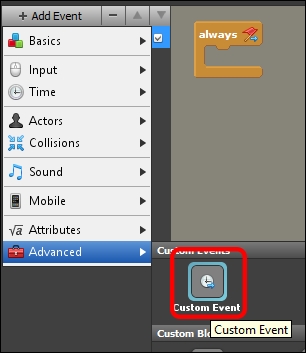
We need to create a few custom events in order to complete the code for this game prototype. For programmers, custom events are like functions that don't accept parameters. You simply trigger them at will in order to execute a reusable bunch of code. To accept the parameters, you must create a custom block, by performing the following steps:
- Click on Add Event.
- Go to Advanced.
- Select Custom Event, as shown in the following screenshot:
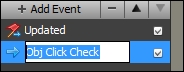
You will see that a second event, simply called Custom Event, has been added to our list of events, as shown in the following screenshot:
Now, double-click on the
Custom Event in the events stack to change its label to Obj Click Check (for readability purposes, this does not affect the event's name in the code and is completely ignored by Stencyl), as shown in the following screenshot:
Now, let's set the name, as it will be used in the code. Click between when and happens, and insert the ObjectClickCheck name:
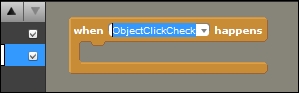
From now on, whenever we want to call this custom event in our code, we will refer to it as ObjectClickCheck. Go back to the When Updating event by selecting it from the events stack on the left-hand side of the screen. We are going to add a special block to this event, which calls the custom event we created just a moment ago. Perform the following steps to add a special block:
- In the blocks palette, navigate to Behavior | Triggers | For Actor, then click and drag the highlighted block into the canvas, as shown in the following screenshot:
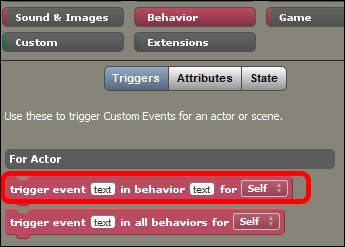
- Drop the selected block inside the always block, and fill in the fields, as shown in the following screenshot (please note that I have deliberately excluded the space between the Player and Handler in the behavior name, so as to demonstrate the debugging workflow. This will be corrected in a later part of the chapter):

Now, ObjectClickCheck will be executed for every iteration of the game loop! It is usually good practice to split up your code like this, rather than having it all in one really long event. This would be confusing and terribly hard to sift through when behaviors become more complex!
There is a chance to assess what you have learnt from this chapter so far. We will create a second custom event; see if you can achieve this goal using only the skeleton guide, which is mentioned later. If you struggle, simply refer to the detailed steps we followed for the ObjectClickCheck event:
- Navigate to Add Event | Advanced | Custom Event. A new event will appear at the bottom of the events pane.
- Double-click on the event in the events pane to change its label to
Handle Dir Clicksfor readability purposes. - Between when and happens, enter the
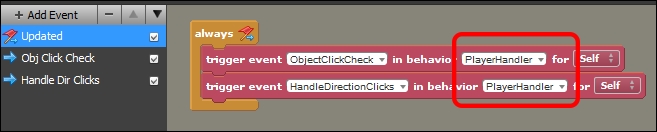
HandleDirectionClicksname. This is the handle we will use to refer to this event in the code. - Go back to the Updated event. Right-click on the trigger event in behavior for self block that is already in the always block, and select Copy from the menu.
- Right-click anywhere on the canvas, and select Paste from the menu to create an exact duplicate of the block.
- Change the event being triggered from
ObjectClickChecktoHandleDirectionClicks. Keep thePlayerHandlervalue for the behavior field. - Drag and drop the new block so that it sits immediately under the original.
Were you successful? If so, you should see these changes and additions in your behavior (note that the order of the events in the events pane does not affect the game logic, or the order in which the code is executed), as shown in the following screenshot:

Learning to create and utilize custom events in Stencyl is a huge step toward mastering the tool, so congratulations on having come this far!
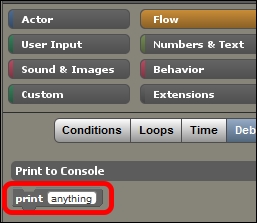
As with all the fields of programming and software development, it is important to periodically and iteratively test your code. This way, it's much easier to catch and repair mistakes. On this note, let's test the code we've written so far, using print blocks. Navigate to and select Flow | Debug | print from the blocks palette, as shown in the following screenshot:
Now, drag a copy of this block into both of your custom events, snapping it neatly into the when happens block as you do so. Name them as follows:
- For the
ObjectClickCheckevent, typeObject Click Detectedin the print block - For the
HandleDirectionClicksevent, typeDirectional Click Detectedin the print block
We are almost ready to test our code. Since this is an Actor Behavior, however, and we have not yet attached it to our Cowboy actor, nothing would happen if we ran the code. We must also add an instance of the Cowboy actor to our scene by performing the following steps:
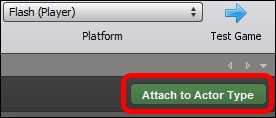
- Click on the Attach to Actor Type button at the top-right section of the blocks palette, as shown in the following screenshot:
- Choose the Cowboy actor from the ensuing list, and click on OK to commit.
- Go back to the Dashboard, and open up the Level 1 scene.
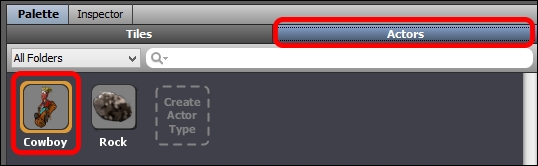
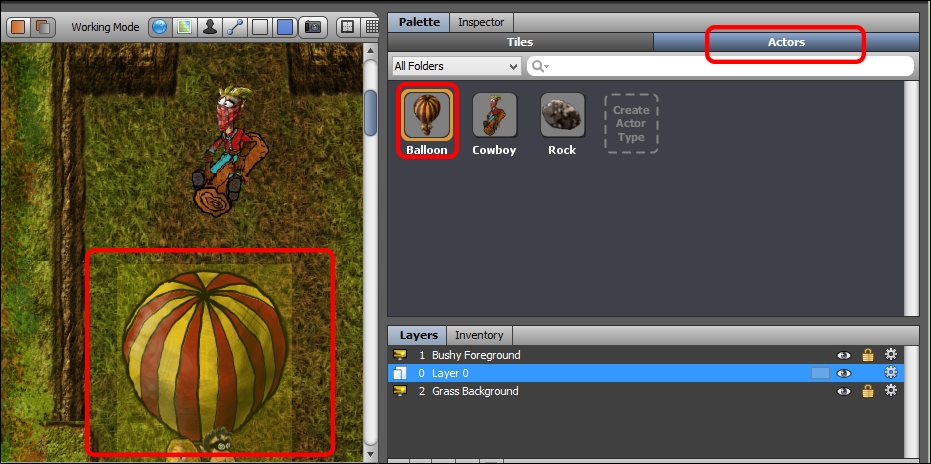
- In the Palette on the right-hand side of the screen, switch from Tiles to Actors, and select the Cowboy actor:
- Ensure that Layer 0 is selected (as actors cannot be placed on the background layers). Click on the canvas to place an instance of the actor in the scene, then click on the Inspector tab, and change the X and Y Scale of the actor to
0.8: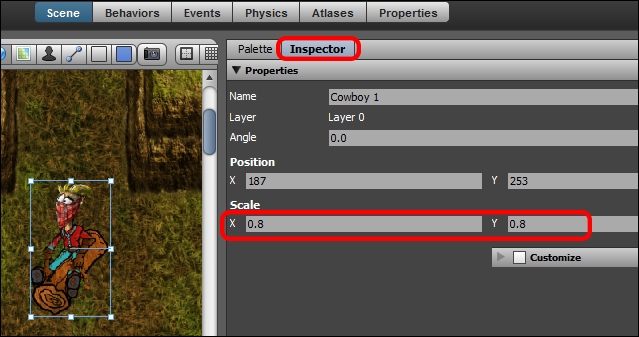
Well done! You've just added your first behavior to an actor type and added your first actor instance to a scene! We are now ready to test our code. First, click on the Log Viewer button on the toolbar, as shown in the following screenshot:

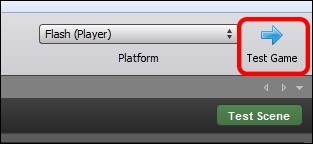
This will launch the Log Viewer, which we examined briefly in Chapter 1, Exploring the Stencyl Toolset and Game Engine. The Log Viewer will open up, at which point we need to only set Platform to Flash (Player), and click on the Test Game button to compile and execute our code, as shown in the following screenshot:
After a few moments, if you have followed all of the steps correctly, you will see that the game window opens on the screen, and a number of events appear on the Log Viewer. However, none of these events have anything to do with the print blocks that we added to our custom events. Hence, something has gone wrong and must be debugged. What could it be? Well, since the blocks simply are not executing, it's likely a typo of some kind. Let's take a look at the Player Handler again, and you'll see that within the Updated event, we've referred to the behavior name as PlayerHandler in both the trigger event blocks with no space inserted between the words Player and Handler, as shown in the following screenshot:
Update both of these fields to Player Handler and be sure to include the space this time so that it looks like the following screenshot (to avoid a recurrence of this error, you may wish to use the drop-down menu by clicking on the downward grey arrow, then selecting Behavior Names to choose your behavior from a comprehensive list):

Great work! You've successfully completed your first bit of debugging in Stencyl. Click on the Test Game button again. After the game window opens, if you scroll down to the bottom of the Log Viewer, you should see the following events piling up:
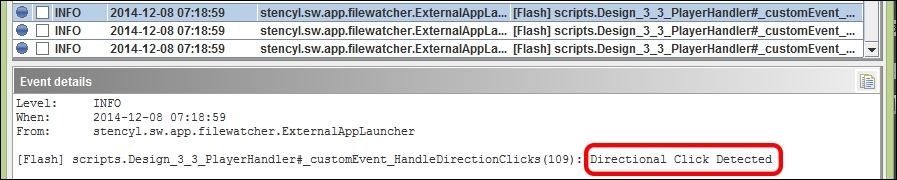
These INFO events are being triggered by the print blocks that we inserted into our custom events, and prove that our code is now working. Excellent job! Much of the rest of the code for the Player Handler behavior will be covered in Chapter 7, Complex Behaviors and Code. Let's move on to a new actor; prepare to meet Dastardly Dan!
Let's add the balloon actor to our game, and insert it into Level 1:
- Go to the Dashboard, and select Actor Types from the RESOURCES menu.
- Select Click here to create a new Actor Type.
- Name it
Balloon, and click on Create. - Click on This Actor Type contains no animations. Click here to add an animation.
- Change the text in the Name field to
Default. - Uncheck Looping?
- Select the Click here to add a frame. button. The Import Frame from Image Strip window appears.
- Change the Scale to 4x.
- Click on Choose Image... then navigate to
Game AssetsGraphicsActor Animationsand selectBalloon.png. - Set the Columns and Rows values to
1, and click on Add to commit this frame to the animation. - All the animations are created with a box collision shape by default. In actuality, the balloon actor requires no collisions at all, so let's remove it. Go to the Collision context, select the Default box as shown in the following screenshot, and press Delete on the keyboard:
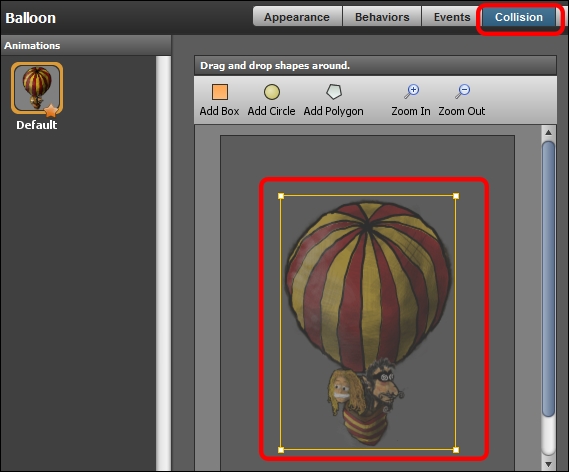
The Balloon actor type is now free of collision shapes, and hence will not interact physically with the other elements of our game levels. Next, switch to the Physics context as shown in the following screenshot:
Set the following attributes:
- Set What Kind of Actor Type? to Normal.
- Set Can Rotate? to No. This will disable all the rotational physical forces and interactions. However, we can still rotate the actor by setting its rotation directly in the code.
- Set Affected by Gravity? to No. We will be handling the downward trajectory of this actor ourselves without using the gravity implemented by the physics engine.
Just before we add this new actor to Level 1, let's add a behavior or two. Switch to the Behaviors context as shown in the following screenshot:
Then, perform the following steps:
- Currently, this actor type has no attached behaviors. Click on Add Behavior, which is at the bottom left-hand corner of the screen:

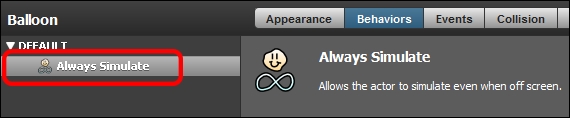
- Under FROM YOUR LIBRARY, go to the Motion category, and select Always Simulate. The Always Simulate behavior will make this actor operational even if it is not on the screen, which is a desirable result in this case. It also prevents Stencyl from deleting the actor when it leaves the scene, which it would automatically do in an effort to conserve memory, if we did not explicitly dictate otherwise. Click on Choose to add it to the behaviors list for this actor type. you should see it appear in the list, as shown in the following screenshot:
- Click on Add Behavior again.
- Under FROM YOUR LIBRARY, go the Motion category once more, and this time select Wave Motion (you'll have to scroll down the list to see it). Click on Choose to add it to the behavior stack. You should see it sitting under the Always Simulate behavior, as shown in the following screenshot:

Prefab behaviors (also called as shipped behaviors) enable us to implement some common functionalities without reinventing the wheel, so to speak. The great thing about these prefab behaviors, which can be found in the behavior library, is that they can be used as templates and modified at will. Let's learn how to add and modify a couple of these prefab behaviors now.
Some prefab behaviors have exposed attributes that can be configured to suit the needs of the project. The Wave Motion behavior is one such example. You can select it from the stack, and configure the Attributes as follows:
- Set Direction to Horizontal from the drop-down menu.
- Set Starting Speed to
5. - Set Amplitude to
64. - Set Wavelength to
128.
Fantastic! Now let's add an instance of the Balloon actor to Level 1:
Before we test the game one last time, we must quickly add a prefab behavior to the Cowboy actor type, modifying it slightly to suit the needs of this game (for instance, we will need to create an offset value for the y-axis, so the PC is not always at the centre of the screen):
- Go to the Dashboard, and double-click on the Cowboy actor type from the Actor Types list.
- Switch to the Behaviors context.
- Click on Add Behavior, as you did previously when adding prefab behaviors to the Balloon actor type.
- This time, under FROM YOUR LIBRARY, go to the Game category, and select Camera Follow. As the name suggests, this is a simple behavior that makes the camera follow the actor it is attached to. Click on Choose to commit this behavior to the stack, and you should see the following screenshot:

- Click on the Edit Behavior button, and it will open up in the behavior designer, as shown in the following screenshot:

- In the behavior designer, toward the bottom-right corner of the screen, click on the Attributes tab, as shown in the following screenshot:

- Once you click on this tab, you will see a list of all the attributes in this behavior appear in the previous window. Click on the Add Attribute button, as shown in the following screenshot:

- Set the Name to
Y Offset. - Change the Type to Number.
- Leave the attribute unhidden.
- Click on OK to commit a new attribute to the attribute stack:

- Set the Name to
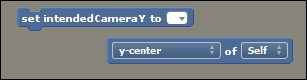
- We must modify the set IntendedCameraY to block in both the Created and the Updated events, as shown in the following screenshot:

- Hold Shift, click and drag the set IntendedCameraY block out onto the canvas by itself:

- Drag the y-center of Self block out like the following screenshot:
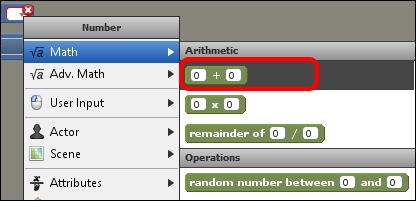
- Click on the little downward grey arrow, on the right-hand side of the empty field, in the set intendedCameraY to block, and navigate to the Math | Arithmetic | Addition block, as shown in the following screenshot:
- Drag the y-center of Self block into the left-hand side field of the Add block, as shown in the following screenshot:

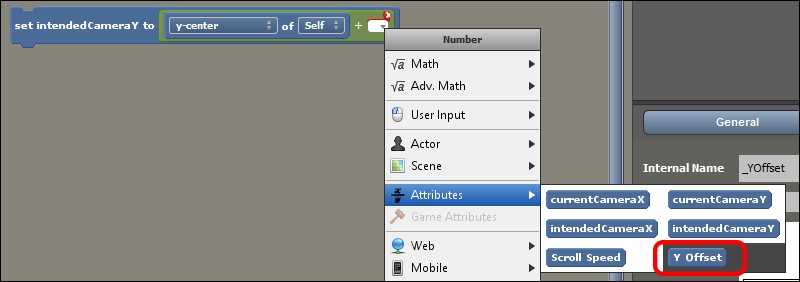
- Next, click on the small downward grey arrow to the right of the right-hand side field of the addition block to bring up the same menu as before. This time, go to Attributes, and select Y Offset, as shown in the following screenshot:
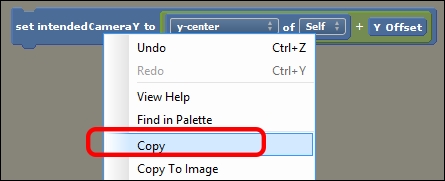
- Now, right-click on the whole block, and select Copy as shown in the following screenshot (this will copy it to the clipboard), then simply drag it back into its original position, just underneath set intendedCameraX to:
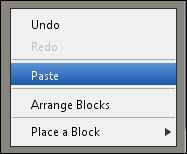
- Switch to the Updated event from the events pane on the left-hand side of the screen, hold Shift, then click and drag set intendedCameraY to out of the always block and drop it in the trash can, as you won't need it anymore. Right-click and select Paste to place a copy of the new block configuration that you copied to the clipboard earlier:
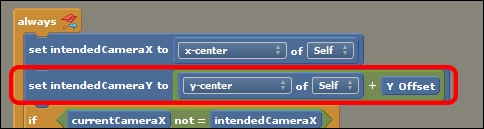
- Click and drag the pasted block so that it appears just underneath the set intendedCameraX to block as shown in the following screenshot, and save your changes:
Go back to the Cowboy actor type, and open the Behavior context. Navigate to File | Reload Document (
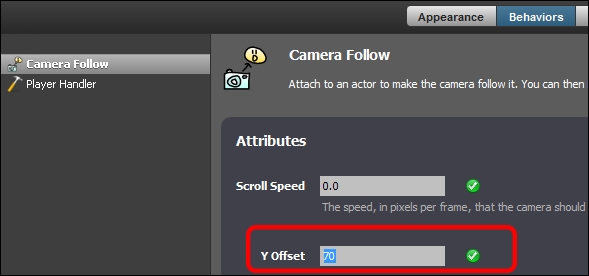
Ctrl+R or Cmd+R) to update all the changes. You should see a new configurable attribute for the Camera Follow behavior, called Y Offset. Set its value to 70, as shown in the following screenshot:
Excellent! Now go back to the Dashboard and perform the following steps:
- Open up Level 1 again.
- Under Physics, set Gravity (Vertical) to
8.0. - Click on Test Game, and after a few moments, a new game window should appear. At this stage, what you should see is the Cowboy shooting down the hill with the camera following him, and the balloon floating around and above him.