Working with SAS Windows
Opening Windows
The SAS windowing
environment has numerous windows that you can use to complete tasks.
You can enter commands to open windows. For more information
about how to execute commands, see Using SAS Windowing Environment Command Types.
You can use window commands
at any command prompt. You might find it helpful to use multiple window
commands together.
For example, from the Log window,
the following string of commands changes the active window, maximizes
it, and changes the word paint to print:
pgm; zoom; change paint print
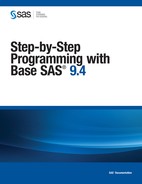
The following display
shows that the cursor immediately moves to the Editor, which has been
maximized to fill the entire display (due to the ZOOM command). The
word paint has been changed to print, and the cursor rests after the
last character of that text string.
Display 41.3 Executing a Window-Call Command in a Series
Managing Windows
Window management
commands enable you to access and use windows more efficiently. The
following list includes the commands that you might use most often
when managing windows:
Scrolling Windows
Scrolling commands enable
you to maneuver within text, and the command names indicate what they
do. They include the following:
HSCROLL, VSCROLL
HSCROLL determines
the amount that you move to the left or right when using the LEFT
or RIGHT commands. VSCROLL determines the amount that you move forward
or backward when using the FORWARD or BACKWARD commands.
Use the following options
with the HSCROLL and VSCROLL commands as needed. HALF is the default
scroll amount.
Example: Scrolling Windows
Now, when you execute
the LEFT or RIGHT command, you move five character spaces in the appropriate
direction. If you want to set the automatic vertical scrolling value
to half a page, then specify
vscroll half
Changing Colors and Highlighting in Windows
SAS gives you a simple way to customize
your environment if your display supports color. You can change SAS
windowing environment colors with the COLOR command. You can also
change SAS code color schemes by using the SYNCONFIG command. To change
windowing environment colors, simply specify the COLOR command followed
by the field or window element that you want changed, and the desired
color. You might also be able to change highlighting attributes, such
as blinking and reverse video.
Other available colors
are blue, green, cyan, pink, yellow, white, black, magenta, gray,
brown, and orange. If the color that you specify is not available,
then SAS attempts to match the color to its closest counterpart.
For more information,
see the online Help for the SASColor window.
You can access the SASColor window with the
SASCOLOR command.
You can also change
the color scheme of text in the windows in which you enter code, such
as the Editor window and NOTEPAD. This is
useful, because you can make different elements of the SAS language
appear in different colors, which makes it easier to parse code. To
change the color scheme for code, use the SYNCONFIG command. The SYNCOLOR
command toggles color coding off and on in these windows.
Finding and Changing Text
Often, you might want to
search for a character string and change it. You can locate the character
string by specifying the FIND command and then the character string.
Then the cursor moves to the first occurrence of the string that you
want to locate. Remember to enclose a string in quotation marks if
CAPS ON is in effect.
You can change a string
by specifying the CHANGE command, then a space and the current character
string, and then a space and the new character string. Remember to
enclose in quotation marks any string that contains an embedded blank
or special characters. For both the FIND and CHANGE commands, the
character string can be any length.
With both the FIND and
CHANGE commands, you can specify the following options to locate or
change a particular occurrence of a string:
For details about which
options you can use together, see SAS System Options: Reference. Note that the option ALL finds or changes all occurrences
of the specified string. In the following example, all occurrences
of host are changed to operating environment:
change host 'operating environment' all
To resume the search
for a string that was previously specified with the FIND command,
specify the RFIND command. To continue changing a string that was
previously specified with the CHANGE command, specify the RCHANGE
command. To find the previous occurrence of a string, specify the
BFIND or FIND PREV command; you can use the PREFIX, SUFFIX, and WORD
options with the BFIND command.
..................Content has been hidden....................
You can't read the all page of ebook, please click here login for view all page.