Chapter 11
HMI

Since the early 1970s, HMI has captured the hearts and minds of Directors of Photography (DP) of film and television. Now, they are the lighting instruments of choice for many major motion picture productions.
For quite a while, HMI was too big and too expensive for photographers.
Today, some HMI instruments are so small that you need only one hand to carry a couple of light heads. Some are even small enough to mount on top of a video camera.
HMI is an abbreviation of Hydrargyrum medium-arc iodide. Hydrargyrum is an archaic word for mercury (Hg), so the HMI is more accurately a mercury-halide.
The light from an HMI has a very special look to it. To the trained eye, it just says “Hollywood.”
Though surely not available anytime soon from your big box store discounter, the HMI look is growing in popularity. These lights are used in many museum exhibits, in trade show booths, and even in some retail establishments.
Appearing to be a continuous light source, many enjoy their what-you-see-is-what-you get qualities.
They emit a fabulous daylight color temperature of around 5,500 K. For that reason, big HMIs are often used in outdoor situations.
Production company jargon speaks of the power of an HMI in terms of 1,000 watts of power (kilowatts). An HMI with a big 10,000 watts is known as a “10K HMI” to differentiate it from a “10K,” which is an incandescent fixture, or as it’s sometimes called, a “tener.”
Why HMI?
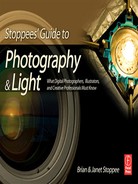
An HMI lighting instrument is a marriage of two inseparable components: a light head and a ballast. Together, they control the HMI lamp that’s in the light head. As unique as the HMI lamp may be, it bears a minor resemblance to a quartz halogen lamp. However, any similarities are only glass deep.
Unlike an incandescent lamp, which heats a tungsten-based filament, the HMI creates an electrical arc between two electrodes. The arc excites the pressurized mercury vapor and a highly efficient light output is created.
In North America, where we have 60 hertz, 120 volt AC power, the HMI lamp cycles on and off 120 times per second, rather than causing a filament to glow continuously, as do incandescent lamps.
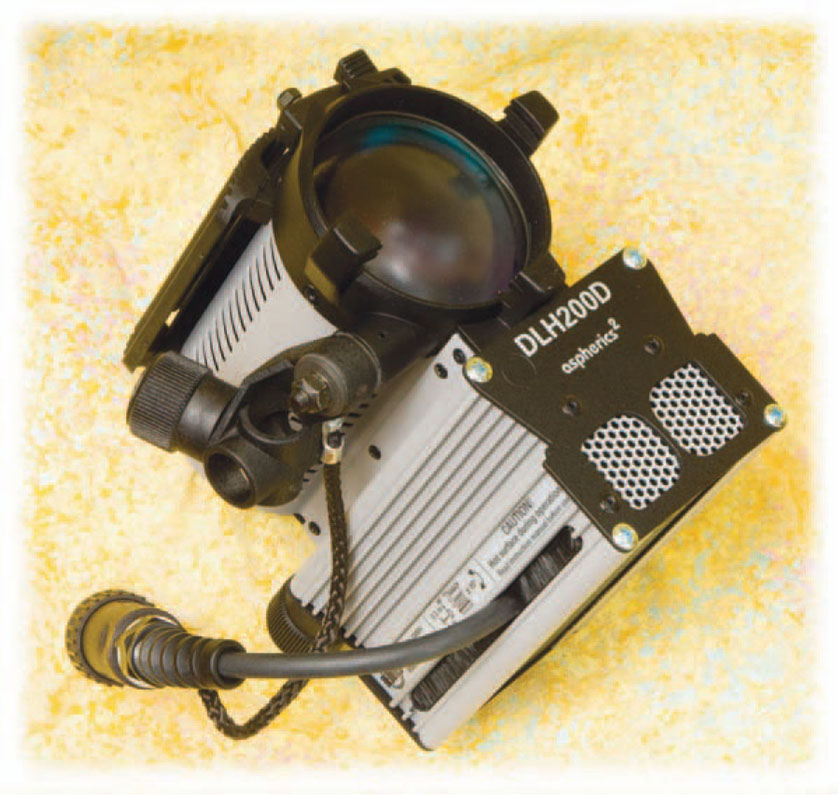
The tiny HMI lamps, to the left, produce big light, due to the optical design of the light units.
This cycling on and off is called “flicker.” The challenge for a great HMI unit is to create a flicker-free environment, so that the flicker does not skip a beat during the shooting of a film or with a fast shutter speed.
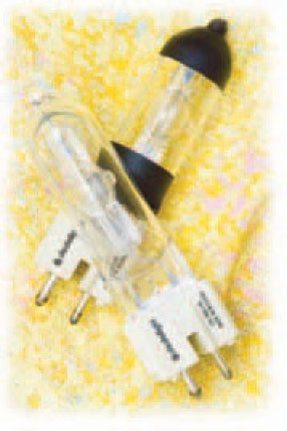
To the right, we used an HMI light head, in a soft bank. It’s an easy to manage light source. The HMI has plenty of power output for photographing still life.

Generally, there are three types of HMI light heads:
• An optical spot/flood instrument is much like a camera’s lens. It has a front element optic and an internal one. As the internal mechanics are adjusted, the beam varies.
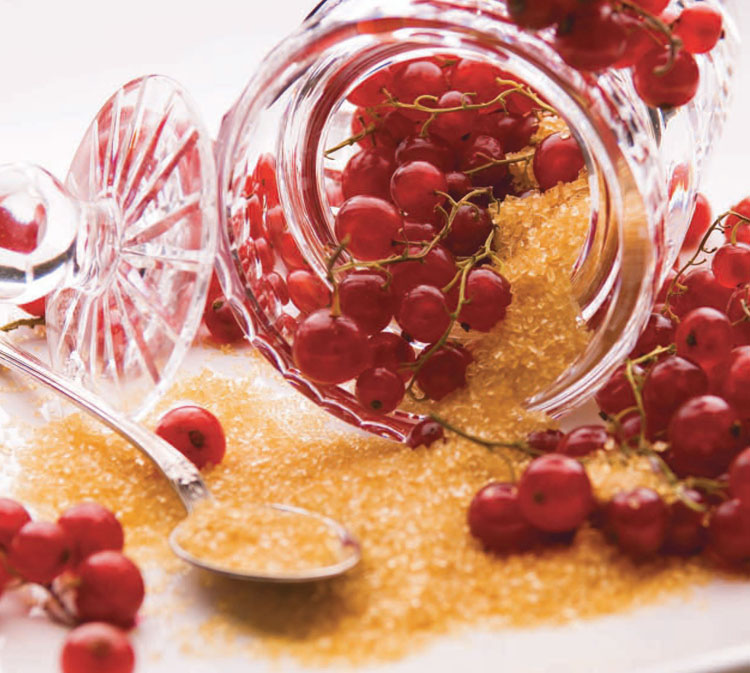
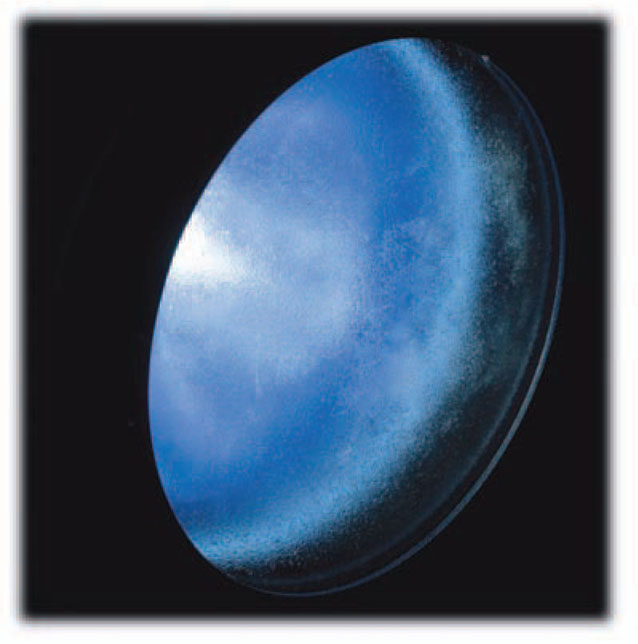
• A “PAR” is a popular instrument for HMIs. It’s an abbreviation for Parabolic Aluminized Reflector. It generally produces a light with a hard edge.
• The third HMI instrumentation is something of a stripped-down version of the PAR. Sometimes called a “soft light,” it’s PAR without the reflector, similar to a bare tube head for studio flash. The soft light is great for soft banks, as we used in the shot to the right.
Tech Specs
Photographer
Brian Stoppee
Stylist
Tracey Lee
Illustrator
Janet Stoppee
Camera
Nikon D2x - ISO: 100 · Shutter Speed: 1/200 Manual Mode
Lens
AF-S Zoom-Nikkor 28-70mm f/2.8 IF-ED @ 70mm 35mm Focal Length: 105mm @ f/7.6
Light Source
1 - DedoPAR Light Head with Direct/Soft Attachment
1 - Dedolight HMI Electronic Ballast
1 - Dedolight Soft Bank
Light Meter
Gossen Starlite
Support
1 - Manfrotto Tripod with Quick Release Head
1 - Matthews Preemie Baby Stand
Software
Adobe Bridge, Camera Raw, and Photoshop Corel Painter
Controlling the Ballast
It’s very easy to get along with a ballast. It is the HMI’s control panel.
Start Up
After securing the light head to a support, connect it to the ballast using the special cabling and power up the ballast. If everything is in correct working order, the “ready” light comes on. Next, press the start button on the ballast or the light head, and within a matter of seconds, you’ll see a gorgeous light appear. After the lamp has been ignited, the control panel indicates that with an illuminated “lamp” light.
An HMI lamp has around a 700-hour lifespan. Normal usage is three hours on and one hour off.
Intensity Control
Though the Academy Award-winning Dedolight labels their units at 400 watts, the control panel reveals their modesty. The boost position pumps the unit up to 575 watts. A dim position allows variable control over a 200- to 400-watt range.

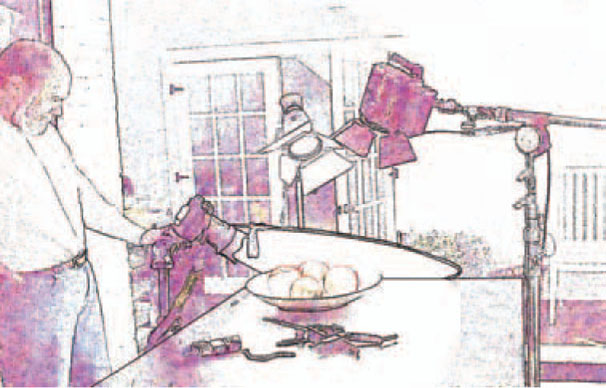
It’s obvious in the image to the right that on a pleasant day in partial shade, we added some lighting dimension with an HMI housed in an eight-sided soft bank. The diffused speculars on the tomatoes give the red spheres shape, with a very natural feeling.

5,500 K Light
Unlike dimming the light in your dining room, where the space not only becomes darker but the light takes up a warmer position on the Kelvin scale, the Dedolight holds its temperature at any intensity.

Tech Specs
Photographer
Brian Stoppee
Stylist
Tracey Lee
Illustrator
Janet Stoppee
Camera
Nikon D2x - ISO: 100 · Shutter Speed: 1/200 Manual Mode
Lens
AF-S Zoom-Nikkor 28-70mm f/2.8 IF-ED @ 70mm 35mm Focal Length: 105mm @ f/7.1
Lighting
1 - DedoPAR Light Head with Direct/Soft Attachment
1 - Dedolight HMI Electronic Ballast
1 - Dedolight Octadome
Light Meter
Gossen Starlite
Support
1 - Manfrotto Tripod with Quick Release Head
1 - Matthews Preemie Baby Stand
1 - Matthews Boa Bag - 15lbs.
Software
Adobe Bridge, Camera Raw, and Photoshop Corel Painter
The PAR
Professional photographers who have been working with studio flash equipment for years can relate to the PAR. The PAR is much like a flash head with its reflector, especially if the reflector detaches and the HMI light head becomes something like a bare tube head, just as its flash head relatives generally do.
For electronic news gathering (ENG) out in the field, a little PAR is often the standard equipment that’s mounted on top of broadcast news cameras.

The Parabolic Reflector and Light Output
The DedoPAR Daylight that we’re familiar with works with the ballast we discussed on the previous two pages. So it’s a 400-watt light head that bumps up to 575 watts. This is a little more than many HMIs offer, for a PAR. However, usable illumination comes down to good lighting equipment design and engineering. This makes it difficult to compare a PAR from brand “A” with brand “B.”
As with any lighting instrument, the incident light meter tells the real story.
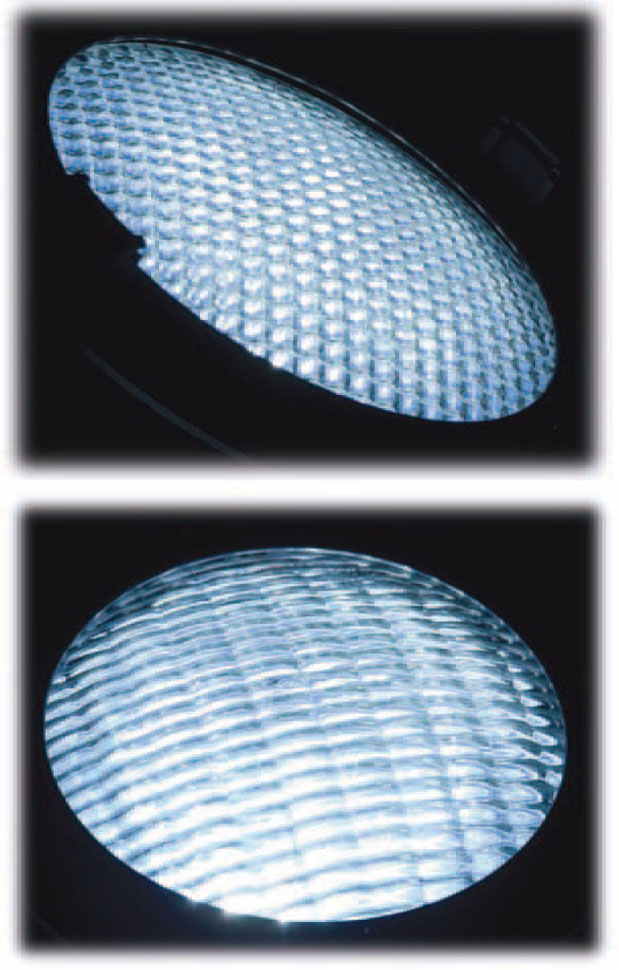
As with most PARs, the DedoPAR is often used without any optics over its reflector.
That’s when its light output is the most efficient. The use of interchangeable lenses allows you to diffuse the beam. (See photos on page 351.)
Going Bare
One of the things we enjoy about the DedoPAR is its adaptability. We can remove the front reflector section and replace it with the Direct/Soft attachment. Chimera and Westcott have speed rings for this. So it goes right into the same soft banks that we use for all our other photographic efforts. (Dedolight also has its own line of soft banks.) The attachment comes with a quartz glass tube. This filters UV, but it also serves as a safety component. If the protective glass filter tube is damaged, the light head shuts down.
The DedoPAR with the direct/soft attachment in a soft bank is excellent for tabletop photography. 1/250 of a second stops the champagne bubbles when the ballast is set at the full 575 watts. Nonmotion still life permits slower shutter speeds and greater depth of field, if desired.


Tech Specs
Photographer
Brian Stoppee
Stylist
Tracey Lee
Illustrator
Janet Stoppee
Camera
Nikon D2x - ISO: 100 · Shutter Speed: 1/50 Manual Mode
Lens
AF Zoom-Nikkor 80-400mm f/4.5-5.6D ED @ 135mm 35mm Focal Length: 202mm @ f/5.0
Lighting
1 - DedoPAR Light Head with Direct/Soft Attachment
1 - Dedolight HMI Electronic Ballast
1 - Dedolight Soft Bank
Light Meter
Gossen Starlite
Support
1 - Manfrotto Tripod with Quick Release Head
1 - Matthews Preemie Baby Stand
Software
Adobe Bridge, Camera Raw, and Photoshop Corel Painter
That Hollywood Look
You cannot successfully define the “Hollywood look” when it comes to lighting, anymore than you can define the culinary expertise of all five-star restaurants. Every great film’s Director of Photography (DP) crafts the look of the lighting in concert with the director’s vision.
The greatest feature films have a look to them that can be distilled down to the term “artfully crafted”.
There’s a visual economy to how they’re lit. Your attention is focused exactly where it should be. The audience has a sense of all that’s happening in the scene, but their eyes do not wander away from the central action.
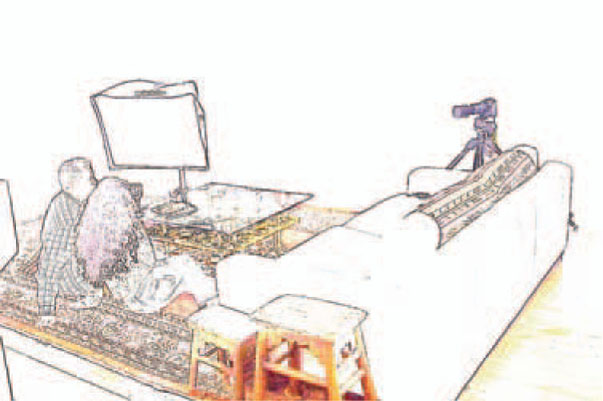
With this in mind, we challenged ourselves with the image to the right. We have just one DedoPAR in a medium soft bank. Using a long telephoto lens, we are shooting from across the room. The light source is creating a specular highlight on the wine glasses, which could serve as a distraction.
By framing the shot tightly, we force the viewer to concentrate on the couple’s faces, but we have given ourselves an advantage by directing the models’ eyes to the wine glasses. The audience is unable to observe their eyes, a natural human inclination.
Please compare this to the same female model featured in this chapter’s divider spread on pages 338 & 339. We are drawn to observe the joy in her eyes, which picks up on the richness of her hair.
The technology of image-making is a lifelong learning process. There is much to know, and it is ever-expanding. However, the creativity is not formulaic.
Just as an accomplished DP does not light two films the same way, don’t let yourself get caught in a photographic rut. Every face is different. Make every photograph a customized experience for your subject. Craft every image with a sharp mind.
Luciene and Joe are lit with just one medium soft bank. A soft PAR, at 575 watts, is the only light source. A long telephoto lens compresses the image, letting us focus on the talent.
The more you challenge yourself, the better you will become.

Tech Specs
Photographer
Brian Stoppee
Stylist
Tracey Lee
Illustrator
Janet Stoppee
Camera
Nikon D2x - ISO: 100 · Shutter Speed: 1/40 Aperture Priority
Lens
AF Zoom-Nikkor 80-400mm f/4.5-5.6D ED @ 175mm 35mm Focal Length: 262mm @ f/5.0
Lighting
1 - DedoPAR Light Head w/Direct/Soft Attachment
1 - Dedolight HMI Electronic Ballast
1 - Dedolight Soft Bank
Light Meter
Gossen Starlite
Support
1 - Manfrotto Tripod with Quick Release Head
1 - Matthews Preemie Baby Stand
Software
Adobe Bridge, Camera Raw, and Photoshop Corel Painter
Talent
Luciene Pereira Joe Reyes
The Optical Spot/Flood
Though experienced professional photographers can find familiarity in the PAR, the optical spot/flood is a new experience for many. It’s oft en this delightful new lighting experience that coerces photographers to add HMIs to their arsenal, even if they have an extensive complement of battery and AC power flash units.
Some HMI manufacturers copy an instrument that has been for decades the lighting backbone of stages from Broadway to the local middle school auditorium. The fresnel (pronounced like “fray nell” by some and “fra nell” by others) gets its name from its unique step lens that’s on its front end. It’s a smaller version of the lens we see on light houses.

Though this may work well for theatrical usage, in still photography, where you are able to carefully examine every aspect of the image for as long as you like, the hot spots that some fresnels create is not acceptable to many photographers.
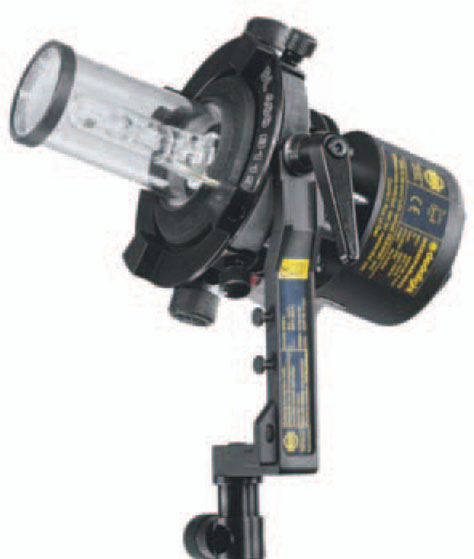
Dedo Weigert won Oscar and Emmy awards for his design of the Dedolight optical lighting instrument. It not only trades the fresnel lens for its own front end optic, but adds a second lens within the light head for a more even, manageable, efficient illumination.
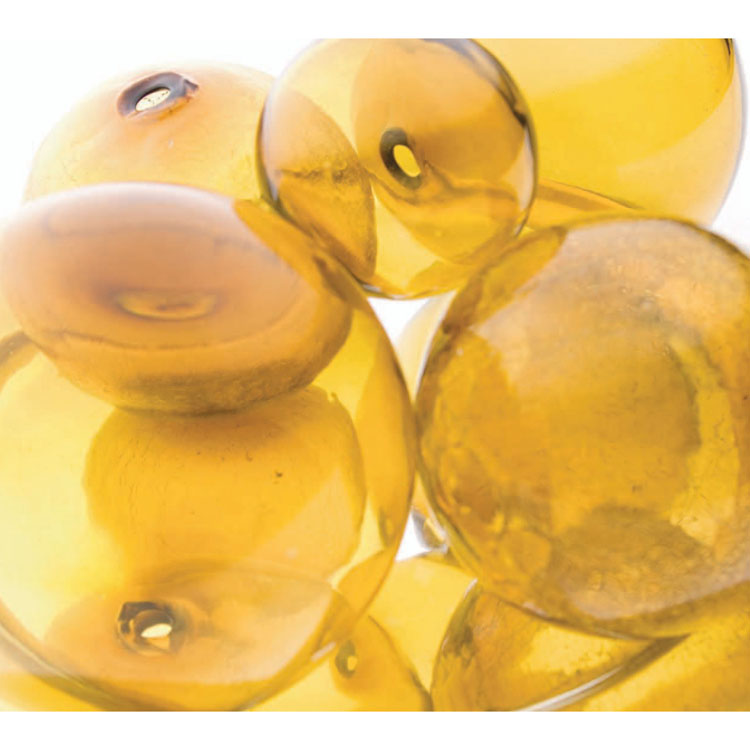
The unique quality light from an optical instrument is obvious from what we see streaming through the window, with one spot outside.
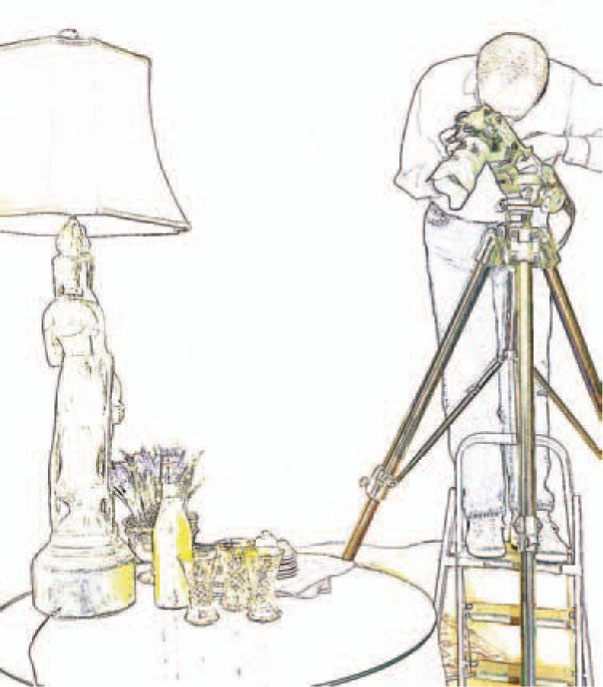

For the image to the right, we created a natural lighting situation by placing one Dedolight 400 outside a window and shot the light exactly as it was presented to us. We lowered the angle of illumination to gain soft shadows, mimicking light later in the day. We chose not to filter the light warmer because of the effect on the yellow glass, and liquid seemed to harm the image more than help it.
Tech Specs
Photographer
Brian Stoppee
Stylist
Tracey Lee
Illustrator
Janet Stoppee
Camera
Nikon D2x - ISO: 100 · Shutter Speed: 1/30 Manual Mode
Lens
AF-S Zoom-Nikkor 28-70mm f/2.8 IF-ED @ 48mm 35mm Focal Length: 72mm @ f/2.8
Lighting
1 - Dedolight HMI Daylight Head
1 - Dedolight HMI Electronic Ballast
1 - Dedolight Barn Door
Light Meter
Gossen Starlite
Support
1 - Manfrotto Tripod with Quick Release Head
1 - Dedolight Stand
Software
Adobe Bridge, Camera Raw, and Photoshop Corel Painter
In all our decades of lighting with flash and other means of illumination, we know of no other lighting instrument that can duplicate this look.
Focusing
Using a Dedolight 400 HMI light head couldn’t be easier. Follow all the directions we provide about the ballast on page 342.
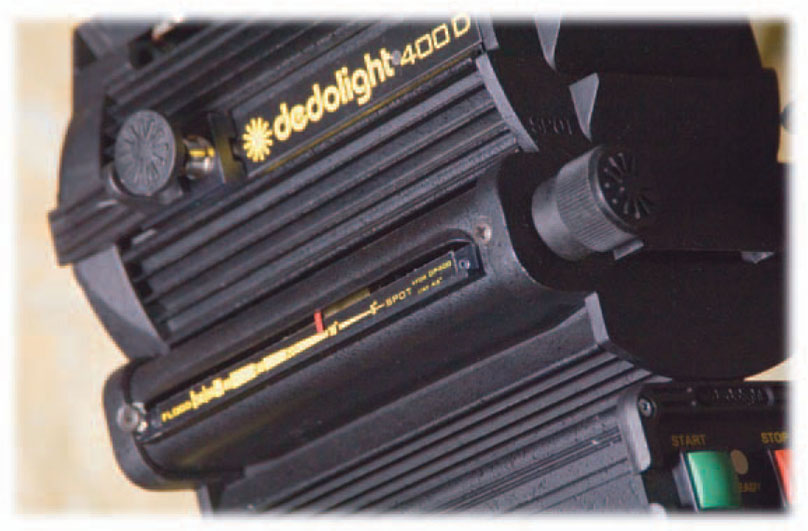
As you twist the focusing knob on the back of the Dedolight, a red indicator conveniently shows you the angle of the beam. This varies from a spot of 4.5° to a 50° flood. Internally, as you turn the knob, you are moving the lamp and an optical element toward the front of the light head. As the assembly meets the widest or most narrow beam the relationship between the lamp of the lens is further refined.
The ballast is your control panel.
Use the guide on the side of the light head as you twist the back knob back and forth. When it’s cranked all the way to the rear, you have a spotlight of 4.5°, and when it’s all the way up front, it’s a flood of light with a 50° spread. None of these positions create hard edges, but the light source quickly drops off.
On page 138, we discussed the inverse square law. As we concentrate more light in one place, the intensity increases. The broader the beam, the more light it takes to fill the larger space. This relationship is evident as you focus this HMI light head.
When you use the light head in the spot position, you will have a far different meter reading than in the flood position.
This is where you also see the advantage of the Dedolight optical system over a fresnel design. Even when as wide as 46°, at 400 watts, the Dedolight has the intensity of some fresnels that are 1K and more.
Accessories
The Dedolight 400 HMI comes with a very thorough four-way barn door. Two of the individual doors expand or contract, as needed. It slips right into the holders that are built into the front of the light head. A sliding latch securely locks it in place.
This works the same way that the projector attachment is secured.
The Dedolight also comes with diffusion screens that Dedo calls “scrims.”
200 Series
Dedo has a smaller optical spot/flood system that’s 200 watts. Photographers work with plenty of these for subjects as large as cars. They illuminate a set with tiny areas of light exactly where they’re wanted. The light focuses the viewer’s attention to a specific place.
The Dedolight 200 Series is a smaller optical spot/flood, with similar operational characteristics. It has approximately 1-stop less light output. The ballast is much smaller, as well, allowing the system to fit in luggage than can be carried on an aircraft.
The optical spot/flood is not the only HMI that utilizes front end lenses. The DedoPAR, which we discussed on pages 344 & 345 comes with three attachment lenses that fit over the front reflector. These spread lenses (flood, spot, and medium) alter the PAR’s light quality and make the instrument all the more versatile.
Detailing a Tabletop Shot
We’re not sure which is more complex: shooting people or tabletop shots.
It’s nice when you get the crystal stemware to smile just right. It’s also rewarding when the talent doesn’t move a muscle, all night long, so you can make a minor adjustment in the morning.
Time is money. You cannot think of a tabletop shot as something that you can shoot over the course of a week, when the client is paying you for only four hours.
The longer the HMIs burn, the more of the clock is ticking on the lamp’s life. We try to work as efficiently as possible and shoot as many images as we can in a day. Some projects demand attention to detail. Solutions are not immediately evident.
For the image to the right, the reflection in the crystal had to be perfect. Combining a DedoPAR and a Dedolight was the best answer. Adding a little reflection with a Westcott Illuminator created the final needed touch that gave the shot its balance.
There are other possible approaches. Some would have chosen to light this with a soft bank. That would have added guaranteed speculars, if the bank were large enough.
However, that was not the look we wanted.
This was a project where we gave the stylist, Tracey Lee, total control of the content. We have been working with her for more than twenty years, and she’s always done an impressive job. We like to build a synergy with our team.
The downside to that is where all of the advanced planning is lost. We know approximately what we are going to shoot, but we don’t have all of the specifics together, until we arrive at the location.
We had to put together more than one setup until the shot was perfected.
In the first setup, we naturally chose to make the DedoPAR our key light and the Dedolight in flood position our fill.
It lacked the control that we sought.
Once we switched the two around, it all started to happen.
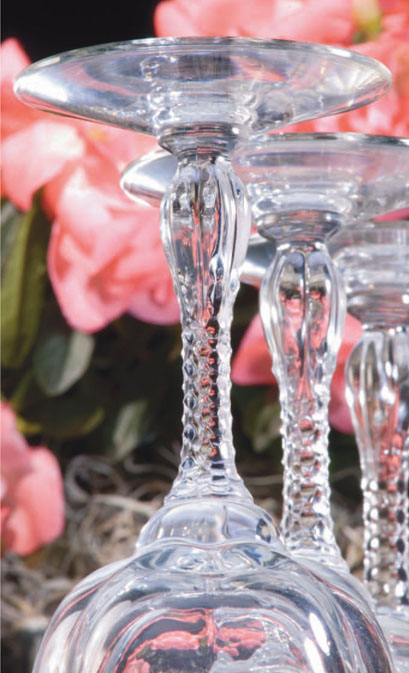
The optical compression that the 200mm macro lens offers, on a Nikon D2x, with its 35mm equivalent of a 300mm, provides the unique relationship between the three stems. This is where planning your depth of field can make or break your shot.
We wanted only one stem to be in sharp focus. If the viewer were able to see the flowers too distinctly in the background, it would have been distracting.
Our focal point is not on a subject; it’s somewhere in front of it. Knowing the hyperfocal distance (see page 94) helped in learning how to achieve the look we were after.

Shooting tabletop images is a juggling act of technology and creativity. One cannot exist without the other.
In this project the balancing routine requires the right lighting setup and the best depth of field, as our top two photographic priorities.
The Dedolight 400 ballast allows us to choose 400 or 575 watts. We can also dim the HMI over a range of 200 to 400 watts.
Our other lighting controls are the four-way barn doors that come with the light heads.
The crystal stems have such gorgeous contours to them. They are a classic study in how light plays with surfaces. The success story is in how to pop out the highlights and get shadows into the crevasses, while allowing the body of the crystal to be bathed in a diffused specular.
Once we fine tuned the PAR as our fill and initially positioned our flood light as a key, it became our job to finesse that main light to provide specular highlights to the base of the upside-down stems.
Some of the battle was won through frequent metering.
This is often the case with a tight tabletop. Every detail counts.
The flowers in the background needed to feel in concert with the stemware, as far lighting as was concerned, they too needed highlights. If not, the crystal would separate from the flowers too dramatically.
Both the foreground and the background carry the same kind of levity.
This is the mood of the shot.
It needs to feel as if a joyous occasion is about to be celebrated. We wanted the viewer to feel as if they just couldn’t wait for those stems to be flipped over and filled.
The Westcott Sunlight Illuminator, that’s on the stand, provided just enough kick-back into the base of the stemware’s left side to nicely polish off the reflections on its beautifully faceted surfaces.
Tech Specs
Photographer
Brian Stoppee
Stylist
Tracey Lee
Illustrator
Janet Stoppee
Camera
Nikon D2x - ISO: 100 · Shutter Speed: 1/8 Manual Mode
Lens
Micro-Nikkor 200mm f/4 IF 35mm Focal Length: 300mm @ f/11
Lighting
1 - Dedolight HMI Daylight Head
1 - Dedolight DedoPAR Light Head with Reflector
2 - Dedolight HMI Electronic Ballasts
2 - Dedolight Barn Doors
1 - Westcott 30’’ Sunlight Illuminator
Light Meter
Gossen Starlite
Support
1 - Gitzo Explorer Tripod
1 - Gitzo Off Center Ball Head
1 - Matthews Preemie Baby Stand
1 - Matthews Baby Jr. Dbl. Riser Hollywood Stand
Software
Adobe Bridge, Camera Raw, and Photoshop Corel Painter
The Projector and Gobos
The projector attachment and available gobos (explained shortly) are another aspect of what makes HMI so attractive to photographers. It’s not something that most of us are used to with flash.
The Dedolight Series 400 Imager is a modular optical system that goes with the 400 series spot/flood that we have been discussing.

We use it for more than just special effects. It’s great for tiny accents of controlled light. It goes right onto the front of the light head, just like any other accessory. There are four shutters to close down light and a lens that pushes and pulls into focus.

The term “gobo” is short for “go between.” The imager allows you to place gobo patterns in the path of the light.
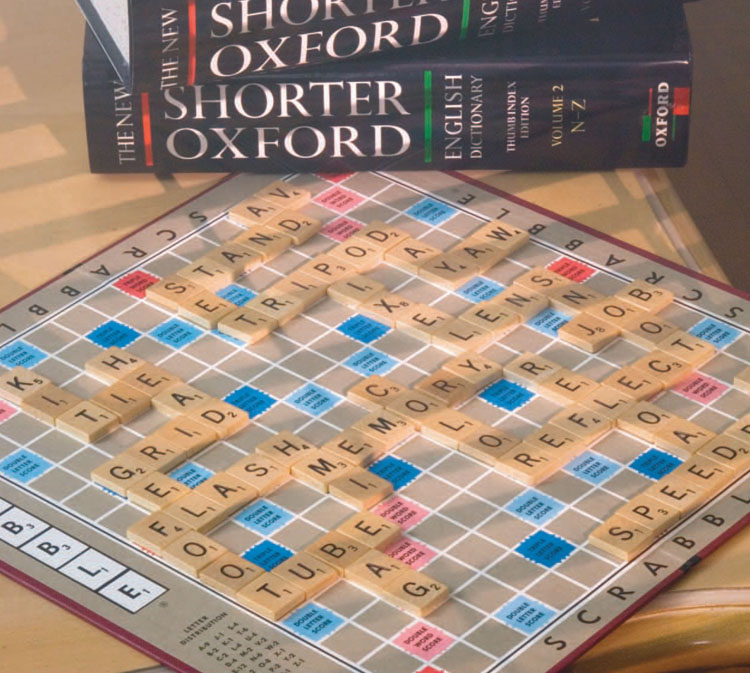
In the next two pages, we photograph a Scrabble board and use the Imager to project the pattern of light coming through venetian blinds using the above gobo from Rosco.
A Westcott Illuminator diffusion panel has come between the light source and the subject. Because of the spherical and glassy nature of the objects, it was important to capture an even reflection.
Tech Specs
Photographer
Brian Stoppee
Stylist
Tracey Lee
Illustrator
Janet Stoppee
Camera
Nikon D2x - ISO: 100 · Shutter Speed: 1/125 Manual Mode
Lens
AF-S Zoom-Nikkor 28-70mm f/2.8 IF-ED @ 48mm 35mm Focal Length: 48mm @ f/5.6
Lighting
1 - Dedolight HMI Daylight Head
1 - Dedolight DedoPAR Light Head with Reflector
2 - Dedolight HMI Electronic Ballasts
2 - Dedolight Barn Doors
1 - Westcott 4?” 2-Stop Diffuser
Light Meter
Gossen Starlite
Support
1 - Gitzo Explorer Tripod
1 - Gitzo Off Center Ball Head
1 - Matthews Preemie Baby Stand
1 - Matthews Baby Jr. Dbl. Riser Hollywood Stand
Software
Adobe Bridge, Camera Raw, and Photoshop Corel Painter
Projector Attachment and Mist Effects
Some uses for the Dedolight Imager are just too much fun to pass up.
Our main light is a simple bounce off a nearby white wall. The Dedolight 400 with the DP400 Imager provides the accent light. The projector is loaded up with a gobo of venetian blinds.
To make the entire setup more challenging (we can’t stand a dull shoot), we enlisted the services of the Rosco 1700 fog machine. This is a darling of the theatrical world. Unlike all the messy oil-based fogging devices, the Rosco uses a water-based fluid that does not stain or leave any residue.
We manipulated the HMI side of the equation first. Until we were satisfied with the balance between the fill and the accent, it took some trial and error (more of the latter).
Because the game board has a neutral density tone, the meter, in its spot mode, was perfect. Yet the image was not so inspiring without the special effects of the haze.
The fog machine is used to fill large theaters and sound stages with mist. We are familiar with using it outdoors, where even a light breeze requires a significant application.
In our small work space, a tiny puff would have done the job. The Rosco 1700 doesn’t do tiny puffs. Within seconds, visibility was down to five feet. It was perfect. It took a little while for enough fog to clear, but once it did, we had ample time to capture the mist exactly as we wanted it.
The fog machine not only put fine moisture particles in the air, without causing any noticeable change in humidity, but also added a minor amount of diffusion to bounce light, which proved to be exactly what we wanted.
A haze effect should be barely noticeable, but add to the atmosphere of the image. Find the right balance with the gobo of the blinds and the main light.

The gobo felt realistic to us. The balance between the bounce and the projection seemed even. Adjusting distance between the projection source and the subject, plus the focusing on the Imager, took a little work until we found just what we were after. A formula for how to best find that equilibrium probably does not exist, so just make it enjoyable.
Tech Specs
Photographer
Brian Stoppee
Illustrator
Janet Stoppee
Camera
Nikon D2x - ISO: 100 · Shutter Speed: 1/8 Manual Mode
Lens
AF-S Zoom-Nikkor 28-70mm f/2.8 IF-ED @ 62mm 35mm Focal Length: 93mm @ f/16
Lighting
1 - Dedolight HMI Daylight Head
1 - Dedolight DedoPAR Light Head with Reflector
1 - Dedolight DP400 Imager
1 - Dedolight Gobo Holder
2 - Dedolight HMI Electronic Ballasts
1 - Rosco Gobo
1 - Rosco 1700 Fog Machine
Light Meter
Gossen Starlite
Support
1 - Manfrotto Tripod with Quick Release Head
1 - Matthews Preemie Baby Stand
1 - Matthews Baby Jr. Dbl. Riser Hollywood Stand
Software
Adobe Bridge, Camera Raw, and Photoshop Corel Painter