Chapter 16
Light and Exhibits
Concluding this volume with printing is quite appropriate, as we started this book by exploring the intricacies of light. Along the way, we have covered a full spectrum of discussions on photography and light. At this point, it’s time to harvest the fruits of our labors in ink jet print media.
We’ve sold our enlargers and processors. All the chemicals left the premises in the late 1980s. We’ve been completely green for decades.
However, we’re still children of the darkroom. Now our darkroom may be digital, but we are still enamored of the gorgeous papers we use to display our work. It’s like the stinky old days of glacial acetic acid, only a zillion times cleaner and better.
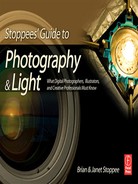
There’s still the thrill of seeing a big high-gloss image roll out of the printer, reminiscent of the anticipation when you opened up those funny Cibachrome tubes that rolled around on a motorized base while some chemicals sloshed about in there with the glass-like paper.
The great part is that we have not lost the museum-quality archival element along the way. Those once short-lived prints that captured some of the most important days in people’s lives and eventually faded away don’t have to haunt us any more. We can deliver something that lasts for more than a hundred years and actually looks and feels like an elegant exhibit print.
The print process is filled with all the technical and creative trappings of everything else in our digital environment. The call to action is to master it to the best of our abilities, bringing our images to breath-taking life.
Printer Drivers and Media
We confess to having a bunch of Epson printers. We have them in all shapes and sizes. If we doubled the number of these print output devices at our disposal, we still would not feel completely fulfilled.
We go back to the Epson Stylus Color 3000. In the year 1998, this gave a studio a new empowerment to print and proof jobs under their own roof. We’ll never forget taking proofs to a huge offset press site with four brand-new Heidelberg six-color presses (a few million dollars of iron) and seeing the disbelief on the faces of the prepress people, who were astounded that we did the proofing ourselves.
Sadly, that print shop (our favorite) was sold off in pieces years ago. However, the studio empowerment has grown exponentially. We don’t know of a for-real studio that doesn’t have a for-real ink jet printer.
Throat Size
This funny-sounding term goes back to the days of light-sensitive papers and chemicals.
If your photo studio had really made it, you processed your own film and papers with equipment from Colenta, Hope, or Kreonite. It’s what the astute custom photo labs used.
If you primarily printed 5″ × 7″, 8″ × 10″, and 11″ × 14″, a print processor, with a 14″ throat, did the job. However, if you needed to do 16″ × 20″ prints you had to have a processor with a 22″ throat, that let you do 20″ × 24″, with an extra inch on either side, so the paper didn’t jam up in the thing.
Some of this hasn’t changed.
Today, there are printers on sale at the office supply stores for well under a hundred bucks that have an 8.5″ throat.
The professional throat sizes are (with the maximum 35mm 2:3 aspect ratio and maximum standard available sheet paper size):

The larger print sizes are accomplished with roll paper that typically comes in lengths of 20 to 100 feet.
Ink and Media
Printer manufacturers are not in the business of selling printers. They make their money supplying expendables. It costs more money to repair a sick consumer printer than it does to buy a new one.
Whoever thought up the concept that the computer age would save paper consumption was a way-off-base daydreamer. History has proven that theory all wrong.
The Drivers
When Apple or Microsoft make a radical change to their operating system, the manufacturers have to return to the engineering drawing board and create new drivers for printers and scanners and various other computer peripheral devices.
There’s more to it than getting the computer to talk to the printer, though. The computer needs to have the ability to address the printer specifically for the characteristic of the paper that is being sent through it.
The Media
What ink does to canvas is different than how it reacts to a backlit display material.
Each medium has its own characteristics and how the printer will handle it makes a big difference. If you have ever chosen a plain paper setting by accident and sent a glossy paper stock through the printer, you know what we’re talking about.
Getting the Right Driver
The printer manufacturers hope that you never stray from their inks and papers. However, as the market grows, the demand for great papers increase. Moreover, there’s a glut of lousy papers out there at you-get-what-you-pay-for pricing.
Some of these good, bad, and ugly papers will work just fine with the drivers you download from the printer’s web site. (Please see page 178 & 179 for more on this.) However, for great results, get the proper profiles.
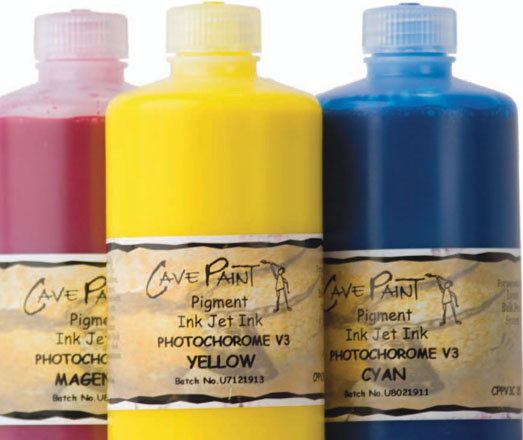
By way of example, the Lyson Cave Paint Photochrome V3 pigment ink jet inks are color-matched to the original Epson Ultra-chrome K3 Inks and designed for our Epson Stylus Pro 4800, so that they can be successfully used with the standard Epson-supplied profiles and driver settings. They are that close in color.
However, Lyson has a complete set of profiles for some of the smaller high-quality Epson printers as well as older Epson wide-format printers that do not use the Epson Ultrachrome K3 ink.
Besides Epson, you can also find profiles for hundreds of high-end printers at lyson. com. These are for printers such as Agfa, Canon, Grand Sherpa, Kodak, Mimaki, Mutoh, and Roland.
The right profiles make all the difference.
ICC Profiles
A “printer profile” is a description of the way your output device reproduces color on specific papers. The profile is a combination color and curve adjuster.
Three Profiles
We’ll use Adobe Photoshop as an example. It needs three different profiles:
Input: This profile describes the color characteristics of the device where the image came from. Primarily the image source is a scanner or digital camera.
Display: High end-monitors come with their own profile information. Windows users can create ICC profiles of their monitor with Adobe Gamma. Mac users have the advantage of the ColorSync utility for creating monitor profiles, as we discussed on pages 172-177.
Output: The profiles for printer, media, and ink combinations are necessary for each print medium that you use. All print media is different. Each medium usually requires its own profile. For our fine prints we use Lyson inks and the ink2image papers that Lyson’s North American arm sells.
Using Profiles
All three of these profiles are used by Adobe Photoshop. For example, users of OEM (original equipment manufacturer) inks such as Epson’s would normally select a media type from the printer driver selection, and a color adjustment mode, such as “Photo-realistic.” These settings automatically call up an output profile from within the print driver for that combination of Epson ink and media. Different output profiles are needed for Lyson products, because their inks have a different color balance than Epson inks. These differences are necessary so that the Lyson inks can provide the performance benefits, such as true fade resistance and improved vibrance.
Once the color of the ink has changed, the old printer driver can no longer manage the color reproduction correctly without help. This is where Lyson profiles come in, correcting the reproduction and in many cases enhancing it.
Where Are My Profiles?
Both Mac and Windows store profiles in various folders in the operating system:
Mac OS X: Follow this folder route to your ColorSync profile: Users > [user name] > Library > ColorSync > Profiles.
Windows XP: We’re told they’re in C:windowssystem32spooldriverscolor.
How Many Colors Can I Print?
Color reproduction is a tough one to nail down. There are many variables involved with how large of a color gamut can be produced.
The same printer and same ink set will produce a different color gamut, depending on which media is being run. On one printer, you will have one result and on a different printer with the same ink set and media, a different result. How each brand of printer deals with media and ink varies.
Gloss and satin coatings often produce the largest color gamuts. Matte coatings have the smallest gamuts.
Vibrant dye-based ink sets have more punch to them compared to a pigment-based ink, but dye-based inks come with their own set of challenges, especially in print longevity. However, the color gamut for the pigment-based ink may be wider. Most color gamut models don’t consider the vibrancy or visual quality of ink and media combinations.
Print Speed versus Density
A larger color gamut is achieved through the higher-color-density Epson print head. Some other printer manufacturers claim to have faster print times.
This is true.
However, faster speed can mean less density. Less density translates into a smaller color gamut.
Get all the color you can.
Print with a head that offers the greatest color density.
Four Inks… Six Inks… Eight Inks
Over the years, the CMYK family has had babies. It’s grown to C, LC, M, LM, Y, and K, adding light cyan (LC) and light magenta (LM). Then C, LC, M, LM, Y, K, LK, and LLK, tacking on light black (LK) and light, light black (LLK). Now it’s become C, LC, VM, LVM, Y, K, LK, and LLK, trading out magenta and light magenta for vivid magenta (VM) and light vivid magenta (LVM).
What’s this all about?
Color gamut!
The printer manufacturers are always attempting to expand the smaller color gamut of CMYK while bringing out a greater richness in the blacks. By printing with more inks, the output improves.
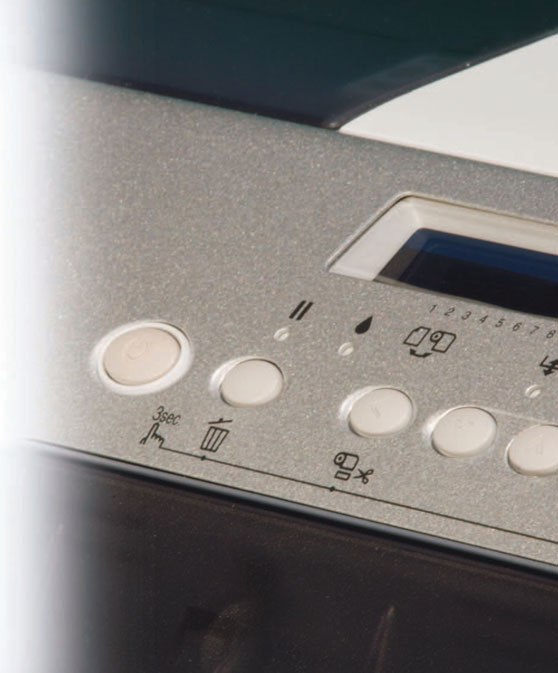
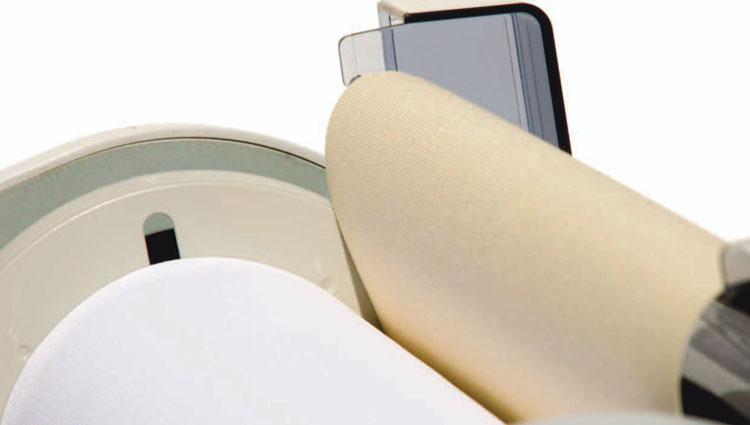
To the left, a roll of ink2image canvas media is being loaded onto an Epson wide-format, 8 ink printer.
Control Ink; Interpret Your Vision
On pages 178 & 179 we discussed color printing control in relationship to matching what you see on the monitor and what comes out of the printer. Here we’ll revisit some of this and put it into practice.
Converting Engines
Your computer’s display works in red, green, and blue (RGB), while your printer has four to eight or more inks based in cyan, magenta, yellow, and black (CMYK). Something needs to convert one color space into another.
Those calculations are handled by an “engine.” There are a range of engines available for the Macintosh. Adobe ACE is our preference. On the Windows side, the engine is the Color Management Module (CMM).
Rendering Intent
When you select File > Print, you are confronted with a series of choices. Again, we discussed this back on pages 178 & 179, but let’s explore what’s going on when you make those selections. You’re telling the engine how to convert one color value to another.
What’s happening is that the engine is “mapping” color values from your computer, the RGB “source space,” to the printer, the CMYK “destination space.”
Relative Colormetric
This intent provides the truest, most accurate conversion possible. Individual color values are mapped directly to their equivalent. However, in the conversion from RGB to CMYK, not all colors are available. Colors that lie outside the reproducible range of the destination source space are clipped. There are blocked-in colors in areas of high color intensity that cannot be reproduced with any detail.
Relative Colormetric is especially preferred when using a six- or an eight-color printer with a large color gamut. This choice is great for satin and gloss papers.
Perceptual
What’s sometimes known as “photographic intent” provides a pumped-up, high-contrast print conversion. Some consumers like this more vivid look. However, tonal values can shift to accommodate the wider range of tones. The details in areas of high-intensity color are preserved. This conversion is popular when converting from a wide color gamut (RGB) to a smaller color gamut (CMYK) or vice versa. It is often recommended for photographic printing.
What Else?
As we discussed on pages 178 & 179, other rendering intents such as Absolute Colormetric and saturation, have no role in professional photographic printing.
Embedding Profiles
When you save an image, Photoshop asks if you want to tag the file with the RGB working space that you used to create it.
These tags can affect your work. When you embed the working space with your photo, you record how your images appear on your display as well as the raw data in the file. It provides the opportunity to send images for printing elsewhere while allowing the other party to open your file and have Photoshop convert it into their color space.
This conversion changes the appearance of the file to match how it looks on your display. The other party can see it as the image appears to you. The conversion process actually changes the data to get it to look right on their display, unless the other party saves the image after viewing it or changing it so that it now matches their display.

Manage Ink
It’s annoying and expensive: always buying new ink jet cartridges drives us nuts. A complete set for wide-format printers is a few hundred dollars.
An active studio can go through quite a few sets of ink cartridges a year. Many cartridge brands cannot be recycled. It’s a huge waste of our precious resources.
Filling the bulk storage cartridge of a wide-format printer is very easy. Start by opening the cartridge’s top port by carefully removing the bung.
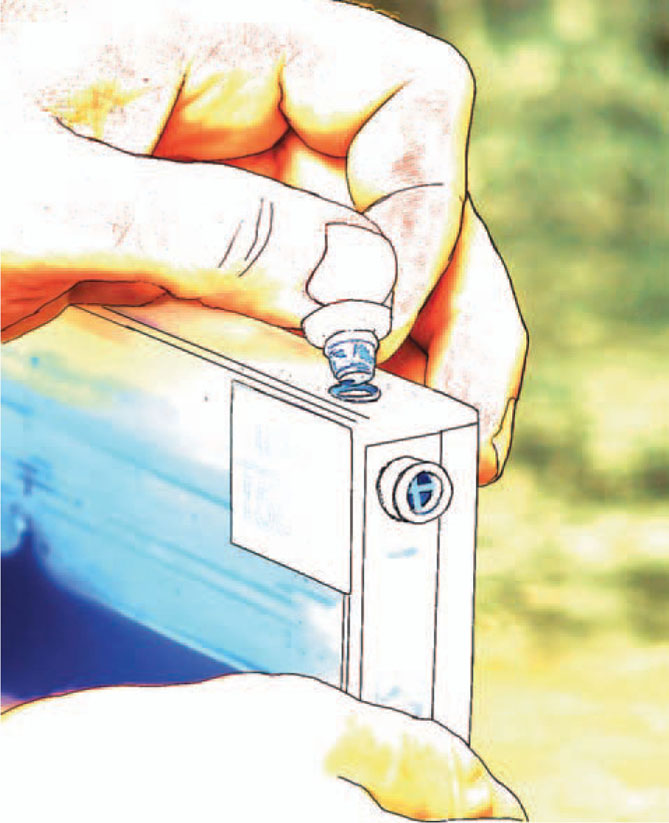
Next, insert the provided funnel and just slowly pour the proper ink into it.

Bulk Ink
There have been a few schemes to regularly pump fresh ink into a printer. Some of them are messy. Most of them require you to remove part of the printer’s cover and run unsightly tubes from one place to another.
We prefer refillable cartridges. The savings are tremendous. The ink is excellent. We refill as we need to. We always have a bottle of each affordable ink on hand.
It’s Easy!
We’ve been using Lyson inks since 2000. When refillable cartridges became available to us, we jumped on it.
Nozzle Check
Printer nozzles can clog. Before you do anything, check to be sure that your printer is working. This is a test that can be done either from the printer’s panel or through a special utility on your computer. Make a habit of doing this from time to time. Write today’s date on the nozzle check and file it away with the printer’s manuals; that way you have a record of when things were working correctly.
It’s best to service your printers now, rather than when you’re in a panic to get some prints out the door.
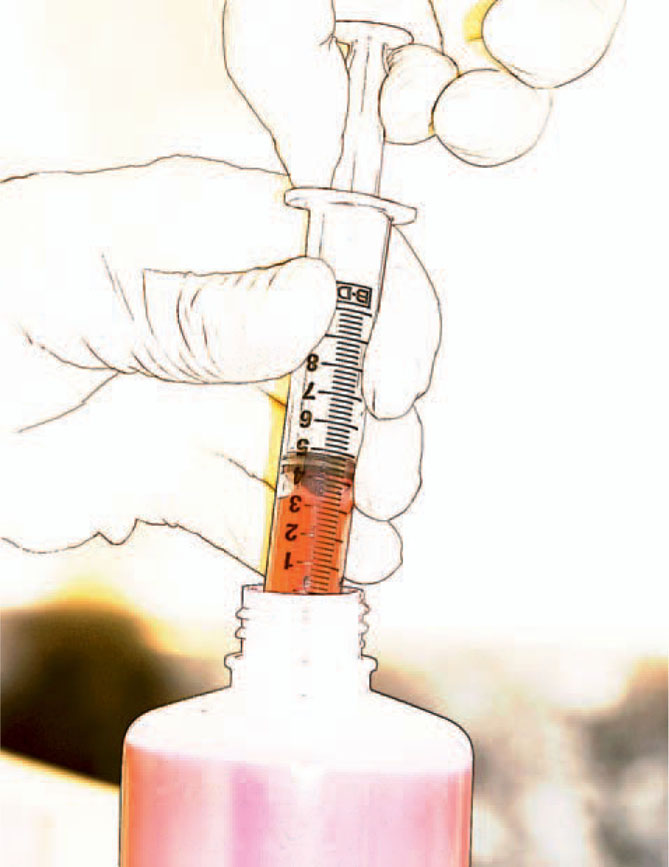
Fill a portion of a syringe with 5 milliliters of ink from the bottle.
Filling the Cartridges
The ink2image kit from Lyson’s North American distributor comes with everything that you need. It’s designed specifically for your make and model of high-end printer.
For refilling the smaller cartridges, use the provided syringe to draw 5 milliliters of ink from the bottle.
If you have a wide-format printer and are using the bulk cartridges, you have it easy. Just pull out the bung, insert a funnel into the opening and pour in the ink. Then reset the chip as we discuss on page 477
Find the cartridge that matches the ink color. On the replacement cartridge is a vent hole and another hole for refilling. Open both of them and just plunge the syringe into the refilling hole. Release the syringe plunger and ink is slowly sucked into the cartridge. Don’t push down on the plunger to force the ink into it. Let the suction do its magic. Keep at it 5 milliliters at a time, until the cartridge is full.
It’s best to let the cartridge sit overnight, before using it. This step ensures that any air bubbles are out.
Clean up your tools very well with water. Refill the cartridges only when the printer signals that the ink is getting low. As you have probably discovered, when the printer tells you that it’s low, the ink isn’t out yet.
It’s like the “low fuel” light on your car’s dashboard. There are probably another two or three gallons left in the tank when it goes on.
How It Works
We are very much “What makes this tick?” kind of people. The backs of the cartridges have little chips on them so that they can communicate to the printer.
Place the syringe as far into the cartridge as it will go. That action forces out some of the air in the cartridge.

Don’t force the ink with the plunger. Draw it up and the ink will do its magic, naturally flowing from the syringe to the cartridge

You’re not supposed to touch them.
If you’re as curious to what the chips are all about, as we were, here’s the story.
They’re fitted to the refillable cartridges to work with the ink level monitor in the printer’s driver software. Just like the cartridges from the printer’s manufacturer, the ink monitor shows the ink level in each refilled cartridge, and it changes as you print.
It is very important that you refill a cartridge when the ink level says that it’s low.
If you wait until it’s empty, the printer will stop printing when the ink monitor software shows the cartridge is empty.
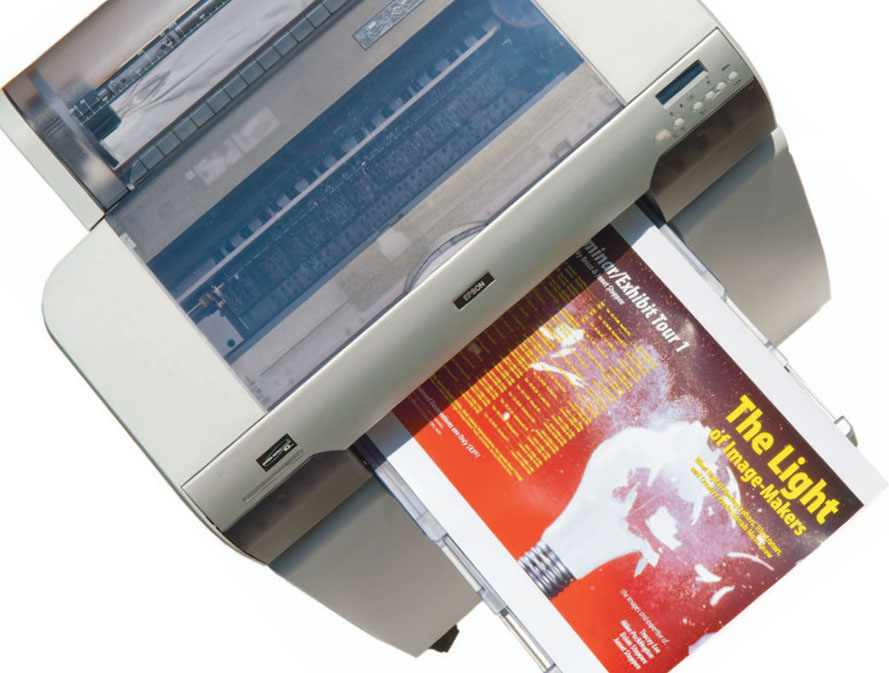
Resetting the Chip
Here’s the coolest little printer device for anyone who is into using bulk inks.
Once an ink cartridge for a wide-format printer has been used, the chip will continue to signal the printer that it’s completely spent. That would seem to prevent you from recharging it with fresh ink.
You can tell the chip to change its tune. You’re in charge of your ink’s recharge. A little device from ink2image (right) lets you reset the chip. Touching the pins of the resetting device to the chip for a few seconds causes the little device’s flashing red LED to change to a constant green. Now follow the same directions that we gave you for using the syringe to refill the spent cartridge, just as you did the bulk feed cartridges.
When you reinsert the recharged cartridge into the printer, it will communicate that it’s a new cartridge (which as far as the ink is concerned is true).
This lets our studio “go green” with cyan, magenta, yellow, black, and the other four inks, too.

The Black and White Gamut
Do you want to print some awesome black and white prints?
Do you like the look of cool-tone or sepia-tone black and white?
Do you have an old six-ink printer sitting around that’s feeling a bit unloved?
Then here’s something that you’re going to enjoy. (You can thank us later.)
Six Ink Black and White
Lyson’s Quad Black Toneable Inks is another cartridge refill system. You can use it with your existing wide-format printer, but then you have to purge the existing ink. Install the Quad Black and purge the system again to get it back to being a color printer. It’s best to just dedicate a printer to black and white.
Preparing Your Computer
The system comes with a special profile. Install it on your computer as we discussed in the “Where Are My Profiles?” on page 471.
Optimizing the Image in Photoshop
Getting the image ready in Photoshop is going to look a little weird on-screen, but when it prints, all will be fine.
Open a black and white image in Photoshop. Make sure that it is monochrome by using the info panel. If the RGB values throughout your image are equal, then it’s monochrome.
Creating a Warm Image
Start by creating a Channel Mixer. Go to Layer > New Adjustment Layer > Channel Mixer. Name it “Warm Adjustment.”
Next, on your Adjustment Layer Panel, choose “Load.” The Lyson Quad Black Toneable kit that had the profile that you loaded has two .cha files. Select “WarmAdj.”
When you did that, your photo should have gone wildly magenta. That’s what it’s supposed to do. Click “OK” to accept these channel mixer values.
Now the adjustment layer is in your Layer panel. On your Layer panel, there’s a dropdown menu that usually says “Normal.” Choose “Color” instead. This change ensures that the gray levels of your image are preserved during the application of the color adjustment. It is necessary that you add this vibrant magenta tint to your image. The Lyson color cast activates the magenta side of the printing channels, producing a warm tone on the print. The monitor profile that you have installed filters out much of the vibrancy of this color cast and changes its hue, making it appear like the traditional warm or sepia tones.
Try the same with a cool tone image.

Matte and Gloss
The media selection at ink2image is exceptional. They buy from fine art paper mills all over the world.
Each paper reacts differently to ink.
Premium presentation matte has a brighter white surface than most matte papers, with a wide color gamut. It’s an economical photo printing paper and in single- or doubled-sided.
Fiber-based matte is acid-free and great for long-term displays. It’s a heavyweight fiber-based paper with a creamy white smooth finish.

Premium luster and gloss have a bright white background for deeper and brighter color and rich neutral blacks. The photo of the print below typifies its rich, deep colors.
Silver gloss in white and natural looks and feels like the traditional photographic silver type gloss paper. It’s an acid-free fiber-based paper in bright white and natural white.
Silver satin is similar to the silver gloss, but with a lower gloss finish.
Smooth fine art is acid-free with an alpha cellulose base with the natural warm color of a traditional watercolor paper that is smooth, but with a little more texture than photo velvet papers.
Protect prints with a UV- and water-resistant lacquer, like Print Guard, below.

Velvet and Canvas
Photo velvet fine art comes in white and natural. Made from 100% cotton and acid-free, its smooth matte surface reproduces the finest details and vivid colors.
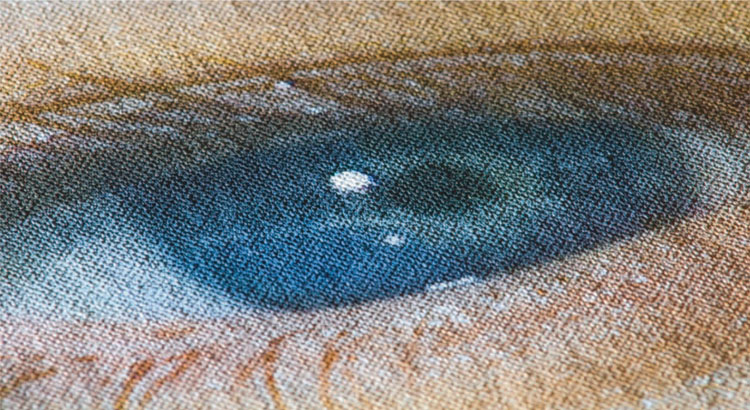
Matte canvas is 100% cotton, 22 mil natural white canvas with a water-resistant coating that is ideal for the reproduction of fine art and photographic images. Making use of a 2:1 weave for superior strength, it’s crack-resistant when stretched. Below is a sense of its texture and richness of color.
Smooth matte canvas has a tighter weave than a normal matte canvas and a bright white finish. It’s suitable for the reproduction of oil paintings and photographic images where too much tooth can detract from the image. It’s a 100% cotton, 19 mil base, also with a 2:1 weave.
High-gloss canvas is a super-high-gloss, water-resistant finish made from a 19 mil poly/cotton-blend base.
Light and Print Longevity
When a photographer sells a printed image to someone, the longevity of that image has to be of utmost importance to them. This is especially true for photographers who cover the special events in personal lives.
The photographer retains the original files and the consumer gets the prints. They may be handed down through the family for generations to come.
The same is true for fine art photographers. They sell exhibit prints sought after by collectors who are willing to spend a pretty penny for something of investment quality.
Silver-Halide Prints, Historically
For years, people preserved memories in black and white photographs. They lasted for decades with no apparent issues of fading.
In the late 1950s, when the color photograph entered the marketplace with great fanfare, people had no reason to believe that the images had a limited lifespan.
These dye-based photographic delivery systems proved how little permanence they had in the 1970s and 1980s, when many of these precious memories didn’t just fade, some of them just about completely disappeared.
To this day, if a silver-halide paper print under glass is exposed to 450 lux cool white fluorescent light for twelve hours per day, it has a twenty- to forty-year lifespan. If these same photos were kept in total darkness in a temperature- and humidity-controlled environment, their lives would be in the range of fifty to one hundred years.
Ink Jet Prints, Going Forward
An ink jet print is created by tiny ink droplets being deposited on paper. The droplets are measured in picoliters, which is a trillionth of a liter.
The longevity of these prints are dependant upon the archival quality of the ink and its receiver, the media, before light exposure is even considered.
Dye-Based Inks vs. Pigment-Based Inks
Inks that are dye-based have many of the same issues as dye-based color photo papers. They offered no solution to the problem. Initially, ink jet printers used dye-based inks, because at the time, they offered the wider color gamut that consumers and professionals desired from the newly emerging digital environment.
Much like color photography in the late 1950s it was something people wanted to embrace, even with all its warts and blemishes.
Today, pigment-based inks are widely accepted and the tolerance for less than technically acceptable image-making has a lower threshold than ever.
An ink set where the pigment particle is encapsulated with resin provides the widest gamut and greatest longevity for lightfastness.
Swellable Papers
Some papers may look pretty but fail to provide the demanded longevity.
Swellable papers, as the name implies, expand with contact by moisture. They have an extended dry time. The paper base is sandwiched between two polyethylene layers, much like the resin-coated (RC) papers of the silver halide days.
These papers are great for dye-based inks, but pigment-based inks are unable to fully penetrate the polyethylene layers.
Porous Papers
This media has a high resistance to moisture and humidity. It dries fast, so there is little concern about smudging. Unfortunately, because these papers have no protective coating, they are under attack in some environmental situations. It’s not the kind of stuff for long-life prints near a home’s cooking spaces, but what prints are?
Cotton Rag Paper
A 100% cotton rag matte coated paper has excellent longevity, especially if it is acid-free. Humidity more adversely affects traditional silver halide images than ink jet prints.
Environmental Challenges
No matter how hard the studio lovingly handles its longest life print product to the end user, once it walks out the door, the consumer bears responsibility for the image’s care.
There are five key factors that work against the life of the image.
Light
Though great improvements have been made to the longevity of silver-halide prints, light is still their number one enemy of fading.
It is not true that ink jet prints are safe from light fading. They are just not as adversely affected. The paper used has the most significant effect on the fade rate. Tests have revealed that the greatest “lightfastness” is found in pigment-based inks printed on archival papers that they are designed to react with optimally.
Studios need to be aware of manufacturer’s claims of lightfastness. Their specifications have to be relative to precise ink and paper combinations. A photographer cannot assume that because a specific printer offers longevity of at least a hundred years that the same is true of all papers that can be run through it. This can be true of papers from the printer’s manufacturer, not just other vendors, as some would like you to believe.
These are responsibilities that studios need to understand for their own best interests and those of their customers.
Not everyone uses the same test conditions.
In a widely accepted white paper report published in 2005, testing prints under 450 lux illumination revealed that some dye-sublimation prints lasted only four to eight years, whereas some pigment-based ink jet prints on compatible paper provided as much as 115 years of longevity.
Even some consumer-oriented pigment-based products exceeded one hundred years. However, other papers that claimed a century of longevity made it for only eleven years with some dye-based ink jet printers.
A well-known brand of silver halide photo paper in a popular mini-lab environment, lasted only nineteen years in the same testing.
Dark Keeping
It is true that some materials that last only ten to twenty years under prolonged exposure to light can survive hundreds of years in controlled dark storage. It cannot be assumed that dark keeping will preserve longevity with all print materials.
Temperature and Humidity
Prolonged exposure to high humidity can cause fungal growth on all prints. High heat and humidity adversely affect traditional silver halide prints more than ink jet prints. Though pigment-based inks are the least affected, dye-based ink prints on swellable paper lose image quality.
Gaseous Pollutants
Ink jet prints with pigment-based inks are not as susceptible to ozone pollutants as are those with dye-based inks. Framed prints behind glass stand a better chance of survival.
Water
A traditional silver halide print has a better chance of being restored from water damage than one from an ink jet printer. Ink jet prints can be ruined by water, if they’re not on a water-resistant medium.
Further Research
This is not the final word on print longevity. Some manufacturers are staking their reputations on it, so we hope for more progress.
Take it upon yourself to stay on top of this. An excellent resource for learning more is Wilhelm Imaging Research. Please visit them at wilhelm-research.com.