31 Partial Manipulation with the Lasso Tool
Photoshop is an endlessly complex image manipulation program that can appear to be a jungle through which you have to hack your way with a machete. However, it is much easier if you have a clear idea of where you want to go. As with modern cell phones, Photoshop has countless functions that are very rarely or never used in practice. There are also truly essential tools that will help you achieve results that are as good as those obtained in the analog darkroom. The most important aspect of this type of work is the ability to selectively manipulate individual parts of an image. You can create outstanding black and white photos with subtle gray tones by following the path through the Photoshop jungle to the three Lasso tools. These tools allow you to select individual areas in the picture for customized manipulation. By right-clicking on the Lasso icon in your tool bar, three Lasso tools appear: the normal Lasso, the Polygonal Lasso, and the Magnetic Lasso.
Making Selections Using the Lasso
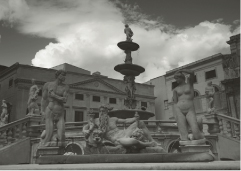
The photo of the Piazza Colonna in Palermo (figure 31–1) is the result of a typical chance situation of a type that many photographers dislike. The backlit sky shows nice contrast in the clouds, but because the buildings and statues are in the shade they have been given a muddy, gray look by the default black and white conversion settings.
However, we can rectify this situation by using the Lasso tool to make selective adjustments to the image. Simply click the Lasso icon and select the highest possible Feather value (250 pixels). This means that the area of transition between the manipulated and nonmanipulated parts of the image are interpolated over an area that is 250 pixels wide, making the difference undetectable in the finished image.
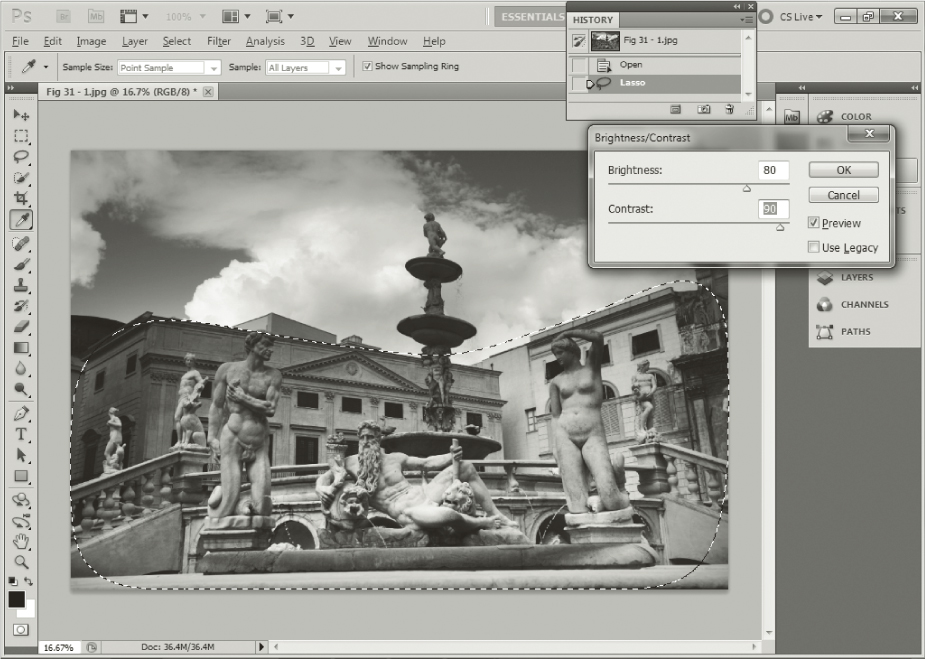
You can now select the part of the image you wish to manipulate by pressing the mouse button and drawing around it. With a large Feather value, you don’t have to draw accurately. In this case, it makes sense to select the entire lower half of the image. Once you have completed the selection shape, the program draws a frame around it (figure 31–2). The breadth of the frame is due to the feathered edge. You can now use the Brightness/Contrast tool (or the more complex Levels and Curves tools) to adjust brightness and contrast.
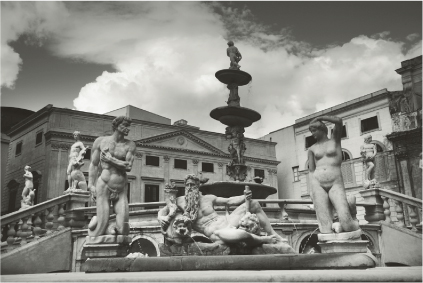
The Brightness/Contrast tool has delivered consistently great results since its CS3 release and rarely produces burned-out highlights or detail-free shadows. Here, increasing contrast by 90% and brightness by 80% transforms the previously soft-looking lower half of the image, resulting in a perfectly acceptable overall result (figure 31–3).
Partial Manipulation with the Magnetic Lasso
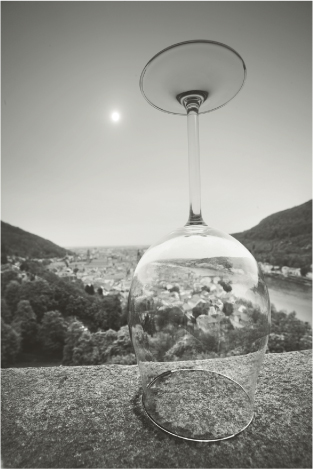
The next photo, taken with a 19 mm lens from the ramparts of the castle in Heidelberg, was a difficult subject to photograph digitally because it is not easy to shoot a backlit sun shining through a hazy sky in a way that prevents all the lit area around the sun from burning out and losing all detail. Therefore, the first requirement for making this a good picture was to use a gradient filter to gradually darken the sky by one to two exposure values. Then I used the highlight indicator on the display to control exposure so the sun itself would blink but not the halo around it. The respective exposure and the filter ensure enough detail in the immediate vicinity of the sun. As far as the image is concerned, all prerequisites have been met for creating a nicely textured, atmospheric photo.
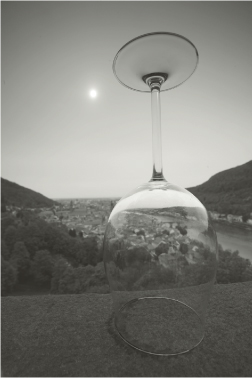
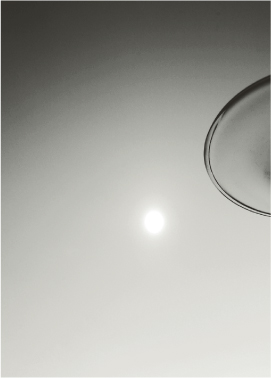

After developing it with the RAW converter, I opened the color photo in Photoshop and converted it to a black and white image using the Black & White tool’s default settings (figure 31–4). The sky now has a pretty nice gray value gradation, but the lower part of the image remains too dark and flat. If I increase the contrast in the entire photo (regardless of the tool I use), I encounter a problem: The pleasing gray tone gradient I had in the sky gets the so-called jagged look (figure 31–5) so typical of digital images. To prevent these jagged edges and conserve the nice and gradual gray tonality of the sky, I left the sky alone and, as in the previous example, concentrated my manipulating efforts only on the lower part of the photo.
To prevent jagged edges, adjust the edge contrast as follows:
- Enlarge the photo on your screen.
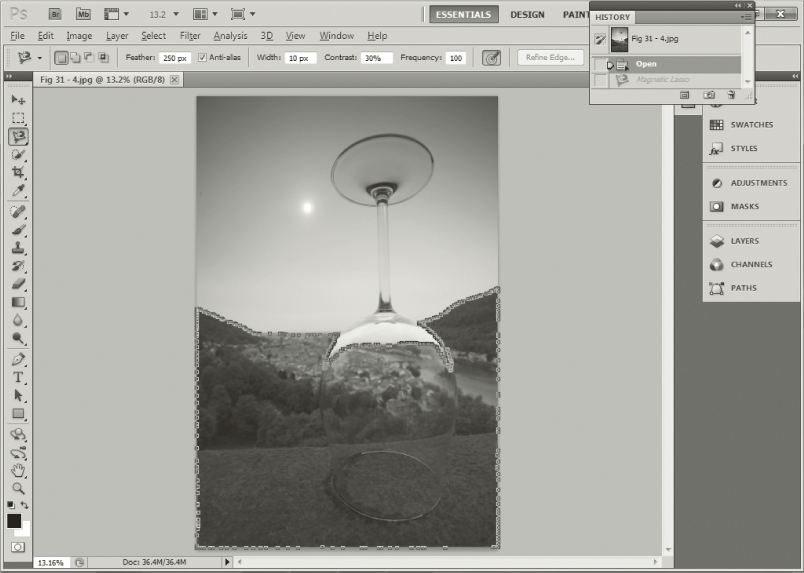
- Right-click the Lasso tool and select the Magnetic Lasso (figure 31–6). The Magnetic Lasso appears and recognizes contrast.
- Guide the mouse to place anchor points automatically along those lines where there is contrast.
- Adjust the edge contrast (in this case 30%).
You can even adjust the distance between anchor points that adjoin an edge. In this case I selected a Frequency value of 100, which is the smallest possible recommended distance for organic shapes that have irregular curves. As in the previous example, I selected a Feather value of 250 pixels to keep the transitions between manipulated and unmanipulated areas unobtrusive. With clear architectural forms, the distance between anchor points can be significantly greater. However, especially with architectural photos, the Magnetic Lasso sometimes is placed on the wrong edges. If this occurs, practice how to adjust the various setting points to rectify the problem. Basically, it is a good idea to set the width of the path to 10 pixels, but you can even narrow it down to 3 pixels with clear architectural shapes.
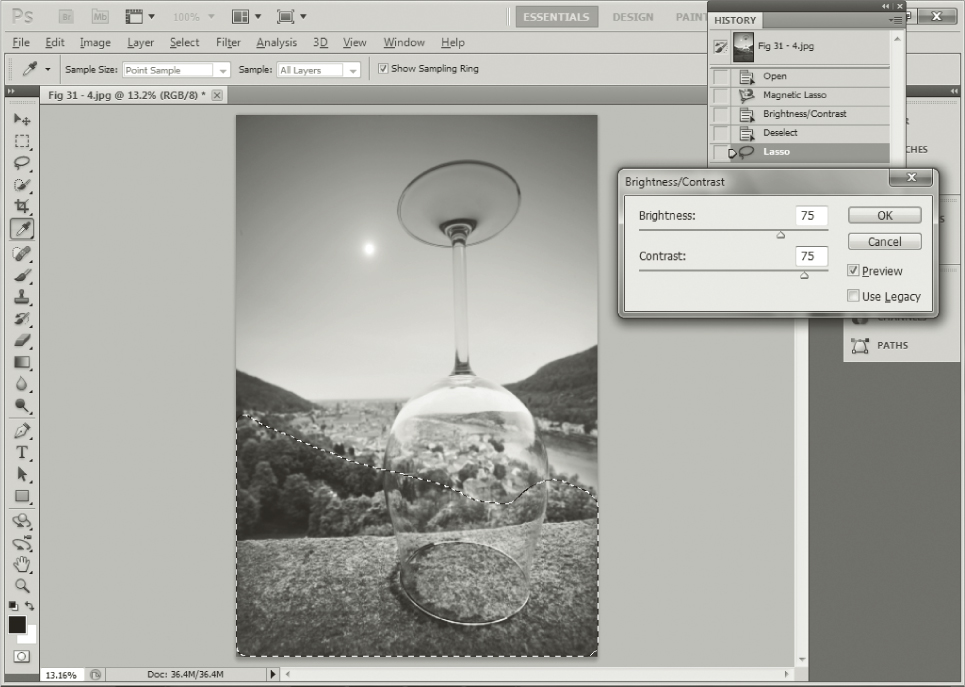
As the picture shows, you can easily place the Magnetic Lasso around the cropped section you want to manipulate. If the markings do not appear in the desired position, you can also set the anchor points manually by using individual mouse clicks. If a point is in the wrong position, you can remove the last point once again with the delete key. After you have carefully moved the tool around the section you want to manipulate and correctly placed the anchor points, double-click and a line of “marching ants” indicates that you can start changing the cropped area (figure 31-7). If you now use the Brightness/Contrast tool to increase contrast in the lower part of the image, the result is perfectly acceptable (figure 31–8). The contrast within the town is fine, while the lower elements of the trees and the wall still look quite dull. I can rectify this dullness with a second Brightness/Contrast adjustment, this time selected using the normal Lasso. I adjusted both sliders to values of +75 (figure 31–9) to produce better contrast in the lower portion of the frame.

The overall result (figure 31–10) is really very good and is in stark contrast to the original default conversion shown in figure 31–4. The result here is better than we could ever have achieved using analog dodging techniques.

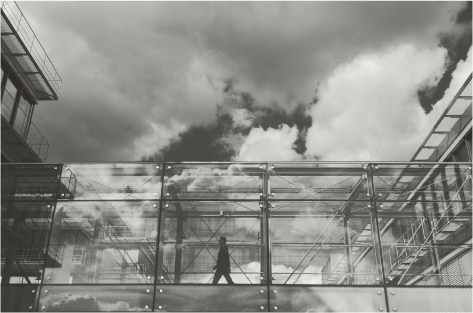
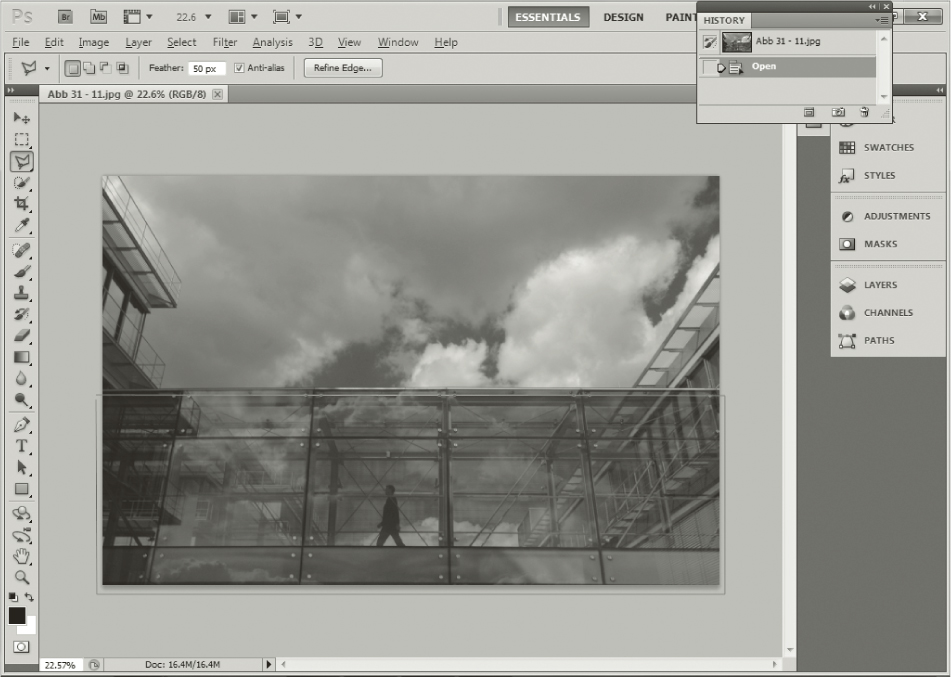
Partial Manipulation of Architectural Lines with the Polygonal Lasso
While I recommend the Magnetic Lasso for selecting organic shapes, the Polygonal Lasso is my favorite tool for selecting all other types of shapes. Even if the tool appears to make very angular selections, using a high Feather value produces smooth selections that stick very closely to the outlines of all sorts of shapes. This tool is great for making rough selections and especially suitable for selecting architectural details. After I converted this picture to black and white (figure 31–11), you can see that the lower part is especially dark and flat. If I brighten the entire image, detail in the clouds is lost, so a selective manipulation of only the lower part makes sense. Because the area to be manipulated has exactly four corners, it is very easy to use the Polygonal Lasso tool to surround the glassy bridge that connects the two buildings. Thus, I placed the anchor points of the Polygonal Lasso tool on these four corners (figure 31–12) by clicking once where I wanted to start the polygon. Then I guided the lasso until it reached the next corner and pulled the polygon line like a rubber band behind it. After clicking the second corner, the polygon line is laid down right along the straight corner. This is certainly the ideal tool for edging straight corners, but it is possible to switch back and forth between the Magnetic Lasso and the Polygonal Lasso. It works like this:
- Start edging with the Magnetic Lasso.
- Hold down the Alt (Windows) or Option (Mac OS) key and click the mouse to switch to the Polygonal Lasso. Keep the Alt or Option key depressed as you anchor points on each corner.
- Release the Alt or Option key and click the mouse to automatically bring back the Magnetic Lasso.
In this photo, however, the Polygonal Lasso fully meets my needs. When I have returned to the beginning point after having edged the desired area, a simple click makes the “marching ants” appear to indicate that I can now start manipulating this selected area.
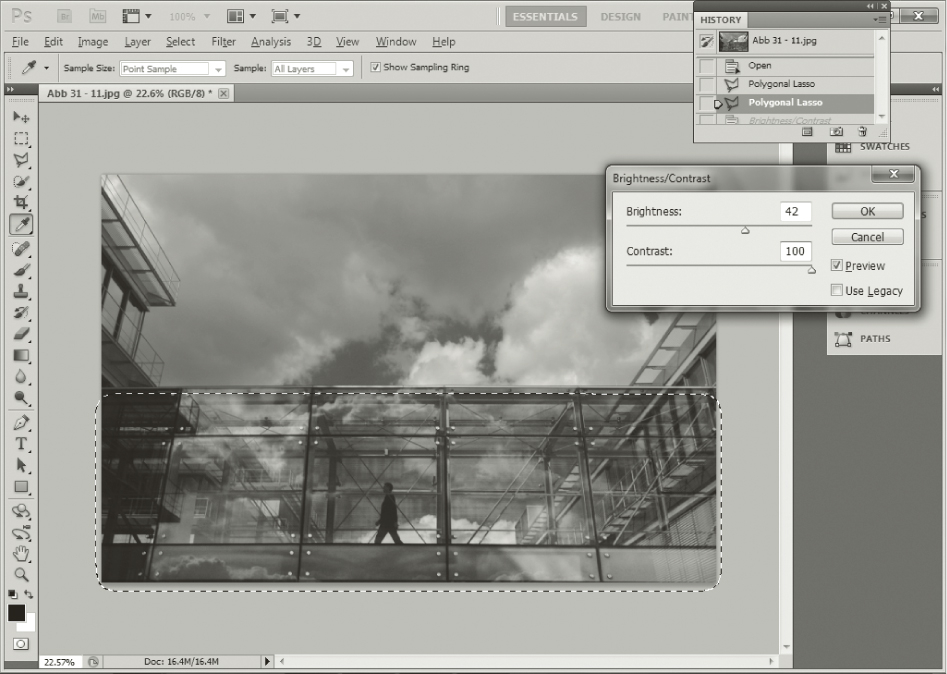
The photo looks considerably better now, and I can use the Brightness/Contrast tool for brightening the very dark, lower part without worrying about losing texture in the highlights. To further improve this image, brightness was increased by 42 points and contrast was increased by 100 points (figure 31–13). Nevertheless, the total image could still look better with a little more contrast, but this would be hard to achieve with conventional tools. In addition, if I used the Brightness/Contrast tool again, the highlights in the clouds would lose their detail. Beginning with Photoshop CS3 there is yet another wonderful option, the already mentioned midtone contrast of the Shadows/Highlights tool. With this tool, you can increase midtone contrast without burning out highlights or allowing shadows to go under. In the photo, the midtone contrast was increased by 22 points, achieving a perfect picture (figure 31–14). A word of advice: Do not increase midtone contrast to an extraordinary degree because your photos will start looking unnatural and sometimes bright edges will start forming in the bright and dark transition points.
The Lasso is another example of a digital tool that is far superior to any that are available in a conventional analog darkroom.