
33 Correcting Lens Errors and Distortion in Architectural Images
Wide-angle lenses have the property of distorting perspective provided they are not shift lenses, and the zoom lenses of most manufacturers distort more often along the edges; in other words, they produce barrel or pincushion distortion in architectural photos. In addition, these zoom lenses can cause vignetting when used with a fully opened aperture. With regard to digital photography, a special problem of wide-angle lenses is chromatic aberration, or color fringes, in the edges of images, of interest only in color photography, of course.
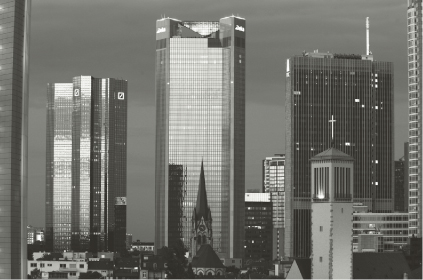
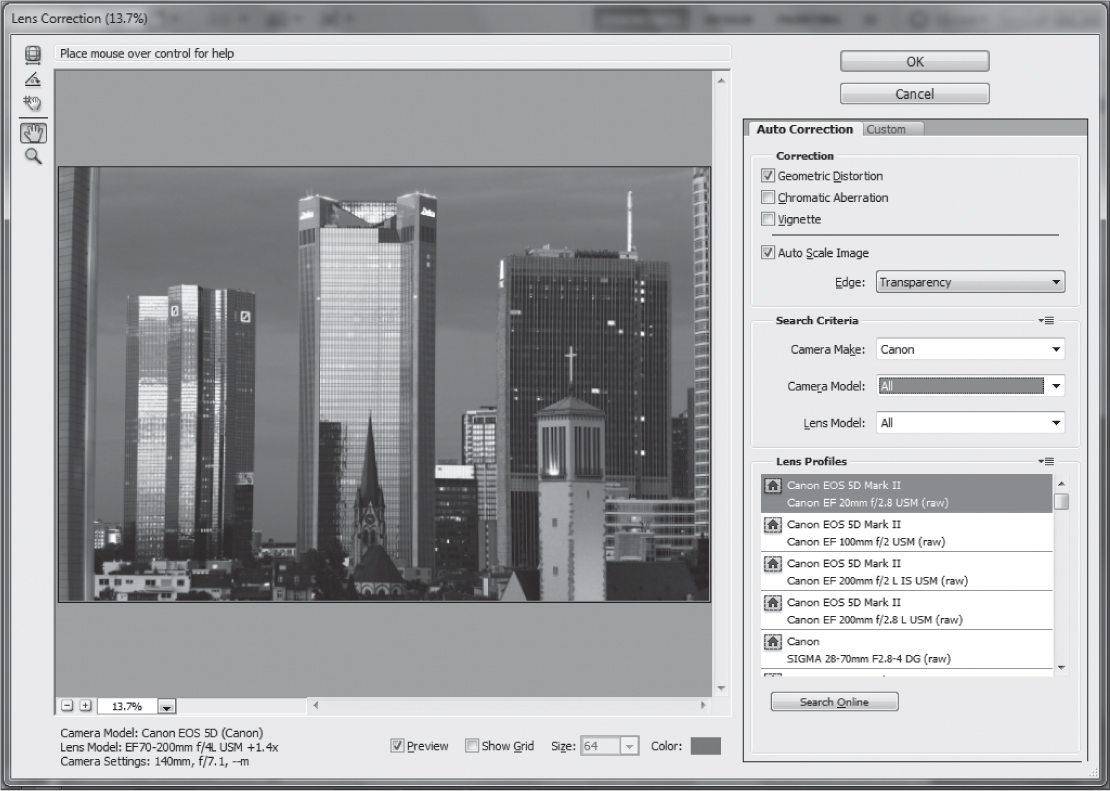
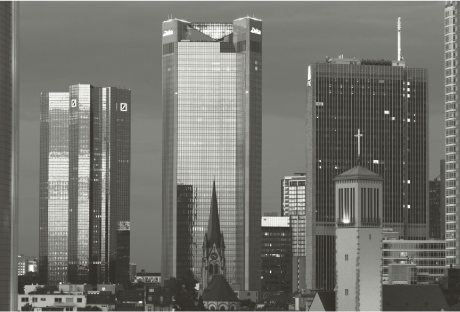
All these problems can be corrected with one single tool, namely the Lens Correction filter introduced in Photoshop CS5. This tool includes profiles that cover just about every current camera and lens model and makes correcting lens errors a comparatively simple task. In the photo in figure 33–1, taken using a Canon 70–200 mm telephoto zoom, there is barrel distortion at the 140 mm focal length. This would normally be reason enough to use a different lens for a photo such as this, but Photoshop makes it usable. All you have to do is enter the make and model of your camera and lens and Photoshop automatically corrects the appropriate optical errors (figure 33–2). The process corrects all distorted and converging architectural lines, especially at the edges of the frame. It wouldn’t have been possible to use a zoom lens that produces this amount of distortion for an analog architectural shot, but digital imaging technology makes it possible to use all types of lenses in a hitherto unthinkably wide range of situations (figure 33–3).
The Lens Correction tool also includes vignetting correction and chromatic aberration correction functionality for combating fringing effects although personally, I prefer to use a RAW converter to correct these types of errors.
Shift Lenses Are Almost Superfluous
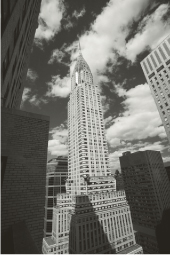
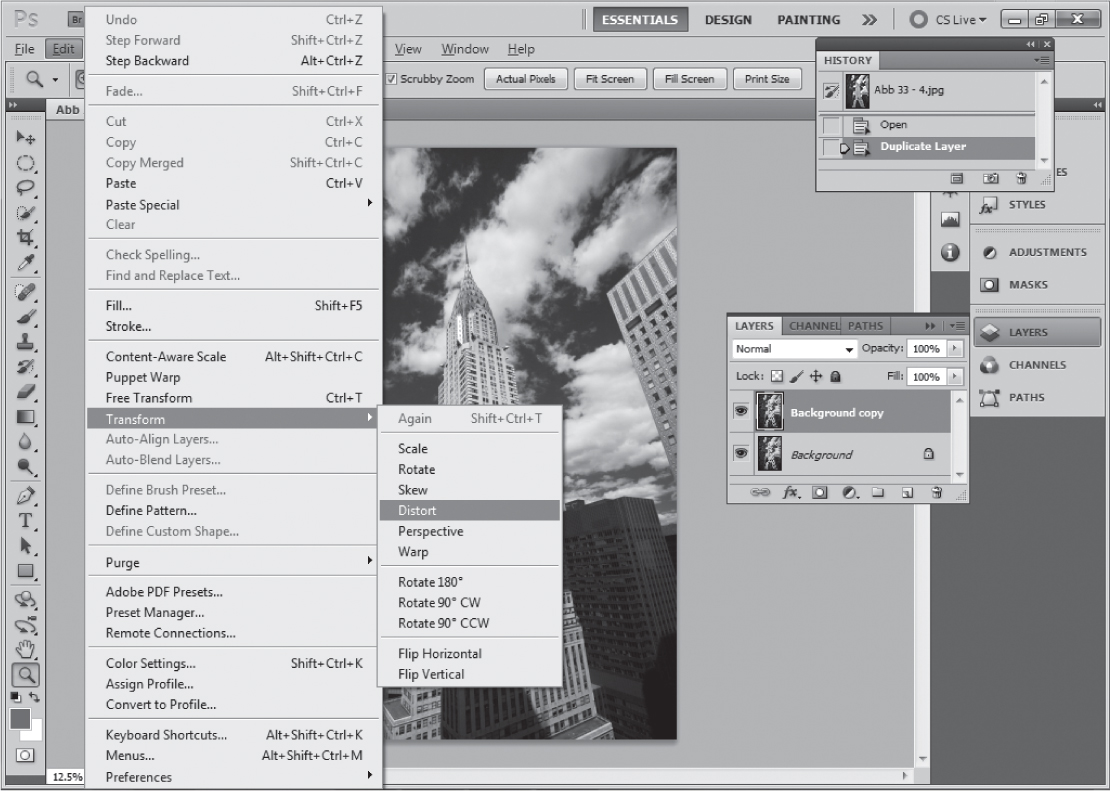
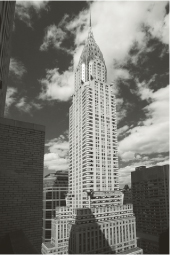
It is well known that wide-angle lenses distort architectural lines if you place the building on the lower edge of the photo because the camera is no longer parallel to the architecture. To compensate for the resulting converging lines, so-called shift lenses can be used to displace the entire optical plane upward so the camera can still be held parallel to the building, as long as the latter begins in the lower part of the image. Because shift lenses are very expensive, the serious amateur will question if they are really needed. As you have already seen, Photoshop provides the answer, and it’s not a bad one at all. The photo of the Chrysler Building in New York (figure 33–4) is a good example. It was taken from about one-third of the way up the building using a 17 mm lens, making it necessary to tilt the camera upward. This caused a lot of distortion in the vertical lines of the building’s façade. In this case, I had to work with a second Photoshop layer created using the Layer > Duplicate Layer command. Once I created the duplicate layer by clicking OK, I navigated to the Transform tool in the Edit menu. Here, I selected the Distort option from the menu (figure 33–5). The tool then presented me with a marquee with eight handles that I position using the mouse. The degree of correction this image required meant that I had to position some of the handles outside of the visible image frame, making it necessary to reduce the size of the image on the canvas (figure 33–6). To preserve the building’s proportions, I had to stretch it out of the top of the frame to the same degree that I extended it sideways. This process naturally leads to cropping of parts of the original image but produces a result that is comparable with equivalent images photographed using specialized tilt/shift lenses (figure 33–7).

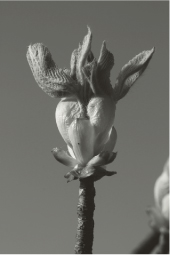
Another very useful feature of the Transform tool is the Warp option, which allows you to transform the shape of selected objects without affecting the surrounding pixels. This function works best with organic forms like the one shown in figure 33–8. In order to make this image look as wonderfully minimalist as a Blossfeld or Mapplethorpe plant photograph, I decided to remove the second, out-of-focus bud from the lower-right corner of the frame.
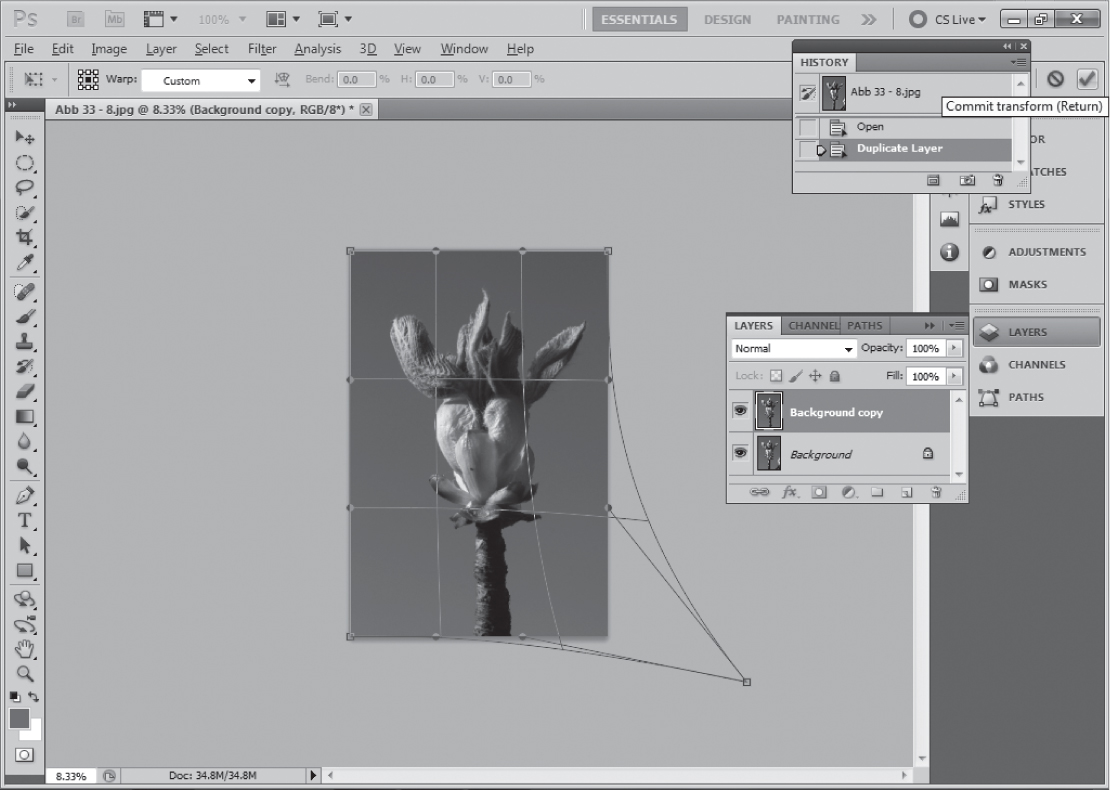
To do this, I once again duplicated the image layer and, this time, selected the Warp option in the Transform menu. The tool superimposes a grid with nine sections onto the image. Each of the corners of the grid and the individual sections can be manipulated separately. Removing the second bud was a simple matter of grabbing the lower-right corner handle and dragging the portion of the image containing the unwanted pixels out of the frame (figure 33–9). I could then manipulate the left-hand side of the lower-right section to counteract the thickening effect the initial warp transformation had on the plant’s stem. Clicking the checkmark icon at the right-end of the toolbar completes the operation (figure 33–10).
Used carefully, Warp effects can also be successfully applied to architectural photos.
Subsequent Sharpening: Yes or No?
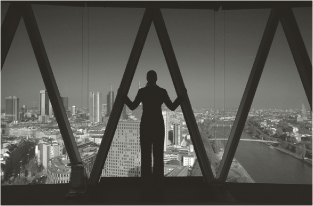
Everyone knows that Photoshop can sharpen images after they were taken, but beware that excessive subsequent sharpening often makes a photo look unnatural. When you click Filters > Sharpen, five options are available: Sharpen Edges, Sharpen, Smart Sharpen, Sharpen More, and Unsharp Mask. For high-end correction, I recommend only two options, Smart Sharpen and Unsharp Mask, but before I explain them let’s first look at the disadvantages of sharpening. The photo taken on top of the new Westhafen Tower in Frankfurt shows the city’s skyline (figure 33–11) with plenty of detail. To demonstrate very clearly the dangers of sharpening, look at a section of your image at 100% and click the Sharpen More tool. In the example, you can now recognize (as opposed to the unsharpened image) white edges along the contours of the silhouette in the foreground (figure 33–12). These edges are unwanted and allow the experienced viewer to immediately recognize that this is a digital photo, even if a grain layer has been added to it. Pictorial noise is also significantly greater.

More suitable is the Unsharp Mask tool. The name does not quite indicate sharpening, but it comes from a technical method employed in analog photography in which an unsharp positive is placed on a sharp negative and then projected onto contrasty paper. A similar result occurs on the computer: Contrast is reduced in large areas of the picture, and those areas become a little softer. In abrupt tone transitions, however, contrast is increased and the overall result is that the photo looks clearly sharper without appearing artificial (figure 33–13).
Another advantage is that several options are available with this tool: Amount, for example, determines to what degree the contrast in areas with abrupt tone transitions should be increased. The standard setting is 50%, recommended for the subsequent sharpening of almost all digital images. The Radius value restricts the width of the area to be sharpened and has been set to one pixel, another recommended standard setting. Finally, the Threshold value can be set for determining the intensity of tone transitions so the filter can be effective in the first place. Its standard setting is 0, which means that the filter affects all areas of the picture. For example, if you would like to prevent a subject’s skin blemishes from being intensified during sharpening, you can increase the Threshold value, and the filter then leaves softer transitions unchanged. In cases like this, it’s well worth your time to try it out.


Even more detailed sharpening alternatives are provided by the Smart Sharpen filter. If you choose the Advanced setting, you can selectively regulate sharpness according to lights and shadows. In this case, you can use the tone width regulator for preventing large areas from being sharpened too and thus stop pictorial noise in the sky, for example, from being increased automatically with the sharpening process.
The Remove options allow you to correct blurred movement or soften sharpness. Don’t expect too much from these functions, however. If the Remove option remains set on the Gaussian Blur, the Smart Sharpen tool will have an effect similar to the Unsharp Mask filter. In this example, the standard setting was selected (figure 33–14).
Remember that it takes longer to work with the Smart Sharpen filter than with the Unsharp Mask filter, and therefore the Smart Sharpen filter is not as useful when processing a large number of pictures. The sharpness performance of a subsequently sharpened image is clearly superior to the impression we get when looking at a print from a small-format slide or negative, and the defenders of the analog bastion will not be able to dispute it. Thus, photos taken with a good digital camera can be easily enlarged to a width of 40 inches and the pixels would still not be visible to the naked eye.