Once you have your puppet built, you are ready to put it on camera and bring it to life, which is the most challenging feat of all. Here you are taking the basic principles learned from the exercises in Chapter 5, “Basic Animation,” and adding in the element of performance. Your puppet should not just move around aimlessly, but move in a way that it appears believable in its actions, and ultimately appears to be thinking, with a life of its own. In this chapter, I will demonstrate some exercises that are useful for getting warmed up to creating an animated performance in stop-motion, and discuss a few things regarding how to think like an animator.
Animation is made up of a series of poses made by the character, and how each pose leads to another. Each main action of the character is referred to as a key pose, and the in-betweens connect each pose to the next one. This way of thinking is particularly relevant to 2D and CG animation, where these key poses are created first, with the in-betweens put in later. In stop-motion, each movement must be done in sequence, so there are no keys or in-betweens, in a sense, but it still helps to think about the animation this way. Careful planning of your key poses will keep your animation from becoming a jumbled mess of jittery movement with no forethought to where it’s going. Each pose in your animation will probably only be there for a brief moment before it transitions into another one, so it’s important for every pose to be clear to the audience. Before animating your puppet, acquaint yourself with it by simply experimenting with posing. This habit will help you explore your character’s personality and give you a chance to test out how flexible your armature is. If the actions called for cannot be performed by your puppet, it’s better to find out through test poses, rather than during the animation itself.
Proper staging is vital to a pose being readable by the audience. All throughout the history of theater, even going back to the ancient Greek amphitheaters, actors had to make sure their actions were clear to the entire audience, including the people sitting in the back row. The audience members of a play cannot very well stand up and ask the actors, “Can you do that again? I missed what you were doing there!” The same principle applies to film, which cannot be rewound to view actions again while being screened. Watching them now on video or DVD gives us this luxury, of course, but we should not be expected to rely on it to understand the performance we are watching. We should be engrossed in the story the characters are telling through their performance, not confused by it.
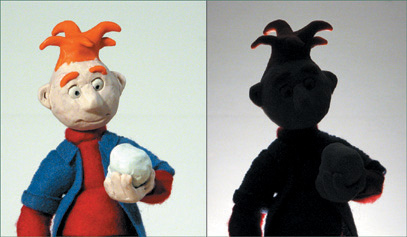
One way to ensure proper staging of a pose is to imagine it in silhouette. If a pose can be viewed as a black silhouette without seeing any facial expression or design details, and it is still clear to the audience what the character is doing, it is an effective pose. For example, in Figure 9.1, you see a character holding a skull in front of him, and the resulting silhouette. Judging from the silhouette, it’s impossible to tell what he is doing. In Figure 9.2, the same action is posed with the skull held to the side, away from the character’s body. In silhouette, this pose reads much better, because it is very clear what the character is doing.

An animation pose should always be built upon a strong and clear line of action, just like the jumping sack in Chapter 5. Thumbnailing in quick sketch drawings is a good way to plan out your animation poses to ensure they are as strong as possible. By experimenting with how much you can exaggerate a pose, even to a ridiculous extreme, and then seeing if it can be replicated by your puppet, you can take a good pose and raise it to the level of a great pose. This is often referred to in animation lingo as plussing your pose. Through your line of action, you also want to express the attitude of your character. What mood is your character in? What is going on inside his head? These decisions will influence how your pose looks and make for stronger animation. Often a slight tilt of the head will add a lot of variety to any pose.
Act out your animation poses with your body in front of a mirror, or videotape yourself for reference. Pay attention to how your body is positioned for different attitudes. By getting into character yourself and studying how your own body moves, you can learn a lot about how best to move your puppet in a realistic, but exaggerated, fashion.
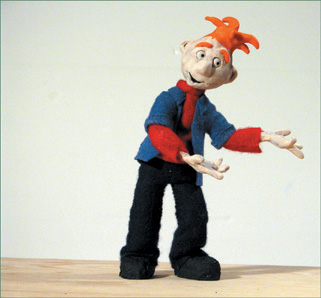
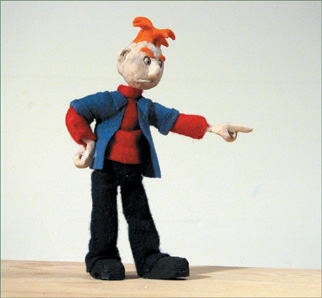
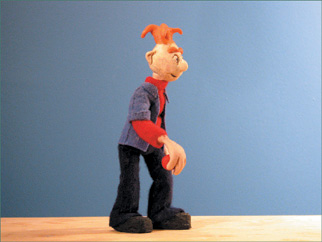
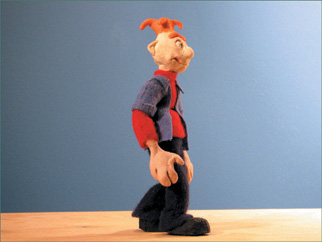
Look for ways to vary your pose so that it is asymmetrical. Nothing in nature is exactly the same on each side. If you cut a tree vertically down the middle, you will not have the same number of identical branches on each half, nor would a person be the same way. When a character stands, it will not usually stand straight up (see Figure 9.3), unless it is a soldier or a robot. There will be a slight weight shift (see Figure 9.4) as the body’s weight is transferred primarily to one foot or the other, so the body will lean toward its center of gravity that is supporting its weight. You can angle the feet at approximately 45 degrees to each other and vary the position of the hands and arms. Even the face should not be exactly the same on each side; one eye might be larger than the other, or one eyebrow higher up, or one corner of the mouth might be higher. Thinking about your pose in this way will ensure that your puppet looks natural and lifelike, rather than stiff and wooden. A good way to test out your puppet’s posing and personality is to pose it as if it is saying a phrase to an unseen character, and try different variations on the same phrase. For example, show the puppet posing the phrase, “Sit down,” both in an inviting way (see Figure 9.5) or in a scolding way (see Figure 9.6).
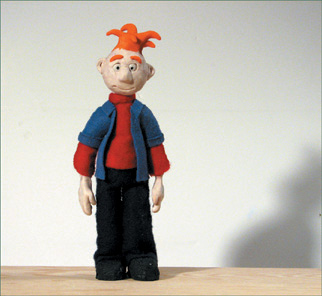
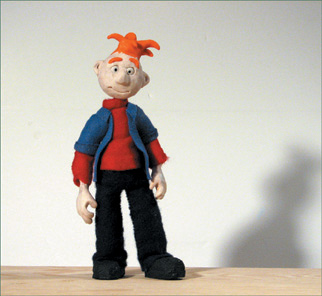
Figure 9.4. Shifting the weight and varying the positions of the limbs makes for a much more natural pose.
One of the best ways to study animation and posing is to watch as much animation as possible, and look for these elements of staging, asymmetry, and a clear line of action in each pose. Often characters will hold or linger slightly on each pose they move into, revealing their thought process through their posing. The best kinds of films to study for posing are usually ones without dialogue, because the posing tells us everything about what the characters are thinking. Films that have dialogue can be studied with the sound off so that you can just focus on the posing decisions made by the animator. Don’t just study animation, however, and certainly don’t limit yourself only to other stop-motion films. Learn from 2D and CG animation (Pixar is especially good at effective character posing), but also from live-action. Look for these elements of strong posing in all kinds of films or theater productions, and take mental notes for your animation. When animators rely on other popular animation films too exclusively, there is a danger of things looking too canned or recycled when it comes to posing. The early animators in the Golden Age of the 1930s and ’40s looked to the stage and to silent film actors for their inspiration, and so should animators of today. Stop-motion in particular is just like live action in many ways, so studying live-action film and theater is certainly one of the best sources of inspiration for the fantasy worlds that can be created.
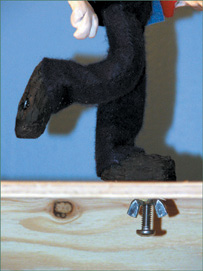
One of the most challenging actions to animate is a walk. You would think it would be simple, since you walk every day, but it’s not, especially in stop-motion where you are dealing with the forces of gravity. Therefore, it’s crucial for your puppet to be lightweight and to have some way to anchor the feet to keep it from falling over, as there will always be a frame with one foot off the ground. The best way to accomplish this is by using tie-downs. If you have built your puppet with nuts inside the feet, you can drill holes into your set platform and screw a bolt into the nut from underneath, securing it tight with a wing nut (see Figure 9.7). The holes can be planned out and drilled into your set before you start animating. If you are using a wooden platform, the holes can be filled in with a light beige clay so they don’t show up on camera. Afterwards they can be filled in more permanently with wood filler. An easier method is using 1/4-inch thick pegboard, usually made of Masonite and available at hardware or lumber stores. These boards already have evenly spaced holes, so you can stick the tie-downs through these holes and drill additional holes only if necessary. No matter which method you use, you can also cover your platform with felt, fake grass, or another material that will hide the holes. Alternatives to tie-downs include magnets or sticky tack, but magnets can often be too strong, and sticky tack not strong enough. Experiment with what works best for you and your puppet.
Before drilling your holes, it helps to know about the mechanics behind the walk (see Figure 9.8). For each step, there are basically four major stages that occur. Each step is measured by its stride, which means how far apart the feet are from each other when the front heel hits the ground. The stride is the first initial pose to a new step, where the front foot’s heel makes contact, and the back foot is bent back but still touching the ground. Notice that the front leg is straight in this pose.
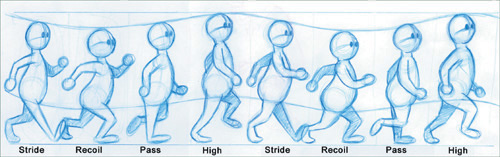
The next stage is the recoil, where the entire front foot makes contact with the ground, and the back foot is on its toe, just about to touch off. In the recoil position, both legs are bent, which causes the entire body to move down slightly, as the hips, torso, and head are all connected. Walks generally originate in the hip, which is the anchor point for all joints involved. The recoil position causing the body to move downward is important for establishing a sense of weight to the walk. If the body stays at the same level throughout, the walk will feel floaty and weightless.
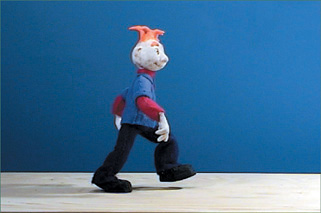
The next stage is the pass, where the front leg straightens out again, pushing the body up, and the back leg starts passing forward to the front. Angling the foot backward creates a nice overlap to the action.
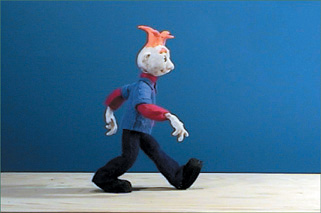
After the pass comes the high position, where the passing leg is now completely forward and ready to kick out into the next step. The foot that was forward in the previous stages is now becoming the back foot, which starts to bend up on its toes and propel the body up to reach its highest position. In a realistic walk, the foot may not necessarily push the body up this high, but animation is about exaggeration, so it helps to add some bounce to the movement. The high position is sometimes difficult to achieve in stop-motion if the puppet cannot balance on its toe that way, or if the ankle joint is not strong enough. If you have trouble with your puppet sagging, a quick-and-dirty solution is to prop it up with a rig behind it, or somewhere in full view to be removed digitally. Some stop-motion animators will leave the back foot tied-down flat until the front foot makes full contact with the ground for shorter, more realistic steps, thus alleviating the problem of having the puppet balance on its toe. This depends partly on the design and animation style.
After these four stages for one step, the front leg kicks out again into the next stride, and the same positions repeat themselves, this time with the other leg. While all this is going on, the arms are also moving opposite to the legs: if the right leg is forward, the right arm is back, and vice versa. The body does this with the arms automatically to maintain its balance while walking. So as you can see, a walk is a multilayered action with many different limbs and movements to keep track of.
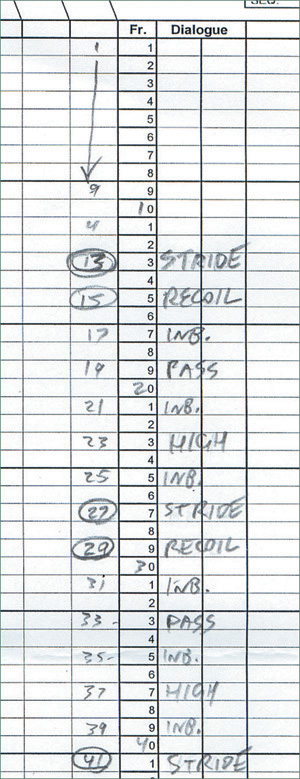
How fast or slow your walk is depends on how many in-between poses you animate between these major key parts of the action. The stride and recoil positions should always be right after each other, however, unless a slow-motion appearance is wanted or the character is doing a sneaky walk. The number of frames for each step must be the same; otherwise, your character will look like it is limping. The stop-motion walk on the CD has seven positions for each step, shot on twos, so its is a 14-frame walk, which is a pretty brisk pace across the screen, made to look even faster psychologically due to it moving from left to right. If I had wanted a slower walk, I would have animated more frames, so long that the number of frames for each step leading to the stride is the same each time. Planning out the animation on a dope sheet (see Figure 9.9) helped me make sure I was on the right track in terms of which frames the steps landed on.
Watch for elements of your character where you can inject some overlapping action and follow-through into the animation. My puppet’s hair, for example, drags behind in a subtle manner as his body moves. When his body goes down for the recoil, the hair flips up as if dragging a step behind the head, and it flips down as the body moves upward. The hands also overlap their action by dragging back as the arm moves forward and backward, always a step behind in the opposite direction. Think back to the motion of the vine in Chapter 5, and look for opportunities to reflect it in your puppet. Watch for arcs in the movement of the arms, and make sure the body is always moving forward, not backward or staying in the same position in sequential frames. Losing track of your path of action and arcs will result in a jittery walk. See Figures 9.10–9.19 to study the basic steps of the walk using a stop-motion puppet.
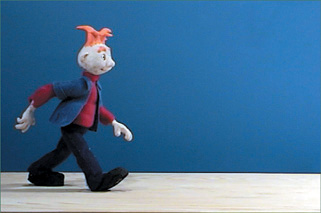

Figure 9.11. The recoil position, where the tie-down switches to the front foot, making full contact with the ground.
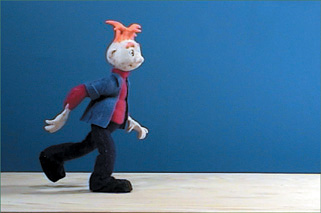
Figure 9.12. The front foot is still secured with a tie-down as the back foot starts lifting off the ground.
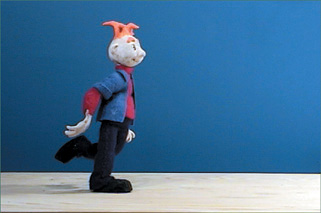
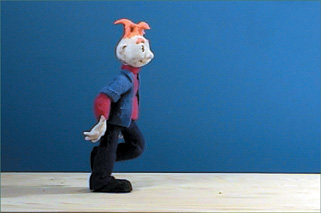
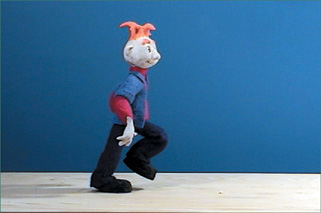
Figure 9.15. The high position, which is a difficult pose to hold if your armature’s ankle joints are not strong enough.
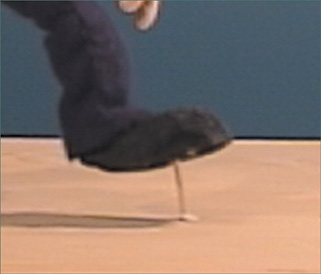

If your puppet has trouble staying upright coming down into a step, a quick solution is to poke a toothpick through the tie-down hole and hold it there while capturing your frame (see Figure 9.18). A little wiggle while capturing could also result in some motion blur to smooth out the action. The toothpick can be removed later digitally with a different plate as another layer in Photoshop (see Figure 9.19).
Knowing how the puppet will be positioned for the strides and everything in between will help you determine where to drill holes for your tie-downs. As I mentioned earlier, before you animate, it is best to drill all the tie-down holes ahead of time. You want to plan, mark, and then drill where the steps will be. You usually do not want to be drilling your holes while you are animating, as that will disturb or jar the table top stage. Set up your camera so that you know where the frame cuts off, and position your puppet into its sequential strides across the screen. Drill your first hole where his first step coming into the shot would be, and then tie down his foot and move the other leg into the next stride. Make a mark where the nut will land on the next step (see Figure 9.20), and then drill the hole (see Figure 9.21), tie down that foot, and continue with the following step, and so on. Once all of your holes are placed, fill them in with clay to hide them, and get ready to animate.
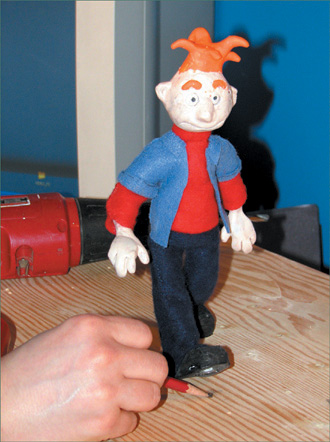
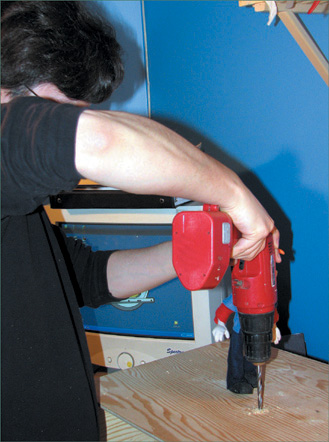
Figure 9.21. Drill holes directly into your platform, with the right size drill bit for your tie-down.
Start with eight frames of an empty stage, and then have your puppet enter the shot and walk across the screen. For the frames where he enters and exits, you can cheat by holding the puppet up with your hand or a rig, as it will be outside of the frame. Once you learn these basic mechanical steps for how a walk is done, you can put personality into any kind of walk, indicating whether your character is sad, happy, proud, afraid, or cautious. Shoot reference footage of different personality walks, and pay attention to how your own body moves. Walks are one of the hardest movements to animate well, so once you have some good practice in it, it will be valuable experience for other stop-motion scenes along the road.
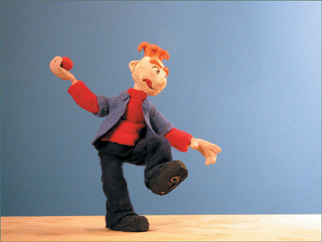
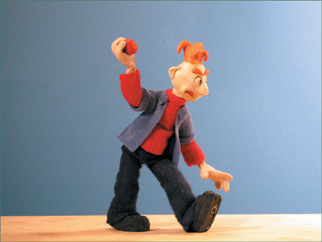
Once you have tried a walk with your puppet and built some tie-downs into your set, another valuable action to try animating is throwing a ball off-screen. This exercise takes the principle of anticipation–action–reaction (introduced with the jumping sack in Chapter 5), along with other principles, and applies it to a puppet. It can be achieved with any kind of puppet but would probably work best with a puppet built on a wire or ball-and-socket armature and a foam or fabric skin, with a minimal amount of heavy clay, if any. For an action such as this, it’s important when setting up your camera to make sure you have enough room on the screen to have the action take place. Once your shot has been set up, place your puppet near the left center of the screen, keeping in mind the TV cutoff. Then try moving it into its anticipation pose and throwing pose, so that you can ensure that he will not go offscreen at any point, and adjust the zoom on your camera if necessary.
Figures 9.22–9.27 show the main key poses of an action such as this.
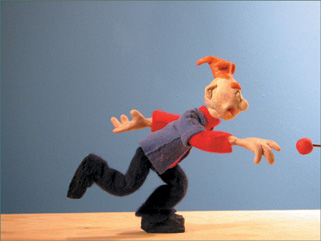
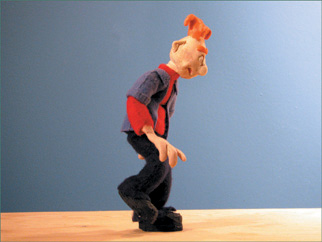
If you have done the other exercises in this book, you should be familiar now with slow-ins, slow-outs, and other aspects of timing. Use your knowledge of these principles to determine how many in-betweens you think you might need between these keys. Act out the action yourself and time it with a stopwatch, or use video reference footage as a rough guide. The throw should be quick, so you might not need many in-betweens there, but if you want a slower movement leading into the anticipation, then more poses would be needed, with a cushion favoring the anticipation pose. Overlap the action so that the hand stops moving a few frames before the foot does, or vice versa. Perhaps you could hold the anticipation pose or the throw pose for a few frames to break up the rhythm of your action. Look for any opportunity to put overlapping action, follow-through, and a sense of weight to your animation.
Plan your animation by recording the timing of your key poses on a dope sheet. Decide which frames the keys should land on, and you will then know how many in-between poses you will need. You could even shoot a pose test, or pop-through of your animation, just shooting the key poses to match the frames you have determined. Playing it back will show a rough, choppy version of your animation and the timing you want. If you want to change your timing, perhaps holding the anticipation longer, you can delete frames until it is the way you want it, and then change your dope sheet to reflect those changes. Once you are satisfied with your timing, get started on animating it with all of the frames. The more you plan your animation beforehand, the better your results will be, but also be open to last-minute ideas that come to you while in the midst of the animation process, much like a one-time live performance.
In a close-up or medium shot of your puppet, it is easier to see the facial expression and have that be the focus of your animation. The face, especially the eyes, says a lot about your character. The eyes are typically the first thing the audience will be drawn to. Experiment with your puppet changing expressions and appearing to think, emote, and react to situations that might be seen on-screen or off-screen. A good exercise to try is a take, which refers to a character reacting to, or changing his mind about something. Have your character facing one direction, and imagine he hears a sound behind him, causing him to turn his head around. Whatever he sees off-screen causes him to react in surprise, shock, or possibly joy.
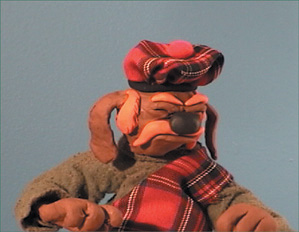
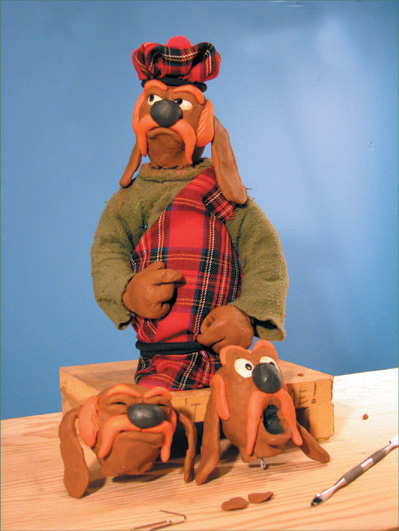
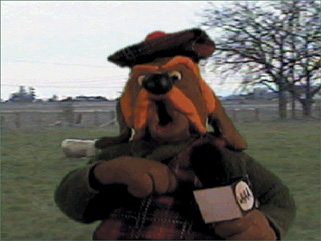
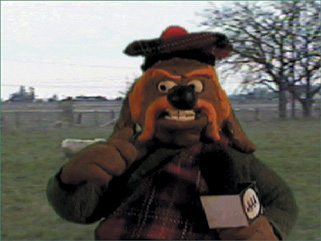
Hamish has volunteered his services for a demonstration in this short piece (see Figures 9.28–9.39) available to view in full on the CD.
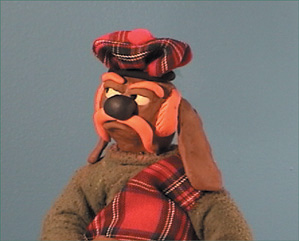
Figure 9.28. Frame 1 (held for a few frames). Hamish starts with his zero pose, daydreaming and minding his own business.

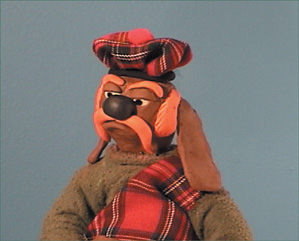
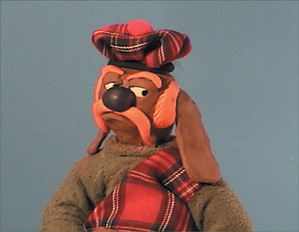
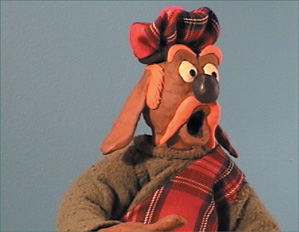
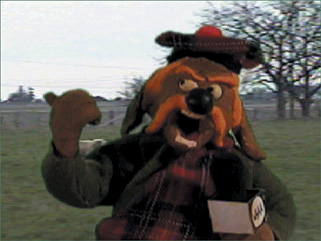
Figure 9.31. Frame 23. To create some overlapping action, Hamish’s eyes lead the action by changing direction before the head.
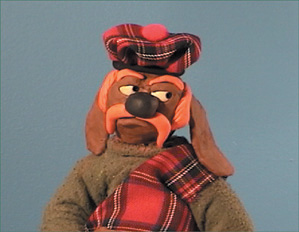
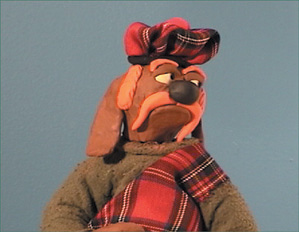
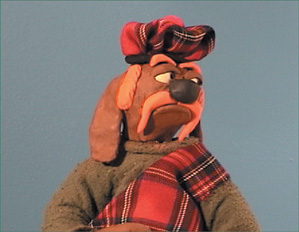
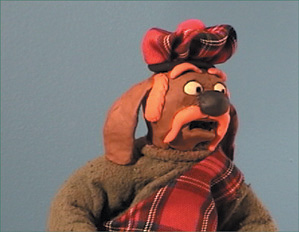
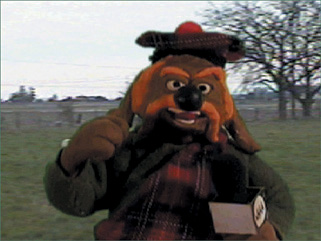
Figure 9.34. Frame 59. After the head stops moving, the eyebrows move up slightly for some more overlapping action, and cushion into a short hold.
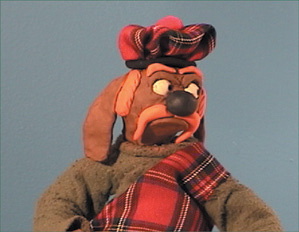
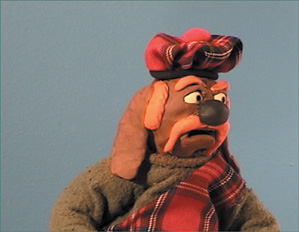
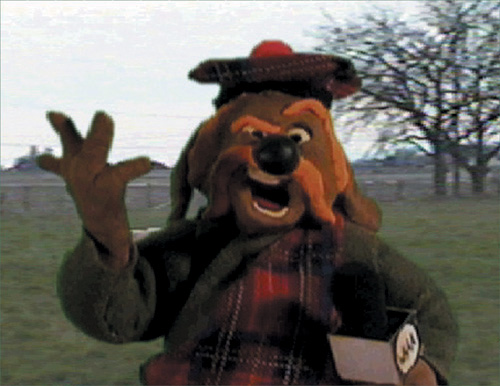
The key to getting the turn of Hamish’s head to look natural is the overlapping action, where different elements of his face start and stop at different times. His eyes start moving, then the head (on a slight arc, not perfectly straight), and then the eyebrows. This very important principle, subtle as it may be, will keep your animation from looking stiff, robotic, and boring. Instead, your audience will really believe your character is alive. There is a scientific explanation for overlapping action as well. The inclination to turn the body in another direction starts in the brain, and that impulse carries itself down the spinal cord within a short flash of time. Since the eyes are closest to the brain, the message to turn goes there first, and afterward travels to the neck, then the shoulders, and hips. It all happens so subtly and quickly that we don’t consciously recognize it, but slow down a live-action clip of someone turning his body around, and you will see the overlap. Therefore, since your animation is being created from scratch, frame by frame, you must work it in to make it appear natural.
The exaggerated take was accomplished by removing Hamish’s original head and replacing it with a couple of replacement heads (see Figure 9.40). The anticipation head is squashed, and the take head is stretched, therefore introducing the principle of squash and stretch into the animation. The original head’s facial expression was then changed and replaced to line up with the previous head. The effect of the different heads is not one that the viewer really sees, since it is so fast, but you feel it as you watch it. There is an element of snap and fluidity created by the head anticipating to prepare the audience, and then stretching past the point of his new expression. It is through this series of poses that we feel Hamish’s expression change. The replacement head technique may not be necessary for a more subtle take, but for broad exaggerated movement, I like the way it looks.
Try some variations on this with your own character, and pay attention to how the timing is affected by your character’s personality. A character like Hamish, who is relatively sharp and alert, may only hold for about six to eight frames after turning his head before he goes into his take. A sleepy, slow, or dim-witted character may hold much longer before reacting—say for 16 frames or a full second—because it takes him longer for his brain to process what he sees. You could also try expanding this exercise to create a double take, which is very popular in comedic timing. In a double take, your character would turn to look at something, and then go back to his original position. Then he would realize what he just saw and turn back, going into his anticipation and reaction.
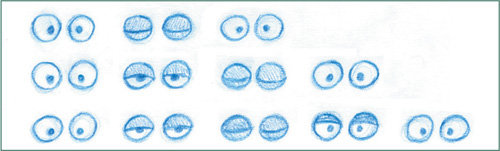
How often should your character blink? This is something you can experiment with or plan out on your dope sheet before animating. It is easy to fall into the trap of having your character blink too much while animating him. As you are progressing along, you may think to yourself, “He hasn’t blinked in awhile, so I’d better do it again.” True, it may have been several hours since you last animated a blink, but in screen time, that is only mere seconds. Blinks really only need to be animated for certain occasions, or every 4 to 5 seconds to keep things interesting. If your character is holding for several seconds, throw a blink in to break it up and keep him looking alive. People also often blink when their eyes are changing direction, whether they are turning their entire head or just their eyes are moving. The brain has a hard time handling the sensory overload of an entire room moving before it, so it sends a little message to the eyelids to blink. How often a character blinks will also depend on his personality. If he is nervous or happy, he might blink more than would a threatening or stoic character. The personality will also determine how the character blinks, as there are many different variations that can be played with. Your blink can be open/shut/open for a really fast one, or open/half/shut/open for a slower one (see Figure 9.41). If the character is sleepy or dopey, it might take several frames for his eyelids to come down, and they could possibly be shut for at least six frames before opening. Shutting the eyes for only one frame will not register in playback, but two frames will, especially if combined with some frames of the eyelids down halfway. Eyelids can be created with a tiny slab of clay resting gently over the eyeball, or a presculpted piece of plastic or other hard material.
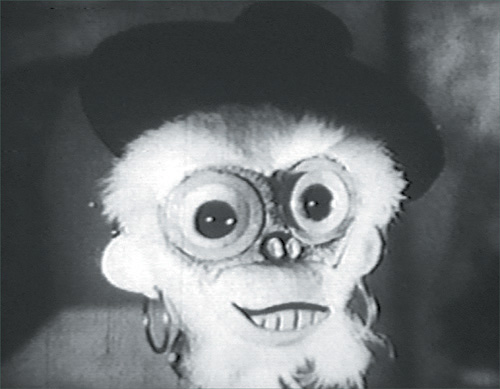
The final ingredient to making your character seem alive to your audience is to have him speak, or even sing. The earliest known example of animated mouth movement to sound in stop-motion was in a short film by experimental filmmaker Len Lye in the mid 1930s (see Figure 9.42). Its only title was Experimental Animation 1933, but I refer to it as “The Peanut Vendor” because that is the title of the popular jazz tune featured in the film. A large monkey sings the song through the use of replacement mouths synced to the soundtrack. Meanwhile, he enters and exits the frame making grotesque faces in full close-up, and then proceeds to dance, remove his tail, and flip it around. It’s a cute little stop-motion experiment, but there is also something very disturbing and creepy about it. I often show it to my students, and it gives them nightmares.
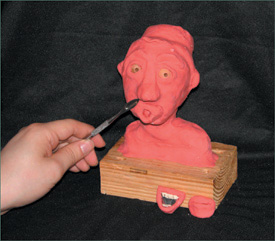
Dialogue is animated by breaking down a soundtrack into frames, so that the animator knows how many frames it will take to recite each syllable and sound of every word. Each frame will then have a different mouth shape to sync exactly with the dialogue track. As I mentioned briefly in Chapter 7, “Building Puppets,” there are a few different ways to animate dialogue in stop-motion. One way is to treat the mouth like a hand puppet that simply opens and closes without a change in shape. You can also have wires built into the mouth so that it will have a similar effect, but with the ability to change shape for more accurate syllables. Another method, achieved primarily through clay animation, is animating through, which consists of building one mouth out of clay and resculpting it for each frame. The main drawback to this method is its time-consuming nature, due to the constant fixing and resculpting necessary as the mouth gets dirty and lumpy throughout the animation process. The final results, when done properly, have a very naturalistic look that is worth the effort.
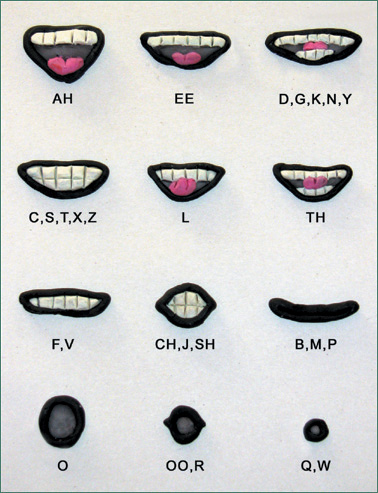
A way to speed up the process of animating through in clay animation is to create a series of replacement mouths that can be removed and replaced for extremely different mouth shapes and blended into the rest of the face each time (see Figure 9.43). A single mouth can be manipulated for subtle changes until replaced by a completely different shape altogether. This method gives the illusion that the face is still one single entity, when in fact the mouths are separate pieces. Replacement mouths can also be created as a floating pair of lips or round shapes I like to call donut mouths, which can be stuck on to a head made of clay, papier-mâché, or any other material. A little bit of sticky wax or putty will hold the mouth in place until it is replaced by another. Figure 9.44 demonstrates the different basic mouth shapes used for dialogue animation, covering major vowel sounds and consonants. The closed mouth for B, M, and P sounds can also serve as a neutral mouth for when the character is holding, or not speaking. Variations on these mouth shapes can also be created without teeth; it all depends on the design you’re going for.
Matching the right mouth shapes to each frame to achieve perfect lip sync is obviously important, but it is only a small part of the performance. When characters speak, they use their entire bodies to act out what they are saying. There is also movement in the eyes, the eyebrows, the head, and perhaps even the arms and hands. A common practice in 2D and CG animation is to create a performance for the character using his entire body acting to the dialogue, and then put the mouths in later. If the character can be animated to appear as if he is saying his line without relying on the lip sync, then the mouths are simply icing on the cake. By watching animation with the sound off, you will see this to be true. The characters speak with their hands and their entire bodies, as well as their mouths. In stop-motion, you obviously do not have the luxury of animating dialogue in this multilayered fashion. The mouth shapes, and all other nuances of movement, must be planned out and then animated at the same time. Keeping track of many things at once is the challenge behind animating to dialogue, but in another sense, it is a rather easy task in that all of the timing is done for you. The length of the scene is predetermined, so all you need to do is create the picture to match the sound.
Before the process of deciding which mouths to use, the dialogue must be recorded. This can be done by recording directly into your computer or by using a tape recorder and using your computer to capture the sound into digital format. You can also rent a recording studio if you want more professional quality. Your dialogue clip should be in .wav format so that you can break it down frame by frame and then record the sounds on a dope sheet. There are several different software packages used for breaking down dialogue tracks. One popular program is Magpie (or Magpie Pro), which is designed specifically for animation dialogue. Another program that can be used is Sound Forge, along with several others. Each program may have special features. Magpie, for instance, has its own dope sheet that can have the different syllable sounds entered into it, with a series of mouth shapes so that you can test your dialogue and find the right shapes to use. You can also print out your dope sheet directly from the program. The one thing all programs have in common is allowing you to see your soundtrack as a wave form alongside a row of frame numbers so that you can literally see your dialogue and which frames the sounds and accents land on. When breaking down dialogue, remember to make sure that your frame rate is set at 24 frames per second if you plan on animating that way. If you break down your dialogue at the wrong frame rate, your animation will not be in sync.
Accents in the dialogue are the moments where certain syllables or words are emphasized more than others. Dialogue has a rhythm to it, just like music. In any melody, certain notes are accented, and each note has a different length: whole notes, half notes, etc. In animating to dialogue or music, the accents should have a strong action to accompany them. My animation reel on the CD has a lengthy dialogue scene with Hamish, so I will use the line where he says, “I don’t know, the fuzz ain’t even here...they all went down to the pub” to explain the dialogue process. (In this context, the word fuzz is a slang term for policemen.)
Figure 9.45 shows the sound wave for Hamish’s line in Magpie Pro, with the words “I don’t know” highlighted in red. The frame numbers are at the top, and each vertical column represents a frame going through the wave form. By selecting a few frames at a time throughout each phrase, you can listen to the words by playing each selection only, to determine where the sounds are. It will sound like a bunch of little chirps and fragments of words. By focusing on this one section and breaking it up, I can see that the word “I” goes from frame 367 to frame 373, the word “don’t” from frame 374 to 377, and the word “know” from frame 378 to frame 389. This information can be recorded on my dope sheet, which I prefer to write out by hand (see Figure 9.46).

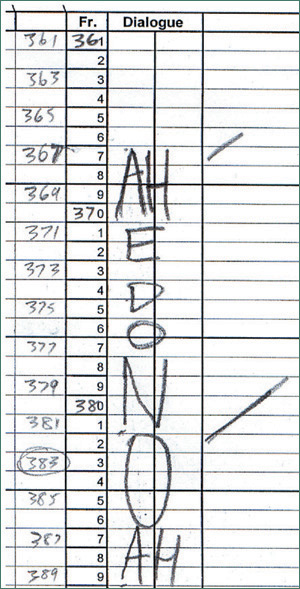
You will notice that the words are not spelled out exactly the way they should be, because they are not enunciated as such. I have to listen to the way Hamish says his line. Because of his Scottish accent, he says it more like “AH-e don’ NOOOOAAAAH.” The individual words blend together into one massive speech pattern and must be broken down phonetically, based on how the words sound, not how they are spelled. Do not think of the dialogue as words; think of it as sounds and patterns of speech. Listen closely to the way your character says his line, and listen for the accents and intonations, recording your observations on your dope sheet. It helps a great deal, both while breaking down the track and animating it, to listen to the line over and over again. Many animators get annoyed by listening to their voice track repeat all day, but I grew up with an autistic brother who liked to repeat phrases from movies constantly, so thanks to him, I’m rather used to it!
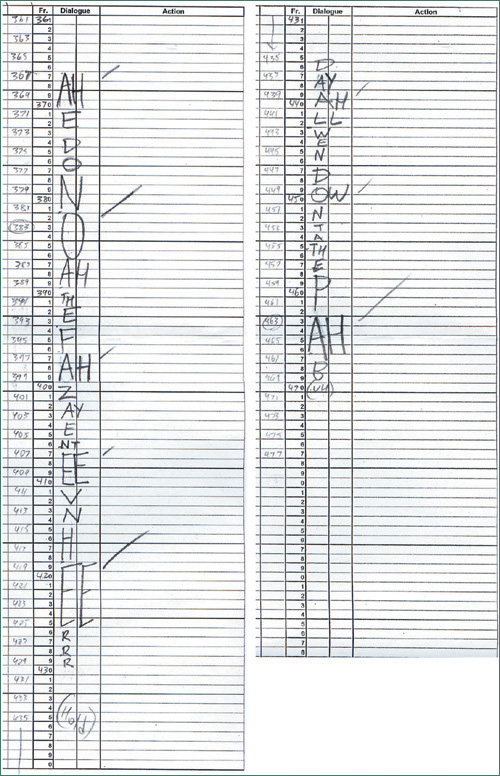
As I continue this process through the entire line of dialogue, I pick up on where the accents are and how Hamish says his line in terms of sound patterns: “AH-e don’ NOOOOAAAH, the FAHZZ ain EEven HEEErr. DeyALL wen DAnda thah PAHHB!” There is also a brief 10-frame pause between the two sentences. All of this information is recorded on my dope sheet (see Figure 9.47).
After listening to the dialogue and breaking it down, the next step is to decide on the poses your character will use to act out his line. To do this, you must get inside your character’s head and think about why he is saying this particular sentence, and how he feels about it. What is the context behind the scene? Here Hamish is having a conversation with a news anchor in the studio, who is asking him questions. The off-screen voice of the news anchor asks, “Have the police spotted anything unusual?” and Hamish gives his answer. He is annoyed by the fact that he can’t answer the question since the “fuzz” have all gone to the pub and left him alone. (It’s possible he would rather be at the pub himself.) To get the right posing, try acting out the line along with the dialogue to see which poses come naturally to you. What kinds of poses do people usually use to express themselves in this way? By using methods such as acting in front of a mirror, shooting video reference, or making thumbnail sketches, or a combination thereof, explore different options until you find the best one. For Hamish’s line about the fuzz at the pub, I decided to assign different key poses to the three main accents in the phrase, on the words ALL, DOWN, and PUB. When characters refer to other people who are off somewhere else, they often gesture behind them with their head or hand. So, I decided to have Hamish cock his head to the side on the word ALL, point with his thumb on the word DOWN, and give him a huge emphatic hand gesture on the word PUB, which is the largest accent in the dialogue (see Figures 9.48–9.52). All of these decisions related to the posing should be thought out before focusing on getting the mouth positions correct. You can watch the final animation on the CD frame by frame to see how it all ties together.
Here are some general points to remember when animating dialogue:
Dialogue animation can be done primarily on twos, but there will often be cases where it will need to be on ones, for words that are said very quickly or run together. For example, the words “down to the pub” are said very quickly, like “dandathapub,” on ones. Consonants like B, M, and P should always be on screen for at least two frames to register.
Animate the lip sync lined up exactly with the frames on the dope sheet, but have body movements hit two to six frames before or after the dialogue.
If the mouth opens wide for a strong accent, don’t just make it wide—make it really wide! It will add some punch to the dialogue and make the accents stronger. Some frames might look funny by themselves, but remember that the audience doesn’t see individual frames—they only see how they work together.
On long sounds expanding over many frames, particularly vowel sounds, hold the same mouth position but keep it moving by pushing the bottom lip up every frame or two so that it transitions smoothly into the following position.
Overlap the movements of the mouth, eyes, and eyebrows so that they start and stop at different times around the accents of the dialogue. For example, if the mouth opens wide on an accent, have the eyes and eyebrows go up a few frames later, rather than on the same frame.
Put holds in your dialogue (minimum six frames) during moments where the voice actor pauses, and find ways to keep the character alive by blinking, looking around, or perhaps fiddling with his hands. The dialogue for Hamish was planned out very carefully, but during one of the breaks while the off-screen voice talks, I improvised on set with a little nose twitch and sniff. This was actually based on the way my wife (who I was only dating at the time) would twitch her nose when it itched, so it was a little personality quirk I threw in there.
Listen for lip smacks, breathing, swallows, and other sounds picked up in the recording, and treat them as extra sounds to animate to. Keep your character alive!
Coming up with lines to practice dialogue is a challenge, but there are many options. You can think of a phrase and record it yourself, or use sound clips from movies if it’s only for practice purposes. (Never use copyrighted material for commercial work unless you have permission!) In my course, I give my students a dialogue exercise based loosely on the Creature Comforts premise, where I ask them questions and whatever spontaneous answer they give is what they animate. This is a great way to learn dialogue because the speech patterns are very real and natural, and good for experimenting with bits of characterization.
As with everything, study, study, study! Analyze other animated films, live-action films, and stage performances. Watch how actors not only enunciate words but act with their eyes and their hands. Look at your own mouth in a mirror and study how it transitions from one syllable to another. Animation is all about observation!
Have fun!
A common method used in stop-motion to make the animation look smoother is the addition of motion blur into certain frames, particularly for fast actions like a throw, jump, or run. There are several different ways to create motion blur that can be experimented with to see what works best for your projects. The most technical way is to have the puppet move slightly while the frame is being exposed. To move the puppet, you can attach thin wires to it like a marionette, and give them a slight tug while capturing. Depending on the camera you are using, the shutter speed or length of the exposure can also be adjusted to assist in the blurring effect.
Another method I have used is to attach a small plate of glass to the lens of a camera (I did this with sticky tack on the long lens of a Bolex for Snot Living) and smear some KY Jelly on the glass where the puppet is in the viewfinder. That creates a smudge that appears like a blurry image on film.
In this digital age, another method is to export the frames you want the blur in from your stop-motion program, and import them into Photoshop. There you can use the Smudge tool to create your blur, and then import the frames back into the animation. Some stop-motion programs now have some motion blur tools built into them, so experiment and see how well they work. Just don’t go overboard; motion blur is something the audience should feel more than see. Have fun playing!