Once you have learned the history of stop-motion animation and the expectations of the industry, and you have become proficient at building puppets and animating them successfully, you should have a good idea as to whether you want to take your skills to the next level and attempt to make your own film. When I say film, I am referring to a piece of animation that is at least one to two minutes or longer, and which perhaps tells a story. Anything less is more like a scene or an exercise or could possibly fall under the category of being used as a bumper (a short interstitial for television or the Web) or commercial. The semantics behind this are quite debatable, but basically, a film is in a different league from the exercises in previous chapters.
At this point, I want to emphasize a few important things. In my own experience as a filmmaker and in being around animation students for several years, I have seen some common bad habits that are not easy to break. Most people get into animation because of a particular film they saw that “changed their life.” For many stop-motion animators, this was King Kong or any of Ray Harryhausen’s films. For the newer generation, it may be Wallace & Gromit, or countless others. I’m sure this has been the case for you as it has for me. When we start creating our own animation, those films are always in the back of our minds as the Holy Grail for which we strive to emulate and achieve the same level of greatness. There is nothing wrong with this, as it is always important to aim high in any art form. The danger is in thinking that you can do it alone, and quickly. Often we forget that most feature films are made by hundreds of people with millions of dollars at their fingertips, and it still takes 3 to 5 years. And so, too many people try to make an epic film that they think will be the Citizen Kane of stop-motion, only to end up losing interest, going broke, or ultimately abandoning it for a variety of reasons. I am guilty of this myself. I think this is why it’s important not only to look to big-budget productions for inspiration, but to attend film festivals or go online to see what others are creating with smaller budgets and resources. If more of us strove to create simpler, shorter films, there would be more stop-motion out there because more of us would actually finish what we started. Short films created on your own can lead to becoming noticed by other artists who may end up helping you create your more elaborate dream projects down the road. There have been a few “overnight success” stories in stop-motion film history, but they are few and far between compared with the artists who have invested decades of hard work before finally getting noticed by the public. Anything worth doing takes time, and animation is one of the most time-consuming trades ever discovered, so making a film independently will always take longer than you think it will. If you make a film in stop-motion, your motivation should ultimately come from a love for the art form and your desire to share a piece of yourself with the world. If your motivation is fame, fortune, and a hot tub, or if you think it can be done quickly and easily with no mistakes made, forget about moving puppets around and do something else.
Since stop-motion is a very individualized craft where one animator creates a performance through a puppet (as opposed to key and in-between animators), it is very common for films to be made by one person only. However, the point I’m trying to make is that most of the films that actually get made still receive support from a team. At their best, films are made possible with the collaboration of others, whether it be financial or artistic assistance. So think big and never lose sight of your vision, but be open to the input of others to make your stop-motion dreams a reality. My experience has been that whenever you embark on a personal project and find yourself faced with dilemmas or things you don’t know how to do, the right people show up out of nowhere with the right solutions. You might be scratching your head wondering how you are going to light your set, and then you randomly get introduced to someone with theater lighting experience. It’s the universe’s way of letting you know you’re on the right path. Having a support team like this also keeps you accountable for finishing your film. If you have enough people who support what you’re doing, they will keep up your enthusiasm for getting it done so they can all see it and celebrate your efforts. It’s easy to get stubborn at times and want to do absolutely everything on your own so that you have complete control over it. But I find, again and again, that contributions made by others make the whole process of filmmaking much easier, more fun, and in the end, more rewarding. There are so many elements that must be created: story, sets, lights, puppets, animation, music, editing, sound, distribution. You can’t expect to be a pro at all of them, so ask for help when you need it. It will still be your film and vision in the end, only made better by input from people who may have ideas you never would have thought of yourself. Often, it’s the advice or contribution of a friend that saves a film from disaster.
If you are a student, see if there is opportunity in your school to make a film as a class project or an independent study. The advantages to student films are mainly access to equipment and a specific time frame. Deadlines are much harder to set for yourself, so if you have one given to you, it teaches you discipline, time management, and how to “let go” of your film. If you have a specific time frame to work in for having it completed, in most cases it will get finished. There will be tons of things you will wish you had time to go back and change, but that is the reality of filmmaking. A student film will seldom be perfect, but it should be the closest thing possible to the vision in your head, given the time and money allotted to you. All you can do is the best you can, and in most cases you may be pleasantly surprised by the results.
There are many disciplines and layers to making a short film, and plenty of books and courses that focus only on filmmaking, so I would recommend using them to complement this book. Experience, as always, is the best teacher, so in this chapter I will share a little bit of my experience and cover briefly some general points to think about while making a film, specifically in stop-motion animation.
What kind of film do you want to make? Will it be funny or more dramatic? Will it be for adults only or for children? Will it have a story or be more lyrical or abstract? Will there be dialogue or pantomime acting? Is there a specific message you want the viewer to take from it? You may be interested in all of these ideas, and if you keep things short and simple, there will be time to explore many different genres of filmmaking. Ideas for films can come from anywhere, inspired by all sorts of situations or other art forms. The most obvious place to look for ideas is your own life. Think back to experiences you had as a child or people who were influential to you. Is there a favorite funny story that always gets brought up at family gatherings? Do you have a relative or a friend you could record and then animate a short dialogue? Do you have any sad or scary memories that would make a good film? A strong basis for many film stories is the idea of “What if...” because it gets our brains thinking about how things would be if they were different. Think of experiences you’ve had or places you’ve been, ask yourself “What if...” and let your imagination fill in the blanks. Keep a sketchbook and take notes, writing down ideas as they come to you, and drawing character designs that could later be turned into puppets. In the beginning, don’t think too much about the practical side of how am I going to do this? Just let your imagination go wild, come up with a good story, and then edit things down later. It’s always better to take an idea to its extreme and scale it back, rather than not take it far enough.
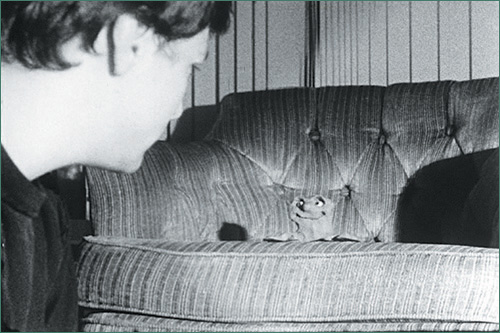
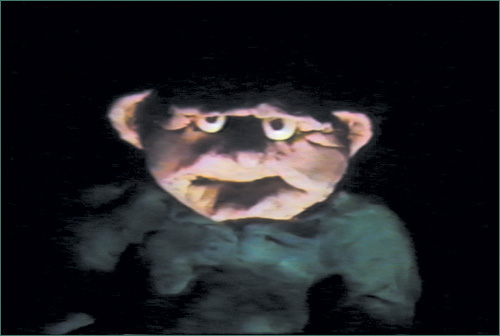
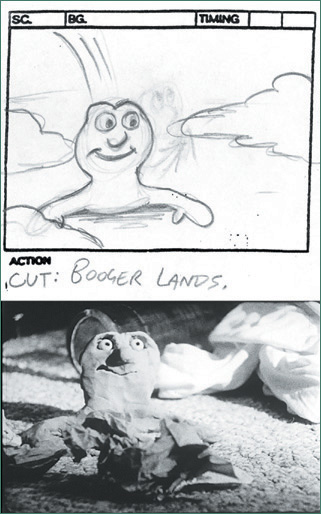
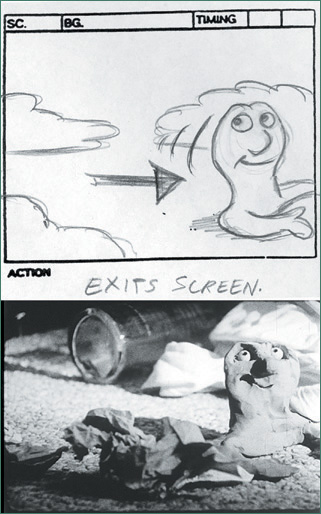
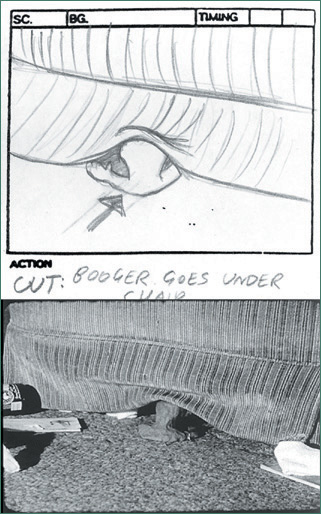
It’s inevitable that your final film will differ a great deal from your original idea, and that is perfectly OK. The best stories are usually the ones that have been rewritten hundreds of times, until every possible approach and angle has been explored. It can be difficult making changes to precious story ideas or characters you grow attached to, but ideas are evolutionary things that keep developing as you work on them. Especially in stop-motion, you will find yourself making changes to your story or character designs once you get into the practical nuts and bolts of how to build everything in three dimensions. My original sketches and ideas for my student film Snot Living involved a tiny clay character that was mostly humanoid in appearance, with arms and legs. But at the time, I had no idea how to build an armature, so I made the character into a blob with arms that would just slide across the floor. I think this decision helped the film a great deal, as I could put the focus more on facial expressions and timing, rather than get bogged down with too many technical details like making the character walk. The initial concept for Snot Living (see Figure 13.1) was inspired by the fact that many other student films I saw featured depressed, whiny people just hanging out in their apartments. So naturally I thought, wouldn’t it be neat if a pesky clay booger tried to get them to cheer up and go outside for a change?
If you abandon an idea, that doesn’t mean it will never see the light of day. It will often resurrect itself in a different way for another project. One of my 2D characters, a baby elephant in my current film-in-progress, Storytime with Nigel, was originally developed for another film idea but was brought back once I had a better story to use him for. The stop-motion narrator Nigel was originally going to be a newscaster in my Bad News film but was made into a children’s storyteller instead. Any concepts that are not developed fully can still be changed to suit better purposes, as your ideas ebb and flow to an actual green-lit film project. The most important thing for keeping ideas going is to keep yourself inspired. Explore antique shops and museums, go to film festivals and open screenings, meet interesting people and talk to them. See as many short films as possible (AtomFilms and other Web sites are good to visit) and read as much as possible. Read short stories, history, mythology, fairy tales, and ancient legends. This material lends itself extremely well to stop-motion animation due to the fantasy element created by the medium itself. That is another key thing to remember: Think of an idea that takes advantage of the medium. Stories about toys coming to life are an obvious choice, as are myths and fairy tales, because these kinds of stories have been told by live puppets for centuries. Think of an idea that will be easy to do in stop-motion, especially for your first short project; something that takes place on a simple interior set or plain background would be best. Making a film with epic battle scenes, pyrotechnics, or giant sets is best left to the professionals with sound-stages and a big budget, and not ideal for the fledgling puppet film.
Filmmakers of today are coming up with many unique ways to tell stories through the short film medium. Your ultimate goal as a storyteller must be to identify with your audience, make them empathize with your characters, and be able to relate to them. To make a film that tells a story, it’s good to know a little bit about story structure and common themes. My goal in this section of the book is not to elaborate too much on how to write a good story, but simply to provide some good starting points and things to watch for when you analyze other short films.
The most basic structure for any story, whether it be one minute or 90 minutes long, is like a three-act play:
Act One: Establish the location and introduce the character(s).
Act Two: Present a conflict or challenge for the character(s) to overcome.
Act Three: Resolve the conflict.
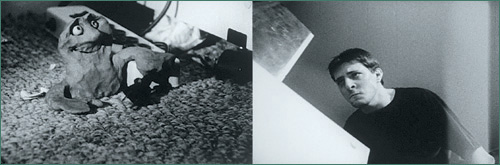
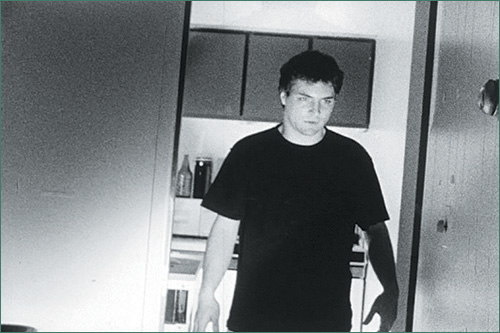
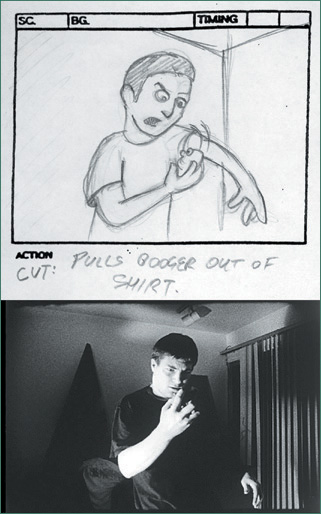
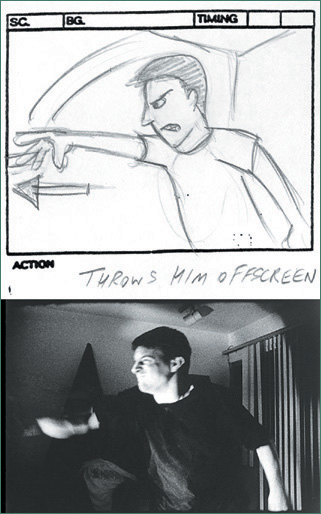
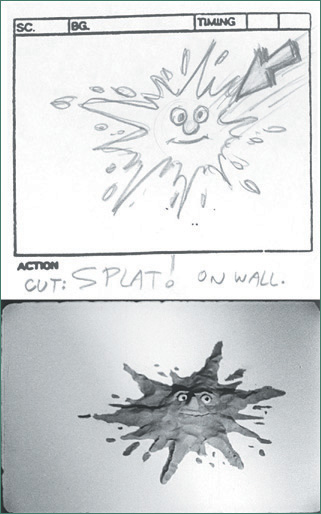
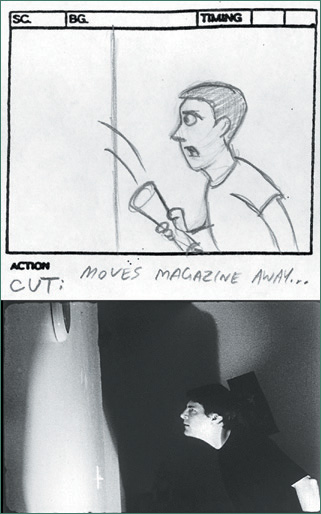
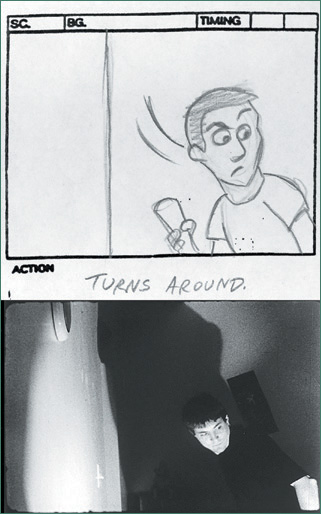
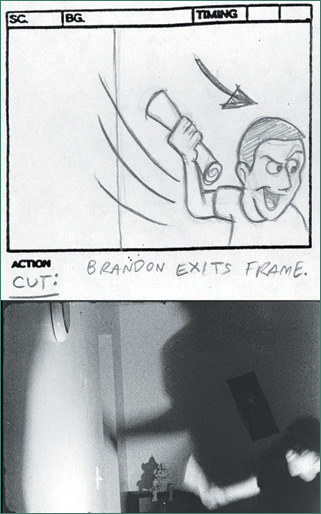
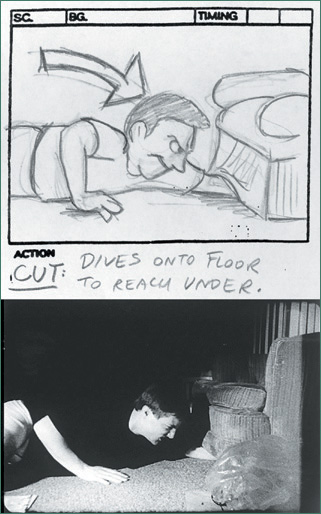
If you think of any movie trilogy or single film, this is the most common pattern you will find. Look for it when watching films, and try to identify where these transitions between acts occur. It may be more obvious in longer films, but try to think in terms of a short film as well. In my film Snot Living, which is 13 minutes long, I started Act One by introducing the unnamed live-action character (played by my friend Brandon, so I will name him as such) by showing him fall out of bed, fail at eating breakfast, and head straight to the television. He is obviously hung over, his apartment is a complete disaster, and his food is rotten, so the location and props are used to tell the audience about who he is. He picks his nose and wipes a booger underneath a table. (I had a sick sense of humor back then.) Act Two begins when the booger, brought to life through clay animation, begins terrorizing Brandon by unplugging the television and enticing Brandon to chase him around the apartment. Eventually, Brandon catches the booger, throws him into the microwave, and kills him, thereby resolving the conflict and segueing into Act Three. Brandon feels remorse and decides to finally go outside, where the film changes from black-and-white to color. He is transformed by what he realizes he has been missing (the beauty of nature) and starts walking down the street, when the booger resurrects to remind him he forgot his pants.
In another example, Tim Hittle’s Oscar-nominated short film Canhead (viewable at AtomFilms.com), the Jay Clay character and his dog Blue are introduced as they take a rest after a long walk. The conflict is presented when Blue disappears on the other side of a canyon, and a giant comes out of the ground to chase Jay Clay. To resolve the conflict, Jay duels with the giant, defeats him, and makes it to the other side of the canyon to be reunited with Blue. The audience empathizes with Jay because his relationship with Blue is evident from the first act. Having a close relationship with a dog is something many of us can relate to, as well as the desire to be reunited with a loved one. Therefore, we root for the hero and hope he can defeat the giant.
Variations on this three-act pattern can even be implemented into one minute. In Aardman Animation’s short film Comfy, directed by Seth Watkins (also on AtomFilms), the audience is introduced to a character with incredibly long limbs in a tiny bed. The conflict arises when the character cannot sleep comfortably, so he proceeds to remove his limbs one by one. At the end, he has no arms or legs and seems to be finally falling asleep, but then he falls out of the bed. The film is funny, because we can all relate to being uncomfortable and having trouble sleeping, and I’m sure most of us secretly wish we could remove our limbs at times.
Even though there is a lot that happens in these films, they are simple enough that their story can be summarized into one sentence. When you are pitching your film for funding or distribution, it helps if your story can be told in one simple sentence—for example:
A young slacker is disturbed by a booger that comes to life.
A man battles a giant so he can be reunited with his dog.
A character who can’t fit into his bed tries to get a good night’s sleep.
The other important fact about all three of these films is that none of them has any dialogue, so they can be understood by anyone all over the world, with no language barriers. Automatically, silent films have a broader appeal for distribution in film festivals. Today, so many animated films and television series are primarily dialogue-driven that it’s becoming difficult to find inspiration for films that simply tell their story through acting and characterization. It is a true testament of acting ability for an animator to be able to communicate to his audience what a character is thinking without dialogue. It is a challenge, but at the same time, it’s easier to tell a story shortly and simply if you don’t need to have your characters speak. Study silent films by Charlie Chaplin, Buster Keaton, and also more modern characters like Mr. Bean, for inspiration.
Some films may not have much dialogue but will instead have a narrator who tells the story. A couple examples are the short films Uncle, Brother, Cousin and the Oscar-winning Harvie Krumpet by Adam Elliot. All of Elliot’s films follow a similar biographical pattern, telling us about the lives of misfit Plasticine characters. The humor in them comes mostly from the writing and the character design, and although they are rather tragic at times, they are also very touching. Through the medium of the narrative short film, animators can make very personal films that connect with audiences.
As a starting point for a short narrative film, perhaps try animating a character who finds something that sparks his curiosity. Many great stories start this way, going all the way back to the Greek myth of Pandora’s Box, or Alice finding the rabbit hole in Alice in Wonderland, or Bilbo Baggins finding the ring in The Hobbit. This is the moment that calls them to adventure. Even in a short film, a character could come across a box, for instance, and whatever is in the box either leads the character on a journey or starts a conflict that must be resolved. Plan ahead and keep it simple!
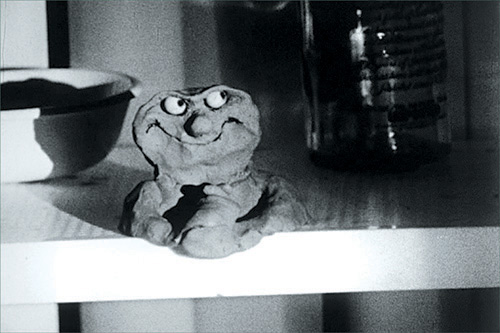
When I was studying filmmaking at the University of Michigan, my film professor Frank Beaver showed us a stop-motion film called Crosspaths made by a former student, James Pinard (see Figure 13.2). The film had no dialogue or camera movement, just eggs moving around on a tabletop set to music. Through this very limited spectrum of materials, the eggs told a spiritual allegory that moved me to tears the first time I saw it. And yet, there were no sets or puppets, just eggs. One of the most unique things about stop-motion, compared to other mediums, is that you can take ordinary objects and bring them to life this way. You don’t always need fancy wire armatures, foam latex, clay, or detailed sets; as long as you have a good story, you can make a film out of absolutely anything.
Take the desk lamp exercise from Chapter 5, “Basic Animation,” and expand on it to tell a short story. Perhaps the lamp could travel around your house and get into an adventure with other household objects. Giving your objects personality and making them appear to think will be expressed through the timing, in terms of how fast or slow you move them and how long you hold them. Remember how important holds are to the rhythm of your animation and the pacing of your story. (Some strange and creative examples of object animation can be viewed at www.eatpes.com.)
Not that human beings are objects, but they can also be animated through a process called pixelation, which is a term used for animating real people frame by frame to achieve impossible feats. Have a friend sit in a chair in front of your camera, take a frame, and then have him scoot up a few inches, and take another frame. Repeating this process will result in your friend sliding across the room in the chair. Or have him jump into the air and try to capture a frame during that split second before he lands, and he will appear to fly across the room. Pixelation has been used to great effect in films like Norm McLaren’s Neighbors (1952) and the Bolex Brothers’ The Secret Adventures of Tom Thumb (1993). Experiment with the technique, and then think of a story you can tell using it.
Some films do not necessarily tell a story with three acts or a beginning, middle, and end, but instead focus on dialogue or character animation. The best example of this genre would be the Conversation Piece series from Aardman Animations. Their earliest films by Peter Lord usually focused on one character being interviewed or telling some kind of story, all improvised from interview recordings. Years later, Nick Park tried a different approach in his Oscar-winning Creature Comforts (1989) by having a “vox pops” montage of different interviews with animals in the zoo. The entertainment in Creature Comforts, both the short film and the television series inspired by it, comes not from a linear story, but through the mannerisms of the characters. It is a brilliant concept combined with amazing character animation, where these animals really seem to be thinking, speaking, and living. Any short monologue, improvised piece of dialogue, or song can be animated in stop-motion and result in a short film. Avoid using copyrighted material for a film like this; instead, record your own dialogue or music. Record your crazy uncle who tells funny stories and animate it, or make a music video for your local garage band.
If telling a linear story or animating characters is not really your thing, or if you want to try something completely different, you could experiment with making an abstract film. Through stop-motion, you can explore the possibilities of light, color, sound, or patterns of imagery with shapes or found objects. Many filmmakers have used stop-motion to create films that defy the typical narrative story structure and instead revel in the miracle of the moving image. Art Clokey’s film Gumbasia (1955) is a classic example of using clay to create patterns of movement set to music. Will Vinton had a brief segment exploring the same concept in his film Closed Mondays (1975), and even Jim Henson animated colored pieces of paper to music in his experimental short film TimePiece (1965). Other abstract stop-motion effects have been explored by filmmakers Carmen D’Avino, Oskar Fishinger, and the Brothers Quay.
Storyboarding and editing for stop-motion differs from other animation mediums. In a 2D or CG film, the camera is almost an abstract entity that can swoop, glide, and be positioned absolutely anywhere, due to the fact that the environment it is capturing is either flat or virtual. There is a greater level of control over the animation and how the camera relates to it. In 2D animation, things can simply be redrawn, and in CG animation, cameras can literally go through walls. Stop-motion, however, is much closer to live-action filmmaking, in that the camera is a physical object that exists in a physical space. So there are more challenges and limitations placed on where the camera can go. Plus, once the set is built, it is much harder for the director to change his mind on a camera angle. A wall, unless it is removed, may not allow for that much flexibility. The story direction for stop-motion usually relies more on simple camera angles, which must be planned in advance through careful storyboarding, which serves as the blueprint for any show.
The art of planning your film with storyboards is a vast topic which is best learned through studying live-action or stop-motion films and paying attention to how they are structured. How and when do camera angles change? What is the camera drawing your attention to, and why? As a filmmaker, what you are essentially doing, through editing, is being selective about what you are showing your audience to tell your story. There may be only one action, like a conversation, taking place in one location, but to keep it interesting, that action may be broken up into different angles, cutting back and forth. It’s important to think cinematically and visually, so you can manipulate the audience’s reaction by how you set up your shots. There are entire books and courses to refer to for fully mastering the art of storyboarding, but following are some basic principles to get you started.
Films are made up of different kinds of shots, angles, and camera movements, which differ in how much they show of the actors or locations, based on how close or far away the camera is. They can also have different psychological effects on the audience. Here are some basic kinds of shots and what they mean in the language of filmmaking:
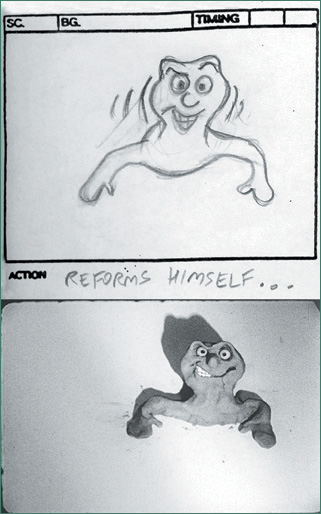
An establishing shot will usually open up a film and is typically a wide view of the location where the action takes place. This could be a house, a room, or an entire city. After briefly establishing the location, you can take your viewer into the story by cutting to any of the following shots, demonstrated with stills from Snot Living.
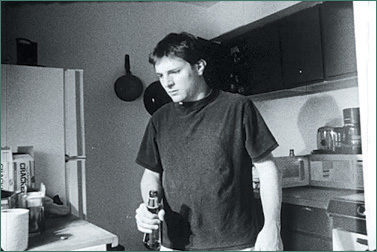
A long shot (see Figure 13.3) shows a character from a distance, far enough away so that you can see the whole body. It is a kind of establishing shot that can still communicate to the audience the character’s surroundings.
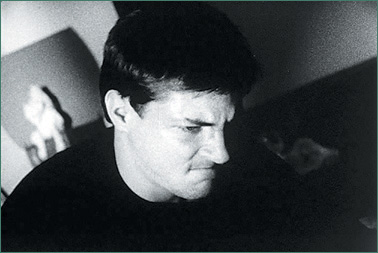
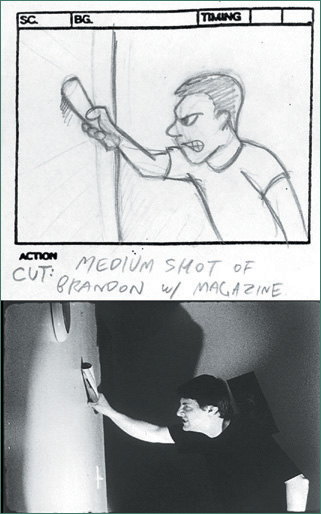
A medium shot (see Figure 13.4) takes the camera closer to the character, usually from the waist up. It puts the audience’s focus on the character, and may be used for a dialogue, pantomime, or action scene.
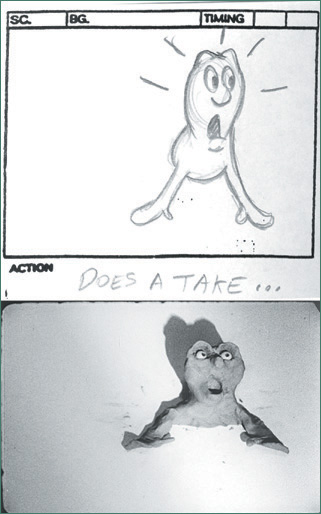
A close-up shot (see Figure 13.5) goes even closer, revealing a character’s facial expression or an object in a very intimate way. In between these different shots might be variations such as medium-long or medium close-up.
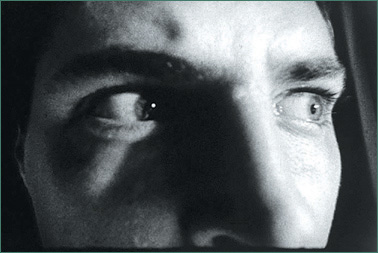
An extreme close-up (see Figure 13.6) focuses on a character or object so tightly that he takes up almost the entire frame, and zeros in on the one important aspect you want the audience to see.
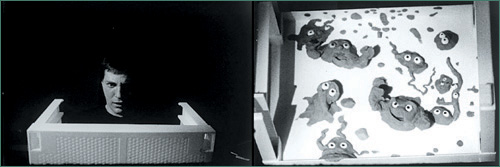
A POV shot (see Figure 13.7) stands for point-of-view, where the camera becomes the eye of one of the characters, seeing exactly what that character sees from its perspective. It is usually preceded by a medium or close-up shot of a character looking at something, so that the audience understands that it’s from the character’s point of view.
An over-the-shoulder shot (see Figure 13.8) is similar to a POV shot, except that we see what or who the character is looking at over his shoulder, or close to it. This shot is often used for dialogue between two characters. Shots described as a one-shot, two-shot, or three-shot refer to how many characters are in the same shot at once. A group shot would feature several different characters on-screen at once.
Certain shots are dictated by the angle at which the camera is positioned in relation to the subject, which also have various psychological effects on the audience.
Low angle shots (or up shots) can serve two purposes. In one aspect, they are essentially POV shots of small characters looking up at big characters or objects, like an ant looking up at a tree, or a tiny clay character looking up at a human (see Figure 13.9). They are also used to make characters look powerful or threatening. High angle shots, or down shots, are also POV shots of characters looking down, as if they are in a tree or on top of a building, but they can also be used to make characters look alone, insignificant, or in danger.
A Dutch angle (see Figure 13.10) is when the camera is titled slightly, close to a 45-degree angle. It is an artistic statement by the director to imply that something mysterious or wrong is about to happen.
Any of these previous shots and angles can be combined with a camera move to further enhance the action or bring the viewer into the story. Following are some basic terms for different camera movements.
Panning refers to the camera moving on an axis, rooted to its tripod, from left to right, or right to left.
Tilting refers to the camera moving up or down on a tripod axis.
Tracking refers to the camera actually moving left/right or right/left on a dolly.
Trucking refers to the camera moving on a dolly either into the scene or away from it.
A zoom is a trucking move that is achieved with the zoom lens of the camera, which is stationary.
Look for ways to make your shots interesting. Think of each shot in your film as a painting that tells part of your story on its own, and uses angles, lines, and shapes to create appealing shapes for the viewer (see Figures 13.11–13.12). Each shot should be thought of this way, and in relation to the other shots that move through the film. If too many of the shots in your storyboard start looking the same, always from a straight-on angle, try changing the camera angle slightly so that the horizon line, or perhaps the edge of a wall, goes diagonally across the frame. Each shot should have a central area of focus. What is the most important thing for the audience to see in the shot? Make this the most important element of your shot, and frame your background around it. It’s important that your characters have room to breathe and move around. Think of the negative space around your character, and keep that interesting as well. One thing that makes for good composition is having characters or objects bleed outside of the frame slightly. Do not feel like you need to cram a whole bunch of objects into the frame in full view. Instead, have a vehicle, piece of furniture, or a window showing partly on the side, to frame in the action and give the sense that the world you are showing the audience extends beyond the frame. Also, foreground elements add depth to a shot and make your audience feel they are looking at a real environment (see Figures 13.13–13.14).
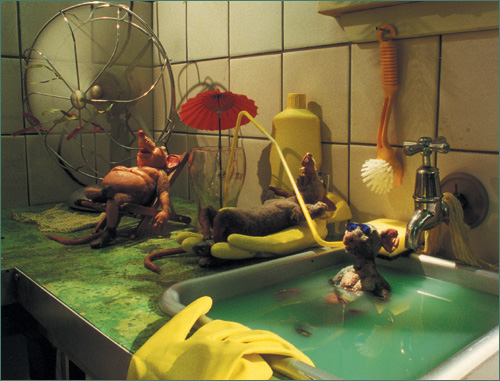
Figure 13.11. Shooting at an angle makes for a more interesting composition. (Courtesy of Nick Hilligoss/Australian Broadcasting Corporation.)
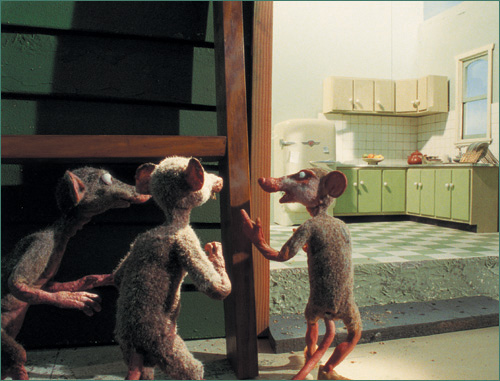
Figure 13.12. Placement and posing of the rats, combined with lighting from an open kitchen area, tells the story and draws in the audience within one shot. (Courtesy of Nick Hilligoss/Australian Broadcasting Corporation.)

Figure 13.13. Composition of the character off to the side draws the viewer in to enter into the background with him. (Courtesy of Nick Hilligoss/Australian Broadcasting Corporation.)
Figure 13.14. Foreground and background elements of the bed and window suggest a larger world outside the frame. (Courtesy of Nick Hilligoss/Australian Broadcasting Corporation.)
While all of these elements are important in individual shots, it’s important to keep the continuity going from one shot to the next, in terms of the story pacing and also in terms of movement. If your character is walking from left to right in a long shot, then cut to a medium shot of him still walking, and keep him moving in the same direction. You would not want the camera suddenly on the other side and show him moving from right to left, as this would be disrupting to the viewer. Your set is like a stage with a proscenium arch, and the camera can be positioned anywhere, high or low, within one side of the stage, but never beyond it (see Figure 13.15).

Lighting is not usually something that is planned very specifically in the storyboard stage, but it helps to have a good sense of what kind of lighting your shots will have. For stop-motion production, this might have an effect on the placement of your camera, so it never hurts to be prepared. Lighting can add some great moods and effects to your film, and it can help to tell the story or tell the audience something about the characters or the atmosphere you want to create (see Figures 13.16–13.18).
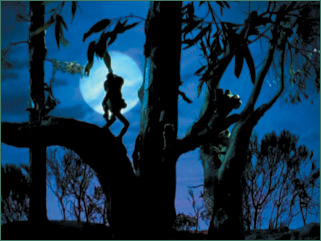
Figure 13.16. Exterior moonlight creates a gentle evening atmosphere. (Courtesy of Nick Hilligoss/Australian Broadcasting Corporation.)
In live action, quite often a scene will be shot several times from different angles, including a master long shot that shows the whole scene, and then again with medium shots and close-ups. Later on, the way all of these shots cut and relate to each other will be decided in the editing room. In animation, the editing is determined before shooting begins, all planned out in the storyboard stage. Occasionally, there may be some changes or last-minute ideas worked out in editing, but an animated film is essentially already edited from the beginning, and then it’s just a matter of putting the shots together in proper sequence. Each shot should have a few extra frames at the beginning and end so that there is more breathing room for changing the pacing during the editing stage.
Cuts between shots are essentially in two kinds: jump cuts and match cuts. A jump cut is a transition between two shots that are basically independent of each other in terms of the action taking place. It may be simply a change in camera position, as from an establishing shot to a medium shot, or from one character to another in two different locations, possibly at different times, jumping between them. A match cut is an edit that happens in the middle of an action. For example, by starting with a close-up of a prop and having a character’s hand reach into the frame to grab it and start to pick it up, you would then cut to a medium or long shot of the character continuing the action. The last frame of the long shot and the first frame of the medium shot would have to line up with each other in sequence. In stop-motion, this would involve animating the character up to a certain point of his action, changing the camera position, and then continuing the animation. It would be very important for the puppet to remain still without sagging or falling over during the camera change.
Figures 13.19–13.32 show a brief sequence from Snot Living with comparison storyboards, showing how many of these shots and camera angles work together when edited. Separate panels show different actions in the same shot, unless indicated by a cut. This sequence from the film is also featured on the CD.
Once your artistic decisions have been made for the story and look of the film, the technical issues (besides building puppets and sets) need to be addressed before shooting begins. Following are some basic principles to consider.
Before shooting your film, and even as early as the preproduction stages, you should have an idea of what the final distribution format of your film will be if you’re shooting it digitally. Are you making it for Web broadcasting or video transfer only? Will you ultimately have it transferred to film? These factors may determine what kind of equipment you will need to shoot it, whether you can get away with just a regular video camera or need something with better resolution, like a digital still camera. If you plan on outputting your digital frames to film, you may want to capture your frames at Hi-Definition resolution, which is 1920 × 1080 pixels. Standard definition is 720 × 480, which will work fine for output to video or DVD. You also need to decide if you will shoot it in an aspect ratio of standard 4:3 format or widescreen 16:9 format. Once you have decided, make sure your camera, capturing software, and editing output are all set to the same format all the way through. Programs such as Adobe Premiere or Final Cut Pro can be used to import your animation and edit it with sound, titles, and effects.
Animation is typically shot at 24 frames per second, but NTSC video and DVD play back at 29.97 frames per second, duplicating every fourth frame to keep an even playback rate. If outputting directly to videotape, you may need to perform a 3:2 pull down to your film, using a program like Virtual Dub or Adobe Premiere. For DVD, most players will now play back files at their original frame rate of 24 frames per second (technically 23.98) and automatically update while playing. Audio, which includes sound effects, music, and dialogue, should all be recorded, if possible, at a sampling rate of 48kHz, which is standard playback speed for DVD. If your sound is at a lower sampling rate, use a program like Sound Forge to convert it to 48kHz for editing, and ensure that the length of your audio clips does not change. These steps will ensure your sound and picture stayes in sync when playing back on DVD.
For purposes of story reels or simple independent projects, sound can be recorded in the comfort of your own home with a good microphone fed into the sound card on your computer. For a higher profile production, I would recommend spending the money to have dialogue, sound effects, and music recorded professionally at a real sound studio. Budget for as many hours as you need to record, and plan ahead so that you don’t waste precious recording time and money making changes or fiddling with details. Create your own original sound effects and music, or get someone to compose an original score for you. Royalty-free sounds and music can be found at your local library or purchased from the Internet. Never use copyrighted material for your film unless you have obtained permission to do so.
Titles can be created with almost any editing software, and credits can be placed either at the beginning of your film (like in the old days) or at the end, or a little of both. Title formats vary depending on whether the film is independent or being commissioned by a studio or broadcaster. If any credits appear at the beginning for a professional studio film, they are typically only for the key members of production: major voice actors, screenwriters, editors, composers, art directors, cinematographers, producers, and the director(s), always credited last. All other crew members and special thanks are mentioned in the end credits. Opening credits are usually most interesting during an opening sequence of the film, so that the audience can get right into the story and not need to sit through a title sequence by itself. The amount of time it takes you to say each title out loud is long enough for each title to remain on-screen.
For an independent short you produced mostly by yourself, you don’t need to have this many titles at the start. In this case, try to avoid long, drawn-out, or overly dramatic title sequences. You don’t want to bore the audience before your film even starts. Start with an invented studio name or logo, include a title with your name or studio, and then the title of your film, and get right into it. White letters on a black background may sound boring, but they suit their purpose well and are easy to read, so they are typically the best bet to stick with. You want your audience to remember your animation, not your flashy titles. As with everything, watch as many short films as possible to get an idea of how titles work.
Give yourself a realistic budget and deadline schedule so that you can actually finish your film. It may take you weeks, months, or even years, but don’t let the years drag on too long, or you may run the risk of never finishing, going over budget, or losing interest in the project altogether. If you want to submit your film to a contest or a specific film festival, find out what their submission deadline is and plan your schedule around that date. It’s easy to get burned out on a film after spending so much time making it, but it takes just as much full-time effort to promote and distribute it, so keep the momentum going!
Above all, have fun, enjoy the process, keep it short and simple, and save your big ambitious feature film for the day when you have millions of dollars and a major studio crew to help you.