

1
Introduction and Goals of Book
A Brief History of Landscape Astrophotography
Landscape astrophotography, Figure 1.1, has been around for decades. Prior to the advent of modern digital cameras, however, only the most dedicated possessed the patience to persist in their pursuit of quality images. Success was elusive owing to the large number of obstacles and the steep learning curve, difficulties exacerbated by the major delay in image review resulting from the need to develop at least the negatives of the film. Nonetheless, the lure of the night sky was irresistible to many who carefully and meticulously perfected their art.
All this changed with the incredible improvements in affordable digital photography for the consumer market during the 1990s and 2000s. Suddenly, not only were digital single-lens reflex (DSLR) cameras available that were capable of producing images of comparable quality to those based on film, digital cameras provided instant feedback. This latter point was a true game-changer; the photographer could now determine, on the spot, if the focus was off; if the exposure was wrong; if the composition needed to be tweaked, and so on. You will find yourself constantly reviewing your images in the field, and you will improve your success rate enormously if you develop the habit of doing so. You will detect and be able to correct minor flaws that, if left undiscovered until you return home, could otherwise ruin an entire evening of shooting.
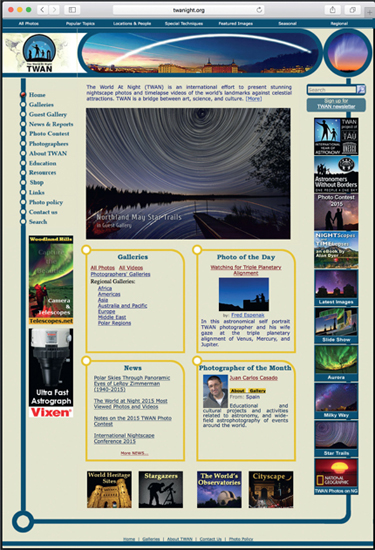
The other significant development in the late 2000s was the creation of the organization known as “The World At Night” (TWAN), developed and promoted successfully by Babak Tafreshi, Figure 1.2. TWAN quickly emerged as the premier, international online hub of landscape astrophotography. Unlike other organizations that emphasized either astronomy or photography, TWAN was the first organization to identify and promote the creative intersection of astronomy and landscape photography. TWAN was the place where notable landscape astrophotographers from around the world freely exhibited their work, and where guest astrophotographers could submit their own images for display. TWAN is a wonderful source not only for inspirational photographs, but is also an organized source of very practical examples, photography locations, and tips for those planning trips to international destinations.
Today, landscape astrophotography, also known as nightscape photography, has exploded into our everyday lives—through science news, advertising, and social media. New apps and online resources designed especially for landscape astrophotography, especially those integrating augmented reality, are constantly being developed and improved. Camera and lens systems continue to be refined to be available at ever-lower costs. A host of online communities can be found to share and learn about the most obscure of landscape astrophotography topics. Clearly, this is a golden era!
Book Goals and What You Will Learn
“To give someone a fish is to feed them for a day, to teach them to fish is to feed them for a lifetime.”—Unknown
This book aims to help you ascend the learning curve as quickly as possible. The goal is for you to acquire your own, broad foundation of knowledge so that you will be able to quickly understand, adapt, and apply future developments as they become available.
There are several elements that generally align in a successful landscape astrophotography image, all of which can be acquired and improved through dedication and study: (i) creative vision, (ii) correct

1.1
Landscape astrophotography images of (a) star trails; (b) the Milky Way; (c) the rising full moon; (d) the Aurora Borealis; (e) the Perseid meteor shower; (f) twilight; (g) cityscapes; and (h) starry skies. Landscape astrophotography combines compelling landscapes with carefully positioned objects of the night sky. This book explains and teaches all the astronomy, photography, and in-the-field knowledge you need to create images such as these.
subject and lighting, and (iii) technical proficiency. Your creative vision can be catalyzed by carefully studying the work of others, or simply by spending some time outdoors under the beautiful night sky and letting your imagination roam. A basic knowledge of astronomy can be gained directly from this book and the tools described herein, especially coupled with practice outside at night. Technical proficiency in photographic technique can be learned through careful study of the information presented herein and practice with your camera, lenses, and other equipment. It is certainly possible to rely on trial-and-error in creating a phenomenal landscape astrophotography image, however, there are many things that can go wrong. The abysmal success rate can be incredibly frustrating. Instead, thorough preparation will all but guarantee fulfillment of your artistic vision, time after time.
1.2
“The World At Night,” or TWAN, is a premier, international online hub of activity of landscape astrophotography. TWAN was the first organization to identify and promote photography at the intersection of astronomy and landscape photography. TWAN is a place where notable landscape astrophotographers from around the world freely exhibit their work, and where guest astrophotographers may submit their own images for display. TWAN is a wonderful source for not only inspirational photographs, but also a host of very practical examples and tips for those planning trips to international destinations.
Source: The World At Night/twanight.org

1.3
Flowchart representing the main steps that typically go into the creation of a nightscape image. Each of the topics shown here is covered in this book: concept development, astronomy 101; photography 101; planning, field reconnaissance, image creation, and image processing in the digital darkroom.
This book aims to help you learn everything you need to know to create landscape astrophotography images that reflect your personal creative vision. The different elements that comprise the process of successfully creating nightscape images generally fall into one or more of the following topics, each of which is a section of the book, Figure 1.3: (i) Understanding Astronomy and Atmospheric Science; (ii) Understanding Photography; (iii) Conceptualizing and Planning Landscape Astrophotography Images; (iv) Creating Landscape Astrophotography Images; and (v) Processing Landscape Astrophotography Images. This book also features a Distinguished Guest Gallery full of awe-inspiring images to help with your creative vision, along with a Case Studies section to help you plan out all the details of your image creation process.
- Learn about astronomy and know the best days of the year for different night sky targets
- Discover subtleties of photographic techniques unique to landscape astrophotography
- Learn about ways to prepare for your nighttime outings to overcome common obstacles and maximize your chances of success
- Integrate your astronomy and photography knowledge in the form of a detailed plan, itinerary, and schedule for your nightscape image expeditions
- Learn special techniques for processing your images to achieve spectacular effects
- Be inspired by the iconic images of world-renowned landscape astrophotographers in the Distinguished Guest Gallery
We begin with an overview of astronomy, and explain how the objects we see each night are always in motion. Their presence or absence varies depending on the month and season. We explore the science behind the amazing phenomena that accompany sunsets and sunrises. We explain the reasons and timing of the phases of the moon and why they’re so important for astrophotography. We introduce the Milky Way; what it is, how, where, and when best to see it, along with a host of other key topics.
Next, we review the fundamentals of photography, beginning with the color and description of light, and its perception by human vision. We review camera and lens choices and explain the pros and cons of each. We go through the elements of correct photographic exposure and how the different camera settings affect the quality of the resultant images. We also describe ways of selectively introducing foreground light through controlled flash illumination and light painting. Finally, we briefly introduce the basic steps of creating nightscape time-lapses.
The subsequent sections deal with the nuts and bolts of astrophotography planning and execution—the hardware and software tools that are of critical importance. We describe how these tools prepare the astrophotographer for a successful outing by helping to identify the best night(s), times, and locations for optimizing their chances of success. We demonstrate the basics of astrophotography planning and execution by example, beginning with a pre-visualized concept all the way through to pressing the shutter release. We show how to select the exact location, orientation, month, date, and time for your photography as well as precisely which lens to pick and what International Standards Organization (ISO), aperture, and shutter speed you should use. Suggested exposure settings and examples for twenty-five popular nightscape images are provided to get you started!
We then explain and demonstrate the possibilities of image enhancement in the digital darkroom, using Adobe Photoshop, Lightroom, and other popular software. A number of plug-ins, scripts, and actions developed especially for landscape astrophotography are detailed. Methods for bringing out the best of individual images are described, as well as for combining two or more images for remarkable effects. Finally, four case studies are explained in depth, from initial visualization of the concept all the way through to curating of the final image. Successes and failures along the way are included to illustrate easy mistakes to make and how to avoid making them!
What You Will Need to Get Started—Camera, Tripod, and Headlamp
This book is written for those who either own, or plan to acquire, a DSLR or equivalent mirrorless camera, Figure 1.4(a). A sturdy tripod and quality head combination is the second absolute necessity, owing to their stability and exquisite control over composition, Figure 1.4(a), (c). While it is possible to create landscape astrophotography images simply by propping up your camera on a fence, bench, or other support, a good tripod system really is essential. Finally, a headlamp or flashlight, preferably one with a red light bulb, or a red plastic cover, is needed, Figure 1.4(b). This is critical for your own personal safety as well as to help with the operation of your equipment. These are really the only three items necessary for the creation of landscape astrophotography images.

1.4
Basic equipment needed for landscape astrophotography: (a) a modern digital, single-lens reflex (DSLR) or mirrorless camera affixed to (b) a sturdy tripod assembly, preferably with a wide-angle lens (in the range of 14–24 mm focal length) and either a (c) headlamp with a red bulb or a flashlight, preferably with a red bulb or red plastic cover.
Satisfying nightscape images involving the moon, sunrises, and sunsets can often be created using contemporary smartphones and point-and-shoot cameras. Although their performance is constantly improving, such cameras simply aren’t designed to capture the highest quality images of the most popular nightscape subjects – the Milky Way, stars, meteors, and so forth. Modern digital DSLRs and their mirrorless equivalents have considerably higher inherent image quality, and also offer a far greater control over exposure. DSLR cameras and their mirrorless equivalents are capable of producing simply incredible images of the night sky and are the focus of this book.
Starry Skies Recipe to Get You Going Tonight
Here is a straightforward recipe to get you outside tonight and embarked upon your landscape astrophotography journey. Fingers crossed for clear skies!
Description:
The starry skies have fascinated us for millennia. Here, you will want a clear view of the sky, and you will want to use a wide-angle lens, one with a focal length of approximately 24 mm or less for a camera with a full-frame sensor, or 18 mm or less for a camera with a crop sensor. Needless to say, you will want to mount your camera on a sturdy tripod! Here’s the recipe:
Makes:
One to two dozen (or more) images of starry skies, Figure 1.5.
Ingredients:
- Camera/tripod
- Manual shutter release or self-timer
- Manual exposure mode
- ISO 800–3200
- Aperture—f/4, f/2.8 or similar
- Shutter speed of say 5 seconds to start
- Headlamp preferably with red light, or red plastic taped over a white light
Directions:
During the day, focus your camera on the most distant object you can see—the horizon, distant mountaintops, or distant city buildings. After finding a good focus, set your camera lens and/or camera body to manual focus and leave it there. Many people will temporarily tape the focus ring of their lens in this position to keep this focus for the duration of the night, as can be seen in Figure 20.1(d). Other options for focusing can be found later in this book, for example in Chapter 20.
Next, before heading out, look up the time of sunset/sunrise. The skies generally become fully dark around 1½ to 2 hours after the sun has set. Plan on arriving on location at least an hour prior to this time to give yourself enough time to unpack, find a good location, and set up your camera system properly.

1.5
The incredible arrays of stars make up eighty-eight identified constellations, including Orion, a portion of which is shown here positioned over the eastern Sierra Nevada in California. Even massive Mt. Whitney (lower right), the tallest mountain in the continental United States, is dwarfed by Orion’s size. You can make a similar image tonight simply by following the recipe in the text.
Set up your camera/tripod with a clear view of the sky; perhaps with an interesting foreground subject—a line of trees, mountaintops, or beach. If your camera doesn’t have a viewfinder, don’t worry. Just aim it so that it is generally pointing at the sky—and be sure to keep the manual focus setting in place!
With your camera pre-focused as described above, expose your first image and review it and its histogram on the back of the camera. If needed, increase or decrease the shutter speed—speeds of 20–30 seconds are very common. If the image is too dark at exposure times of say 20 seconds, bump up the ISO; just try to keep the ISO below 6400. If no clouds are present, you should be able to make at least a dozen or so high quality images. And if this doesn’t yet make sense to you, it will; read on!
Bibliography
Keimig, Lance, Night Photography and Light Painting, 2015, Focal Press/Taylor and Francis, New York and London