
These are the most important components of the standard JSF (JavaServer Faces) component set. Without them, JSF wouldn’t have been very useful in the first place. When using plain HTML elements instead of JSF components, you’d end up polluting the controller with code to manually apply, convert, and validate submitted values; to update the model with those values; and to figure out the action method to be invoked. That’s exactly the hard work JSF should take off your hands as being a component-based MVC (Model-View-Controller) framework for HTML form-based web applications.
Input, Select, and Command Components
All input components extend from the UIInput superclass. All selection components extend from a subclass thereof, which can be UISelectBoolean, UISelectOne, or UISelectMany. (See Chapter 3, Table 3-1, for a comprehensive list of standard JSF components.) All input and select components implement the EditableValueHolder interface which allows attaching a Converter, Validator, and ValueChangeListener. All command components extend from the UICommand superclass and implement the ActionSource interface which allows defining one or more managed bean methods which should be invoked during the invoke application phase (fifth phase). They can have only one “action” method and multiple “action listener” methods.
HTML requires all input, select, and command elements to be nested in a form element. The standard JSF component set offers only one such component, the <h:form>, which is from the UIForm superclass. You could also use a plain HTML <form> element, but that wouldn’t automatically include the mandatory javax.faces.ViewState hidden input field in the form which represents the JSF view state. The renderer of the <h:form> is the one responsible for automatically including it in every generated HTML representation of the JSF form. Without it, JSF won’t recognize the request as a valid postback request. In other words, the FacesContext.getCurrentInstance().isPostback() would return false and then JSF wouldn’t even process the submitted values, let alone invoke the action method. A plain HTML <form> element in a JSF page is only useful for GET requests in combination with <f:viewParam> tags which should take care of processing the submitted input values. This will be detailed later in the section “GET Forms.”
All command components have an action attribute which can be bound to a managed bean method. This method will be invoked during the invoke application phase (fifth phase), as long as there’s no conversion or validation error. Conversion and validation are covered in Chapter 5, so we’ll skip detailing this step here.
Text-Based Input Components
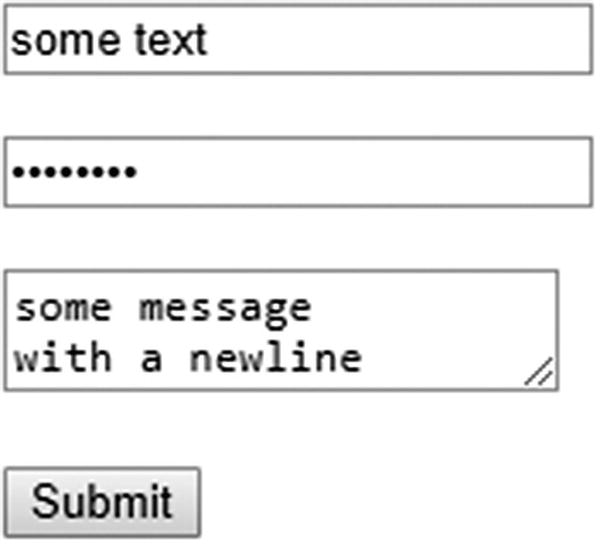
All text-based input components have a value attribute which can be bound to a managed bean property. The getter of this property will, during the view render time, be consulted to retrieve and display any preset value. And, the setter of this property will, during the update model values phase (fourth phase) of the postback request, be invoked with the submitted and already converted and validated value, if applicable. Following is a basic usage example which demonstrates all text-based input components .
Facelets file /test.xhtml:
<h:form><h:inputText value="#{bean.text}" /><h:inputSecret value="#{bean.password}" /><h:inputTextarea value="#{bean.message}" /><h:inputHidden value="#{bean.hidden}" /><h:commandButton value="Submit" action="#{bean.submit}" /></h:form>
Backing bean class com.example.project.view.Bean:
@Named @RequestScopedpublic class Bean {private String text;private String password;private String message;private String hidden;public void submit() {System.out.println("Form has been submitted!");System.out.println("text: " + text);System.out.println("password: " + password);System.out.println("message: " + message);System.out.println("hidden: " + hidden);}// Add/generate getters and setters for every property here.}
Generated HTML output:
<form id="j_idt4" name="j_idt4" method="post"action="/project/test.xhtml"enctype="application/x-www-form-urlencoded"><input type="hidden" name="j_idt4" value="j_idt4" /><input type="text" name="j_idt4:j_idt5" /><input type="password" name="j_idt4:j_idt6" /><textarea name="j_idt4:j_idt7"></textarea><input type="hidden" name="j_idt4:j_idt8" /><input type="submit" name="j_idt4:j_idt9" value="Submit" /><input type="hidden" name="javax.faces.ViewState"id="j_id1:javax.faces.ViewState:0"value="-4091383829147627416:3884402765892734278"autocomplete="off" /></form>
Rendering in Chrome browser (with newlines added):
You’ll notice several things in the generated HTML output. Undoubtedly the first thing noticeable is that JSF has also automatically generated id and name attributes of the HTML elements, all with a j_id prefix which is defined by the public API (application programming interface) constant UIViewRoot.UNIQUE_ID_PREFIX. The “t” basically stands for “tree” and the number basically represents the position of the component in the component tree . This is thus prone to be changed whenever you add, remove, or move around components in the Facelets file. This is thus also subject to headaches when QA (quality assurance) needs to write integration tests for the web application wherein more than often the HTML element IDs need to be used.
JSF will use an autogenerated ID when it’s mandatory for the functionality in order to have an id and/or a name attribute in the generated HTML output. The id attribute is mandatory in order to be able to find the HTML element by any JavaScript code which can also be autogenerated by JSF, such as functions responsible for the Ajax works. As this makes the generated HTML code rather hard to read and, frankly, ugly, we’d like to just explicitly specify the id attribute of any JSF form, input, select, and command component. This way JSF will just use it for the id and name attributes of the HTML elements instead of autogenerating one. Now, let’s rewrite the Facelets file /test.xhtml for that. A good practice is to let the ID attribute of the input component match exactly the bean property name, and the ID attribute of the command component match exactly the bean method name. This would end up in more self-documenting code and generated HTML output.
<h:form id="form"><h:inputText id="text" value="#{bean.text}" /><h:inputSecret id="password" value="#{bean.password}" /><h:inputTextarea id="message" value="#{bean.message}" /><h:inputHidden id="hidden" value="#{bean.hidden}" /><h:commandButton id="submit" value="Submit"action="#{bean.submit}" /></h:form>
Now, the generated HTML output looks as follows:
<form id="form" name="form" method="post" action="/project/test.xhtml"enctype="application/x-www-form-urlencoded"><input type="hidden" name="form" value="form" /><input id="form:text" type="text" name="form:text" /><input id="form:password" type="password" name="form:password" /><textarea id="form:message" name="form:message"></textarea><input id="form:hidden" type="hidden" name="form:hidden" /><input id="form:submit" type="submit" name="form:submit"value="Submit" /><input type="hidden" name="javax.faces.ViewState"id="j_id1:javax.faces.ViewState:0"value="-7192066430460949081:-3987350607752016894"autocomplete="off" /></form>
That’s already clearer. Note that when you explicitly set a component ID , it will always end up in the generated HTML output. The generated HTML element ID, then, represents the “client ID” which may be different from the component ID, depending on its parents. If the component has any parent which is an instance of NamingContainer interface, then the ID of the NamingContainer parent will be prepended to the client ID of the component. From the standard JSF HTML component set, only the <h:form> and <h:dataTable> are instances of NamingContainer. Others are <ui:repeat> and <f:subview>.
If you look closer at the generated HTML output, there’s only one generated ID left. It’s the one of the view state hidden input field, which is always j_id1. It represents the ID of the UIViewRoot instance, which by default cannot be set from a Facelets file on. When using JSF in Portlet-based web applications instead of Servlet-based web applications, it is overridable and would represent the unique name of the Portlet. In a Portlet-based web application it is possible to have multiple Portlet views in a single JSF page. In other words, a single JSF page in a Portlet-based web application can have multiple UIViewRoot instances.
Coming back to the generated HTML output, the name attribute of the HTML input element is mandatory for HTML in order to be able to send the submitted values as request parameters via HTTP. It will become the request parameter name. In any decent web browser you can inspect the request parameters in the “Network” section of the web developer’s toolset, which is accessible by pressing F12 in the web browser. Figure 4-1 shows how Chrome presents the postback request after submitting the form with some values filled out, as you can see in the “Form Data” section of the figure.
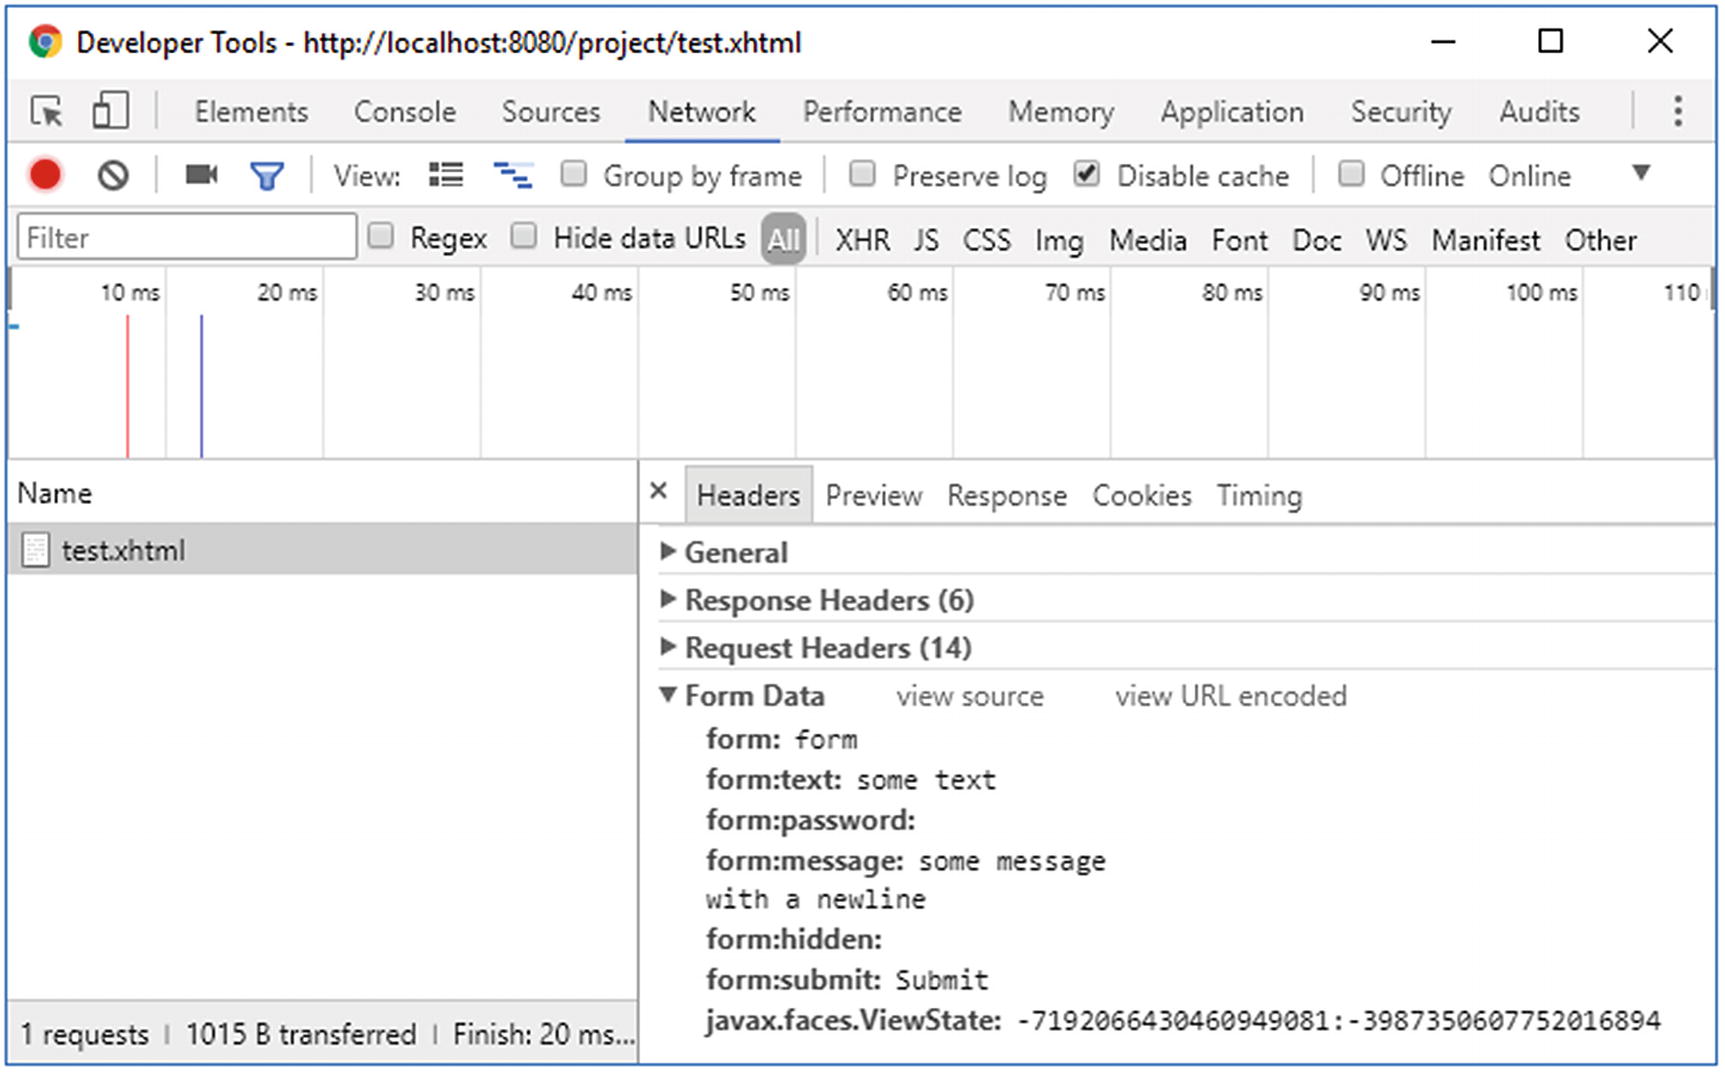
Figure 4-1 Chrome Developer Tools—Network—Headers—Form Data
The hidden input field with the name representing the ID of the <h:form> will signal JSF which form exactly was submitted during the postback request. That is, a single HTML document can have multiple form elements. This way JSF can, during the apply request values phase (second phase), determine whether the current form component was actually submitted. It will cause the UIForm#isSubmitted() of the form component to return true. The hidden input field with the name javax.faces.ViewState represents the unique identifier referring the serialized view state object which is stored in the session. Both hidden input fields are automatically included by the renderer associated with the UIForm component. The autocomplete="off" on the view state hidden input field is, by the way, not a technical requirement but just a work-around against some browsers overriding it with the last known value when the back button is pressed, which may not be the correct value per se.
Our example hidden input field has an empty value. It’s effectively useless in this form. Such a hidden input field is generally only useful when its value is being set by some JavaScript code which you’d like to capture in the managed bean. There’s generally no point to “transferring” managed bean properties from one to the next request using hidden input fields. Instead, such properties should be assigned to a managed bean which is declared to be in a broader scope than the request scope, such as the view, flow, or session scope. This saves the effort of hassling with hidden input fields. The bean scopes will be detailed in Chapter 8.
The other request parameters should speak for themselves if you’re familiar with basic HTML. They represent the name/value pairs of the involved input elements. You should be able to determine which values were actually entered in the form prior to submitting. JSF will also be able to do the same. It will traverse the component tree and use the “client ID” of the component as request parameter name to obtain the value from the request parameter map. Basically, the following code will under the hood be executed for each input component during apply request values phase (second phase). This happens in the UIInput#decode() method .
FacesContext context = FacesContext.getCurrentInstance();ExternalContext externalContext = context.getExternalContext();Map<String, String> formData = externalContext.getRequestParameterMap();String clientId = component.getClientId(context);String submittedValue = formData.get(clientId);component.setSubmittedValue(submittedValue);
And, during the same phase, the following code is basically executed for each command component in the decode method of the renderer associated with the component:
if (formData.get(clientId) != null) {component.queueEvent(new ActionEvent(context, component));}
During the process validations phase (third phase), JSF will set the submitted value of every involved input component as “local value” after performing the necessary conversion and validation if any converter or validator is registered on the component or associated bean property and has executed without errors. This happens in the UIInput#validate() method whose core logic is shown in the following code in a (very!) simplified form:
String submittedValue = component.getSubmittedValue();try {Converter converter = component.getConverter();Object newValue = component.getConvertedValue(submittedValue);for (Validator validator : component.getValidators()) {validator.validate(context, component, newValue);}component.setValue(newValue);component.setSubmittedValue(null);}catch (ConverterException | ValidatorException e) {context.addMessage(clientId, e.getFacesMessage());context.validationFailed(); // Skips phases 4 and 5.component.setValid(false);}
When there are no validation errors and the FacesContext#isValidationFailed() thus returns false, then JSF will advance to the update model values phase (fourth phase). During this phase, the “local value” of the input components will ultimately be set as managed bean properties associated with the value attribute of the input components. This will happen in the UIInput#updateModel() method which is simplified as follows:
ValueExpression el = component.getValueExpression("value");if (el != null) {el.setValue(context.getELContext(), component.getValue());component.setValue(null);}
The el variable basically represents the Expression Language (EL) statement as defined in the value attribute, which is, in case of our <h:inputText> example, thus #{bean.text}. The ValueExpression#setValue() will basically trigger the setter method behind this expression with the component’s value. So, effectively it will execute bean.setText(component.getValue()).
Once all model values have been updated, JSF will advance to the invoke application phase (fifth phase). Any ActionEvent which is, during the apply request values phase (second phase), queued in a command component will be broadcasted. It will ultimately invoke all methods associated with the command component. In the case of our <h:commandButton> example, which has #{bean.submit} defined as an action attribute, it will invoke the Bean#submit() method. Finally, JSF will advance to the last phase, the render response phase (sixth phase), generating the HTML output and thereby invoking the getter methods in order to obtain the model values to be embedded in the HTML output.
File-Based Input Component
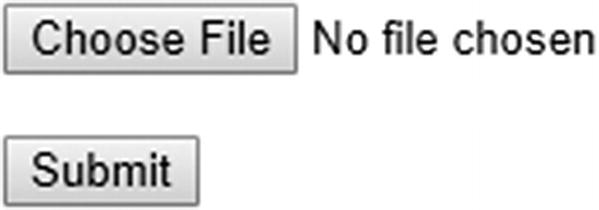
Yes, there is only one file-based input component . That’s the <h:inputFile>. It has only one additional requirement on the <h:form> it is being placed in, its enctype attribute has to be explicitly set to multipart/form-data to conform the HTML specification . This has no effect on other input components; they will continue to work just fine. It’s just that the default form encoding application/x-www-form-urlencoded doesn’t support embedding binary data. The multipart/form-data encoding supports this, but it is only slightly more verbose. Every request parameter value is preceded by a boundary line, a Content-Disposition header with the request parameter name, a Content Type header with the content type of the value, and two newlines. It is very inefficient compared to the default encoding wherein the URL-encoded request parameter name/value pairs are just concatenated by the & character, but it’s actually the only reliable way to be able to embed files in a HTTP POST request without inducing ambiguity, particularly when uploading text files whose content coincidentally resembles name/value pairs.
The value attribute of the <h:inputFile> should be bound to a bean property of the javax.servlet.http.Part interface.
Facelets file /test.xhtml:
<h:form id="form" enctype="multipart/form-data"><h:inputFile id="file" value="#{bean.file}" /><h:commandButton id="submit" value="Submit"action="#{bean.submit}" /></h:form>
Backing bean class com.example.project.view.Bean:
@Named @RequestScopedpublic class Bean {private Part file;public void submit() throws IOException {System.out.println("Form has been submitted!");System.out.println("file: " + file);if (file != null) {System.out.println("name: " + file.getSubmittedFileName());System.out.println("type: " + file.getContentType());System.out.println("size: " + file.getSize());InputStream content = file.getInputStream();// Write content to disk or DB.}}// Add/generate getters and setters for every property here.}
Generated HTML output:
<form id="form" name="form" method="post" action="/project/test.xhtml"enctype="multipart/form-data"><input type="hidden" name="form" value="form" /><input id="form:file" type="file" name="form:file" /><input id="form:submit" type="submit" name="form:submit"value="Submit" /><input type="hidden" name="javax.faces.ViewState"id="j_id1:javax.faces.ViewState:0"value="6034213708100805615:8835868421785849982"autocomplete="off" /></form>
Rendering in Chrome browser (with newlines added):
The request processing life cycle is the same as for text-based input components, except for the apply request values phase (second phase). Instead of extracting the submitted file as a request parameter in the UIInput#decode() method, the submitted file is being extracted as a request part in the renderer associated with the file input component. The default implementation basically looks as follows:
FacesContext context = FacesContext.getCurrentInstance();ExternalContext ec = context.getExternalContext();HttpServletRequest request = (HttpServletRequest) ec.getRequest();String clientId = component.getClientId(context);Part submittedValue = request.getPart(clientId);component.setSubmittedValue(submittedValue);
Selection Components
JSF offers a bunch of selection components of the UISelectBoolean, UISelectOne, and UISelectMany component families which all extend from UIInput. Except for the UISelectBoolean, they all expect the available items for selection to be provided via <f:selectItems> or <f:selectItem> tags nested in the selection component. The value attribute of a UISelectBoolean component can only be bound to a bean property of boolean or Boolean type and doesn’t support a converter, while others support a converter. The value attribute of a UISelectOne component has to be bound to a single-value property such as String, and the value attribute of a UISelectMany component can only be bound to a multi-value property such as Collection<String> or String[].
In real-world HTML-based web applications, the <h:selectOneListbox> (single-select list box) and <h:selectManyMenu> (multi-select drop-down) aren’t terribly useful. Generally the <h:selectOneMenu> (single-select drop-down) and <h:selectManyListBox> (multi-select list box) are preferred as they are more user friendly. Following is a basic usage example which demonstrates all selection components except for the aforementioned least useful ones. In case you want to use them anyway, just follow the demonstrated approach with a different tag name.
Facelets file /test.xhtml:
<h:form id="form"><h:selectBooleanCheckbox id="checked" value="#{bean.checked}" /><h:selectOneMenu id="oneMenu" value="#{bean.oneMenu}"><f:selectItems value="#{bean.availableItems}" /></h:selectOneMenu><h:selectOneRadio id="oneRadio" value="#{bean.oneRadio}"><f:selectItems value="#{bean.availableItems}" /></h:selectOneRadio><h:selectManyListbox id="manyListbox" value="#{bean.manyListbox}"><f:selectItems value="#{bean.availableItems}" /></h:selectManyListbox><h:selectManyCheckbox id="manyCheckbox" value="#{bean.manyCheckbox}"><f:selectItems value="#{bean.availableItems}" /></h:selectManyCheckbox><h:commandButton id="submit" value="Submit"action="#{bean.submit}" /></h:form>
Backing bean class com.example.project.view.Bean:
@Named @RequestScopedpublic class Bean {private boolean checked;private String oneMenu;private String oneRadio;private List<String> manyListbox;private List<String> manyCheckbox;private List<String> availableItems;@PostConstructpublic void init() {availableItems = Arrays.asList("one", "two", "three");}public void submit() {System.out.println("Form has been submitted!");System.out.println("checked: " + checked);System.out.println("oneMenu: " + oneMenu);System.out.println("oneRadio: " + oneRadio);System.out.println("manyListbox: " + manyListbox);System.out.println("manyCheckbox: " + manyCheckbox);}// Add/generate getters and setters for every property here.// Note that availableItems property doesn’t need a setter.}
Generated HTML output:
<form id="form" name="form" method="post" action="/project/test.xhtml"enctype="application/x-www-form-urlencoded"><input type="hidden" name="form" value="form" /><input id="form:checked" type="checkbox" name="form:checked" /><select id="form:oneMenu" name="form:oneMenu" size="1"><option value="one">one</option><option value="two">two</option><option value="three">three</option></select><table id="form:oneRadio"><tr><td><input id="form:oneRadio:0" type="radio"name="form:oneRadio" value="one" /><label for="form:oneRadio:0"> one</label></td><td><input id="form:oneRadio:1" type="radio"name="form:oneRadio" value="two" /><label for="form:oneRadio:1"> two</label></td><td><input id="form:oneRadio:2" type="radio"name="form:oneRadio" value="three" /><label for="form:oneRadio:2"> three</label></td></tr></table><select id="form:manyListbox" name="form:manyListbox"multiple="multiple" size="3"><option value="one">one</option><option value="two">two</option><option value="three">three</option></select><table id="form:manyCheckbox"><tr><td><input id="form:manyCheckbox:0" type="checkbox"name="form:manyCheckbox" value="one" /><label for="form:manyCheckbox:0"> one</label></td><td><input id="form:manyCheckbox:1" type="checkbox"name="form:manyCheckbox" value="two" /><label for="form:manyCheckbox:1"> two</label></td><td><input id="form:manyCheckbox:2" type="checkbox"name="form:manyCheckbox" value="three" /><label for="form:manyCheckbox:2"> three</label></td></tr></table><input id="form:submit" type="submit" name="form:submit"value="Submit" /><input type="hidden" name="javax.faces.ViewState"id="j_id1:javax.faces.ViewState:0"value="403461711995663039:117935361680169981"autocomplete="off" /></form>
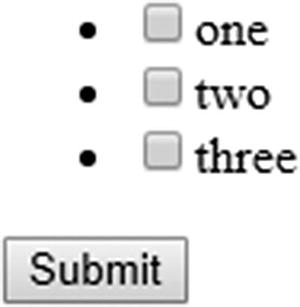
Rendering in Chrome browser (with newlines added):
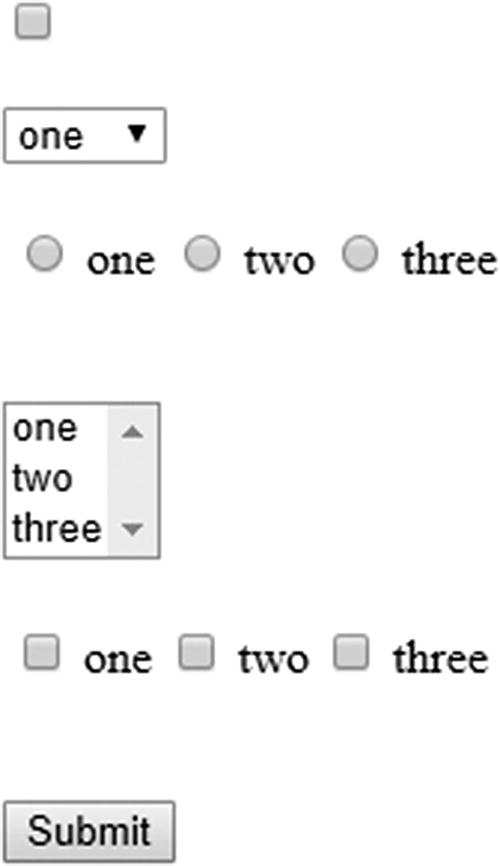
In the generated HTML output, you’ll immediately notice that <h:selectOneRadio> and <h:selectManyCheckbox> generate an HTML table around the inputs. Such a markup is indeed frowned upon since Web 2.0. This is somewhat a leftover of JSF 1.0, when Web 2.0 didn’t exist yet. For the <h:selectManyCheckbox> this could easily be worked around by using a bunch of <h:selectBooleanCheckbox> components in the desired HTML markup which are bound against a slightly adjusted model.
Facelets file /test.xhtml:
<h:form id="form"><ul><ui:repeat id="many" value="#{bean.availableItems}" var="item"><li><h:selectBooleanCheckbox id="checkbox"value="#{bean.manyCheckboxMap[item]}" /><h:outputLabel for="checkbox" value="#{item}" /></li></ui:repeat></ul><h:commandButton id="submit" value="Submit"actionListener="#{bean.collectCheckedValues}"action="#{bean.submit}" /></h:form>
Backing bean class com.example.project.view.Bean:
@Named @RequestScopedpublic class Bean {private List<String> manyCheckbox;private List<String> availableItems;private Map<String, Boolean> manyCheckboxMap = new LinkedHashMap<>();@PostConstructpublic void init() {availableItems = Arrays.asList("one", "two", "three");}public void collectCheckedValues() {manyCheckbox = manyCheckboxMap.entrySet().stream().filter(e -> e.getValue()).map(Map.Entry::getKey).collect(Collectors.toList());}public void submit() {System.out.println("Form has been submitted!");System.out.println("manyCheckbox: " + manyCheckbox);}// Add/generate getters for availableItems and manyCheckboxMap.// Note that setters are not necessary for them.}
Generated HTML output:
<form id="form" name="form" method="post" action="/project/test.xhtml"enctype="application/x-www-form-urlencoded"><input type="hidden" name="form" value="form" /><ul><li><input id="form:many:0:checkbox" type="checkbox"name="form:many:0:checkbox" /><label for="form:many:0:checkbox">one</label></li><li><input id="form:many:1:checkbox" type="checkbox"name="form:many:1:checkbox" /><label for="form:many:1:checkbox">two</label></li><li><input id="form:many:2:checkbox" type="checkbox"name="form:many:2:checkbox" /><label for="form:many:2:checkbox">three</label></li></ul><input id="form:submit" type="submit" name="form:submit"value="Submit" /><input type="hidden" name="javax.faces.ViewState"id="j_id1:javax.faces.ViewState:0"value="-2278907496447873737:-4769857814543424434"autocomplete="off" /></form>
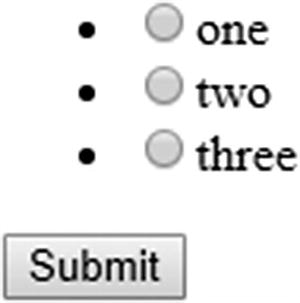
Rendering in Chrome browser:
That’s already more Web 2.0 friendly. The bullets of the <ul> can of course be hidden by setting the CSS (Cascading Style Sheets) list-style-type property to none. Note that the actionListener attribute of the <h:commandButton> always runs before the action attribute. The same approach was not possible for <h:selectOneRadio> for a long time. There’s no such component as <h:radioButton> or anything like that. Solutions were sought in third-party component libraries such as PrimeFaces. Since JSF 2.2 this could be tricked with the new “pass-through elements” and “pass-through attributes” feature on plain HTML <input type="radio"> elements.1 Only since JSF 2.3 has it been natively possible with help of the new group attribute which basically represents the same as the name attribute of the plain HTML <input type="radio"> element.
Facelets file /test.xhtml:
<h:form id="form"><ul><ui:repeat id="one" value="#{bean.availableItems}" var="item"><li><h:selectOneRadio id="radio" group="groupName"value="#{bean.oneRadio}"><f:selectItem itemValue="#{item}" /></h:selectOneRadio><h:outputLabel for="radio" value="#{item}" /></li></ui:repeat></ul><h:commandButton id="submit" value="Submit"action="#{bean.submit}" /></h:form>
Backing bean class com.example.project.view.Bean:
@Named @RequestScopedpublic class Bean {private String oneRadio;private List<String> availableItems;@PostConstructpublic void init() {availableItems = Arrays.asList("one", "two", "three");}public void submit() {System.out.println("Form has been submitted!");System.out.println("oneRadio: " + oneRadio);}// Add/generate getters and setters for every property here.// Note that availableItems property doesn’t need a setter.}
Generated HTML output:
<form id="form" name="form" method="post" action="/project/test.xhtml"enctype="application/x-www-form-urlencoded"><input type="hidden" name="form" value="form" /><ul><li><input type="radio" id="form:one:0:radio"name="form:groupName" value="form:one:0:radio:one" /><label for="form:one:0:radio">one</label></li><li><input type="radio" id="form:one:1:radio"name="form:groupName" value="form:one:1:radio:two" /><label for="form:one:1:radio">two</label></li><li><input type="radio" id="form:one:2:radio"name="form:groupName" value="form:one:2:radio:three" /><label for="form:one:2:radio">three</label></li></ul><input id="form:submit" type="submit" name="form:submit"value="Submit" /><input type="hidden" name="javax.faces.ViewState"id="j_id1:javax.faces.ViewState:0"value="3336433674711048358:164229014603307903"autocomplete="off" /></form>
Rendering in Chrome browser:
Technically, the <h:selectManyCheckbox> could support the group attribute too, but this hasn’t yet been implemented. Perhaps it will be in JSF.next.
SelectItem Tags
Providing available items for UISelectOne and UISelectMany components can be done in several ways. As demonstrated in the previous section, you can use the <f:selectItems> and <f:selectItem> tags nested in the selection component for this. You can use the <f:selectItem> tag to define the available items entirely on the view side. Following is an example using <h:selectOneMenu> , but you can use it the same way in any other UISelectOne and UISelectMany component:
<h:selectOneMenu id="selectedItem" value="#{bean.selectedItem}"><f:selectItem itemValue="#{null}" itemLabel="-- select one --" /><f:selectItem itemValue="one" itemLabel="First item" /><f:selectItem itemValue="two" itemLabel="Second item" /><f:selectItem itemValue="three" itemLabel="Third item" /></h:selectOneMenu>
Note that a select item with value of #{null} can be used to present the default selection in case the bean property associated with selection component’s value attribute is null. If you have consulted the tag documentation of <f:selectItem>, then you’ll perhaps have noticed the noSelectionOption attribute and have thought that it was intended to represent a “no selection option.” Actually, this isn’t true. Many starters indeed think so, as you can see in many forums, Q&A sites, and poor-quality tutorials on the Internet. In spite of the misleading attribute name, it does not represent a “no selection option.” A better attribute name would have been hideWhenOtherOptionIsSelected, and even then it works only when the parent selection component has explicitly a hideNoSelectionOption="true" attribute set like the one that follows:
<h:selectOneMenu id="selectedItem" value="#{bean.selectedItem}"hideNoSelectionOption="true"><f:selectItem itemValue="#{null}" itemLabel="-- select one --"noSelectionOption="true" /><f:selectItem itemValue="one" itemLabel="First item" /><f:selectItem itemValue="two" itemLabel="Second item" /><f:selectItem itemValue="three" itemLabel="Third item" /></h:selectOneMenu>
So, hideWhenOtherOptionIsSelectedAndHideNoSelectionOptionIsTrue would ultimately have been the most self-explanatory attribute name. Unfortunately, this wasn’t very well thought out when the noSelectionOption was implemented in JSF 1.2. Requiring two attributes for this attribute to function shouldn’t have been necessary. The primary purpose of this attribute pair is to prevent the web site user from being able to re-select the “no selection option” when the component has already a non-null value—for example, by having it prepared in a @PostConstruct method, or by re-rendering the component after a form submit with a non-null value.
That said, the itemValue attribute of the <f:selectItem> represents the value that will be set as bean property when the form is submitted, and the value that will be preselected from any non-null bean property when the HTML output is to be generated. The itemLabel attribute represents the label that will be displayed to the web site user. When the itemLabel attribute is absent, JSF will default to itemValue. Note that the label is in no way submitted back to the server. That is, in the generated HTML output, the <option> label is not part of the <option> value.
You can use the <f:selectItems> tag to reference a Collection, Map, or array of available items in the backing bean. You can even mix this with <f:selectItem> tags .
<h:selectOneMenu id="selectedItem" value="#{bean.selectedItem}"><f:selectItem itemValue="#{null}" itemLabel="-- select one --" /><f:selectItems value="#{bean.availableItems}" /></h:selectOneMenu>
They will be rendered in the same order as they are declared in the view. Only when you use an unordered Map implementation as value, such as HashMap, the order of items provided by <f:selectItems> will be undefined. It’s therefore better to use an ordered Map implementation, such as TreeMap or LinkedHashMap. When populating the available items as a Map, keep in mind that the map key represents the item label and the map value represents the item value. You’d perhaps intuitively expect it to be the other way around, but this was a technical limitation. That is, on the Java side, the map key enforces uniqueness while the map value doesn’t. And on the HTML side, the option label is supposed to be unique while the option value doesn’t need to be. Following is how you can populate such a map:
private Map<String, String> availableItems;@PostConstructpublic void init() {availableItems = new LinkedHashMap<>();availableItems.put("First item", "one");availableItems.put("Second item", "two");availableItems.put("Third item", "three");}// Add/generate getter. Note that a setter is unnecessary.
As said, you can also use a TreeMap or HashMap, but then the item labels will become, respectively, sorted or unsorted, regardless of the insertion order.
In case you’d really like to swap the map keys and values around on the view side, you can always do so by manually assigning the map entry value as an item label and the map entry key as an item value. You can do that with help of the var attribute of the <f:selectItems> by which you can declare the EL variable name of the currently iterated item. This can, in turn, be accessed in the itemValue and itemLabel attributes of the same tag. When you pass Map#entrySet() to the value attribute of the <f:selectItems>, then each iterated item will represent a Map.Entry instance. This has, in turn, getKey() and getValue() methods which are thus perfectly usable as EL properties .
<f:selectItems value="#{bean.availableItems.entrySet()}" var="entry"itemValue="#{entry.key}" itemLabel="#{entry.value}"></f:selectItems>
This also works when using a Collection or array as available items. You don’t explicitly need to first convert it to a Set (more specifically, Iterable), as demonstrated above. This is particularly useful when you have a Collection or an array of complex objects as available items, such as model entities .
Model entity representing a “country”:
public class Country {private Long id;private String code;private String name;// Add/generate getters and setters.}
Backing bean:
@Named @RequestScopedpublic class Bean {private String countryCode;private List<Country> availableCountries;@Injectprivate CountryService countryService;@PostConstructpublic void init() {availableCountries = countryService.getAll();}// Add/generate getters and setters.// Note that a setter is unnecessary for availableCountries.}
View:
<h:selectOneMenu id="countryCode" value="#{bean.countryCode}"><f:selectItem itemValue="#{null}" itemLabel="-- select one --" /><f:selectItems value="#{bean.availableCountries}" var="country">itemValue="#{country.code}" itemLabel="#{country.name}"</f:selectItems></h:selectOneMenu>
Note that any persistence framework-specific annotations , such as JPA’s @Entity and @Id, and the actual implementation of CountryService, are omitted for clarity. Those are irrelevant to any front-end framework, such as JSF.
With the above construct, the value as obtained from Country#getCode() will end up as value of the generated HTML <option> element. Now, when the form is submitted, it will become the submitted value of the selection component, which will in turn invoke the setter method behind the #{bean.countryCode} property with exactly that value. Of course, you can also use the whole Country object as the property value of the selection component, but that would require a converter which can convert between the complex object and a unique string suitable to be embedded in HTML output and sent as an HTTP request parameter. You can read more in Chapter 5.
SelectItemGroup
In case you’d like to group a bunch of options under a common label, you can use the javax.faces.model.SelectItemGroup, which you in turn reference in the value attribute of the <f:selectItems>. Unfortunately, this cannot be done declaratively in the Facelets file on a custom nested model. You really have to map your model into the JSF-provided javax.faces.model.SelectItem for this. Following is a kickoff example:
private List<SelectItem> availableItems;@PostConstructpublic void init() {SelectItemGroup group1 = new SelectItemGroup("Group 1");group1.setSelectItems(new SelectItem[] {new SelectItem("Group 1 Value 1", "Group 1 Label 1"),new SelectItem("Group 1 Value 2", "Group 1 Label 2"),new SelectItem("Group 1 Value 3", "Group 1 Label 3")});SelectItemGroup group2 = new SelectItemGroup("Group 2");group2.setSelectItems(new SelectItem[] {new SelectItem("Group 2 Value 1", "Group 2 Label 1"),new SelectItem("Group 2 Value 2", "Group 2 Label 2"),new SelectItem("Group 2 Value 3", "Group 2 Label 3")});availableItems = Arrays.asList(group1, group2);// Add/generate getter for availableItems.// Note that a setter is unnecessary.}
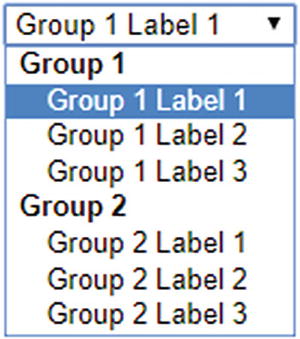
Noted that both model APIs have basically not changed since JSF 1.0 (2004) and that’s why you still see a SelectItemGroup#setSelectItems() method taking a SelectItem[] array instead of a SelectItem… varargs argument . This will certainly be worked on for JSF.next. When referencing it as <f:selectItems value="#{bean.availableItems}" /> in any selection component, below is how it would look for each of them.
The <h:selectOneMenu> will render each group as HTML <optgroup>:
The <h:selectOneRadio layout="pageDirection"> will render it as a nested table:

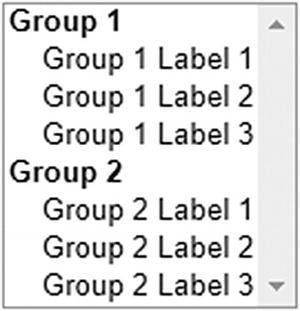
The <h:selectManyListbox> will render each group as HTML <optgroup>:
The <h:selectManyCheckbox layout="pageDirection"> will render it as a nested table :
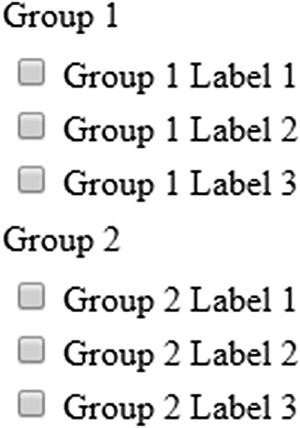
Note the importance of the layout="pageDirection" attribute in <h:selectOneRadio> and <h:selectManyCheckbox>. This will look much better than the default of layout="lineDirection" which would render everything in a big single table row.
Label and Message Components
In an average well-designed form, input elements are usually accompanied with a label element and a message element targeting the input field. In HTML, labels are represented by the <label> element. In JSF, you can use the <h:outputLabel> component to generate an HTML <label> element. HTML does not have a dedicated element to represent a message. In JSF, the <h:message> component generates a HTML <span> element and the <h:messages> component generates either a <ul> element or a <table> element, depending on the value of the layout attribute.
The label element has various SEO (search engine optimization) and usability advantages. It tells in text about the associated input element. Screen readers, like those used by people with visual disabilities, will find the label and tell its contents by sound. Search bots will find the label and index the associated input element as such. And, the label will focus and activate the associated input element when being clicked itself. Text-based input elements will then show the text cursor. Check box and radio input elements will then be toggled. List box and drop-down input elements will then be focused. File input elements will then open the browse dialog. Submit buttons will then be invoked.
The message element is usually to be used to display conversion and validation error messages coming from the server side. This way, the end user is informed about the state of the form and can act accordingly, usually by correcting the input values. You can also use it to display warning or informal messages.
In JSF, the <h:outputLabel>, <h:message> and <h:messages> components have a for attribute wherein you normally define the ID of the associated UIInput component. Following is an example in the flavor of a login form:
<h:form id="login"><fieldset><legend>Login</legend><section><h:outputLabel for="email" value="Email address" /><h:inputText id="email" value="#{login.email}"required="true" /><h:message id="m_email" for="email" /></section><section><h:outputLabel for="password" value="Password" /><h:inputSecret id="password" value="#{login.password}"required="true" /><h:message id="m_password" for="password" /></section><footer><h:commandButton id="submit" value="Login"action="#{login.submit}" /></footer></fieldset></h:form>
You can actually use any arbitrary component search expression in the for attribute. For the <h:outputLabel> component, this doesn’t make much sense. For the <h:message> and <h:messages> components, referring the ID of a non-UIInput component would only make sense when you want to programmatically add a faces message from the managed bean on. But you would then need to know the client ID of the target component.
<h:form id="login">...<h:commandButton id="submit" value="Login"action="#{login.submit}" /><h:message id="m_submit" for="submit" />...</h:form>
The above <h:commandButton> will generate a client ID of "login:submit" in the HTML output. You can then programmatically add a faces message as follows:
public String submit() {try {yourAuthenticator.authenticate(email, password);return "/user/home.xhtml?faces-redirect=true";}catch (YourAuthenticationException e) {FacesContext context = FacesContext.getCurrentInstance();FacesMessage message = new FacesMessage("Authentication failed");context.addMessage("login:submit", message);return null;}}
A better practice, however, is to add the faces message as a global message by passing null as the client ID.
context.addMessage(null, message);Such a message will then only end up in a <h:messages globalOnly="true">.
<h:commandButton id="submit" value="Login"action="#{login.submit}" /><h:messages id="messages" globalOnly="true"rendered="#{component.namingContainer.submitted}" />
Note the logic in the rendered attribute of the messages component. It will thus only be rendered when the submitted property of the NamingContainer parent evaluates to true. In this specific case, it’s consulting the UIForm#isSubmitted(). This is very useful in case you have multiple non-Ajax forms each with its own global messages component and/or a “catch-all” <h:messages redisplay="false"> component somewhere near the bottom of the JSF page, which is then using CSS fixed positioned on top. Otherwise the global message would unintentionally show up over there as well.
This message-rendering logic is not necessary in Ajax forms as you could just fine-tune the message rendering by simply explicitly specifying the message(s) component(s) in the render attribute of <f:ajax>. Moreover, the UIForm#isSubmitted() would unexpectedly return false when the execute attribute of the <f:ajax> does not explicitly target the form as in execute="@form".
Command Components
You’ll have noticed examples of the <h:commandButton> in the previous sections about input and select components. This thus generates an HTML <input type="submit"> element, which is the HTML way to send all input values of the <form> element it is sitting in to the server. On the server side, this component is also capable of invoking one or more Java methods, which are usually defined in the action or actionListener attribute, or via a <f:actionListener> tag nested in the command component. You’ll also have read that the action listener method always runs before the method associated with the action attribute.
You can use the <f:actionListener> tag to register one or more additional action listeners on the very same command component. All those action listeners are invoked in the same order as they’re declared in the view and attached to the component. The target method can be declared in three ways on the <f:actionListener> tag. One way is via the type attribute and the other two ways are via the binding attribute .
<h:commandButton ...><f:actionListener type="com.example.project.SomeActionListener" /><f:actionListener binding="#{beanImplementingActionListener}" /><f:actionListener binding="#{bean.someActionListenerMethod()}" /><h:commandButton>
The type attribute in the first way must basically represent the fully qualified name of the class implementing the ActionListener interface.
package com.example.project;import javax.faces.event.ActionListener;import javax.faces.event.ActionEvent;public class SomeActionListener implements ActionListener {@Overridepublic void processAction(ActionEvent event) {// ...}}
The binding attribute in the second way must basically reference a managed bean instance implementing the ActionListener interface.
@Named @RequestScopedpublic class BeanImplementingActionListener implements ActionListener {@Overridepublic void processAction(ActionEvent event) {// ...}}
And the binding attribute in the third way can basically reference any arbitrary managed bean method which is declared void.
@Named @RequestScopedpublic class Bean {public void someActionListenerMethod() {// ...}}
Note that the third way is more or less undocumented. It has only been possible since the introduction of EL 2.2 (2009), wherein developers could start explicitly declaring method expressions by simply adding the parenthesis, if necessary with arguments. Coincidentally, the binding attribute of the <f:actionListener> could deal with them. Under the hood of the binding attribute is treated as a ValueExpression and the logic expected to obtain a managed bean instance implementing the ActionListener interface when invoking ValueExpression#getValue(). However, instead of a getter, a void method was invoked and returned nothing which is interpreted as null. So, the logic continued silently as if there were simply no bean instance available.
The action listeners have an additional feature on top of the action attribute. When a javax.faces.event.AbortProcessingException is explicitly thrown from an action listener , then JSF will swallow the exception and abort processing the invoke application phase (fifth phase) and immediately advance to the render response phase (sixth phase). All remaining action listeners and the action method, if any, will be skipped. The swallowed exception won’t end up in any error response. Given this fact, and the fact that action listeners are always invoked before the action method, you could (ab)use it to perform some conversion and validation based on already updated model values before the action method is invoked.
public void someActionListenerMethod() {try {convertOrValidate(this);} catch (SomeConversionOrValidationException e) {FacesContext context = FacesContext.getCurrentInstance()context.addMessage(null, new FacesMessage(e.getMessage()));throw new AbortProcessingException(e);}}public void someActionMethod() {// Won't be invoked when AbortProcessingException is thrown.}
I’m saying “(ab)use” because it is essentially the responsibility of a normal Converter or Validator implementation to perform such task, so that the model values are not polluted with invalid values. However, for a long time in JSF it was not possible to perform conversion or validation based on multiple fields. Hence developers started using the action (listener) methods, which is essentially a violation of the JSF life cycle.
Only in JSF 2.3 was a new <f:validateWholeBean> tag introduced to perform validation on multiple fields. You can read more about this in Chapter 5. So this leaves only one reasonable real-world use case open for action listener methods : performing conversion based on one or more model values. One example has already been demonstrated in the section “Selection Components” (the case of using multiple <h:selectBooleanCheckbox> in <ui:repeat> to work around the fact that the <h:selectManyCheckbox> generates an HTML table). Another example would be invoking an external web service with the supplied model values and obtaining its result as a “converted” value. The action method should then still be used to execute business service logic. When the action method throws an exception, the request will end up as an HTTP 500 error response. You can find more about this in Chapter 9.
Apart from the <h:commandButton>, JSF offers two more command components: the <h:commandLink> and the <h:commandScript>. The <h:commandLink> has basically an identical life cycle as the <h:commandButton>, except that it generates an HTML <a> element which submits the enclosed form with the help of JavaScript. Everywhere where you use <h:commandButton>, it could be substituted with <h:commandLink>.
<h:form id="form">...<h:commandLink id="submit" value="Submit" action="#{bean.submit}" /></h:form>
Whereby the generated HTML output looks as follows:
<form id="form" name="form" method="post" action="/project/test.xhtml"enctype="application/x-www-form-urlencoded"><input type="hidden" name="form" value="form" />...<script type="text/javascript"src="/project/javax.faces.resource/jsf.js.xhtml?ln=javax.faces"></script><a id="form:submit" href="#" onclick="mojarra.jsfcljs(document.getElementById('form'),{'form:submit':'form:submit'},''); return false;">Submit</a><input type="hidden" name="javax.faces.ViewState"id="j_id1:javax.faces.ViewState:0"value="-6936791897896630173:-5064219023156239099"autocomplete="off" /></form>
And the rendering in Chrome browser:

In the generated HTML output, you’ll notice that it auto-includes the jsf.js JavaScript file. This contains, among other things, the jsf object and the JSF implementation-specific helper functions which are in case of the Mojarra implementation put in the mojarra object. In plain HTML, there’s no way to submit a <form> using an <a> element. Hence, some JavaScript has to be thrown into the game.
In Mojarra’s specific case, the mojarra.jsfcljs() function will be invoked with the parent form as the first argument, the command component’s client ID as a request parameter name and value as the second argument, and the target attribute of the <h:commandLink> as the third argument, if any. Under the hood of the mojarra.jsfcljs() function will create <input type="hidden"> elements for each name/value pair in the second argument and add them to the form provided as the first argument, making sure that those parameters end up a postback request. Then it will create a temporary <input type="submit"> button, add it to the form, and invoke the click() function on it, as if you would be using a regular submit button. Finally, it will remove all of those dynamically created elements from the form.
This function is actually also used by the <h:commandButton>, but only when you need to pass additional request parameters via one or more <f:param> tags nested in the command component.
<h:form id="form">...<h:commandButton id="submit" value="Submit" action="#{bean.submit}"><f:param name="id" value="#{otherBean.id}" /></h:commandButton></h:form>
Generated HTML output:
<form id="form" name="form" method="post" action="/project/test.xhtml"enctype="application/x-www-form-urlencoded"><input type="hidden" name="form" value="form" /><script type="text/javascript"src="/project/javax.faces.resource/jsf.js.xhtml?ln=javax.faces"></script><input id="form:submit" type="submit" name="form:submit"value="Submit" onclick="mojarra.jsfcljs(document.getElementById('form'),{'form:submit':'form:submit','id':'42'},'');return false" /><input type="hidden" name="javax.faces.ViewState"id="j_id1:javax.faces.ViewState:0"value="886811437739939021:6102567809374231851"autocomplete="off" /></form>
Rendering in Chrome browser:

You can obtain them in the managed bean via @Inject @ ManagedProperty.
@Inject @ManagedProperty("#{param.id}")private Integer id;public void submit() {System.out.println("Submitted ID: " + id);}
Make sure that you import the @ManagedProperty from the right package. JSF offers two, one from the javax.faces.bean package which is deprecated since JSF 2.3 and another one from javax.faces.annotation package which you should be using for CDI. You also need to make sure that you explicitly activate the JSF 2.3-specific feature of CDI-aware EL resolvers by having at least one managed bean in the web application explicitly annotated with @FacesConfig; otherwise the CDI-aware @ManagedProperty would fail to find the current instance of FacesContext via CDI. Also here, <h:commandButton> is substitutable with <h:commandLink>.
There’s another way of passing parameters around via command components—that is, by simply passing them as an action method argument .
<h:form id="form">...<h:commandButton id="submit" value="Submit"action="#{bean.submit(otherBean.id)}"></h:commandButton></h:form>
Whereby the modified action method looks as follows:
public void submit(Integer id) {System.out.println("Submitted ID: " + id);}
In case of the <h:commandButton>, this won’t generate any JavaScript and it thus looks identical as when you aren’t using any action method arguments . This thus also means that the #{otherBean.id} value isn’t passed via HTML source code back to the server as a request parameter. This in turn means that it’s only evaluated during the postback request when JSF is about to invoke the action method. This in turn means that the #{otherBean.id} must at least be @ViewScoped in order to be still available in the postback request. In other words, this argument passing approach is definitely not exchangeable with the <f:param> tag approach whereby both beans can be just @RequestScoped.
The last command component offered by the standard JSF component set is <h:commandScript>. This is new since JSF 2.3. It allows you to invoke a managed bean action method by just calling a named JavaScript function from your own script. The postback request will always be performed via Ajax.
<h:form id="form"><h:commandScript id="submit" name="invokeBeanSubmit"action="#{bean.submit}"></h:commandScript></h:form>
Generated HTML output:
<form id="form" name="form" method="post" action="/project/test.xhtml"enctype="application/x-www-form-urlencoded"><input type="hidden" name="form" value="form" /><script type="text/javascript"src="/project/javax.faces.resource/jsf.js.xhtml?ln=javax.faces"></script><span id="form:submit"><script type="text/javascript">var invokeBeanSubmit = function(o) {var o = (typeof o==='object') && o ? o : {};mojarra.ab('form:submit',null,'action',0,0,{'params':o});}</script></span><input type="hidden" name="javax.faces.ViewState"id="j_id1:javax.faces.ViewState:0"value="3568384626727188032:3956762118801488231"autocomplete="off" /></form>
It has no visible HTML rendering in web browsers. In the generated script, you’ll see that it has generated a function variable with the same name as specified in the name attribute. In this example, it’s indeed in the global scope. As this is considered poor practice in the JavaScript context (“global namespace pollution”), you’d better provide a namespaced function name. This only pre-requires that you’ve already declared your own namespace somewhere before in the HTML document, usually via a JavaScript file in the <head> element. The following example simplifies it with an inline script:
<h:head>...<script>var mynamespace = mynamespace || {};</script></h:head><h:body><h:form id="form"><h:commandScript id="submit" name="mynamespace.invokeBeanSubmit"action="#{bean.submit}"></h:commandScript></h:form></h:body>
Coming back to the generated function variable, you’ll also see that it accepts an object argument and passes it through as “params” property of the last object argument of the Mojarra-specific mojarra.ab() function. That helper function will, under the hood of the mojarra.ab() function, prepare and invoke the jsf.ajax.request() function of the standard JSF JavaScript API. In other words, you can pass JavaScript variables to a managed bean action method this way. They are injectable via @ManagedProperty the same way as if you were using <f:param>. The following example demonstrates the JavaScript call with hard-coded variables in a JavaScript object, but you can of course obtain those variables from anywhere else in JavaScript context:
var params = {id: 42,name: "John Doe",email: "[email protected]"};invokeBeanSubmit(params);
Backing bean class:
@Inject @ManagedProperty("#{param.id}")private Integer id;@Inject @ManagedProperty("#{param.name}")private String name;@Inject @ManagedProperty("#{param.email}")private String email;public void submit() {System.out.println("Submitted ID: " + id);System.out.println("Submitted name: " + name);System.out.println("Submitted email: " + email);}
The <h:commandScript> can also be used to defer the partial rendering of an HTML document to the window load event. To achieve this, simply set the autorun attribute to true and specify the client ID of the target component in the render attribute. The following example loads and renders a data table only when the page has finished loading in the client side:
<h:panelGroup layout="block" id="lazyPersonsPanel"><h:dataTable rendered="#{not empty bean.lazyPersons}"value="#{bean.lazyPersons}" var="person"><h:column>#{person.id}</h:column><h:column>#{person.name}</h:column><h:column>#{person.email}</h:column></h:dataTable></h:panelGroup><h:form id="form"><h:commandScript id="loadLazyPersons" name="loadLazyPersons"autorun="true" action="#{bean.loadLazyPersons}"render=":lazyPersonsPanel"></h:commandScript></h:form>
Whereby the backing bean looks as follows:
@Named @RequestScopedpublic class Bean {private List<Person> lazyPersons;@Injectprivate PersonService personService;public void loadLazyPersons() {lazyPersons = personService.getAll();}public List<Person> getLazyPersons() {return lazyPersons;}}
And the Person entity looks as follows:
public class Person {private Long id;private String name;private String email;// Add/generate getters and setters.}
Note that any persistence framework-specific annotations, such as JPA’s @Entity and @Id, and the actual implementation of PersonService, are omitted for clarity. Those are, namely, irrelevant to any front-end framework, such as JSF.
Coming back to the available command components, it may speak for itself that <h:commandScript> is only useful in order to be able to invoke a JSF managed bean action method using native JavaScript, generally during a specific HTML DOM (Document Object Model) event. However, both <h:commandLink> and <h:commandButton> seem to do exactly the same thing; only the visual presentation is different. One renders a link and the other renders a button. The user experience (UX) consensus is that a button must be used to submit a form, and a link must be used to navigate to another page or jump to an anchor. Using a link to submit a form is therefore not always considered the best practice. It’s only useful when you’d like to submit an HTML form using an icon or image. For all other cases, use a normal button. The following example shows how a command link can be used on a Font Awesome icon :
<h:commandLink id="delete" action="#{bean.delete}"><i class="fa fa-trash" /></h:commandLink>
Navigation
Sometimes, you’d like to navigate to a different JSF page when a certain form has been successfully submitted—for example, from the login page to the user home page, as demonstrated in the section “Label and Message Components,” or from the detail page back to the master page.
Historically, navigation targets must be defined separately in <navigation-rule> entries in the faces-config.xml which then does the job based on the String return value from the action method of UICommand components. This approach turns out to be quite cumbersome in the long term, and not terribly useful for HTML-based web applications. This idea was more or less derived from desktop-oriented applications. Hence, JSF 2.0 introduced the “Implicit navigation ” feature, which allows you to define the navigation target directly in the String return value itself. In other words, instead of the following action method:
public String someActionMethod() {// ...return "someOutcome";}
And the following faces-config.xml entry:
<navigation-rule><navigation-case><from-outcome>someOutcome</from-outcome><to-view-id>/otherview.xhtml</to-view-id></navigation-case></navigation-rule>
you could just do as follows in the action method:
public String someActionMethod() {// ...return "/otherview.xhtml";}
You could even leave out the default suffix of the view technology you’re using.
public String someActionMethod() {// ...return "/otherview";}
You can force a redirect by appending a faces-redirect=true query parameter.
public String someActionMethod() {// ...return "/otherview?faces-redirect=true";}
Returning null would return to the very same view from where the form was submitted. In other words, the end user would stay in the same page. It is cleaner, however, to declare the action method as void.
public void someActionMethod() {// ...}
Coming back to the redirect approach, this is also known as “Post-Redirect-Get” pattern 2 and makes a major difference with regard to bookmarkability and avoiding double submits. Without a redirect after a POST request on a JSF form, the URL (uniform resource locator) in the web browser’s address bar wouldn’t change to the URL of the target page but would just stay the same. That’s caused by the nature of the “postback”: submitting the form back to the very same URL from which the page with the form was served. When JSF is instructed to navigate to a different view without a redirect, then it will basically build and render the target page directly to the response of the current postback request.
This approach has disadvantages. One is that refreshing the page in the web browser would cause the POST request to be re-executed, and thus perform a so-called double submit . This would potentially pollute the data store in the back end with duplicate entries, particularly if the involved relational table doesn’t have proper unique constraints defined. Another disadvantage is that the target page isn’t bookmarkable. The URL currently in the browser’s address bar basically represents the previous page. You won’t get the target page back by bookmarking, copy/pasting, and/or sharing the URL and then opening it in a new browser window.
When JSF is instead instructed to navigate to a different view with a redirect, then it will basically return a very small HTTP response with a status of 302 and a Location header with the URL of the target page therein. When the web browser retrieves such a response, it will immediately fire a brand-new GET request on the URL specified in the Location header. This URL is reflected in the web browser’s address bar and is thus bookmarkable . Also, refreshing the page would only refresh the GET request and therefore not cause a double submit.
Ajaxifying Components
As you have noticed in <h:commandScript> in the section “Command Components,” JSF is capable of firing Ajax requests and performing partial rendering as well. This capability was introduced in JSF 2.0 for the first time with the <f:ajax> tag. This tag can be nested in any component implementing ClientBehaviorHolder interface, or it can be wrapped around a group of components implementing this interface. In the standard JSF component set, almost all HTML components implement ClientBehaviorHolder as well. If you consult the ClientBehaviorHolder Javadoc,3 then you’ll find the following list:
All Known Implementing Classes :
HtmlBody, HtmlCommandButton, HtmlCommandLink, HtmlDataTable, HtmlForm, HtmlGraphicImage, HtmlInputFile, HtmlInputSecret, HtmlInputText, HtmlInputTextarea, HtmlOutcomeTargetButton, HtmlOutcomeTargetLink, HtmlOutputLabel, HtmlOutputLink, HtmlPanelGrid, HtmlPanelGroup, HtmlSelectBooleanCheckbox, HtmlSelectManyCheckbox, HtmlSelectManyListbox, HtmlSelectManyMenu, HtmlSelectOneListbox, HtmlSelectOneMenu, HtmlSelectOneRadio, UIWebsocketThat are thus the <h:body>, <h:commandButton>, <h:commandLink>, <h:dataTable>, <h:form>, <h:graphicImage>, <h:inputFile>, <h:inputSecret>, <h:inputText>, <h:inputTextarea>, <h:button>, <h:link>, <h:outputLabel>, <h:outputLink>, <h:panelGrid>, <h:panelGroup>, <h:selectBooleanCheckbox>, <h:selectManyCheckbox>, <h:selectManyListbox>, <h:selectManyMenu>, <h:selectOneListbox>, <h:selectOneMenu>, <h:selectOneRadio> and <f:websocket>.
You’ll see that all visible input , select, and command components are covered as well.
A requirement of the <f:ajax> is that the ClientBehaviorHolder component is nested in <h:form>, and that <h:head> is being used in the template. The <h:form> basically enables JavaScript to perform a postback request with the right JSF view state associated. The <h:head> basically enables <f:ajax> to automatically include the necessary jsf.js JavaScript file which contains, among others, the mandatory jsf.ajax.request() function .
<h:head id="head"><title>f:ajax demo</title></h:head><h:body><h:form id="form"><h:inputText id="text" value="#{bean.text}"><f:ajax /></h:inputText><h:commandButton id="submit" value="Submit"action="#{bean.submit}"><f:ajax execute="@form" /></h:commandButton></h:form></h:body>
Generated HTML output:
<head id="head"><title>f:ajax demo</title><script type="text/javascript"src="/project/javax.faces.resource/jsf.js.xhtml?ln=javax.faces"></script></head><body><form id="form" name="form" method="post"action="/project/test.xhtml"enctype="application/x-www-form-urlencoded"><input type="hidden" name="form" value="form" /><input id="form:text" type="text" name="form:text"onchange="mojarra.ab(this,event,'valueChange',0,0)" /><input id="form:submit" type="submit" name="form:submit"value="Submit" onclick="mojarra.ab(this,event,'action','@form',0);return false;" /><input type="hidden" name="javax.faces.ViewState"id="j_id1:javax.faces.ViewState:0"value="6345708413515990903:-8460061657159853996"autocomplete="off" /></form></body>
Rendering in Chrome browser (with newlines added) is identical as without Ajax:
In the generated HTML output, you’ll see that the jsf.js JavaScript file containing the necessary JSF Ajax API is auto-included in the HTML head. You’ll also notice that <f:ajax> in <h:inputText> has generated an additional onchange attribute, and in <h:commandButton> an additional onclick attribute, both defining some JSF implementation-specific JavaScript code responsible for performing the Ajax request.
JSF specifies two internal Ajax event types: valueChange and action. Those are the default event types in case <f:ajax> doesn’t have the event attribute specified. When <f:ajax> is attached to a component implementing the EditableValueHolder interface, then the default event type becomes valueChange. For components implementing the ActionSource interface, this is action. For all other ClientBehaviorHolder components, the default event is click. The actual generated HTML DOM event type for those internal event types depends on the component and the associated renderer.
In case of text-based input components and drop-down- and list box-based selection components, the default HTML DOM event type for <f:ajax> is "change". In case of radio- and check box-based selection components and command components, this is "click". You can see this in the generated HTML output, which can be overridden by explicitly specifying the event attribute on the <f: ajax> tag .
<h:inputText ...><f:ajax event="blur" /></h:inputText>
The above example will generate the JavaScript code in the onblur attribute instead of the onclick attribute. The supported values for the event attribute depend on the target ClientBehaviorHolder component. They can be found in the VDL documentation of the component of interest. All on[event] attributes are defined over there. When you remove the “on” prefix on them, then you have a list of supported event types. For example, the VDL documentation of <h:inputText> 4 indicates that the following event types are supported:
blur, change, click, dblclick, focus, keydown, keypress, keyup, mousedown, mousemove, mouseout, mouseover, mouseup, select
When the desired DOM event type occurs on the client side and triggers the associated JSF implementation-specific JavaScript code defined in the on[event] attribute , then ultimately the jsf.ajax.request() function of the standard JSF JavaScript API will be invoked. It will prepare a bunch of predefined postback parameters of which javax.faces.source and javax.faces.behavior.event are the most important ones. The former specifies the client ID of the source component, essentially the value of this.id in JavaScript context. The latter specifies the event type, essentially the value of event.type in JavaScript context. You’ll have guessed that they are derived from the first two arguments passed to the Mojarra-specific mojarra.ab() function as visible in the generated HTML output.
Once fired, the Ajax request will run through the JSF life cycle almost the same way as a non-Ajax request. The restore view phase (first phase), process validations phase (third phase), update model values phase (fourth phase), and invoke application phase (fifth phase) are identical. The apply request values phase (second phase) is slightly different. It will only decode the components that are covered by the execute attribute of the <f:ajax> tag, which defaults to @this (“the current component”). The render response phase (sixth phase) is completely different. Instead of generating a whole HTML document, it generates a special XML document which contains only the generated HTML output of components which are covered by the render attribute of the <f:ajax> tag, which defaults to @none (“no one component”).
The execute and render attributes accept a space-separated collection of component search expressions. This can represent a client ID relative to the closest NamingContainer parent, or an absolute client ID which is always relative to the UIViewRoot, or standard or custom search keywords, or chained combinations thereof. See Chapter 12 for an in-depth explanation of them. For now, we only need to know about the standard search keywords @this, @form, and @none. As its name suggests, the @form keyword refers to the closest parent component of the UIForm type, such as <h:form>.
During the apply request values phase (second phase) of the Ajax request, JSF will, for each component covered by the execute attribute of the <f:ajax> tag in addition to the default decode process, also check if the javax.faces.source request parameter equals the current component’s client ID. If so, then JSF will queue the AjaxBehaviorEvent for the invoke application phase (fifth phase). Under the hood of queueing the AjaxBehaviorEvent, it boils down to the following logic:
FacesContext context = FacesContext.getCurrentInstance();ExternalContext externalContext = context.getExternalContext();Map<String, String> formData = externalContext.getRequestParameterMap();String clientId = component.getClientId(context);String source = formData.get("javax.faces.source");String event = formData.get("javax.faces.behavior.event");if (clientId.equals(source)) {component.getClientBehaviors().get(event).forEach(behavior -> component.queueEvent(new AjaxBehaviorEvent(context, component, behavior)));}
Here, the ClientBehavior basically represents the definition of the <f:ajax> tag. Based on this logic, you will conclude that you can have multiple <f:ajax> tags attached in the very same component, even on same event types. The advantage is that you can, if necessary, register multiple Ajax behavior listeners on the very same event type.
<h:inputText id="foo" ...><f:ajax listener="#{bean.onchangeFoo}" /><f:ajax listener="#{otherBean.onchangeFoo}" /></h:inputText>
Those Ajax behavior listener methods will thus be invoked during the invoke application phase (fifth phase); of course, only when there’s no conversion or validation error during the process validations phase (third phase). In case of command components, those Ajax behavior listener methods will always be invoked before the action listener methods and the action method. Regardless of the target component, the Ajax behavior listener method must be a public void method which can optionally take the AjaxBehaviorEvent argument.
public void onchangeFoo(AjaxBehaviorEvent event) {// ...}
This gives you, in input and select components, the opportunity to perform some business task on a specific Ajax event. Most occurring real-world examples involve preparing another bean property which in turn gets rendered in another component. Think of cascading drop-down menus wherein the available items of the child drop-down menu depend on the selected item of the parent drop-down. In action components, <f:ajax listener> isn’t terribly useful. You already have the possibility to perform the business task in action listener and/or action method. You can just continue using them even when having <f:ajax> attached.
During the render response phase (sixth phase) of the Ajax request, JSF will for each component covered by the render attribute of the <f:ajax> tag generate a XML <update> element which contains the generated HTML output of only the particular component and all of its children, if any. The jsf.ajax.response() function of the standard JSF JavaScript API, which is by the jsf.ajax.request() registered as Ajax callback function, will extract the id attribute of the <update> element, which represents the client ID of the target component, and obtain via JavaScript’s document.getElementById() on the client ID the concrete HTML element and replace it in the HTML DOM tree with the contents of the <update> element.
Following is an example of a form with one required input field having a message attached, and a command button which explicitly targets the message component :
<h:form id="form"><h:inputText id="text" value="#{bean.text}" required="true" /><h:message id="m_text" for="text" /><br /><h:commandButton id="submit" value="Submit" action="#{bean.submit}"><f:ajax execute="@form" render="m_text" /></h:commandButton></h:form>
Figure 4-2 shows how Chrome presents the Ajax response after submitting the form with the input field not filled out. It’s a big one-liner, so it’s scrolled a bit so it starts at the <update> element of interest. It contains the generated HTML output of the <h:message id="m_text"> component.
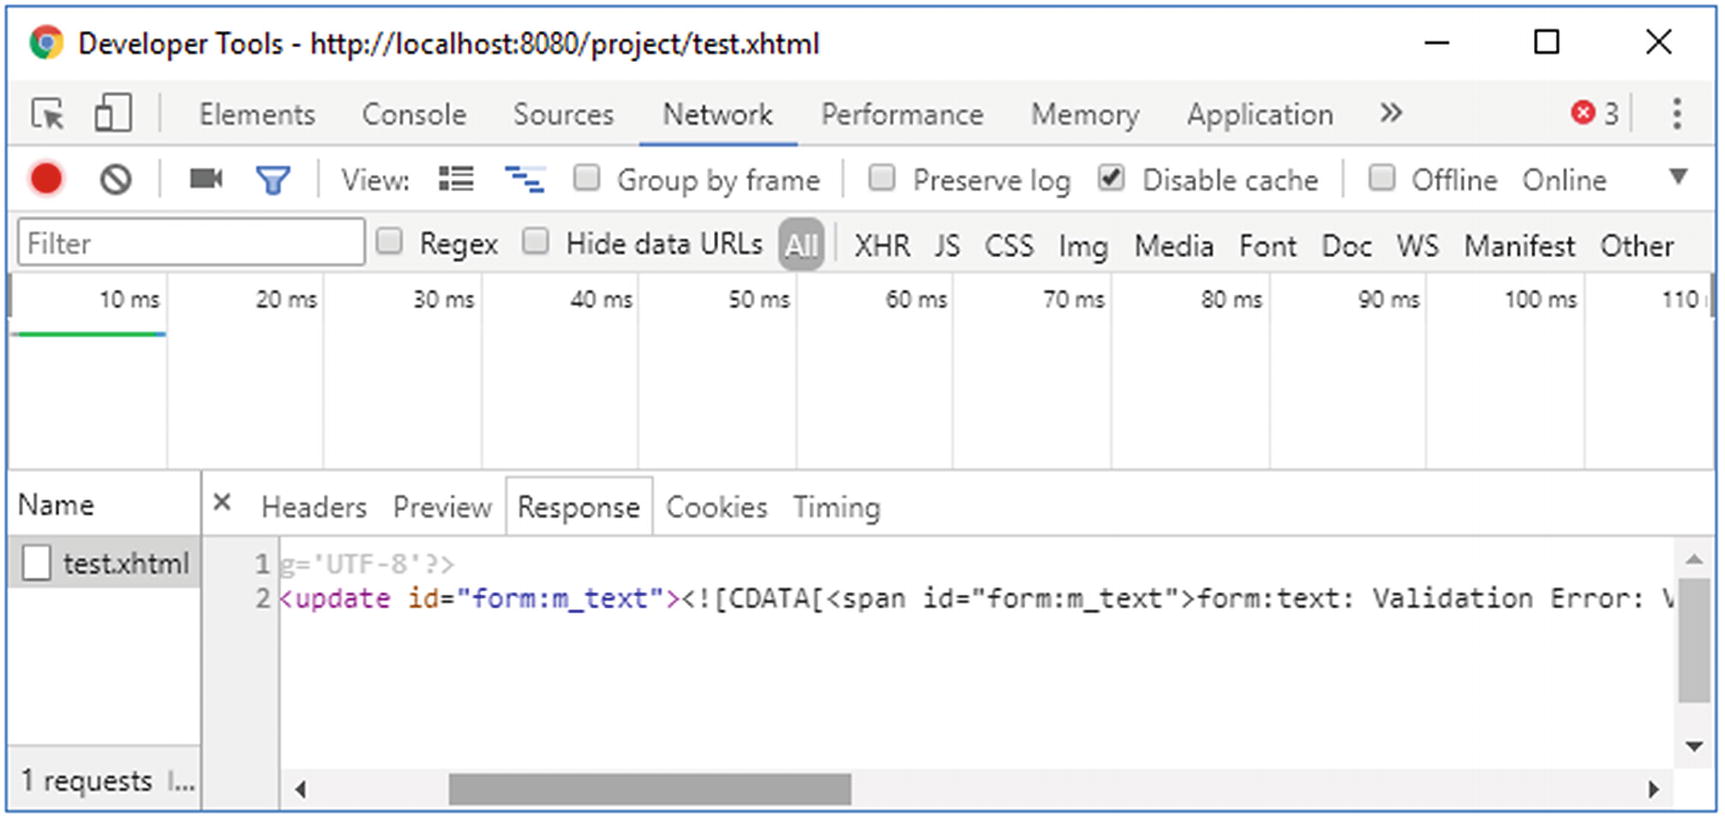
Figure 4-2 Chrome Developer Tools—Network—Response
If you scroll further in the XML response, then you’ll also notice an <update id="j_id1:javax.faces.ViewState:0"> element containing the value of the javax.faces.ViewState hidden input element . This is important for JSF in order to maintain the view state across Ajax requests. When the render attribute happens to cover a UIForm component, then the javax.faces.ViewState hidden input element currently in the HTML document will basically be completely wiped out during the replacement of the element in the HTML DOM tree with contents of the <update> element of the Ajax response.
The missing javax.faces.ViewState hidden input element will eventually be appended to every <form method="post"> of the current UIViewRoot. This approach is actually by design for two reasons: (1) because the view state value could change across Ajax requests and therefore the existing forms currently in the HTML document have to be updated to catch up this change, just in case those forms are not covered by the render attribute; and (2) because the value of the javax.faces.ViewState hidden input field can get quite large when the JSF state saving method is explicitly set to “client” and thus otherwise render an inefficient Ajax response when the render attribute happens to cover multiple forms.
Navigation in Ajax
In UICommand components with a properly defined action method, it’s not different. However, sometimes you’d like to perform navigation in an Ajax listener attached to n UIInput component. There are reasonable real-world use cases for this. However, the UIInput class doesn’t support defining an action method and <f:ajax listener> doesn’t support returning a navigation outcome. Therefore, your only option is to perform the navigation programmatically. This can be done in two ways. The first way is to use the javax.faces.application.NavigationHandler.5
public void ajaxListener(AjaxBehaviorEvent event) {// ...String outcome = "/otherview?faces-redirect=true";FacesContext context = FacesContext.getCurrentInstance();Application application = context.getApplication();NavigationHandler handler = application.getNavigationHandler();handler.handleNavigation(context, null, outcome);}
The second way is to use the javax.faces.context.ExternalContext#redirect().6
public void ajaxListener(AjaxBehaviorEvent event) throws IOException {// ...String path = "/otherview.xhtml";FacesContext context = FacesContext.getCurrentInstance();ExternalContext externalContext = context.getExternalContext();String uri = externalContext.getRequestContextPath() + path;externalContext.redirect(uri);}
There are several differences. Most important, the NavigationHandler can deal with implicit navigation outcome values, but ExternalContext#redirect() can only deal with actual paths and requires manual prefixing of the request context path when it concerns a web application resource. However, it can take basically any URI, such as an external URL as in externalContext.redirect("http://example.com"), whereas the NavigationHandler can’t deal with them.
GET forms
JSF has no concept of “GET forms,” but you can just use plain HTML for this. JSF supports processing GET request parameters and invoking managed bean actions on GET requests. For this, <f:viewParam> and <f:viewAction> can be used. They must be placed in <f:metadata> which in turn can only be declared in the top-level page. So, when using templating , it must be declared in the template client and you can’t declare it in the master template. In other words, <f:metadata> cannot be shared across template clients.
Technically, the location of <f:metadata> in the view doesn’t matter, as long as it’s in the top-level page. Most self-documenting would be to put it in the very top of the view, directly after the root tag.
<!DOCTYPE html><html lang="en"xmlns:="http://www.w3.org/1999/xhtml"xmlns:f="http://xmlns.jcp.org/jsf/core"xmlns:h="http://xmlns.jcp.org/jsf/html"><f:metadata>...</f:metadata><h:head>...</h:head><h:body>...</h:body></html>
When using templating, give it its own template definition.
<ui:composition template="/WEB-INF/templates/layout.xhtml"xmlns:="http://www.w3.org/1999/xhtml"xmlns:f="http://xmlns.jcp.org/jsf/core "xmlns:h="http://xmlns.jcp.org/jsf/html"><ui:define name="metadata"><f:metadata>...</f:metadata></ui:define><ui:define name="content">...</ui:define></ui:composition>
No, you can’t put <f:metadata> in the master template and keep <f:viewParam> and <f:viewAction> in the template client. This is a technical limitation. The best you can do is to create a custom <f:event> type which runs after the invoke application phase (fifth phase) and then declare it in the master template. An example is given in the section “Create Custom Component Event” in Chapter 3.
The <f:viewParam> tag is backed by the UIViewParameter component which in turn extends from UIInput superclass. This means that it behaves almost exactly like <h:inputText>, but then for GET parameters. The subtle differences are found in the process validations phase (third phase). By default, an empty parameter would skip any custom validators and bean validation. For example, the @NotNull bean validation annotation will only work when the context parameter javax.faces.INTERPRET_EMPTY_STRING_SUBMITTED_VALUES_AS_NULL is explicitly set to true in web.xml. The other difference is in the render response phase (sixth phase). Basically, it renders absolutely nothing.
The <f:viewAction> tag is backed by the UIViewAction component which in turn implements the ActionSource interface. This means that it behaves almost exactly like <h:commandButton>, but then for GET requests. Of course, you could also use a @PostConstruct annotated method on a @ViewScoped managed bean for performing logic on GET requests, but the problem is that it would run directly after the managed bean instance is created, when <f:viewParam> hasn’t even had a chance to run. <f:viewAction> will be invoked during the invoke application phase (fifth phase), after the model values are updated. It even supports returning a String representing a navigation outcome, which will then behave as a redirect.
Following is an example of a search form :
Facelets file /search.xhtml:
<f:metadata><f:viewParam id="query" name="query" value="#{search.query}" /><f:viewAction action="#{search.onload}" /></f:metadata><h:body><form><label for="query">Query</label><input type="text" name="query"value="#{empty search.query ? param.query : search.query}"></input><input type="submit" value="Search" /><h:message for="query" /></form><h:dataTable id="results" rendered="#{not empty search.results}"value="#{search.results}" var="result"><h:column>#{result.name}</h:column><h:column>#{result.description}</h:column></h:dataTable></h:body>
Backing bean class com.example.project.view.Search:
@Named @RequestScopedpublic class Search {private String query;private List<Result> results;@Injectprivate SearchService searchService;public void onload() {results = searchService.getResults(query);}// Add/generate getters and setters here.// Note that results doesn't need a setter.}
In the Facelets file there are a couple of things to notice apart from the plain HTML form approach. The value attribute of the text input displays #{param.query} when #{search.query} is empty, because the submitted value would otherwise not show up at all when there's a conversion or validation error on <f:viewParam>. #{param} is actually an implicit EL object referring the request parameter map . #{param.query} basically prints the value of the request parameter with the name “query”. Please note that this construct of the value attribute is invalid for JSF input components. It would throw a javax.el.PropertyNotWritableException during the update model values phase (fourth phase), and, moreover, it is already doing the very same logic under the hood of the <f:viewParam>.
<h:message> can be attached to <f:viewParam>. In this specific construct, however, it’s not really used. Only when you add a converter or validator to <f:viewParam>, for example, by <f:viewParam ... required="true"> would you see the error message in <h:message>, and then <f:viewAction> won’t be invoked.
Now, when you open the page and submit the form, the submitted value will appear as a query string in the URL as in /search.xhtml?query=jsf. This is bookmarkable and re-executable every time you open the URL.
Stateless Forms
State saving is particularly helpful in dynamically manipulated forms which use Ajax to conditionally render parts of the form, such as cascading drop-down menus and secondary input fields. JSF remembers the state of the form across Ajax postbacks on the same view. Generally, it is those forms where you absolutely need a view-scoped managed bean instead of a request-scoped managed bean.
When your web site has "public" and "private" sections, you'd like to postpone the HTTP session creation as much as possible until the end user has actually logged in. This way robots won’t trigger the unnecessary creation of the HTTP session. However, if you have a standard JSF login form in the public section, the HTTP session would already be created by just accessing that page. This is an unnecessary cost in terms of server memory if the form has basically no dynamic state of its own and is tied to a request-scoped managed bean. You could consider using client-side state saving instead, but this will affect the entire web site and it has a cost in terms of network bandwidth and CPU (central procession unit) power. True, the cost is negligible if you have state-of-the-art hardware, but it's not negligible if you have a lot of visitors and/or relatively poor hardware.
In case of static forms tied to a request-scoped bean, such as a simple two-field login form which can theoretically safely be entirely cleared out on every postback, then the view state doesn’t necessarily need to be saved. This can be achieved by setting the transient attribute of <f:view> to true.
<f:view transient="true"><h:form id="login">...</h:form></f:view>
This way JSF won’t create any view state and the javax.faces.ViewState hidden input field will receive a fixed value of “stateless”. Note that this affects the entire view and there’s no way to toggle this for only a specific form. JSF currently does not support configuring the state saving method on a per-form basis. Also, statelessness has an additional disadvantage in that it's theoretically easier to perform a CSRF (cross site request forgery) attack if there's an open XSS hole. (See also the section “Cross Site Request Forgery Protection” in Chapter 13.) Fortunately, with JSF it's already very hard to accidentally introduce a XSS hole. The only way to get a XSS hole is to use <h:outputText escape="false"> to redisplay user-controlled data.