
Technically, the input components as described in Chapter 4 are also output components. They are not only capable of processing any submitted input values but also capable of outputting the model value during the render response phase (sixth phase). This is also visible in the JSF (JavaServer Faces ) API (application programming interface ): the UIInput superclass extends from the UIOutput superclass.
There are also a bunch of components that merely output their model value or even just an HTML element. Those are the pure output components. They don’t participate in all phases of the JSF life cycle. Sometimes they participate during the restore view phase (first phase), in case they are dynamically created or manipulated, but the majority of their job is executed during the render response phase (sixth phase), while generating the HTML output. During the other phases, they don’t do many additional tasks.
Document-Based Output Components
These components are <h:doctype>, <h:head>, and <h:body>. Note that there’s no such component as <h:html>. <h:doctype> is arguably the least used HTML component of the entire standard JSF HTML component set. You could get away with just a plain <!DOCTYPE html> element. <h:doctype> is only useful when you want to have a pure XML representation of the <!DOCTYPE> element, which is generally only the case when you need to store entire JSF views as part of another XML structure of some higher-level abstract layer around JSF.
<h:head> and <h:body> are, since JSF 2.0, the most important tags after <f:view> became optional in Facelets . Historically, <f:view> was mandatory in JSP in order to declare the JSP page being a JSF view. While generating the <head> and <body> elements of the HTML document doesn’t require any special logic, and <h:head> and <h:body> aren’t mandatory for a Facelets page in order to be recognized as a JSF view, those tags are mandatory for the proper automatic handling of JavaScript and CSS (Cascading Style Sheets) resource dependencies, also introduced in JSF 2.0.
<h:head> and <h:body> allow JSF to automatically relocate JavaScript and CSS resource dependencies to the right places in the component tree so that they ultimately end up in the right place in the generated HTML output. From the standard JSF component set only <h:commandLink>, <h:commandScript>, <f:ajax>, and <f:websocket> utilize this facility. They all require the jsf.js JavaScript file being included in the final HTML document. During the view build time, they will basically use UIViewRoot#addComponentResource() 1 to register the component resource dependency at the specified target component, which can be either <h:head> or <h:body>. During the view render time, the renderer associated with the <h:head> and <h:body> component will obtain all so far registered component resource dependencies by UIViewRoot#getComponentResources() 2 and generate the appropriate <link rel="stylesheet"> and <script> elements with a URL (uniform resource locator) referring the associated resource dependency.
As shown in the section “Standard HTML Components” in Chapter 3, the following code is what the most minimal and HTML5-valid JSF page looks like:
<!DOCTYPE html><html lang="en"xmlns:="http://www.w3.org/1999/xhtml"xmlns:h="http://xmlns.jcp.org/jsf/html"><h:head><title>Title</title></h:head><h:body>...</h:body></html>
Text-Based Output Components
These components are <h:outputText>, <h:outputFormat>, <h:outputLabel>, and <h:outputLink>. They all extend from the UIOutput superclass and have a value attribute which can be bound to a managed bean property . During the view render time, the getter will be consulted to retrieve and display any preset value. These components will never invoke the setter method and therefore it could be safely left out of the managed bean class in order to reduce unused code.
Historically, in JSF 1.x on JSP (Java Server Pages ), <h:outputText> was mandatory in order to output a bean property as text. JSP didn’t support JSF-style EL (Expression Language) #{...} in template text. Facelets supported JSF-style EL #{...} in template text and hence bean properties could be outputted directly in Facelets without the need for a whole JSF component. In other words , the following codes are equivalent in JSF on Facelets, <h:outputText>:
<p>Welcome, <h:outputText value="#{user.name}" />!</p>And EL in template text:
<p>Welcome, #{user.name}!</p>It doesn’t need explanation that the latter code snippet is more terse and readable. <h:outputText> has, however, not become useless in Facelets. It’s still useful for the following purposes:
Disabling implicit HTML escaping.
Attaching an explicit converter.
Referencing in <f:ajax render>.
JSF has implicit HTML escaping everywhere. Anything outputted to the HTML response is checked on the HTML special characters “<”, “>”, “&”, and optionally also “"” when outputted within an attribute of an HTML element. Those HTML special characters will be replaced by “<”, “>”, “&”, and “"”, respectively. The web browser will then not interpret those characters as part of the generated HTML output but as plain text and, ultimately, will present them as literal characters to the end user.
Imagine that a user chooses <script>alert('xss')</script> as a username, and it’s emitted via #{user.name} through either one of the above shown code snippets; then JSF will render it as follows in the generated HTML output:
<p>Welcome, <script>alert('xss')</script>!</p>And the web browser will display it literally as “Welcome, <script>alert('xss')</script>!” instead of only “Welcome, !” along with a JavaScript alert with the text “xss” whereby the user-controlled JavaScript is unintentionally actually executed. The end user being able to execute arbitrary JavaScript code is dangerous. It would allow the malicious user to execute specific code which transfers information about session cookies to an external host when someone else logs in and views a page wherein the username of the malicious user is being rendered. (See also the section “Cross-Site Scripting Protection” in Chapter 13.)
On the other hand, there may also be cases whereby you’d like to embed safe HTML code in the generated HTML output. Most common use cases are related to posting messages for other users on a web site, whereby a limited subset of formatting is allowed, such as bold, italics, links, lists, headings, etc. Generally, those are to be entered in a text area element using a predefined human-friendly markup format , such as Markdown, or the lesser known Wikicode, or the ancient BBCode. They are all capable of parsing the raw text with the markup and converting it to safe HTML code whereby any malicious HTML code is already escaped or stripped out.
<h:inputTextarea value="#{message.text}" />The raw text is at least always saved in the database for the record, and the resulting safe HTML code, along with the version of the parser used, can also be saved in the database for performance, so that the parser doesn’t need to be unnecessarily re-executed for the same piece of raw text. Given that we’re going to use Markdown with CommonMark3 and having the following Markdown interface ,
private interface Markdown {public String getText();public void setHtml(String html);public String getVersion();public void setVersion(String version);}
And the following MarkdownListener entity listener,
public class MarkdownListener {private static final Parser PARSER = Parser.builder().build();private static final HtmlRenderer RENDERER =HtmlRenderer.builder().escapeHtml(true).build();private static final String VERSION = getCommonMarkVersion();@PrePersistpublic void parseMarkdown(Markdown markdown) {String html = RENDERER.render(PARSER.parse(markdown.getText()));markdown.setHtml(html);markdown.setVersion(VERSION);}@PreUpdatepublic void parseMarkdownIfNecessary(Markdown markdown) {if (markdown.getVersion() == null) {parseMarkdown(markdown);}}@PostLoadpublic void updateMarkdownIfNecessary(Markdown markdown) {if (!VERSION.equals(markdown.getVersion())) {parseMarkdown(markdown);}}private static String getCommonMarkVersion() {try {Properties properties = new Properties();properties.load(Parser.class.getResourceAsStream("/META-INF/maven/com.atlassian.commonmark"+ "/commonmark/pom.properties"));return properties.getProperty("version");}catch (IOException e) {throw new UncheckedIOException(e);}}}
then the Message entity implementing the Markdown interface and registered with the MarkdownListener entity listener can look as follows:
@Entity @EntityListeners(MarkdownListener.class)public class Message implements Markdown, Serializable {@Id @GeneratedValue(strategy=IDENTITY)private Long id;@Column(nullable = false) @Lobprivate @NotNull String text;@Column(nullable = false) @Lobprivate String html;@Column(nullable = false, length = 8)private String version;@Overridepublic void setText(String text) {if (!text.equals(this.text)) {this.text = text;setVersion(null); // Trigger for MarkdownListener @PreUpdate.}}// Add/generate remaining getters and setters.}
Finally, in order to present the safe HTML code to the end user, you can use <h:outputText> with the escape attribute set to false, whereby you thus instruct JSF that it doesn’t need to implicitly HTML-escape the value.
<h:outputText value="#{message.html}" escape="false" />Next to implicit HTML escaping, JSF also supports implicit conversion. For any property type which is emitted via <h:outputText> or even EL in template text, JSF will look up the converter by class, invoke its Converter#getAsString() method, and render the result. In case you want to explicitly use a specific or a different converter, you have to replace any EL in template text by <h:outputText> and explicitly register the converter on it. Generally, it is those kinds of number- or datetime-related properties that need to be formatted in a locale-specific pattern.
<h:outputText value="#{product.price}"><f:convertNumber type="currency" locale="en_US" /></h:outputText>
The last purpose of <h: outputText> is being able to reference a piece of inline text in <f:ajax render>. By default, <h:outputText> doesn’t generate any HTML code. But if it has at least an attribute specified which must end up in the generated HTML output, such as id or styleClass, then it will generate an HTML <span> element. This is referenceable via JavaScript and thus useful for Ajax-updating specific parts of text. Of course, you could also opt for Ajax-updating some common container component, but this is far less efficient than Ajax-updating only specific parts which really need to be updated.
<h: outputFormat> is an extension of <h:outputText> which parses the value using java.text.MessageFormat API4 beforehand. This is particularly useful in combination with localized resource bundles . An example can be found in the section “Parameterized Resource Bundle Values” in Chapter 14.
<h: outputLabel> basically generates the HTML <label> element, which is an essential part of HTML forms. This was already described in the section “Label and Message Components” in Chapter 4. It is important to note that <h:outputLabel> and <h:outputText> are, in HTML perspective, absolutely not interchangeable. In a relatively recent burst of low-quality programming tutorial sites on the Internet which basically show code snippets without any technical explanation for the sake of advertisement incomes, <h:outputLabel> is often incorrectly being used to output a piece of text in a Hello World JSF page. Such tutorial sites can better be ignored entirely.
<h: outputLink> generates an HTML <a> element. It’s somewhat a leftover of JSF 1.x and isn’t terribly useful since the introduction of the much more useful <h:link> in JSF 2.0. When you don’t need to reference a JSF view with a link, for which you’d use <h:link> instead, you could as well just use a plain HTML <a> element instead of <h:outputLink>. The following tags generate exactly the same HTML.
<h:outputLink value="http://google.com">Google</h:outputLink><a href="http://google.com">Google</a>
The plain HTML equivalent is terser.
Navigation-Based Output Components
These components are <h:link> and <h:button>, both extending from the UIOutcomeTarget superclass. They have an outcome attribute which accepts a logical path to a JSF view. The path will actually be validated if it’s a valid JSF view; otherwise, the link or button will be rendered as disabled. In other words, they don’t accept a path to a non-JSF resource, let alone an external URL. For this, you’d need <h:outputLink> or plain HTML instead.
<h:link> will generate an HTML <a> element with the URL of the target JSF view specified as an href attribute. <h:button> will generate an HTML <input type="button"> element with an onclick attribute which assigns, with help of JavaScript, the URL of the target JSF view to window.location.href property . This is indeed somewhat awkward, but that’s just a limitation of HTML. Neither <input type="button"> nor <button> supports an href-like attribute.
Given the following folder structure in a Maven WAR project in Eclipse,
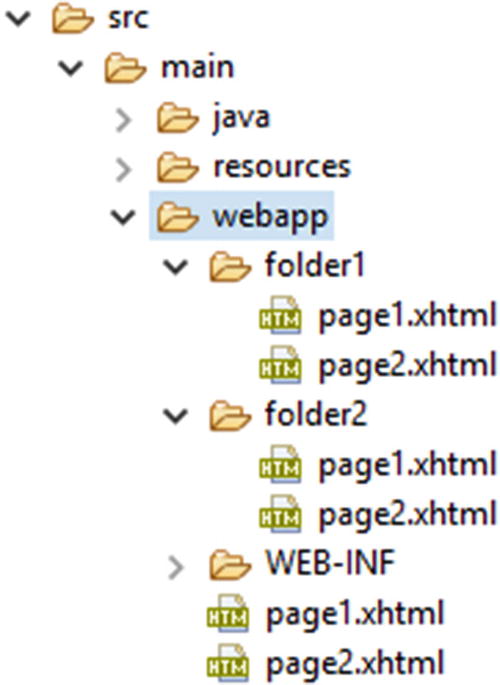
The following <h:link> and <a> pairs enclosed in /folder1/page1.xhtml will all generate exactly the same links.
<h:link outcome="page2" value="link1" /><a href="#{request.contextPath}/folder1/page2.xhtml">link1</a><h:link outcome="/folder2/page1" value="link2" /><a href="#{request.contextPath}/folder2/page1.xhtml">link2</a><h:link outcome="/folder2/page2" value="link3" /><a href="#{request.contextPath}/folder2/page2.xhtml">link3</a><h:link outcome="/page1" value="link4" /><a href="#{request.contextPath}/page1.xhtml">link4</a><h:link outcome="/page2" value="link5" /><a href="#{request.contextPath}/page2.xhtml">link5</a>
Note thus that <h:link> already automatically prepends any context path of the web application project and appends the currently active URL pattern of the FacesServlet mapping. Also note that without the leading slash, the outcome is interpreted relative to the current folder , and with a leading slash, the outcome is interpreted relative to the context path.
Panel-Based Output Components
These components are <h:panelGroup> and <h:panelGrid>, both extending from the UIPanel superclass. <h:panelGroup> has multiple responsibilities. It can generate an HTML <span>, or <div>, or even <td>, depending on the layout attribute and whether it’s enclosed in a <h:panelGrid>.
By default, <h:panelGroup> generates just an HTML <span> element, like <h:outputText>. The main difference is that <h:panelGroup> doesn’t have a value attribute. Instead, the content is represented by its children. It also doesn’t support disabling HTML escaping or attaching a converter. That’s up to any <h:outputText> child. In this context, it’s not terribly useful. <h:panelGroup> is only more useful than <h:outputText> when you need to be able to reference using <f:ajax render> an inline element which in turn groups a bunch of closely related inline elements. Something like the following represents the “user profile ,” which should be Ajax-updatable from within some sort of user profile edit page.
<p>Welcome,<h:panelGroup id="userProfile"><img src="#{user.imageUrl}" />#{user.name}</h:panelGroup></p>...<h:form>...<f:ajax ... render=":userProfile" />...</h:form>
When setting the layout attribute of <h:panelGroup> to block, then it will generate an HTML <div> element . In standard HTML, “inline elements”5 don’t start at a new line by default and don’t allow block element children. And, “block-level elements”6 always start at a new line by default and allow inline as well as block elements as children. Hence the supported values of the layout attribute of <h:panelGroup> are “inline” and “block”. Historically, the layout attribute was only added in JSF 1.2 after complaints from JSF developers about a missing JSF component to represent an HTML <div> element. (See also Chapter 7.) This could be used to wrap larger sections which need to be Ajax-updatable; otherwise a plain HTML <div> is also sufficient.
<h:panelGroup layout="block" id="userProfile"><p>Welcome,<img src="#{user.imageUrl}" />#{user.name}</p></h:panelGroup>
Note that it’s illegal in HTML to have a block element nested in an inline element . The <p> is a block element and hence the layout="block" is absolutely mandatory in the above construct. If you don’t specify this attribute and thus effectively let JSF render an HTML <span> element, then the web browser behavior is unspecified. The average web browser will render the block element children outside the inline element and even possibly error out when this construct is manipulated by JavaScript, such as during a JSF Ajax update action.
Also keep in mind that in the above construct, the <p> tags and the “Welcome” text are also updated during any JSF Ajax update action on the <h:panelGroup>. This is essentially a waste of hardware resources, on both the server side and the client side, as those are static and never subject to changes. When Ajax-updating things, you should preferably ensure that <f:ajax render> only references components that absolutely need to be Ajax-updated and thus not an unnecessarily large section.
When <h: panelGroup> is being nested in a <h:panelGrid> component, which generates an HTML <table> element, then the layout attribute of <h:panelGroup> is ignored and the component will basically act as a container of components which should ultimately end up in the very same cell of the table. That is, the renderer of <h:panelGrid> considers every direct child component as an individual table cell.
Given the following two-column <h: panelGrid>, which should generate a two-column HTML table, what would you guess the actual generated HTML output should look like?
<h:panelGrid columns="2">one<h:outputText value="two" />threefour<h:panelGroup>five</h:panelGroup>sixseven<h:panelGroup>eightnine</h:panelGroup></h:panelGrid>
Hint
Each section of template text between two JSF components is internally considered a single JSF component. In Mojarra, it’s represented by the internal UIInstructions component. The actual component tree hierarchy is thus roughly represented as below.
<h:panelGrid columns="2"><ui:instructions>one</ui:instructions><h:outputText value="two" /><ui:instructions>threefour</ui:instructions><h:panelGroup>five</h:panelGroup><ui:instructions>sixseven</ui:instructions><h:panelGroup>eightnine</h:panelGroup></h:panelGrid>
Note again that there’s no such component as <ui: instructions> in Facelets. The above markup is purely for visualization so that your brain can better process it. This <h:panelGrid> has thus effectively six direct children which will each end up in their own table cell. With two columns, this will thus effectively generate three rows. Here’s the actual generated HTML output (reformatted for readability).
<table><tbody><tr><td>one</td><td>two</td></tr><tr><td>three four</td><td>five</td></tr><tr><td>six seven</td><td>eight nine</td></tr></tbody></table>
Rendering in Chrome browser:
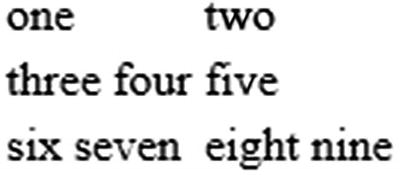
You see, <h:panelGroup> makes sure that “five” and “eight nine” don’t end up in the very same table cell as “six seven.” Also note that it’s unnecessary to wrap any JSF component in <h:panelGroup> if it should represent a single cell already. Therefore, <h:outputText> behind “two” doesn’t need to be wrapped in <h:panelGroup>. You can, of course, do so for better source code readability, but this is technically unnecessary.
If you happen to have a dynamic amount of cells based on a view-scoped model, then you can nest a JSTL (JSP Standard Tag Library ) <c:forEach> in <h:panelGrid> to have it generate them as a data grid with a fixed amount of columns.
<h:panelGrid columns="3"><c:forEach items="#{viewProducts.products}" var="product"><h:panelGroup><h3>#{product.name}</h3><p>#{product.description}</p></h:panelGroup></c:forEach></h:panelGrid>
Note thus that <ui:repeat> is unsuitable here as compared to <c:forEach>, as explained in the section “JSTL Core Tags” in Chapter 3. It will technically work just fine, but the renderer of <h:panelGrid> will interpret it as a single table cell.
Also note that it’s very important for the model to be view scoped, particularly if you have JSF form components inside <h:panelGrid>. The technical reason is that during processing the postback request, JSF expects the model item behind the iteration index to be exactly the same as it was when the page was presented to the end user . In other words, when JSF is about to process a form submit, and an item has been added or removed or even reordered in the meanwhile, causing the iteration index to be changed, the submitted values and/or the invoked action would possibly be performed against the wrong item currently at the initially known index. This is dangerous for the integrity of the model. If you don’t have any JSF form components inside <h:panelGrid>, or if the model isn’t subject to changes during the view scope, e.g., because it’s only created or updated during application startup, then the backing bean behind #{viewProducts} can safely be request scoped.
Data Iteration Component
Yes, there’s only one, <h:dataTable>, which extends from the UIData superclass and generates an HTML <table> based on an iterable data model whereby each item is represented as a single row. The other data iteration component available in JSF, the Facelets <ui:repeat>, doesn’t extend from the UIData superclass and doesn’t emit any HTML output and therefore doesn’t technically count as an “output component.” Also, in the standard JSF component set no such component generates an HTML <ul>, <ol>, or <dl>, but this can relatively easily be created as a custom component extending from UIData. (See also the section “Creating New Component and Renderer” in Chapter 11.)
The value attribute of UIData supports java.lang.Iterable. In other words, you can supply any Java collection as a model value. As index-based access is most used in UIData, most efficient is the java.util.ArrayList as it offers O(1) access by index. The renderer of the <h:dataTable> component supports only <h:column> as a direct child component. Anything else is ignored. As its name hints, <h:column> represents a single column. Each iteration round over the value of <h:dataTable> will basically re-render all columns against the currently iterated item. As with <c:forEach> and <ui:repeat>, the currently iterated item is exposed in EL scope by the var attribute. Following is a basic example which iterates over a List<String>.
<h:dataTable id="strings" value="#{bean.strings}" var="string"><h:column>#{string}</h:column></h:dataTable>
Backing bean class com.example.project.view.Bean:
@Named @RequestScopedpublic class Bean {private List<String> strings;@PostConstructpublic void init() {strings = Arrays.asList("one", "two", "three");}public List<String> getStrings() {return strings;}}
Generated HTML output:
<table><tbody><tr><td>one</td></tr><tr><td>two</td></tr><tr><td>three</td></tr></tbody></table>
Rendering in Chrome browser:
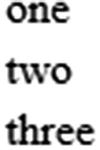
It is important to note that the variable name as specified by the var attribute shouldn’t clash with existing managed bean names or even with implicit EL objects. Implicit EL objects have higher precedence in EL resolving. One example of an implicit EL object is #{header} which refers to ExternalContext#getRequestHeaderMap().7 So when you happen to have #{bean.headers} and you’d like to present it in an iterating component, then you can’t use var="header" and you’d better think of a different name, such as var="head".
Following is a more elaborate example which shows a list of products . A similar table was shown earlier in Chapter 5.
<h:dataTable id="products" value="#{products.list}" var="product"><h:column><f:facet name="header">ID</f:facet>#{product.id}</h:column><h:column><f:facet name="header">Name</f:facet>#{product.name}</h:column><h:column><f:facet name="header">Description</f:facet>#{product.description}</h:column></h:dataTable>
Backing bean class com.example.project.view.Products:
@Named @RequestScopedpublic class Products {private List<Product> list;@Injectprivate ProductService productService;@PostConstructpublic void init() {list = productService.list();}public List<Product> getList() {return list;}}
Product entity: com.example.project.model. Product:
@Entitypublic class Product {@Id @GeneratedValue(strategy=IDENTITY)private Long id;@Column(nullable = false)private @NotNull String name;@Column(nullable = false)private @NotNull String description;// Add/generate getters+setters.}
Product service: com.example.project.service.ProductService:
@Statelesspublic class ProductService {@PersistenceContextprivate EntityManager entityManager;@TransactionAttribute(SUPPORTS)public List<Product> list() {return entityManager.createQuery("FROM Product ORDER BY id DESC", Product.class).getResultList();}}
Generated HTML output :
<table><thead><tr><th scope="col">ID</th><th scope="col">Name</th><th scope="col">Description</th></tr></thead><tbody><tr><td>3</td><td>Three</td><td>The third product</td></tr><tr><td>2</td><td>Two</td><td>The second product</td></tr><tr><td>1</td><td>One</td><td>The first product</td></tr></tbody></table>
Rendering in Chrome browser:
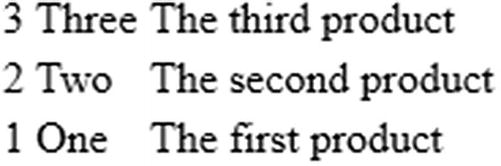
It is important to note that the model behind the value attribute of <h: dataTable> must refer a bean property which is already prepared beforehand in a one-time life cycle event, such as @PostConstruct or <f:viewAction>. This doesn’t apply specifically to UIData components but to basically every JSF component. That is, the getter method may be invoked multiple times during the JSF life cycle, especially when referenced in the value attribute of an iteration component or in the rendered attribute of any JSF component.
The technical reason is that any EL value expression is, behind the scenes, created as a javax.el.ValueExpression instance which internally basically just holds the literal EL string such as #{products.list} and any ValueExpression#getValue() call on it would simply re-evaluate the expression against the provided EL context. This is normally a very cheap operation, done in nanoseconds, but it may slow down drastically when the getter method in turn performs a relatively expensive database query which may take tens or even hundreds of milliseconds.
Iteration components may invoke the getter method during every phase of the JSF life cycle when the iteration component happens to have form components nested. When you prepare the model by obtaining a list from the database in the getter method, this would cause the database to be queried on every single getter method call, which is plainly inefficient. Moreover, the same problems with regard to resolving the iterated item of interest based on the iteration index may occur as described in the last paragraph of the previous section about <h:panelGrid> with <c:forEach>.
Another thing to note is <f:facet name="header">. This generates basically <thead> with the content in <th>. <h:dataTable> also supports <f:facet name="footer"> which will then generate the <tfoot> with the content in <td>. You can usually find all supported <f:facet> names in the tag documentation, as well as in the <h:dataTable> tag documentation.8
Basically, you can put anything inside <h:column> to represent the cell content. Even form components or a nested <h:dataTable> or <ui:repeat>. Following is a small example which shows a fictive Set<Tag> tags property of Product entity in a nested <ui:repeat>.
<h:dataTable id="products" value="#{products.list}" var="product">...<h:column><ui:repeat value="#{product.tags}" var="tag">#{tag.name}<br/></ui:repeat></h:column></h:dataTable>
Editable <h:dataTable>
As to form components nested inside <h:column>, you can substitute EL in template text with input components as follows:
<h:form id="list"><h:dataTable id="products" value="#{products.list}" var="product"><h:column><f:facet name="header">ID</f:facet>#{product.id}</h:column><h:column><f:facet name="header">Name</f:facet><h:inputText id="name" value="#{product.name}" /><h:message for="name" /></h:column><h:column><f:facet name="header">Description</f:facet><h:inputTextarea id="description"value="#{product.description}"></h:inputTextarea><h:message for="description" /></h:column></h:dataTable><h:commandButton id="save" value="Save" action="#{products.save}"><f:ajax execute="@form" render="@form" /></h:commandButton></h:form>
Whereby the save() method of the backing bean class basically looks as follows, after having changed the backing bean class to be a @ViewScoped one instead of a @RequestScoped one:
public void save() {productService.update(products);}
And the update() method of the service class in turn looks as follows:
@TransactionAttribute(REQUIRED)public void update(Iterable<Product> products) {products.forEach(entityManager::merge);}
Note that you don’t need to worry at all about collecting the submitted values. JSF has already done that task for you. Also note that you don’t need to worry about uniqueness of the component IDs within <h:dataTable>, as that component already implements the NamingContainer interface and prepends its own client ID and the iteration index to the client ID of the child components , as you can see in the following generated HTML output:
<table id="list:products"><thead><tr><th scope="col">ID</th><th scope="col">Name</th><th scope="col">Description</th></tr></thead><tbody><tr><td>3</td><td><input id="list:products:0:name" type="text"name="list:products:0:name" value="Three"></input></td><td><textarea id="list:products:0:description"name="list:products:0:description">The third product</textarea></td></tr><tr><td>2</td><td><input id="list:products:1:name" type="text"name="list:products:1:name" value="Two"></input></td><td><textarea id="list:products:1:description"name="list:products:1:description">The second product</textarea></td></tr><tr><td>1</td><td><input id="list:products:2:name" type="text"name="list:products:2:name" value="One"></input></td><td><textarea id="list:products:2:description"name="list:products:2:description">The first product</textarea></td></tr></tbody></table>
It must be said that having an editable table like this is not terribly efficient, certainly not when the table contains a lot of columns and rows . JSF can handle it pretty well; only the average web browser will have a hard time handling it, certainly when the number of rows exceeds a few thousand. And then I’m not speaking about the end user potentially going crazy from scrolling through the whole page all the time and basically having no clear overview. There are several solutions to this: first and foremost is pagination; second is filtering; third is row-based inline editing and updating; and fourth is external editing in a dialog or detail page.
All the mentioned table-specific performance and usability solutions are not offered by the standard <h:dataTable> and therefore require quite an amount of custom code. It’s strongly recommended that you look for an existing JSF component library supporting these features in order to make your JSF life easier without the need to reinvent the wheel. Currently the most widely used one is PrimeFaces with its <p:dataTable>.9 This can even be further simplified with <op:dataTable> of OptimusFaces,10 which is in turn based on <p:dataTable>. Editing in a detail page is only doable with standard JSF, and it’s demonstrated in the “Custom Converters” section of Chapter 5.
It should be said that in the specific case of the previously shown List<String> example, turning the column from output to input isn’t as easily done as with the List<Product> example. In other words , the following example won’t work at all.
<h:form><h:dataTable value="#{bean.strings}" var="string"><h:column><h:inputText value="#{string}" /></h:column></h:dataTable><h:commandButton value="Save" action="#{bean.save}"><f:ajax execute="@form" /></h:commandButton></h:form>
The technical problem is that java.lang.String is immutable and doesn’t have a public setter method for its internal value. True, it indeed also doesn’t have a getter, but EL already defaults to Object#toString() which in case of String just returns the very string itself. This can be solved by referencing the model value by an index as follows:
<h:form><h:dataTable binding="#{table}" value="#{bean.strings}" var="string"><h:column><h:inputText value="#{bean.strings[table.rowIndex]}" /></h:column></h:dataTable><h:commandButton value="Save" action="#{bean.save}"><f:ajax execute="@form" /></h:commandButton></h:form>
Note the binding attribute. Basically, during the view build time, this sets the current UIComponent instance as an EL variable identified by the given name. In this particular snippet, it will thus make the #{table} variable to reference the concrete HtmlDataTable instance behind the <h:dataTable> tag. The #{table} variable is, then during the view build time, referenceable only after the tag location in the view and during the view render time anywhere in the view. In this way, you can access its properties as if it were a bean. #{table.rowIndex} basically thus refers to the UIData#getRowIndex() method,11 which returns the current iteration index. And, finally, this is used to reference the item of interest in the list. During the update model values phase (fourth phase) JSF will simply replace the item at the specified index.
Also for the binding attribute it’s very important that the variable name shouldn’t clash with existing managed bean names or implicit EL objects and for sure not with other components in the same view. You can alternatively let the binding attribute reference a backing bean property as follows:
<h:dataTable binding="#{bean.table}" ...>With:
private UIData table; // +getter +setterBut this is fairly useless if it isn’t used anywhere else in the backing bean. Moreover, this is dangerous when the managed bean scope is wider than request (see also the section “View Build Time” in Chapter 3. It is better not to bind component instances to a backing bean at all; it might indicate a poor practice. The only reasonable real-world use case in JSF 2.x is binding composite component children to a backing component (see also the section “Composite Components” in Chapter 7).
In case you’re using <ui:repeat> or <c:forEach> instead of <h:dataTable> on something like a List<String>, then you can obtain the iteration index in a much simpler way, via the varStatus attribute .
<h:form><ui:repeat value="#{bean.strings}" var="string" varStatus="loop"><h:inputText value="#{bean.strings[loop.index]}" /><br/></ui:repeat><h:commandButton value="Save" action="#{bean.save}"><f:ajax execute="@form" /></h:commandButton></h:form>
Add/Remove Rows in <h:dataTable>
Coming back to the <h: dataTable> with List<Product>, there may be cases in which you’d like to be able to add or remove items while staying in the same view, usually in some sort of an admin page. In order to add a new Product, we need to prepare a new instance in the managed bean, fill it in a separate form, persist it, and then refresh the table.
<h:form id="list"><h:dataTable id="products" value="#{products.list}" ...>...</h:dataTable></h:form><h:form id="add"><h:outputLabel for="name" value="Name" /><h:inputText id="name" value="#{products.product.name}" /><h:message for="name" /><h:outputLabel for="description" value="Description" /><h:inputTextarea id="description"value="#{products.product.description}"></h:inputTextarea><h:message for="description" /><h:commandButton id="add" value="Add" action="#{products.add}"><f:ajax execute="@form" render="@form :list:products" /></h:commandButton></h:form>
Whereby the relevant backing bean code looks as follows:
private List<Product> list; // +getterprivate Product product = new Product(); // +getter@PostConstructpublic void init() {list = productService.list();}public void add() {productService.create(product);list.add(0, product);product = new Product();}
With this create() method in service class:
@TransactionAttribute(REQUIRED);public Long create(Product product) {entityManager.persist(product);return product.getId();}
Removing could be done in several ways. In any case, you may need an additional column to hold the submit buttons or radio buttons or check boxes. The easiest way is a column with a command button which deletes the currently iterated item and then refreshes the table.
<h:form id="list"><h:dataTable id="products" value="#{products.list}" var="product">...<h:column><h:commandButton id="delete" value="Delete"action="#{products.delete(product)}"><f:ajax render="@namingcontainer" /></h:commandButton></h:column></h:dataTable></h:form>
With this delete(Product) method in a @ViewScoped backing bean class:
public void delete(Product product) {productService.delete(product);list.remove(product);}
And this delete() method in service class:
@TransactionAttribute(REQUIRED)public void delete(Product product) {if (entityManager.contains(product)) {entityManager.remove(product);}else {Product managedProduct = getById(product.getId());if (managedProduct != null) {entityManager.remove(managedProduct);}}}
Note the render attribute of <f:ajax>. It specifies @namingcontainer, which basically references the closest parent NamingContainer component. From the standard JSF HTML component set, only <h:form> and <h:dataTable> are instances of NamingContainer. In this specific construct, @namingcontainer thus references the <h:dataTable>. You could also have used <f:ajax render=":list:products"> instead; it’s only slightly verbose. The <f:ajax render="products"> wouldn’t work, because it will try to find it within the context of the currently iterated row, which is basically within all <h:column> components .
Select Rows in <h:dataTable>
Having a radio button column in a <h: dataTable> is natively possible since JSF 2.3 thanks to the new group attribute of the <h:selectOneRadio> (see also the section “Selection Components” in Chapter 4).
<h:form id="list"><h:dataTable id="products" value="#{products.list}" var="product"><h:column><h:selectOneRadio id="selected" group="selected"value="#{products.selected}"><f:selectItem itemValue="#{product}" /></h:selectOneRadio></h:column>...</h:dataTable><h:commandButton id="deleteSelected" value="Delete selected product"action="#{products.deleteSelected}"><f:ajax execute="@form" render="products" /></h:commandButton></h:form>
With this deleteSelected() method in a @ViewScoped backing bean class:
private Product selected; // +getter +setterpublic void deleteSelected() {productService.delete(selected);list.remove(selected);}
Note that you need a ProductConverter or BaseEntityConverter here as well. Those are elaborated in the section “Custom Converters” in Chapter 5.
The check box selection is a little more convoluted. You’d intuitively grab <h:selectManyCheckbox>, but this doesn’t yet support the group attribute as <h:selectOneRadio> does. You’d need to fall back to <h:selectBooleanCheckbox> with a Map<Product, Boolean> whereby the map key represents the currently iterated product and the map value represents the check box value.
<h:form id="list"><h:dataTable id="products" value="#{products.list}" var="product"><h:column><h:selectBooleanCheckbox id="selection"value="#{products.selection[product]}"></h:selectBooleanCheckbox></h:column>...</h:dataTable><h:commandButton id="deleteSelected" value="Delete selected products"action="#{products.deleteSelected}"><f:ajax execute="@form" render="products" /></h:commandButton></h:form>
The modified deleteSelected() method in the @ViewScoped backing bean looks as follows:
private Map<Product, Boolean> selection = new HashMap<>(); // +getterpublic void deleteSelected() {List<Product> selected = selection.entrySet().stream().filter(Entry::getValue).map(Entry::getKey).collect(Collectors.toList());productService.delete(selected);selected.forEach(list::remove);selection.clear();}
The overloaded ProductService#delete(Iterable) method looks as follows:
@TransactionAttribute(REQUIRED)public void delete(Iterable<Product> products) {products.forEach(this::delete);}
Dynamic Columns in <h:dataTable>
With <h:dataTable>, with the help of JSTL <c:forEach>, it is also possible to dynamically create multiple <h:column> instances based on a Java model which is at least view scoped. A request-scoped model can also, but this doesn’t guarantee that during a postback request it is exactly the same as it was during the preceding request, and therefore there is a risk of the dynamic <h:column> composition being off.
The value of the <c:forEach> should reference a collection including at least the entity property names or even map keys. You can then use the brace notation in EL as in #{entity[propertyName]} or #{map[key]} to reference the actual value. This works for both UIOutput and UIInput components. The following example illustrates how you could achieve this for a List<Product>.
Backing bean:
@Named @RequestScopedpublic class Products {private List<Product> list;private List<String> properties;@Injectprivate ProductService productService;@PostConstructpublic void init() {list = productService.list();properties = Arrays.asList("id", "name", "description");}// Add/generate getters (setters not needed here).}
Facelets file:
<h:dataTable value="#{products.list}" var="product"><c:forEach items="#{products.properties}" var="property"><h:column>#{product[property]}</h:column></c:forEach></h:dataTable>
You could even generalize this further for other entities of a common superclass , such as BaseEntity, whereby you obtain the relevant property names from the entity service.
Resource Components
JSF offers three resource components , <h:graphicImage>, <h:outputScript>, and <h:outputStylesheet>, for image resources, JavaScript resources, and CSS resources, respectively. They can reference physical resource files as well as dynamic resource files. The physical resource files themselves must be placed in the /resources subfolder of the main web folder. The dynamic resource files can be handled with a custom ResourceHandler which intercepts on a specific library name and/or resource name. Given the following folder structure in a Maven WAR project in Eclipse,

the resources are referenceable as follows:
<h:graphicImage name="images/some.svg" /><h:outputScript name="scripts/some.js" /><h:outputStylesheet name="styles/some.css" />
The generated HTML output looks as follows, provided that /project is the context path of the web application :
<img src="/project/javax.faces.resource/images/some.svg.xhtml" /><script type="text/javascript"src="/project/javax.faces.resource/scripts/some.js.xhtml"></script><link type="text/css" rel="stylesheet"href="/project/javax.faces.resource/styles/some.css.xhtml" />
You’ll see that it’s prefixed with /javax.faces.resource path and suffixed with the currently active URL pattern of the FacesServlet. The /javax.faces.resource is represented by the constant ResourceHandler#RESOURCE_IDENTIFIER.12 That the resource URL matches the URL pattern of the FacesServlet ensures that it will actually invoke the FacesServlet which in turn knows how to handle the resource. It will first invoke ResourceHandler#isResourceRequest(), which by default determines if the URL prefix starts with the known RESOURCE_IDENTIFIER constant, and if so then delegates to ResourceHandler#handleResourceRequest() instead of going through the JSF life cycle.
Also note that the web resources are not placed in the src/main/resources folder but in the src/main/webapp/resources folder. The src/main/resources folder is only for non-class resources which must end up in the classpath, such as resource bundle files. These classpath resources are then obtainable by ClassLoader#getResource().13 src/main/webapp/resources doesn’t end up in the classpath; instead, it ends up in the web content. These web resources are then obtainable by ExternalContext#getResource(),14 which delegates under the hood to ServletContext#getResource().15
The name attribute thus basically represents the path to the resource relative to the src/main/webapp/resources folder. These components also support a library attribute. The library attribute must represent the unique resource library name of a JSF library. For standard JSF, the resource library name is “javax.faces”, for PrimeFaces,16 the resource library name is “ primefaces”, for OmniFaces,17 the resource library name is “ omnifaces”, for BootsFaces,18 the resource library name is “ bsf”, and so on. Normally, these library-specific resources are already automatically included by the JSF library in question, usually declaratively via the @ResourceDependency annotation on the UIComponent or Renderer class, and sometimes programmatically via UIViewRoot#addComponentResource(). This is elaborated in the section “Resource Dependencies” in Chapter 11. Those resources can if necessary be referenced using a resource component whereby you thus explicitly specify the library attribute.
The following example explicitly includes the standard JSF jsf.js file:
<h:head>...<h:outputScript library="javax.faces" name="jsf.js" /></h:head>
This is usually unnecessary as the JSF components depending on this script, such as <h:commandLink>, <f:ajax>, and <f:websocket> already automatically include it. Here’s another example which explicitly includes the jquery.js file from PrimeFaces library —this works of course only if you have PrimeFaces installed.
<h:head>...<h:outputScript library="primefaces" name="jquery/jquery.js" /></h:head>
This can be useful when you’d like to reuse the PrimeFaces-provided jQuery library on a page that doesn’t necessarily contain PrimeFaces components. That is, this script won’t be automatically included when the page doesn’t contain any PrimeFaces component, but you might happen to have some web project-specific scripts which in turn depend on jQuery. JSF resource management will already make sure that both automatically included and explicitly included JavaScript and CSS resources don’t get duplicated in the generated HTML output. In other words, the above line which explicitly includes jQuery can safely be used on a page that does contain a PrimeFaces component .
Note that there are currently a relatively large number of poor-quality JSF tutorials on the Internet which don’t correctly use the library attribute. Instead, those tutorials incorrectly demonstrate the library attribute to represent the subfolder within the src/main/webapp/resources folder—something like the following:
<h:graphicImage library="images" name="some.svg" /><h:outputScript library="scripts" name="some.js" /><h:outputStylesheet library="styles" name="some.css" />
This is outright wrong. It doesn’t offer any custom resource handler to distinguish library-specific resources from each other. In the above example, you’d basically need to check three different resource libraries even though all those resources belong to the very same library—the web project itself.
Talking about custom resource handlers, imagine that you want to compel the web browser to forcibly reload the image, JavaScript, and/or CSS resource when it has changed in the server side instead. This can be achieved by adding a query string parameter to the resource URL whose value represents the version of the resource. This is also called “cache busting .” In JSF, this can be achieved with a custom ResourceHandler which decorates the Resource to return its last modified timestamp as a query string parameter.
public class VersionResourceHandler extends ResourceHandlerWrapper {public VersionResourceHandler(ResourceHandler wrapped) {super(wrapped);}@Overridepublic Resource createResource(String name, String library) {Resource resource = super.createResource(name, library);if (resource == null || library != null) {return resource;}return new ResourceWrapper(resource) {@Overridepublic String getRequestPath() {String url = super.getRequestPath();return url+ (url.contains("?") ? "&" : "?")+ "v=" + getLastModified();}private long getLastModified() {try {return getWrapped().getURL().openConnection().getLastModified();}catch (IOException ignore) {return 0;}}};}}
In order to activate it, register it in the faces-config.xml as follows:
<application><resource-handler>com.example.project.resourcehandler.VersionResourceHandler</resource-handler></application>
Note that the createResource() method returns the created resource unmodified when it’s null or when the library is not null. The resource itself is null when the name is unknown. The library is null when it’s unspecified and thus specific to the web project. You could of course also apply this logic to all resources of other libraries, but they usually already have their own version of a resource handler.
Coming back to the resource components, you can place <h:graphicImage> only inside the body, which can be both the plain HTML <body> or the JSF <h:body>. Obviously, in an HTML document, you can have an <img> element only inside the document body. You can place <h:outputScript> and <h:outputStylesheet> basically anywhere in the JSF page. The <h:outputScript> will by default generate the HTML <script> element at exactly the declared location, regardless of being in the head or the body of the document. <h:outputStylesheet>, however, will by default be moved to the end of <h:head> when declared inside <h:body>. That is, in HTML it’s illegal to have a <link rel="stylesheet"> outside <head>. The <h: outputScript> can also be automatically moved to end of document head when declared inside <h:body> with the target attribute set to head. When the target attribute of <h:outputScript> is set to body, then it will be automatically moved to end of the document body. <h:outputStylesheet> doesn’t support it. In other words, the following test Facelet,
<h:head><title>Resource component relocation demo.</title><h:outputStylesheet name="style1.css" /><h:outputScript name="script1.js" /><h:outputScript name="script2.js" target="head" /><h:outputScript name="script3.js" target="body" /></h:head><h:body><p>Paragraph 1</p><h:outputStylesheet name="style2.css" /><h:outputScript name="script4.js" /><h:outputScript name="script5.js" target="head" /><h:outputScript name="script6.js" target="body" /><p>Paragraph 2</p></h:body>
will basically generate the following HTML output (URLs simplified for brevity).
<head><title>Resource component relocation demo.</title><script type="text/javascript" src="script1.js"></script><link type="text/css" rel="stylesheet" href="style1.css" /><script type="text/javascript" src="script2.js"></script><link type="text/css" rel="stylesheet" href="style2.css" /><script type="text/javascript" src="script5.js"></script></head><body><p>Paragraph 1</p><script type="text/javascript" src="script4.js"></script><p>Paragraph 2</p><script type="text/javascript" src="script3.js"></script><script type="text/javascript" src="script6.js"></script></body>
In other words, the resource rendering order in the document head is:
1. <h:outputScript> from <h:head> without target.
2. <h:outputStylesheet> from <h:head>.
3. <h:outputScript> from <h:head> with target="head".
4. <h:outputStylesheet> from <h:body>.
5. <h:outputScript> from <h:body> with target="head".
Note that <h:outputStylesheet> implicitly infers target="head" and is therefore rendered after <h:outputScript> without any target. All JavaScript and CSS resources which are automatically included via the @ResourceDependency annotation of components will end up between the resources declared in <h:head> and those declared in <h:body>. So if you happen to use a JSF library which automatically includes a bunch of CSS resources, and you’d like to override some of them, you’d best put such <h:outputStylesheet> in <h:body> so that you can guarantee that it’s loaded after the library’s.
Beware though, some JSF libraries will automatically override the default renderer of <h:head> which may mess up the default resource ordering. In such a case, you’d best consult the documentation of the JSF library in question for new ordering rules, or to restore the default renderer of <h:head> via the web project’s faces-config.xml.
<render-kit><renderer><component-family>javax.faces.Output</component-family><renderer-type>javax.faces.Head</renderer-type><renderer-class>com.sun.faces.renderkit.html_basic.HeadRenderer</renderer-class></renderer></render-kit>
In case you’re using MyFaces instead of Mojarra as JSF implementation, use org.apache.myfaces.renderkit.html.HtmlHeadRenderer instead as the renderer class .
In case you intend to develop such a JSF library which automatically includes specific resources, keep in mind to use @ResourceDependency or UIViewRoot#addComponentResource() instead of replacing the default renderer of <h:head> for the purpose. As annotations don’t allow specifying dynamic values, any dynamic resources can best be added during the PostAddToView event of <h:head>. This can be achieved application-wide with a SystemEventListener as follows assuming that the JSF library’s resource library name is “foo”:
public class DynamicResourceListener implements SystemEventListener {private static final String LIBRARY = "foo";@Overridepublic boolean isListenerForSource(Object source) {UIOutput output = (UIOutput) source;return "javax.faces.Head".equals(output.getRendererType());}@Overridepublic void processEvent(SystemEvent event) {FacesContext context = event.getFacesContext();String scriptName = "foo.js"; // Can be dynamic.addResource(context, scriptName);String stylesheetName = "foo.css"; // Can be dynamic.addResource(context, stylesheetName);}private void addResource(FacesContext context, String name) {UIComponent resource = new UIOutput();resource.getAttributes().put("library", LIBRARY);resource.getAttributes().put("name", name);resource.setRendererType(context.getApplication().getResourceHandler().getRendererTypeForResourceName(name));context.getViewRoot().addComponentResource(context, resource, "head");}}
which is registered in faces-config.xml as follows:
<system-event-listener><system-event-listener-class>com.example.project.listener.DynamicResourceListener</system-event-listener-class><system-event-class>javax.faces.event.PostAddToViewEvent</system-event-class><source-class>javax.faces.component.UIOutput</source-class></system-event-listener>
Note that <source-class> could better have been a javax.faces.component.html.HtmlHead, but this doesn’t necessarily work across all JSF implementations. In, for example, Mojarra, <h:head> implicitly creates an instance of UIOutput instead of HtmlHead.
Once installed, this DynamicResourceListener will result in the following HTML output for exactly the last shown test Facelet with style1.css, script1.js, script2.js, etc. (also here, URLs are simplified for brevity).
<head><title>Resource component relocation demo.</title><script type="text/javascript" src="script1.js"></script><script type="text/javascript" src="foo.js"></script><link type="text/css" rel="stylesheet" href="foo.css" /><link type="text/css" rel="stylesheet" href="style1.css" /><script type="text/javascript" src="script2.js"></script><link type="text/css" rel="stylesheet" href="style2.css" /><script type="text/javascript" src="script5.js"></script></head><body><p>Paragraph 1</p><script type="text/javascript" src="script4.js"></script><p>Paragraph 2</p><script type="text/javascript" src="script3.js"></script><script type="text/javascript" src="script6.js"></script></body>
The resource rendering order in the document head is thus
6. <h:outputScript> from <h:head> without target.
7. Dynamic script added to head during PostAddToView.
8. Dynamic stylesheet added to head during PostAddToView.
9. <h:outputStylesheet> from <h:head>.
10. <h:outputScript> from <h:head> with target="head".
11. <h:outputStylesheet> from <h:body>.
12. <h:outputScript> from <h:body> with target="head".
You see, the ordering is quite predictable. It shouldn’t have been necessary to override the renderer of <h:head>. Moreover, overriding the renderer of <h:head> from a JSF library risks the possibility that it becomes incompatible with any other JSF library which coincidentally also overrides the renderer of <h:head>. You’d really want to avoid that.
Another advantage of using resource components is that JSF will automatically push all resources associated with the document to the client, so that the client will be able to retrieve them sooner than the time needed to parse the HTML document and locate all <link>, <script>, and <img> elements. This is new since JSF 2.3. This only requires that the JSF 2.3 web application is deployed to a Servlet 4.0-compatible container (Payara 5, GlassFish 5, Tomcat 9, WildFly 12, etc.), and that HTTPS is being used instead of HTTP, and that the client supports HTTP/2 protocol.19 This does not require additional configuration from the JSF side on.
Pass-Through Elements
JSF also supports implicitly interpreting any arbitrary HTML element as a full-fledged JSF component . This feature was introduced in JSF 2.2 and is formally known as “pass-through elements.” This is particularly useful when you want to use HTML5 elements such as <main>, <article>, <section>, <aside>, <nav>, <header>, <footer>, etc. and want to be able to reference them in <f:ajax render>. Previously, before JSF 2.2, those elements didn’t have a JSF component equivalent and you’re therefore forced to wrap them in <h:panelGroup layout="block"> which only makes the HTML less semantic. The pass-through element trigger is available by the http://xmlns.jcp.org/jsf namespace. All you need to do is to specify at least one attribute on this namespace. The default namespace prefix is just “jsf”.
<!DOCTYPE html><html lang="en"xmlns:="http://www.w3.org/1999/xhtml"xmlns:jsf="http://xmlns.jcp.org/jsf"xmlns:h="http://xmlns.jcp.org/jsf/html"><h:head><title>Title</title></h:head><h:body><header>...<nav jsf:id="menu">...</nav></header><main jsf:id="main">...</main><footer>...</footer></h:body></html>
Under the hood, in the JSF component tree, those HTML5 elements are turned into a UIPanel component and are treated in the JSF component tree exactly like <h:panelGroup>. This way you can cleanly keep using semantic HTML5 markup while still being able to reference them via <f:ajax render>. In other words, the following construct won’t work:
<main id="main">...<h:form id="form">...<h:commandButton id="submit" ...><f:ajax render=":main" /></h:commandButton></h:form></main>
It fails because UIViewRoot#findComponent() doesn’t return anything when passing “main”. JSF can’t find any component with the given ID. The <main> element is here basically interpreted as template text. But the following construct will work:
<main jsf:id="main">...<h:form id="form">...<h:commandButton id="submit" ...><f:ajax render=":main" /></h:commandButton></h:form></main>
UIViewRoot#findComponent() on “main” will then return a UIPanel instance representing the <main> element. JSF will then be able to render it into the Ajax response. The pass-through element feature also works on other HTML elements, only they don’t necessarily turn into a UIPanel instance. Instead, they will be turned into a JSF component whose generated HTML output matches the very HTML element (see Table 6-1). The following construct is, under the hood, identical to the previous one:
<main jsf:id="main">...<form jsf:id="form">...<input type="submit" jsf:id="submit" ...><f:ajax render=":main" /></input></form></main>
Table 6-1 Passthrough Elements Recognized by JSF
Passthrough HTML element | Implied JSF component |
|---|---|
<a jsf:action="…"> | <h:commandLink> |
<a jsf:actionListener="…"> | <h:commandLink> |
<a jsf:value="…"> | <h:outputLink> |
<a jsf:outcome="…"> | <h:link> |
<body jsf:id="…"> | <h:body> |
<button jsf:id="…"> | <h:commandButton type="button"> |
<button jsf:outcome="…"> | <h:button> |
<form jsf:id="…"> | <h:form> |
<head jsf:id="…"> | <h:head> |
<img jsf:id="…"> | <h:graphicImage> |
<input jsf:id="…" type="button"> | <h:commandButton type="button"> |
<input jsf:id="…" type="checkbox"> | <h:selectBooleanCheckbox> |
<input jsf:id="…" type="file"> | <h:inputFile> |
<input jsf:id="…" type="hidden"> | <h:inputHidden> |
<input jsf:id="…" type="password"> | <h:inputSecret> |
<input jsf:id="…" type="reset"> | <h:commandButton type="reset"> |
<input jsf:id="…" type="submit"> | <h:commandButton type="submit"> |
<input jsf:id="…" type="*"> | <h:inputText> |
<label jsf:id="…"> | <h:outputLabel> |
<link jsf:id="…"> | <h:outputStylesheet> |
<script jsf:id="…"> | <h:outputScript> |
<select jsf:id="…"> | <h:selectOneListbox> |
<select jsf:id="…" multiple="*"> | <h:selectManyListbox> |
<* jsf:id="…"> | <h:panelGroup> |
Any attribute specified on such a pass-through element is implicitly mapped to the corresponding attribute of the JSF component. In the following example, the JSF component and pass-through element pairs are equivalent.
<h:graphicImage library="common" name="some.svg" /><img jsf:library="common" name="some.svg" /><h:inputText value="#{bean.name}" /><input type="text" jsf:value="#{bean.name}" /><h:inputText a:type="email" value="#{bean.email}" /><input type="email" jsf:value="#{bean.email}" /><h:link outcome="contact" value="Contact" /><a jsf:outcome="contact">Contact</a>
Note that you don’t necessarily need to register every single attribute of a pass-through element on the “jsf” namespace. Only one is sufficient to trigger the pass-through element feature , preferably the first one. This keeps the code concise.
Footnotes
1 https://javaee.github.io/javaee-spec/javadocs/javax/faces/component/UIViewRoot.html#addComponentResource-javax.faces.context.FacesContext-javax.faces.component.UIComponent-java.lang.String- .
2 https://javaee.github.io/javaee-spec/javadocs/javax/faces/component/UIViewRoot.html#getComponentResources-javax.faces.context.FacesContext-java.lang.String- .
7 https://javaee.github.io/javaee-spec/javadocs/javax/faces/context/ExternalContext.html#getRequestHeaderMap-- .
12 https://javaee.github.io/javaee-spec/javadocs/javax/faces/application/ResourceHandler.html#RESOURCE_IDENTIFIER .
13 https://docs.oracle.com/javase/8/docs/api/java/lang/ClassLoader.html#getResource-java.lang.String- .
14 https://javaee.github.io/javaee-spec/javadocs/javax/faces/context/ExternalContext.html#getResource-java.lang.String- .