CHAPTER 7
![]()
Techniques for Quality Electrical Work
Along with a good selection of quality tools, a good selection of quality techniques is essential for successful electrical projects. Some of this is mental and some is physical. By mental, we mean planning the project and proceeding in an efficient manner so that you are not pushing in the wrong direction. This has to do with performing in the right order the many small tasks that make up a complete job so that one completed phase of the work does not block another. By physical, we mean handling tools and materials in a skillful and precise manner so that the correct amount of force is brought to bear in ways that produce good results.
From Service to Finished Installation
Some examples will clarify these points. Building an electrical service is not too difficult, but if the job is not planned carefully, there is the potential for error and costly rework. We have previously stressed the need to consult with the utility representative prior to starting an installation. The utility will want the meter to be located where it is not exposed to damage (meters are very expensive), where it can be read easily (even if it is a smart meter), and if the service is aerial, where the service drop can connect to the power pole without an obstruction, as shown in Figure 7-1. This is an example of where prior planning makes sense.

FIGURE 7-1 When designing an aerial service, a clear shot at the transformer is needed.
Moreover, you have to make sure that your service-entrance conductors can get into the building. If it is a back-to-back installation, make sure that the location of the entrance panel will work on the inside of the building. This enclosure, shown in Figure 7-2, has to be located so that the required dedicated and working spaces are provided; the door can open at least 90 degrees; there is no Code violation such as placing the entrance panel within a bathroom, clothes closet, or on a stairway; there is no potential conflict with water piping or duct work; and preferably it is not necessary to move a framing member.

FIGURE 7-2 When designing a service, the location of the entrance panel must be considered.
Possibilities for Error
This is an example of planning for an electrical installation, and it is similar to many other situations that arise. For every switch or receptacle that you place, there is the possibility for error. Often there is a good, better, and best solution. Even minor decisions can affect the quality of the job and the efficiency of the workflow favorably or adversely.
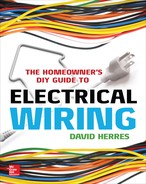
Appearance is very important. A conduit riser, shown in Figure 7-3, must be plumb to a very tight tolerance or the job will appear shoddy, even if electrically the error is inconsequential. In the case of an underground service lateral where the raceway connects to a 90-degree sweep and then rises vertically to enter a meter socket, if you complete and backfill the trench before mounting the meter socket, more precise positioning of the vertical riser will be possible. When doing raceway work, shown in Figure 7-4, this is a general principle for the placement of surface-mounted receptacles, switch boxes, light fixtures, and so on. Following this procedure will save a lot of work and make for more accurate raceway installations.
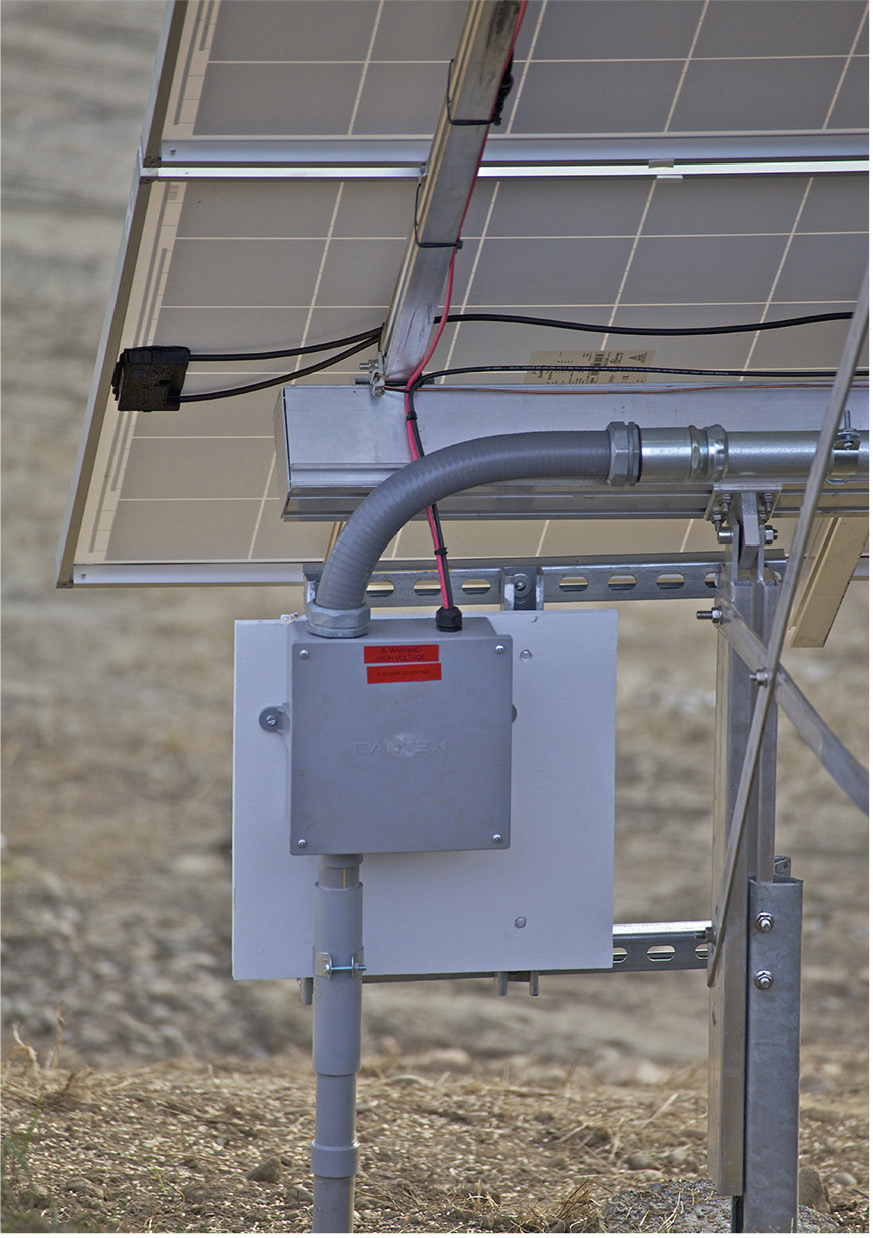
FIGURE 7-3 Underground raceway placement must be coordinated with equipment position if the conduit riser is to be plumb.
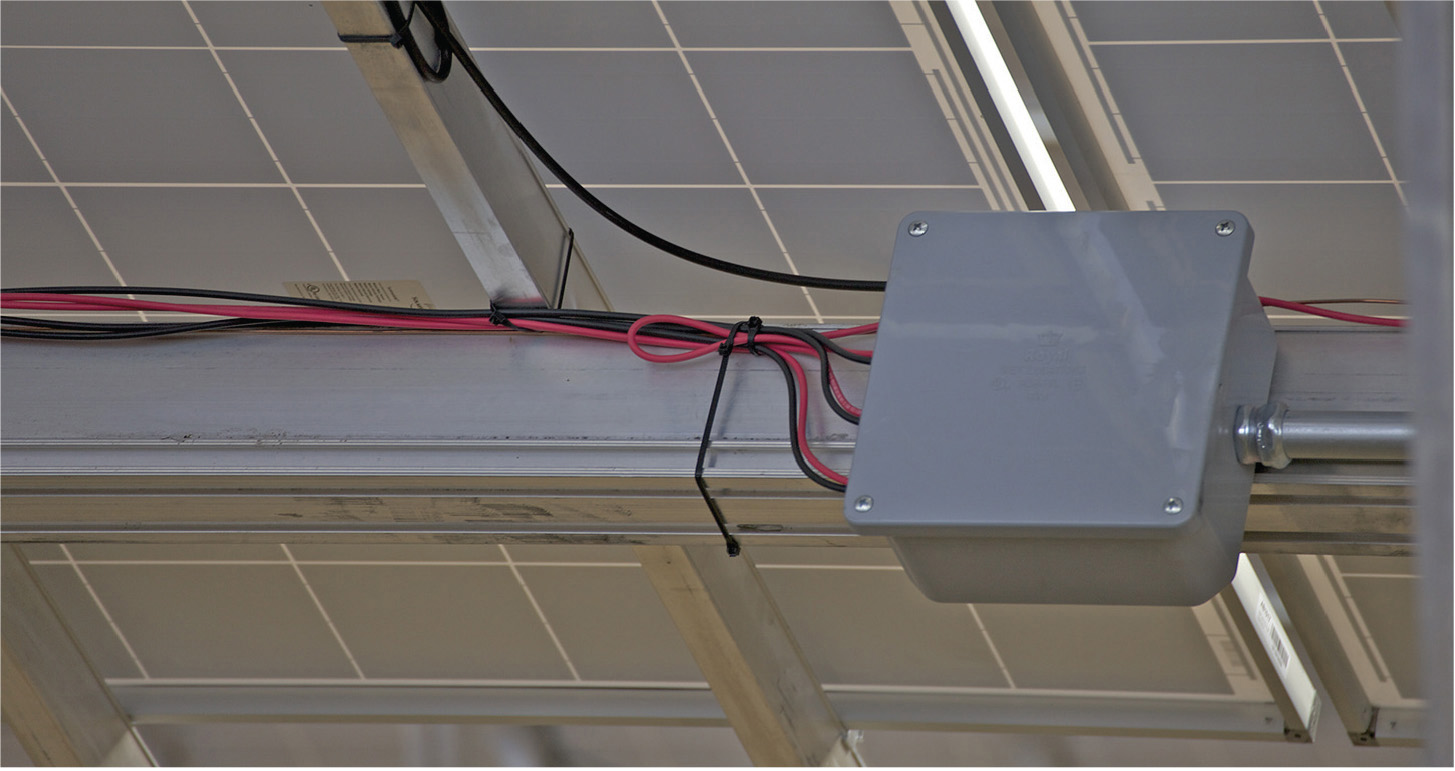
FIGURE 7-4 Conduit installations are sometimes used in residential work. For a good appearance, planning is required.
As for the physical aspect, you should always be looking for easier and more efficient ways of doing things. The object is to reduce the amount of labor necessary to complete each task without compromising the quality of the installation. Always strive for accuracy. It takes less energy to make a straight and true cut than to make a crooked one.
Learning the Trade
If possible, watch other workers as they ply their trade. If you have the good fortune to work along with a skilled electrician for a period of time, that will be a great help. If you are a school teacher with the summer off, think about it.
If working with or observing a professional is not an option, there are always YouTube videos, shown in Figure 7-5. This is a wonderful way to pick up skills and expertise very quickly. With over 100 hours of video uploaded per minute, there is new material coming online constantly, so check frequently. Type into the search bar, “How to wire an entrance panel,” and take it from there. You’ll find some misinformation, but the extensive comments section helps to sort it all out. Overall, it’s quite lively and worthwhile.

FIGURE 7-5 YouTube videos are full of valuable information.
As you gain experience and expertise, even vicariously, as explained earlier, you will become adept at a wide variety of tasks, and you will find that knowledge and skills learned for one type of work can be applied in other areas as well. Use tools to their best advantage. For example, a metal wall box can be grounded by removing at least one of the square cellulose washers from the bolt in the yoke. Instead of slowly unscrewing them from that mile-long bolt, snip them off with your diagonal cutter. And while we are on the subject, removing concentric knockouts from a heavy-duty box such as a meter socket can be laborious in the extreme, but large diagonal cutters (dikes), shown in Figure 7-6, make quick work of this task.
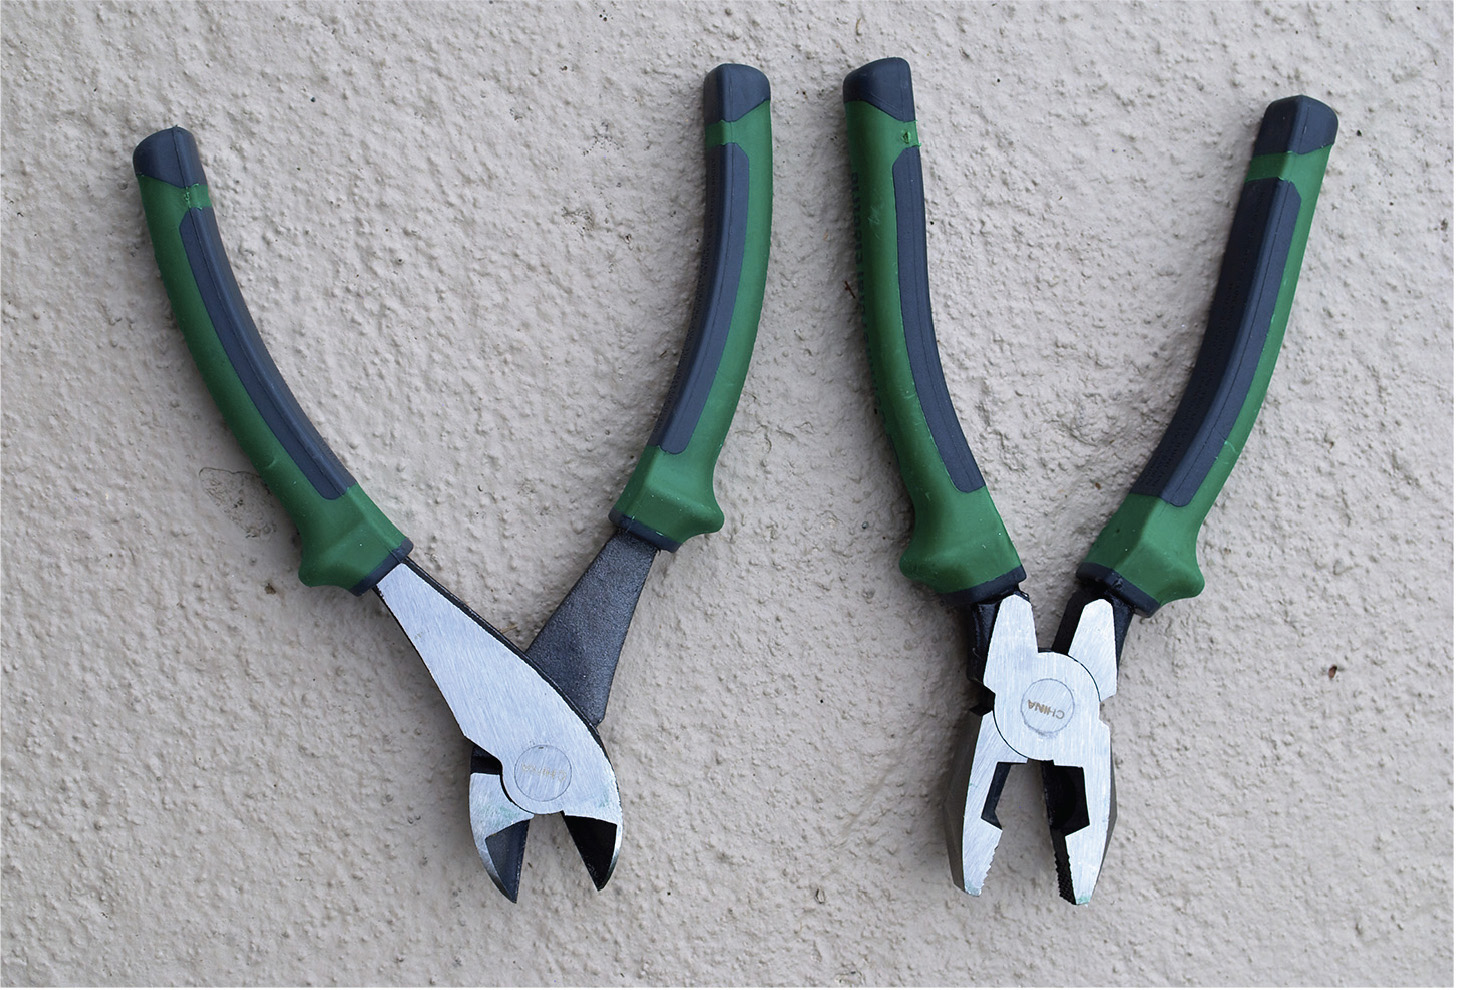
FIGURE 7-6 A selection of tools in various sizes facilitates fast, high-quality work.
Some Labor-Saving Tips
Become ambidextrous. Most people favor one hand over the other for intricate tasks that require any degree of dexterity, but you can easily become ambidextrous. All it takes is a little practice. Try hammering nails with your off hand. You will soon get so that you can do it equally well either way. This is a valuable skill when, high on a ladder, you have to reach a long way to both sides.
If you have two pieces to cut and install (it may be wire, raceway, lumber, or something else), always cut the longer piece first. Then, if you make a mistake and the piece proves to be too short, it can be cut down to make the short piece, and you will have a second shot at the long one.
The end of a fish tape will snap off if you try to bend it sharply because it is semihardened. If the end breaks off, heat it with a propane torch to anneal or soften it so that a new hook can be formed.
Often you will want to use electrical tape to temporarily join two or more items. To aid in getting them apart later, spin the end of the tape between your fingers to leave a tail.
When a device bolt breaks off in a wall box, it is a tough situation if the wallboard has been installed. If it is too short to grab with Vise-Grips, drill the broken bolt out, and tap the next size bigger threads. Chuck the tap into your cordless drill, and it will feed in nicely. Use thread-cutting lubricant if you want your tap to last.
If you are going to mount a fluorescent strip fixture on a drywall ceiling, you will have to screw through the enclosure and ceiling material into the framing. The predrilled holes rarely coincide. Screw right through the metal without regard to the predrilled holes, a job for your cordless drill, as shown in Figure 7-7.

FIGURE 7-7 The ubiquitous cordless drill is used in many trades and is indispensible for electrical work.
Where possible, wire nuts in an enclosure should be positioned with the openings pointed down so that any moisture will drain. If you need to work on a light fixture over a sink, first close the drain so that dropped hardware will not be lost.
Use of 1/0 AWG and larger conductor terminations in a meter socket or entrance panel, shown in Figure 7-8, are difficult. Make use of the hole, with its rounded edges, at the end of the handle of a large adjustable wrench. The moving parts of these tools eventually wear out, so cut off the handles and save them as wire-bending tools.
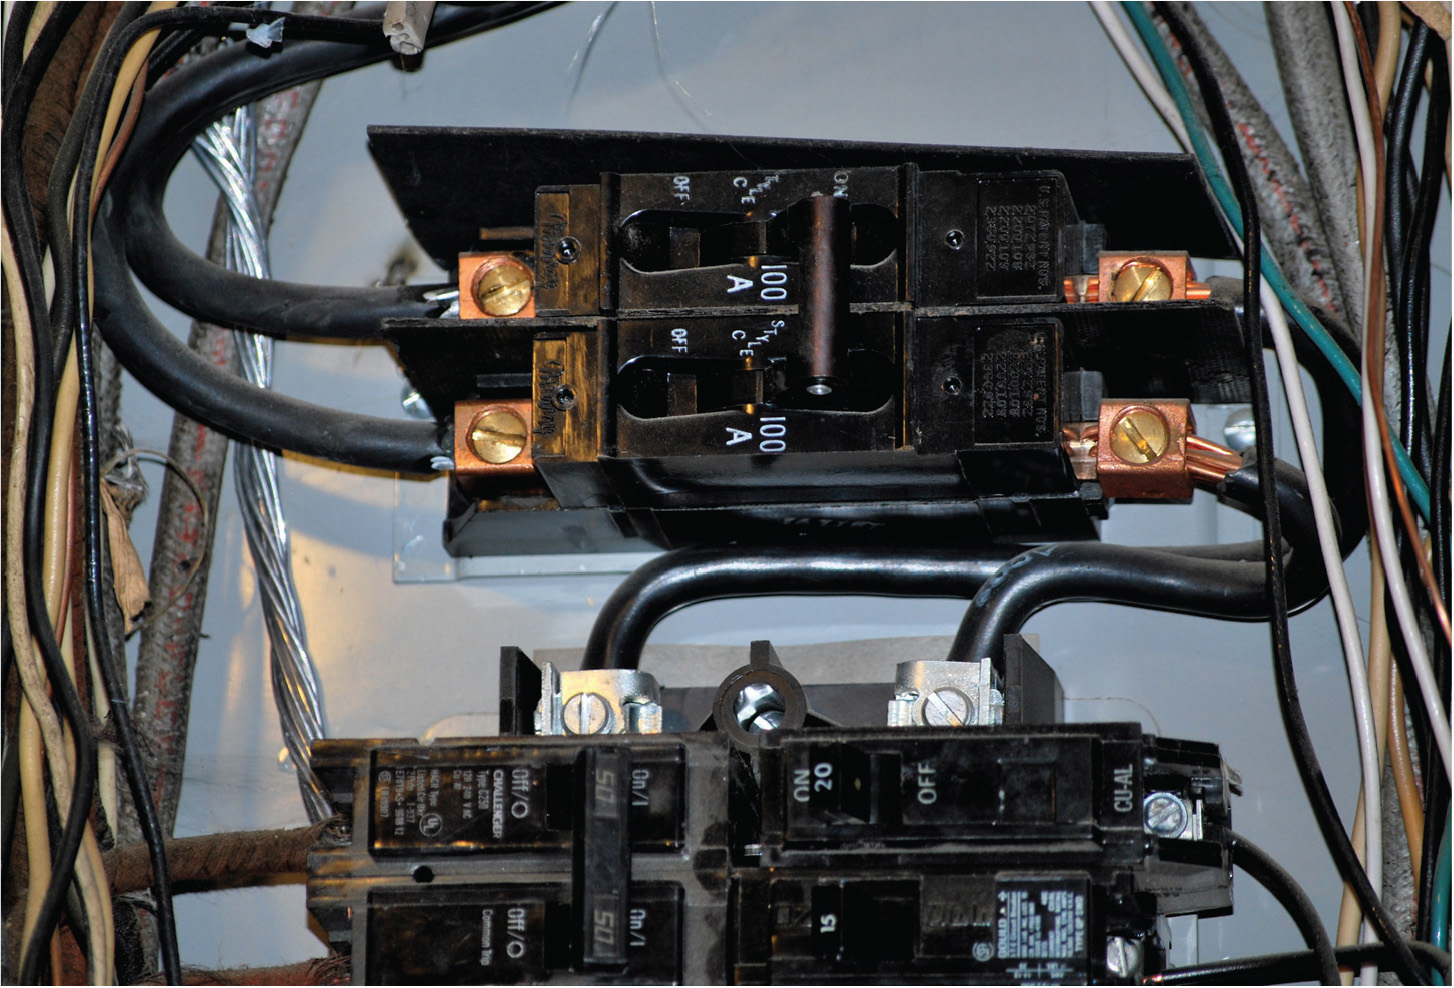
FIGURE 7-8 Bending large conductors for terminations inside an enclosure can be difficult.
A partially severed wire buried in a wall will cause an arc-fault breaker to trip out. Temporarily(!) replace it with a standard breaker. A transistor radio tuned to no station with the volume turned high can be moved along the wall. A burst of static will indicate that you have found the fault. If it is a series fault, you will need a load connected at the last receptacle.
When removing Romex, never pull it out from the middle of the roll. It will be full of twists. Instead, take the roll out of the wrapper, and set it up on a short length of pipe supported at both ends so that it can be unreeled. If you are installing Romex through drilled studs, start at the middle and go to the end that is the more difficult route. Then you can unroll enough to get to the other end, allowing for error, and finish the installation.
Romex, shown in Figure 7-9, comes with various color jackets depending on the manufacturer and the lot. If you use different colors for branch circuits, tracing and troubleshooting will be much easier. In addition, Romex handles better when it is warm. If it is cool, turn up the heat in the room or warm the roll using a small electric heater immediately before installation. A cable ripper is an inexpensive little tool that allows you quickly to slit the outer jacket of Romex without danger of nicking the conductor insulation.
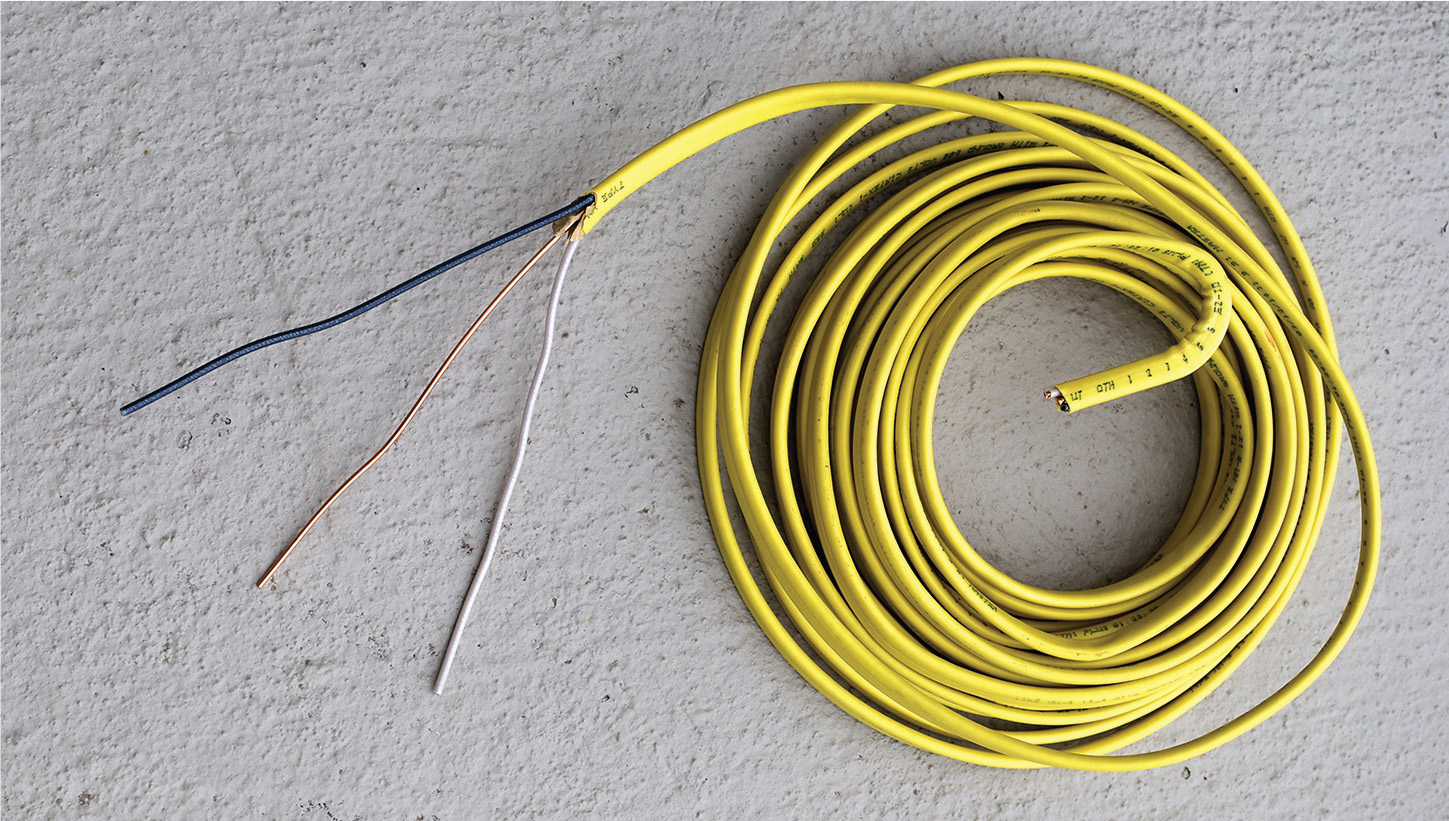
FIGURE 7-9 Romex cable is available in many colors, and using a selection of them is helpful in tracing branch circuits.
Most wiring can be done without junction boxes. Wherever possible, use daisy-chain rather than spider-web configurations. (The opposite, as we shall see in Chapter 11, is true for communication and data wiring.) Where a junction box is necessary, use a 4 × 4 box, shown in Figure 7-10, rather than an octagonal box. In basements and utility areas, mark the contents of a junction box on the cover.

FIGURE 7-10 A 4 × 4 box with an offset bender.
We won’t have much to say in this book about conduit bending because most residential wiring is not in raceways. EMT in small diameters is easy to bend using a conduit bender, as shown in Figure 7-11, but for complex jobs, the routing becomes a daunting challenge—part science and part art.
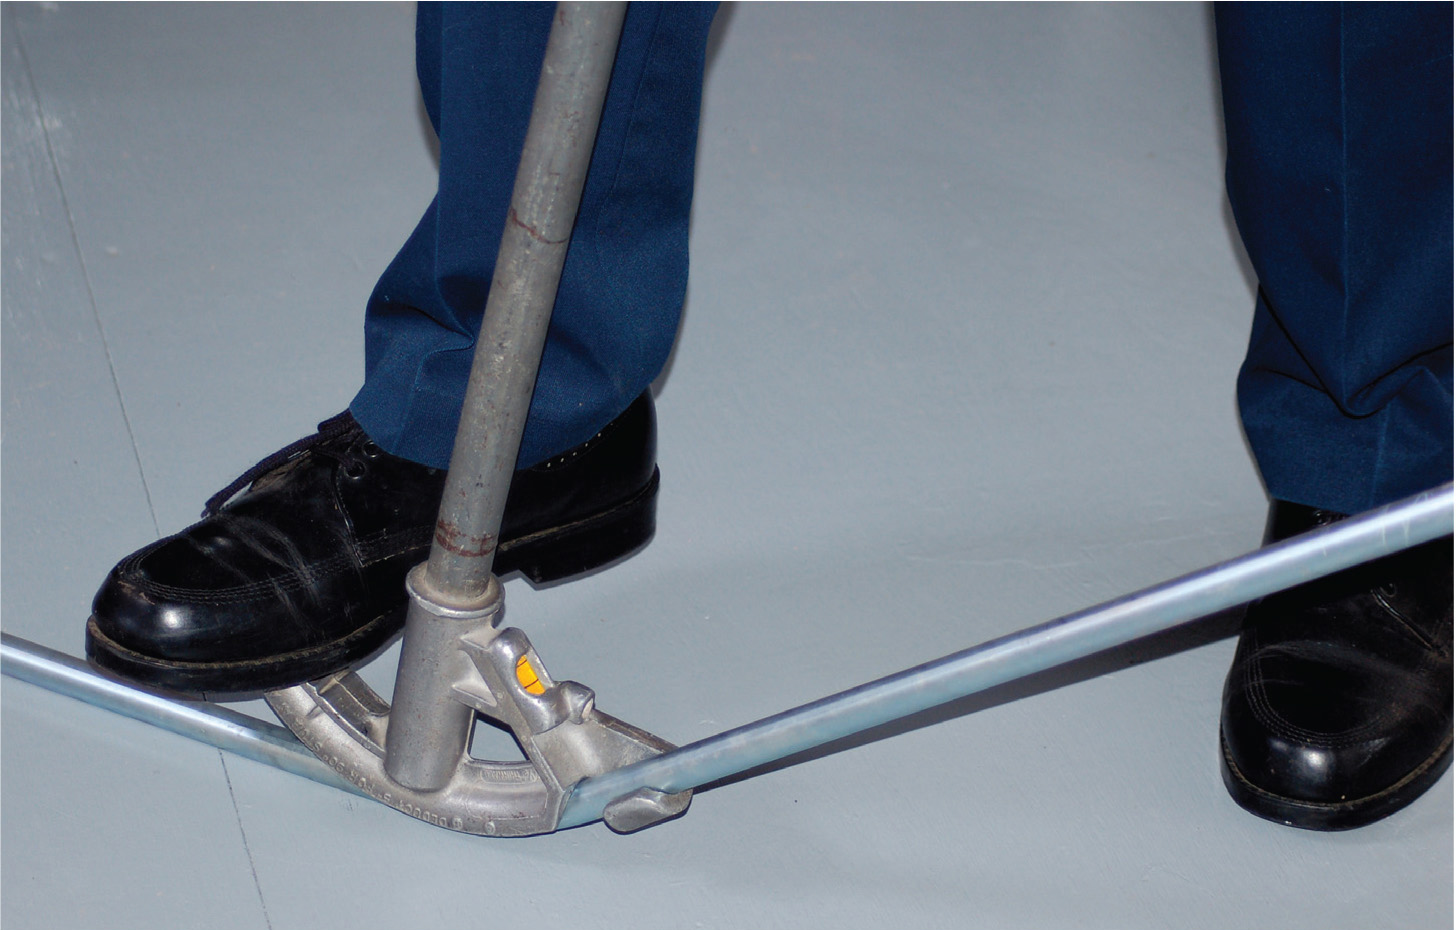
FIGURE 7-11 Bending EMT.
You need a good eye for what will work and look good, as well as a certain body of knowledge. Conduit bends are shown in Figures 7-12 and 7-13. Complex jobs even call for the use of trigonometric functions and other advanced math. An excellent reference on this topic is the well-known Benfield Conduit Bending Manual, 2nd edition (Overland Park, Kansas, EC&M Books, 1993). On the Internet, www.porcupinepress.com also provides lots of useful information on bending conduit.
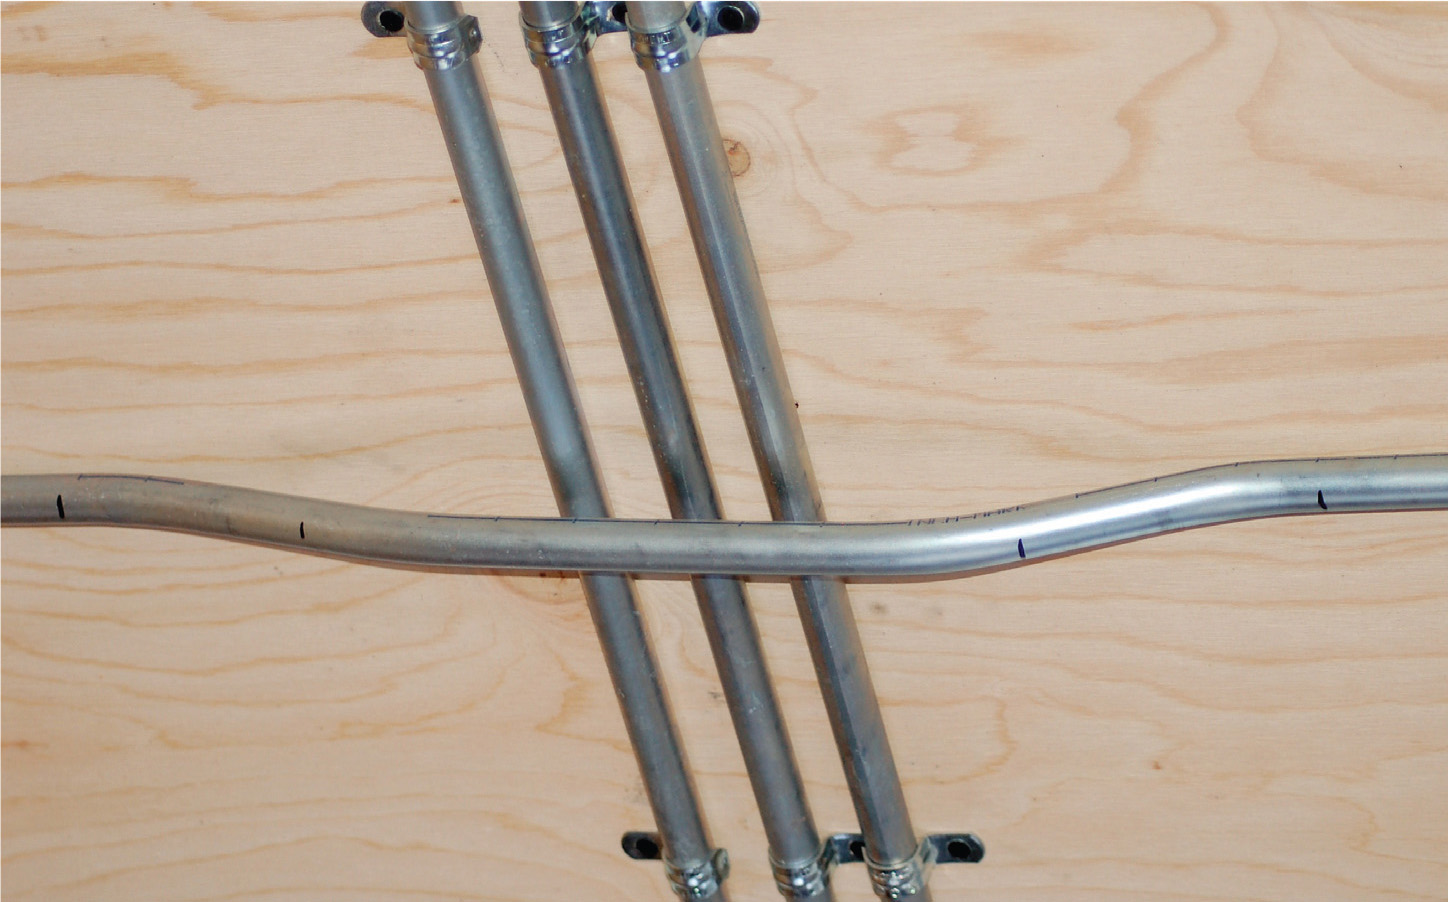
FIGURE 7-12 A two-point saddle bend, which is used where two or more pipes must be crossed.
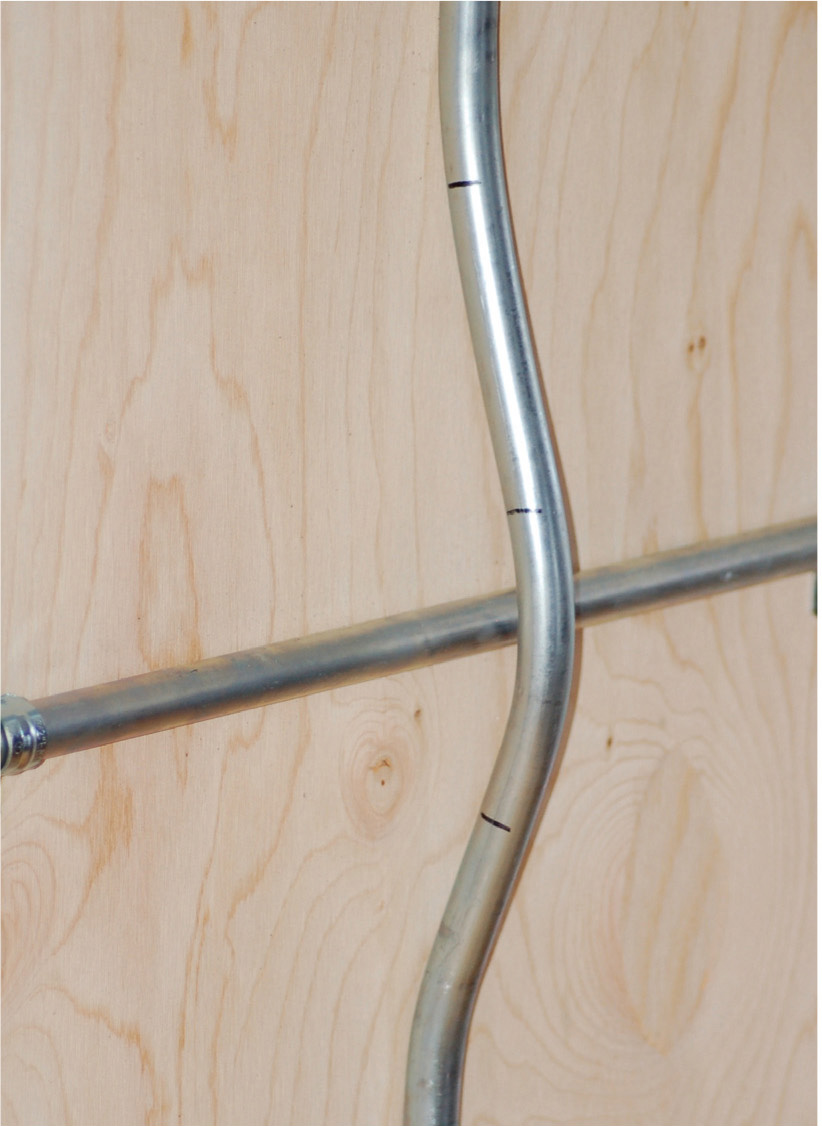
FIGURE 7-13 A three-point saddle bend, which is used where a single pipe must be crossed.
There are some residential applications where raceways can be used to good effect. We have already mentioned how PVC conduit is perfect for underground services and feeders and above-ground outdoor applications where long horizontal runs are avoided. Indoors, PVC also can be used, but EMT is not expensive in small quantities and has a better appearance. It should be secured using the proper hardware, as shown in Figure 7-14.
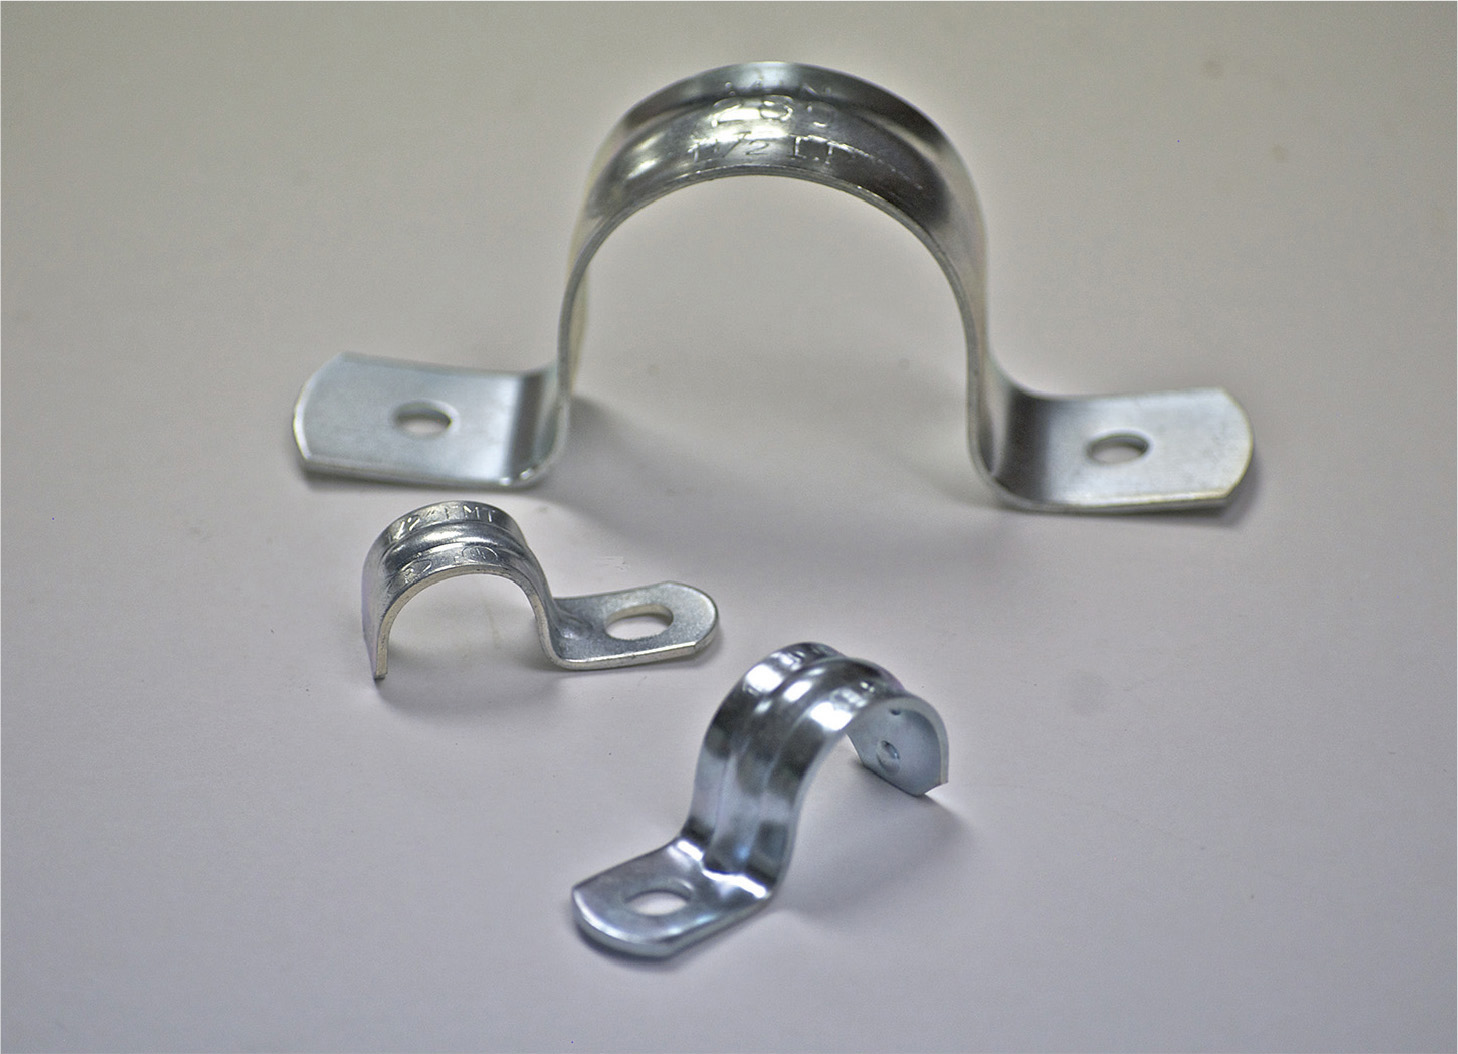
FIGURE 7-14 EMT clamps should be placed at proper intervals.
Anytime you have a wiring drop, such as in a basement or utility room, through the air to a hot-water heater or similar appliance, it should be run in a raceway, preferably EMT. You can transition from Romex to EMT by going through the correct connectors and splicing the conductors using wire nuts inside a 4 × 4 box. Don’t forget that the enclosure, at least the cover, must be accessible, although not necessarily readily accessible.
Comparing Types MC, AC, and EMT
These cable types may be used interchangeably in certain applications, but Type MC cable and Type EMT raceway each have their own design and installation requirements. When used with the right conductors, they have nearly identical uses but quite different working characteristics. For this reason, it is advantageous to use the two types in concert. You have to understand specific construction specifications and permitted uses for each system.
Type MC resembles armored cable (Type AC), but there are some distinct differences. Whereas Type AC has a grounding strip in intimate contact with the inside of the metallic sheath, which thus can serve as the equipment-grounding conductor, Type MC has no such strip. Therefore, the outer sheath of Type MC cable does not qualify as an equipment-grounding conductor, but Type MC cable contains an insulated grounding conductor that, when terminated properly at both ends, makes a reliable return path for fault current, facilitating overcurrent protection. The metal jacket supplements the equipment-grounding conductor. It is solidly connected to grounded metal enclosures at both ends so that the raceway and equipment cannot become energized without causing the overcurrent device to trip out.
EMT is an unthreaded thin-wall raceway that is seen commonly in industrial and commercial locations. The raceway is typically made of steel with a smooth galvanized finish or aluminum. With appropriate fittings terminated properly, it can serve as an equipment-grounding conductor in most applications. However, most electricians pull a green wire for everything.
Then, if the raceway were to pull apart, ground continuity for the circuit would be maintained. The sections of raceway on either side still would be grounded from opposite ends of the run. Also, like the metal sheath of Type MC cable, the raceway provides supplementary and redundant grounding where required and greatly lowers the overall impedance of the equipment-grounding conductor.
Type MC cable and EMT have other traits as well, most notably in uses permitted/not permitted, as noted in the National Electrical Code (NEC). A simple EMT run is quite easy to install, but a complex job can be a big challenge. Multiple runs coming out of a panel have to be in the right order so that they can peel off as required to go to their final destinations without having to cross. The runs have to be straight and uniformly spaced or they will look unsightly and unprofessional. To maintain uniform spacing, a plywood template based on the raceway positions coming out of the box is helpful.