Invasion of the Body Snatchers: Body Sculpting
Photographer Dave Moser
Okay, if you remember that movie (Invasion of the Body Snatchers) you’re way older than I am (remember, I’m only 19), and therefore, for the rest of this chapter intro, I’ll refer to you as either “gramps” or “meemaa” (depending on your gender and what kind of mood I’m in). This chapter is a testament to the fact that people’s bodies are simply not perfect, with the possible exception of my own, which I might say is pretty darn fine because of all the healthy food I eat at sundry drive-thru eating establishments that shall remain nameless (Wendy’s). Anyway, your goal (my goal, our common goal, etc.) is to make people look as good in photos as they look in real life. This is a constant challenge because many people eat at McDonald’s. Luckily, there are a ton of tricks employed by professional retouchers (who use terms like digital plastic surgery, Botox in a box, digital liposuction, liquid tummy tucks, noselectomies, stomalectomies, and big ol’ nasty feetalectomies) that can take a person who hasn’t seen a sit-up or a stomach crunch since they tested for the President’s Council on Physical Fitness and Sports (which for me, was just one year ago, when I was a senior) and make them look like Wonder Woman or Superman on a good day. In this chapter, you’ll learn the pros’ secrets for transforming people who basically look like Shrek into people who look like the person who produced Shrek (I don’t really know who that is, but those Hollywood types always look good, what with their personal trainers and all).
Slimming and Trimming
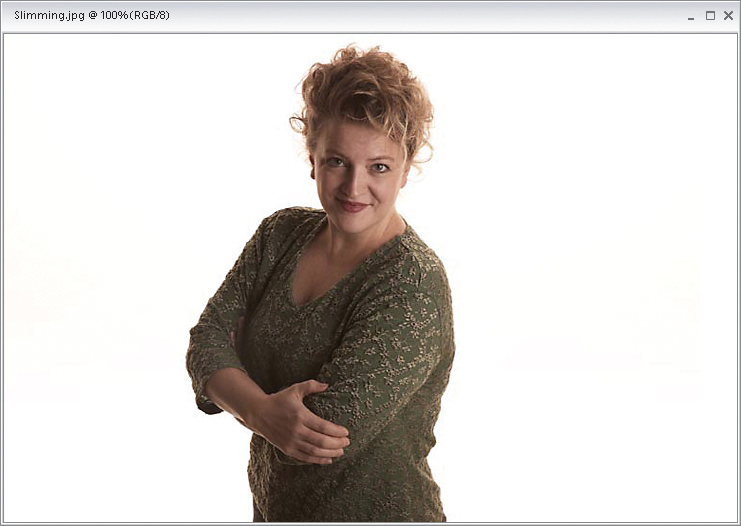
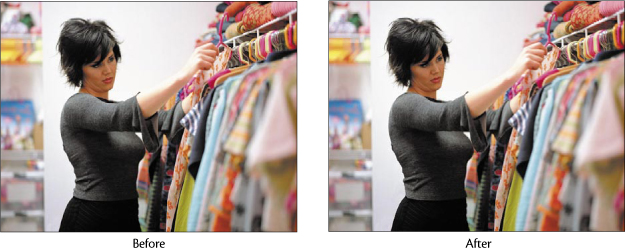
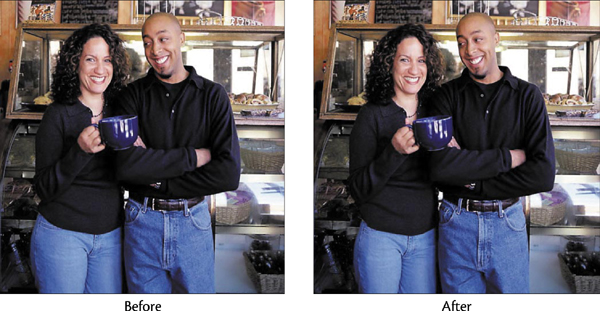
This is an incredibly popular technique because it consistently works so well, and because just about everyone would like to look about 10 to 15 pounds thinner. I’ve never applied this technique to a photo and (a) been caught, or (b) not had clients absolutely love the way they look. The most important part of this technique may be not telling the client you used it.
Step One:
Open the photo of the person that you want to put on a quick diet.
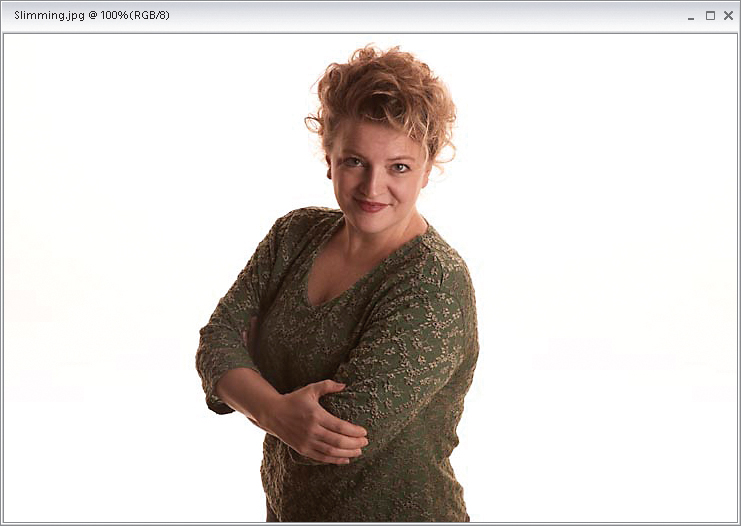
BRAND X PICTURES
Step Two:
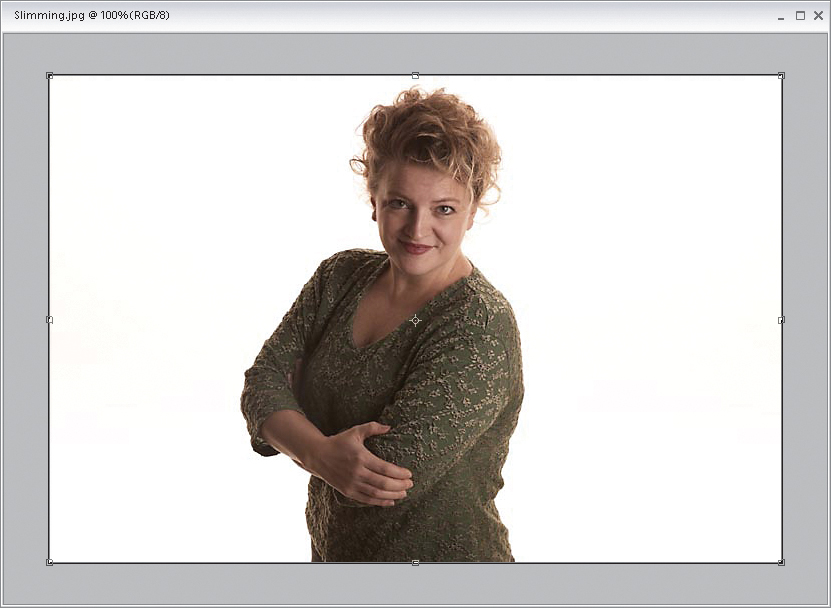
Maximize your view if needed by going under Window, under Images, and choosing Maximize Mode or click the Maximize button in the upper right-hand corner of the image window. Now, press Control-A to put a selection around the entire photo. Then, press Control-T to bring up the Free Transform command. The Free Transform handles will appear at the corners and sides of your photo.
Step Three:
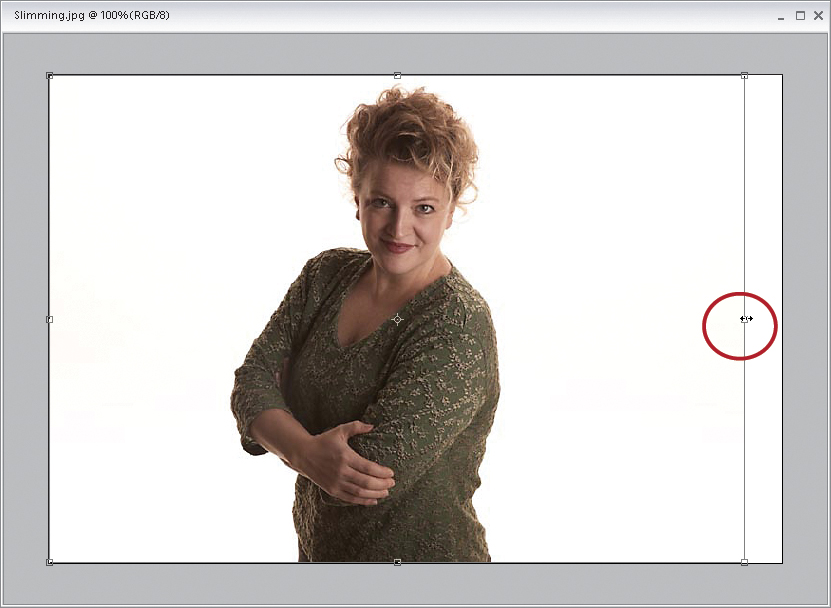
Grab the right-center handle and drag it horizontally toward the left to slim the subject. The farther you drag, the slimmer the subject becomes. How far is too far (in other words, how far can you drag before people start looking like they’ve been retouched)? Look in the Options Bar at the Width field as a guide.
Step Four:
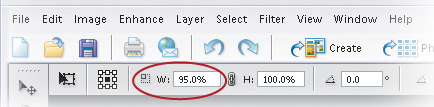
You’re pretty safe to drag inward to around 95%, although I’ve been known to go to 94% or even 93% once in a while (it depends on the photo).
Step Five:
Press Enter to lock in your transformation and press Control-D to deselect. Now that you’ve moved the image area over a bit, you’ll have to use the Crop tool (C) to crop away the background area that is now visible on the right side of your photo. After you drag out your cropping border over your image, press the Enter key to complete your crop.
You can see how effective this simple little trick is at slimming and trimming your subject. Also, notice that because we didn’t drag too far, the subject still looks very natural.

Removing Love Handles
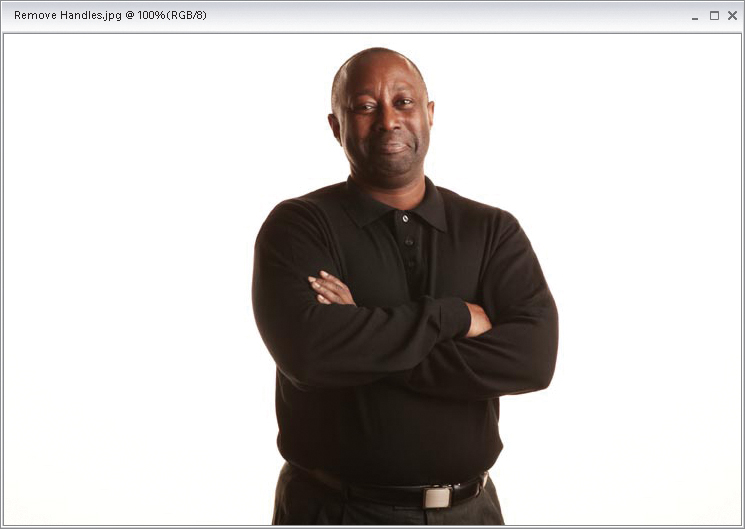
This is a very handy body-sculpting technique, and you’ll probably be surprised at how many times you’ll wind up using it. It uses Liquify, which many people first dismissed as a “toy for giving people bug-eyes and huge lips,” but it didn’t take long for professional retouchers to see how powerful this tool could really be.
Step One:
Open the photo that has a love handle repair just waiting to happen.
BRAND X PICTURES
Step Two:
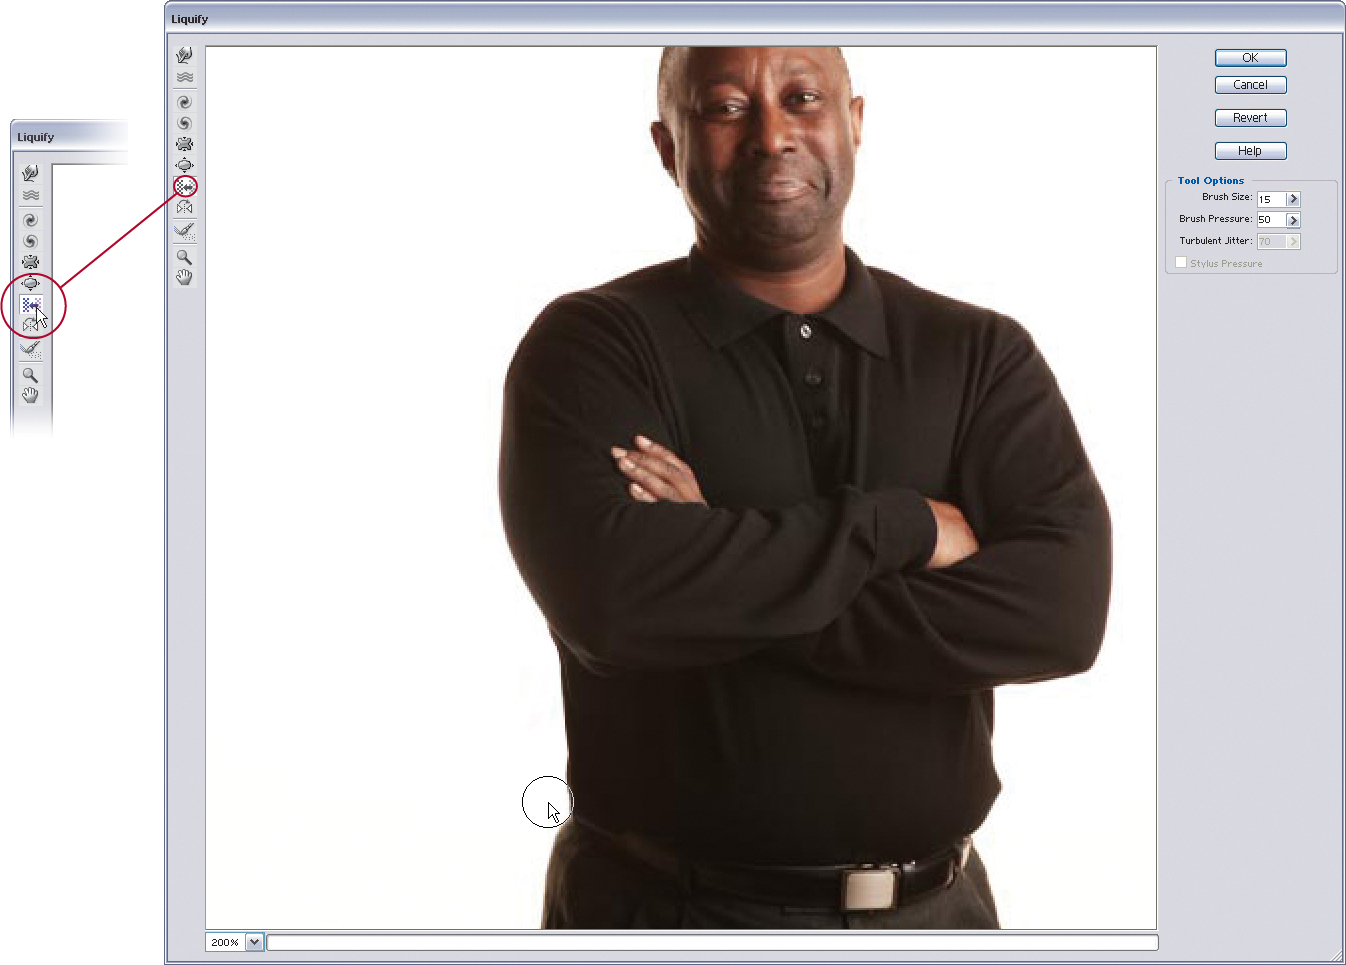
Go under the Filter menu, under Distort, and choose Liquify. When the Liquify dialog appears, click on the Zoom tool in the Toolbar on the left-hand side of the dialog, and then drag out a selection around the area you want to work on to give you a close-up view for greater accuracy.

Step Three:
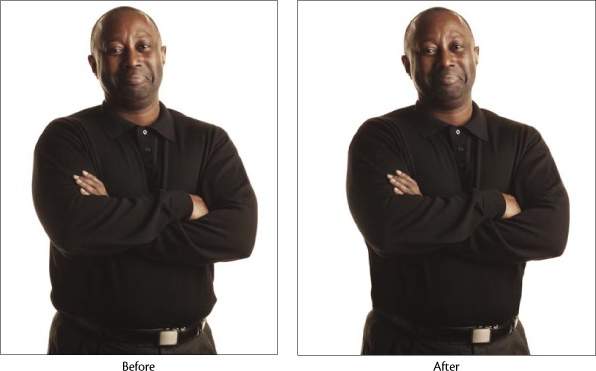
Get the Shift Pixels tool from Liquify’s Toolbar (it’s the seventh tool down). Choose a relatively small brush size using the Brush Size field near the top-right of the Liquify dialog. With it, paint a downward stroke starting just above and outside of the left love handle and continuing downward. The pixels will shift back in toward the body, removing the love handle as you paint. (Note: When removing love handles on the right side, paint upward rather than downward. Why? That’s just the way it works.) When you click OK, the love handle repair is complete, and you’ll see the difference a quick 30-second retouch can make.
Slimming Buttocks, Thighs, and Arms
This technique (which I picked up from Helene DeLillo) works great for trimming up thighs and buttocks by repositioning parts of the existing areas. It’s deceptively simple and amazingly effective. At the end of this tutorial, I also show how to use the same technique to slim arms (helpful in getting rid of “grannies,” which is an industry term for loose skin under a person’s arm. Hey, I didn’t make up the term, I just fix the problems).
Step One:
Open the photo that you need to retouch. In this case, we’re going to reduce the size of this person’s buttocks.
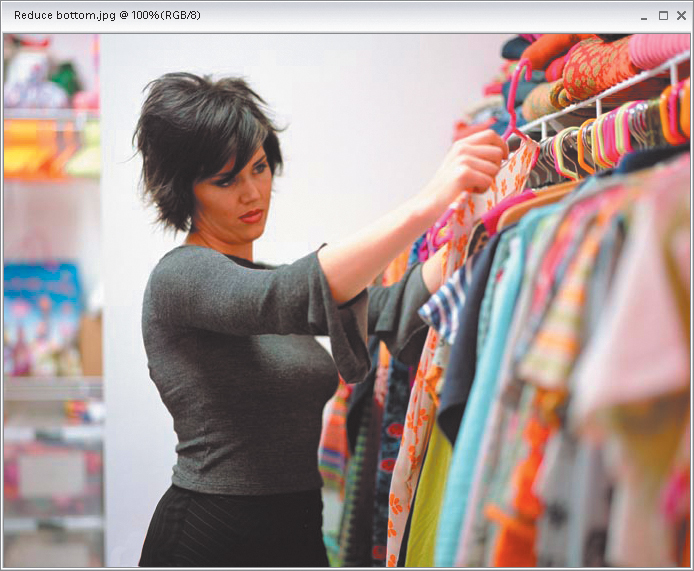
BRAND X PICTURES
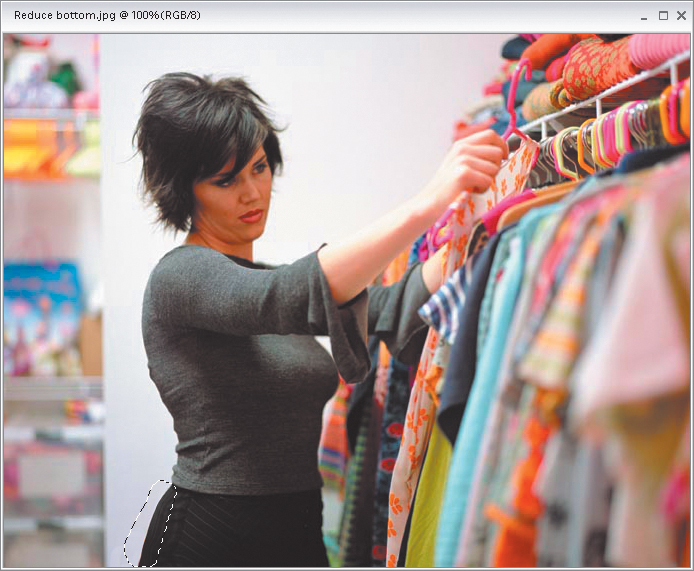
Step Two:
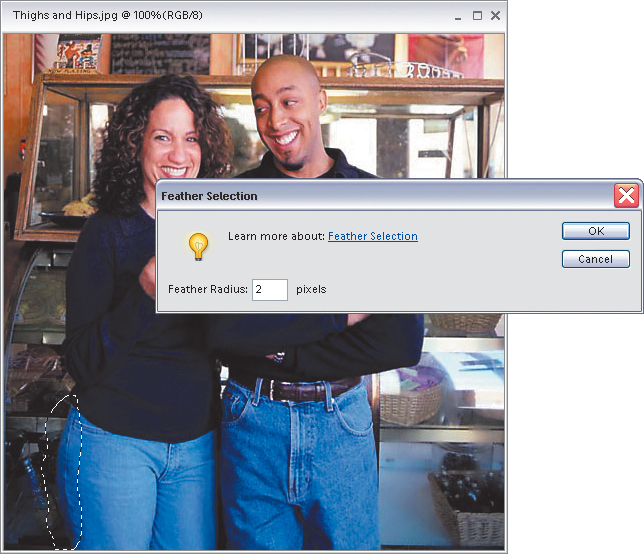
Press L to switch to the Lasso tool and make a selection loosely around the area you want to retouch. It’s important to select some background area, because that background will be used to cover over the existing area. Once you have your selection in place, soften the edges just a bit by going under the Select menu and choosing Feather. Enter 1 to 2 pixels and click OK to soften the edges of your selection.
Step Three:
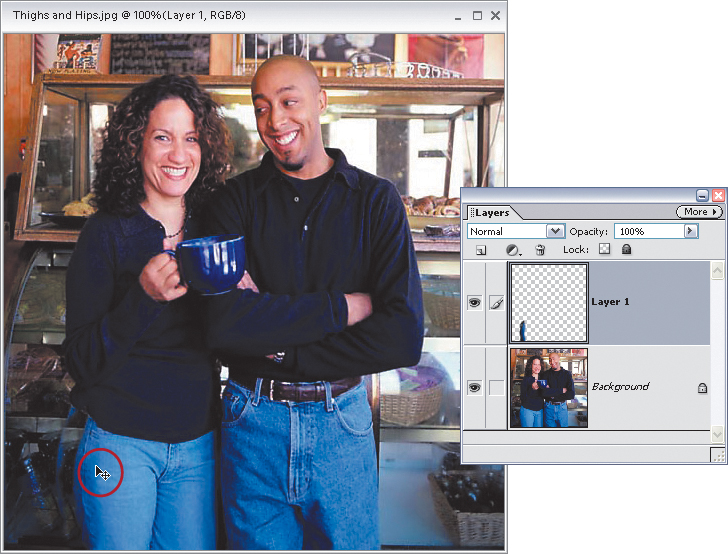
Go under the Layer menu, under New, and choose Layer via Copy (or press Control-J). This will create a new layer with just your selected area on it.
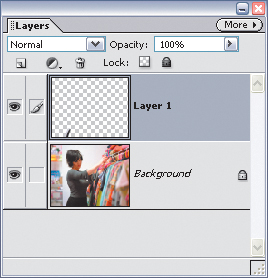
Step Four:
Press V to switch to the Move tool, click on the area you had selected (it’s on its own separate layer now), and drag inward toward the rest of the body. You’re literally moving the edge of the body, thereby reducing the width of the hips and buttocks at the same time.

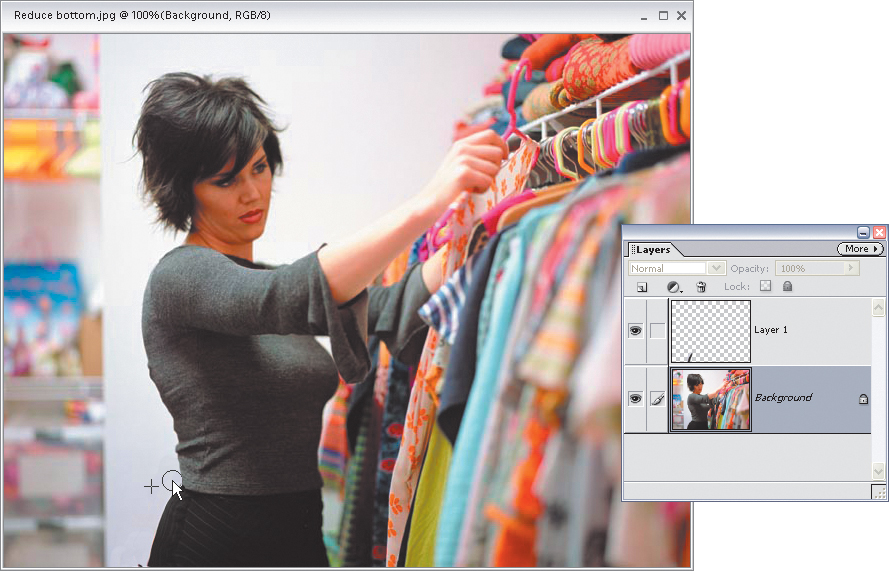
Step Five:
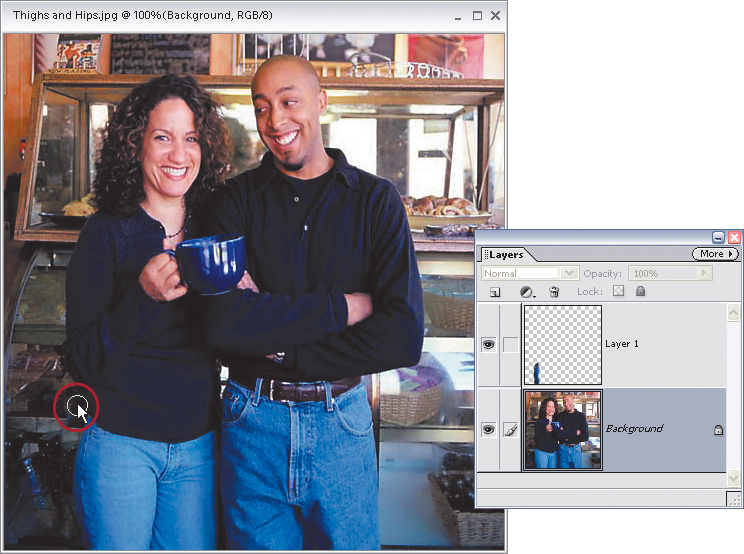
When you do this, you’ll usually have a small chunk of the old body left over that you’ll have to remove from the original Background layer. Press Z to switch to the Zoom tool and zoom in, then click on the Background layer in the Layers palette to make it the active layer. Get the Clone Stamp tool from the Toolbox (or press the S key), choose a small, hard-edged brush from the Brush Picker in the Options Bar, and Alt-click in an area on the background that’s very near to where you need to retouch. Then clone the background over the leftover body to produce smooth curves.
Step Six:
Once you’ve removed those little chunks (I know, chunks probably isn’t the best word to use, but yet on some level, it fits), the retouch is done.
Just the Thighs
Step One:
This time, we’re going to select the top of a person’s thigh with the Lasso tool (L). Depending on the photo, you may not have to feather the edges (as we did in Step Two of the previous technique), but it probably wouldn’t hurt.
BRAND X PICTURES
Step Two:
Once it’s selected, go under the Layer menu, under New, and choose Layer via Copy. This will create a new layer with just your selected area on it. Press V to switch to the Move tool, and drag the copied area upward to slim the thigh.
Step Three:
Again, you’ll probably have little chunks (okay, how about “shards” or “pieces” instead? Nah. They’re chunks) that you’ll have to remove, so switch to the Background layer, get the Clone Stamp tool again (S), Alt-click near the area you need to retouch, and click to clone the background area over the chunks.
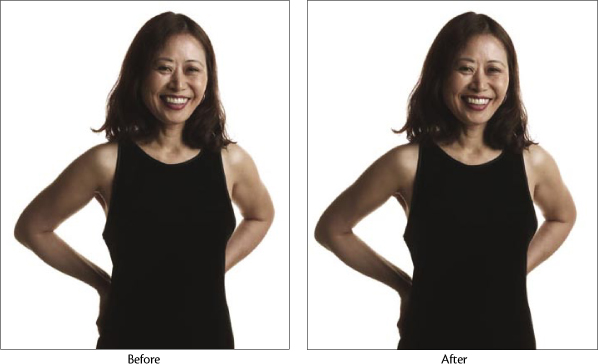
Once you’ve cloned over all the chunks (this process is called “dechunkinization”—not really, but it should be), the retouch is complete. In the next technique, we’re going to apply the same effect to trim a subject’s arm.
Slimming Arms
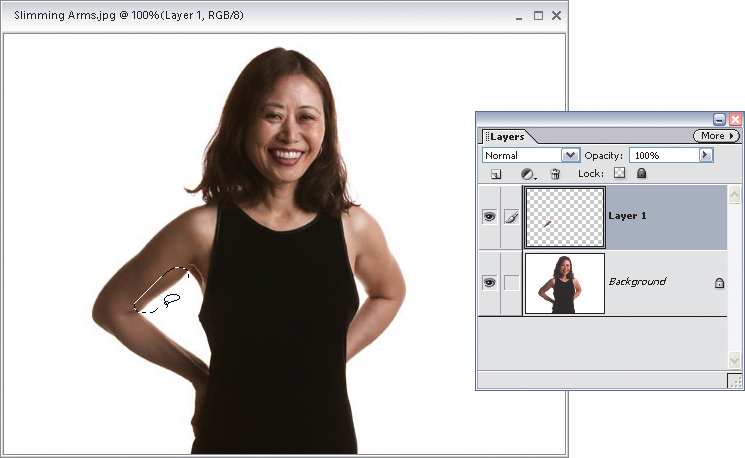
Step One:
Here’s the technique applied to the arms. Start by selecting the area you want to slim with the Lasso tool (L) (sound familiar?). Once it’s selected, go under the Layer menu, under New, and choose Layer via Copy. This will create a new layer with just your selected area on it.
BRAND X PICTURES
Step Two:
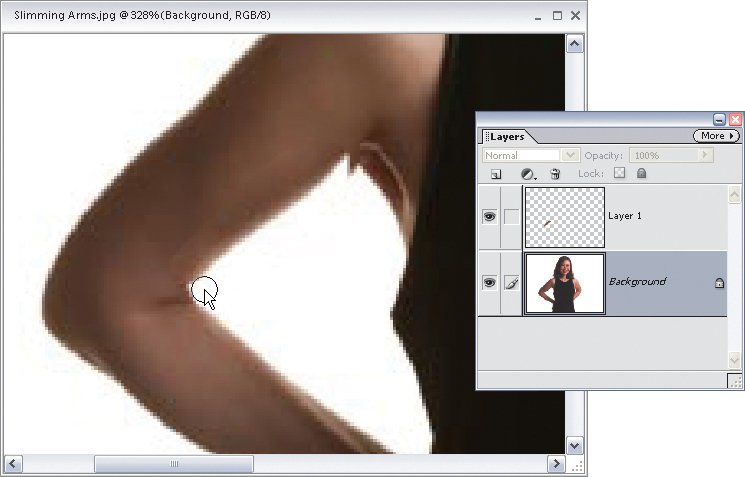
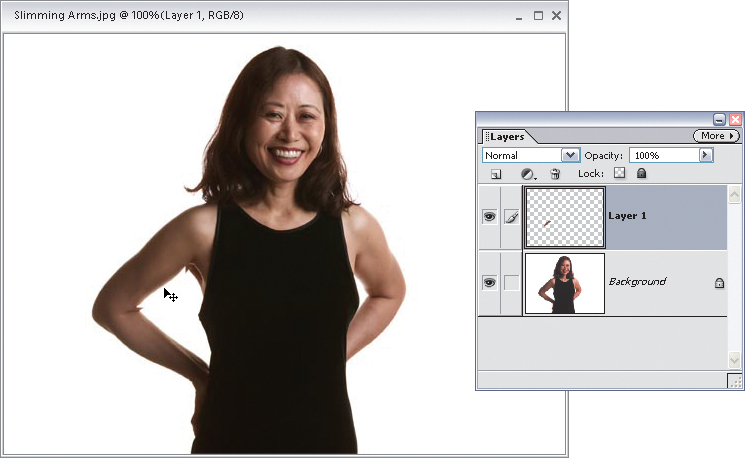
Press the letter V to switch to the Move tool and drag your copied area toward the inside of the arm to slim the arm.
Step Three:
As usual, dragging this area will leave little chunks on the background, so go to the Layers palette and click on the Background layer, switch to the Clone Stamp tool (S), Alt-click the background, and then click to clone away those excess areas. It’s a subtle retouching effect, but on the right person, it’s worth a million bucks (meaning, you can charge a million bucks).