The Show Must Go On: Showing It to Your Clients

Photographer Jeannie Theriault
Okay, you’ve sorted and categorized the photos from the shoot; you’ve backed up your digital negs to CD; and you’ve color corrected, tweaked, toned, sharpened, and otherwise messed with your photo until it is, in every sense of the word, a masterpiece. But now it’s time to show it to the client. Hopefully, you’ll get to show it to the client in person, so you can explain in detail the motivation behind collaging a 4×4 monster truck into an otherwise pristine wedding photo. (Answer: Because you can.) There’s a good chance they’ll see the photo first on your screen, so I included some cool tricks on how to make your presentation look its very best (after all, you want those huge 122″ tires to look good), and I even included some techniques on how to provide your own online proofing service using Elements (in case your clients smell bad, and you don’t want them coming back to your studio and stinkin’ up the place). I want you to really sop up the techniques (like you’re using a big ol’ flaky biscuit) because once you’re done with this chapter, once you’ve come this far, there’s no turning back. At this point, some people will start to scour their studio, searching for that one last roll of traditional print film, probably knocking around at the bottom of some drawer (or hidden in the back of the refrigerator, behind some leftover Moo Shoo Pork), so they can hold it up toward the light, smile, and begin laughing that hysterical laugh that only people truly on the edge can muster. These people are not Kodak shareholders.
Watermarking and Adding Copyright Info
This two-part technique is particularly important if you’re putting your photos on the Web and want some level of copyright protection. In the first part of this technique, you’ll add a see-through watermark, so you can post larger photos without fear of having someone download and print them; and secondly, you’ll embed your personal copyright info, so if your photos are used anywhere on the Web, your copyright info will go right along with the file.
Step One:
We’re going to start by creating a watermark template. Create a new blank document in the Elements Editor (go to File, under New, and choose Blank File) in RGB mode in your typical working resolution (72 ppi for low-res, 300 ppi for high-res, etc.). Click on the Foreground color swatch at the bottom of the Toolbox and choose a medium gray color in the Color Picker, then click OK. Now, press Alt-Backspace to fill the Background layer with medium gray. Press the letter D to set your Foreground color to black.

Step Two:
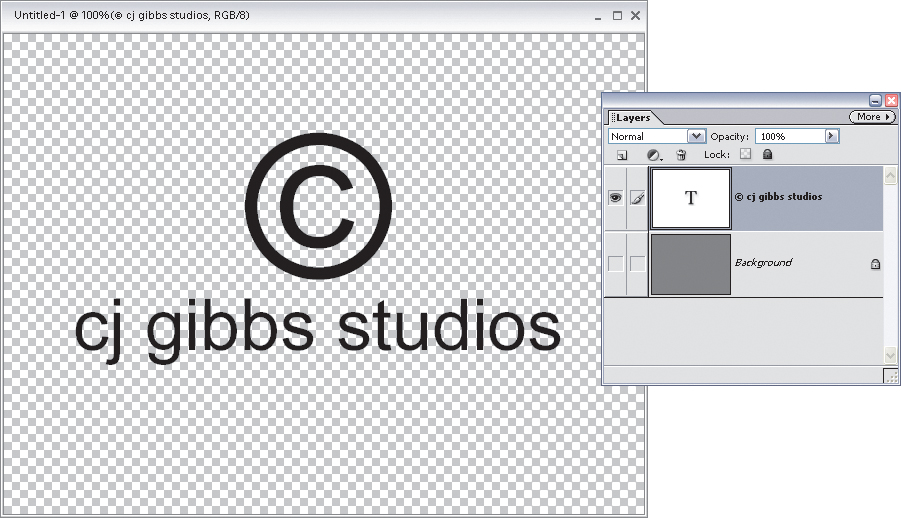
Press T to switch to the Type tool, and in the Options Bar choose a font like Arial Bold from the Font pop-up menu and then click on the Center Text icon. Click the cursor on the gray background, press-and-hold the Alt key, type “0169”, and then release the Alt key to create a copyright symbol. Then, press Enter to move your cursor to the next line and type in the name you want to have for the copyright on the photo. If needed, adjust the leading (space between lines) by selecting all your text (Control-A) and choosing a point size in the Set the Leading pop-up menu in the Options Bar. Now hide the Background layer by clicking on the Eye icon in the far-left column beside it in the Layers palette.

Step Three:
Highlight your name (but not the copyright symbol) with the Type tool and increase the size of your name to the size you’d like by using the Set the Font Size pop-up menu in the Options Bar. When it’s at the right size, highlight just the copyright symbol, and resize it upward until it’s quite a bit larger than your name. Try the type at 48 points and the copyright symbol at 200 points.
Step Four:
Go to the Styles and Effects palette (if it’s not visible, go under the Window menu and choose Style and Effects) and in the More flyout menu choose Thumbnail View. In the pop-up menu in the palette’s upper left-hand corner, choose Effects. In the second pop-up menu, make sure All is selected. Now scroll down the palette and double-click on the effect named Clear Emboss (type). This applies a beveled effect and makes the fill transparent.

Step Five:
Now you can make the Background layer visible again by going to the Layers palette and clicking in the far-left column where the Eye icon used to be. You can now see the Clear Emboss (type) effect clearly (okay, that was pretty lame).

Step Six:
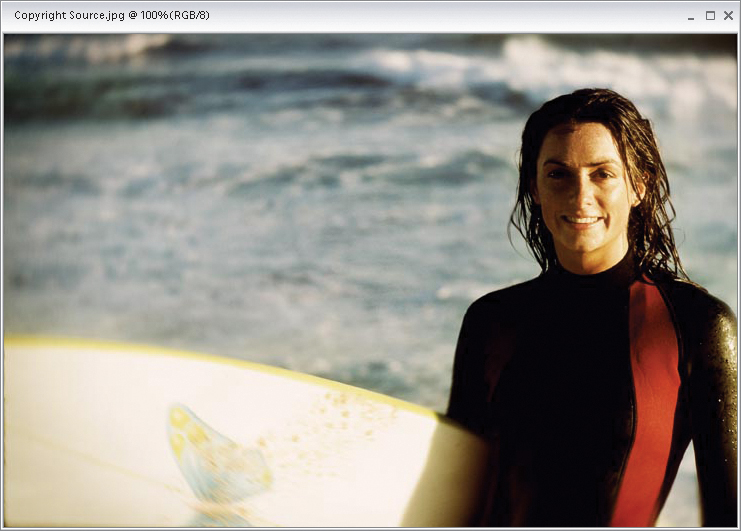
Open the photo you want to contain this transparent watermark. Make sure this photo and the document with your embossed watermark are both visible within Elements (if not, deselect Maximize Mode by going under the Window menu, under Images, and choose Cascade).
BRAND X PICTURES
Step Seven:
Press V to switch to the Move tool, then click-and-drag the large copyright symbol’s Type layer from the Layers palette (in the embossed watermark document) and drop it onto your photo (you’re dragging a layer between documents). Once the copyright symbol is in your new document, you can resize it as needed. Just press Control-T to bring up Free Transform and click-and-drag one of the corner handles. Add the Shift key to resize the type proportionately. Press Enter to complete your transformation.

Step Eight:
Now go to the Layers palette and lower the Opacity of your Type layer so it’s clearly visible, but doesn’t dominate the photo.

Step Nine:
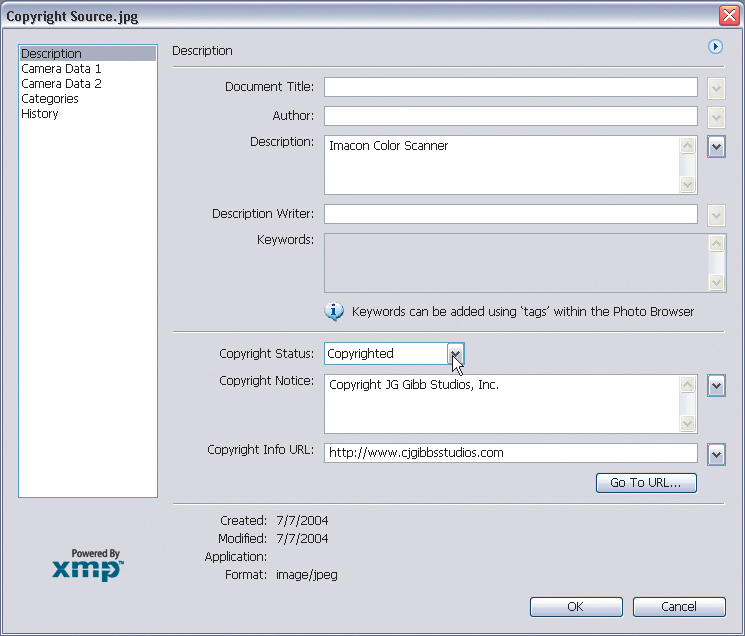
Now for the second part—we’ll embed your personal copyright info into the photo file itself. Go under the File menu and choose File Info. This is where you enter information that you want embedded. This embedding of info is supported by all the major file formats on the Windows platform (such as TIFF, JPEG, EPS, PDF, and Photoshop’s native file format).

Step Ten:
In the dialog, change the Copyright Status pop-up menu from Unknown to Copyrighted. In the Copyright Notice field, enter your personal copyright info, and then under Copyright Info URL enter your full Web address. That way, when others open your file in Elements, they can go to File Info, click the Go To URL button, and it will launch their browser and take them directly to your site.
Step Eleven:
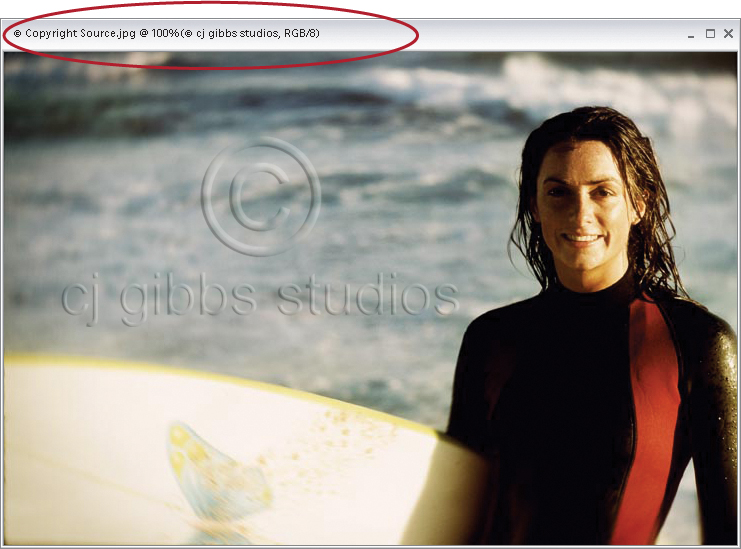
Click OK and the info is embedded into the file. Once copyright info has been added to a file, Elements automatically adds a copyright symbol before the file’s name, which appears in the photo’s title bar. That’s it—you applied two levels of protection: one visible and one embedded.
Putting Your Photos Up on the Web
Elements has a built-in feature that not only automatically optimizes your photos for the Web, it actually builds a real HTML document for you, with small thumbnail images; links to large, full-size proofs; your email contact information; and more. All you have to do is upload it to the Web and give your friends (or clients) the Web address for your new site. Here’s how to make your own.
Step One:
In the Elements Editor, open all the photos that you want to appear on your webpage. (Note: You can also Control-click to select images within the Elements Organizer.)

BRAND X PICTURES
Step Two:
Go to the task bar above the Options Bar and click on the Create button.

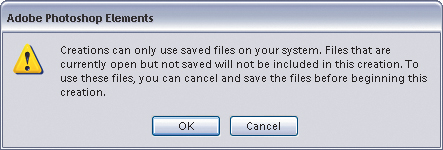
When you click this, you may get an annoying dialog letting you know that only saved photos will be included in your creation (which in this case is a webpage). If your photos have been saved (if they’re named, then they’re saved), click OK. If not, press Cancel, then go under the File menu and choose Save. Give them a name and click the Save button. Then click the Create button again.
Step Three:
When the Creation Setup dialog appears, you’ll see a list of things you can create on the left side of the dialog. Click on the bottom option, Web Photo Gallery, and then click the OK button at the bottom-right corner of the dialog.

Step Four:
When you click OK, the Adobe Web Photo Gallery dialog appears, and all your open photos will appear in a column on the left side of the dialog. This dialog is where you make your choices for how your webpage will look. At the top is a pop-up menu of preset webpage layouts (called Gallery Styles). As you choose the different styles in the pop-up menu, a thumbnail preview of each layout appears near the top of the dialog. Choose a style that looks good to you. In the next steps, you’ll decide what text will appear on the page, how big the thumbnails and photos will appear on your webpage, and what quality they’ll be.

BRAND X PICTURES
Step Five:
The first choice you should probably make is where your finished webpage will be saved to (officially called its “destination”), so click on the Browse button near the bottom-right corner of the dialog to bring up the Browse For Folder dialog. Navigate to the folder where you want your finished webpage saved to, and then click OK. Now you can start customizing your webpage.

Step Six:
Now look in the Banner tab in the center section of the dialog. This is where you type in the title and subtitle of your webpage and where you enter your email address (if you want people who visit your site to be able to email you). If you’re putting this up to show your work to clients, you certainly want to include a link for them to email you.

Step Seven:
Click on the Thumbnails tab. This is where you choose the size of the small thumbnail images that the people viewing your site will click on to see the full-sized photos. Choose your desired size from the Thumbnail Size pop-up menu. You can also choose captions—such as Filename, Caption (that is, if you already created captions for the images in the Organizer), or Date—to appear under each thumbnail if you like by clicking on the respective checkboxes in the Captions section.

Step Eight:
Click on the Large Photos tab. This is where you choose the final size and quality of the full-size photos displayed on your webpage. Choose your desired size from the Resize Photos pop-up menu, then use the Photo Quality slider to determine their quality. (Note: The higher the quality, the longer the photos may take to appear onscreen.) You can again choose titles to appear under each photo in the Captions section by clicking the checkboxes.

Step Nine:
When you click Save (at the bottom of the dialog), Elements 3 will do its thing—resizing the photos, adding your text, making thumbnails, etc.—and a preview of your webpage (complete with live navigation) will appear onscreen. But your page isn’t on the Web—it’s just a preview within Elements 3. To get your photos actually up on the Web, you’ll have to upload them to a Web server, but before you can do that, you have to go and find the files to upload.

BRAND X PICTURES
Step Ten:
Elements automatically creates all the files and folders you’ll need to upload your gallery to the Web and saves them in the location you chose earlier in the Destination section of the Adobe Web Photo Gallery dialog. These are the files and folders you need to put your photo gallery up live on the Web, including your HTML home page (index.html). Now all you have to do is upload them to a Web server and you’re live!

Getting One 5×7″, Two 2.5×3.5″, and Four Wallet Size Photos on One Print
I’ve often joked that we’re now one click away from becoming a Sears Portrait Studio since Adobe invented the Picture Package feature, which lets you gang-print the standard, common photo sizes together on one sheet. With Picture Package, Elements does all the work for you. All you have to do is open the photo you want gang-printed, and then Elements will take it from there—except for the manual cutting of the final print, which is actually beyond Elements’ capabilities. So far.
Step One:
Open the photo in the Elements Editor that you want to appear in a variety of sizes on one page, and then go under the File menu and choose Print Multiple Photos.

BRAND X PICTURES
Step Two:
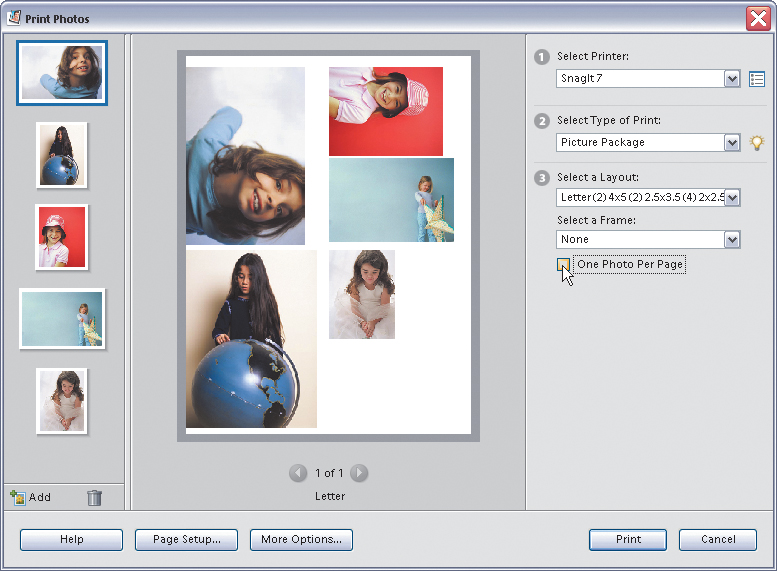
When the dialog appears, on the right-hand side choose which printer you want to print to. Then in section 2, choose Picture Package from the pop-up menu.

Step Three:
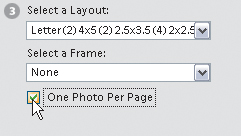
In the third section down, choose the sizes and layout for your Picture Package from the Select a Layout pop-up menu. In this example, I chose Letter (2) 4×5 (2) 2.5×3.5 (4) 2×2.5, but you can choose any combination you like.

Step Four:
Even though you’ve chosen a layout, only one photo will appear in the layout preview in the center of the dialog. You’ll need to click the One Photo Per Page checkbox to place your image multiple times.
Step Five:
Elements 3 automatically resizes, rotates, and compiles your photos into one document. This is a simple use of Picture Package, but it’s actually more flexible than it looks, as you’ll see in the next step.

Step Six:
Another option you have is to add a custom frame around the photos in your Picture Package. To add a frame, just choose one from the Select a Frame pop-up menu and your choice will be immediately reflected in the preview.

Step Seven:
If you’d like to create more Picture Package layouts using your same settings, all you have to do is import another photo. You do that by first clicking on the Add button near the bottom left-hand corner of the dialog. This brings up the Add Photos dialog, where you can find the photo you want to import from the Photo Browser, the Catalog, etc. Just click on the checkbox to the right of the image’s thumbnail in the dialog, and click OK. Once imported, a small thumbnail of your photo appears in the list of photos on the left side of the dialog (you can see a second photo has been added in the capture shown here).

Step Eight:
To see the layout with your new photo, click the right-facing arrow button just below the large preview in the center of the dialog. It will toggle you to a layout for your second photo. If you import several photos, you’ll be able to toggle to a layout for each photo.

BRAND X PICTURES
Step Nine:
If you’re a more advanced user who understands color management options and assigning color profiles, you can click on the More Options button, located directly below the preview, and assign a color space to your photos before printing. But if you’re not comfortable making these choices, just skip the More Options button.

Step Ten:
Click Print and here’s how your additional Picture Package output will look.

Using Picture Package Layouts with More Than One Photo
Although the Picture Package feature is most often used for printing one photo multiple times on the same page, you can substitute different photos in different positions, and you can customize their location. Here’s how:
Step One:
Once you have the Picture Package dialog open (see previous tutorial), click the Add button (near the bottom left-hand corner of the dialog) to add additional photos from the Photo Browser, Catalog, etc., until you have a row of thumbnails appearing down the left side of the dialog. Make sure the One Photo Per Page checkbox (found on the right side of the dialog, just below Select a Frame pop-up menu) is turned on.

BRAND X PICTURES
Step Two:
To add a new photo to your Picture Package layout, just click on the image’s thumbnail on the left and drag-and-drop it onto the preview area in the center of the dialog on the position you want it to appear. (Note: As you drag, you’ll notice a highlight around the preset picture positions in the preview window.)

Step Three:
If you want to move a photo to another position, just click directly on the photo in the preview area and drag it to a new position. It will automatically resize if necessary.

Step Four:
You can have as many different photos as you have positions in your layout, so just continue dragging-and-dropping thumbnails from the left side of the dialog into position within the preview area.

Step Five:
If you’d prefer to just have all your imported photos appear on the page at once (rather than dragging-and-dropping them), just turn off the One Photo Per Page checkbox and all imported photos on the left of the dialog will automatically flow into place.
Sending a PDF Presentation to a Client
In Elements 3 there’s a feature that takes a group of images, creates a slide show (complete with transitions), and compresses it into PDF format so you can email it easily to a client for proofing. This is perfect for showing your portfolio to clients, sending clients proofs of wedding shots or portrait sittings, sending friends photos from a party, or one of a dozen other uses, none of which I can think of at this particular moment, but I’m sure it’ll come to me later when I’m at the mall or driving to the office.
Step One:
Open the photos you want to use in your PDF presentation in the Editor, and then click the Create button. (Note: You can also Control-click images in the Organizer, and then click the Create button.)

Step Two:
This brings up the Creation Setup dialog. There’s a list of different projects you can create on the left side of the dialog. Click on the top option (Slide Show), and then click the OK button in the bottom-right corner of the dialog.

Step Three:
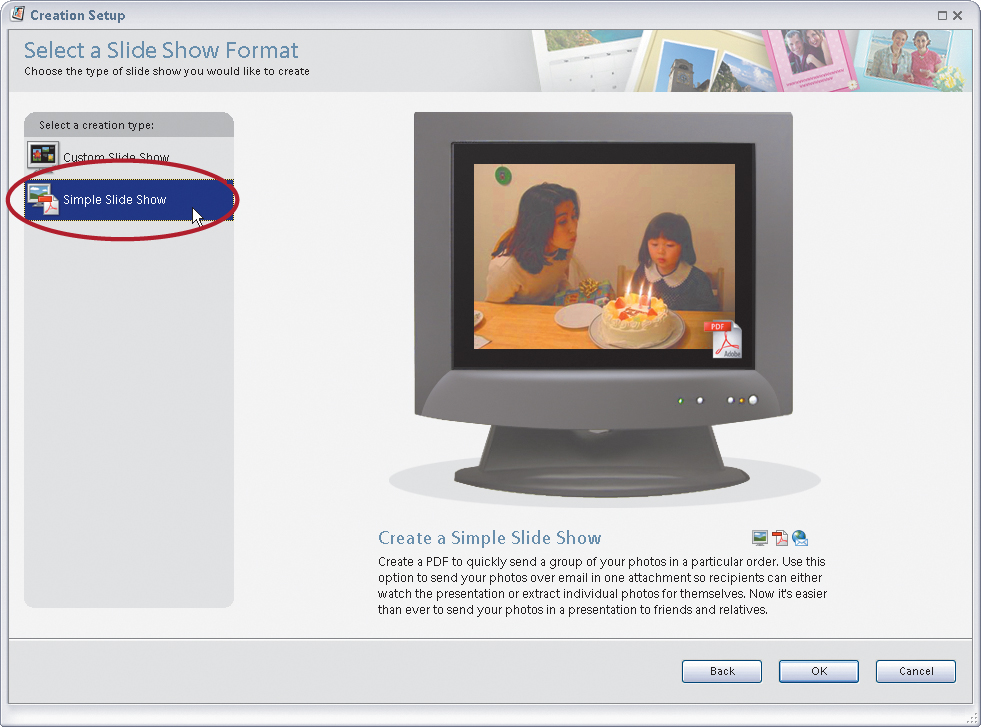
This brings up the Select a Slide Show Format options, where you choose which kind of slide show you want. In this case, choose Simple Slide Show on the left of the dialog, and then click the OK button near the right-hand corner of the dialog.
Step Four:
Clicking OK brings up another dialog. At the top of the dialog are thumbnails of all the photos that will be included in your Simple Slide Show. The thumbnails are numbered, meaning thumbnail 1 will be displayed first, thumbnail 2 will be shown second, and so on. If you want to change the order of your slides, just click on a thumbnail and drag it into the order you’d like it to appear. If you want to remove an image from the slide show, click on the thumbnail and then click the Remove Photo button in the top-center area of the dialog. And, of course, to add an image, click the Add Photos button in the top-left corner and browse for your image.

BRAND X PICTURES
Step Five:
By default, Elements 3 will provide a random transition between your slides, but some of them may look cheesy or out of place, depending on your subject matter. So, if you prefer to play it safe and choose something that nearly always works, choose a transition like Dissolve from the Transition pop-up menu.

Step Six:
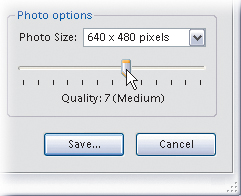
In the lower-right half of the dialog, in the Photo Options section, you can choose the size of the photos that will appear in your slide show. In the example shown here, I chose 640×480 pixels, but you can choose any size you’d like from the Photo Size pop-up menu, or enter your own preferred size by choosing Custom from the menu.

Step Seven:
If you choose any size other than the original size of the photo, you also get to choose a quality setting. Remember: The higher the quality, the larger your file size will be, so try and find a happy medium. Try a 7 or an 8. Only go higher if you know the person you’re emailing this presentation to has a high-speed Internet connection.
Step Eight:
Click the Save button and choose where to save your PDF file. Elements 3 then creates a PDF file for you, ready to email to your client.

Step Nine:
When your client opens your emailed PDF, it automatically launches Adobe Reader in Full Screen mode (your photos appear centered on a black background), and the presentation begins. The capture below shows the first slide in a PDF presentation in Full Screen mode, right before it transitioned to the next photo. (Note: If for some strange reason your client/friend doesn’t have Adobe Reader installed, he or she can download it free from Adobe’s site at www.adobe.com/products/acrobat/readstep2.html.)

How to Email Photos
Believe it or not, this is one of those most-asked questions, and I guess it’s because there are no official guidelines for emailing photos. Perhaps there should be, because there are photographers who routinely send me high-res photos that either (a) get bounced back to them because of size restrictions, (b) take all day to download, or (c) never get here at all because there are no official guidelines on how to email photos. In the absence of such rules, consider these the “official” unofficial rules.
Step One:
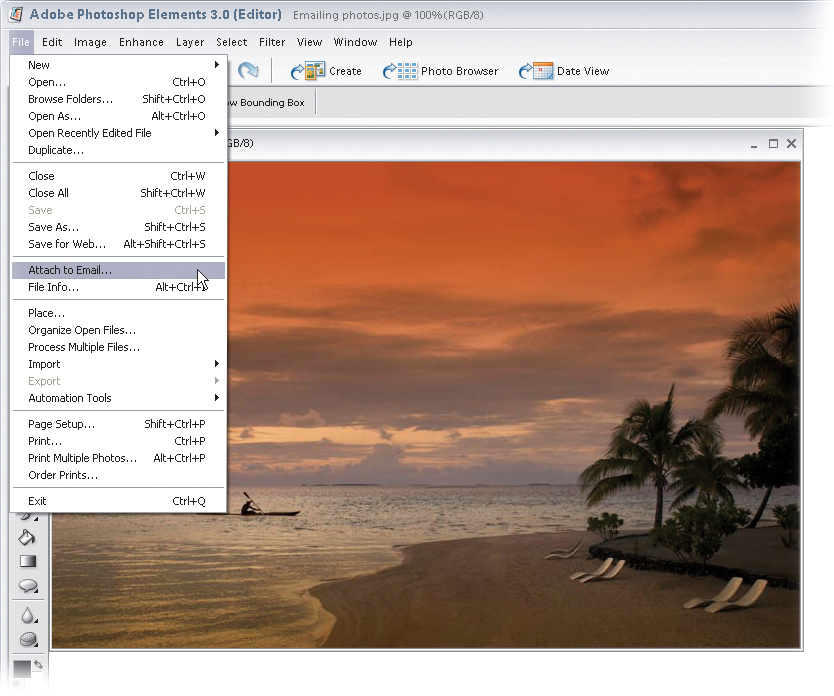
Open the photo in the Elements 3 Editor that you want to email. Go under the File menu and choose Attach to E-mail. (Note: You may get an Email dialog asking you to choose an email client as your default. Choose your email client [Microsoft Outlook, etc.] from the pop-up menu and click OK.)
BRAND X PICTURES
Step Two:
This opens your photo in the Attach to E-mail dialog. The first decision to make is: Who do you want to email this photo to? (Adobe calls this simple task Select Recipients, because that makes it sound significantly more complicated and confusing.) To choose who will receive your photo by email, click on the Add Recipient button at the bottom center of the dialog.

Step Three:
This brings up a dialog where you add the person’s first and last names and an email address. Enter the information and click OK. If you want to send this photo to more than one person, click the Add Recipient button again to add another name—keep doing that until you’ve added enough names that you feel like you’re actually starting to spam people.

Step Four:
If you’d like to add a message to your email (like “Here’s where I’m on vacation. The weather is here, wish you were beautiful,” etc.), enter that in the Message field at the bottom of the dialog. Feeling a bit creative? Why not add a border to your photo, or an entire layout, complete with graphics, that will email right along with your photo. To do just that, click on the Stationery & Layouts button.

Step Five:
When the Stationery & Layouts Wizard dialog appears, you have just two simple decisions to make. The first question to ask is: What do you want the layout to look like? You choose this from the list of layouts (called Stationery) on the left side of the dialog. As you click on each choice, your layout is immediately reflected in the preview area on the right, so you’ll see just what your “recipient” will see. If the basic layout looks good, click the Next Step button in the bottom right-hand corner of the dialog.

Step Six:
Your second choice is really an option to customize your layout, which you do in the Layout panel on the left side of the screen. You can choose the size of your photo, the position of your photo, text options, etc. For instance, you can enter a message directly onscreen in the preview area and then control the font and color of your text in the Text category.

Step Seven:
Adjust the options along the left of the dialog to make your image look its best. When it looks good to you, click the Done button.

Step Eight:
When you click Done, since you tweaked the settings of your Stationery, it brings up a dialog so you can name your custom setting. Enter a name, click OK, and it’s saved so you can quickly get to that exact layout in the future by choosing it from the Stationery pop-up menu. It then takes you back to the Attach to E-mail dialog again. Click the OK button.

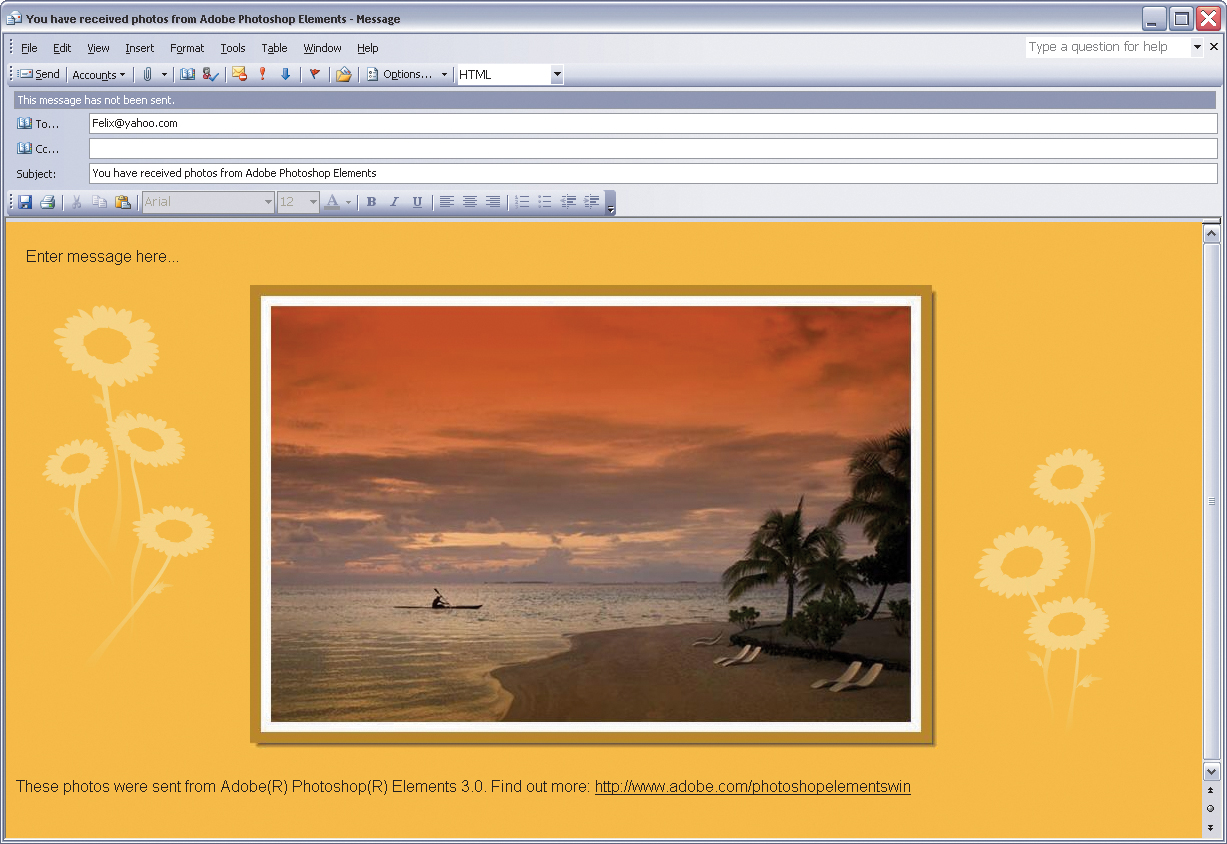
Step Nine:
Clicking OK launches your default email application and your photo and custom stationery are automatically attached. All that’s left to do now is click the Send button and it’s on its way.