Get Back: Photo Restoration Techniques

Photographer Carol Freeman
Okay, I know you’re thinking, “Hey, this is a supposed to be a book for digital photographers. Why are we restoring old damaged photos taken 50 years before digital cameras were invented?” Well, a secret loophole in my book contract enables me, once in every book, to cover a topic that doesn’t fall within the general purview of the book. For example, in Photoshop CS Down & Dirty Tricks, I included a full chapter called “Underrated Breakfast Cereals.” So when you’re working your way through this chapter, keep thinking to yourself, “Hey, this could be another cereal chapter.” Then you’ll find not only does this chapter fit, but on some level it fits so well that it makes you want to fix yourself a huge bowl of Kellogg’s® Smart Start™. Besides, there’s another useful loophole: the theory that once a torn, washed-out, scratched photo of your great-grandfather is scanned, it then becomes a “digital,” torn, washed-out, scratched photo of your great-grandfather. And once you open it in Elements 3, you’ll be engulfed with a burning desire to repair that photo. If I hadn’t included this chapter on how to repair and restore these old photos, then where would you be, Mr. “Hey-this-is-supposed-to-be-a-book-for-digital-photographers” frumpy-pants? Don’t you feel just a little guilty? I thought so. Now put down your spoon and start restoring some photos. (Note: My publisher told me that if I found a way to work the phrase “burning desire” into the book, it would increase sales by as much as 7%. If that somewhat suggestive phrase makes you uncomfortable, feel free to mentally replace “burning desire” with “uncontrollable urge,” even though its response rate is more along the lines of 3 to 4%.)
Repairing Washed-Out Photos
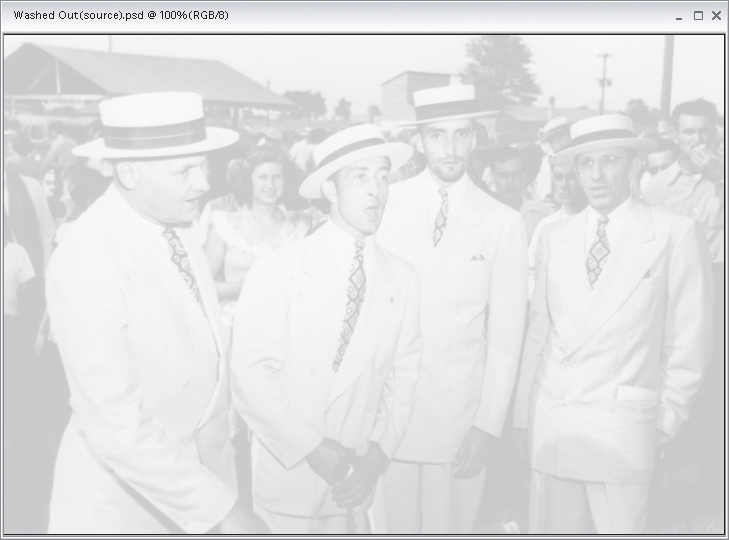
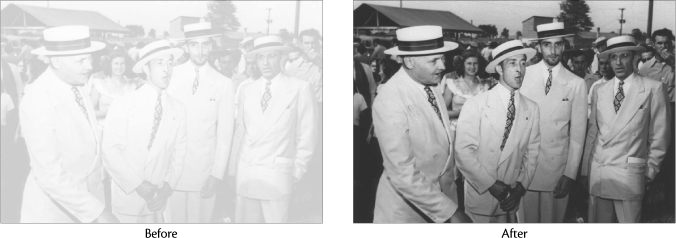
If you’ve got an old photo that’s washed out, lacking detail, and generally so light that it’s just about unusable, try this amazingly fast technique to quickly bring back detail and tone.
Step One:
Open the washed-out photo.
Step Two:
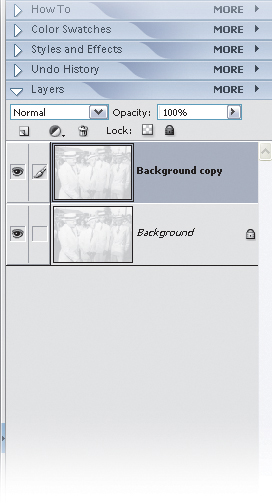
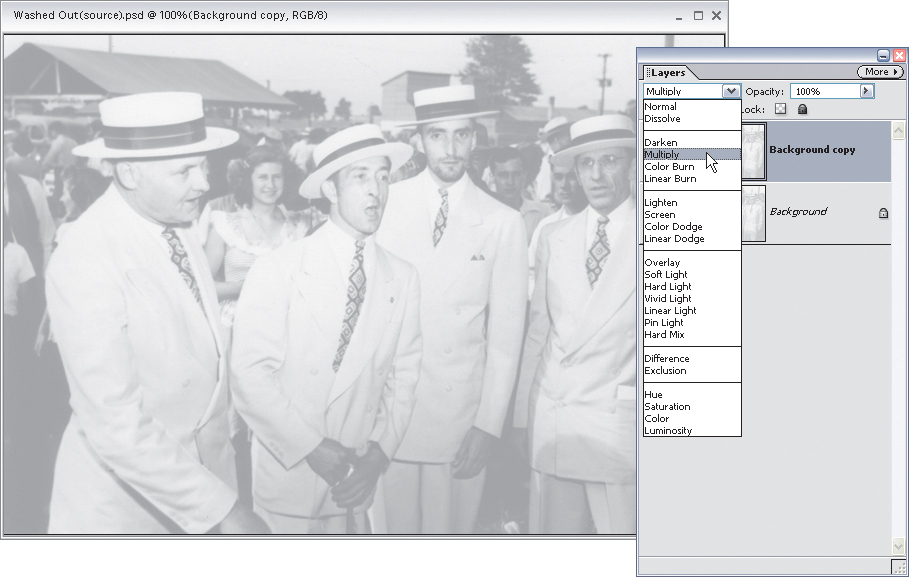
Duplicate the Background layer by dragging it to the Create a New Layer icon at the top of the Layers palette. This creates a layer called “Background copy.”
Step Three:
Change the layer blend mode of the Background copy layer by choosing Multiply from the pop-up menu at the top of the Layers palette. As the name implies, this has a “multiplier” effect that darkens the photo and brings back some of the tonal detail.
Step Four:
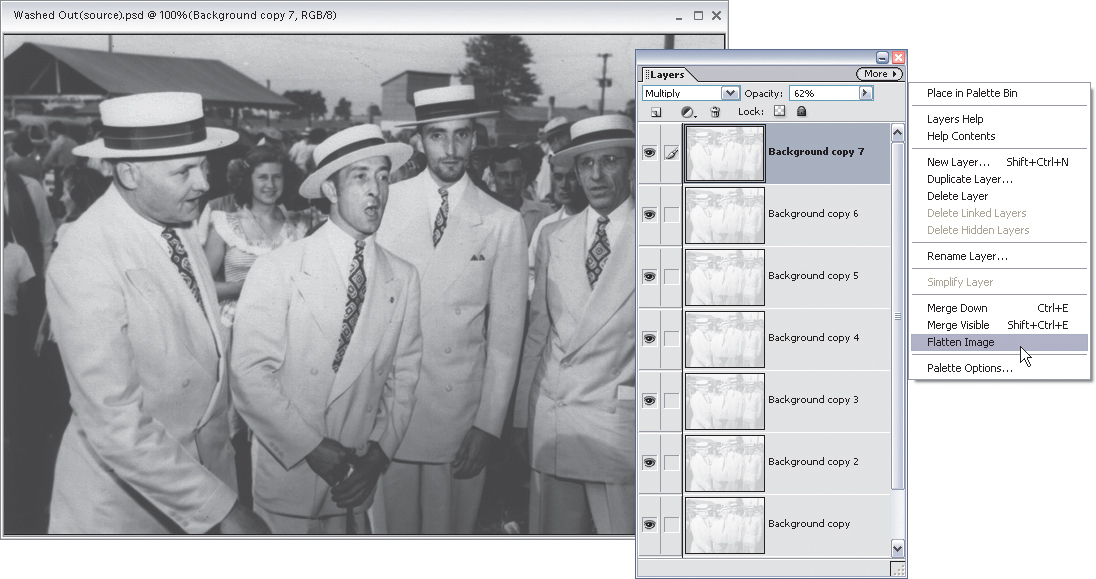
If the image is still too blown out, continue making copies of this duplicate layer (which is already set to Multiply mode) until the photo no longer looks washed out. If the last layer that you add makes it too dark, just lower the Opacity setting of this layer until it looks right.

Step Five:
Now you may have a new problem—you’ve got a bunch of layers. The more layers you have, the larger your Elements file, and the larger your Elements file, the slower Elements goes, so there’s no sense in having a bunch of extra layers. It just slows things down. So, once the photo looks good, go to the Layers palette, click the More flyout menu, and choose Flatten Image to flatten all those layers down into one Background layer.
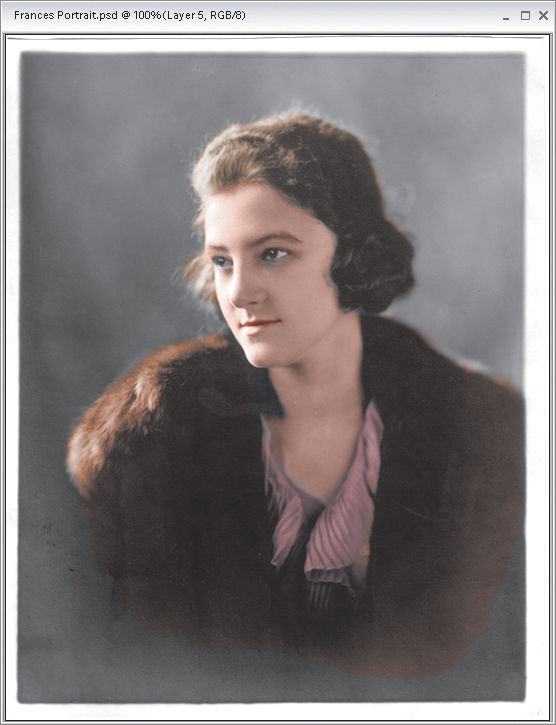
Colorizing Black-and-White Photos
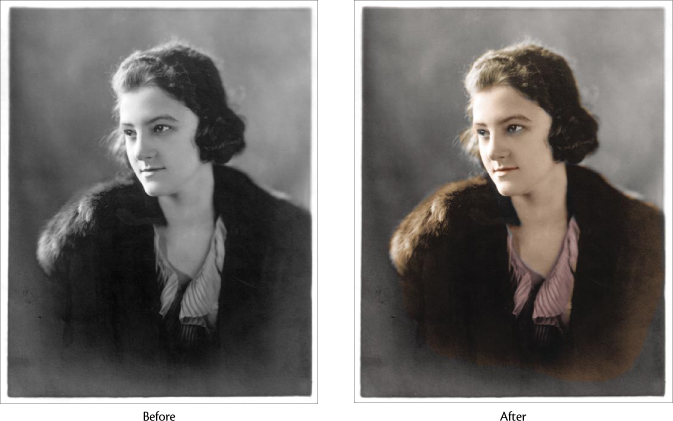
Once you’ve restored a black-and-white photo, you might want to consider colorizing (hand tinting) the photo to give it added depth. This particular technique doesn’t take a lot of Elements skills, it just takes a bit of patience, because colorizing a photo can take some time.
Step One:
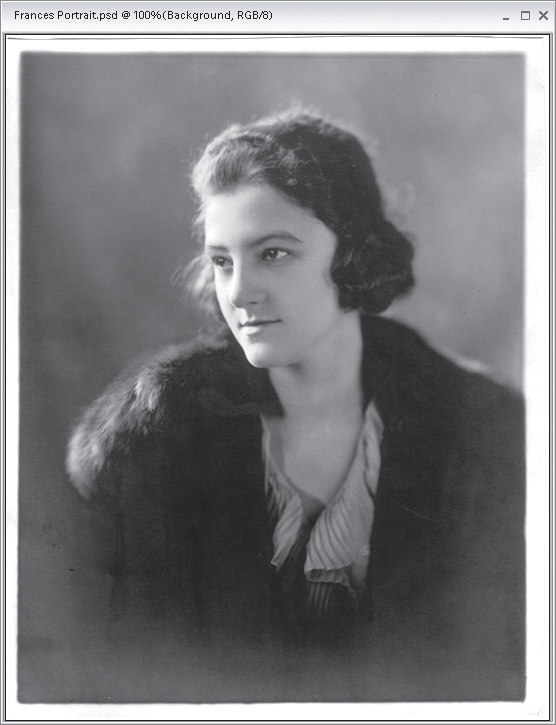
Open the black-and-white photo you want to colorize.
Step Two:
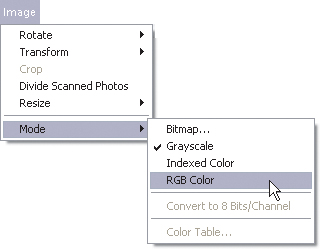
To colorize a photo, your Elements image has to be in a color mode, so if your photo is in Grayscale mode (it will say “Gray” up in your document’s title bar), you’ll have to convert it to RGB mode by going under the Image menu, under Mode, and choosing RGB Color.
Step Three:
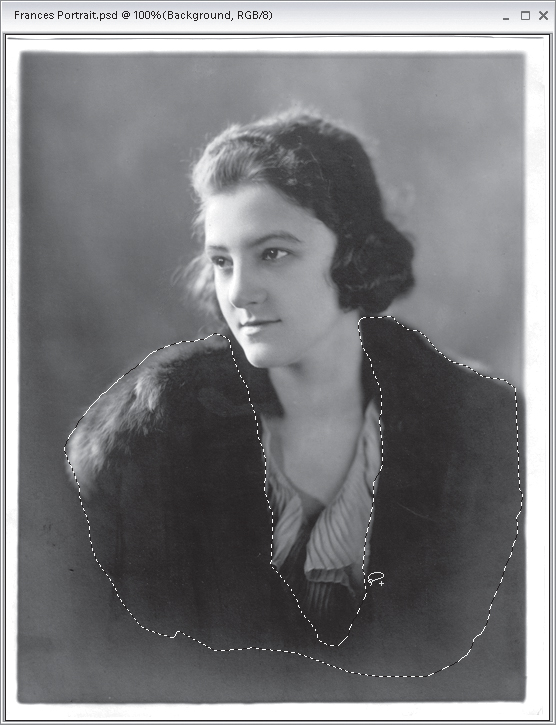
Press L to switch to the Lasso tool and draw a selection around the first area within your photo that you want to colorize. Press-and-hold the Alt key to subtract from your selection or hold the Shift key to add to it. Then, go under the Select menu and choose Feather. When the dialog appears, enter 2 pixels to soften the edge of your selection just a tiny bit, then click OK. Now, you could do all of your colorization on the Background layer, but I recommend pressing Control-J to copy your selected area onto its own layer. That way if a color you’ve applied winds up looking too intense, you can lower the layer’s Opacity to “tone it down” a bit.
Step Four:
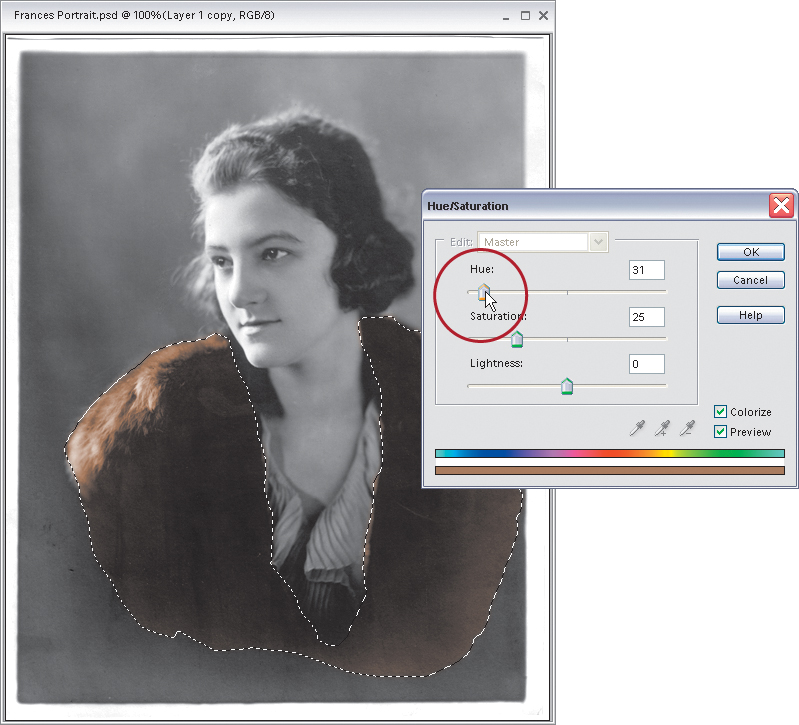
Go under the Enhance menu, under Adjust Color, and choose Adjust Hue/Saturation. When the Hue/Saturation dialog appears, click on the Colorize checkbox in the bottom right-hand corner of the dialog, drag the Hue slider (at the top of the dialog) to the tint you’d like for this selected area, and then click OK.
Step Five:
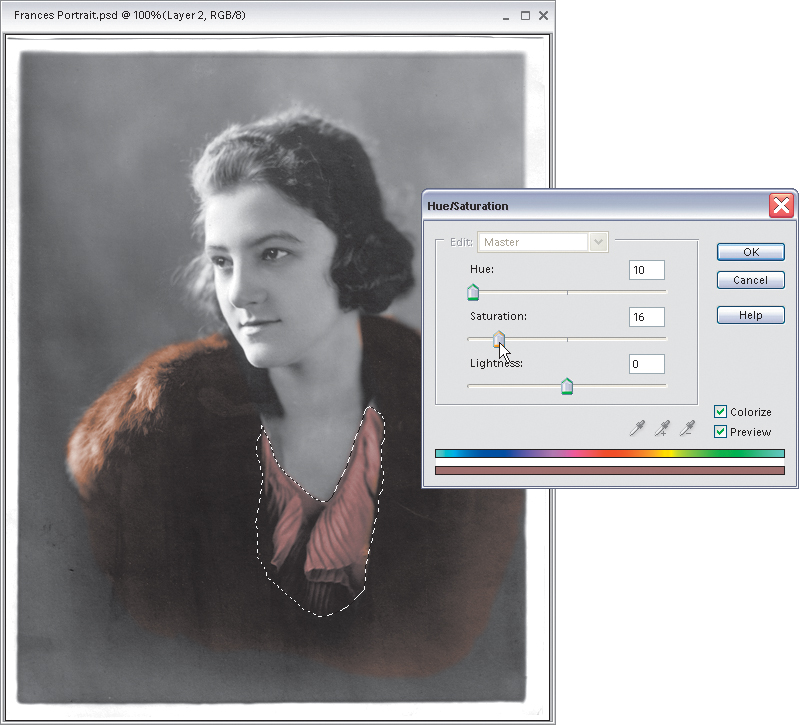
In the Layers palette, click on the Background layer to make it active and with the Lasso tool, select the next area to be colorized (in this case, her blouse). Apply a feather to your selection (as you did in Step Three), and press Control-J to copy your selection to its own layer. Now apply your Hue/Saturation adjustment again (like you did in Step Four). When you’re applying the color, if the color looks too intense, drag the Saturation slider to the left to reduce the color’s intensity, giving it a pastel look that’s typical of color tinting. When it looks good to you, click OK.
Step Six:
You’ll basically repeat this process to colorize the rest of the photo. Each time you’ll go to the Background layer, select an area to be colorized, add a slight feather, copy the selection to its own layer by pressing Control-J, apply the Hue/Saturation command, click the Colorize checkbox, and choose your desired color using the Hue slider. When you’re finished, if any of the colors look too intense, just lower the Opacity in the Layers palette. Then choose Flatten Image from the Layers palette’s More flyout menu to complete the effect.
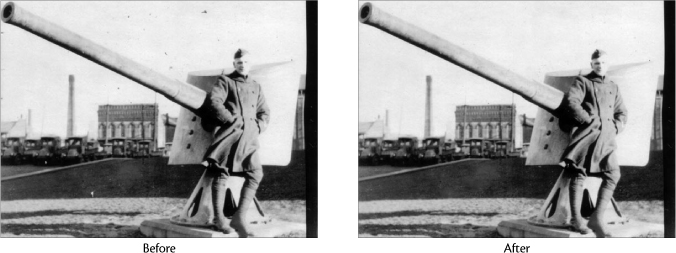
Removing Specks, Dust, and Scratches
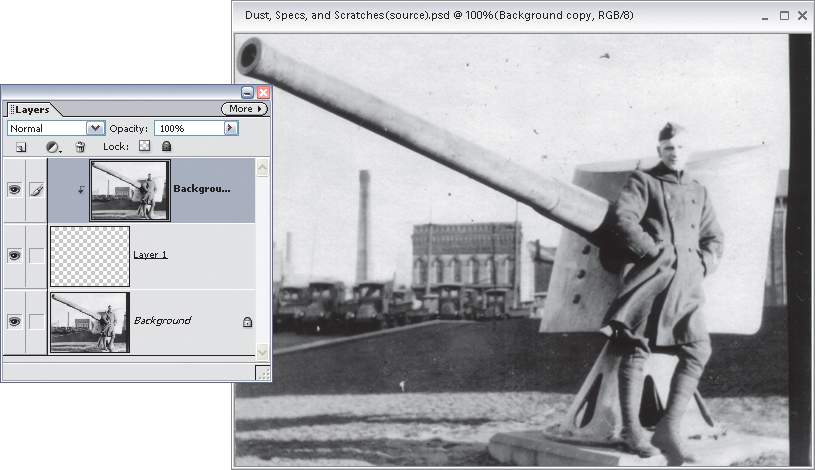
If you’ve used Elements’ Dust & Scratches filter, you’ve probably already learned how lame the filter really is. That is, unless you use this cool workaround that takes it from a useless piece of fluff, to a...well...reasonably useful piece of fluff. This technique works brilliantly for removing these types of artifacts (that’s “Elements-speak” for specks, dust, and other junk that winds up on your photos) on the background areas of your photos.
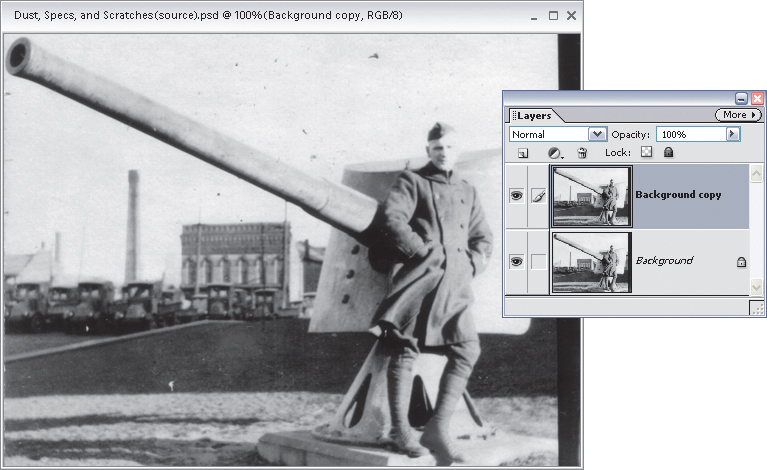
Step One:
Open the photo that needs specks, dust, and/or scratches repaired. Duplicate the Background layer by dragging it to the Create a New Layer icon at the top of the Layers palette. This creates a layer called “Background copy.”
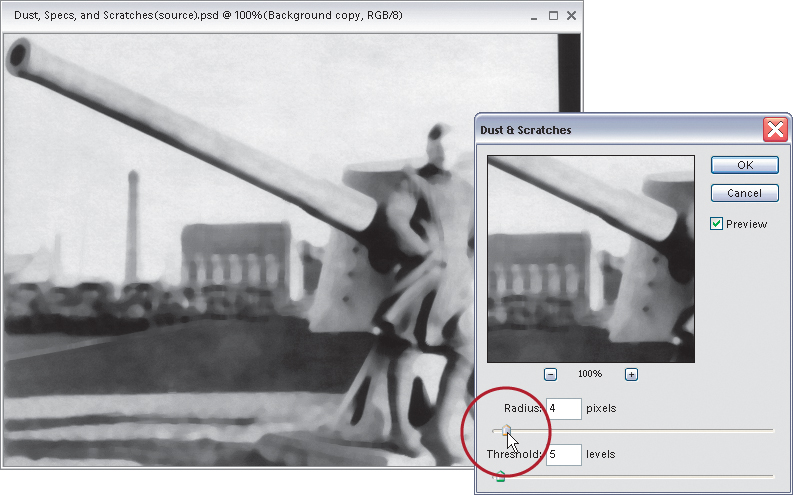
Step Two:
Go under the Filter menu, under Noise, and choose Dust & Scratches. When the Dust & Scratches dialog appears, drag both sliders all the way to the left, then slowly drag the top one (Radius) back to the right until the specks, dust, and scratches are no longer visible (most likely this will make your photo very blurry, but don’t sweat it—make sure the specks are gone, no matter how blurry it looks), then click OK.
Step Three:
In the Layers palette, hold the Control key and click on the Create a New Layer icon to create a new blank layer beneath your current layer. Now, click back on the top layer, then press Control-G to group your blurred layer with the blank layer beneath it. Doing this hides the effect of the Dust & Scratches filter you applied earlier.
Step Four:
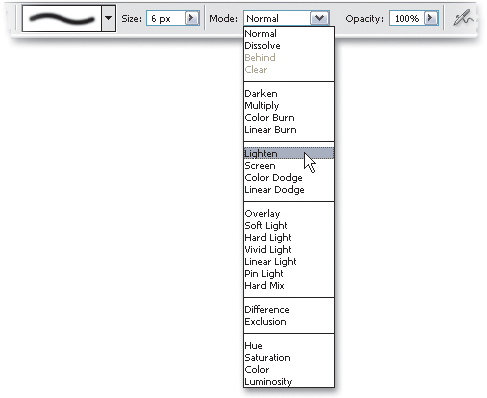
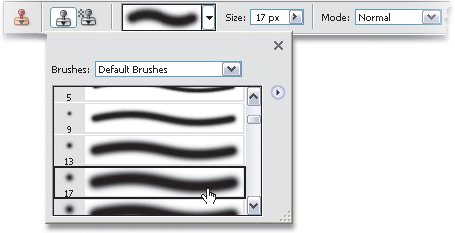
Press the letter D to set your Foreground color to black. Press B to switch to the Brush tool, then go to the Options Bar and change the Mode pop-up menu from Normal to Lighten. This changes the brush so that when you paint, it only affects the pixels that are darker than the area you’re painting. Also, click the Brush Preset icon in the Options Bar, and when the Brush Picker appears, choose a medium-sized, soft-edged brush.
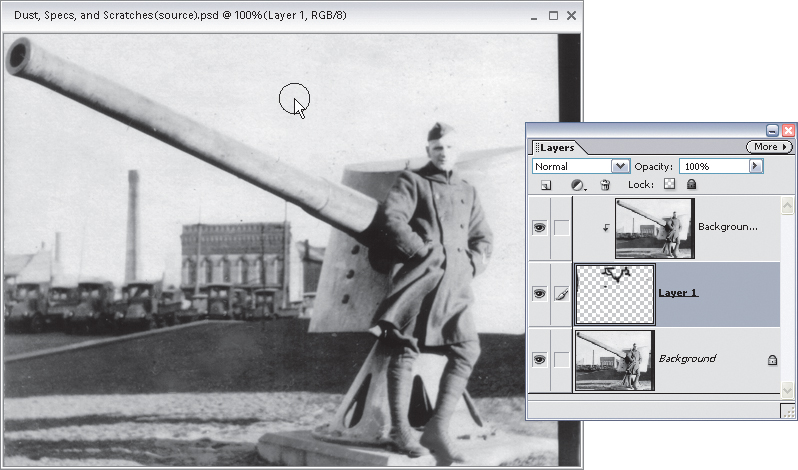
Step Five:
Click on the middle layer (you’ll actually paint on this blank layer), then paint directly over the areas of your photo that have specks. As you paint, the specks and dust will disappear (you’re actually revealing the blurred layer above, where you applied the Dust & Scratches filter). Again, this technique works best on background areas, but it can also be useful for cleaning detailed areas. Just use a very small brush to minimize any blurring that may occur.
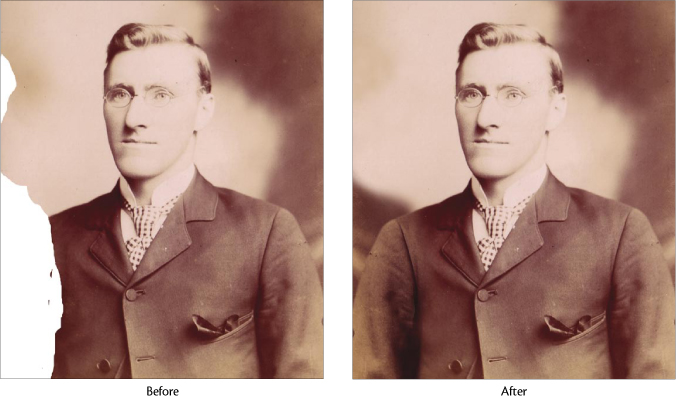
Repairing Damaged or Missing Parts
If you have an old photo with a serious rip, tear, stain, or other major anomaly, there’s a reasonable chance that one of these little nasties could affect a part of your photo’s main subject (for example, if it’s a photo of a person, a stain could have a body part or facial feature covered, leaving you with quite a task). Here’s how to repair missing or damaged parts, the easy way.
Step One:
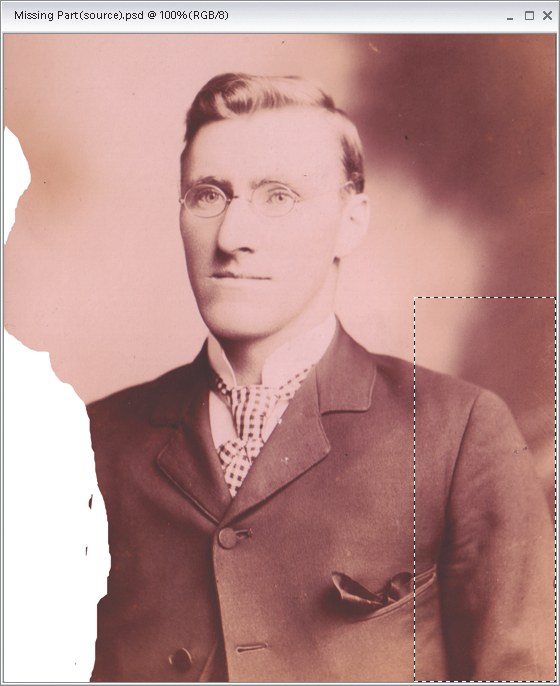
Open the photo that contains a damaged feature (in this case, most of his right shoulder and arm are missing).

Step Two:
Use one of Elements’ selection tools (try the Lasso tool if you just need to make a loose selection or try the Rectangular Marquee tool, as I did here) to select an undamaged part of the image that you can use to fix the damaged area. For instance, if you’re trying to fix a person’s right shoulder and the left shoulder is undamaged, select the left shoulder to use for the repair.
Step Three:
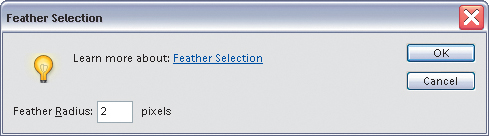
To keep from having a hard edge around the selected area, you’ll need to apply a feather to the edges of your selection. Go under the Select menu and choose Feather. When the dialog appears, enter a Feather Radius. For low-res images use a 1- or 2-pixel Radius. For high-res, 300-ppi images, you can use as much as 4 or 5 pixels.
Step Four:
You’ll need to duplicate the selection, so go under the Layer menu, under New, and choose Layer via Copy (or press Control-J). This creates a new layer and copies your selected area to it.

Step Five:
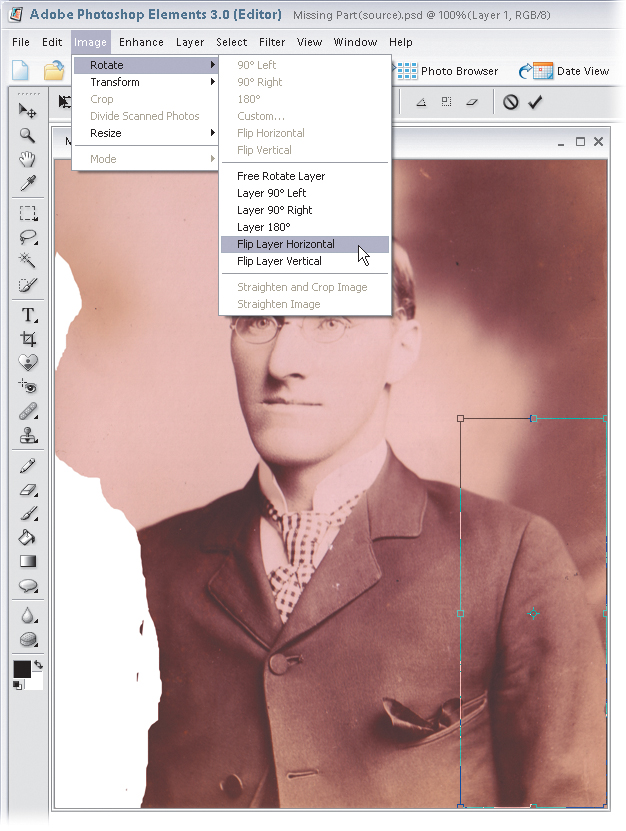
You probably can’t just simply drag this patch over to fill the empty space (because the person would end up with two left shoulders, leaving him looking slightly freakish). So, you’ll need to flip the copied layer, so go under the Image menu, under Rotate, and choose Flip Layer Horizontal (or Vertical) to turn your patch layer into a mirror reflection of the original selection.
Step Six:
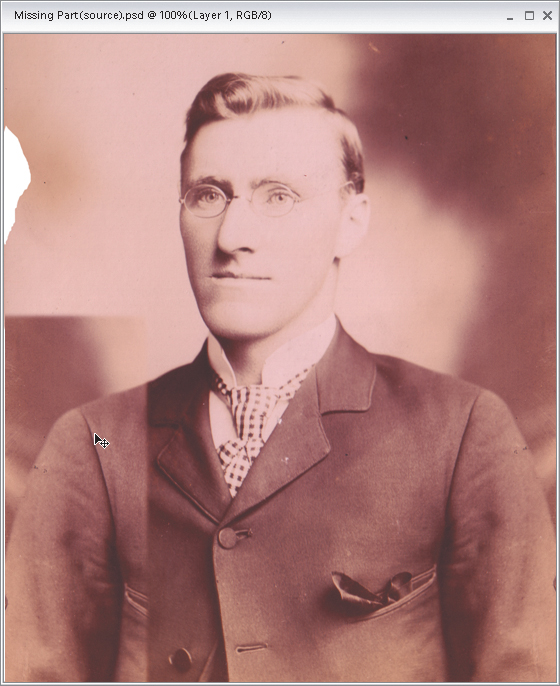
Now, switch to the Move tool by pressing the V key, and with the patch on its own layer, drag it over to where the tear is on the left. (Note: If you lower the Opacity of the patch layer to about 50%, it may help you to precisely position the patch because you’ll be able to see some of the original image on the layer beneath it.) When you do this, you’ll see you have a new problem—the tone of the flipped shoulder and the original shoulder don’t match (the flipped shoulder is too light, so to make the restoration look real, you’ll have to change the tone of the flipped shoulder layer).
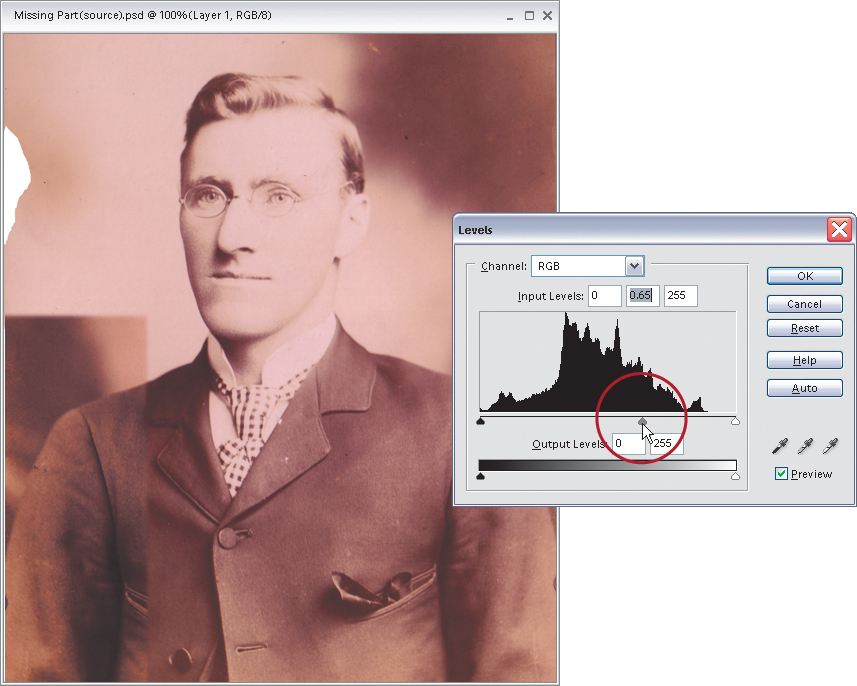
Step Seven:
Press Control-L to bring up the Levels dialog. To darken the tone of the flipped shoulder, drag the midtones Input Levels slider to the right. This darkens the midtones and helps make the flipped shoulder better match the coat on the left side. Click OK when the flipped shoulder comes close to matching the original coat.
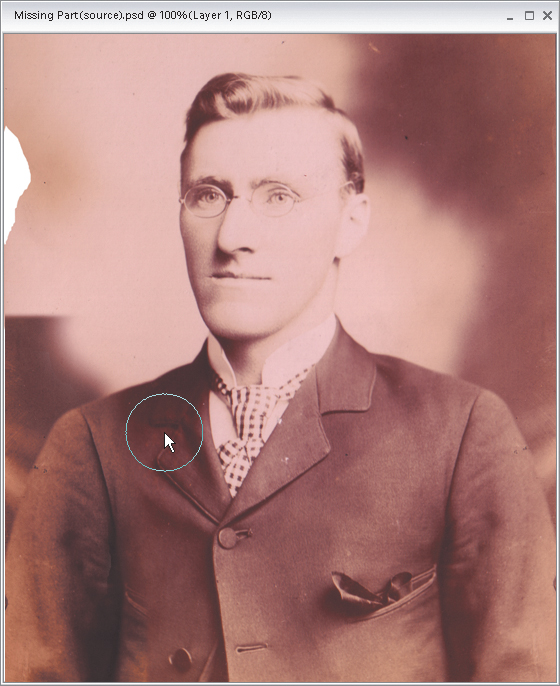
Step Eight:
Even after you match up the tones, you can see a hard edge where your flipped shoulder meets the original photo. To hide that edge, press the E key to switch to the Eraser tool, choose a soft-edged brush from the Brush Picker in the Options Bar, and erase over that edge. Now go to the Layers palette’s More flyout menu and choose Flatten Layers.
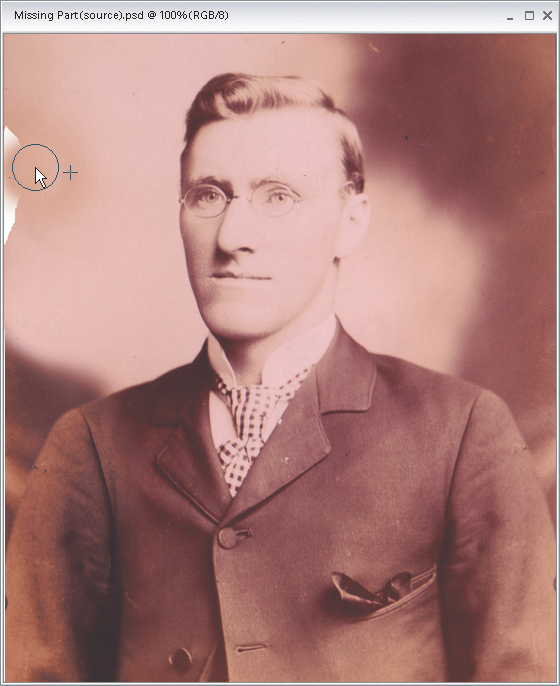
Step Nine:
Although you’ve fixed the coat area, you still have a hard edge just above his shoulder and to the left, plus you have another rip above that. To fix these areas, press S to switch to the Clone Stamp tool. Choose a soft-edged brush from the Brush Picker in the Options Bar, and Alt-click an area near the hard edge, then click to clone over that area. Now go up to the rip on the left side and do the same thing—Alt-click near the rip and click to clone that sampled area over the rip, which completes the restoration.
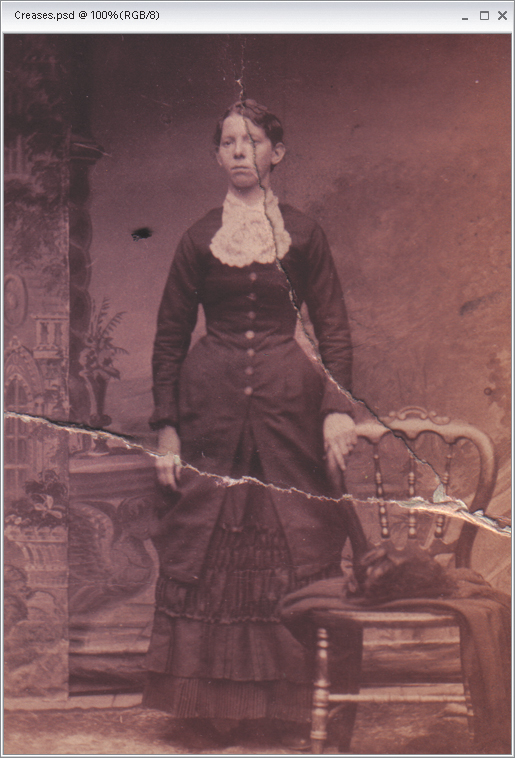
Repairing Rips and Tears
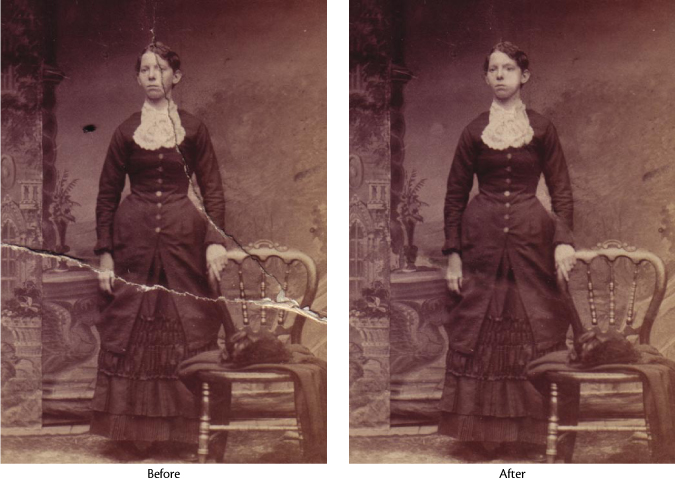
There are few things worse than rips, tears, or cracks from a photo being bent, especially when it happens to old family photos you really care about. Here’s a simple technique that lets you hide these nasty rips by “covering them up.”
Step One:
Scan a photo that has rips, tears, or bends, and open it in Elements. The photo here has tears from being bent.
Step Two:
The plan is to clone over the cracks using non-cracked nearby areas. Start by getting the Clone Stamp tool from the Toolbox (or press the S key). Choose a medium to small, soft-edged brush by clicking the Brush Preset icon in the Options Bar to open the Brush Picker.
Step Three:
Hold the Alt key and click in a “clean” area near the cracked area. (By clean, I mean Alt-click in an area that has no cracks or other visible problems. But to help ensure that your repair doesn’t look obvious, it’s important to click near the tear, and not too far away from it.)

Step Four:
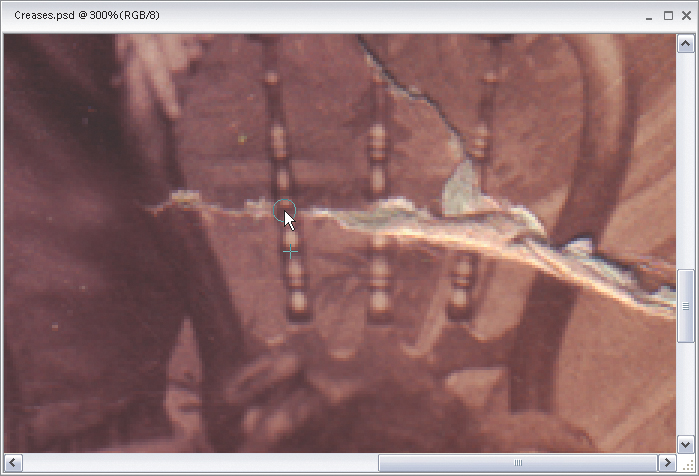
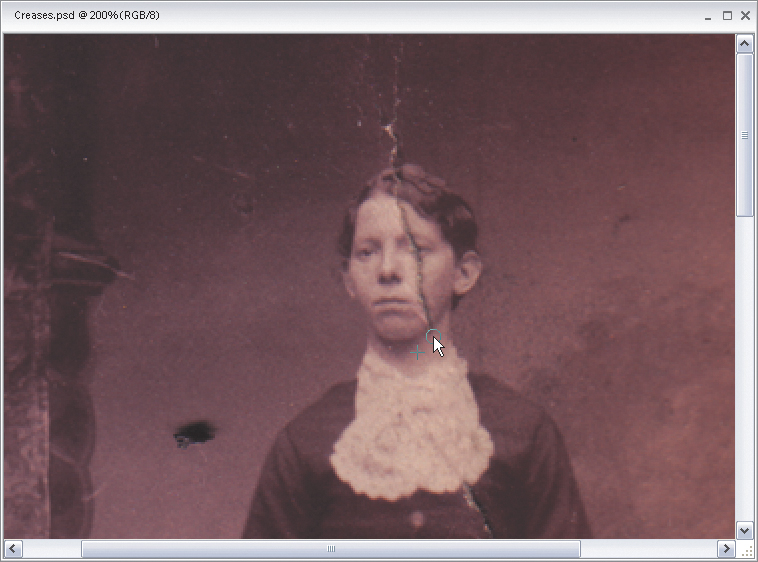
Now, move the Clone Stamp tool over the rip and click a few times over the crack. Don’t paint strokes—just click. As you click, you’ll see two cursors: your brush cursor where you’re painting and a crosshair cursor over the area you Alt-clicked on earlier. This lets you see the area you’re cloning from (the crosshair) and the area you’re cloning to (the brush cursor). This will be your basic strategy for repairing these rips—Alt-click the Clone Stamp tool in a clean area near the crack, then move your cursor over the crack and click a few times until the crack is covered by the cloned areas.

Step Five:
Now start working on other areas. Press the Z key to switch to the Zoom tool and zoom in if needed. Then press S to switch back to the Clone Stamp tool. (Note: You also might want to try the Healing Brush tool [J] using a similar technique, depending on the photo, as it may work just as well if not better.)
Step Six:
When it comes to detail areas like the chair in this photo, the strategy is to Alt-click directly on the chair rail below the rip, then move your cursor directly up and over the rip and click. This clones the lower part of the chair rails (that are intact) over the missing parts. This is a bit tedious, but it’s necessary to complete the repair. Continue cloning like this to complete the restoration.