
8. An Overview of the Ubuntu Cockpit Web Interface
Although it comes equipped with the latest in Linux desktop environments, Ubuntu is very much a server operating system and, as such, the majority of Ubuntu deployments will either be to remote physical servers or as cloud-based virtual machine instances. Invariably, these systems run without a keyboard, mouse or monitor, with direct access only available via the command-prompt over a network connection. This presents a challenge in terms of administering the system from remote locations. While much can certainly be achieved via remote access to the command-line and desktop environments, this is far from a consistent and cohesive solution to the administrative and monitoring tasks that need to be performed on a daily basis on an enterprise level operating system such as Ubuntu.
This issue has been addressed with the introduction of the Cockpit web-based administration interface. This chapter will explain how to install, configure and access the Cockpit interface while also providing an overview of the key features of Cockpit, many of which will be covered in greater detail in later chapters.
Cockpit is a light-weight, web-based interface that allows general system administrative tasks to be performed remotely. When installed and configured, the system administrator simply opens a local browser window and navigates to the Cockpit port on the remote server. After loading the Cockpit interface into the browser and logging in, a wide range of tasks can be performed visually using administration and monitoring tools.
Behind the scenes, Cockpit uses the same tools to perform tasks as would normally be used when working at the command-line, and updates automatically to reflect changes occurring elsewhere on the system. This allows Cockpit to be used in conjunction with other administration tools and techniques without the risk of one approach overriding another. Cockpit can also be configured to access more than one server, allowing multiple servers to be administered and monitored simultaneously through a single browser session.
Cockpit is installed by default with a wide range of tools already bundled. Cockpit also, however, allows additional extension plugins to be installed as needed. Cockpit is also designed so that you can create your own extensions using a combination of HTML and JavaScript to add missing or custom functionality.
Cockpit’s modular design also allows many features to be embedded into other web-based applications.
8.2 Installing and Enabling Cockpit
Cockpit is generally not installed on Ubuntu by default, but can be set up and enabled in a few simple steps. The first step is to install the Cockpit package as follows:
# apt install cockpit
Next, the Cockpit socket service needs to be enabled:
# systemctl enable --now cockpit.socket
Finally, the necessary ports need to be opened on the firewall to allow remote browser connections to reach Cockpit if a firewall is enabled on your system (for details on firewalls, refer to the chapter entitled “Ubuntu Firewall Basics”).
If ufw is enabled:
# ufw allow 9090
If firewalld is enabled:
# firewall-cmd --add-service=cockpit --permanent
# firewall-cmd --reload
If you have access to the desktop environment of the server on which Cockpit has been installed, open a browser window and navigate to https://localhost:9090 to access the Cockpit sign in screen. If, on the other hand, the server is remote, simply navigate to the server using the domain name or IP address (for example https://myserver.com:9090).
When the connection is established, the browser may issue a warning that the connection is not secure. This is because the Cockpit service is using a self-signed certificate. Either select the option to proceed to the web site or, to avoid this message in the future, select the advanced option and add an exception for the server address.
Once connected, the browser will load the log in page shown in Figure 8-1 below:

Sign in to the Cockpit interface either as root or with your a user account credentials. Note that when signed in as a user some tasks will be restricted within the Cockpit interface due to permission constraints unless you enable the Reuse my password for privileged tasks option prior to signing in. After signing in, Cockpit will display the System screen.
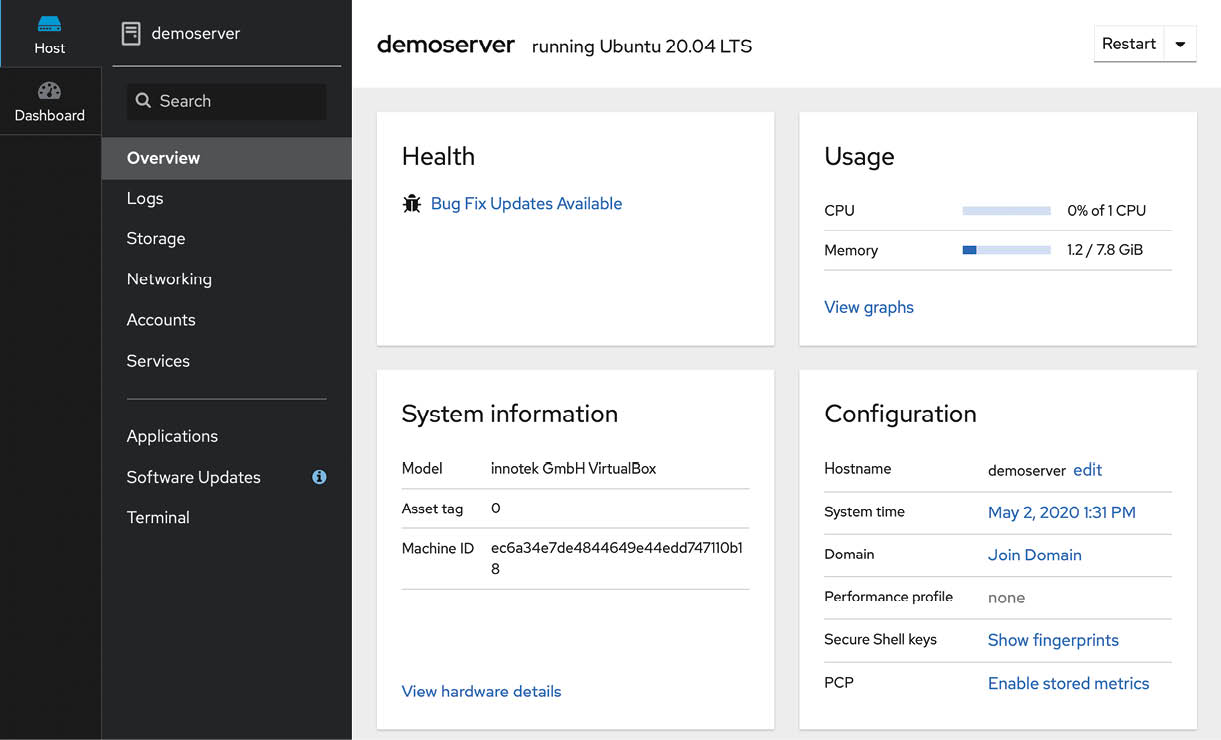
The Overview screen provides an overview of the current system including realtime performance metrics for CPU and memory. This screen also includes information about the system including the underlying hardware, host name, system time and whether the system software is up to date. Options are also provided to restart or shutdown the system.
Figure 8-2, for example, shows the Overview page of the Cockpit interface:
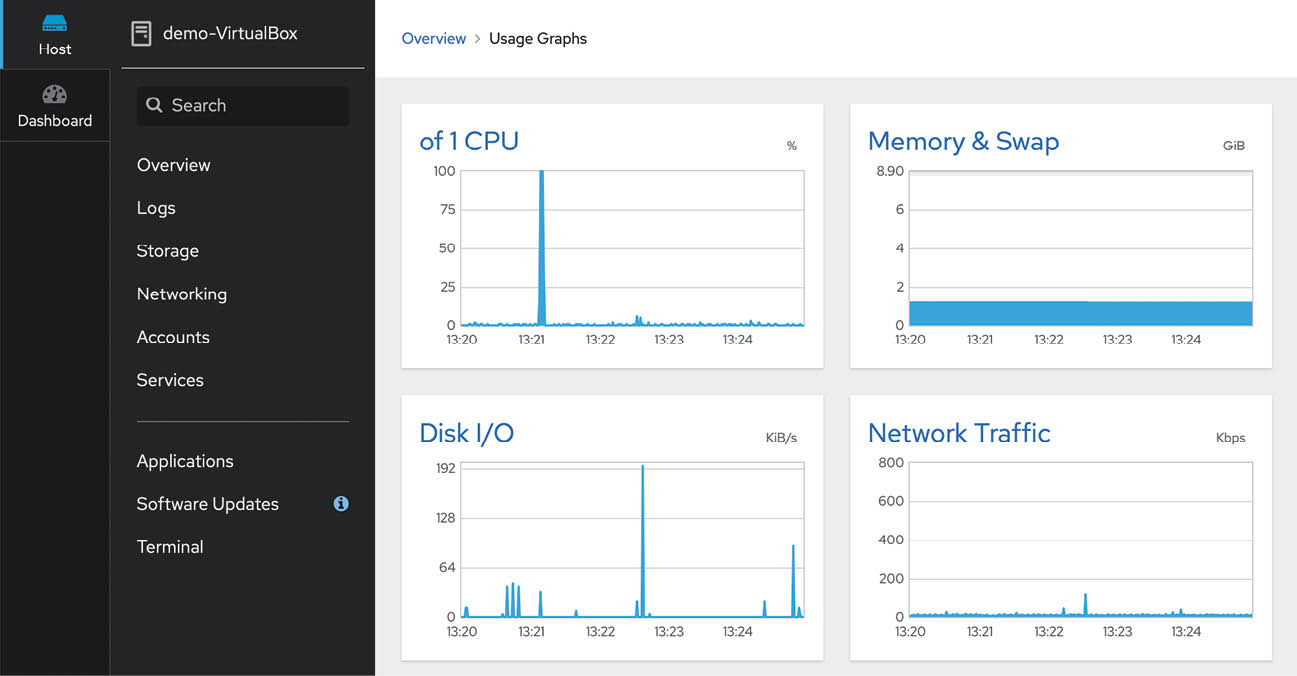
For more information on a particular category, click on the corresponding link. Figure 8-3, for example, shows the system usage graphs:
When the Logs category is selected, Cockpit displays the contents of the systemd journal logs. Selecting a log entry will display the entire log message. The log entries are ordered with the most recent at the top and menus are included to filter the logs for different time durations and based on message severity.

Figure 8-4
Select the Storage option to review and manage the storage on the system including disks, partitions and volume groups, Network File System (NFS) mounts and RAID storage. This screen also allows disk I/O activity to be monitored in realtime and lists log output from the system udisksd service used to query and manage storage devices.
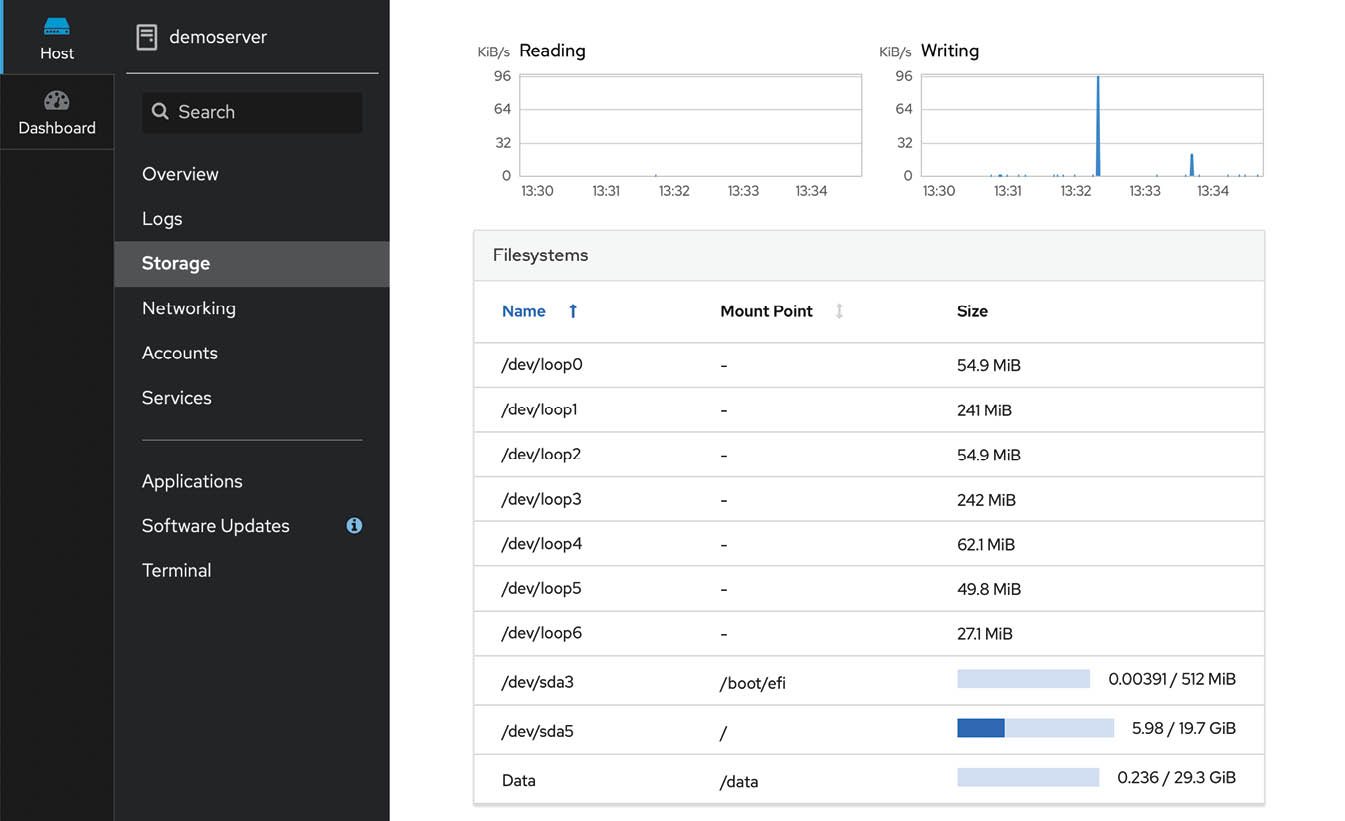
Figure 8-5
The Networking screen provides information on a wide range of network related configurations and services including network interfaces and firewall settings and allows configuration changes to be made such as creating network bridges or setting up virtual networks.
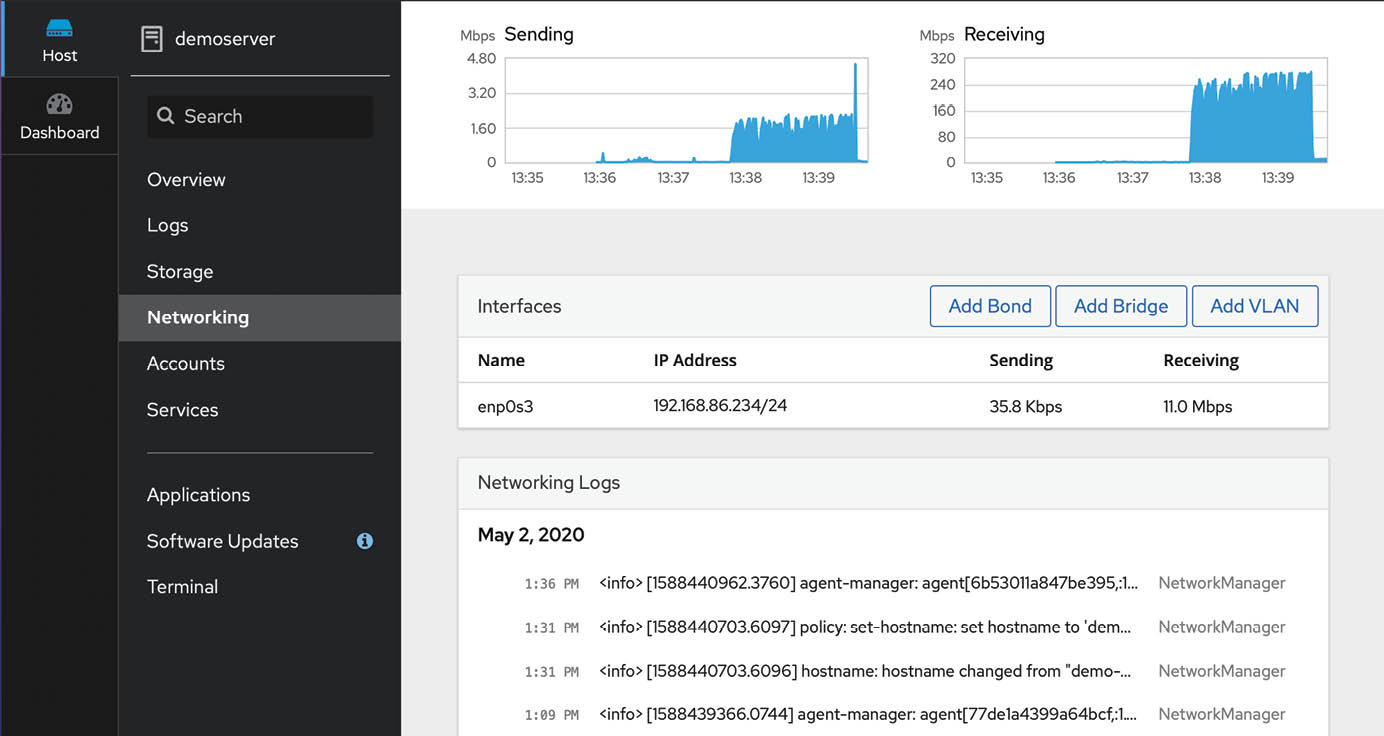
Figure 8-6
Select this option to view the current user accounts configured on the system, and create accounts for additional users. The topic of user management will be covered later in the chapter entitled “Managing Ubuntu Users and Groups”.

Figure 8-7
Click on an existing account to view details and make changes. The user account details page may also be used to review and add Public SSH keys to the user’s account for remote access to the server as outlined in the chapter entitled “Configuring SSH Key-based Authentication on Ubuntu”.
This screen displays a list of the system services running on the server and allows those services to be added, removed, stopped and started.

Figure 8-8
The topic of services will be covered in detail in the chapter entitled “Managing Ubuntu systemd Units”.
As previously mentioned, additional functionality can be added to Cockpit in the form of extensions. These can either be self-developed extensions, or those provided by third parties. The Applications screen lists installed extensions and allows extensions to be added or deleted.
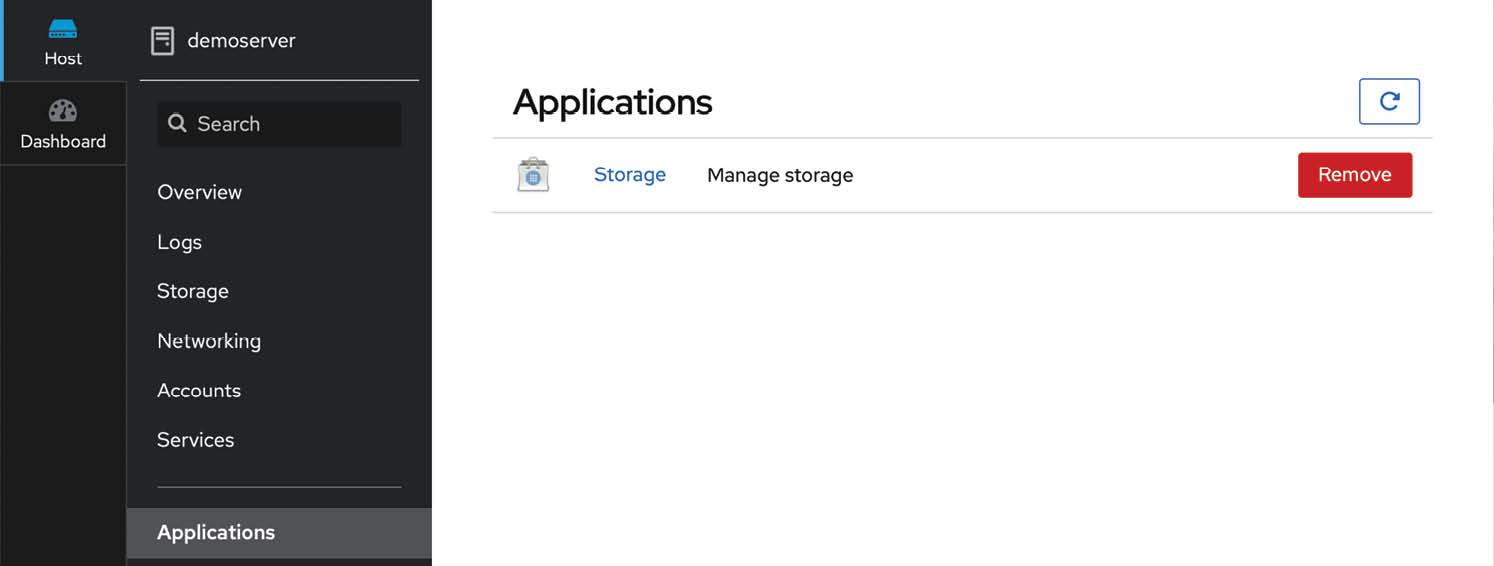
Figure 8-9
If the Applications option is not available within the cockpit interface, it can be installed as follows:
# apt install cockpit-packagekit
Virtualization allows multiple operating system instances to run simultaneously on a single computer system, with each system running inside its own virtual machine. The Virtual Machines Cockpit extension provides a way to create and manage the virtual machine guests installed on the server.

Figure 8-10
The Virtual Machines extension is not installed by default but can be added via the Cockpit Applications screen or by running the following command:
# apt install cockpit-machines
The use of virtualization with Ubuntu is covered starting with the chapter entitled “An Overview of Virtualization Techniques”.
If any software updates are available for the system they will be listed on this screen. If updates are available, they can be installed from this screen:
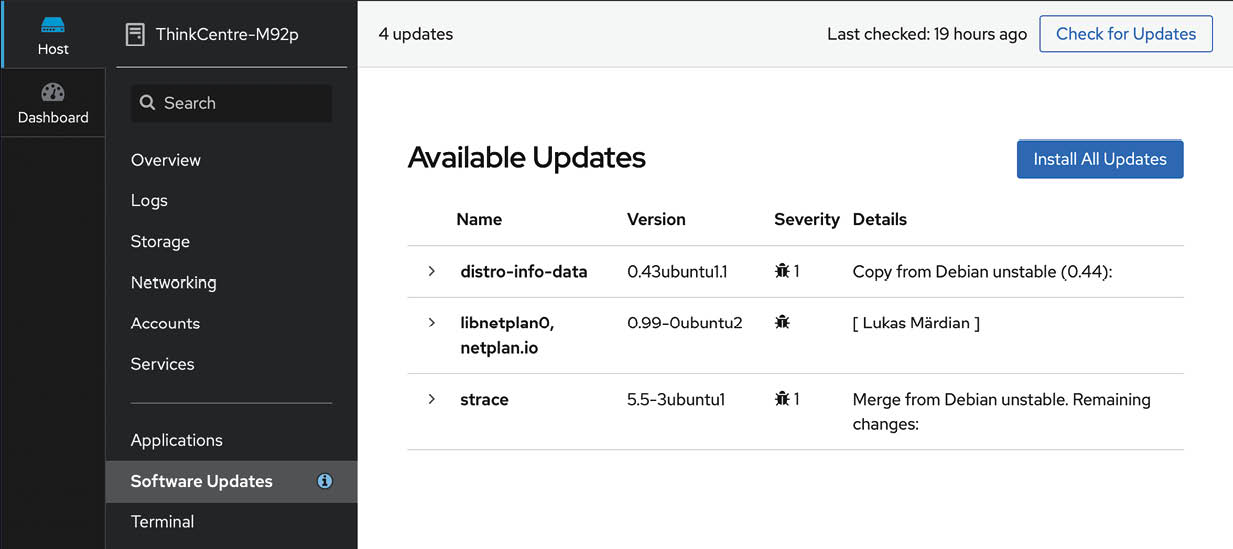
Figure 8-11
If the Cockpit Software Updates screen is not available, it can be installed as follows:
# apt install cockpit-packagekit
As the name suggests, the Terminal screen provides access to the command-line prompt.
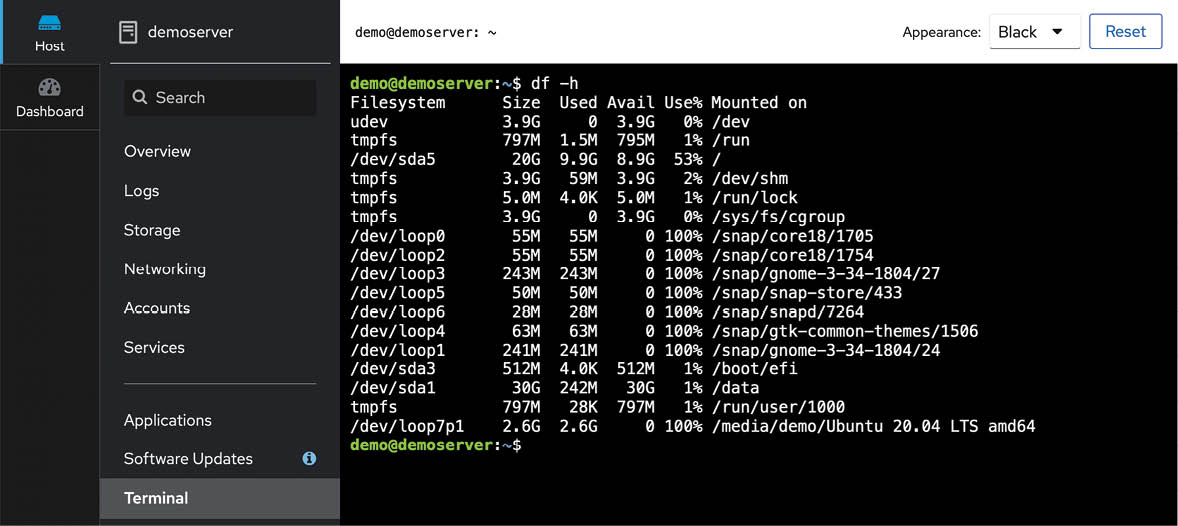
Figure 8-12
8.14 Connecting to Multiple Servers
Cockpit can be configured to administer multiple servers from within a single session. This requires that the Cockpit dashboard be installed on the primary system (in other words the system to which the initial Cockpit session will be established). If the dashboard is not already installed run the following command:
# apt install cockpit-dashboard
Once the dashboard has been installed, sign out of Cockpit and then sign in again. The dashboard will now appear in the Cockpit interface as highlighted in Figure 8-13:

When selected, the dashboard page will display performance graphs for the current system and provide a list of currently connected systems:

To add another system, click on the + button highlighted in Figure 8-14 above, enter the IP address or host name of the other system and select a color by which to distinguish this server from any others added to Cockpit before clicking on the Add button:

Figure 8-15
Enter the user name and password to be used when connecting to the other system, then click on the log in button. The newly added server will now be listed in the Cockpit dashboard and will appear in graphs represented by the previously selected color:

Figure 8-16
To switch between systems when using Cockpit, simply use the drop down menu shown in Figure 8-17 below:

The Cockpit web interface allows remote system administration tasks to be performed visually from within a web browser without the need to rely on the command-prompt and command-line tools. Once installed and enabled, the system administrator simply opens a web browser, connects to the remote server and signs into the Cockpit interface. Behind the scenes, Cockpit uses the same command-line tools as those available via the command prompt, thereby allowing both options to be used without the risk of configuration conflicts. Cockpit uses a modular framework allowing additional extensions to be added, and for custom extensions to be developed and integrated. A Cockpit session can be used to administer a single server, or configured to access multiple servers simultaneously.