
10. Managing Ubuntu Users and Groups
During the installation of Ubuntu, the installer provided the opportunity to create a user account for the system. We should not lose sight of the fact that Ubuntu is actually an enterprise class, multi-user and multi-tasking operating system. In order to use the full power of Ubuntu, therefore, it is likely that more than one user will need to be given access to the system. Each user should have his or her own user account login, password, home directory and privileges.
Users are further divided into groups for the purposes of easier administration and those groups can have different levels of privileges. For example, you may have a group of users who work in the Accounting department. In such an environment you may wish to create an accounts group and assign all the Accounting department users to that group.
In this chapter we will cover the steps to add, remove and manage users and groups on an Ubuntu system. There are a number of ways to manage users and groups on Ubuntu, the most common options being command-line tools and the Cockpit web interface. In this chapter we will look at both approaches to user management.
10.1 User Management from the Command-line
New users may be added to an Ubuntu system via the command-line using the useradd utility. To create a new user account, enter a command similar to the following:
# adduser john
Adding user `john' ...
Adding new group `john' (1001) ...
Adding new user `john' (1001) with group `john' ...
The home directory `/home/john' already exists. Not copying from `/etc/skel'.
Enter new UNIX password:
Retype new UNIX password:
passwd: password updated successfully
Changing the user information for john
Enter the new value, or press ENTER for the default
Full Name []:
Room Number []:
Work Phone []:
Home Phone []:
Other []:
Is the information correct? [Y/n] Y
By default, this will create a home directory for the user in the /home directory (in this case /home/john). To specify a different home directory, use the --home command-line option when creating the account:
# adduser --home /users/johnsmith john
Once the account has been created, the password can be changed at any time using the passwd tool:
# passwd john
Changing password for user john.
New password:
Retype new password:
passwd: all authentication tokens updated successfully.
An existing user may be deleted via the command-line using the deluser utility. While this will delete the account, the users files and data will remain intact on the system:
# deluser john
It is also possible to remove the user’s home directory and mail spool as part of the deletion process:
# deluser --remove-home john
All users on an Ubuntu system are members of one or more groups. By default, new users are added to a private group with the same name as the user (in the above example, the account created for user john was a member of a private group also named john). As an administrator, it makes sense to organize users into more logical groups. For example all sales people might belong to a sales group, while accounting staff might belong to the accounts group and so on. New groups are added from the command-line using the addgroup command-line tool, for example:
# addgroup accounts
Use the adduser tool to add an existing user to an existing group from the command-line:
# adduser john accounts
To remove a user from a group, use the deluser command as follows:
# deluser john accounts
An existing group may be deleted from a system using the delgroup utility:
# delgroup accounts
Note that if the group to be deleted is the primary or initial group for any user it cannot be deleted. The user must first be deleted, or assigned a new primary group using the usermod command before the group can be removed. A user can be assigned to a new primary group using the usermod -g option:
# usermod -g sales john
# delgroup accounts
To find out the groups to which a user belongs, simply run the groups command. For example:
$ groups john
john : accounts support
By default, only the first user account created on an Ubuntu system has the ability to use the sudo command to perform privileged tasks. If a newly added user attempts to use sudo, a message similar to the following will be displayed:
john is not in the sudoers file. This incident will be reported.
To add the user to the sudoers file, simply add the user to the sudo group:
# adduser john sudo
10.2 User Management with Cockpit
If the Cockpit web interface is installed and enabled on the system (a topic covered in the chapter entitled “An Overview of the Ubuntu Cockpit Web Interface”), a number of user management tasks can be performed within the Accounts screen shown in Figure 10-1 below:

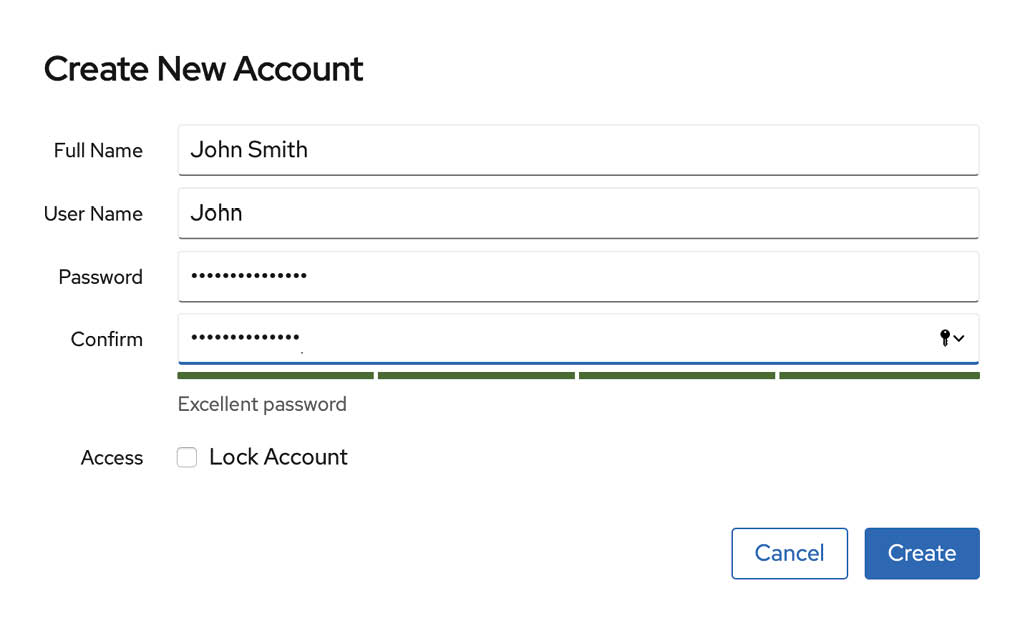
The screen will display any existing user accounts on the system and provides a button to add additional accounts. To create a new account, click on the Create New Account button and enter the requested information in the resulting dialog (Figure 10-2). Note that the option is also available to create the account but to lock it until later:
To modify a user account, select it from the main screen and make any modifications to the account details:
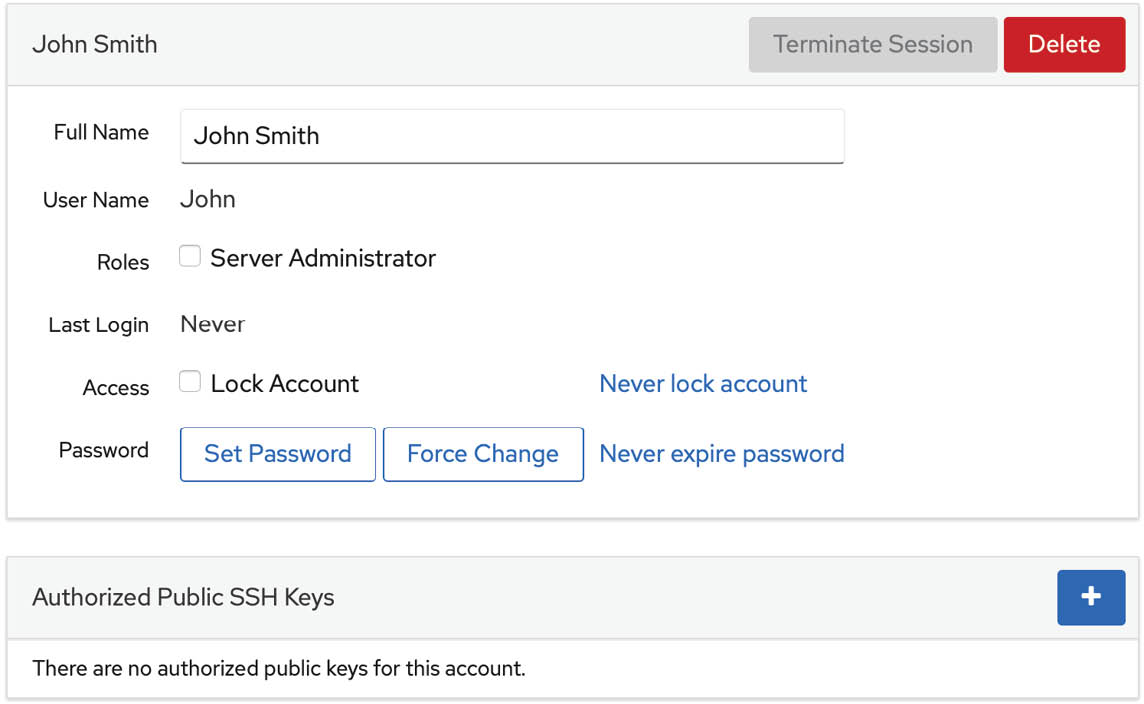
Figure 10-3
This screen allows a variety of tasks to be performed including locking or unlocking the account, changing the password or forcing the user to configure a new password. If the Server Administrator option is selected, the user will be added to the sudo group and permitted to use sudo to perform administrative tasks. A button is also provided to delete the user from the system.
If the user will be accessing the system remotely using an SSH connection with key encryption, the user’s public key may be added within this screen. SSH access and authentication will be covered later in “Configuring SSH Key-based Authentication on Ubuntu”.
10.3 User Management using the Settings App
A third user account management option is available via the GNOME desktop settings app. This app is accessed by clicking on the down arrow located in the top right-hand corner of the GNOME desktop and selecting the Settings option as shown in Figure 10-4:

When the main settings screen appears, click on the Users option in the left-hand navigation panel. By default, the settings will be locked and it will not be possible to make any changes to the user accounts on the system. To unlock the settings app, click on the Unlock button shown in Figure 10-5 below and enter your password. Note that it will only be possible to unlock the settings if you are logged in as a user with sudo privileges:

Once the app has been unlocked, a green button labeled Add User... will appear in the title bar. Click this button to display the dialog shown in Figure 10-6 below:

To assign sudo access to the new user, select the Administrator account, otherwise leave Standard selected. Enter the user’s full name and username and either assign a password now, or allow the user to set up the password when they first log into their account. Once the information has been entered, click on the Add button to create the account.
The settings for an existing user can be viewed, modified or the account deleted at any time by selecting the corresponding icon within the Users screen as shown in Figure 10-7. The option is also available to view the user’s login activity. Note that it will be necessary to unlock the Settings app again before any changes can be made to an account:

As a multi-user operating system, Ubuntu has been designed to support controlled access for multiple users. During installation, a single user account was created. Additional user accounts may be added to the system using a set of command-line tools, via the Cockpit web interface or using the GNOME settings app. In addition to user accounts, Linux also implements the concept of groups. New groups can be added and users assigned to those groups using command-line tools and each user must belong to at least one group. By default a standard, non-root user does not have permission to perform privileged tasks. Users that are members of the special sudo group, however, may perform privileged tasks by making use of the sudo command.