
5. Dual Booting Ubuntu with Windows
Ubuntu, just like most Linux distributions, will happily co-exist on a hard disk drive with just about any version of Windows. This is a concept known as dual-booting. Essentially, when you power up your PC you will be presented with a menu providing the option to boot either Ubuntu or Windows. Obviously you can only run one operating system at a time, but it is worth noting that the files on the Windows partition of your disk drive will be available to you from Ubuntu regardless of whether your Windows partition was formatted using NTFS, FAT16 or FAT32.
During the installation process the Ubuntu installer will detect the Windows installation on the drive and provide the option of deleting it and using the entire disk for Ubuntu, or sharing the disk with Windows. In the latter case you will be able to specify the percentage of the disk to be used for Ubuntu.
According to the Ubuntu documentation, a minimum of 25 GB of disk space is required for a full Ubuntu Desktop Edition installation, and more space to store any files you may subsequently create. Once the disk space for Ubuntu has been selected, the installer will resize the Windows partition (without destroying any data) and use the remainder of the disk for Ubuntu.
This chapter will demonstrate how to set up a dual boot system with Ubuntu and Windows 10, change the system that boots by default when the computer system is powered on, and outline how to access files located on the Windows partition of the disk from within Ubuntu.
Within this chapter the assumption is made that the steps outlined in the previous chapter have been followed to create a bootable Ubuntu installation USB drive using the Ubuntu Desktop installation image, and that the system has been configured to boot from the USB drive when started.
5.1 Beginning the Ubuntu Installation
To start the installation, insert the Ubuntu USB drive and reboot your computer system. If the system loads Windows again you will need to change the boot order in your system settings. Details on how to do this will be system specific and were covered briefly in the previous chapter.
Once Ubuntu has loaded you will be presented with the screen shown in Figure 5-1.

Begin the installation by clicking on the Install Ubuntu button and wait for the initial screen of the installer to appear as shown in Figure 5-2:

Either select your keyboard layout or, if you are unsure, click on the Detect Keyboard Layout button to work through some steps to identify your keyboard before clicking on Continue. On the next screen, choose whether to perform the Normal or Minimal installation:

Figure 5-3
Select the Normal option if you have plenty of disk space and want to explore the main applications and utilities included with Ubuntu without having to manually install them later, otherwise use the Minimal option.
The option is also available to update the software packages that comprise the Ubuntu distribution during the installation. If this option is selected and the system is connected to the internet, the installer will download any updates issued since the Ubuntu installation image was released and applies them to the system during installation. If you choose not to perform this update during the installation process these updates may still be applied at any time after the installation completes.
A second option provides the choice of whether to install 3rd party non-open source software to support specific hardware devices and the playback of proprietary media files on the system. Unless you prefer to avoid using non-open source software, use of this option is recommended.
Having made appropriate selections, click the Continue button to proceed to the disk allocation screen. At this point, the installer will have detected the presence of an existing Windows operating system on the target disk drive and will provide a number of options in terms of how the disk should be used to accommodate the Ubuntu installation:
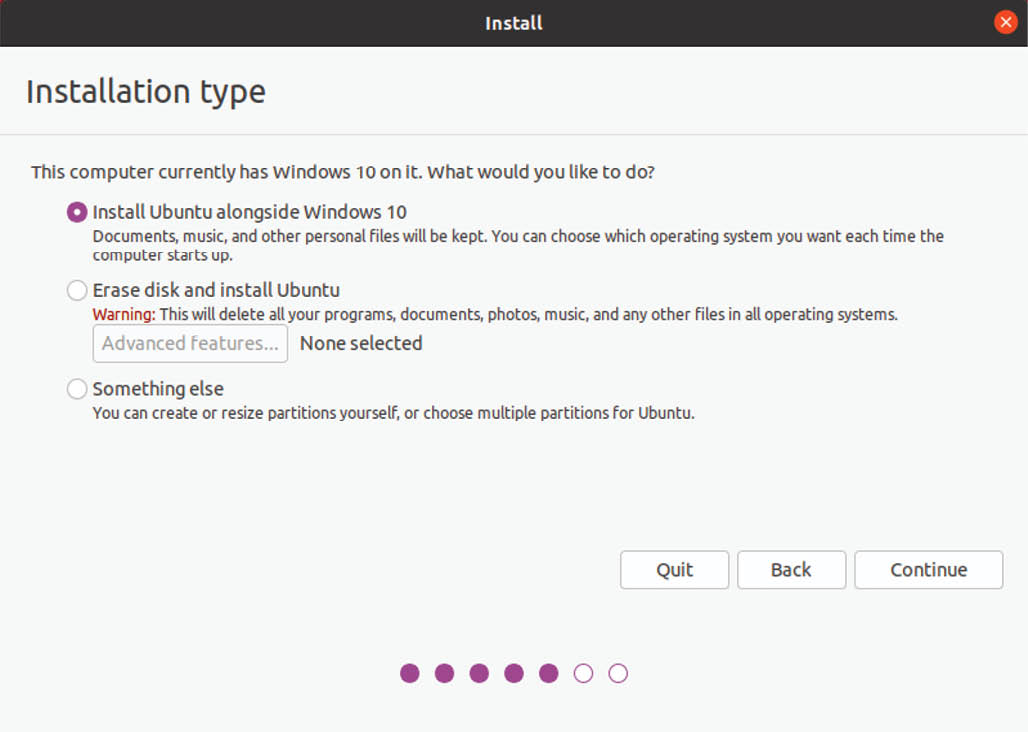
Figure 5-4
Given that it is our intention to configure a dual boot system, the option to Install Ubuntu alongside Windows is the desired choice. With this option selected, click the Continue button to proceed. The subsequent screen allows the amount of disk space allocated to each operating system (in this case Windows and Ubuntu) to be configured:

Figure 5-5
At this point it is necessary to decide how much of your Windows partition you wish to donate to the Ubuntu installation. Move the slider (positioned between the Windows and Ubuntu partitions in the diagram) until the Ubuntu partition allocation is a size you are comfortable with. At least 25GB of space should be made available for a full Ubuntu Desktop installation.
When you have selected the size of the Ubuntu partition, click the Install Now button to proceed with the installation. When the warning dialog appears read it carefully and click Continue if you are sure you wish to proceed.

Figure 5-6
While the installation is in progress, the installer will ask for information about your geographical location in order to configure time zone settings:
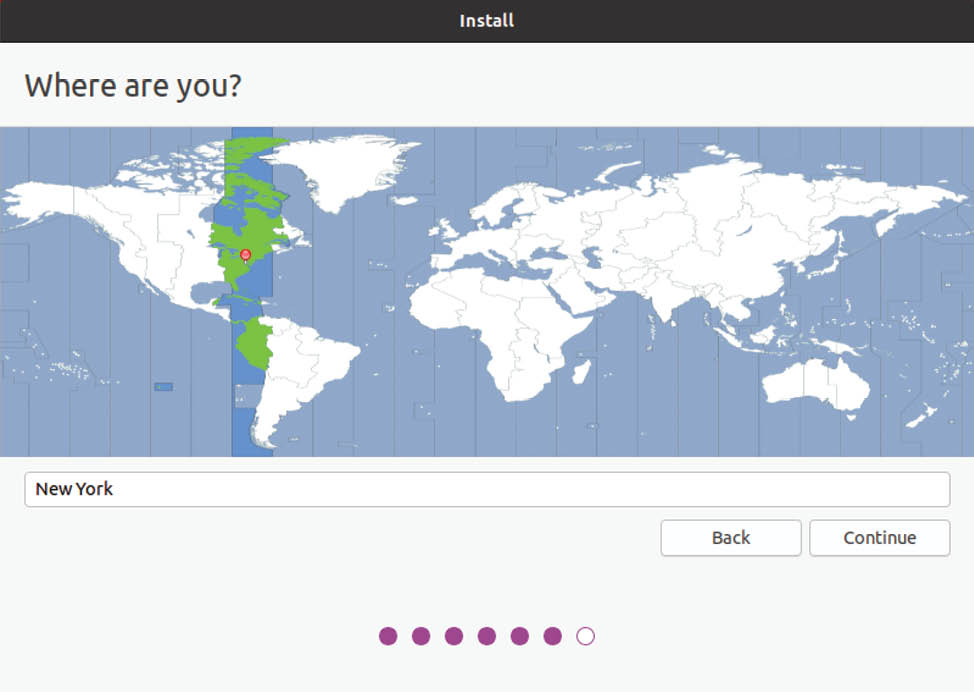
Figure 5-7
Next, the installer will ask you to provide a user name and password for the first account on the system:

Figure 5-8
The option is also provided to dictate whether the password must be specified each time the user wishes to log into the system. By default, each time Ubuntu starts a login screen will be presented seeking username and password credentials. If you are the sole user of the system and would like to bypass this screen and be logged in automatically each time the system boots, be sure to set the Log in automatically checkbox before proceeding.
Once all the questions have been answered, the installer will simply proceed with the installation. Depending on the speed of your system, and whether or not you opted to download updates during the installation, this process can take some time. For a more detailed view of the steps being performed by the installer, click on the status title located above the progress bar:
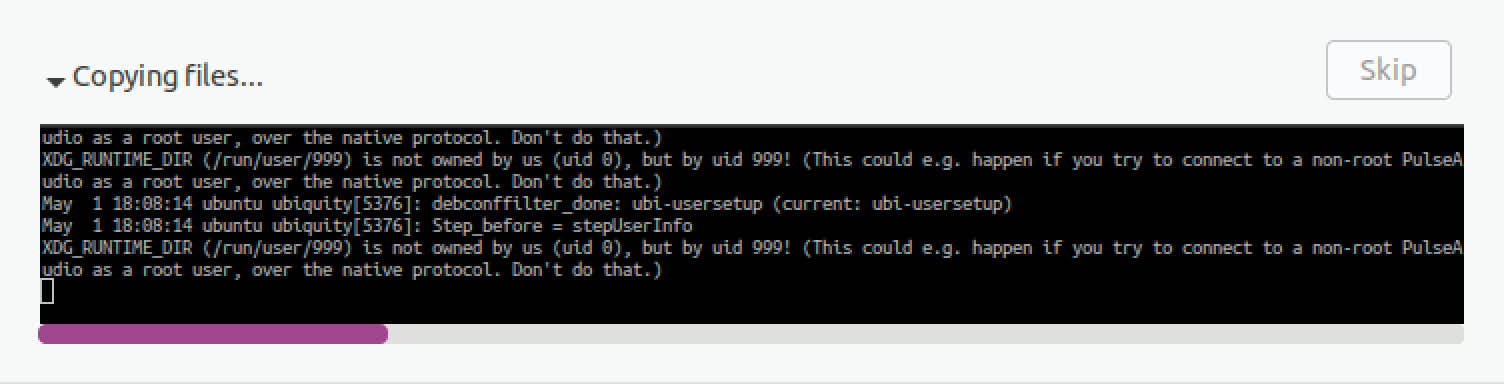
Figure 5-9
When the installation is complete, a dialog will appear to inform you the system is ready to be restarted:
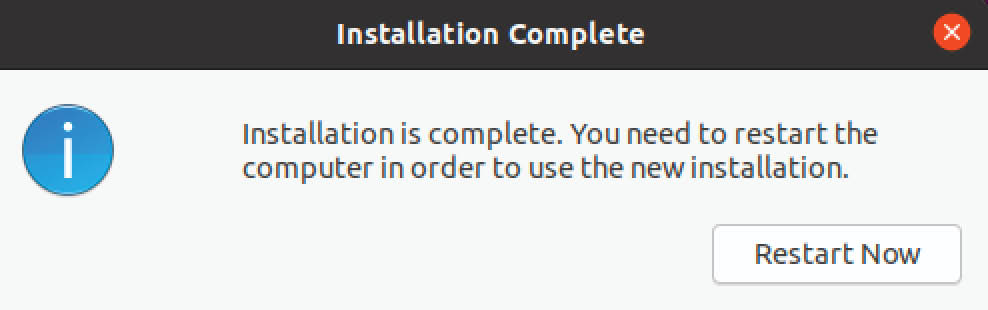
Figure 5-10
When you are ready to reboot, press the Restart Now button. The installer may prompt you to remove the installation media and the system will take a few moments to shut down. At this point remove the USB flash drive and press the Enter key to proceed.
5.2 Booting Ubuntu for the First Time
When the system reboots a screen similar to the one illustrated below will appear providing the option to boot either Windows or Ubuntu:
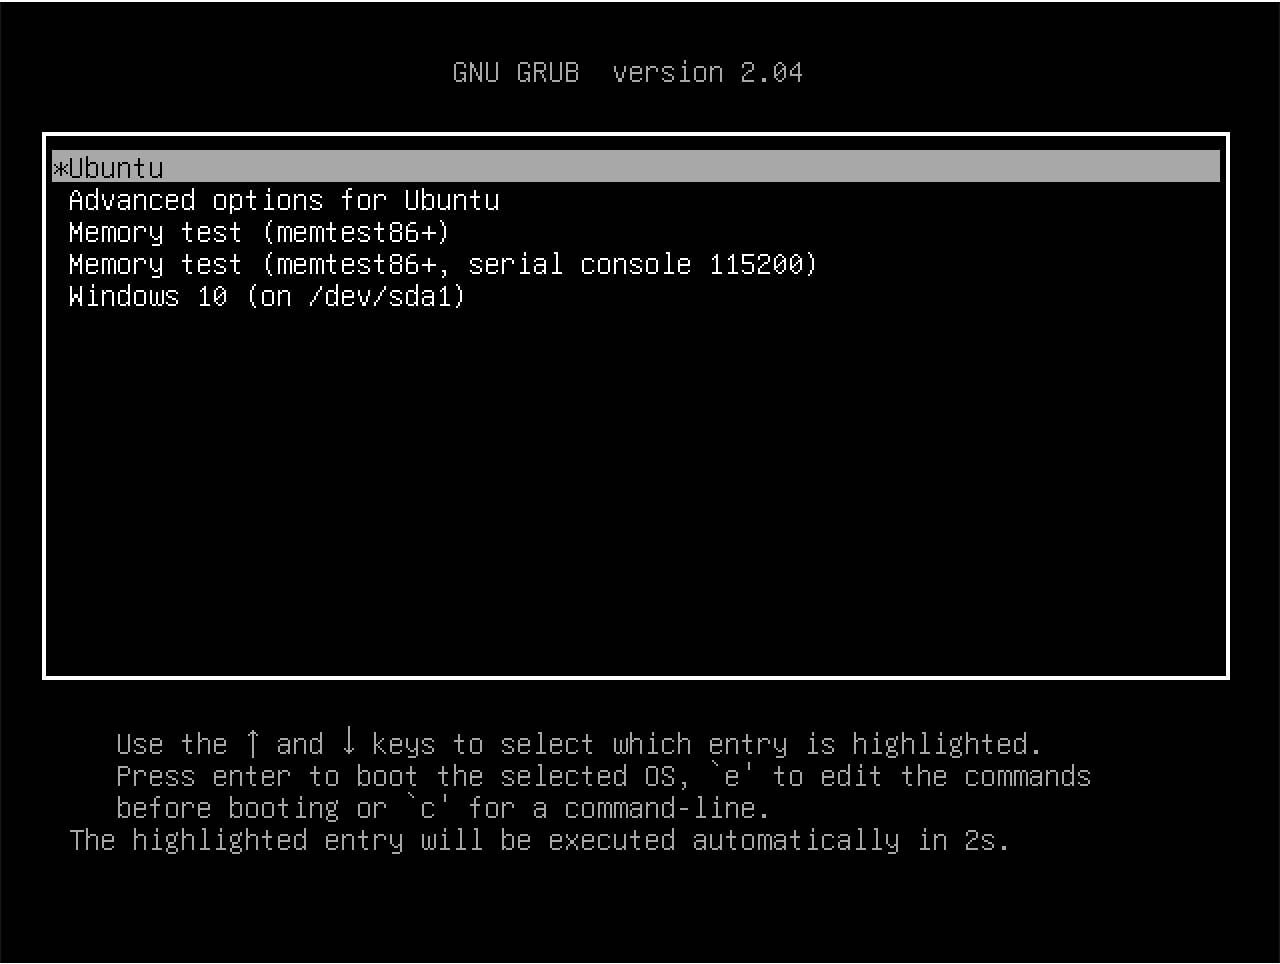
Figure 5-11
Press Enter to boot Ubuntu. If you wish to boot Windows use the keyboard arrow keys to select the Windows option. If you choose to boot Ubuntu the operating system will load and the Ubuntu login screen will appear (unless the automatic login option was selected). Enter the user name and password you set up during the installation process and you will be logged into the Ubuntu Desktop environment.
5.3 Changing the Default Boot Option
When the system starts, the boot options screen will appear and wait 10 seconds for the user to make an operating system choice. If no selection has been made before the timeout elapses, the default operating system will be started. On a newly configured system, the default operating system will be the standard Ubuntu image. This default can, however, be changed from within Ubuntu.
A range of boot configuration options (including the 10 second timeout and the boot settings outlined in “Installing Ubuntu on a Clean Disk Drive”) are declared in the /etc/default/grub file which reads as follows on a new installation:
GRUB_DEFAULT=0
GRUB_TIMEOUT_STYLE=hidden
GRUB_TIMEOUT=10
GRUB_DISTRIBUTOR=`lsb_release -i -s 2> /dev/null || echo Debian`
GRUB_CMDLINE_LINUX_DEFAULT=”quiet splash”
GRUB_CMDLINE_LINUX=””
The first step in changing the default boot system is to declare the GRUB_SAVEDEFAULT setting within this file and to change the GRUB_DEFAULT setting to saved:
GRUB_DEFAULT=saved
GRUB_SAVEDEFAULT=true
GRUB_TIMEOUT_STYLE=hidden
GRUB_TIMEOUT=10
.
.
This setting allows a new default value to be saved within the boot configuration. Next, run the grub-set-default command to change the default setting using a numbering system that counts the first option as 0. For example, if the Windows 10 option is position 5 in the menu, the command to make Windows 10 the default boot option would read as follows:
# grub-set-default 4
Check that the new setting has taken effect by running the following command:
# grub-editenv list
saved_entry=4
Note that the saved_entry value is now set to 4. After changing the default, regenerate the boot configuration file as follows:
# grub-mkconfig --output=/boot/grub/grub.cfg
Reboot the system and verify that the boot menu defaults to the Windows 10 option and that Windows loads after the timeout expires.
5.4 Accessing the Windows Partition from the Command-line
When running Ubuntu in a dual boot configuration it is still possible to access files located on the Windows partition. This can be achieved by manually mounting the partition from the command-line or from the desktop using the Disks (gnome-disks) graphical utility.
When working from the command-line, the first step in this process is to create a directory to use as the mount point for our Windows partition. In this example we will create a directory named /mnt/windows:
# mkdir /mnt/windows
In order to identify the device name that has been assigned to the Windows partition, use the fdisk command as follows:
# fdisk -l
.
.
Disk /dev/sda: 50 GiB, 53687091200 bytes, 104857600 sectors
Units: sectors of 1 * 512 = 512 bytes
Sector size (logical/physical): 512 bytes / 512 bytes
I/O size (minimum/optimal): 512 bytes / 512 bytes
Disklabel type: dos
Disk identifier: 0x7ef44412
Device Boot Start End Sectors Size Id Type
/dev/sda1 * 2048 1187839 1185792 579M 7 HPFS/NTFS/exFAT
/dev/sda2 1187840 59770533 58582694 28G 7 HPFS/NTFS/exFAT
/dev/sda3 59770878 104855551 45084674 21.5G 5 Extended
/dev/sda5 59770880 104855551 45084672 21.5G 83 Linux
.
.
In the above output, the main Windows partitions can be identified from the NTFS entry in the type column. In the above example output the system contains one physical disk drive referenced by device name /dev/sda. The first is the Windows system partition while the second, much larger, NTFS partition is the Windows boot partition containing the Windows operating system and user data. This partition contains the files we need access to and is represented by /dev/sda2.
With this knowledge, we need to run the mount command (assuming the Windows partition is /dev/sda2) as follows:
# mount /dev/sda2 /mnt/windows
Check that the mount was successful by listing the contents of the top level directory of the mount point:
# ls /mnt/windows
‘$Recycle.Bin’ ProgramData swapfile.sys
‘Documents and Settings’ ‘Program Files’ ‘System Volume Information’
pagefile.sys ‘Program Files (x86)’ Users
PerfLogs Recovery Windows
To automate the mount each time the system is booted, simply add the appropriate mount line to the /etc/fstab file:
/dev/sda2 /mnt/windows ntfs defaults 0 0
To unmount the Windows file system at any time:
# umount /mnt/windows
5.5 Accessing the Windows Partition from the Desktop
The first step in mounting a partition using the desktop environment is to launch the disks utility. With the desktop loaded, right-click on the desktop background and select Open Terminal from the resulting menu. Within the terminal window, gain root privileges before launching the Disks utility as follows:
$ gnome-disks
Once the disks tool has launched, a window similar to that shown in Figure 5-12 will appear:

To view information about a partition, select it from the graphical representation in the Volumes section of the dialog. In the above example, the Windows system partition is selected and highlighted. To mount the partition so that the contents can be accessed from within Ubuntu, select the partition and click on the options button indicated in Figure 5-13 to display the menu:
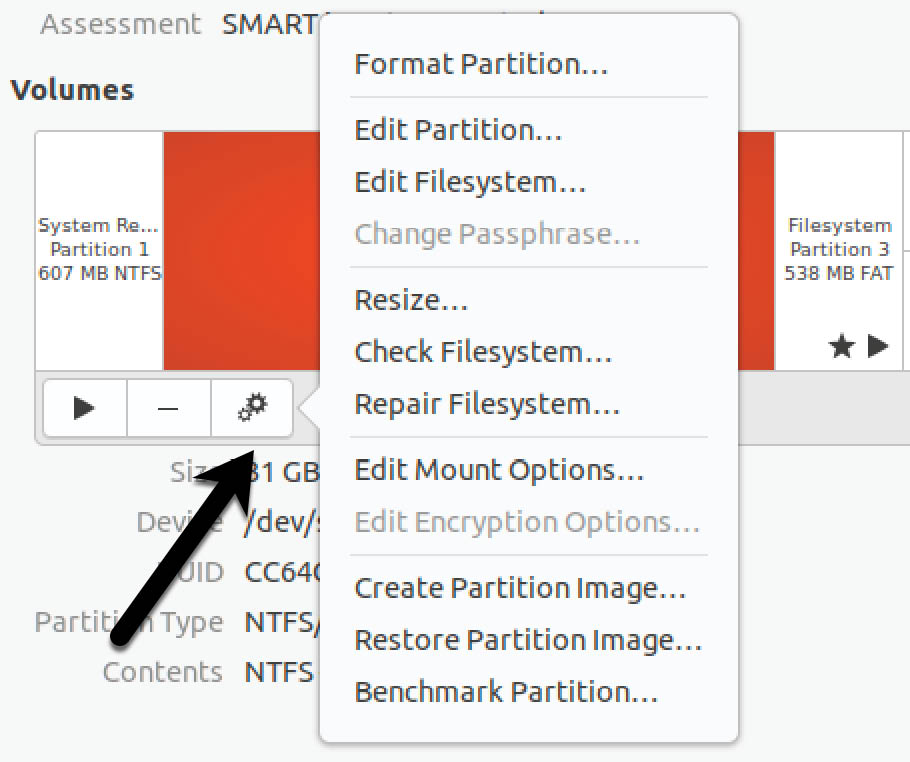
From the menu, select Edit Mount Options... to display the dialog shown in Figure 5-14. Turn off the User Session Defaults switch and make sure that both the Mount at system startup and Show in user interface options are enabled. Within the Mount Point text field, change the path to /mnt/windows. If the partition needs to be automatically mounted each time the system reboots, also enable the Mount at system startup option:
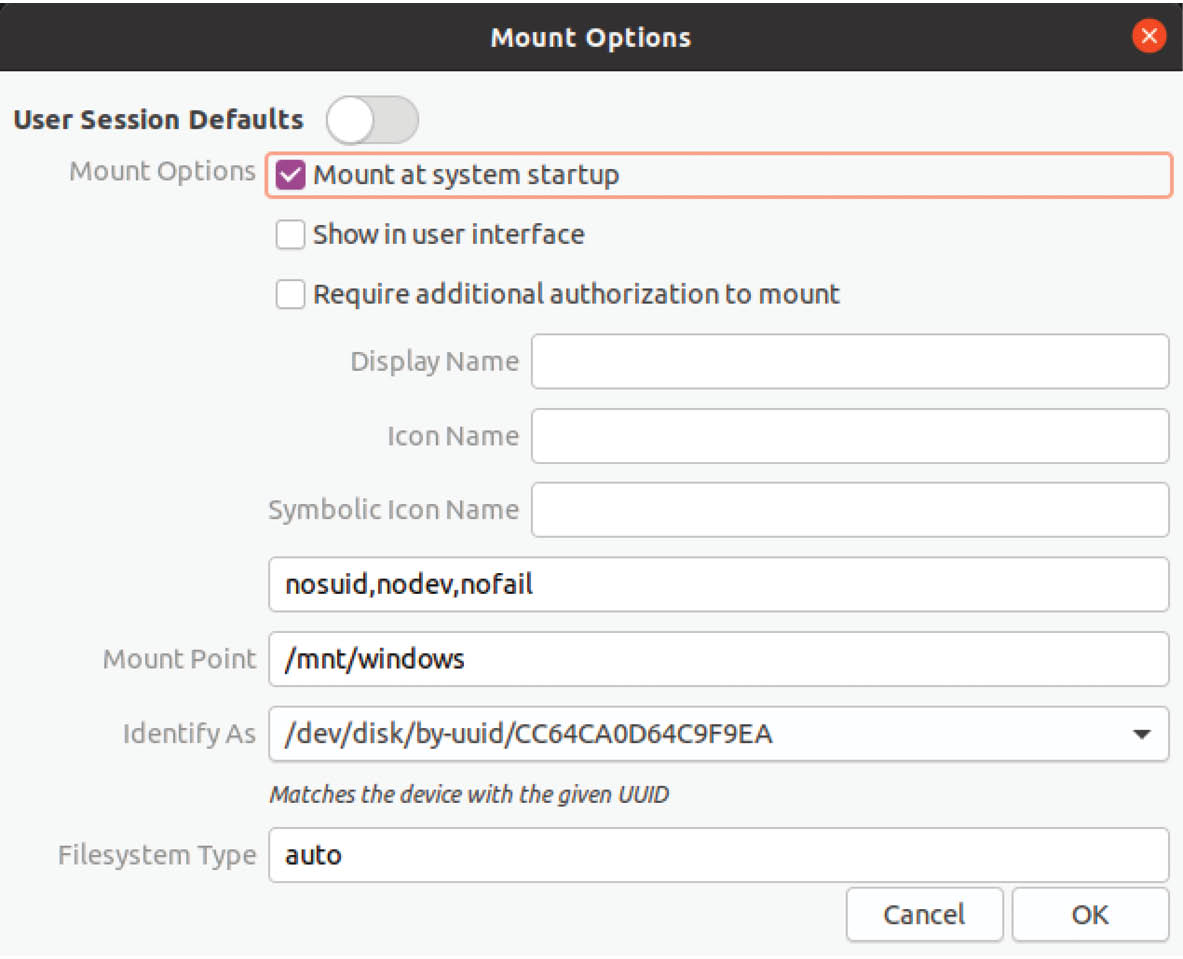
With the changes made, click on the OK button to return to the main dialog. To mount the partition, simply click on the mount button highlighted in Figure 5-15 below:

Once the partition is mounted, exit from gnome-disks and note that an icon for the volume has appeared in the dock as shown on Figure 5-16 (note that if the Show in user interface option has been disabled this icon would not be present):

Double click on the icon to browse the partition using the Files tool:

Figure 5-17
To unmount the partition, click on the mount button (which will have changed to a stop button) as shown in Figure 5-15 above.
Ubuntu can safely co-exist on the same disk drive as a Windows operating system by creating a dual boot environment. This involves shrinking the amount of space occupied by the Windows system to make room for Ubuntu during the installation. Once Ubuntu has been installed, the boot menu configuration can be modified to change the default operating system. The Windows partition on the disk drive may be accessed from Ubuntu either via the command-line or using the Disks desktop utility.