Photoshop comes with several built-in effects: shadows, glows, bevels, textures, and strokes. These effects allow for quick changes to a layer’s appearance. Layer Styles are “live” effects, which is to say that as the content of a layer updates, so does the effect. For example, if you have a bevel and shadow applied to a type layer and you change the type, the effect will be applied to the new characters.
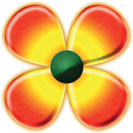
This flower was created from two basic shapes. The beveling, textures, and colorization were done with Layer Styles. Open the file Ch13_Flower_Style.psd from the Chapter 13 folder on the CD to explore the effects.
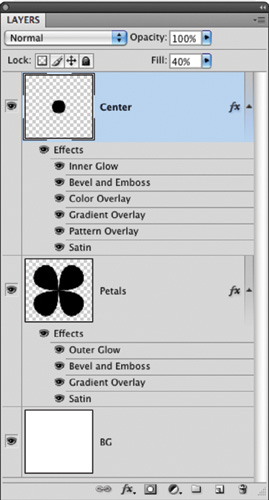
The effects that are applied to a layer become the layer’s custom style. You can tell that an effect has been applied if an f icon appears to the right of the layer’s name in the Layers panel. A layer style can be expanded by clicking the triangle icon next to the fx icon to reveal the layer effects in the panel. This makes it easier to edit the effects to modify the style. Let’s start exploring the powerful options of Layer Styles.
Photoshop offers ten effects to choose from. Each offers several options for customization and can be used to create unique and dynamic layer styles. Each effect has its own interface with many shared commonalities; however, each deserves close exploration.
Create a new document and choose the 2 × 3 preset.
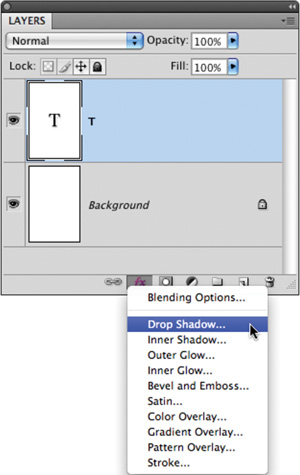
Select the Type tool and add the letter T. Use a thick sans serif font and set the point size large enough to fill the canvas. If you are not yet familiar with the Type tool, open Ch13_Layer_Style_Start.psd from the Chapter 13 folder.
At the bottom of the Layers panel, click the fx icon and choose the first effect, Drop Shadow.
The Layer Style dialog box opens and provides you with control over the effect.
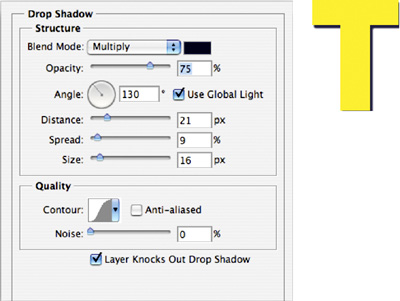
The Drop Shadow effect is straightforward, useful, and serves as an introduction to the Layer Styles. Several of the Drop Shadows’ interface elements appear in other effects. Let’s examine its window closely:
Blend Mode: Specifies the blending mode for the shadow. This allows the shadow to more realistically blend with lower layers. The Multiply blending mode is the most common for shadows. This mode causes the darkness of the shadow to mix with background colors, which more closely simulates a natural shadow.
Color: By default, color is set to black for the shadow. But shadows often pick up the color of the light source or background. To change the color of the shadow, click the color rectangle to load the Adobe Color Picker.
Opacity: Adjusts the opacity of the effect. Opacity is the opposite of transparency: the higher the number, the less you can see through the layer.
Angle: Sets the direction of the shadow.
Use Global Light: Allows you to use a consistent light source for all layer effects. It’s a good idea to leave the Use Global Light check box selected so that your designs have realistic (and consistent) lighting.
Distance: Affects how far the shadow is cast. You can also click in the window and manually drag the shadow into position.
Spread: Affects how much the shadow disperses.
Size: Modifies the softness of the shadow.
Contour: Most users skip the Contour settings. This is a terrible mistake. The contour is essentially a curve; it is representative of how Photoshop fades transparency. There are several presets to try, and you’ll explore this setting more later on.
Anti-aliased: Gives you a smoother onscreen appearance. This is important if you are creating titles for screen usage (such as Internet or video).
Noise: Places noise in the shadow, which adds random dispersion to your style.
Layer Knocks Out Drop Shadow: Is selected by default (and should probably stay that way). It ensures that the shadow does not bleed through partially transparent text.
Deselect the Drop Shadow check box to remove the shadow, and then select the Inner Shadow check box.
The Inner Shadow effect casts a shadow in front of the layer. This effect can be used to create a “punched-out” or recessed look. It looks best when the shadow is set to a soft setting. Inner shadows look good when used in combination with other layer styles but are distracting when overused.
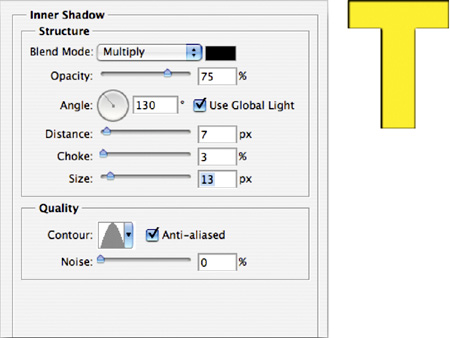
The controls of this effect are nearly identical to the Drop Shadow; the only new setting is Choke. The Choke slider shrinks the boundaries of the Inner Shadow prior to blurring.
Deselect the Inner Shadow check box to remove the shadow, and then select the Outer Glow and Inner Glow check boxes.
The Outer Glow and Inner Glow effects create a glow on the outside and inside edges of an object. Both effects allow you to set the color, amount, and shape of the glow. If you choose a dark glow, you might need to change its blending mode to see it.
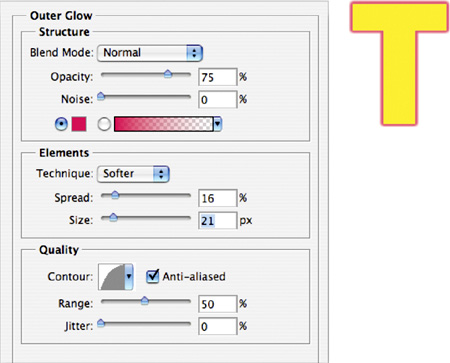
The key difference between the two is that Inner Glow lets you set the glow’s emanation, either the edges of the layer or the center of the layer. Inner Glows signify light coming from behind the layer. It is unlikely that you would need to apply a Drop Shadow and a glow simultaneously. Tweak Contour and Quality to add a variety of shapes to your glows:
Technique: You can choose the Softer option, but it does not preserve as many details. Choose Precise if the source has hard edges (like text or a logo).
Source: An Inner Glow can emanate from the edges or the center of a layer.
Range: This helps target which portion of the glow is targeted by the contour.
Jitter: This will vary the application of the glow’s gradient. It affects color and opacity.
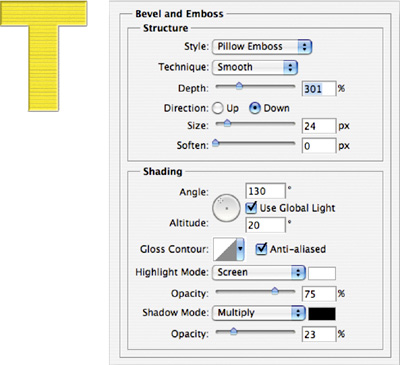
Deselect the Outer Glow and Inner Glow check boxes to remove the glows, and then select the Bevel and Emboss check box.
The Bevel and Emboss effect is very versatile, but you’ll need to be careful not to overdo it. You can use bevels in combination with other effects to create realistic depth. This effect has five different kinds of edges:
Outer Bevel effect adds a three-dimensional beveled edge around the outside of a layer. This bevel is created by adding a clear edge.
Inner Bevel effect generates a similar effect inside the edge. Instead of a clear edge, it uses the layer’s own pixels.
Emboss effect combines inner and outer bevels into one effect.
Pillow Emboss combines the inner and outer bevel effects, but it reverses the outer bevel. This causes the image to appear stamped into the layer.
Stroke Emboss must be used with the Stroke Layer Style. These two effects combine to create a colored, beveled edge along the outside of the layer.
The Bevel and Emboss effect allows significant control over the edges. You can change the lighting source and direction of the bevel, as well as the bevel’s thickness, softness, and depth:
Depth: Specifies how thick the bevel is.
Direction: Indicates whether the bevel goes up or down to change the look of the bevel.
Altitude: Allows you to set the altitude of the light source between 0° and 90°. The higher the number, the more the bevel appears to go straight back.
Gloss Contour: Creates a glossy, metallic appearance. The Gloss Contour is applied after shading the bevel or emboss.
The Flexible Power of Contour Settings
The least understood option of Layer Styles is the Contour setting. Most users leave Contour set to the default linear slope setting. The easiest way to grasp the Contour setting is to think of it as a cross-section of the bevel (it represents the shape of the bevel from a parallel point of view).
The basic linear contour reflects light with predictable results. However, irregularly shaped contours can generate metallic highlights or add rings to the bevel. The Contour setting is extremely powerful and unlocks many looks. Be sure to choose the Anti-aliased option for smoother results.
You have a few options available to modify a contour:
Click the drop-down menu and select a preset.
If you don’t like the 12 included contours, you can load additional contours. Loading contours is similar to loading styles: just click the submenu triangle.
You can make your own contours by defining the shape of the curve. Click the curve and add points. If the Preview box is selected, the curve will update in near-real time. This is the best way to learn how the Contour controls work. You’ll find Contour controls on glows, shadows, and bevels.
You’ll find an extra set of contours called UAP contours.shc in the Chapter 13 folder.
Highlight Mode and Opacity: Specify the blending mode and opacity of the highlight.
Shadow Mode and Opacity: Specify the blending mode and opacity of the shadow.
Contour: Provides flexibility of the Contour controls and is the bevel effect’s best option. There are two Contour settings: the first affects the bevel’s lighting; the second, the specialized Contour pane, alters the shape of the edge.
Texture: Allows you to add texture to the bevel. You’ll find several textures available in the Pattern Picker, and additional textures can be added by loading them from the Picker’s submenu.
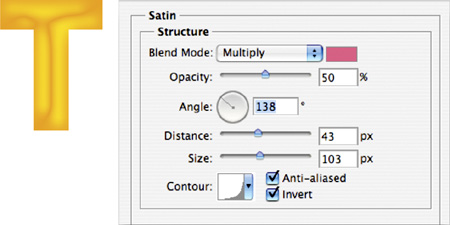
Deselect the Bevel and Emboss check boxes to remove the bevel, and then select the Satin check box.
You can use the Satin effect to add irregular ripples or waves in your layer style or to create liquid effects and subtle highlights. This effect requires experimentation because its controls are very sensitive. To create different looks, experiment with different colors, contour settings, and blending modes. The Satin effect works well in combination with other effects.
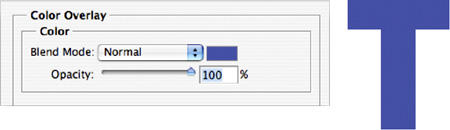
Deselect the Satin check box to remove the satin, and then select the Color Overlay check box.
The Color Overlay style replaces the contents of your layer with a new fill color. This can be a great time-saver and allows for fast design of text effects or Web buttons. Additionally, you can use blending modes to create tinting effects.
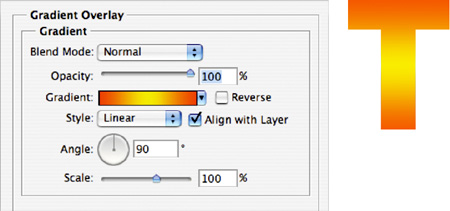
Deselect the Color Overlay check box to remove the color, and then select the Gradient Overlay check box.
The Gradient Overlay allows you to overlay a gradient on top of a layer. You can harness the full power of the Gradient Editor. For more on gradients, see Chapter 6, “Painting and Drawing Tools.”
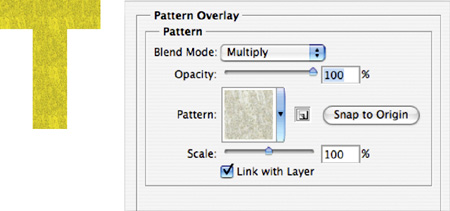
Deselect the Gradient Overlay check box to remove the gradient, and then select the Pattern Overlay check box.
A Pattern Overlay uses photorealistic patterns or seamless tiles. To create more believable effects, combine patterns with blending modes. Photoshop ships with several seamless patterns, and you can find several more online.
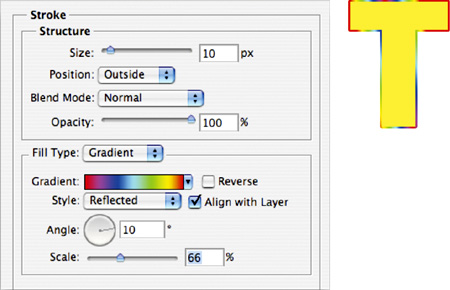
Deselect the Pattern Overlay check box to remove the pattern, and then select the Stroke check box.
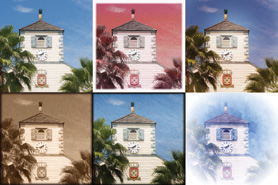
Creating Duotones and Treated Photos with Layer Styles
The Color, Gradient, and Pattern Overlays are very useful when working with photos. If you’re working with groups of historical sources or grayscale photos, you can use Layer Styles to create consistent tinting effects. Often, it is easiest to strip out all the color data of a historical photo before restoring it. You can then add the duotone or sepia tone effect back in as the last step.
Open the file Ch13_Photo_Styles_Practice.tif from the Chapter 13 folder.
Load the Layer Styles set UAP Photo-Styles.asl from the Chapter 13 folder as well.
Double-click the Background layer to float it. Name the layer photo.
Click the different styles to try them out.
Open the effect window and examine how blending modes and textures can be harnessed for powerful effects.
The Stroke effect places a colored border around the edge of a layer. This is a much better replacement for the Stroke command found in the Edit menu. You can choose from inner, outer, or center strokes, as well as advanced controls such blending modes, textures, and gradients. If you’d like to emboss the stroke, combine it with the Stroke Emboss effect (within the Bevel and Emboss options).
Using Layer Styles is an important part of a professional user’s workflow. The efficiency and flexibility offered by Layer Styles are huge time-savers. They can also add consistency to a designer’s techniques. Be sure to fully explore all the ways Layer Styles can be useful to you.
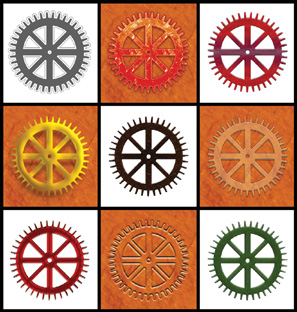
Adobe Photoshop includes some very attractive layer style presets to work with. Using these presets is an excellent way to learn the potential of Layer Styles. By seeing the possibilities, you can learn how to combine effects to create your own custom looks.

Open the file Ch13_Style_Practice.psd from the Chapter 13 folder.
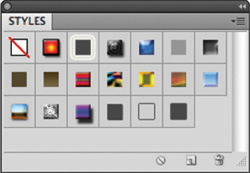
Activate the Styles panel by choosing Window > Styles. Each swatch represents a layer style. To apply a style, highlight any layer (other than the Background layer or a locked layer) and click a swatch.
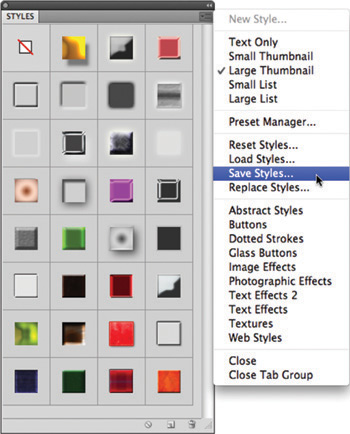
If you need more looks, click the Styles panel submenu. You’ll find several options built into Photoshop. When you select a new set of styles from the Preset list, you are presented a choice:
Append: Adds new styles to the bottom of the current list

Cancel: Does not load anything new
OK: Replaces the current list with new presets
You can also load styles that don’t appear in the Preset list. Choose Load Styles from the Styles panel submenu. You’ll find a collection of styles called UAP Styles.asl in the Chapter 13 folder. If you’d like these new styles to appear in your Preset list, locate the Presets folder inside your Photoshop application folder. Any Layer Style library copied into the Styles folder will appear as a preset the next time you launch the application.
You’ll find these presets and 31 other styles in the UAP Styles set on the CD.
It’s a pretty straightforward process to create your own layer styles. You simply add one effect at a time and experiment with different combinations. Options like Contour and blending modes go a long way toward creating appealing layer styles. Layer Styles are quick to learn and are easy to master; just continue to experiment with many options.
Once you’ve created an original style (or even modified an existing one), you may want to save it. There are two ways to save a style:
Embed: Photoshop embeds the layer style information into the layered files. Be sure to save the document in a layered format (such as Photoshop Document, Layered TIFF, or Photoshop PDF). Three months from now, when your project comes back to life, you can open your source files and start making changes. Remember, layer styles will automatically update as you make edits to the layer.
Save as a Library: After creating a layer style, you can add it to the open style library by clicking an empty space in the Styles window. A new thumbnail swatch is created, and you are prompted to name the swatch. It is then available to you until you load another style library.
Tip: Scaling Styles
When changing the image size (Image > Image Size), specify that you’d like styles to scale proportionately.
If you want to permanently save styles, you must save a Styles library (or set) from the loaded swatches. It’s a good idea to create a personal set in which to store your styles. There is no “new set” option. Simply create new styles and then delete any styles you don’t want by dragging them onto the trash icon at the bottom of the panel or Option/Alt-clicking an unwanted style. When you’re ready to save, choose Save Styles from the Styles panel submenu.
You should store styles in <Photoshop Application folder> > Presets > Styles. Styles placed in this default location will appear in your pop-up menu when you restart Photoshop.