
If you have multiple PCs, you can share files and printers between them across your local network. This allows you to access the same resources no matter which PC you pick up or where you hang out in your house.
This chapter describes how to share files and printers. I’ll cover using homegroups as well as how you can manually share files and printers. I’ll also cover how to share your printer if you don’t have a desktop PC you can connect it to.
The easiest way to share media (or any file, for that matter) between computers in your home is by using a homegroup. Homegroups share the documents, music, videos, folders, printers, and backup drives that you choose to share across your home network using only a password. With a homegroup, it doesn’t matter who is logged on to a PC. As long as the PC is part of the homegroup, any logged-on user can access your shared network resources.
Note
Sharing files in a homegroup Watch the video at http://aka.ms/WinIO/homegroup.
You can create only a single homegroup on your network. Therefore, you create a homegroup on one PC and then join that homegroup from every other PC. To create a homegroup, open PC Settings, select Network, and then select HomeGroup. Select which file types and resources you want to share, as shown in Figure 24-1. After creating the homegroup, open this same window to change the sharing settings.
To make browsing for shared files on other computers easier, don’t share file types that you don’t plan to store on that computer. For example, if you store all your music and videos on your desktop computer, share music and videos from only that computer and turn off sharing for music and videos on mobile computers that might connect only to those shared resources.
If you turn on sharing for Media Devices, digital media receivers (DMRs) will be able to play resources on your computer.

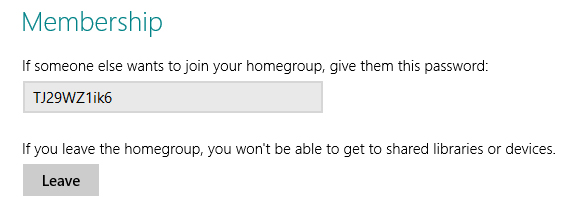
At the bottom of the HomeGroup settings page, as shown in Figure 24-2, is a password that you must type when you join another computer to the homegroup. You don’t need to memorize it; you can simply look it up on the settings page of any computer connected to the homegroup.
Only computers running Windows 7 or Windows 8.1 can participate in a homegroup. Earlier releases of Windows do not support homegroups.
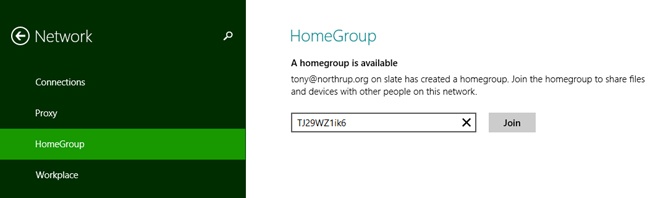
To join a homegroup from a PC running Windows 8.1, just access the HomeGroup page of PC Settings, type the password, and click Join (as shown in Figure 24-3).
To join a homegroup from a PC running Windows 7 (or from the Windows 8.1 desktop), start the Network And Sharing Center and then click HomeGroup in the lower-left corner. As shown in Figure 24-4, click Join Now.

Troubleshooting: Why can’t I connect to a homegroup?
If the HomeGroup page in PC Settings prompts you to create a new homegroup instead of joining an existing one, but you’ve already created a homegroup on a different PC, verify that the PC that created the homegroup is connected to the network. You might need to wait a few minutes for Windows to detect the existing homegroup. If that doesn’t work, from the Start screen search for fix homegroup and select Find And Fix Problems With Homegroup. The HomeGroup troubleshooter, as shown in Figure 24-5, will attempt to diagnose your problem, and it might even fix it for you.

Accessing shared files hasn’t changed from Windows 7. Open File Explorer and navigate to Homegroup, as shown in Figure 24-6. Within Homegroup, files are organized by users, file types, and then individual folders. If a user has multiple folders within a single library (for example, three folders within their Documents folder), each will be listed separately.
If you regularly use a mobile PC to access folders shared from a desktop PC, consider adding the shared folders to the appropriate library on the mobile PC. For example, if you keep your pictures on your desktop PC but want to be able to browse them from your tablet, add the Pictures folder from the desktop PC to the Pictures library on the tablet. For detailed instructions, refer to Chapter 9.

Windows Vista and earlier versions of Windows can’t participate in homegroups. However, when you create a homegroup, Windows automatically shares your Users folder in a way that lets other PCs connect to it. In earlier versions of Windows, simply use Windows Explorer to map a network drive to \<PC_name>Users. Be sure to grant the user file permissions as described in Granting permissions to files later in this chapter.
For most people, homegroups make sharing folders and printers much simpler than in Windows Vista and earlier versions of Windows, which required you to share individual folders and printers. However, you might still want to manually share an individual folder and then map it as a network drive if you access it frequently. For example, it’s much easier to access my E: drive that’s mapped to a shared folder than it is to browse to HomegroupTonyWin8DocumentsMy DocumentsWindows 8.1 Inside Out.
To manually share a folder, right-click it in File Explorer and then click Properties. Select the Sharing tab, as shown in Figure 24-7, and click the Advanced Sharing button.

In the Advanced Sharing dialog box, select the Share This Folder check box as shown in Figure 24-8.

Then, click the Permissions button. Here, you need to specify the users who have access to the shared folder and what level of access they have when accessing the share. The default settings allow everyone to connect to the shared folder with nothing more than Read access. If you want users to be able to edit any file or folder for which they also have sufficient file permissions, grant Change access to Everyone. Full Control also allows users to change permissions when accessing the shared folder.
Whereas homegroups automatically allow users to access both shares and the files contained within, when you manually share folders, you must separately configure both share permissions and file permissions. Sharing a folder and granting share permissions does not grant users any permission to the files within the shared folder. Therefore, while everyone will have access to connect to the share by default, file permissions can restrict them from accessing any of the contents in the share.
Share permissions simply define the greatest permissions users can have to the contents of the share. For example, if you grant Read access to the Everyone group, nobody will be able to update a file within the share, even if they have full control over the file permissions.
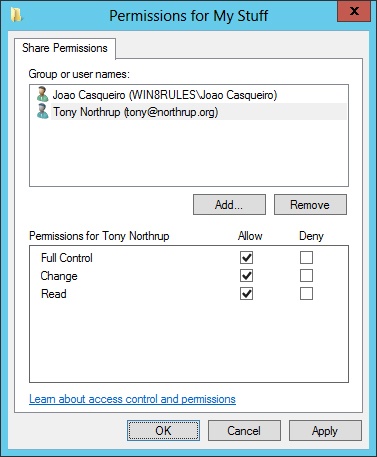
If you really don’t want to be caught with your pants down, you can specify more restrictive share permissions than the default settings that allow everyone to read files. From the Permissions dialog box, select Everyone and then click Remove. Then, click Add. You’ll see the remarkably confusing Select Users Or Groups dialog box. This dialog box is designed for use in enterprises that have thousands of users, and as such, it’s quite inefficient in a home environment. Type the name of the user you want to share with in the box and then click OK. Returning to the Permissions dialog box, select the user and choose which permissions they should have (Figure 24-9). Then, click OK.
Now, your folder is shared with the share permissions you specified. Your next step is to connect to it from the remote PC. In File Explorer, select the Home tab, click Easy Access (in the New group), and then click Map As Drive.
The Map Network Drive wizard appears. Make note of the drive letter at the top of the wizard; you’ll use this drive letter to access the folder in the future. Click Browse to select the shared folder, or type the name of the shared folder in the format \<PC_name><folder_name>. If you’re logged on using an account that doesn’t exist on the sharing PC, or that doesn’t have sufficient permissions to the shared folder and files, then select the Connect Using Different Credentials check box as shown in Figure 24-10. Finally, click Finish.

You can also map drives to folders within a shared folder by browsing to a subfolder or specifying the folder name using the format \<PC_name><folder_name><subfolder><subfolder>. That way, you don’t have to share each folder separately. Simply use the Users folder that homegroups automatically share and map drives to specific subfolders within it for your own convenience.
If you switch between computers frequently, you might forget whether your files are stored in the Documents folder or on a mapped drive. To make things easier, use the same drive letters on each of your PCs to connect to the same shared folders. I’ve connected the W drive on each of my PCs to the Windows 8.1 Inside Out folder I’m using to write this book. I’ve even done that on the PC that stores the files locally. That way, no matter which PC I’m using, I can open the W drive and find my files.
If you aren’t using homegroups, you must configure two different security mechanisms:
Share permissions. The user must be granted access to the shared folder, which can be done manually as described in the section “Using file sharing” earlier in this chapter.
File permissions. The user must be granted access to individual files using NTFS file permissions.
Users can access a file across the network only if they have both share and file permissions. Think of it like a bank vault with locked safe deposit boxes within it. Use share permissions to decide who can enter the bank vault. Use file permissions to grant access to the individual safe deposit boxes, which represent folders and files. Homegroups grant both share permissions and file permissions to everyone in the homegroup, essentially allowing everyone into the bank vault and then into the safe deposit boxes. When you manually share folders, you have separate locks for the bank vault and safe deposit boxes, and you need to separately define both share and file permissions.
To set permissions to share a folder or file with another user, right-click the file or folder in File Explorer and then click Properties. Select the Sharing tab and click the Share button. The File Sharing dialog box appears.
On the Choose People To Share With page, select the users who you want to share the folder or file with and whether you want them to have Read or Read/Write permissions (Figure 24-11). If you’re sharing the folder with other users, you must create an account for them on the PC sharing the folder, and the user name and password must match their credentials on the PC they’re connecting from. Click Share.

File permissions apply to users who access files and folders both across the network and when logged on locally to the computer. To set file permissions for a user, right-click the file or folder and click Properties. Then, select the Security tab. Click the Edit button to modify permissions for the file or folder. If you edit a folder’s permissions, the permissions you specify will be applied to all files and folders contained within the folder.
Note
For more information about file permissions, refer to Protecting files in Chapter 9.
Occasionally, you need to take something from the digital world and bring it into the physical world by spraying some ink on mushed up trees. It seems like a rather antiquated process, and I avoid it whenever possible, but we still need to print.
Printing has actually become more complex in recent years, because PCs became mobile and printers will always be stationary. In the days when everyone had a desktop PC, they plugged their printer into the PC’s USB port (or the parallel port, if you’re as old as I am)—connecting to a printer was as easy as connecting your mouse or keyboard. If you have a Wi-Fi network, however, your printer needs to become a network device.
There are several ways to share your printer across your network. The sections that follow describe each option in more detail and then describe how to connect to shared printers from client PCs.
Note
Sharing printers Watch the video at http://aka.ms/WinIO/shareprinters.
If you happen to have a desktop PC, connect your printer to your desktop PC and then have that PC join your homegroup, as described earlier in this chapter. Any other PC that participates in the homegroup will be able to connect to the printer as long as the PC sharing the printer is turned on and connected to the network.
Depending on how often you print, you might want to change your desktop PCs power settings so that it stays turned on during the hours when you might want to use the printer. For more information, refer to the section Power settings in Chapter 5.
Even if you have PCs that can’t connect to your homegroup, such as a PC running Windows XP or Windows Vista, you can still connect to a printer that’s shared using homegroups.
If you prefer not to use a homegroup (for example, if you prefer to grant access to shared resources on a user-by-user basis), you can manually share a printer.
From the Start screen, search for printers, and then select View Devices And Printers. Right-click the printer and select Printer Properties. On the Sharing tab, as shown in Figure 24-12, select Share This Printer.
Windows is available for both 32-bit (x86) and 64-bit (x64) processors. By default, Windows automatically installs a driver only for clients with the same processor type. If you have both 32-bit and 64-bit versions of Windows Vista, Windows 7, or Windows 8.1 in your home, click the Additional Drivers button and select the other processor type, as shown in Figure 24-13. Windows will prompt you to select the printer driver, so you’ll need to download the appropriate version from the printer manufacturer’s website and extract the files to a folder on your computer.


Printers are rather stationary devices, whereas many new PCs are extremely mobile. Even if all of your PCs are mobile devices, you can still print from anywhere in your house by using a printer that connects directly to your wired or wireless network without using a PC. As shown in Figure 24-14, you might need to retrieve the printer’s IP address directly from the printer to connect to it.

If your printer can’t connect directly to your network, you might be able to connect it to your router or wireless access point. Some routers and wireless access points support sharing a USB printer across the network, instantly converting any printer into a network printer. For more information about routers and wireless access points, refer to Chapter 21.
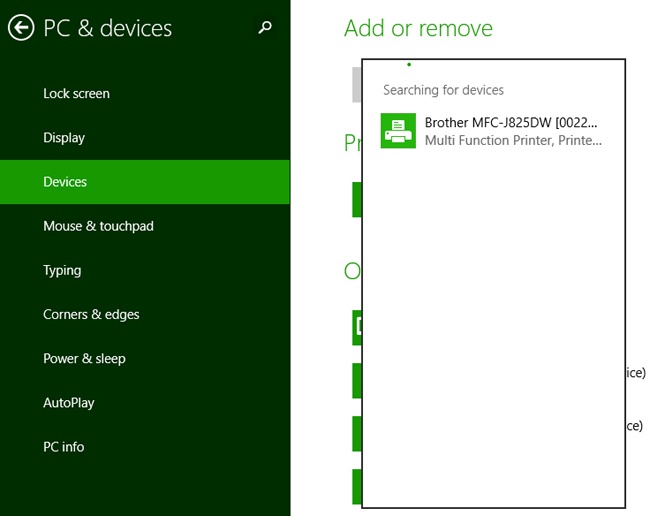
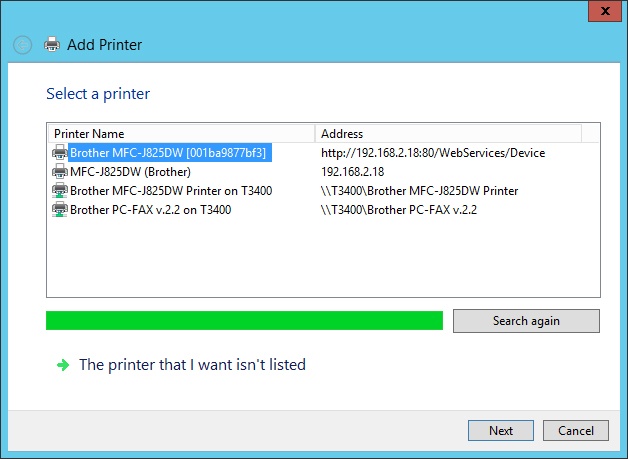
Whereas File Explorer automatically connects you to every shared folder in your homegroup, you must manually connect to printers shared in your homegroup. No matter how your printer is shared on the network, the process of connecting to the printer is the same: from the Start screen, search for printer and then select Add Printer. Windows will prompt you to connect to any printers that it can find on the local network, as shown in Figure 24-15, including any shared by homegroups.
Although this technique is supposed to find shared printers, it doesn’t always succeed. The desktop provides a more reliable approach. From the Start screen, search for printer and then select Devices And Printers. Then, click Add A Printer. As shown in Figure 24-16, the Add Printer wizard more reliably finds network printers. Select a printer, click Next, and follow any prompts that appear.
As shown in Figure 24-17, Windows might prompt you to install a driver by downloading it from the PC sharing the printer. It’s technically possible (though highly unlikely) that the driver might not be trustworthy, so installing the driver requires administrative privileges. If the printer driver needs to install software, you might get a second confirmation prompt.

Figure 24-17. Installing a driver downloaded from the PC sharing the printer requires administrative privileges.
As shown in Figure 24-18, Windows might instead prompt you to select a driver. It will only do this if it can’t automatically download the driver, which will happen if you’re running a version of Windows with incompatible drivers or if you connect directly to the printer. These drivers are approved by Microsoft, so you can trust them, at least to the extent you trust other Microsoft-approved software. Click Windows Update to get the latest list of printer drivers.
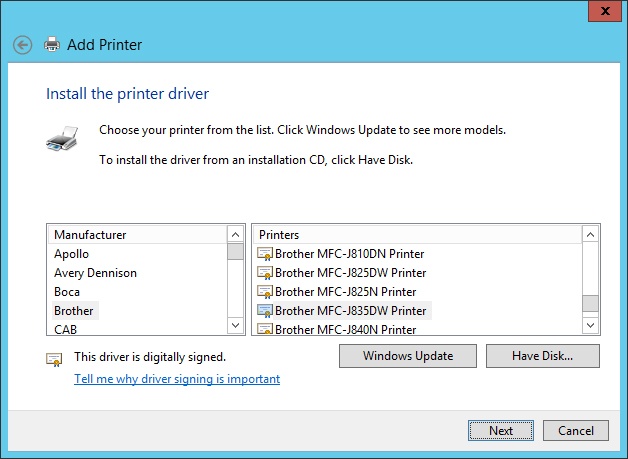
If you still don’t see your printer, download the latest version of the driver from your printer manufacturer’s website and click Have Disk to select it (or just install it using the printer manufacturer’s software). If you do click Have Disk, be prepared to take a trip down memory lane. By default, the wizard selects the A drive. Apparently, the Windows developers at Microsoft haven’t updated this dialog box since people used to install printer drivers from floppy disk drives, which were typically named A and B.
If the Add Printer wizard doesn’t find your printer (which does happen regularly), you might have to identify the printer’s name on the network and connect to it manually.
If your printer is connected directly to another PC on the network (for example, using a USB cable), go to the PC sharing the printer and open a command prompt. First, run the command hostname, which displays the PC’s hostname, which is Win8PC in the following example.
C:>hostname
Win8PC
While you’re at it, run the command ipconfig and make note of the IPv4 address, which is 192.168.2.7 in the following example. You probably won’t need this, but you might:
C:>ipconfig

Windows IP Configuration


Ethernet adapter Local Area Connection 1:

   Connection-specific DNS Suffix  . :
   Link-local IPv6 Address . . . . . : fe80::95aa:b974:daac:9df9%13
   IPv4 Address. . . . . . . . . . . : 192.168.2.7
   Subnet Mask . . . . . . . . . . . : 255.255.255.0
   Default Gateway . . . . . . . . . : 192.168.2.1
Now, run one more command at the command prompt: net share. Net Share lists every shared resource on the PC. In the following example, the resource you’re looking for is Brother MFC-J825DW Printer. Make note of the exact name.
C:>net share

Share name   Resource                        Remark

-------------------------------------------------------------------------------
ADMIN$       C:Windows                      Remote Admin
Q$           Q:                             Default share
print$       C:Windowssystem32spooldrivers
                                             Printer Drivers
C$           C:                             Default share
IPC$                                         Remote IPC
Brother MFC-J825DW Printer
             USB002                 Spooled  MFC-J825DW
Brother PC-FAX v.2.2
             USB002                 Spooled  MFC-J825DW
The command completed successfully.
Now you have all the information you might possibly need to connect to the shared printer. Return to the PC that you want to print from and open the Add Printer wizard. This time, click The Printer That I Want Isn’t Listed. Windows gives you several different options. Choose Select A Shared Printer By Name and type \<hostname><printer name> as shown in Figure 24-19. Click Next and complete the wizard.
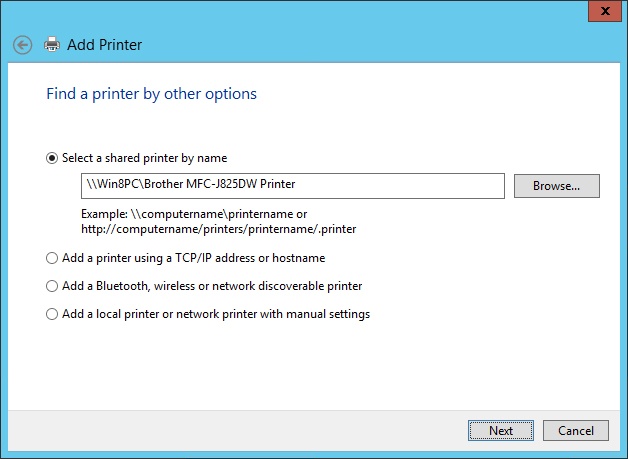
Figure 24-19. If you can’t automatically connect to a printer, you can identify its name and connect manually.
If you still can’t connect, attempt to connect to the printer again. This time, type the name \<ip_address><printer name>. Specifying the IP address bypasses the name resolution process, and resolving names on the local network is a notoriously unreliable process.
Troubleshooting: Why can’t I connect to my printer?
If you’ve tried connecting to a shared printer manually and still receive an error, restart both PCs. You knew I was going to say that, didn’t you?
On the PC sharing the printer, follow the instructions in Switching between public and private networks in Chapter 19, to configure the local network as a private (home) network and verify that sharing is turned on.
Next, while still on the PC sharing the printer, search Settings for sharing and then select Manage Advanced Sharing Settings. As shown in Figure 24-20, verify that Turn On Network Discovery, Turn On Automatic Setup Of Network Connected Devices, and Turn On File And Printer Sharing are selected.

Figure 24-20. Network Discovery and File And Printer Sharing should be enabled on the PC sharing the printer.
With that done, there’s another setting to verify: Windows Firewall. Windows Firewall can block incoming communications, including those sent by the PC sharing the printer. Search Settings for Firewall and select Windows Firewall. Then, select Advanced Settings. In the Windows Firewall With Advanced Security window, verify that the following inbound rules are enabled for the Private profile only:
File And Printer Sharing (Echo Request – ICMPv4-In)
File And Printer Sharing (Echo Request – ICMPv6-In)
File And Printer Sharing (LLMNR-UDP-In)
File And Printer Sharing (NB-Datagram-In)
File And Printer Sharing (NB-Name-In)
File And Printer Sharing (NB-Session-In)
File And Printer Sharing (SMB-In)
File And Printer Sharing (Spooler Service-RPC)
Note
For more information about using Windows Firewall, refer to Chapter 19.
If it still doesn’t work, open a command prompt (without administrative privileges) on the PC connecting to the printer. Run the command ping <ip_address>, where <ip_address> is the IP address of the server sharing the printer. If you see replies, then your PC is able to communicate with the PC sharing the printer. At the command prompt, type net use \<ip_address>. You might be prompted for your user name and password.
C:>net use \Win8PC
The password or user name is invalid for \Win8PC.

Enter the user name for 'Win8PC': [email protected]
Enter the password for Win8PC:
The command completed successfully.
This step establishes a connection to the PC sharing the printer and authenticates your account to the printer. This connection is used for all shared file and printer communications, so you shouldn’t have any problems connecting to the PC until you restart.
With that connection established, you should be able to browse for the printer using the steps in Automatically connecting to shared printers earlier in this chapter.
If you don’t see replies when you ping the PC sharing the printer, you have a network problem. Refer to Chapter 23.
Troubleshooting: Why can’t I print anymore?
If you were able to print and suddenly you can’t, there are a few things that could cause this. Go through these steps to identify the problem:
Make sure the correct printer is selected as the default. In Devices And Printers in Control Panel, the printer should have a green check mark. If not, right-click it and select Set As Default Printer.
Is the printer OK? Check the ink or toner, make sure it has paper and isn’t jammed. Most printers are smart enough to display some sort of error message.
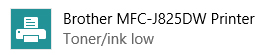
Does Windows know what the problem is? Go to the Devices page of PC Settings. Beneath your printer, Windows will display the status if it has detected a problem, as shown in Figure 24-21. If the status is Offline, then your computer can’t connect to the printer. Check the USB cable or verify the printer’s connection to the network.
Restart the printer, restart whatever it’s connected to (your PC or router), and restart the PC that’s trying to print. I know, it’s not an elegant solution, but it often works.
If you’re trying to print to a printer connected by a USB cable, unplug the printer and then remove it from Devices And Printers in Control Panel. Then, reconnect the printer and turn it on. Windows 8.1 should detect it automatically, which will probably solve your problem. If Windows 8.1 doesn’t detect it, try a different USB port, and try replacing the USB cable. If Windows 8.1 still will not detect it, try connecting the printer to a different computer. If another computer can connect to the printer, the problem is with the first computer. If neither computer can connect to the printer, then the problem is with the printer.
If you’re trying to print across the network and the printer is shared from a PC, try to print from the PC sharing the printer. If it can’t print, return to the previous step. If the PC can print directly to the local printer, then the problem is network related. Verify that the PCs can connect to shared folders. Try removing the printer from both PCs, and then reinstall it and share it again. If you run into problems reconnecting to the shared printer, follow the instructions in the troubleshooting tip, “Why can’t I connect to my printer?”
If Windows doesn’t display the name of a network printer, you can manually connect to it. Start by looking up your printer’s IP address. If your printer has an LCD display, there will be a menu option to display the current IP address. If not, there will be a command to print the network settings. Refer to your printer’s manual for more information.
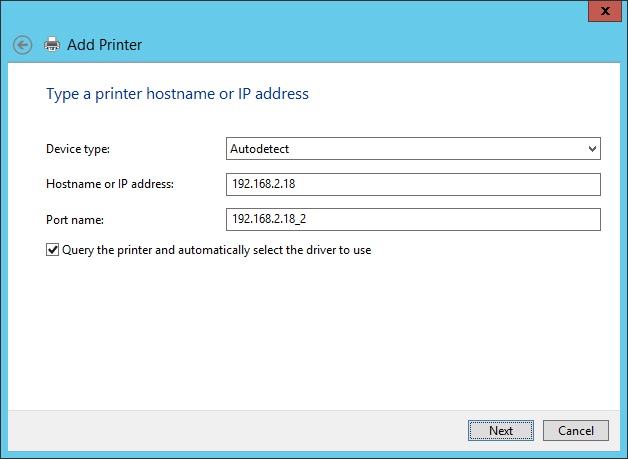
On your Windows 8.1 PC, search from the Start screen for printer and then select Devices And Printers. Then, click Add A Printer, just as you would when automatically connecting to a printer. This time, click The Printer That I Want Isn’t Listed. On the Find A Printer By Other Options page, select Add A Printer Using A TCP/IP Address Or Hostname, and then click Next. On the Type A Printer Hostname Or IP Address page, do as it requests and type the IP address, as shown in Figure 24-22. When you click Next, Windows should connect to the printer.
If you continue to have problems, check the printer manufacturer’s website to see if it has any software for Windows Vista, Windows 7, or Windows 8.1 that you can download and install. Any of them should work.