
Associating scripts with events
Using Script Editor
The InfoPath object model
You can get more out of InfoPath by adding custom validation and calculations that aren’t possible through the product’s user interface. This chapter describes how to write scripts and associate them with InfoPath forms to add this extra functionality.
Skills required
This chapter requires an understanding of XPath (see Chapter 17, “XPath primer”, on page 384 and Chapter 24, “XML Path Language (XPath)”, on page 498) and either VBScript or JScript.
Using a script, you can manipulate both the InfoPath user interface and the abstract XML document underlying the form. You can also call external code to add almost any functionality to a form. This can be useful in a broad range of situations, for example:
More complex validation. The standard validation functionality of InfoPath is quite powerful, but sometimes there are constraints that cannot be expressed using the standard features. For example, constraints that involve more than two fields in the form, or ones that require a calculation to be performed.
Calculations. Values, such as totals and averages, can be calculated based on other values specified by the user.
Custom error messages. Custom error messages can be created that are more meaningful than the basic ones provided by InfoPath.
Access to secondary data from a database, Web service or other XML document. A script is not required if you simply want to read and write an entire XML document from an external data source. However, a script is required if you want to use the secondary data source for validation, or to complete sections of the form. Because this is such a common use case, all of Chapter 11, “Using secondary data sources with forms”, on page 250 is devoted to it.
Custom user interface components. Using a script, you can add custom toolbars, menus and task panes, optimizing the InfoPath environment for a specific set of users.
Scripts can be executed when the user clicks a button on the form, when the user changes a value, when a form is first loaded, or in response to a number of other events. In this chapter we will provide a number of examples of InfoPath scripts, focusing mostly on the XML aspects rather than user interface customization.
Let’s start with a very simple example to show the basics of script creation. To implement a simple script that displays a message for the user:
Start with a blank form, by clicking New Blank Form on the Design a Form task pane.
Click Controls on the Design Tasks task pane.
Drag a Button from the list of controls to the blank form.
Right-click the button in the form and click Button Properties. This will bring up the Button Properties dialog shown in Figure 10-1. From this dialog, you can change the label displayed on the button, as well as the associated script ID, which is by default assigned a unique name like
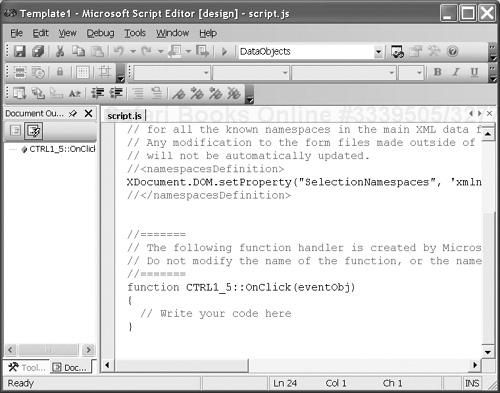
CTRL1_5.Click Microsoft Script Editor. This will bring up Script Editor, which is the software used to create and edit script functions. Near the bottom of the script file (shown in Figure 10-2) is a function named something like
CTRL1_5::OnClick, whereCTRL1_5is the button’s name. The comment//Write your code hereis displayed as a prompt.Type the following line into the script body:
XDocument.UI.Alert("This is your first script")Save the script by clicking Save on the File menu in Script Editor, and exit Script Editor.
Save the form itself by clicking Save on the File menu in InfoPath.

Now, test your script by filling out the form you just created. The easiest way to do this is to click Preview Form on the toolbar. When clicking the Button button, you should get a dialog saying “This is your first script”, as shown in Figure 10-3.

Let’s take a closer look at the script in the example. The name of the function into which you inserted your code is something like CTRL1_5::OnClick.CTRL1_5 is the script ID of the button, and OnClick is the name of the event that causes that function to be executed. We will look more closely at events in section 10.4, “Events”, on page 232.
The single line of code refers to the object XDocument, which represents the current document that is displayed in the form. It then refers to the document’s user interface via the property UI. Finally, it calls the Alert method of that UI object, passing it one parameter that is the string “This is your first script”. The Alert method is used to display a message.
As you may have noticed, the script file that appears in Script Editor contains other functions in addition to the one you are editing at the moment. Each form has at least one script file associated with it that contains all the necessary functions for that form.
InfoPath scripts can be written in JScript or VBScript, the default being JScript. All of the examples in this chapter are written in JScript. These two languages are similar and are often embedded in HTML to enhance Web pages. To change the scripting language for a form, click Options on the Tools menu and click the Design tab. Under Scripting, choose whether you want to write scripts in JScript or VBScript.
Script files can contain a list of functions for that form, as well as variable definitions and comments. Some functions may be associated with a particular field or button, while others are associated with the form as a whole. In addition, you can create a library of added functions in the script file in order to reuse code.
When a form is saved, the script file is stored within the .xsn file. If you use the Extract Form Files command to extract the files associated with the form, the script file will appear as a separate file whose extension is .js. By default, it will be named script.js.
It is possible to create additional script files and associate them with the form using the Resource Manager which is accessible from the Tools menu. This is useful for sharing functions across multiple forms. However, you will not be able to edit the additional script files using Script Editor; you will have to edit them in another tool such as a text editor or Visual Studio.
In our previous example, we associated a script function with a button, so that every time the button was clicked, the script function was executed. There are a number of different kinds of events that trigger script execution in addition to the clicking of a button. They include positioning the cursor on a field, changing a value, loading a form, switching views, and more. The InfoPath events are listed in Table 10-1.
Table 10-1. Types of events
Event type | Description |
|---|---|
| The user clicks a button on the form. |
| The user changes the value of a field (before the change is accepted). |
| The value in a field is validated, after it is changed. |
| The user changes the value of a field (after the change is accepted and validated). |
| A document is opened with the form. |
| The user switches views. |
| The user queries the data source to import new data. |
| The user submits the form. |
| The user opens a document that was created using an older version of the form. |
A script function may be associated with a particular event, and in some cases a particular field or button. In the script, the name of the function will indicate the event. For example:
A function named
CTRL1_5::OnClickwill be executed when theCTRL1_5button is clicked.A function named
msoxd_item_number_attr::OnValidatewill be executed when the item number field is validated.A function named
XDocument::OnLoadwill be executed when a new document is loaded.
You don’t have to specify these function names yourself. They are generated by XPath when you launch Script Editor and they should not be changed. However, it is useful to understand their meaning when editing the script. Throughout the rest of the chapter, we will see examples of working with these events.
In our previous example, we used Script Editor to create the simple script function. Script Editor is a separate application that is launched from Info-Path when the user needs to create or edit a script function. In our example, we launched it from the Button Properties dialog, and it automatically created an empty function associated with that button.
There are a number of other ways to launch Script Editor, depending on the event that will trigger the function to be executed:
If you are creating a script function associated with validation or modification of a particular field, you can launch Script Editor from the field’s Data Validation dialog. This is explained in 10.7.2, “Launching Script Editor”, on page 239.
If you are creating a script function for the
OnLoadorOnSwitchViewevent, you can click either of these events on the Script submenu of the Tools menu, shown in Figure 10-4.If you are creating a script function for the
OnSubmitRequestevent, you can launch Script Editor from the Submitting Forms dialog that was described in 9.3.8, “Allowing users to submit forms”, on page 220.

In all these cases, InfoPath creates an empty “stub” function for you, and you just need to fill in the function body. Script Editor can also be launched directly from the Script submenu of the Tools menu.
Microsoft provides an object model for use in InfoPath scripts. The object model allows you to programmatically manipulate the underlying XML document, as well as the user interface itself. Figure 10-5 shows the basic hierarchy of the object model. Only the most commonly used objects are shown.

At the top of the object model hierarchy is the Application object which represents the application itself. From Application, you can access the open InfoPath windows via the Windows property, as well as the open XML documents, via the XDocuments property.
In most scripts you will be interested in performing some operation that involves the currently displayed XML document, which can be accessed via the XDocument object. For example, in 10.2, “A simple sample script”, on page 228, we used the method call XDocument.UI.Alert to display a message box within the current document. The XDocument object has a number of properties that are useful in scripts:
DOMcan be used to get an XML representation of the document. This is discussed further in the next section.UIcan be used to display message boxes and other dialogs.Viewcan be used to switch views, determine what view is currently displayed, and which fields are currently selected.DataObjectscan be used to access secondary data sources, which are described in 11.1, “Defining a secondary data source”, on page 252.
In addition, there are event objects that are passed to scripts as parameters when an event, such as clicking a button or changing a value, occurs.
Many scripts involve querying or manipulating the XML document behind the form. This is accomplished by accessing the DOM (Document Object Model) of the XML document. DOM is an open W3C standard model for accessing XML documents. Microsoft implements the W3C standard and also provides some convenient extensions.
DOM is made up of quite a large number of objects, and therefore cannot be covered in a single chapter. However, we will provide you with a series of examples for common use cases. You can browse the complete DOM object model using Script Editor, as described in the next section.
You can access the DOM for the currently displayed XML document by specifying XDocument.DOM. The XDocument.DOM property represents the document as a whole. From there, you can access the nodes of the document.
Nodes are elements, attributes and other XML constructs such as comments and processing instructions. In addition, the character data content of an element is considered a node, specifically a text node. Nodes are arranged in a hierarchy and may have children and parents.
Using the DOM, you can select nodes from the document using an XPath expression. Alternatively, you can traverse the document via the nodes and their parent/child relationships to retrieve the elements and attributes of interest. You can also use the DOM to update the value of existing nodes, and insert new ones. We will look at each of these uses in turn.
The InfoPath object model is fully documented in the InfoPath Developer’s Reference, which is included in the InfoPath help. This document is a reference guide for the various events and objects and their associated properties and methods.
In addition, you can browse the InfoPath object model interactively in Script Editor using Object Browser. If Object Browser is not already displayed, point to Other Windows on the View menu, then click Object Browser.
In Object Browser, you can traverse the object model much as you might in Windows Explorer. When an object is selected in the left-hand pane, its members (functions and properties) are displayed to the right, as shown in Figure 10-6. The pane at the bottom of Object Browser displays further information about the component, often including a description of its purpose.

One of the most common uses for scripts is to perform validation, either because custom error messages are desired, or because the validation involves complex business rules. In this section we will look at three different examples of validation scripts. In the process, we will learn more about JScript as well as the InfoPath object model. All of the examples in this chapter can be found in the order_scripts.xsn example file. This form, shown in Figure 10-7, is a slightly modified version of our order form from the previous chapter.

Validation is usually associated with either the OnBeforeChange event or the OnValidate event.
OnBeforeChange
The
OnBeforeChangeevent occurs after the user has made a change to a value, but before the change is accepted. If there is an error in the value, the change will be undone and the field will return to its previous value. This is useful if you want to prevent a user from specifying a field unless another field is specified or has a certain value. For example, you may want to prevent the user from specifying a second address line unless the first address line is completed.
OnValidate
The
OnValidateevent occurs after the user has changed the value in the field, and after it has been validated against the schema. If an error is reported, the change will stay, but the field will be underlined in red to identify it as an error.
In addition to these events, it is possible to perform some validation when the user submits the form by relating the script to the OnSubmitRequest event. However, the user will not be warned of the error until the form is completed. Also, this works only for submit, not save. As a result, a user may unknowingly save a document with errors in it.
To create or modify a script function associated with validation, you can launch Script Editor from the field’s Data Validation dialog. If a script function already exists for that field, for that event, the cursor will be positioned at that script function. If one does not exist, a stub will be created, as we saw in our previous example.
To launch Script Editor to show our first example:
Open
order_scripts.xsnin design mode.Right-click the Product Number field and click Text Box Properties.
On the Data tab, click Data Validation. This brings up the Data Validation dialog shown in Figure 10-8.
At the bottom of the Data Validation dialog, select the event you wish to use as a trigger for the script, in this case
OnValidate, and click Edit to launch Script Editor.

You should now be in Script Editor with your cursor positioned on the first line of the script shown in Example 10-1. The purpose of this script is to ensure that the product number is less than 1000. This validation could also be done without a script, but we have chosen a simple example to start with.
Example 10-1. Product number validation
function msoxd__item_number_attr::OnValidate(eventObj)
{
  // Make sure it is less than 1000
  if (eventObj.Site.nodeTypedValue > 999)
    eventObj.ReportError(eventObj.Site,
       "Invalid product number: " +
       eventObj.Site.nodeTypedValue +
       "  The product number must be less than 1000.")
}
Line 1 indicates that the name of the function is msoxd__item_number_attr::OnValidate, which means that it is associated with the item number field and the OnValidate event. The function name is fixed and cannot be changed. Line 1 also tells us that a single parameter is passed to this function, eventObj. It provides information about the event, in particular the node that changed to trigger it (eventObj.Site).
Line 4 starts an if statement that determines whether the value in question is over 999. The value of the appropriate field is retrieved using the reference eventObj.Site.nodeTypedValue. If the value is greater than 999, an error is reported using the ReportError method of eventObj. We pass two parameters to the ReportError method: the node that is in error (eventObj.Site), and a string that is the error message.
You can test this script by entering a product number that is greater than 999. The field will be surrounded with a red-dashed line, and the custom error message will appear both when you hover over the field and when you right-click it.
Our last example simply checked the value of a field against a constant. However, some validation involves multiple fields. Suppose, for example, that the product number 999 is used for special promotions that have a limit of one per customer per order. As such, we don’t want a user to be able to enter a quantity that is greater than 1 if the product number is 999. The script shown in Example 10-2 will enforce this constraint.
Example 10-2. Multi-field validation
function msoxd_ns1_item::OnValidate(eventObj)
{
  // Retrieve the necessary nodes and values
  var itemNode = eventObj.Site
  var quantNode = itemNode.selectSingleNode("ns1:quant")
  var quant = quantNode.nodeTypedValue
  var prodNum = itemNode.selectSingleNode("@number").nodeTypedValue

  //test the condition and report error
  if (prodNum == 999 && quant > 1)
    eventObj.ReportError(quantNode,
     "Quantity cannot exceed 1 for product number 999.", false)
}
If you are still in Script Editor, you can simply scroll down to find this function. However, if you are not, you will have to launch Script Editor in a different way to get to it directly. This function is related to the entire item row, rather than an individual field. Specifically, it is associated with the item element. To get to a script function for an element that is not represented by one field in the form:
Select
itemin the Data Source task pane.Right-click it and click Properties.
Click the Validation and Script tab.
As before, select the event you wish to use as a trigger for the script, in this case
OnValidate, and click Edit to launch Script Editor.
In our previous example, we used the reference eventObj.Site.nodeTypedValue to get to the value of the element we were validating. In this case, we instead want to work with nodes that are related to the element we are validating, namely the quant child and the number attribute of the item element.
line 4
On line 4, we assign the
itemelement to a variable, namelyitemNode.
line 5
On line 5, we assign the
quantnode using theselectSingleNodemethod ofitemNode. TheselectSingleNodemethod is passed an XPath expression which selects the desired node. In our case, we are using a relative XPath expression to select thens1:quantchild of theitemelement. It is also possible to use absolute XPath expressions, as we will see in our next example. Note that the namespace prefix is required when referring to qualified elements likequant. The prefixns1is generated by InfoPath. If you scroll to the top of the script file, you will see the line that maps thens1prefix to the appropriate namespace (see Example 10-3).
line 6
On line 6 we extract the typed value of the node and assign it to the
quantvariable. Using a typed value allows it to be treated as a number rather than as a string. It would also be possible to specifyquantNode.textto return the content of thequantelement as a string.
line 7
Line 7 retrieves the product number value in a similar fashion to the
quantchild. However, since thenumbernode is an attribute rather than an element, the@character is used in the XPath expression to indicate this. In addition, thenumberattribute is unqualified, so it is not prefixed in the expression.
lines 9 through 12
Lines 9 through 12 test for the error condition and report an error if necessary. Note that the first parameter passed to the
ReportErrormethod is thequantNodenode. This means that the error will show up as an error in the quantity field, even though the error involves two fields. If desired, we could have specified the product number field, or calledReportErrortwice to report errors in both fields.
In this example, we could have associated the script function with the quantity field, rather than the entire row. However, associating it with the entire row, i.e. the item element, allows the script function to be executed each time any field in the row is changed.
Up to this point, we have associated both of our validation examples with the OnValidate event. It is also possible to use the OnBeforeChange event for validation. For example, suppose we want to prevent users from entering a second address line if the first address line is not completed. We might use a script like the one shown in Example 10-4.
Example 10-4. Using the OnBeforeChange event
function msoxd_ns1_addr2::OnBeforeChange(eventObj)
{
  // Retrieve the necessary nodes and values
  var addr1 = XDocument.DOM.selectSingleNode(
                  "/ns1:order/ns1:shipTo/ns1:addr")
  var addr2 = XDocument.DOM.selectSingleNode(
                  "/ns1:order/ns1:shipTo/ns1:addr2")

  //test the condition and report error
  if (addr1.text == "" && addr2.text != "")
  {
    eventObj.ReturnMessage =
      "A second address line cannot be specified without a first."
    eventObj.ReturnStatus = false
    return
  }
  eventObj.ReturnStatus = true
  return
}
This script handles the error slightly differently, because calling the ReportError function is not allowed from an OnBeforeChange script function. Instead, it calls the ReturnMessage method of eventObj if there is an error. This results in a dialog that displays the error message after an invalid value is entered. In addition, the function sets the ReturnStatus property of eventObj to false if there is an error, and true if there is not an error.
If there is an error, the change to the field will be rolled back. You can test this by attempting to enter a second address line when the first address line is not specified. When you try to move the cursor from the Address 2 field, you will get an error message and your change will be undone. Interestingly, because the function is related to the addr2 element only, this script does not prevent you from entering a first address line, then a second line, then deleting the first line. To do that, you would need to associate the script with a higher-level element, such as shipTo, which would be executed any time a change was made in any of its children.
There is another difference between this example and the previous examples. It uses absolute XPath expressions rather than relative ones. In the last example, we called the selectSingleNode method of the item node. The XPath expression we used was evaluated in the context of the item node. In this case, we are also executing the selectSingleNode method, but of the XDocument.DOM object itself, which represents the entire document. As a result, we need to specify the entire path to retrieve the node of interest, namely: /ns1:order/ns1:shipTo/ns1:addr
The slash at the beginning of the expression means that it starts at the root of the document and works its way down the hierarchy.
Another common use for scripts in InfoPath is to perform calculations, such as totals, averages, tax amounts, or currency conversions. Calculation scripts are often associated with the OnAfterChange event, which occurs after validation. This is useful for updating fields in response to changes in other fields, for example to update a total when a line item has changed.
Suppose we want each line item in our order form to reflect the total cost of that item, namely the quantity times the price. In addition, we want a summary section that shows the total number of items ordered, and the total cost of the order. We could associate script functions with the quantity and price fields, so that any time either of them change, the totals are updated. The script functions might look like Example 10-5.
Example 10-5. A calculation script
function msoxd_ns1_quant::OnAfterChange(eventObj) {
  if (eventObj.IsUndoRedo)
      return;
  updateCost(eventObj.Site.parentNode)
  updateTotals()
}

function msoxd_ns1_price::OnAfterChange(eventObj) {
  if (eventObj.IsUndoRedo)
      return;
  updateCost(eventObj.Site.parentNode)
  updateTotals()
}
This function just calls two other functions, updateCost and updateTotals, that are defined later in the script file. The updateCost function, shown in Example 10-6, calculates the cost of each line item.
Example 10-6. Calculating the cost
function updateCost(thisItemNode)
{
  var thisQuant = thisItemNode.selectSingleNode("ns1:quant")
  var thisPrice = thisItemNode.selectSingleNode("ns1:price")
  var thisCost = thisItemNode.selectSingleNode("ns1:cost")
  var nQuant = parseFloat(thisQuant.nodeTypedValue)
  var nPrice = parseFloat(thisPrice.nodeTypedValue)
  var nCost = nPrice * nQuant;
  thisCost.nodeTypedValue = nCost
}
On lines 3 through 5, it assigns the three relevant nodes to variables. Then, on lines 6 and 7, it extracts the typed value of the quantity and price nodes and converts them to JScript floating point numbers using the paraseFloat function. This is necessary for them to be used in mathematical calculations. Line 8 calculates the cost and assigns it to the nCost variable, and finally the cost node is updated by setting the thisCost.nodeTypedValue equal to nCost.
Our second calculation function, updateTotals, appears in Example 10-7. It calculates the two values in the summary section, namely the number of items and the order total. The logic is similar to the updateCost function, except that it calls yet another function, sum, to calculate the sum.
Example 10-7. Calculating the totals
function updateTotals()
{
  var numItemsNode =
    XDocument.DOM.selectSingleNode("//ns1:numItems")
  var nNumItems = sum("//ns1:quant")
  numItemsNode.nodeTypedValue = nNumItems

  var orderTotalNode =
    XDocument.DOM.selectSingleNode("//ns1:orderTotal")
  var nOrderTotal = sum("//ns1:cost")
  orderTotalNode.nodeTypedValue = nOrderTotal
}
It passes the sum function XPath expressions that are used to retrieve the nodes whose values need to be included in the sum. The XPath expressions used in this function use a double slash notation, as in //ns1:quant. This essentially means “all the ns1:quant elements in the document, no matter where they appear.”
The sum function is shown in Example 10-8. On line 3, it selects the nodes of interest using the selectNodes method of XDocument.DOM. In our previous examples, we used selectSingleNode because we only wanted to retrieve one node. The selectNodes method can be used instead to retrieve a list of nodes.
Example 10-8. The sum function
function sum(xpath)
{
  var nodeList = XDocument.DOM.selectNodes(xpath)
  var sum = 0
  var xmlNode

  while (xmlNode = nodeList.nextNode())
     if (xmlNode.nodeTypedValue > 0)
    sum += parseFloat(xmlNode.nodeTypedValue);

  return sum
}
The function then iterates through the list of nodes using a while loop that assigns one node after another to the xmlNode variable. The value of each node in the list is added to the sum.
In this example, we created a library of three functions that can be called from one or more other functions. You can add an unlimited number of such library functions to the script file. Unlike the functions that are specifically associated with fields and events, you can choose the names of your library functions.
We have seen how to select nodes from a document using the selectSingleNode and selectNodes methods along with XPath expressions. We have also seen how to update a node’s value, by assigning a value to the node’s nodeTypedValue property.
There may be cases where you also want to insert or delete nodes from the hierarchy. In most cases, the standard InfoPath user interface will take care of this for you, in that it creates the basic structure of the document by default. The user can use the standard InfoPath functionality for inserting and deleting repeating or optional elements.
However, you may want to customize this functionality. Suppose we want a facility that allows users to repeat a line item in the order form, so that they can more easily enter similar items. We have accomplished this in our order form example by placing a Repeat button within the item row and associating it with the script shown in Example 10-9.
Example 10-9. Repeating an item
function RepeatButton::OnClick(eventObj) {
  //assign the current item node to a variable
  var currentItem = eventObj.Source;
  //copy the current item node
  var copyOfItem = currentItem.cloneNode(true);
  //insert the copy before the current item node
  currentItem.parentNode.insertBefore(copyOfItem,currentItem);
}
Three simple lines of code are all that is needed to insert a copy of an item. On line 3, the current item (the one whose row contains the Repeat button that was clicked) is assigned to the variable currentItem. In this case, we use eventObj.Source to access this node.
When using the OnClick event, there is no eventObj.Site property as there was in the validation and calculation examples. In its place, the Source property retrieves the node that directly contains the button. In this case, it is the item element because the button appears within an item’s row.
Line 5 assigns a copy of the current item node to the variable copyOfItem. Finally, line 7 inserts the copy directly before the current item row. The parentNode property of the current item is used to access the item’s parent, namely the items node. The insertBefore method is then used to insert the current item as a child of items.
This chapter has provided an overview of InfoPath scripts and how they can be used to query and modify XML documents. In addition to these features, there are a number of other InfoPath capabilities that were not covered in detail in this chapter. They include:
Modifying the user interface. Using a script, it is possible to add a custom task pane, toolbar or menu.
Integration with external code. Scripts can access any external COM component.
Accessing external data. Scripts can be used to access data from files, databases or Web services. This is covered in detail in the next chapter.
A set of examples is provided with InfoPath. They can be found in the directory in which Microsoft Office is installed, in the OFFICE11SAMPLESINFOPATH subdirectory. Now that you have read this chapter, you will be in a good position to understand these examples and reuse parts of them in your own forms.