
In our previous chapters on Interface Builder and creating controllers and view objects, you learned about subclassing. To reiterate, subclassing is a way of inheriting and extending a class to add new functionality. In iOS, every object that appears on the screen is a subclass of a base UIView class (in OS X, the base class is NSView). We subclass UIView because this class has all of the basic functionality that we need in order to show something on the screen and allow user interaction.
Any Custom Control that you create will need to subclass UIView as well.
To begin, let's create our example Xcode project. Go to File | New | Project and create a new Single View Application in Xcode, cab be called as CustomControlsExample. Save the project at a place that is accessible on your system.
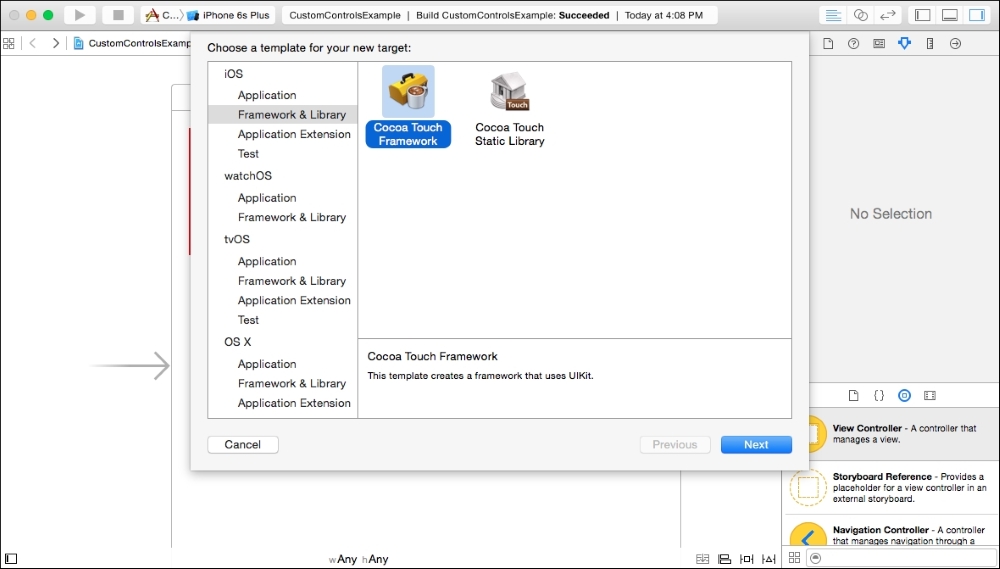
Apple recommends that you create a Cocoa Touch Framework whenever you create a new Custom Control for iOS.
Frameworks are a way for you to easily reuse functionality within or among your applications. Since Xcode projects have the ability to support multiple platforms at the same time, you can create frameworks to encapsulate the functionality that you'd like to share. Custom Controls are prime candidates for this kind of reuse.
To create our framework, we go to File | New | Target. Select Cocoa Touch Framework from the Framework & Library subsection, as shown here:
Name your target CustomExampleKit, leaving all other options at their default values. Once CustomExampleKit is created, you'll see that a CustomExampleKit folder has appeared in the project navigator sidebar.
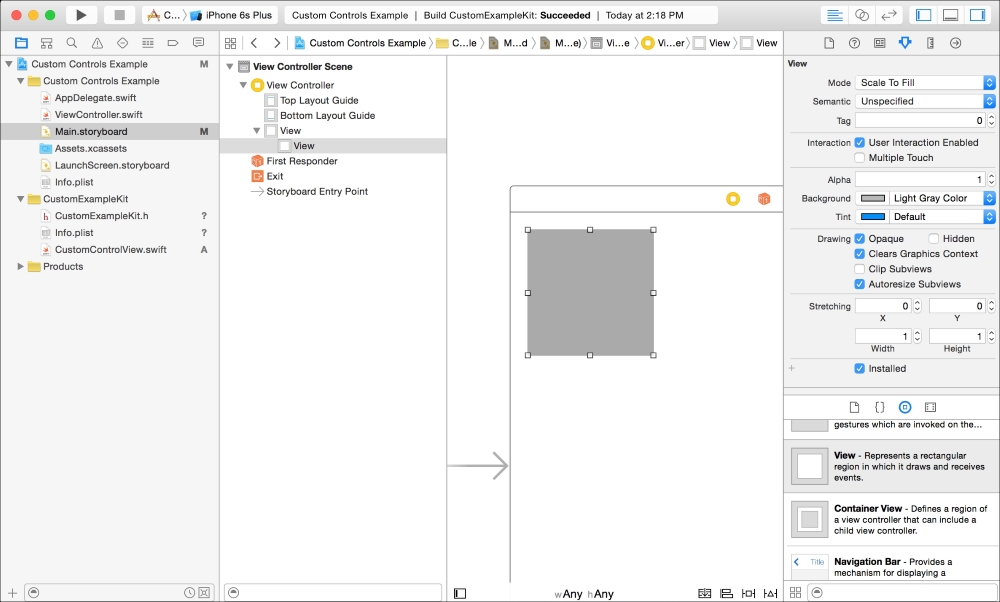
Open the Main.storyboard file, and drag a view from the object library in the Utility sidebar to the blank view that is already on the canvas.
In the Attributes Inspector in the Utility sidebar, change the background color to light gray and change the dimensions of the view to 150 x 150 in the Size Inspector.
The window looks like this:
Inside of our CustomExampleKit target and folder, we need to create a new Cocoa Touch class. Right-click on the CustomExampleKit folder and select New File. Name the class CustomControlView and make sure that it's a subclass of UIView. When you click Next and go to the save dialogue box, you'll see that the target that the file is being added to is CustomExampleKit.
Open up the Main.storyboard file once again. Select your Custom Control and open up the Identity Inspector pane of the Utility sidebar. Associate the Custom Control view with your class by adding CustomControlView into the class area of the inspector. IB should automatically add CustomExampleKit into the module area:

Open the Assistant editor (Opt + Cmd + return) and open the CustomControlView.swift file using the jump bar. Remove all of the code between the comments to start from a blank slate.
We're now going to create a custom property for our new control. As a proof of concept, we're simply going to change the color of the background.
To start, we need to create a property for our class that stores an instance of UIColor. Then, we need to override the built-in layoutSubViews() method on our control to use our background color property in order to actually set the value:
import UIKit
class CustomControlView: UIView {
    var customBackgroundColor = UIColor.redColor()

    override func layoutSubviews() {
        backgroundColor = customBackgroundColor
    }
}
The layoutSubviews method on a UIView base class is like viewDidLoad on a UIViewController; it's called whenever a new instance of this class is initialized and is about to be placed on the screen.
Upon running this code on the simulator or on a device, you'll see that the color of the view changes at runtime.