
One of the things that you will find is that an iOS app is never really done. You'll always find ways to improve and refine your app. Build and run the Let's Eat app, and compare it with the design shown in the app tour. You will notice upon close inspection that your app's screens have minor differences when compared to the screens shown in the app tour, and require minor changes.
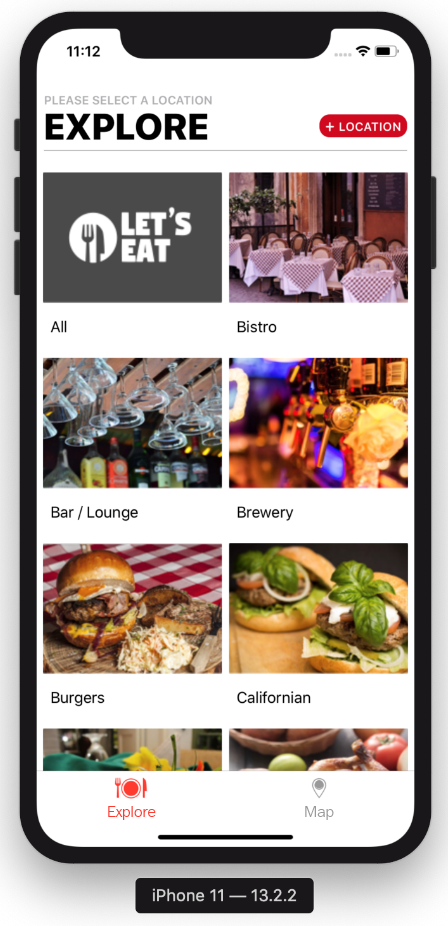
Refer to the screenshot of your app's Explore screen shown here:

The changes required for the Explore screen are as follows. Refer to the numbers to see the parts that need to be changed:
- The grey navigation bar (1) is not present on the app tour and will need to be removed.
- The collection view cells (2) have sharp edges. You'll need to implement rounded corners for the cells to match the cells shown in the app tour.
- The color of the Tab Bar (3) is grey and the tab bar buttons are blue. You'll need to change the color of the tab bar to white, and the colors of the Explore and Map buttons on the tabs to red to match the app tour.
Now let's take a look at the Locations screen for your app. Again, refer to the numbers to see the parts that need to be changed:

- The large title at the top of the Locations screen (4) shown in the app tour is missing, and you will need to add it.
Finally, let's modify the Restaurant Detail screen. As before, the number indicates the part that needs to be changed:

- For the Restaurant Detail screen, the icons for the Add Photo and Add Review buttons (5) are blue. You'll need to change the icon colors to red to match the app tour.
As you can see, there are only five minor changes that need to be made, and you'll find these changes easy to implement. You'll start by modifying the Explore screen. Do the following steps:
- Click ExploreViewController.swift inside the Explore folder in the Project navigator.
- Add a viewWillAppear() method after the viewDidLoad() method, as follows:
override func viewWillAppear(_ animated: Bool) {
    super.viewWillAppear(animated)
    navigationController?.setNavigationBarHidden(true, animated: false)
}
This will hide the navigation controller's grey navigation bar.
- Click ExploreCell.swift (inside the View folder in the Explore folder) in the Project navigator, and add the following private extension and the roundedCorners() method after the class definition:
private extension ExploreCell {
    func roundedCorners() {
        imgExplore.layer.cornerRadius = 9
        imgExplore.layer.masksToBounds = true
    }
}
This will round the corners of the collection view cells on the Explore screen.
- Add a new method, layoutSubviews(), just after the lblName and imgExplore property declarations. Call roundedCorners() in layoutSubviews() as follows:
override func layoutSubviews() {
    super.layoutSubviews()
    roundedCorners()
}
This will execute roundedCorners() when the collection view is being drawn on the screen.
- Click AppDelegate.swift in the Project navigator and add a private extension at the bottom of the file after the last curly brace:
private extension AppDelegate {

    func initialize() {
        setupDefaultColors()
    }

    func setupDefaultColors() {
        UITabBar.appearance().tintColor = .systemRed
    UITabBarItem.appearance().setTitleTextAttributes
        ([NSAttributedString.Key.foregroundColor: UIColor.systemRed],
        for: UIControl.State.selected)
        UINavigationBar.appearance().tintColor = .systemRed
        UITabBar.appearance().isTranslucent = false
    }
}
The AppDelegate.swift file contains the declaration and the definition of the AppDelegate class. This class handles application events, for example, what happens when an application is launched, sent to the background, terminated, and so on. You can add code here to configure your app as it is starting up. As before, you will use an initialize() method to call all other setup methods. The setupDefaultColors() method will change the tint colors for items in the tab bar and navigation bar to red, and make the tab bar not translucent.
- You need to call initialize() as the app is starting up, so modify application(_:didFinishLaunchingWithOptions:) as follows:
func application(_ application: UIApplication,
    didFinishLaunchingWithOptions launchOptions:
    [UIApplication.LaunchOptionsKey: Any]?) -> Bool {
    // Override point for customization after application launch.
    initialize()
    return true
}
- Build and run the app. The Explore screen should look like the following screenshot:
You'll see that the navigation bar is gone, the corners of each cell are rounded, and the Explore and Map buttons are now red when selected.
Next, you'll update LocationViewController.
- Click LocationViewController.swift inside the Location folder in the Project navigator and modify the initialize() function inside the private extension as follows:
func initialize() {
    manager.fetch()
    title = "Select a location"
    navigationController?.navigationBar.prefersLargeTitles = true
}
Each view controller has a title property that can be displayed in the navigation bar. This sets title to Select a location and displays in large letters at the top of the screen.
- Build and run the app, and tap the LOCATION button. The Locations screen should look like the following screenshot:

You'll see Select a location in large letters at the top of the screen, and the Cancel and Done buttons are now red.
Now let's fix the button colors on the Restaurant Detail screen. To do that, perform the following steps:
- Click RestaurantDetail.storyboard inside the RestaurantDetail folder in the Project navigator.
- Click the image view containing the camera.fill icon in the document outline. Click the Attributes inspector and under View, set Tint to System Red Color, as shown in the following screenshot:

- Do the same thing for the image view containing the pencil icon, as shown in the following screenshot:

- Build and run the app, and navigate to the Restaurant Detail screen, as shown in the following screenshot:

Now we can see that the Add Review and Add Photo icons are now red.
Great! You've finished cleaning up the design for the app on the iPhone. The five issues mentioned earlier have been addressed, and your app's screens now look exactly like the screen's shown in the app tour. As you can see, even minor changes can make your app more visually appealing.
So far, you've been running your app in the iPhone Simulator. In the next section, you'll run your app in the iPad Simulator to see what changes are required. You'll then modify your app so that the user interface will change based on the device it's running on, and adjust the user interface of your app to take advantage of the iPad's larger screen.