Chapter 3
Event Handling
![]() Waiting for the Document to Be Ready
Waiting for the Document to Be Ready
![]() Handling an Event
Handling an Event
![]() jQuery Events
jQuery Events
![]() Triggering Events
Triggering Events
Events are a fundamental aspect of creating dynamic and responsive scripts. Typically, an event occurs when a user performs some type of action such as a mouse click, key press, or form submission. Some events can also be triggered by calling them programmatically, which can be helpful when you need to perform a task automatically.
The jQuery library offers a number of features that make handling events an easier task than when using JavaScript, especially when it comes to handling browser differences. Rather than worrying about using addEventListener(), attachEvent(), and DOM Level 0 event handlers based on the capabilities of different browsers, you can use something as simple as click() or keydown() to handle an event, and jQuery will do the rest of the work for you.
Waiting for the Document to Be Ready
As you will remember from previous chapters, jQuery offers you the ready() function so that you can be sure that all the elements in the document are loaded before running jQuery code on them. This is certainly important when you are reacting to a user event, since you do not want the user to receive JavaScript errors when interacting with your Web site or application.
ready() vs. load()
In JavaScript, you will see a number of scripts use the load event on the window object to determine when all the elements have been completely loaded. For example, you may see something similar to the following code:

Alternatively, you might see a more modernized version, using the addEventListener() function, as in the following code:

Notice the similarity to using ready() in jQuery, shown in the following code:

What Is the Difference?
There is an important difference between the two methods. The ready() method allows you to begin running your script as soon as all of the elements have been loaded, but it does not wait for images or other media to finish loading. The JavaScript load event waits for the document and all media to be loaded before it is triggered.
Many scripts can be run without worrying about whether images or other media have loaded, which allows ready() to give you access to the elements in the document more quickly than the load event. This gives the users a better experience when media isn’t essential to the script, allowing them to more quickly interact with your Web site or application.
On the other hand, when running a script that works with images (such as a slideshow), using ready() could cause unexpected results. If the script needs to show an image that has not yet loaded, it could show a broken image or nothing at all. In cases like this, it is better to wait for the load event to ensure that all of the media has been loaded before being manipulated.
When you need to wait for the load event, jQuery provides you its own load method, which does the cross-browser work for you. The following code uses the jQuery load function:

Throughout the remainder of the book, you will see ready() used for most scripts, while the load method will be used when necessary to wait for other media to load.
Using the $ Argument with ready()
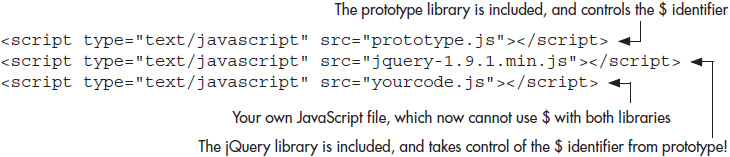
The ready() method also performs one more helpful task for you. Suppose you are using jQuery as well as another JavaScript library (such as prototype) that uses the $ identifier to shorten the code. Rather than replacing all instances of $ with jQuery, you can call jQuery(document).ready() and include all of your jQuery code within the ready() method and send $ as an argument, as in the following code:

This allows the other library to use the $ identifier and allows you to use it with your jQuery code. One problem can still exist, though.
When using more than one library that uses the $ identifier, the last one included in the HTML code will take control of it, making $ buggy or unusable for the other libraries. In addition to sending the $ argument to ready, jQuery provides the noConflict() method to ensure that it does not take control of the $ identifier.
Suppose you had the following code in the head section of your HTML document:
Notice that prototype will initially control the $ identifier, but this is quickly taken away on the next line by the inclusion of jQuery. To fix this, you can use jQuery’s noConflict() method, as in the following code:
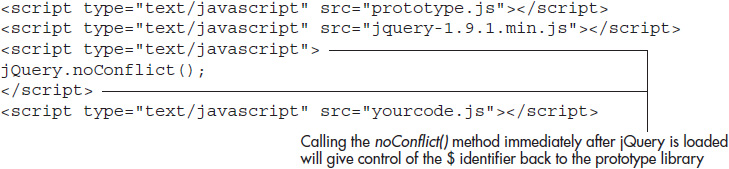
This will now allow $ to be used by prototype. As an added bonus, you can still use $ with your jQuery code by sending the ready() method the $ argument, as described previously!
NOTE
You can call the noConflict() method in your own JavaScript file (yourcode.js in this case) if you prefer; just be sure to place it on the first line of your code.
Now that you know when to begin reacting to events, it’s time to learn how to handle those events.
Handling an Event
The jQuery library provides several methods for handling events. For the most common events, jQuery has its own shorthand functions to make it easy to react to a user event. Other events can be added using the on() method, which will be discussed later in this chapter. First, you will look at basic event handling using one of the jQuery shorthand functions.
Basic Event Handling
Suppose you need to perform an action when the user clicks an element. jQuery provides the click() method to handle this event. For example, if you had an element with an id of change-size, you could use the following code:

The click() method calls a function that will be run when the event occurs. The code within the function will then execute and react to the click event.
Since this script will not require media to be loaded, you can place everything inside of the ready() function, as in the following code:

Using the click Event
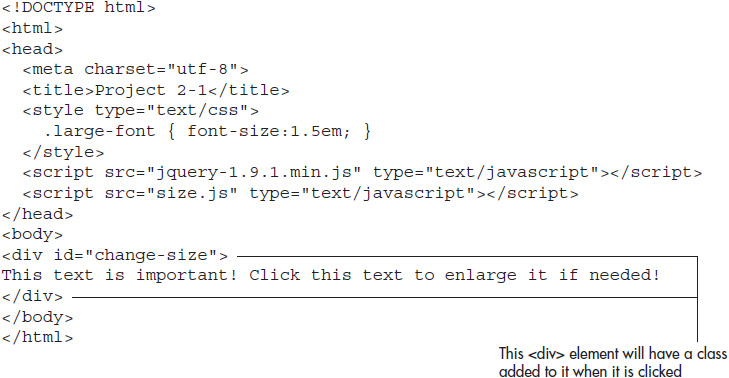
Now that you have seen the basic syntax, you can apply it to a Web page to react to a click event. Place the following HTML code into a file and save it as size.html:
Next, place the following code into a file and save it as size.js:

Open the size.html file in your browser and click the text. It will become larger when clicked, since a class is added to make the font size larger in the function that handles the event. Figure 3-1 shows how the initial page looks in the browser, and Figure 3-2 shows how the page looks after the text is clicked.
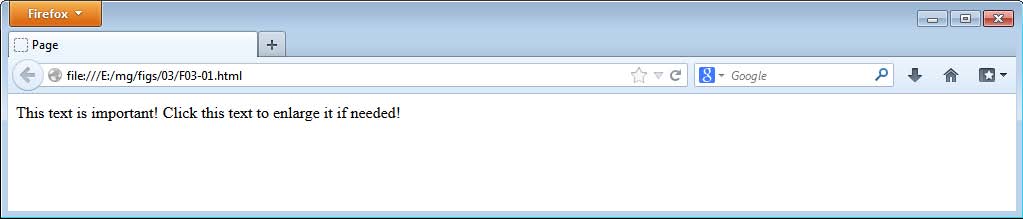
Figure 3-1 The initial page
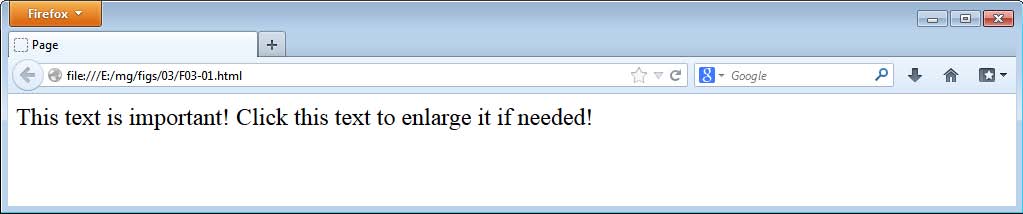
Figure 3-2 The page after the text has been clicked, displaying a larger font size
While this script works, it isn’t very obvious that the font size can be enlarged. The user would need to know to click the text itself to enlarge it. To improve usability, it would be helpful to have the user click a different element that tells the user what it does, such as a button.
Update the Click Script
To update the script, you will need to alter both the HTML code and the jQuery code. First, change the HTML within the <body></body> tags of the size.html page to the following code and save the file:
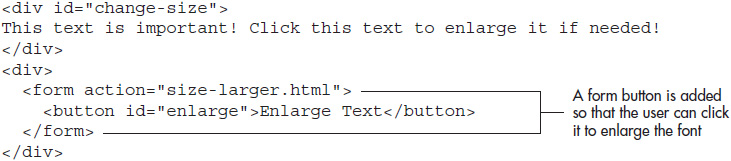
A form with a button labeled “Enlarge Text” is added, giving the user a clear action to take to enlarge the text.
Notice that it is within a form and that the action attribute of the form is pointed to an alternate HTML page that would have enlarged text. This is a fallback for accessibility in case the user does not have JavaScript enabled: The user will still be able to view the enlarged text since the browser will go to that alternate page.
NOTE
There are a number of ways to make the script accessible; this just demonstrates one option. Other possibilities include the use of a server-side script as the action of the form, hiding the button for those without JavaScript (if the functionality is considered an enhancement rather than a necessity), and other options.
To make the button change the font size, you will need to alter the jQuery script. Change the size.js file to use the following code and save it:

Notice that the only change is that the click() function is now attached to the <button> element (with the id of enlarge) rather than the <div> element, which contains the text to enlarge.
Open the size.html file in your browser and click the button. The text changes size, but the browser goes to the alternate page (maybe even more quickly than the change occurs)! This is not quite the desired result, and will require a couple of alterations in order to fix it.
Fixing the Updated Click Script
The action attribute specified that the button should go to a second HTML page (size-larger.html) when clicked. While this is a good feature for those without JavaScript, it certainly is not what you want it to do for those who have JavaScript enabled.
To fix this, you will need to send the Event object to the click function as an argument. The Event object contains information about the event that occurred, and has a method of its own called preventDefault() that can prevent the default action from occurring when the specified event occurs. The Event object will be discussed in more detail in Chapter 7, but you can make use of some basics to fix this script.
First, you need to send the Event object as an argument to the function that will handle the click event. In JavaScript, you simply place arguments within the parentheses () that follow the function keyword, and the same is true for jQuery. The following code shows how the function called in the click method can be altered to pass along the
Event object:
![]()
Notice that event is simply placed within the parentheses. Since it is already a defined object, it does not need quote marks around it as a string argument would.
The next thing you will need to do is use the preventDefault() method of the Event object within the function handling the click event. This is shown in this code:

Save the updates and then reload the size.html file in your browser. With the event.preventDefault(); statement in place, you will now be able to enlarge the text without leaving the current page.
Figure 3-3 shows the initial page, and Figure 3-4 shows the page after the button is clicked. The text is enlarged and the browser does not redirect you anywhere else.

Figure 3-3 The initial page, before the button is clicked
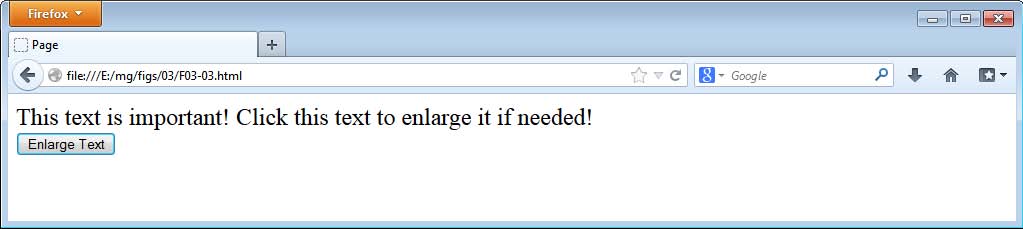
Figure 3-4 The page after the button is clicked
Now that you know how to handle an event, you can begin learning the other jQuery events.
jQuery Events
The jQuery library offers support for JavaScript events both through shorthand methods and through the use of the on() method. As you have seen, the shorthand methods are very handy and make it easy to bind an event to an element.
You can now learn what each event is and when it will occur while a user is interacting with your Web page or application. First, you will learn the events that have shorthand methods available; then you will learn the remaining events and how to use on() to bind them to elements.
To begin, Table 3-1 lists the events in jQuery that have shorthand syntax.
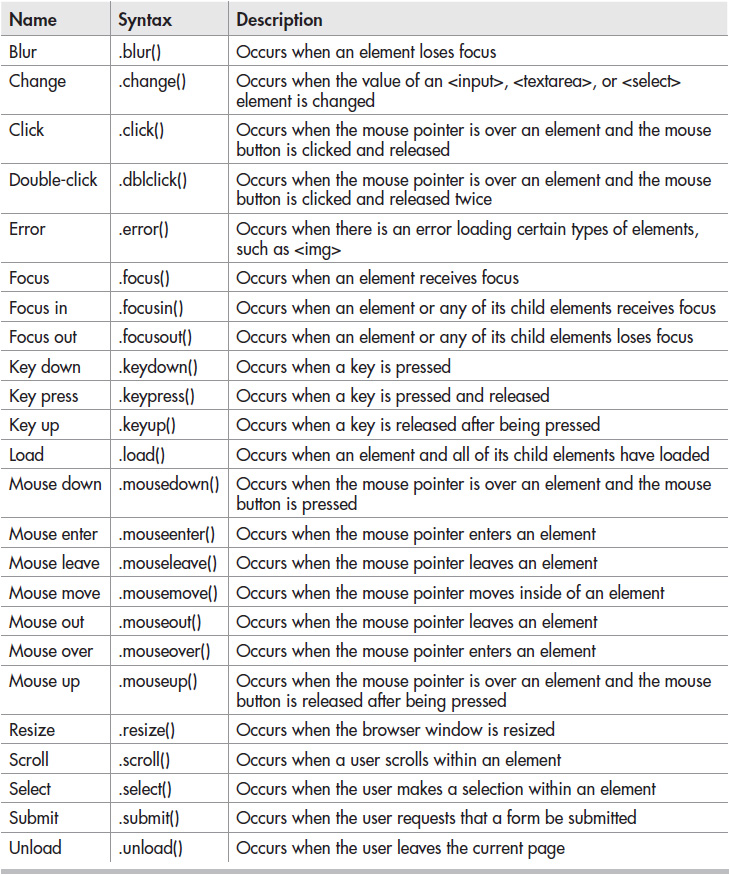
Table 3-1 Events with Shorthand Methods
These events are discussed in more detail in the following sections.
Mouse Events
Mouse events allow you to react to actions the user can take with the mouse, such as clicking or moving the mouse over a certain element on the page. Many scripts make use of one or more of these events to interact with users.
The click and dblclick Events
You have already been using the click() method for click events, so it will be no surprise that dblclick() does the same thing for double-click events.
A double-click occurs when the mouse button is pressed and released twice within a certain period of time. The time allowed between the two clicks depends on the system, but is typically a short amount of time such as a half-second. Users can override this on most systems to a timing that is more comfortable for them (whether longer or shorter).
An example of the dblclick() method is shown in the following code:

The code within the handling function will run when the element is double-clicked.
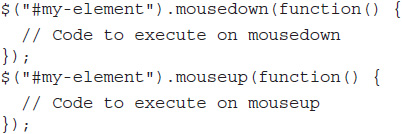
The mousedown and mouseup Events
The mousedown and mouseup events each make up a portion of the click event. These events are helpful if you need to capture a particular part of a mouse click. For example, mousedown can be used to help determine that the user has begun dragging an item rather than clicking it.
Here is a breakdown of a mouse click:
1. Mouse button is pressed. Triggers the mousedown event.
2. Mouse button is released. Triggers the mouseup event.
3. Mouse button has been both pressed and released. Triggers the click event.
This shows the order in which each event is triggered, which can help you when you need to know what event to react to in various situations.
These shorthand methods are shown in the following code:
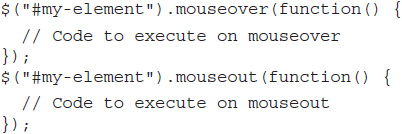
The mouseover and mouseout Events
The mouseover and mouseout events occur when the user moves the mouse into an element or moves the mouse out of an element. Due to the way these events are passed on to other elements that can also handle them, it is usually preferable to use mouseenter and mouseleave, which are discussed next. The reasoning for this will be discussed in the “Event Capturing and Bubbling” section later in this chapter.
Examples of these shorthand methods are shown in the following code:
The mouseenter and mouseleave Events
The mouseenter and mouseleave events occur when the user moves the mouse into an element or moves the mouse out of an element. The selected element will always be the one to handle the event, so these methods are recommended over mouseover and mouseout.
These shorthand methods are shown in the following example code:
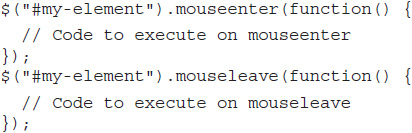
Another shorthand provided by jQuery is the hover() method, which can be used to provide event handlers for the mouseenter and mouseleave events in one single method. An example is shown in the following code:
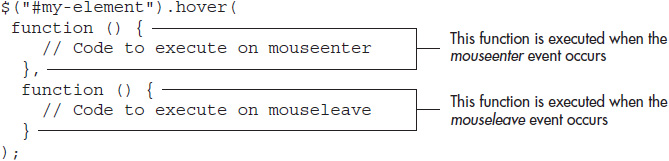
Notice the comma between the two functions, which separates them as arguments within the hover() method.
The mousemove Event
The mousemove event occurs when the user has the mouse pointer over an element and moves it. This event will continue to occur as long as the mouse pointer is moving while within the element. Once the mouse pointer leaves the element, the event will stop until the mouse pointer moves back onto the element.
An example of the shorthand method is shown in the following code:

Keyboard Events
Keyboard events are triggered when the user presses or releases a key on the keyboard. These will be discussed in more detail in Chapter 7, but here is an overview of each of these events.
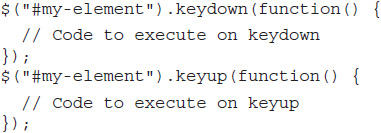
The keydown and keyup Events
The keydown and keyup events occur when the user presses or releases a key on the keyboard. The shorthand methods are shown in the example code that follows.
The keypress Event
The keypress event occurs after the user has both pressed and released a key on the keyboard. The shorthand method is shown in the following code:

You will learn more about this event and how to capture specific keys in Chapter 7.
Other Events
The remaining events use the same shortcut syntax, and many of them will be covered as example scripts are written throughout the book. A number of them can be used with form elements, while others are related to the window or to other elements in the document.
For now, take a look at how event capturing and bubbling work.
Event Capturing and Bubbling
When an event occurs, there are two phases: capturing and bubbling. These are used when several elements could register the event, and is typically the result of nested elements, such as in the following code (place this code in a file and save it as bubble.html):
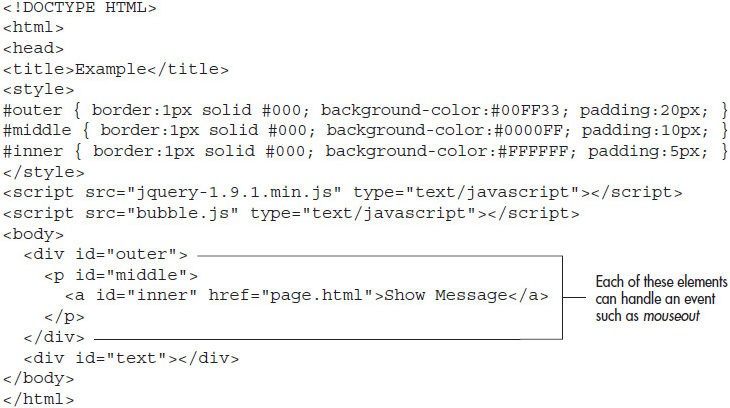
In a case like this, the <a>, <p>, and <div> elements can all register a common event such as mouseout. The last <div> element (#text) is not affected if an event is added to any of the other elements, since it is outside of that nesting.
In the capturing phase, an event will be sent to the least specific element that can handle it and then passed on to each level until it reaches the most specific element that can handle it (in the case going from <div> to <p> to <a>). In the bubbling phase, an event will be sent to the most specific element that can handle it and then passed on to each level until it reaches the least specific element that can handle it (in this case going from <a> to <p> to <div>).
JavaScript allows you to specify one phase or the other to handle events, but browsers (especially older ones) may not follow this, instead using the default phase of that browser. To help eliminate confusion, jQuery always uses the bubbling phase when registering events, which makes event handling consistent across browsers.
Scripting a mouseout
The only other issue occurs when using methods such as mouseover() or mouseout(), which do not stop the bubbling from continuing. This means that if you register a mouseout event to the <div> element in the example code, the bubbling will cause the event to be registered with the <a> element first, since it is the most specific element that could handle the event. It will then register the same event handler to the <p> and then to the <div> element for which it was originally intended.
To see what happens, place the following jQuery code into a file and save it as bubble.js:
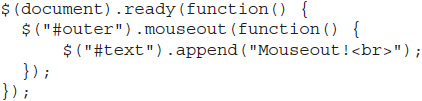
Open the bubble.html file in your browser and move the mouse in and out of the three elements (which are colored and surrounded by borders to help visualize what is happening). You will notice that each time you move your mouse pointer out of any of the elements, a new message is added to the last <div> element (#text). This is probably not the functionality you were looking for. Most likely, you would prefer this only to happen when the mouse pointer leaves the originally intended element, which was the top <div> element (#outer). Figure 3-5 shows the initial page, while Figure 3-6 shows the page after several mouseout events have occurred.
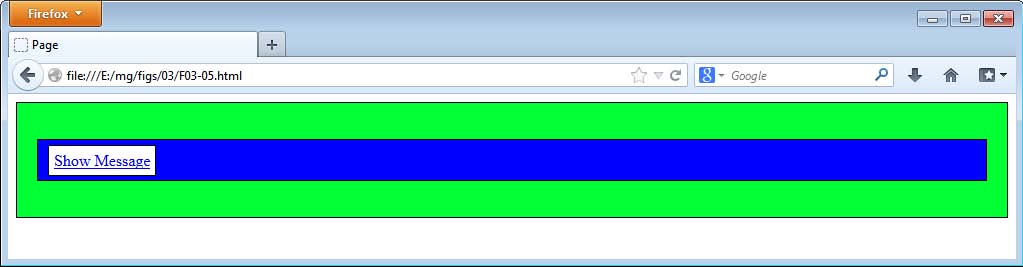
Figure 3-5 The page before any mouseout events
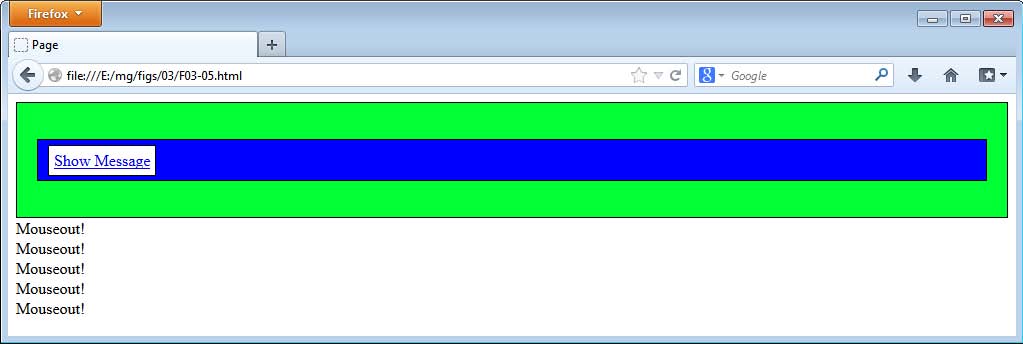
Figure 3-6 The page after several mouseout events have been fired
NOTE
The append() function in jQuery will add content to an element after any content already in place. You will learn more about this method as you progress.
Obtaining the Desired Behavior with mouseleave
Fortunately, jQuery provides the mouseleave() method, which does not continue bubbling, but will instead handle the event only on the intended element. For example, update your bubble.js file to use the following code and save it:
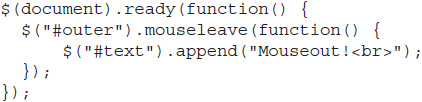
Reload the bubble.html page in your browser and try moving the mouse out of the three <div> elements again. This time, the message should only appear when you move the mouse pointer out of the outer <div> element. Figure 3-7 shows the page after one mouseout event occurs on the outer <div> element.
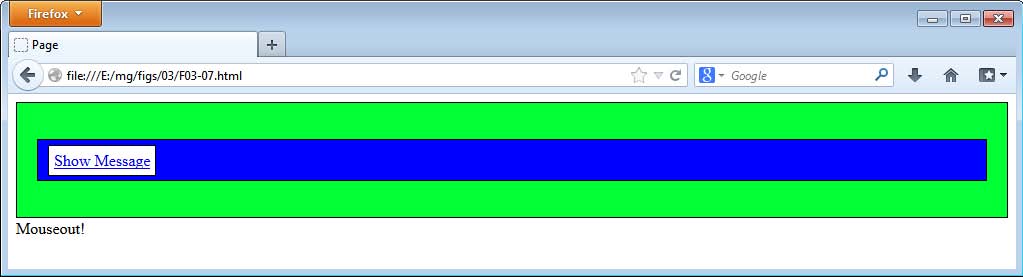
Figure 3-7 Even if you move the mouse pointer over the inner <div> elements, only a single mouseout event will occur on the outer <div> element.
Using the on() Method to Handle Events
The on() method is relatively new to jQuery. This method was introduced in jQuery 1.7 to supersede other methods of binding event handlers to elements: bind(), delegate(), and live().
You will very commonly see these used in scripts, especially those written for versions of jQuery before 1.7, so you will need to be familiar with them should you need to update or debug a script that uses them.
The bind() Method
The bind() method is used to bind an event handler to an element that currently exists. This means that any element using bind() must already exist—this method does not keep track of the possibility of the element being added programmatically later, something delegate() can do.
An example of using the bind() method is shown in the following code:

While the shorthand click() method takes only the handling function as an argument, the bind() method takes two arguments: the event name and the function to handle the event.
You can further customize it by having it use the same handler function for two different events, as in the following code:

This code would execute the function when the mouse button is clicked on the element or when the user presses a key while within that element.
In jQuery 1.4 and later, you can use object notation to bind multiple events that use different handling functions to an element. The following code shows an example of this:
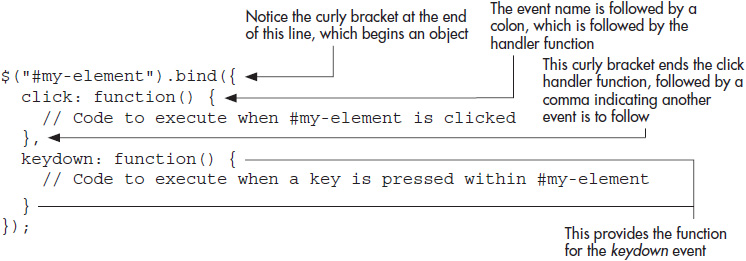
In JavaScript, structures such as functions and objects can be passed as arguments. This structure passes an object using object literal notation, which allows you to define a list of properties and values. Here, the properties are event names and the values are handler functions. You will learn more about JavaScript structures that are used within jQuery in Chapter 5.
Finally, if you want to remove an event handler from an element, you can use the unbind() method. If you want to unbind all events from an element, you can simply call the unbind() method on the element, as in the following code:
![]()
If you want to remove one event type but keep others, you can specify the type of event to remove by passing it as an argument, as in the following code:
![]()
This will remove all click event handlers from the element. If you need to remove specific click event handlers, you will need to namespace them. This will be discussed in later in this chapter when you learn the on() method.
The delegate() Method
The delegate() method allows you to bind an event handler to any element, even if it won’t exist until later due to being added through programming. It uses a selector to get any parent elements, and then another selector is passed for the child elements that exist or will be added. Most commonly, this would occur with a table, where you may need to add rows later based on information supplied by the user.
The following code shows an example of the delegate() method:

This will assign the handler function to react to all click events on all <td> elements within the table, whether they exist already or get added to the document later.
You can remove handlers defined using delegate() by using undelegate(). This works much like unbind(), as shown in the following code:
![]()
This method is called delegate because it delegates the event handling from the specified element to the selected element using event bubbling. Consider the following code:

Here, the <td> that is passed as the first argument assigns the handling of the click event to the <tr> element surrounding it. All <td> elements within the selection (the #my-table <tr> elements in this case) will delegate the click event to the <tr> element surrounding it.
By delegating the event to its outer element, all of the <td> elements can use the handling function for the click event, even if they are added to the document later.
The live() Method
The live() method works much like the delegate() method, but uses a slower method by attaching events at the document element. The jQuery API documentation recommends using on() or delegate() in its place.
If you need further information on live(), see http://api.jquery.com/live/.
The on() Method
The on() method combines the bind() and delegate() methods, allowing you to use a single method whether you wish to use current and/or future elements. The difference is in whether an argument is present to tell jQuery to delegate the handler to a particular element.
Using on() to Bind an Event Handler You can use on() in the same way as bind() by simply calling it, as in the following code:

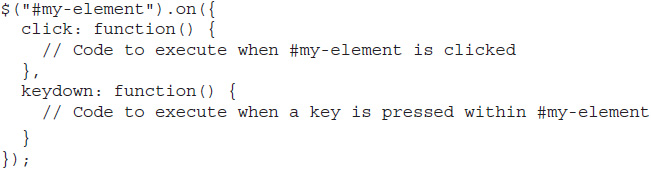
In the same fashion as bind(), you can use it to bind multiple events to elements, as in the following code:
Using on() to Delegate an Event Handler To use on() for event delegation, you simply add an argument to the on() method, as in the following code:

Here, you pass an argument after the event name, which determines which elements will delegate the event to the selected element(s). In this case, any <td> element will delegate the click event to the <tr> element surrounding it.
Using off() to Unbind or Undelegate an Event Handler As with unbind() and undelegate(), you can use off() to remove an event handler from an element that added the handler using on().
To remove all event handlers from an element, you can use the following code:
![]()
If you want to remove one event type, you can use the following code:
![]()
Finally, if you want to remove a delegated event, you can use the following code:
![]()
This example will remove the click event delegated from the <td> elements to their surrounding <tr> elements within #my-table.
Other Events
In addition to the events with shorthand methods available, there are other events that can be called using on() and the event name. These are listed in Table 3-2.
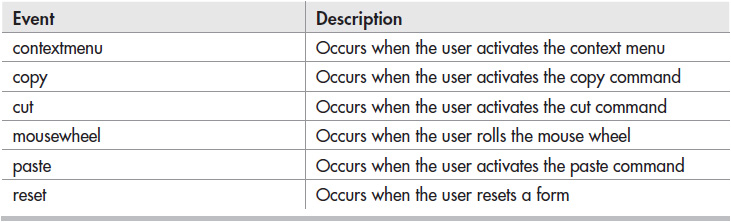
Table 3-2 Other Events
These are JavaScript events for which jQuery has no defined shorthand function. These events tend to be used less often than the others, but can be used in most modern browsers by providing the event name in the on() method.
For example, to assign an event handler to the reset event, you could use the following code:

Since the reset event is tied to a <form> element, this example code would execute when the form with an id of #my-form is reset by the user.
Try This 3-1
Add Event Handlers
![]()
This project allows you to practice using jQuery event methods by adding an event handler using a shorthand method and another one using the on() method.
Step by Step
1. Place the following HTML code into your editor and save the file as pr03-01.html:
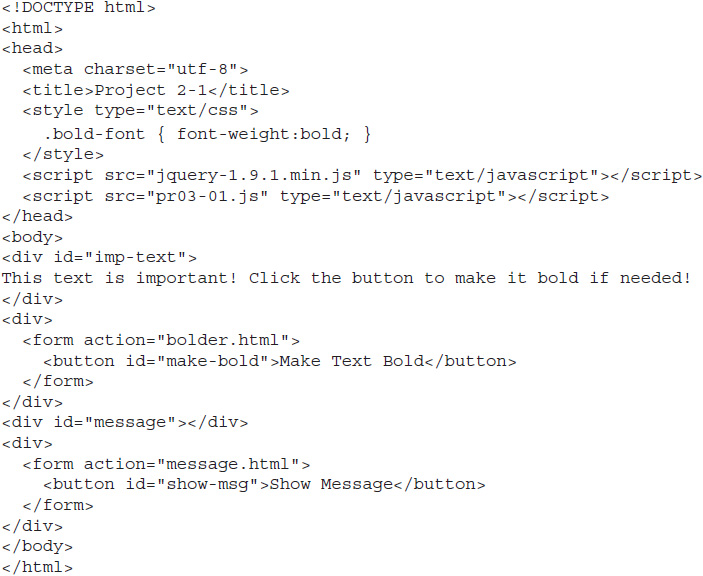
2. In the pr03-01.js file, add jQuery code that will add the bold-font class to the first <div> element when the first <button> element is clicked. Use the shorthand click() method. Make sure to prevent the default action from occurring.
3. Add jQuery code that will append the text “Hi, hope you liked the important text!” to the #message <div> element when the #show-msg <button> element is clicked. Use the on() method. Make sure to prevent the default action from occurring.
4. Save the file. When complete, it should look like this code:
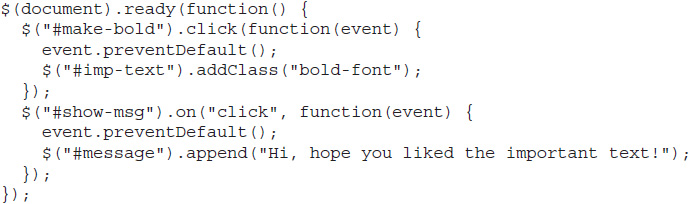
5. Open the pr03-01.html file in your Web browser. Click the first button and the important text should become bold. Click the second button and the “Hi, hope you liked the important text!” message should be inserted above the clicked button.
Try This Summary
In this project, you practiced adding event handlers to elements by using jQuery shorthand methods and the on()method. Also, you practiced passing the Event object to the handling function and preventing the default event from occurring.
Triggering Events
Sometimes it is helpful to be able to simulate an event occurring without the user needing to perform the action.
jQuery provides the trigger() method to allow you to trigger an event without the user performing the actual event. An example of this method is shown in this code:
![]()
This will cause the click event to fire on the #my-element element. Any event handlers for the click event that are attached to the element will be executed. For example, consider the following code (save as trigger.js):
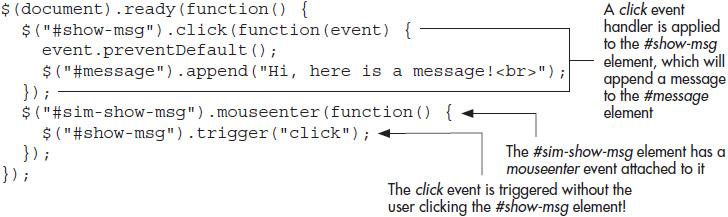
Here, a click event handler is assigned to the #show-msg element, which will display a message. A mouseenter event handler is applied to another element (#sim-show-msg), which uses the trigger() method to trigger the click event on the #show-msg element.
Using the following HTML code with this jQuery code will allow you to see this in action. Save the HTML file as trigger.html and the JavaScript file as trigger.js.
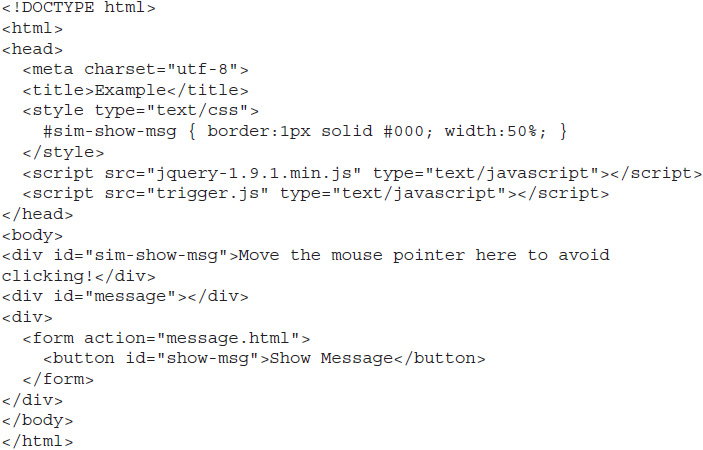
Open the trigger.html file in your Web browser. Move the mouse pointer over the bordered <div> element or click the button to show the message. Each time you perform either action, the message will be appended to the #message element again. Figure 3-8 shows the initial page, and Figure 3-9 shows the page after one of the actions has been performed.
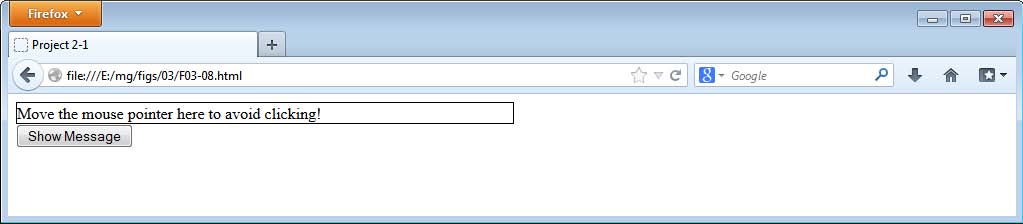
Figure 3-8 The initial page
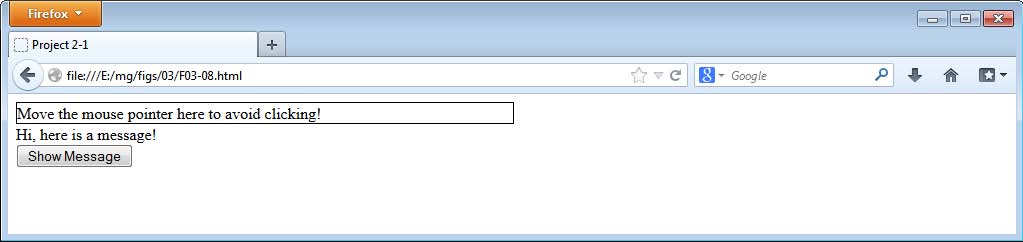
Figure 3-9 The page after the mouse pointer moves over the bordered <div> element or the button is clicked
Try This 3-2
Trigger Practice
![]()
This project allows you to practice firing an event without the user performing that particular event. You will use the trigger() method to accomplish this.
Step by Step
1. Insert the following HTML code into your editor and save the file as pr03-02.html:
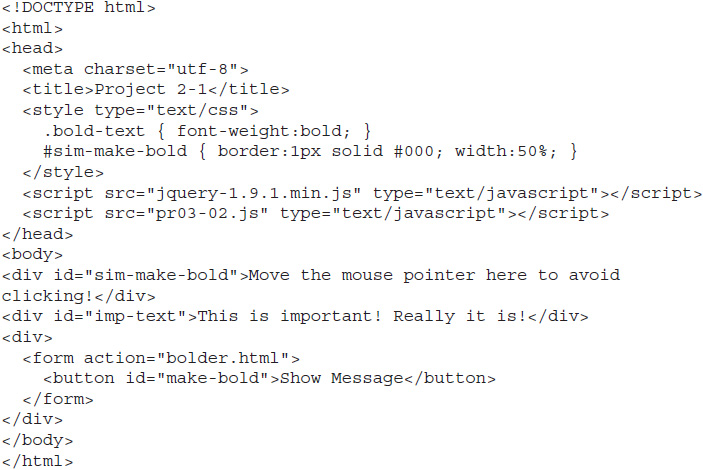
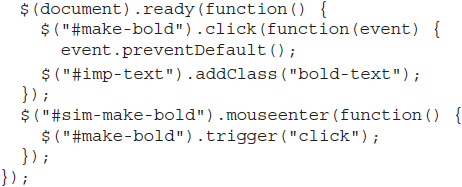
2. In the pr03-02.js file, add jQuery code that will make the text in the #imp-text element bold when the user clicks the #make-bold <button> element.
3. Add code to trigger the click event of the #make-bold <button> element when the user’s mouse pointer enters the #sim-make-bold element.
4. Save the file. When complete, the code should look like this:
5. Open the pr03-02.html file in your Web browser. Either moving the mouse pointer over the bordered <div> element or clicking the button will make the text bold. Refresh the page to try the other action if desired.
Try This Summary
In this project, you used your knowledge of the trigger() method to trigger an event without the user performing that particular event. This required an event handler for the actual event, which was then triggered using the trigger() method.
 Chapter 3 Self Test
1. The ready() method allows you to begin running your script as soon as all of the elements have been loaded, but it does not wait for __________ or other media to finish loading.
2. When you need to wait for the load event, jQuery provides you its own __________ method, which does the cross-browser work for you.
A. onload
B. readyState
C. load
D. done
3. In addition to sending the $ argument to ready(), jQuery provides the __________ method to ensure that it does not take control of the $ identifier.
A. doNotControl$
B. noConflict()
C. avoidConflict()
D. no$
4. jQuery provides the shorthand __________ method to handle the click event.
A. onclick()
B. mouseclick()
C. squeak()
D. click()
5. The Event object has a method named preventEvent() that can be used to prevent the default event from occurring on an element.
A. True
B. False
6. Which of the following properly sends the Event object as an argument to the click() method?
A. $(“#my-element”).click(function(event) {
B. $(“#my-element”).clicked(function(e) {
C. $(“#my-element”).mousedown(function(event) {
D. $(“#my-element”).click(function[event] {
7. The blur event occurs when an element loses focus.
A. True
B. False
8. Which of the following events occurs when a key on the keyboard is pressed and released?
A. keydown
B. keypress
C. blur
D. mousedown
9. The _________ and __________ events occur when the user moves the mouse pointer over and out of an element, and also these events do not bubble.
A. mouseon, mouseoff
B. mouseover, mouseout
C. mousein, mouseexit
D. mouseenter, mouseleave
10. When using the __________ method to attach an event handler to an element, the element must already exist.
A. bind()
B. delegate()
C. addEvent()
D. live()
11. The __________ method combines the bind() and delegate() methods, allowing you to use a single method whether you wish to use current and/or future elements.
A. bindDelegate()
B. deleBind()
C. attach()
D. on()
12. The __________ method can be used to remove event handlers from elements that used on() to add the handlers.
A. remove()
B. unbind()
C. off()
D. delete()
13. jQuery has shorthand methods for every possible JavaScript event.
A. True
B. False
14. The hover() method is a shorthand method for combining mouseover and mouseout handlers into one function.
A. True
B. False
15. The __________ method allows you to simulate a user event.
A. trigger()
B. sim()
C. fire()
D. go()