Chapter 4
Working with Styles
![]() CSS Rules
CSS Rules
![]() The css() Method
The css() Method
![]() Class Methods
Class Methods
![]() Size and Position Methods
Size and Position Methods
Cascading Style Sheets (CSS) plays a major role in Web page design, and jQuery allows you to work with its syntax in numerous ways to meet your scripting goals. You have already seen how the $() function allows you to select elements using CSS selectors. In addition to this, jQuery offers a number of methods that give you the ability to get the values of CSS properties or to alter those properties.
In this chapter, you will learn how to use the css() method, class methods, and size and position methods to retrieve or update CSS property values. To begin, you will look at how CSS rules are defined, which will help you understand what the jQuery methods are meant to do.
CSS Rules
As you have seen previously, CSS allows you to select elements by using element names, classes, ids, and other types of selectors. When working with CSS code, you define the selector and then define a rule within a set of curly brackets ({}). A rule consists of one or more property and value pairs, with each pair separated by a semicolon. For example, the following code shows how a typical style sheet definition looks in CSS code:
![]()
As you can see, you will have a property name, a colon, and a property value. If more than one property is defined, you add a semicolon after each set of property/value pairs and repeat the process.
These properties and values are what jQuery will allow you to retrieve or alter in your scripts. Keep in mind, however, that you can make use of any CSS properties in jQuery, even if they are not specifically defined in CSS code or in a style attribute. As a result, you can obtain or alter any CSS property values as you need to in your script.
The css() Method
The jQuery library offers the css() method, which allows you to obtain values or make alterations on the fly. As you will recall, the use of addClass() requires that the class to be added already exists in the CSS code. This is not the case with the css()method; it allows you to make changes to specific properties without the need to define what the values will be in your CSS code beforehand.
The css() method, like the other jQuery CSS methods you will learn, allows you to call it in two different ways. One way will get values and one will set values. In the case of the css() method, calling it with one string or array literal argument will get values, and calling it with two string arguments or with an object literal argument will set values.
Getting Values
If you simply want to get one property value, you can call the css() method using the property name as the argument, as shown in the following code:
![]()
In this example, the method will return the value of the color property for the element with an id of my-element. In order to make use of the value, the returned result is assigned to a JavaScript variable named eColor.
NOTE
When getting property values, you are not able to use shorthand properties. For example, if you need to get the padding on all sides of an element, you will have to use all four padding properties (padding-top, padding-right, padding-bottom, and padding-left) rather than the shorthand padding property.
To use the value, you could append it to an element to display it on the page, as in the following code:

This code both assigns a value to a JavaScript variable and uses the variable value. When using the value of a variable, you do not need to enclose it in quote marks.
CAUTION
Different browsers can return different strings for the value of a property. For example, the color value for black could be returned as #000000, rgb(0,0,0), or another string. A plugin such as jQuery Color can help you get a consistent value if you need to compare colors. You will learn about installing and using plugins in Chapter 10.
Should you need to obtain multiple values, you can use an array literal as the argument, as in the following code:
![]()
This will return an array instead of a string. In this case, eColor will be assigned an array, allowing you to access the color value using eColor[0] and the background-color value using eColor[1].
NOTE
If the selection in the $() function matches more than one element, only the property value for the first matched element will be returned.
If you are unfamiliar with JavaScript variables, arrays, and other items, do not fear! They will be explained in more detail in Chapter 5. In the meantime, they will be used in a straightforward fashion as seen in the previous examples.
Setting Values
The css() function also allows you to set the values of properties for any selected elements. This can be useful when you don’t have access to the CSS code or simply need to quickly change one or more property values on the fly.
Setting a Single Property Value
If you want to set a single property value, you send the css() method two arguments: the property name and the value to be set. For example, to set the color property to #FF0000, you would use the following code:
![]()
When setting a color, you can use any valid CSS value. In the case of the color red, values such as #FF0000, #F00, red, rgb(100%, 0%, 0%), and rgb(255,0,0) are all valid ways of setting a value to red.
Also, hyphenated property names can be written in CSS or JavaScript syntax. For example, the background-color property in CSS is represented as backgroundColor in JavaScript (the hyphen is removed and the next letter is capitalized). This same pattern holds for all hyphenated properties: margin-left to marginLeft, border-right-width to borderRightWidth, and so on.
If you use the JavaScript syntax, quote marks are optional around the property name. As a result, each line of jQuery in the following code would set the background color of the element to red:

To be consistent, it is best to choose one convention and use it throughout your code. This will make it easier to edit or debug later if needed. In this book, I will use the CSS syntax for property names, but feel free to use one of the others should you feel more comfortable, or if required (a coding convention where you are employed, for example).
NOTE
If the selection in the $() function matches more than one element, the specified property will be set for all matched elements in the selection.
Setting Multiple Property Values
If you want to set multiple property values at once, you can send a single argument to the css() method in the form of an object literal. An object literal encloses property names and values within curly brackets ({}).
The general format for object literal notation looks like the following code:
![]()
Notice that each property/value pair is separated by a comma. Each property and its corresponding value are separated by a colon. The entire set of property/value pairs is enclosed within curly brackets.
To use this with the css() method, you simply send an object literal as the argument. Suppose you want to change the color property to white and the background-color property to black. You could use the following code:
![]()
For readability (especially when the list becomes long), you may wish to place each property/value pair on its own line, as in the following code:
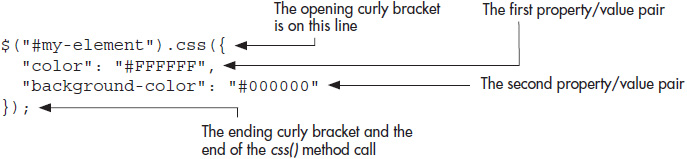
In this format, you can quickly scan each property/value entry reading downward, which can be helpful when you need to find something within an extensive list!
Using Relative Values
jQuery 1.6 and higher allows you to use values beginning with += or −= to set relative values (setting the value incrementally higher or lower than its current value) for properties that are based on numeric values, such as width, height, font-size, and so on.
The value that is passed with += or −= will be interpreted by jQuery in pixels. Since you may not always know the current pixel value of width, height, and other such properties (the element may have its width defined with a percentage or other type of value), this allows you to increment the pixel value rather than guess whether passing a certain pixel value will make a property value larger or smaller.
For example, suppose you have the following HTML code (save it as expand.html):
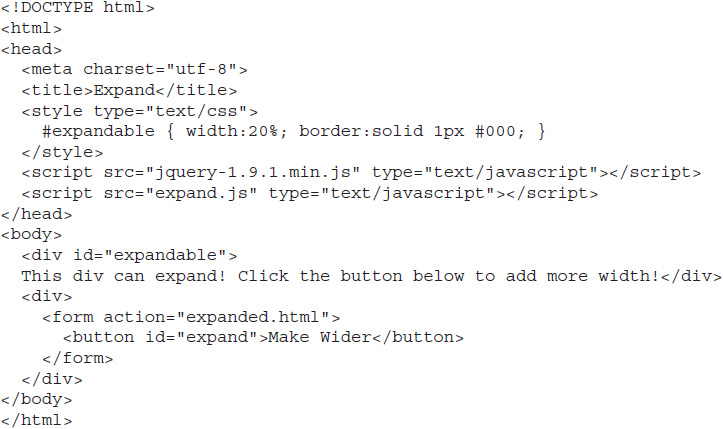
As you learned in the last chapter, you can assign a click event to the button element and then perform your work. The following code shows how you can use css() to widen the expandable <div> element by 50 pixels each time the button is clicked (save it as expand.js):
Open the expand.html file in your browser and click the button. Each time you click, the width of the <div> element will increase, giving the text more room to expand on the same line.
You can do this with multiple property values as well. As you will recall, you can set multiple property values using object literal notation. So, if you want to set the left padding to expand along with the width, you could edit your JavaScript file to use the following code:
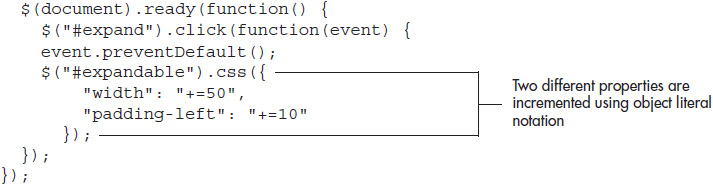
Save the expand.js file and reload expand.html in your browser. When you click the button, the <div> element will expand and there will be additional padding to the left of the content. Figure 4-1 shows the initial page, and Figure 4-2 shows the page after the button is clicked once.
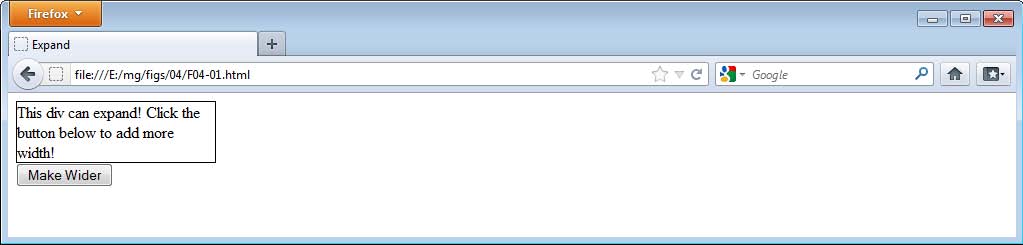
Figure 4-1 The initial page
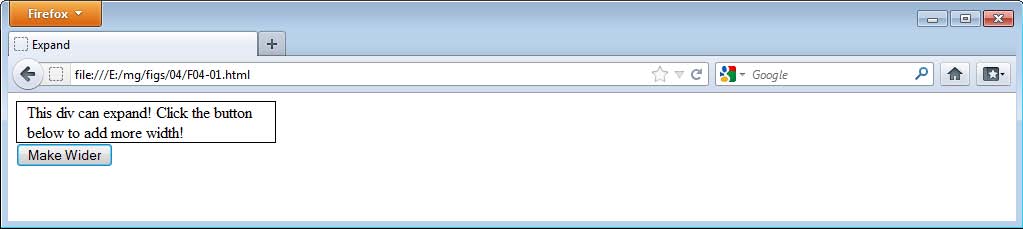
Figure 4-2 The page after clicking the button once
NOTE
When setting incremental values, you are not able to use shorthand properties. For example, if you need to set the padding on all sides of an element, you will have to use all four padding properties (padding-top, padding-right, padding-bottom, and padding-left) rather than the shorthand padding property.
Using Functions to Set Values
jQuery versions 1.4 and higher allow you to set the return value of a function as the property value. This can be helpful if you need to perform additional steps or calculations to determine what the value of the property should be.
An example is shown in this code:
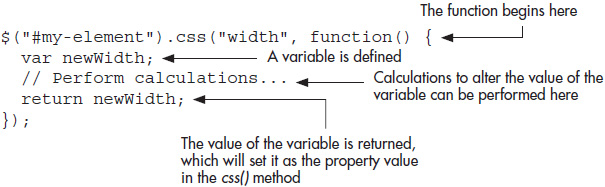
In this case, a variable named newWidth is defined, calculations are performed, and the value of the newWidth variable is returned, which will set it as the value of the width property for the selected element.
This can be a handy way to calculate or determine a new value for a property. In the next chapter, you will learn some JavaScript tips that will assist you with making calculations or using different values based on certain conditions.
Class Methods
The jQuery library offers four methods that can assist you when you need to work with classes, allowing you to add, remove, and toggle classes, or to see if an element has a particular class. If you have access to the CSS file for a page, you can use the classes you create to make CSS alterations easy by using any of the class methods.
The addClass() and removeClass() Methods
You have been using addClass() already to add classes to elements. The removeClass() method, in contrast, removes a class from an element.
Suppose you had the following HTML code (save as remove.html):
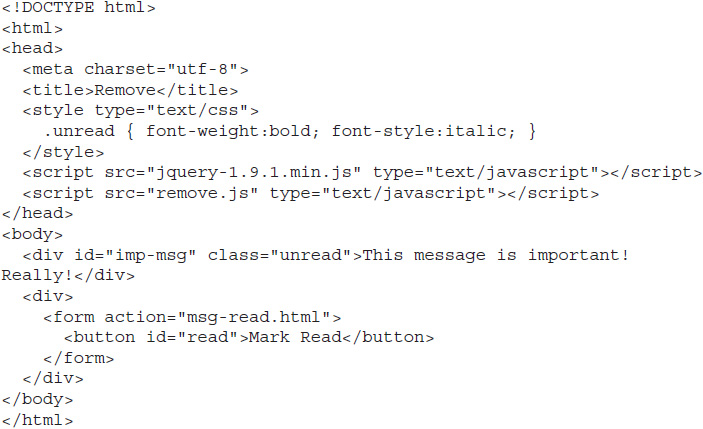
You will notice that there is an “important” message being displayed, along with a button that allows you to mark it as read. When the page is loaded, the imp-msg <div> will have the class unread attached to it, which makes the text bold and italic.
Clicking the button would allow you to mark the message as “read.” In this case, removing the unread class from the <div> element would take off the bold and italic styles, making the text appear without any additional styling.
To remove the class, you can use the removeClass() method, as in the following code (save as remove.js):

Open the remove.html file in your browser. When you click the button, the message should have the bold and italics that were included in the unread class removed. Figure 4-3 shows the initial page, and Figure 4-4 shows the page after the button is clicked.
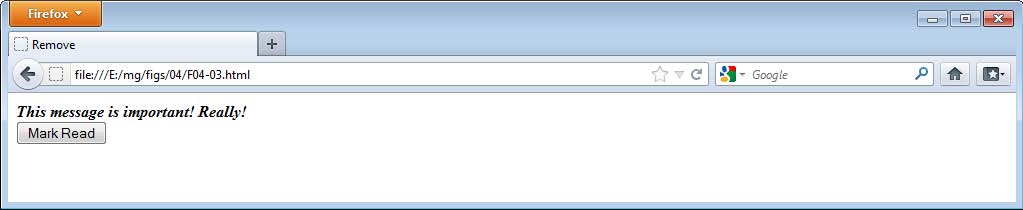
Figure 4-3 The initial page
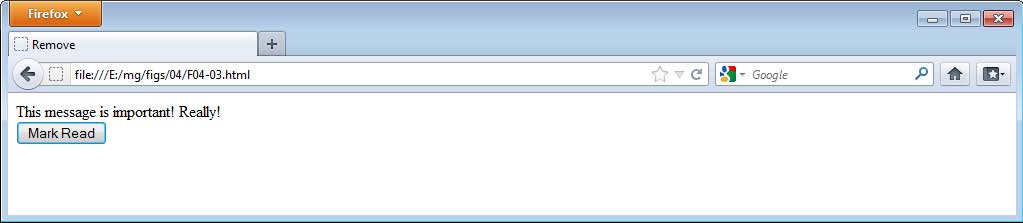
Figure 4-4 The page after the button is clicked
NOTE
While this will remove the class now, refreshing the page will cause the message to be “unread” again. Saving a change like this requires some server-side code in addition to this. These types of coding techniques will be discussed in more detail in Chapter 9.
Remove Multiple Classes
Just like addClass(), the removeClass() method can be used to remove multiple classes or all classes from selected elements. Separating multiple class names with spaces will remove each of those classes, while calling the method without an argument will remove all classes. The following code shows an example of both of these:

Combine addClass() and removeClass() by Chaining
jQuery supports method chaining, which allows you to place methods one after another to act on selected elements. For example, you could chain the addClass() and removeClass() methods to a selection to perform both operations without the need to write the code in two separate statements.
Consider the following code:
![]()
The first statement will remove one-class from my-element, and the second statement will add another-class to the same element. These two statements are performed one after another.
Instead of writing two separate statements and making the same selection twice, you can chain the two methods together in a single statement, as in the following code:
![]()
Here, the same effect is achieved with a single statement, and my-element does not need to be selected a second time. Keep in mind, however, that my-element will need to be selected again if you need to do something with it later when the new action won’t immediately follow the current statement.
The toggleClass() Method
The toggleClass() method allows you to switch between adding and removing one or more classes each time the method is applied to a particular selection.
Toggle a Single Class
To toggle a single class, simply send the class name as an argument to toggleClass(), as in the following code:
![]()
In this case, if my-element has one-class, then it will be removed; if my-element does not have one-class, then it will be added.
You could use this to provide a simple toggle to the user, such as switching the font size of an element back and forth. Suppose you had the following HTML code (save as toggle.html):
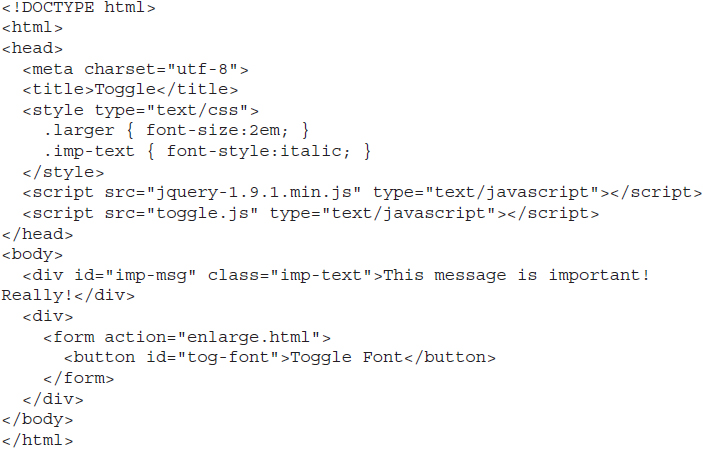
Here, the imp-msg element has a class already applied to it (imp-text) to make the text italic. A class named larger is available in the CSS code, which can be toggled on the element to allow the user to switch the font to a larger size and back to the original size as needed.
The following code will toggle the larger class on the imp-msg <div> element when the tog-font button is clicked (save as toggle.js):
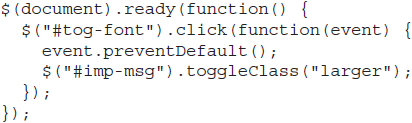
When the button is clicked the first time, the larger class will be added. When it is clicked again, the larger class will be removed. Each time the button is clicked, the larger class will be added or removed depending on whether the imp-msg element has the class or not. Figure 4-5 shows the initial page, and Figure 4-6 shows the page after the first button click.

Figure 4-5 The initial page
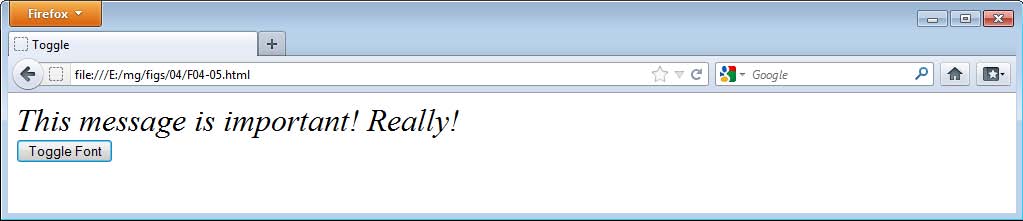
Figure 4-6 The page after the button is clicked the first time, displaying the text in a larger font
Toggle Multiple Classes
The toggleClass() method can also be used to toggle multiple classes at once (or all classes), much like addClass() and removeClass().
If you call the method with no arguments, all classes for the element will be toggled:
![]()
To toggle multiple classes by name, simply separate each class name with a space when calling toggleClass(), as in the following code:
![]()
In this case, both classes will be added or removed, based on whether the element currently has each class. Keep in mind that this is done separately for each class, so one-class could be added while another-class() is removed, this could be switched, or both could be in the same state and be added or removed at the same time.
For example, go back to the code for the toggle.html page. You will recall that there were two available classes and one was already applied to the <div> element:

To see what happens when both classes are toggled at once, open your toggle.js file and alter it to use the following code:
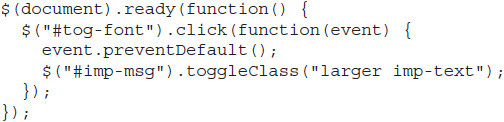
Save the file and refresh toggle.html in your browser. When the button is clicked, larger will be added to the imp-msg <div> element, while imp-text will be removed. Since imp-msg did not have the larger class, it was added. Since imp-msg already had the imp-text class, it was removed. Figure 4-7 shows the initial page, and Figure 4-8 shows the page after the button is clicked.

Figure 4-7 The initial page
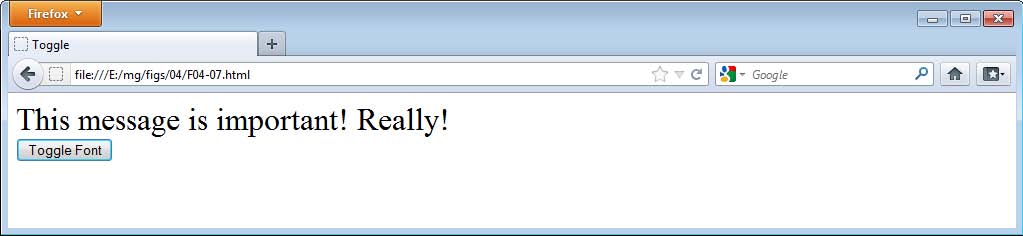
Figure 4-8 The page after the button is clicked. The text loses the italic font but becomes larger.
If you make any changes with jQuery code before the toggle is performed, then it will alter how the toggle works. For instance, change the toggle.js code to the following and save the file again:
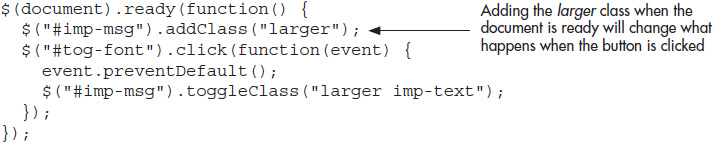
Here, the larger class is added when the document is ready, so the text will already be larger and imp-msg will already have the larger class when the button is clicked to toggle the classes. Thus, both larger and imp-text will be removed on the first click, both added on the second, and so on. Figure 4-9 shows the initial page, and Figure 4-10 shows the page after the button is clicked.
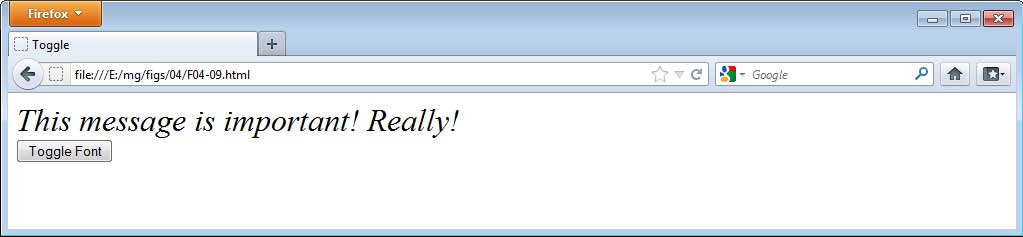
Figure 4-9 The initial page
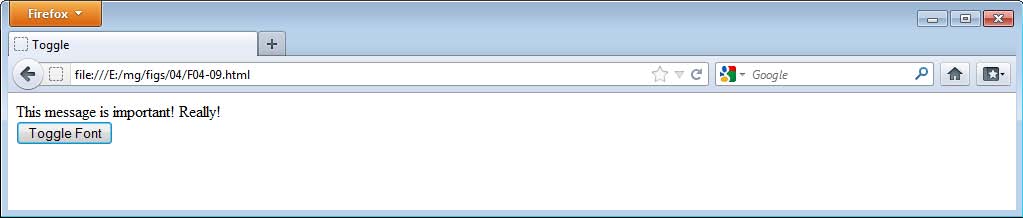
Figure 4-10 The page after the button is clicked
Specifying an Add or Remove
If you need to be more specific, you can specify whether toggleClass() should add or remove a class by sending a second argument. If the value true is sent, then the class will be added; if false is sent, then the class will be removed:

Using a Function to Determine the Argument
If you need to determine what class name(s) should be sent in the argument through scripting, you can send the return value of a function as the argument to toggleClass(), as in the following code:
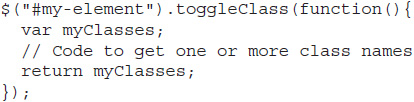
As with the css() method, you can return a value to be used as the argument. In this case, you will want a single class name or a space-separated list of class names to be returned and used as the argument.
The hasClass() Method
The hasClass() method determines whether or not the elements in a selection have a specified class. If one or more elements have the class, the method will return a value of true ; if not, false will be returned.
For example, consider the following HTML code snippet:
![]()
The <div> element has two classes assigned to it: looking and staring. The following code shows the different values returned by hasClass() given several different arguments:

If hasClass() is run on a collection of elements, then it will return true if one or more elements within the selection have the class, and false if none of the elements in the selection have the class. Consider this example code:

The following code shows the result of using different class names as the argument to hasClass() :

This can be used with a JavaScript if statement to selectively perform an action based on whether an element has a given class. The structure of an if statement is shown in the following code:

The value is typically a statement that evaluates to either true or false. The code within the curly brackets will only execute if the value within the parentheses evaluates to true (you will learn more about using the if statement in the next chapter).
In the case of hasClass(), it will return true if one or more of the selected elements has the specified class, so you can use the method in the if statement to execute the code inside the curly brackets if it returns true. Consider the following code:
![]()
Given these <div> elements, you could execute a statement like the one in the following code:

As you can see, hasClass() will return true in this case, so the statement inside the curly brackets will be executed, and the <div> element will have its font size increased. Had gazing been sent as the argument instead, hasClass() would have returned false, and any code within the curly brackets would have been ignored.
CAUTION
When working with if, be careful that you keep its parentheses separate from those of the jQuery methods. Both need to be closed, so be sure to double-check that the outer and inner sets of parentheses are all closed to avoid potential script errors.
Try This 4-1
Use toggleClass()
![]()
This project allows you to practice using the jQuery css() and toggle() methods to change the value of style properties and to add and remove CSS classes.
Step by Step
1. Place the following HTML code into your editor and save the file as pr04-01.html :
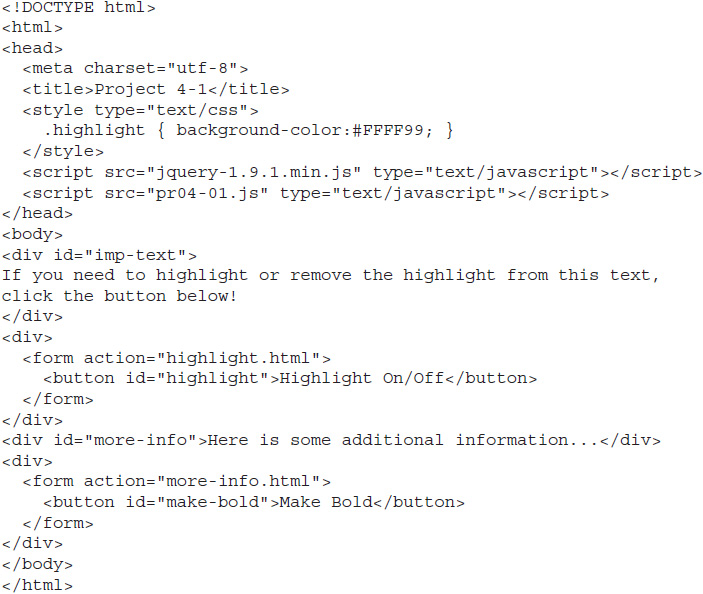
2. In the pr04-01.js file, add jQuery code that will toggle the highlight class on the imp-text <div> element when the highlight button is clicked.
3. Add jQuery code that will make the text in the more-info <div> element bold when the make-bold button is clicked (use the css() method).
4. Save the file. When complete, the code should look like this:
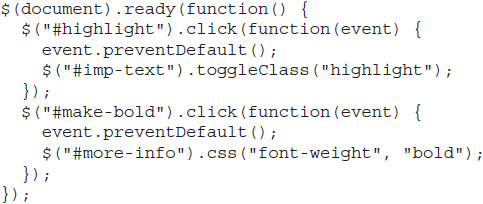
5. Open the pr04-01.html file in your Web browser. Click the first button, and the important text should become highlighted. Click the second button, and the additional text should become bold (clicking this button again will have no further effects).
Try This Summary
In this project, you practiced using both the toggleClass() and css() jQuery methods to add/remove a class as needed and to change the value of a CSS property on an element.
Size and Position Methods
Sometimes it is helpful to be able to get positional CSS property values, since they may be useful when positioning an element on the screen or giving an element a particular width, height, border, padding, and so on.
The jQuery library has a number of methods for obtaining different values that can help you in your scripts. Some of the methods only retrieve information, but others also serve as shorthand methods for setting property values.
NOTE
When using these methods to get or set values, the selection process works like that of the css() method. The first matched element is selected when getting values, while all matched elements are changed when setting values.
The width() and height() Methods
The width() and height() methods can get or set the width or height of an element. When getting a value, you simply call one of the methods with no arguments, as in the following code:
![]()
This gets the width of my-element and assigns it to a variable named eWidth. The value it gets will be the width in pixels, without the string “px” attached to the end of it. This can make it easier to perform calculations on the returned value, as opposed to the value returned by css(“width”), which would need to have the “px” string removed from the end to perform any numerical calculations.
The width and height values for an element are the width and height of the element before any padding, borders, or margins are added. You will see as you progress that there are other methods for determining the width and height based on different rules.
To set a value, you send the methods an argument with the new value. This can be any string such as “40”, “20px”, “2em”, “50%”, and so on. If you use a number without providing the unit behind it, then jQuery will assume it is a pixel value. Some examples are shown here:

Each of these is valid and will set the width accordingly. The height() method works the same way as width() but sets the height of the element instead.
The innerWidth() and innerHeight() Methods
The innerWidth() and innerHeight() methods get the width or height of an element plus its padding, in pixels. The borders and margins are not included in this value. For example, suppose you had the following CSS code:
![]()
The examples in the following code show what is returned by both methods when they are called for my-element :
![]()
Notice that when the shorthand padding property is used, it adds the specified padding value to all sides of the element, so calling innerWidth(), for example, will include the width (20), plus the left padding (10), plus the right padding (10), for a total of 40. The call to innerHeight() works the same way (100 + 10 + 10 = 120).
The outerWidth() and outerHeight() Methods
The outerWidth() and outerHeight() properties get the width or height of an element plus its padding and border, in pixels. The margins are not included in this value. For example, suppose you had the following CSS code:
![]()
The examples in this code show what is returned by both methods when they are called for my-element :
![]()
These methods also provide an option for you to include the margin along with the padding and border. This is done by sending the value of true as an argument to innerWidth() or innerHeight().
Suppose you had the following CSS code:
![]()
The examples in the following code show what is returned by both methods when they are called for my-element using the optional argument to include the margin values:
![]()
This can be helpful when you need to know how much space an element will use on the screen.
The offset() Method
The offset() method allows you to get or set the left and top coordinates of an element on the page relative to the document element. This means that the coordinates are defined where (0,0) is at the top-left of the page.
Getting the Offset
To get the offset of an element, you can call the offset method without any arguments, as in the following code:
![]()
The method returns two values, the width and the height, which can be accessed by including .left or .top after the variable name that is assigned the result (it returns an object with the properties left and top). Assuming #my-element was positioned at (20, 30), the following code shows examples of the results of calling offset() on the element:

Setting the Offset
To set the offset of an element, you send the left and top values as an argument using object literal notation, as in the following code:
![]()
This will move the element to the coordinates (40, 50) on the page.
NOTE
If the element has a position value set to anything other than relative, then this method will reset it to relative in order to perform the repositioning of the element.
The position() Method
The position() method works like the offset() method, but gets or sets the position of an element based on its parent element. This keeps you from needing to find the position of the parent element and then set the position of the element. Instead, you can simply use the position() method.
For example, the code here shows examples of getting or setting an element’s coordinates using the position() method:

NOTE
If the element has a position value set to anything other than relative, then this method will reset it to relative in order to perform the repositioning of the element.
The scrollLeft() and scrollTop() Methods
The scrollLeft() and scrollTop() methods get or set the position of the horizontal and vertical scroll bars, in pixels. For example, to get the position of the horizontal scroll bar, you could use the following code:
![]()
If you want to set the position, you simply send the pixel value as the argument, as in the following code:
![]()
This would cause the scroll bar to be positioned 20 pixels from the left edge of the element.
To see how you could use one of the scroll methods, suppose you had the following HTML code (save as scroll.html):
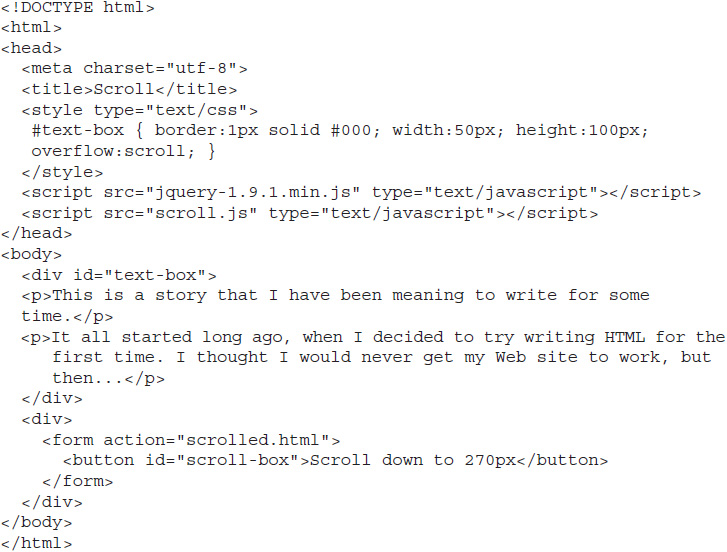
This will create a bordered text box with a vertical scroll bar to scroll through the remaining text. You can move the position of the scroll bar using scrollTop(), as in the following code (save as scroll.js):
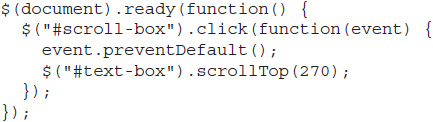
This will move the vertical scroll bar position down 270 pixels from the top of the text-box element. In this case, that will be somewhere near the beginning of the second paragraph (the exact position will depend on your default font size, and so on). Figure 4-11 shows the initial page, and Figure 4-12 shows the page after the button is clicked.
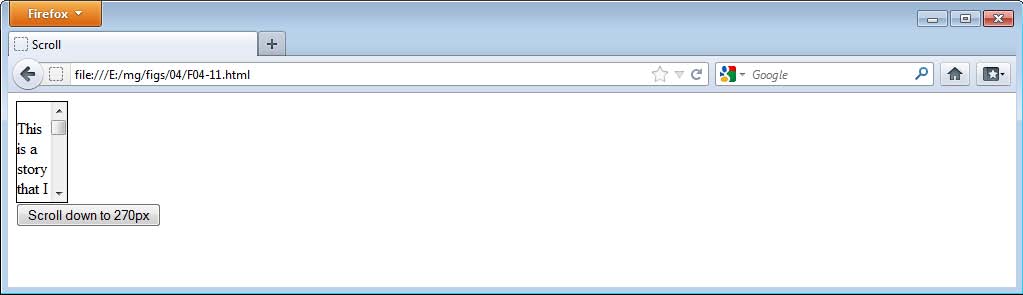
Figure 4-11 The initial page
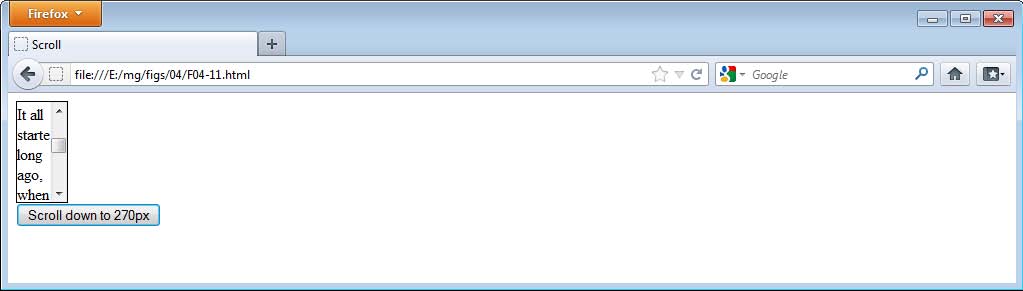
Figure 4-12 The page after the button is clicked
As you can see, the scroll bar is repositioned and the text is scrolled down to the new position.
Try This 4-2
Use offset()
![]()
This project allows you to practice using CSS position methods by setting the coordinates of an element using the offset() method.
Step by Step
1. Insert the following HTML code into your editor and save the file as pr04-02.html :

2. In the pr04-02.js file, add jQuery code that will make the text box move to the coordinates (100, 50) on the page when the button is clicked.
3. Save the file. When complete, the code should look like this:
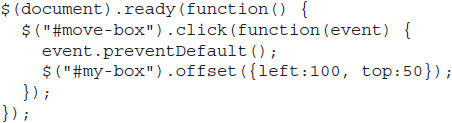
4. Open the pr04-02.html file in your Web browser. Click the button to move the text box to the new location in the document.
Try This Summary
In this project, you used your knowledge of the offset() method to move an element to a new position on the page based on the coordinates you sent as an argument.
 Chapter 4 Self Test
1. When working with CSS code, you define the selector and then define a rule within a set of __________.
2. The jQuery library has the __________ method, which allows you to obtain property values or make alterations on the fly.
A. style()
B. css()
C. getPropVals()
D. docStyles()
3. Which of the following will properly get the value of the color property for an element with an id of code and assign it to a variable named eColor ?
A. var eColor = $(“#main”).css(“color”);
B. var eColor = $(“#code”).css(“background-color”);
C. var eColor = $(“#code”).style(“color”);
D. var eColor = $(“#code”).css(“color”);
4. When getting property values with the css() method, you are not able to use __________ properties.
A. any
B. position
C. color
D. shorthand
5. If the selection in the $() function matches more than one element when using the css() method, only the property value for the last matched element will be returned.
A. True
B. False
6. Which of the following properly sets the value of the background-color property to #FFFFFF for an element with an id of text-box ?
A. $(“#text-box”).css(“background-color”, “#FFFFFF”);
B. $(“#text-box”).style(“background-color”, “#FFFFFF”);
C. $(“#text-box “).css(“color”, “#FF0000”);
D. $(“#box-text”).css(“color”, “#FFFFFF”);
7. The css() method can be used to set more than one property value at a time.
A. True
B. False
8. jQuery 1.6 and higher allows you to use values beginning with __________ or __________ to set relative values (setting the value incrementally higher or lower than its current value) for properties that are based on numeric values, such as width, height, font-size, and so on.
A. ++, – –
B. =+, =–
C. +=, –=
D. plus, minus
9. jQuery versions 1.4 and higher allow you to set the return value of a __________ as the property value.
A. mouseover
B. variable
C. constant
D. function
10. The __________ method removes a class from an element.
A. removeClass()
B. deleteClass()
C. closeClass()
D. clearClass()
11. jQuery supports method __________, which allows you to place methods one after another to act on selected elements.
A. opening
B. listing
C. chaining
D. talking
12. The __________ method allows you to switch between adding and removing one or more classes each time the method is applied to a particular selection.
A. removeClass()
B. toggleClass()
C. switchClass()
D. swapClass()
13. jQuery has shorthand methods for getting and setting the width and height properties of an element.
A. True
B. False
14. The __________ method allows you to get or set the coordinates of an element based on the document element.
A. position()
B. offset()
C. coords()
D. placement()
15. The __________ method allows you to get or set the position of the vertical scroll bar within an element.
A. scrollLeft()
B. top()
C. left()
D. scrollTop()