
Chapter 9
Working with AJAX
![]() Introduction to AJAX
Introduction to AJAX
![]() Creating AJAX Requests
Creating AJAX Requests
![]() Two-Way AJAX Requests
Two-Way AJAX Requests
![]() Security Issues and Further Information
Security Issues and Further Information
The jQuery library offers numerous helpful methods for working with AJAX requests. This makes it easy to send information to the server or retrieve information from the server and do so in a way that works across modern browsers.
Introduction to AJAX
The acronym AJAX stands for Asynchronous JavaScript and XML. The term was used by Jesse James Garrett in 2005 in his article “Ajax: A New Approach to Web Applications” (www.adaptivepath.com/ideas/ajax-new-approach-web-applications). While the term originally dealt with XML as the means of transferring data, it can now mean transferring data in any form between the client and the server.
In modern JavaScript applications, you can request data from the server using the XMLHttpRequest object. This allows you to send to or receive information from the server without reloading the current page (asynchronously). Before this was possible, you had to send the request to the server synchronously, wait for the response from the server, and load the new information, requiring a page reload or a redirect to another page. When making calls to the server asynchronously, you can do this behind the scenes without the need to reload the whole page in the browser window. Instead, you can simply load the retrieved information into a specified location on the current page when it arrives.
This chapter will discuss basic AJAX requests, two-way AJAX requests, and offer some resources to further your study of AJAX security and server-side programming if you don’t already have this knowledge.
Creating AJAX Requests
There are several methods available in jQuery for requesting information from the server. Technically, you can request just about any type of text file: txt, html, xml, json, js, and numerous other file types are possible. In this section, you will look at the most commonly used file types (html, xml, and json) and how you can use different jQuery methods to obtain the needed data.
First, you will need a document that needs some data from the server to get you started. This HTML document will be used for the examples in this chapter. Save the following code as ajax.html:
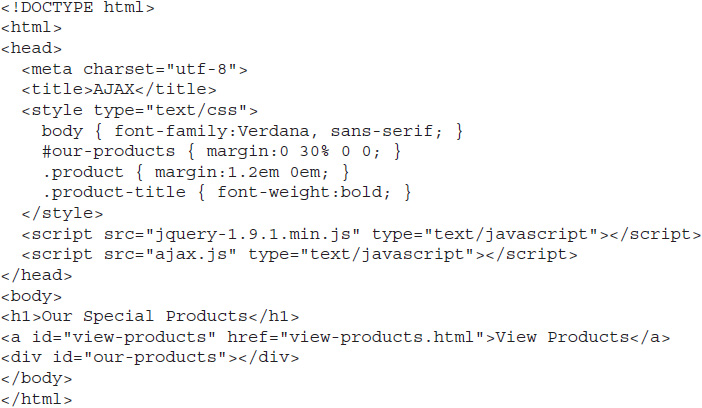
This document has some very basic styles applied to it, and contains an empty #our-products <div> element.
You will also need a .js file, so save the following code as ajax.js:

At this point, this just has an empty function to handle a click event on the “View Products” link. The HTML and jQuery/JavaScript code will be adjusted as you move through the upcoming sections of the chapter.
Retrieving HTML
The easiest type of AJAX request to perform is one that loads an HTML file from the server. The jQuery library provides the load() method for loading HTML content into a document. To use it, you select an element in the current document where the retrieved content will be loaded and provide the URL of the document containing the additional content to the load() method.
For example, to load the contents of my-file.html into an element with an id of #my-element, you could use the following code:
![]()
This would load any HTML within my-file.html into #my-element in the current document.
This load() method has the same name as the load() event-handling method. To keep this from being problematic, jQuery determines which of the methods is being called based on the arguments that are sent to it.
To make use of this with your current example document (ajax.html), you will need to create an additional HTML document that has the content that will be added to ajax.html. So, save the following code as more-content.html:
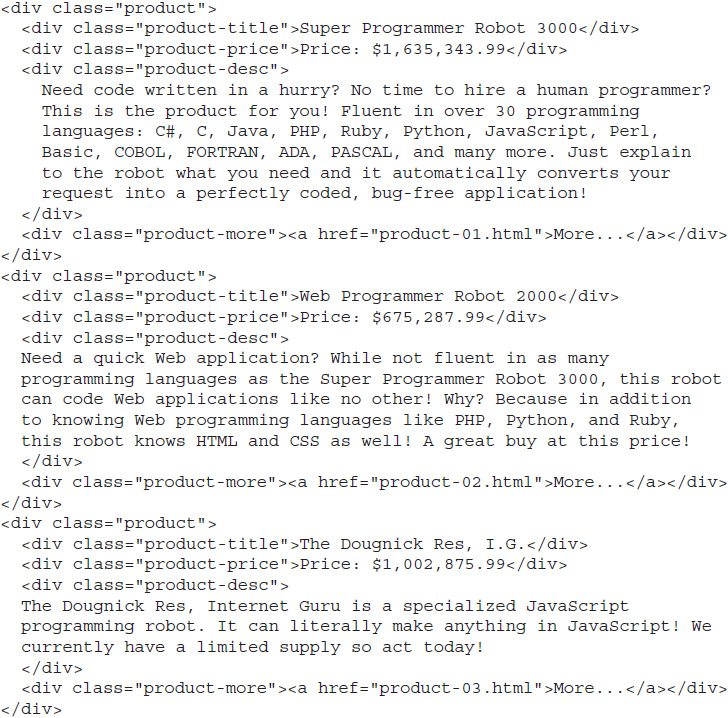
One thing you will notice here: This is not a complete HTML file with the doctype, head section, and so on included. Instead, you have a snippet of HTML code specifically for the purpose of providing content to the #our-products element in the main HTML document (you will see how to access content within complete HTML documents later in this section).
With this HTML snippet file available, you can simply plug it into the load() method to add its content to the ajax.html document. Make the following changes to your ajax.js file and save it:
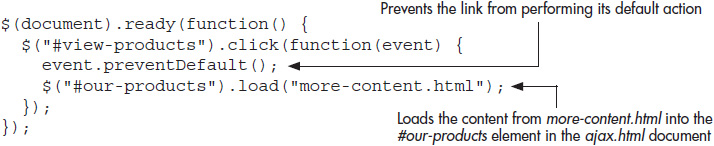
Load the ajax.html file in your browser and click the “View Products” link. The content will be loaded into the page once you click the button! Figure 9-1 shows the initial page, and Figure 9-2 shows the page once the “View Products” link is clicked.
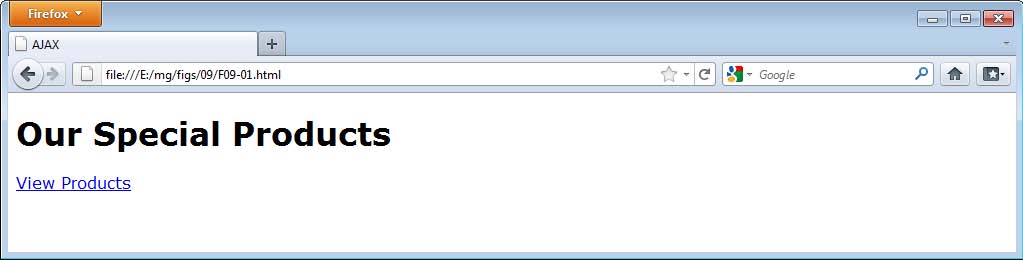
Figure 9-1 The initial page
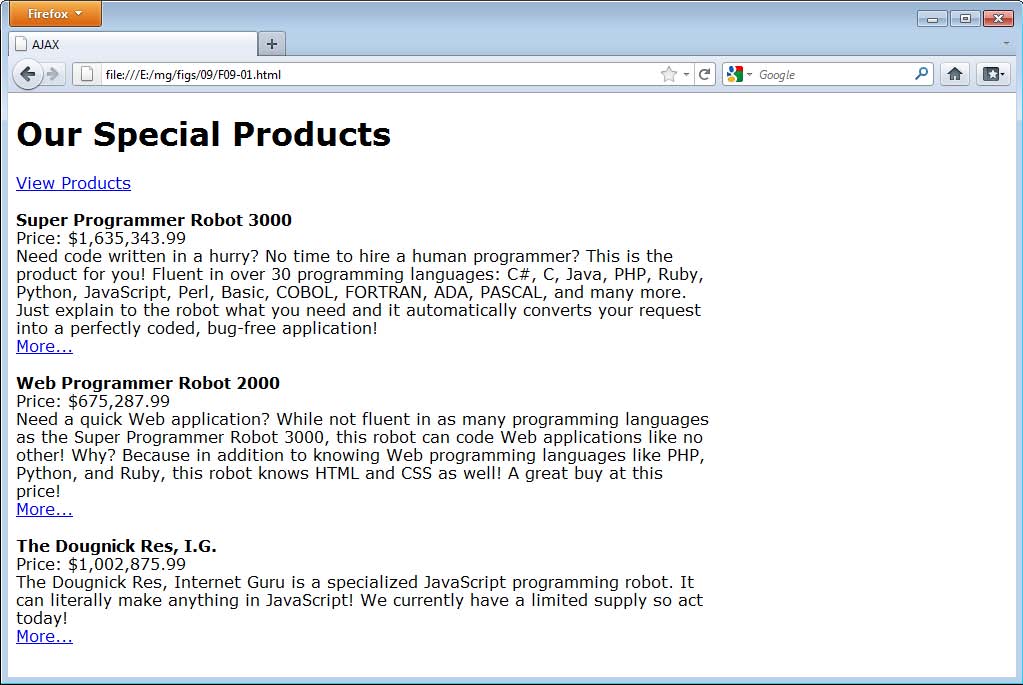
Figure 9-2 The page after the link is clicked
Loading a Portion of a Complete HTML Document
Sometimes the HTML you will need won’t be in a handy snippet file. You may need to get content from a complete HTML document. This means that the other document will have its own doctype, head section, body tags, and possibly other elements that are not needed in the document where you will use the content.
Fortunately, jQuery makes it possible to select a portion of the document using its selector syntax as part of the argument to the load() method. As an example, suppose the more-content.html file contained the following code rather than an HTML snippet:


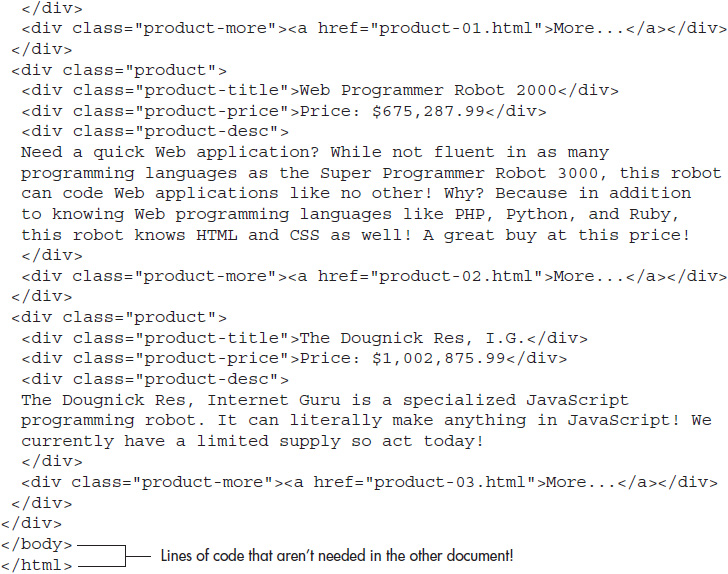
While the needed code is here, there is also a bit of extra content that you don’t need: the <doctype>, <html>, and <head> elements; the opening and closing <body> tags; and the additional <h1> and <p> elements. Instead, you just want all of the .product elements to be loaded.
You can do this by placing a space after the URL of the document you are retrieving, followed by a jQuery selector. For example, the following code would get all of the .product elements from more-content.html:
![]()
With this, you can now update ajax.js to use the following code and save it:

Note that the empty() method is now added to prevent the loaded document from displaying more than once if the link is clicked more than once. Open ajax.html in your browser and click the “View Products” link. You should get the same result as before, with the product content being displayed once the link is clicked.
Using Animation and the Callback Function
When loading the content, you may wish to use one of the animation effects, such as slideDown(). At first, this would seem fairly easy to do by simply adding it to the chain, as in the following code:
![]()
Replacing the load() call in ajax.js with this line will not appear to make any difference! The content will simply appear once it loads, with no sliding. So why doesn’t this work?
The first issue is that the content being loaded is already visible, so slideDown() won’t reshow it. This is easy enough to fix by adding hide() to the chain before calling load() so that the content that is loaded within #our-products will be hidden before loading, then displayed afterward by using slideDown(). Thus, the following code could be used instead:
![]()
Trying this out, unfortunately, doesn’t change things much, except to potentially add an extra delay before the content is displayed. Why is this?
AJAX methods load content asynchronously. This means that the typical order of execution for your statements may be altered. Most jQuery/JavaScript code runs synchronously. In other words, each task is run only after the previous task has completed. There is a strict order that is maintained so that no unexpected tasks are completed before their turn in the order.
With an asynchronous request, the asynchronous task is started, but the script immediately returns to the next task at hand rather than waiting for the asynchronous task to be completed. The asynchronous task will at some later time receive a response from the server and be executed.
What this means for the last code listing is that the hide() method will execute, and the load() method will begin execution (but may be waiting for a response). While the load() method waits for a response, the script execution is immediately handed back to the next task, which is to execute the slideDown() method. Thus, even though you might not have the content loaded yet, slideDown() is executed right away. Since this particular call uses a duration of two seconds, nothing else can be done until that time elapses. Once it is complete, the asynchronous task can then be completed if it has received a response and can load the data.
Given that you are working locally at this time, you will likely have the data load immediately after the two-second delay. If there were any additional lag time, the request might not complete until a longer wait (or until even more synchronous tasks are completed). To keep this from happening, you can use a callback function to be executed once the asynchronous load() method has completed its task. This is done by adding the callback function as an argument to the load() method, as in the following code (save these changes to your ajax.js file):
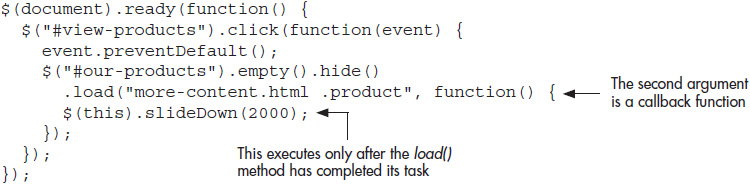
Reload the ajax.html file in your browser and click the “View Products” link. This time, the new content should slide down as expected once it is loaded. Figure 9-3 shows the slide-down in progress after the link is clicked.
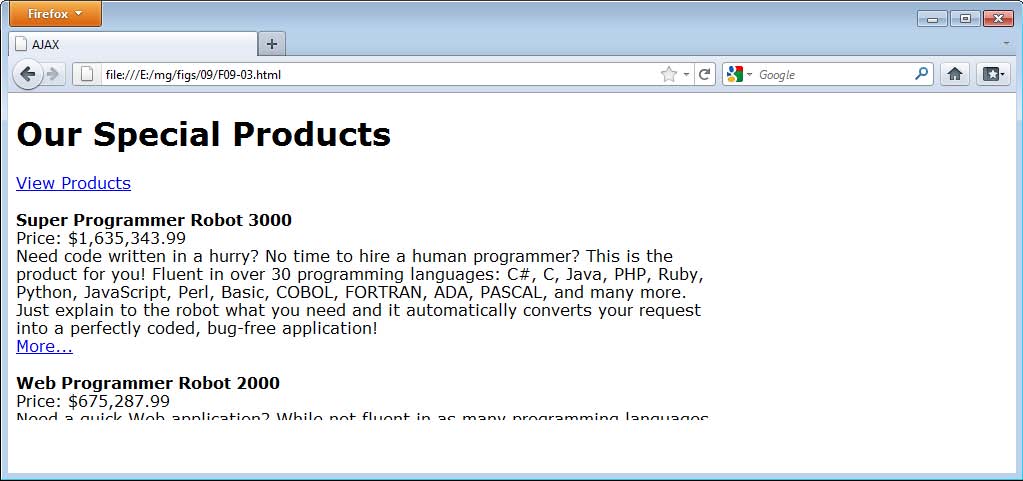
Figure 9-3 The slide-down now works as expected.
Retrieving XML
Another type of document you can retrieve is one in XML format. To retrieve the data, you can use the $.get() method, which sends back the text of the document in most cases. However, if a response is received from the server that the document’s MIME type is XML, its callback function will receive the XML DOM tree.
Using an XML Document
To work with this method, you will first need an XML document. The following code shows how the same data you were retrieving via an HTML document could be represented in an XML document (save this file as more-content.xml):
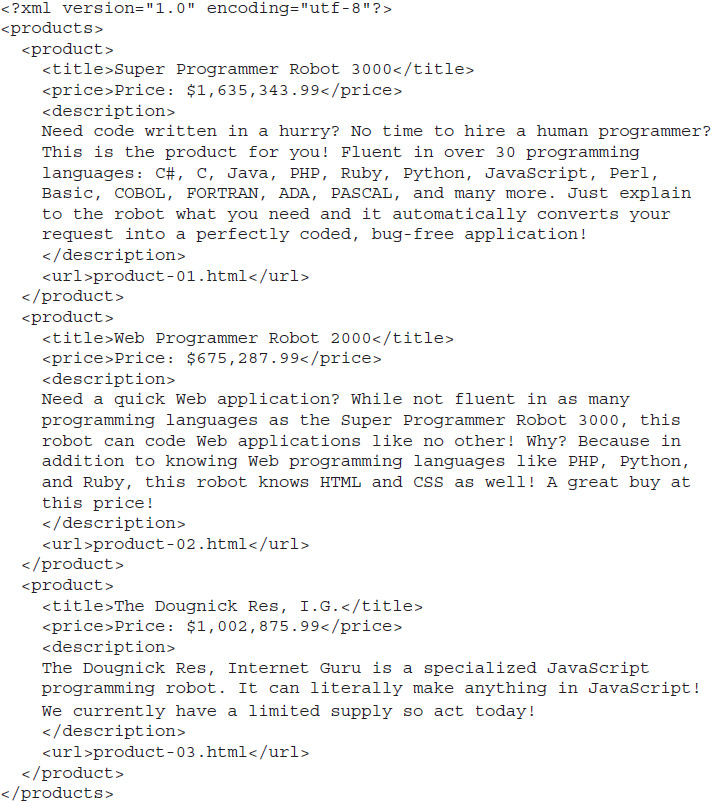
As you can see, the XML document simply describes the content, rather than providing HTML code. With an XML file, you will need to retrieve the document structure and build the HTML code from the structure and data contained in the XML file.
The $.get() method is a global jQuery method—it is not tied to a jQuery object (such as a selection of elements) like most methods you have used. Instead, you simply call the method to get the information, then use it in the document where needed (using append(), prepend(), and so on). First, you will need to get the data, so you will need to call the method. Since this document is XML, you will use the callback function to obtain the DOM structure of the document, which you can then easily traverse using jQuery, as in the following code:
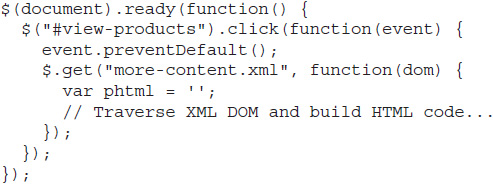
The first argument specifies the URL of the file to retrieve. The second argument is the callback function, which executes when the response has been received and the DOM information has been loaded. This information is stored in the argument used in the callback function, which can use any name you wish (dom is used in this case). The phtml variable will be used to build and store the HTML that will be used to fill in the product information.
You now need a way to traverse the XML DOM structure and build your HTML code from it. For this purpose, the jQuery find() method will be most helpful.
The find() Method
The jQuery find() method allows you to search all descendant elements of the specified element and select any needed elements using a second selector as the argument. For example, to find all of the <product> elements in the XML document, you can use the dom object obtained from the XML file and select any <product> elements within it using the following code:
![]()
You can now use the jQuery methods you already know to work with those elements. In this case, the selection includes all of the <product> elements in the XML document, so you can use each() to cycle through each of the <product> elements and build your HTML from their content, as in the following code (update your ajax.js file to use this code and save it):
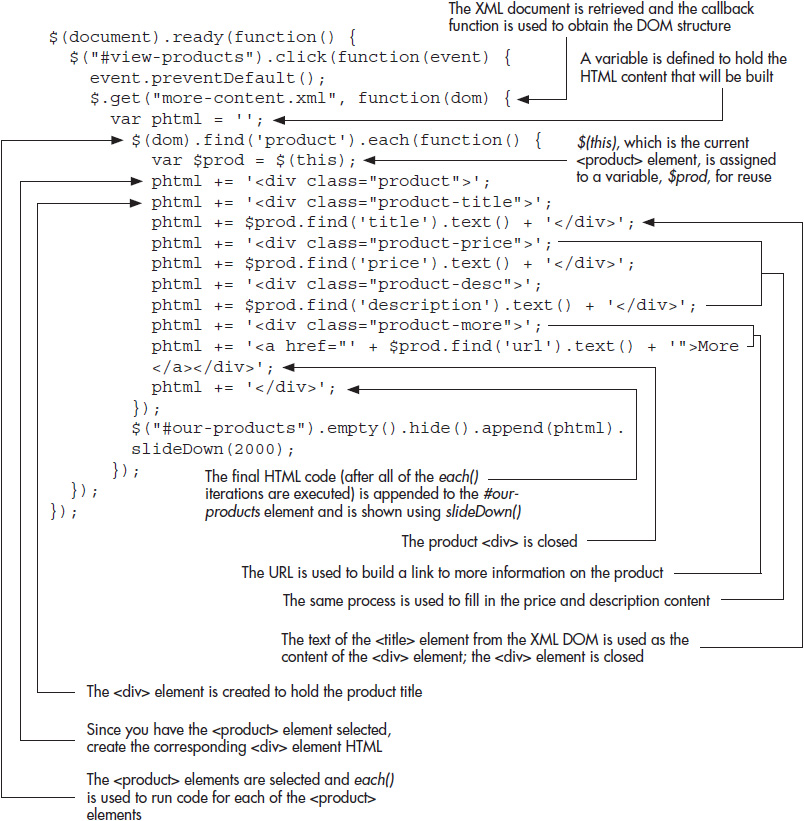
Notice how find() is used throughout the code to select the necessary elements and how their content can be retrieved using text(). The DOM structure and content within the XML document is used to build the corresponding HTML that will be inserted into the ajax.html document.
After the last iteration of each(), the content is appended and shown using slideDown(). Notice that simply adding slideDown() to the chain works here, since you are already within the callback function of the asynchronous request from $.get().
Reload the ajax.html file in your browser and click the “View Products” link. This should work exactly as it did before, but now is using an XML document to obtain its necessary data.
Retrieving JSON
Another popular file from which you can obtain data is a json file. JSON (JavaScript Object Notation) was developed by Douglas Crockford as a means to transport data easily among the different applications that may need it. JSON formats data in such a way that everything is described as an object (map) or array. A map can have properties (which can be values or further maps/arrays), and arrays can contain items (which can also be values or further maps/arrays). This formatting allows JSON data to be used easily by numerous applications. In fact, most languages have some type of JSON parser available so that JSON data can be either retrieved or sent out as needed.
An example of JSON-formatted data is shown here:

As you can see, there is a root object (you could also use an array here), which contains three name/value pairs. Each value can, in turn, be another object or array if needed, as “schedule” and “foods” demonstrate here. One more thing that you should notice: When creating JSON data, the names of any object properties must be within quote marks, where in JavaScript, this is optional for simple names.
To load JSON data, jQuery has another global method named $.getJSON(), where you can pass the file to load and the callback function as arguments. For example, the following code could be used to get the data from a file named more-content.json:

The data argument will contain the JSON data to be parsed, which can be done using the global version of each, which is $.each(). Instead of working on a selection, $.each() can be passed an object or an array as the first argument and a callback function as the second argument. This callback function can use two arguments: current iteration index (0, 1, 2, and so on) and the current item or property from the array or map. For your example, you can use the current item/property to easily obtain its value.
First, you will need your data in JSON format. The following code shows how the same data you have been using could be represented in JSON (save the file as more-content.json):
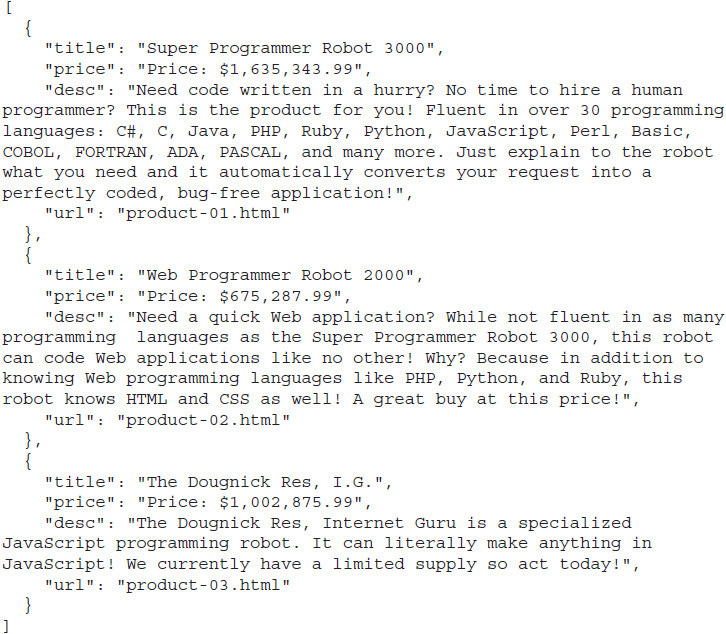
In this case, the root is an array, and each of the three maps within it can easily be iterated over using $.each().
Each of the descriptions runs over multiple lines in the code listing, but should not do so in your actual source code in order to avoid errors. Also, your Web server needs to have .json (application.json) configured in the server MIME types in order for JSON files to be properly parsed.
With the JSON file in place, you can now update your ajax.js file to make use of it. Update your ajax.js code to the following and save the file:

Notice how $.each() works well with the JSON data. The JSON file contains an array of objects, each of which contains property/value pairs. The prod argument contains the object/array of the current iteration. In this case, you are iterating over an array of objects, so the prod argument will represent each object in the array. You can then use each object’s property names to access the corresponding values, just as you would with a typical JavaScript object (refer back to Chapter 5 if needed). In the end, the same effect is achieved, with the content being loaded and displayed with a slide-down effect after the link is clicked.
Try This 9-1
Practice Basic AJAX
This project allows you to practice a simple AJAX request by using the load() method to load some HTML code from another page. You will need to be sure to request only the code you need from the other HTML page.
Step by Step
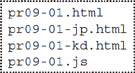
1. Place the following HTML code into your editor and save the file as pr09-01.html:

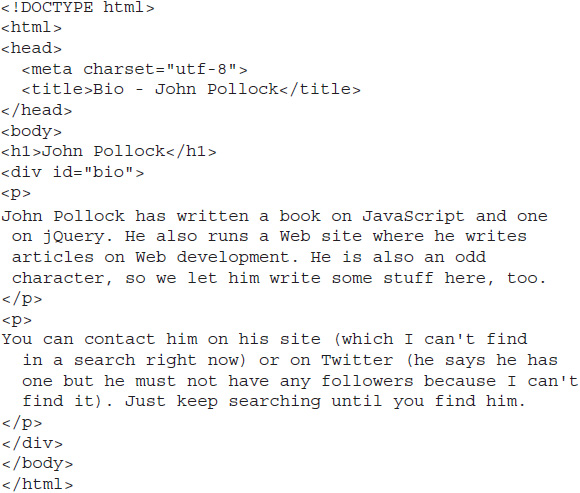
2. Place the following HTML code into your editor and save the file as pr09-01-jp.html:
3. Place the following HTML code into your editor and save the file as pr09-01-kd.html:

4. Notice how both “bio” pages have a <div> element with an id of bio. In the pr09-01.js file, add jQuery/JavaScript code that will load the appropriate bio information from the corresponding HTML file when the “View Details” link is clicked for that person.
5. Save the file as pr09-01.js. When complete, the code should look like this:
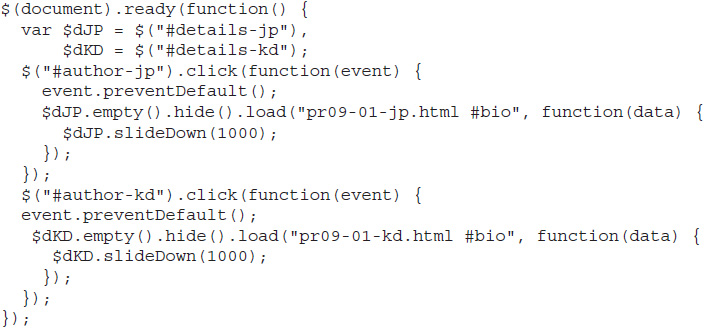
6. Open the pr09-01.html file in your Web browser. Click each link to view the details about the chosen author, which will be loaded from a separate HTML file.
Try This Summary
In this project, you used your knowledge of the AJAX load() method to load information from outside HTML files. Depending on the link that was clicked, a different HTML file was used to obtain the necessary data to display on the page.
Two-Way AJAX Requests
In addition to simply loading data from a file, jQuery provides AJAX methods that allow you to also send data to be processed by an application on the server. In this way, you can provide an even more interactive experience that gathers information based on user decisions or user input.
Using Get and Post Requests
The jQuery library provides the global $.get and $.post methods. These can be used to pass information to an application on the server, which can then return data to your application on the client side.
For these examples, you will be adding a PHP file to the project you have been working on in this chapter. This file will take data from your AJAX request and send data back to you based on the data you sent. While this book will use a simple PHP script, the same tasks can be performed by any server-side language (Ruby, Python, ASP.NET, Java, and so on). Since this book is about using jQuery on the client side, the PHP script will be discussed according to concepts more than the specifics of the code. Resources for learning server-side programming languages will be provided at the end of the chapter.
Using Get
The $.get() method can be used to send and receive data. The general format is shown in the following code:

Up to four arguments can be used as needed. These include (as seen in the previous code):
![]() url The URL of the file to get
url The URL of the file to get
![]() map An object of property/value pairs that can be sent to the server/application
map An object of property/value pairs that can be sent to the server/application
![]() function(data, status, jqXHR) The callback function that executes on success
function(data, status, jqXHR) The callback function that executes on success
![]() data The data returned from the server/application
data The data returned from the server/application
![]() status The text of the status response
status The text of the status response
![]() jqXHR The jQuery XHR object
jqXHR The jQuery XHR object
![]() type The type of data expected from the server
type The type of data expected from the server
The url argument is required, where the others are optional. If nothing is used for type, jQuery will try to determine the data type of the requested file.
An example of $.get() is shown in the following code:

This will get the url app.php and will send it an object map that includes the property num with a value of 1. When the request has been completed successfully, the callback function is executed and can make use of any data that has been returned using the data variable.
As a more complete example, you will update the ajax.html file you have been using. This update will move the CSS code to an external style sheet so that it can be used for multiple files. This is shown in the following code (save as ajax.html):
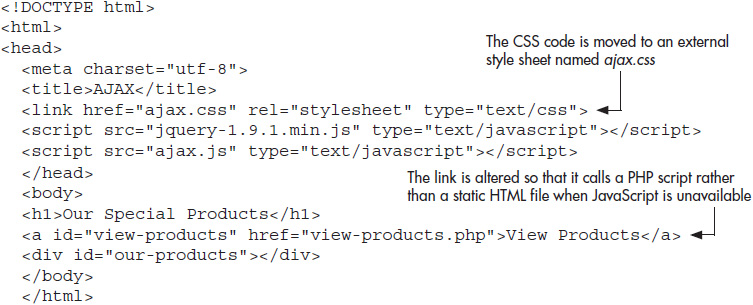
You will now create the external CSS file. Place the following code into a new file and save it as ajax.css:

This is the same code used within the <style></style> tags previously.
The idea behind the example script will be to load the title of each product (Super Programmer Robot 3000, Web Programmer Robot 2000, and so on) when the “View Products” link is clicked and make each title a link that will display the details about the product when clicked.
This will use two different AJAX requests, both of which will request return data from a PHP script. Depending on the data sent to the PHP script from the $.get() method, the PHP script will return either a list of linked product titles or the product details for a single product.
To ensure the user can obtain the data once the “View Products” link is clicked, the PHP script will also check to see whether the request was made as an AJAX request or not. If not, then the product titles and data will simply be displayed as you have done previously.
The PHP file will simply be a concept file. You’ll see notes pointing to different parts of the PHP code to describe what is being done. You will then see how this affects the jQuery code you need to write to make the necessary requests and work with the returned data.
NOTE
To run the code as it is, you will need a server with PHP and MySQL installed (the product data also needs to be entered into a MySQL database named “products” within a table named “special”). If you have another configuration (a different programming language or database type), you can code the same concept file in the alternate language and/or adjust the database portions of the code to suit your setup.
The code for the PHP file you will use is shown here (save as view-products.php):
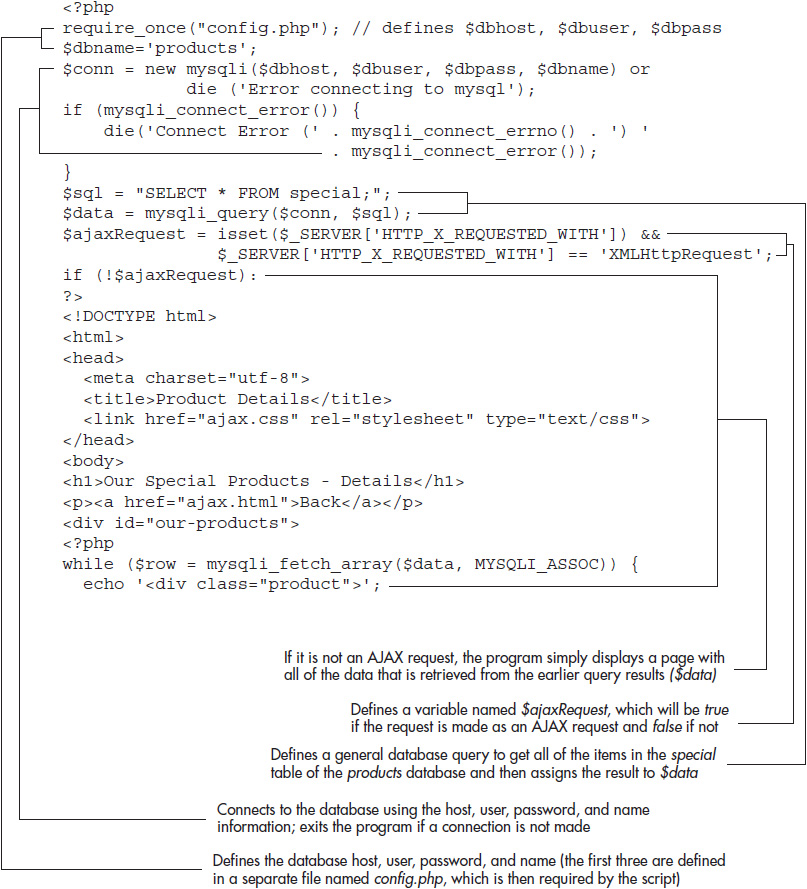
This PHP program is what reacts to a click on the “View Products” link. In summary, it performs one of four general actions, based on the type of request and the information sent to it:
![]() Simply display a page with all of the data if the request is not an AJAX request (for example, if the user has JavaScript disabled)
Simply display a page with all of the data if the request is not an AJAX request (for example, if the user has JavaScript disabled)
![]() Return a list of products in HTML format (where each title can be clicked to display further details)
Return a list of products in HTML format (where each title can be clicked to display further details)
![]() Return the details of a single product in HTML format
Return the details of a single product in HTML format
![]() Return nothing for the HTML if the request is made improperly (does not contain either the page or prod properties, and only one of those properties at a time)
Return nothing for the HTML if the request is made improperly (does not contain either the page or prod properties, and only one of those properties at a time)
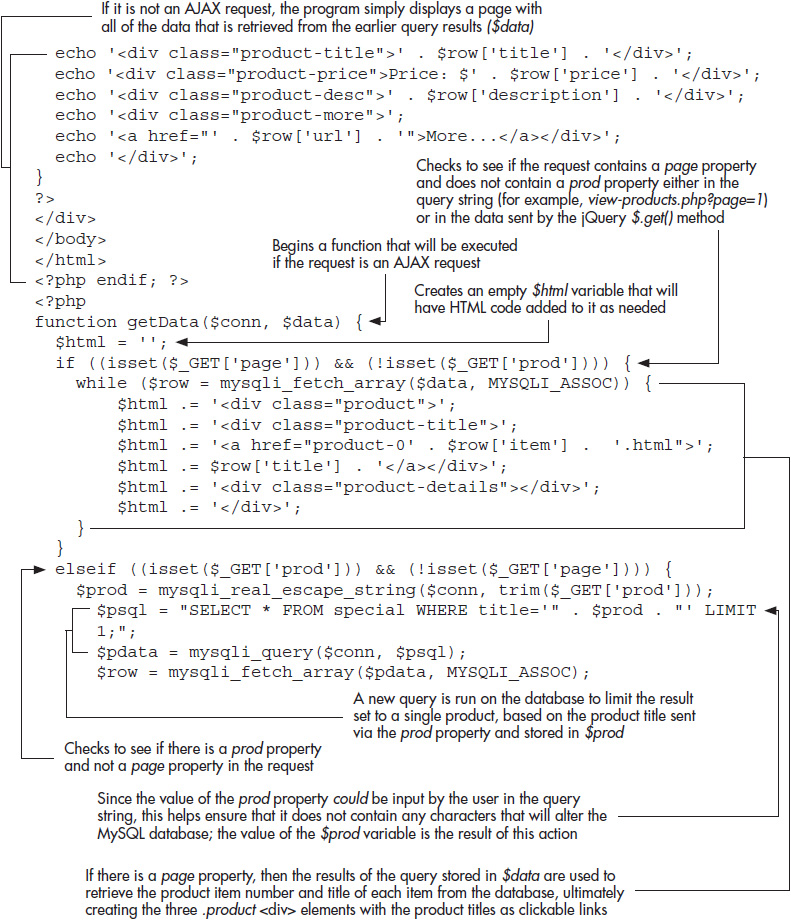
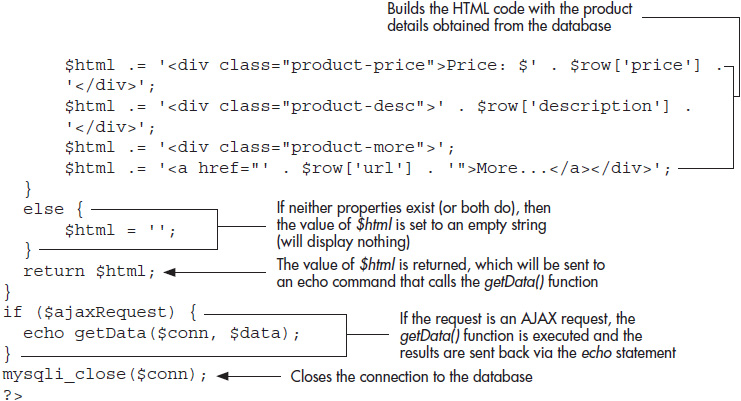
The PHP program does the major work here: It makes the application accessible for those without JavaScript and returns the relevant data to allow you to enhance the application via jQuery/JavaScript for those that have it enabled. Since the data has been placed into a database for this application, the PHP program also does the work of connecting to and retrieving information from the database.
This PHP program is used here to present the concept, but should only be used in a test environment. It should not be used in a production environment where you will need to double-check application and data security, among other needs.
The task now is to use jQuery and its $.get() method to put this PHP program to use and create an application that responds to the various elements that can be clicked by the user to request further information.
First, you need to determine how a click on the “View Products” link will be handled. In this case, you want to retrieve the list of clickable links. Since the PHP script checks for the existence of the page to return the links, you can use the $.get() method to send the program what it needs. Consider the following code (save this as the new code for your ajax.js file):
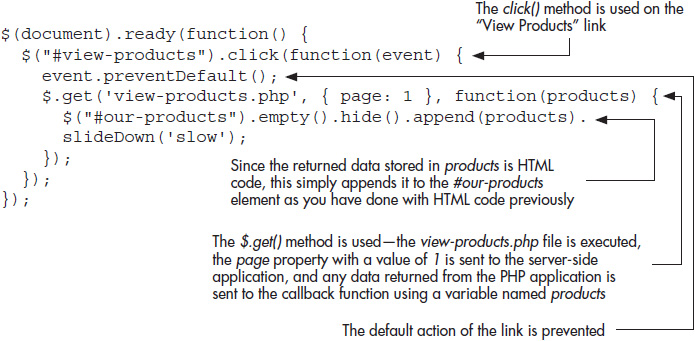
This handles the first click to view the product list. It sends the PHP program the page property as part of the get request, which you will recall is used by the PHP program to determine that the list of product links should be returned (rather than the details of a single product, which happens when you send it the prod property). Figure 9-4 shows how the ajax.html page looks after the “View Products” link is clicked.
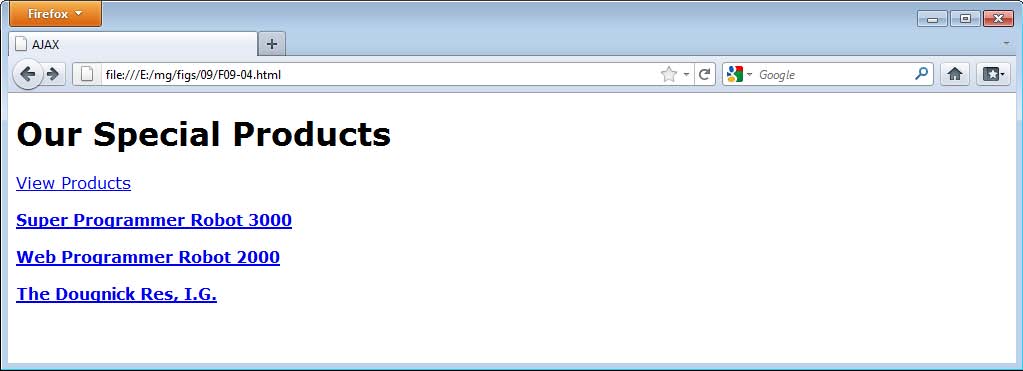
Figure 9-4 The products are displayed as a list of clickable links.
The next task is to react any time one of the product links is clicked. The details of the product need to be loaded and shown to the user. The first issue is that you will need to access elements that were not a part of the DOM when the page loaded. You will recall from Chapter 3 that the on() method allows you to use event delegation, allowing you to attach an event handler to a parent element, which can then target the specific child element later.
In this case, the #our-products element was already in place when the document loaded, and the <div> elements with the .product-title class were loaded after the “View Products” link was clicked. Thus, we can use on() to delegate the event and allow clicks on any <div> elements with the .product-title class to work once they are a part of the DOM, as in the following code:

With this in place, you now need to see whether the container element (.product-details) for all of the elements containing details exists. This will accomplish a particular goal here: to determine whether the data is already in the DOM and can simply be shown/hidden, or whether the data needs to be loaded into the DOM via an AJAX request.
To accomplish this, you will need to search for a <div> element with the .product-details class within the current .product <div> element. This can be done using the find() method. The following code illustrates what you will be doing:

As you can see, with jQuery’s selectors and the find() method, you can locate the .prod-details element if it exists. Assigning the result of the selection to a variable ($prodDetails) gives you a way to determine if the element is there: If so, the object will have a length of 1 or more; otherwise, the length will be 0.
With this information, you can handle the click in a different way when the .prod-details <div> is present. If it exists, you will simply show or hide the data that has been loaded. If it does not exist, then you need to obtain the data with $.get() and load it into the DOM.
So, if you want to use a slide animation, you can use slideToggle() when the element is present. If not, you can load the data and then use slideDown(), as in the following code:
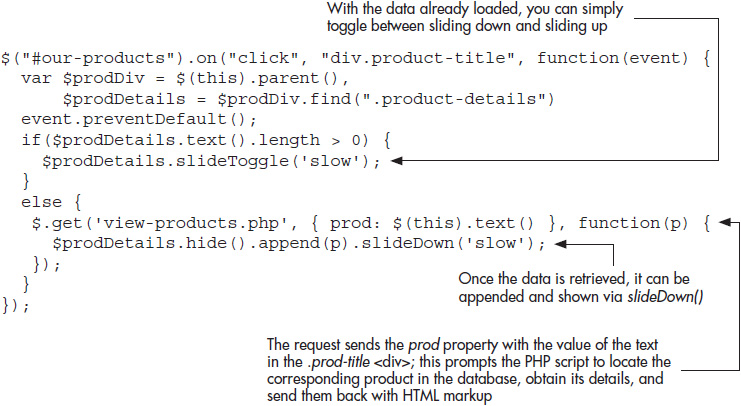
As you can see, slideToggle() is used when the element is present, while $get() is used to obtain the information and add it to the document if not. Notice that the PHP program is sent the property prod with a value of $(this).text() from $.get(). $(this).text refers to the text within the element .prod-title element, which means that the product title is sent. This allows the PHP program to check the database for the product title and return the product details for that title.
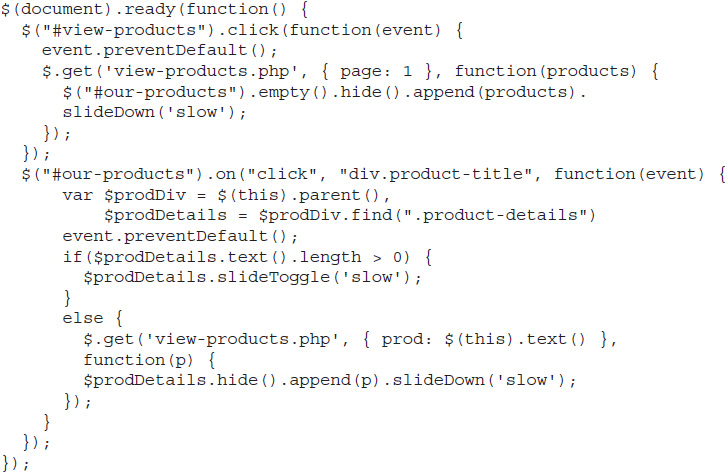
With that taken care of, you can now complete the ajax.js file. Use the following code for ajax.js and save the file:
If you are able to use this example in a test server environment, you can load the ajax.html page and go through the process. Click the “View Products” link to get the list of products, then click a product title to view/hide its details. Figure 9-5 shows the result of clicking the “Web Programmer Robot 2000” link.
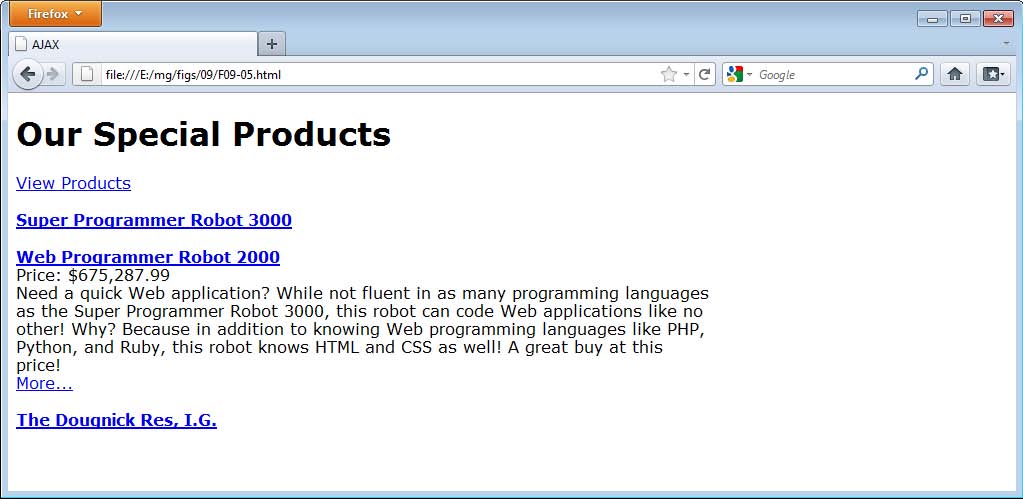
Figure 9-5 The details are displayed when the link is clicked.
Using Post
The $.post() method works the same way as get, but sends the data via a post request rather than get. The biggest difference here is that a post request can transport more data than a get request.
For example, to call the first request from the previous example using $.post() rather than $.get(), you would simply swap out the method name, as in the following code:
![]()
![]()
The PHP program would then need to be updated accordingly to look for $_POST information rather than $_GET. If your application is transmitting large amounts of data, $.post() may be a better option for you.
Handling Errors
Sometimes when gathering information from the server, things do not go as planned. Perhaps the file you are trying to access doesn’t get loaded due to a network error or a slow connection. In such cases, it is good to be able to handle the error in some way so that the user knows that something went wrong.
For any AJAX function other than load(), you can chain the error() function to it in order to handle errors with an AJAX request. For example, consider the following code:
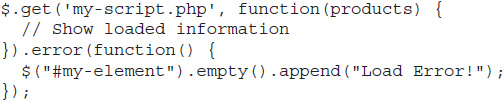
Here, the error() method is chained to the $.get() method. In this way, a function can be executed to alert the user to the error.
In your ajax.js file, you can now use this to provide a quick error message to users if an AJAX request fails for some reason. This example will simply display some text, but you could do any number of things (provide a “try again” link or other helpful information, for instance). Save the new code, shown here, in your ajax.js file:
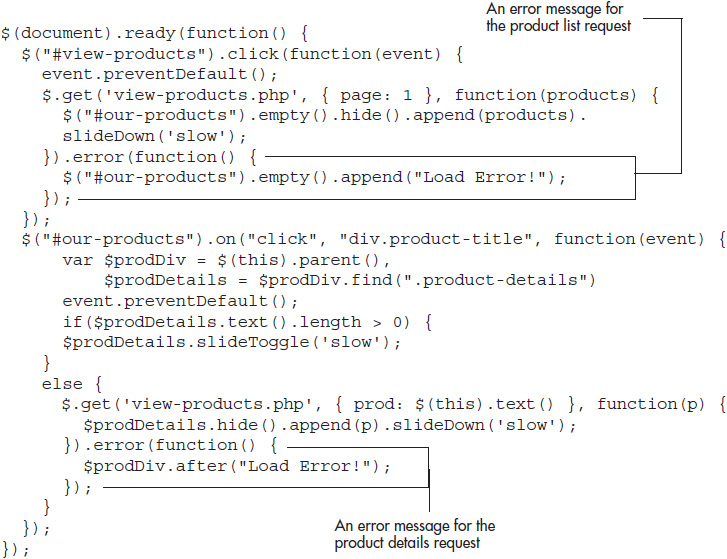
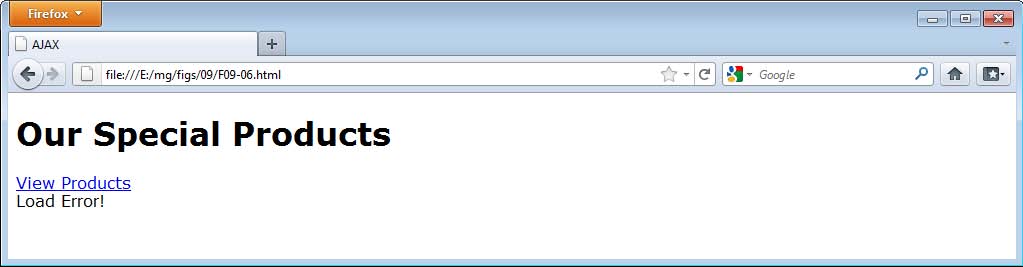
To see the error work, you may need to manually create one by altering the name of the requested file in the code to one that doesn’t exist (creates a 404 error). So, instead of “view-products.php,” you might use “not-here.php” or anything else so that an error will occur. Figure 9-6 shows the page when there is an error after clicking the “View Products” link.
Form Input Serialization
The jQuery library offers a helpful method named serialize() for sending form input data to the server, which allows you to submit the form behind the scenes, avoiding the typical page reload or redirect for the user once a form is submitted.
You can serialize individual input fields, but most likely you will want to send all the form input to the server. By selecting the form and using serialize(), this can be done easily using jQuery.
As an example, suppose you have a contact form that allows users to send you a message. Rather than redirecting the users back to the same page or a new one for confirmation, you would like to simply display a message on the page once the submission is complete. Using serialize(), you can submit the form data and then use $.get() or $.post() to send the serialized data to an application. In the callback function that executes on the completion of the request, you can insert a message letting the user know the message was sent successfully.
First, you will need a page with an HTML form. Save the following code as form-ajax.html:
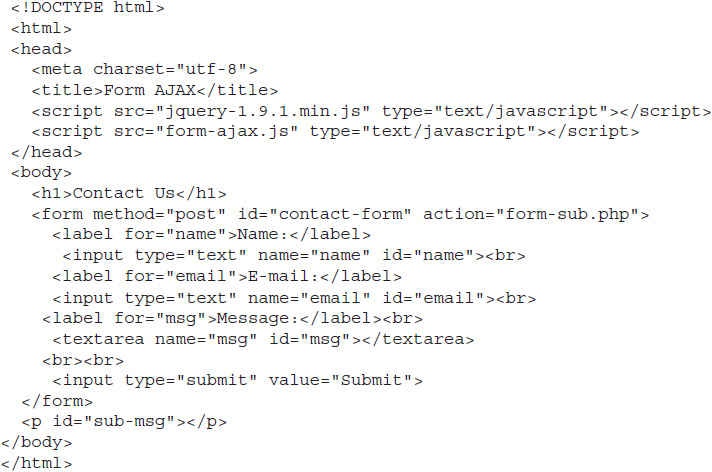
This sets up a simple form with three input fields. The name attribute is used with all of the fields. This is because serialize() will only include input fields that have the name attribute (used by server-side scripts to collect form data). Also, only fields that contain input are sent as part of the serialized string to the server. Thus, empty text boxes, unchecked radio buttons, and so on will not be included. You can use form validation (refer back to Chapter 8) to ensure that the fields you require data from have been completed.
To avoid another long PHP code example, assume that the server-side PHP program that handles the form (form-sub.php) can perform the following tasks:
![]() Redirect the user to a completion/error message if it is not an AJAX request/JavaScript is disabled
Redirect the user to a completion/error message if it is not an AJAX request/JavaScript is disabled
![]() Return a “success” message if the information was successfully submitted
Return a “success” message if the information was successfully submitted
The details on how to accomplish these tasks are handled by the server-side program, so you need only work on the client-side task of making sure the information is sent to it.
Using serialize() and $.post(), the following code submits the form data behind the scenes with an AJAX request and simply appends a message to the page when complete (save the file as form-ajax.js):
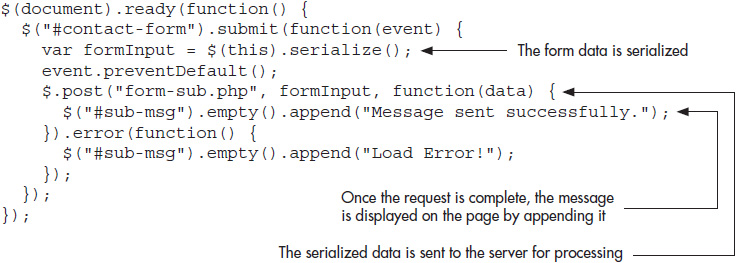
As you can see, the form is selected and submit() is used to handle the form when it is submitted. By using the form itself as the selection for serialize(), each form input field that is filled in will be sent as part of a formatted string to the server. For example, entering “blah” in all three fields will send the following string to the server:
![]()
This works the same way as if it had been submitted via a regular get or post request to the server, and the server-side program can handle the data in its usual syntax.
Since the data returned is not being used, all that displays upon completion is the message, “Message sent successfully.” You could also choose to return a message, the input data, or other items from the server-side program, depending on your needs. Figure 9-7 shows the initial page, and Figure 9-8 shows how the page would look with a server-side program returning a completed request, which displays the success message.

Figure 9-7 The initial page
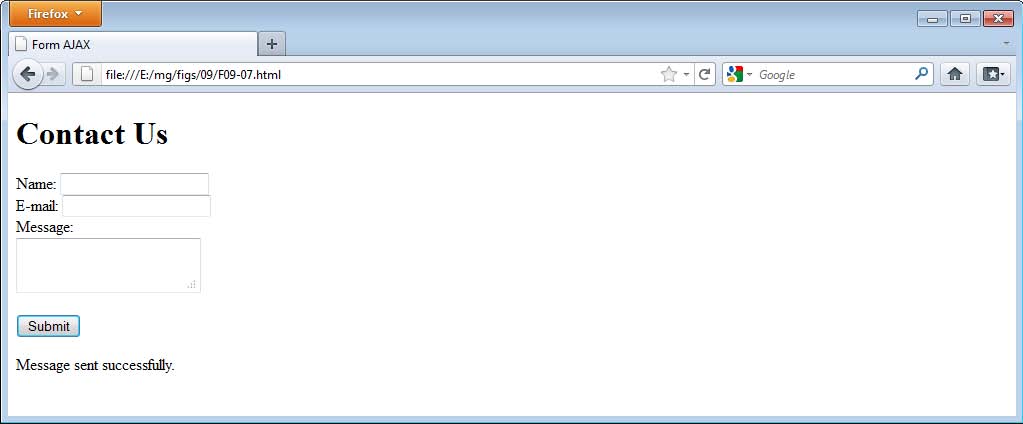
Figure 9-8 The page after successful submission
Try This 9-2
Practice Serialization
This project allows you to practice using the serialize() method to serialize form input. You will create a form that submits without reloading the page, like the example in this chapter. Upon completion, a success message will be displayed.
Step by Step
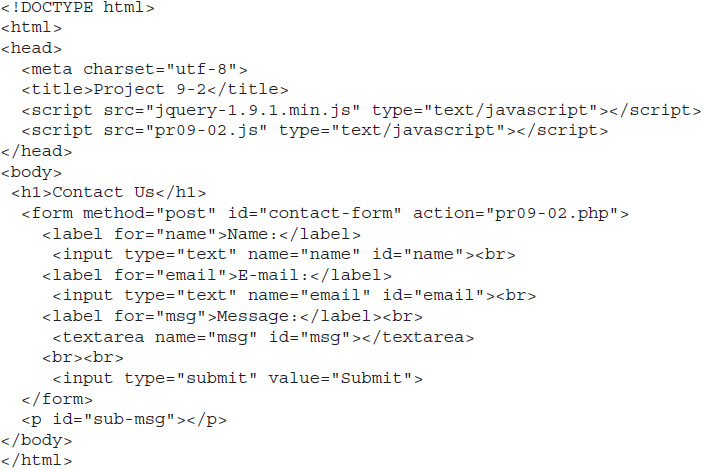
1. Insert the following HTML code into your editor and save the file as pr09-02.html:
2. Next, you will create an empty PHP file. This will allow the script to succeed if you are not able to work with a server (if you are able to use a server, you can adjust the program and/or language and write some code to return information if desired). Insert the following PHP code in your editor and save the file as pr09-02.php:
![]()
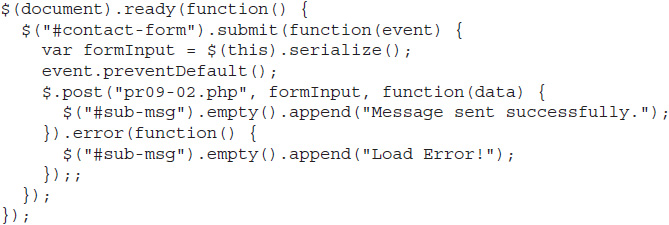
3. Create a JavaScript file and save it as pr09-02.js. Add jQuery/JavaScript code so that the form input is serialized and used as part of a post request using the $.post() method. If the request is successful, send a success message with the text “Message sent successfully.” If there is an error, send the message “Load Error!”
4. When complete, the code should look like this:
5. Open the pr09-02.html file in your Web browser. Fill in some form fields and submit the form to see the success message.
Try This Summary
In this project, you used your knowledge of the $.post() method and the serialize() method in order to serialize and submit form information behind the scenes without reloading the page. Once this process was complete, a success message was displayed for the user.
Security Issues and Further Information
Due to the risk of cross-site scripting and other potential attacks, AJAX requests must request files on the same server. This helps to prevent malicious code from running, or from another site changing the code from something helpful to something malicious.
If you do have a trusted source, however, there are some methods being drafted for allowing requests from another server, such as Cross-Origin Resource Sharing (CORS). You can read more about this at www.w3.org/TR/cors/.
When dealing with data sent to and from the server, it is often possible for users to input information of their own in some way. Form elements provide an easy way for users to input information, but get and post requests can also be sent information (the user simply needs to know the name of the file you are requesting, for example, view-products.php). Rather than running the program from your intended action, users could, for instance, type their own URLs for get requests to see if malicious code could be run.
It is best to always test user input before running a database query or displaying it on a Web page. Some resources for this, as well as for learning some common server-side languages, are provided next.
Further Information
Further information on AJAX and server-side programming is provided here so that you can further explore the topics.
AJAX Security
![]() AJAX Security Basics www.symantec.com/connect/articles/ajax-security-basics
AJAX Security Basics www.symantec.com/connect/articles/ajax-security-basics
![]() OWASP AJAX Security Guidelines https://www.owasp.org/index.php/OWASP_AJAX_Security_Guidelines
OWASP AJAX Security Guidelines https://www.owasp.org/index.php/OWASP_AJAX_Security_Guidelines
![]() Common Ajax Security Vulnerabilities and How to Resolve Them www.securitygeeks.net/2013/06/common-ajax-security-vulnerabilities.html
Common Ajax Security Vulnerabilities and How to Resolve Them www.securitygeeks.net/2013/06/common-ajax-security-vulnerabilities.html
Server-Side Programming Resources
![]() PHP http://php.net
PHP http://php.net
![]() ASP.NET www.asp.net/get-started
ASP.NET www.asp.net/get-started
![]() Ruby www.ruby-lang.org
Ruby www.ruby-lang.org
![]() Python www.python.org
Python www.python.org
![]() Java www.java.com/en/download/faq/develop.xml
Java www.java.com/en/download/faq/develop.xml
 Chapter 9 Self Test
1. The acronym AJAX stands for __________.
A. Asynchronous JavaScript and HTML
B. Alternative JQuery and XML
C. Asynchronous JavaScript and XML
D. Absolute JavaScript aside XML
2. While the term AJAX originally dealt with XML as the means of transferring data, it can now mean transferring data in any form between the client and the __________.
A. server
B. modem
C. phone
D. browser
3. In modern JavaScript applications, you can request data from the server using the __________object.
A. XMLHttpRequest
B. AJAX
C. RequestAJAX
D. ServerRequest
4. The jQuery library provides the __________ method for loading HTML content into a document.
A. getHTML()
B. load()
C. loadHTML()
D. HTML()
5. The jQuery library makes it possible to select a portion of the document using its selector syntax as part of the argument to the load() method.
A. True
B. False
6. AJAX methods load content __________.
A. synchronously
B. immediately
C. constantly
D. asynchronously
7. When using $.get(), if a response is received from the server that the document’s MIME type is XML, its callback function will receive the XML DOM tree.
A. True
B. False
8. The jQuery __________ method allows you to search all descendant elements of the specified element and select any needed elements using a second selector as the argument.
A. search()
B. locate()
C. find()
D. select()
9. JSON stands for __________.
A. JQuery Standard Object Nodes
B. JavaScript Object Notation
C. Java Server Over Network
D. JSON: Standard Object Notation
10. To load JSON data, jQuery has a global method named __________.
A. $.getJSON()
B. $.JSON()
C. $.retrieveJSON()
D. $.JSONget()
11. The jQuery library provides the global __________and __________ methods.
A. $.get(), $.getMore()
B. $.grab(), $.post()
C. $.get(), $.post()
D. $.getAJAX(), $postAJAX()
12. The $.get() and $.post() methods provide a __________ function that is executed if the request is successful.
A. return
B. callback
C. sendback
D. finished
13. You can use only PHP programming on the server side when performing AJAX requests.
A. True
B. False
14. In order to ensure that the user is aware of any errors loading data from an AJAX request, the error() method can be added to the chain after any AJAX method other than the load() method, which will execute any code within it if there is a load error.
A. True
B. False
15. The __________ method allows you to format form input data to be sent as a server-side request behind the scenes without reloading the page.
A. serious()
B. cerealize()
C. surmise()
D. serialize()