16
RENDERING
Even though it is something to consider with every creative decision you make, pressing the render button may be the last thing you do with your 3D application. (Some 3D applications offer a few postproduction options.) This is how your 3D scene becomes a pixelated 2D image. Of course, your scene is being rendered constantly throughout your 3D work: it’s how you see the objects you’re handling. This real-time rendering also occurs in games and uses industry programming interfaces such as DirectX and OpenGL which use the faster scanline algorithms and are supported by video graphics cards.
But to get your renders to look their best, you need to bring the more advanced technologies into play. Rendering is a whole field by itself, with studios employing experts in just that. Even though a native renderer comes with your 3D program, chances are you will end up using software that is a devoted renderer – those are often bundled with 3D software as well. There are a lot of rendering programs available and there is no single answer as to which one is best (see Chapter 19 for comparisons). This chapter gives you just a few basic settings. Your renderer will have many more options. During the exploration of shaders and lighting effects, a few landmarks were provided that should help you to navigate those options.
Image Size and Aspect
This is a setting you may have considered while working with your camera, but it is usually controlled in the render settings. You will need to know how big your final output is going to be. This depends a lot on what you want to do with it. To view on the web, keep in mind that the standard quality (as far as resolution goes) for the web is 72 dpi, or dots per inch – which is pixels per inch. For television, the maximum you will need is 1920 × 1080. That is the resolution for full high-definition quality images on television. Film, of course, is much higher. For printing, you will need something quite large if you want it to look good. Printing quality resolutions are usually 300 dpi. This means that if you want something in A4 format, which is 210 × 297 mm or 8.27 × 11.69 inches, at 300 dpi you get 2480 × 3508 pixels. The only limits to the size of your image are how much computing power and time to render you have.
Something else you want to consider is the aspect ratio (Figure 16.1). This is the ratio of your image’s width to its height. A4 is a standard print ratio, used for magazines and books. Other common aspect ratios are the standard PC monitor (4:3) and television (and monitor) widescreen (16:9). While you should keep these in mind for projects, don’t be afraid to experiment with other aspect ratios for artistic effect.
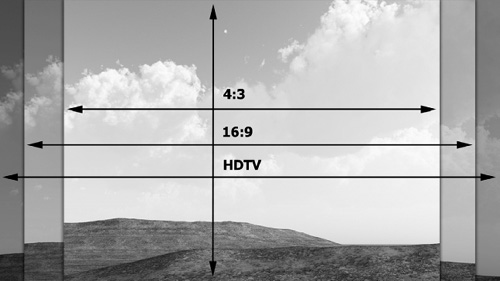
Figure 16.1 Common aspect ratios.
Quality and Optimization
Before you render, you’ll want to manage settings for quality. One of the easiest things to do right off is to use the presets that are often available in render settings. Many of these presets contain optimizations for special cases, such as motion blur or caustics. Just clicking on the presets and exploring what has been changed can help you to get started.
However, settings that affect the quality of the image do not just reside in render settings. You will find things throughout the production. With modeling, you need to consider the right polygon count against render time. In shaders and materials you need to choose which shader is optimized for the desired effect, the resolution of your textures, and how light is transmitted and emitted from objects. In lights, you need to choose the type of lighting as well as settings for shadows. With every setting related to quality, you should keep in mind that after a while, higher settings give no noticeable improvement. Always choose the lowest settings possible to get an acceptable result. The audience is not going to be looking at the image zoomed in to 200% of its size.
Antialiasing
One of the problems that can crop up when rendering is seeing artifacts such as sharp, stepped edges, noise, or flickering in animations. This is aliasing, and you can get it even if the image has high resolution (Figure 16.2). Remember that rendering algorithms gather data from the scene to give a pixel its color. To get the most accurate color for the pixel, the renderer needs enough samples per pixel. Increasing the samples per pixel will do this for the entire image, so you should use the lowest settings possible to get the result you want. There is also the possibility of adaptive sampling: the renderer sees if there is high contrast or detail and increases the sampling only in that area, while keeping lower sampling in other parts of the image. This will tend to improve things where they are needed most.
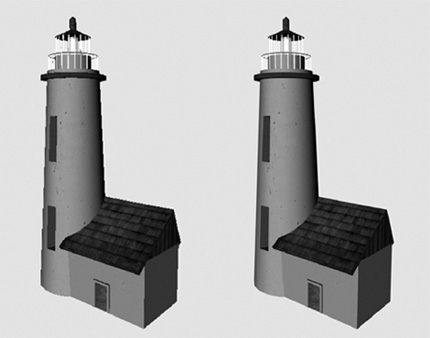
Figure 16.2 Antialiasing techniques before and after.
Another cause of aliasing can be having texture maps that are of too low a resolution for the object they’re applied to. In that case, you will need to edit the texture image in a 2D application and increase its resolution.
File Type and Naming
You can save your image or animation as one of many file types. If you are just saving a still image, you will probably want a JPG for viewing onscreen, such as on the web, and a TIFF for using in print. But, if you intend to do some postproduction work in something like Photoshop, and especially if you’re rendering more than one channel, either you need a file type that supports layers such as TIFF or PSD or you will need to render several passes.
For an animation with more than one channel, you need something like RPF, RLS, or EXR (for HDR). If you do not need to use multiple channels you can use JPGs for animations as well.
When making an animation, it is generally better to save it as a series of images, for any postproduction work required. You will need to follow some kind of naming convention, such as name_#.extension, and also specify a output path to save to. It is possible to save it as a composite animation file such as MOV (QuickTime) or AVI, but this has a serious disadvantage. If rendering stops for some reason, like a computer crash, then you will have lost all the rendering that was accomplished for the animation file. If you were rendering to a series of images, you will have only lost a single image and can start the render running again from the point at which it failed.
Bucket Rendering
Now comes the question as to what is rendered when. An image is usually rendered in tiles, piece by piece (Figure 16.3). The advantage of this is to separate the parts of the image that are difficult to render from easier areas. In many applications, you can control the size of your bucket. For complex scenes, smaller bucket sizes will help to break down the tasks and increase the speed of the render. But for simple scenes, smaller bucket sizes can actually slow down the render. This is because every time a bucket tile is finished, the image is updated. This adds to the load on the processor, which slows things down. With modern computers, however, this is less of an issue and in some cases user control has been removed.

Figure 16.3 Bucket rendering.
Batch Rendering
Let’s say you would like to have several non-sequential frames rendered without needing to start the render again each time a new frame is started. This is where batch rendering comes into play. A batch file is a set of commands given to the computer to do, one after another. With batch rendering, the rendering often occurs on a different thread. This means that it is running as if it were a different program. Using batch files, you can queue several rendering tasks at the same time, so that once one is finished, the next starts rendering. Since you only need the render software open to do this, and that software can read a project file, you can even have it render images from several different projects. It is often handled using command prompts or scripting, though sometimes there will be a user interface to create a batch file and start it. Recent versions of some applications allow you to keep working while the batch is rendering. Batch rendering is not very practical unless you have quite a few images to do or you wish to leave the computer while two or three pictures are rendering.
Network Rendering
If you need more than that, such as with an animation or a large and complicated image to render, you can recruit the help of other computers. With network rendering, each computer involved needs to have a client – a smaller version of the renderer that will communicate with the server. In a home studio, your network will be the computer you have been working on, and any spare computers or the computers of your friends or family. The server application will dole out the tasks to each computer, which will render that portion and send it back to the server, which will then piece it all back together. These could be either tile buckets, in the case of distributed bucket rendering, or whole frames. You really do not want to get a network involved for smaller rendering tasks, since it will just slow things down because of the communication and task organization that must occur. In a medium studio, you may be fighting for access to the render farm (what a network of computers devoted only to rendering is often called); in a larger studio, you would probably just hand over your work to a render technician.
Frame Buffers
All that graphical data bouncing around has to be stored somewhere before it is rendered as an image or to a file. The frame buffer can refer to two things: the actual hardware that is capable of storing that data or the actual store of graphical information. In some cases, this can be viewed.
Spherical and Panoramic Renders
To render a sky map or a reflection map, you will need to have a spherical or panoramic render (Figure 16.4). A few applications do this directly. With others, you will need a special lens shader. For a full spherical image of the scene, one method is to have a reflective sphere, render that, and then unfold it in a 2D editor to get your map.
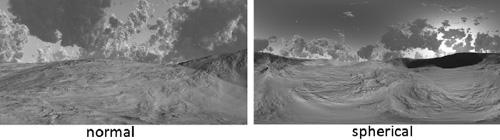
Figure 16.4 Spherical rendering.
Stylized Renders
Your goal may not be to get an image as realistic as possible, but to create an artistic or useful effect (Figure 16.5).As an example, the lined illustrations of 3D objects in this book were created using contouring. This required that contours be turned on in the render settings and adjusted in the shader. You can make your renders look more illustrated or painterly, and change their color saturation, exposure, or any number of things. Playing around with lighting, shaders, camera settings, and render settings can enhance the mood of your images and bring another level to what is possible with the computer-aided imagination.
Figure 16.5 Stylized rendering.
Layers
An image can be rendered with several layers (also called passes, or elements). These layers can contain different information such as lighting maps, shadows, and Z-depth (distance from camera). They can be used for postproduction and compositing (Figure 16.6). This gives you a lot of power to edit your image without having to rerender it. For instance, if you were to render the lighting map for each light and set it to white, you could then change both the brightness and the color of the light in postproduction. Another powerful tool to use in conjunction with this is the ability to hide objects from render. This lets you use very high-quality settings for only some parts of the image, forgoing them where they are not needed. Using this and Z-depth maps, you can recomposite the image back together. You can use it to fake the depth of field by blurring some parts of the image and not others; render bubbles drifting in a scene; or render an object with motion blur moving behind glass – the transparency makes motion blur effects take a long time, but if you render the glass on a different layer that problem is solved. Many special effects such as particles are also more efficient to render separately. Computer-generated effects are incorporated into live footage using layers.

Figure 16.6 Layers.
Postproduction
The work after your render is an important part of getting your image or animation just right. In postproduction, it’s a lot easier to do some things such as adjust the lighting and color balance. Various effects can be added as well. For instance, if you didn’t render a lens glare effect, but decide you want it, it is fairly simple to do with a 2D editor.
Postproduction is when you do the compositing work. When you render objects that are meant to be combined with other objects or with live footage, part of the information included will be an alpha mask, giving the 2D application the information it needs to add only that object into the scene and not the background surrounding the object. In this way, not only can you tweak color and lighting, you can also nudge the arrangement a bit. This is one reason why shadows need to be rendered in a separate layer. Also, as you are arranging things in the image, you need to make sure the lighting intensity and direction match. So if you rendered these objects in the same scene, you cannot move them too far from where they were originally.
An efficient way to animate is to copy old school methods. If a background will be static, then instead of rendering everything in that background for all your frames, you can make just one render of the background. Then you can render all the moving objects and creatures, and then composite the single background image into every frame. With 2D video editors, this is a simple thing to do.
A Batch of Robots
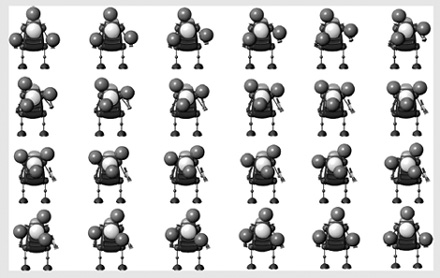
Step 1
Open up the scene with the robot animation in it. In your render options, set your quality so that the minimum sampling is at least 0 and the maximum is at least 2. This is the number of sample rays put out for each pixel. When it is less than zero, this means that there is only one sample ray for more than one pixel. Set your aspect ratio to be a square, and make it at least 1000 × 1000. Set the name convention and file type so that it is something like the Juggler0001.jpg. The numbers at the end of the filename will increase with every frame. Set it to render frames 1 –24. Render it as a sequence of images. You may have played with the lighting, but if not and if you want a white background you will probably find it within the environment settings on either the camera or the render options. Start a batch render.