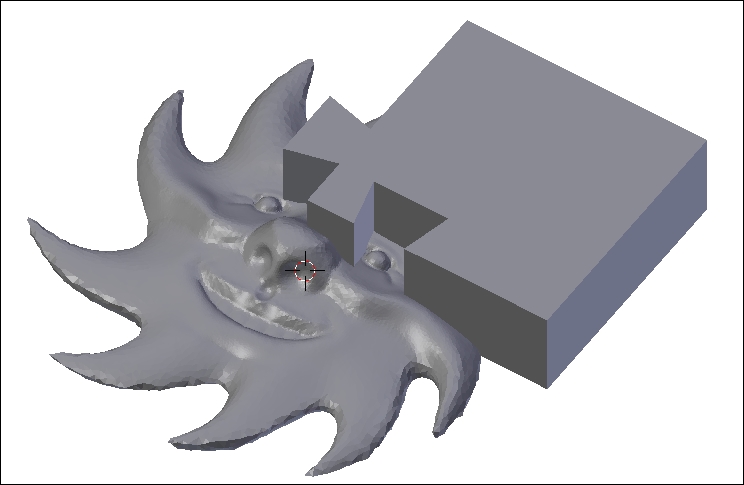
Now, let's build a basic puzzle piece that can be used to turn the sun into a puzzle.
Let's get started with the basic shape of a puzzle piece:
- On the menu at the bottom of the 3D View, locate the layers pane, which looks like an array of connected boxes. Each box is a separate layer.

- Click on an empty layer:

The sun will disappear, but that's simply because it's on another layer, the one with the orange dot in it. Organizing objects in different layers in Blender is a great way to ensure that things don't quickly get out of hand and to ensure that there is no need to hide or unhide individual objects. In addition, multiple layers can be viewed at once if desired, so you can work on related objects. For now, we'll use this empty layer to start building our puzzle object:
- Add (Shift + A) a Grid object:

- Under the Tool Shelf to the left of the 3D View are the properties of the new Grid. Before clicking on anything else, change the X Subdivisions and Y Subdivisions values to
6: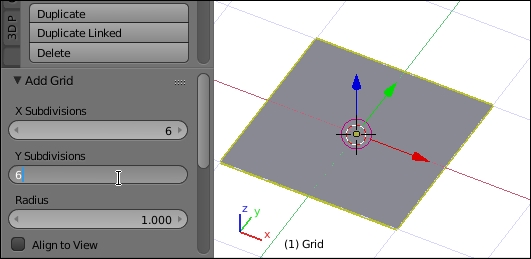
The Grid subdivisions won't be visible until you check its geometry by toggling Edit Mode quickly. For later steps, though, this piece needs to be positioned in the back-right quadrant of the 3D grid that we're working on. In other words, one corner of this grid needs to be sitting on the origin.
- Move (G) the grid along the X axis (X) 1 unit.
- Then, move (G) the grid along the Y axis (Y) 1 unit.

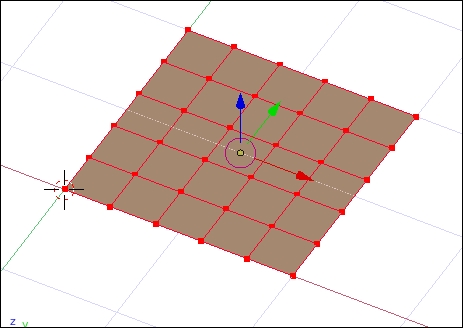
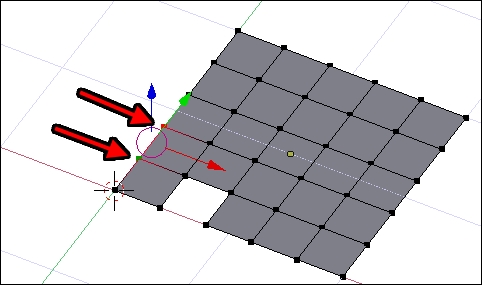
- Enter Edit Mode (Tab) and deselect all points (A):
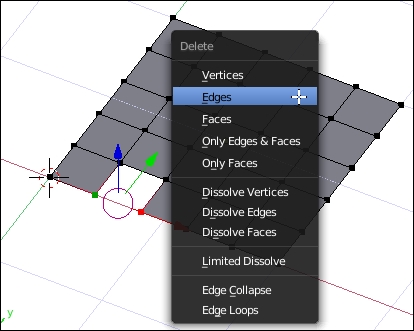
- From the origin, select the second and third vertices to the right:

- Delete (X) the selected Edges:
- From the origin, select the second and third vertices in the Y direction:
- Extrude (E) the selected edge
-0.4units. Be sure to type the amount to extrude on the keyboard, remembering to hit the - key when you do.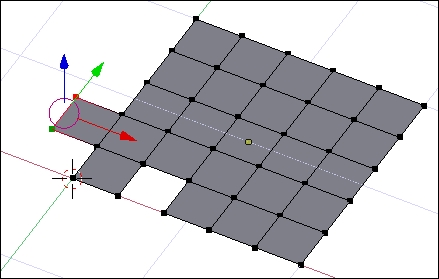
- Scale (S) the selected edge by a factor of
1.5. Again, be sure to type the scale factor in.
- Select the two vertices at the top of the hole made when deleting the edge earlier:

- Scale (S) this edge by a factor of
1.5as well: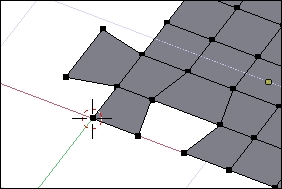
- Leave Edit Mode (Tab).
This creates the basic, but flat, shape of an interlocking puzzle piece. Because both the tab and hole are made with complementary actions, they will mate perfectly.
Now to make the puzzle piece the appropriate size for the sculpted part:
- In the menu at the bottom of the 3D View, locate the Pivot Center drop-down menu, which looks like two overlapping circles by default:

- Click on the Pivot Center dropdown and select 3D Cursor:

- Be sure the 3D Cursor is still at the origin by re-centering the view (Shift + C) if necessary.
Note
Changing the Pivot Center allows control of the point that the scale and rotation actions occur around. In this case, because the puzzle shape has been moved so that its corner is at the origin, the scale operation will keep that corner where it is as the rest of the piece grows. Notice how this works in the very next step.
- Scale (S) the puzzle shape up some to make the next step easier.
- With the puzzle shape still selected, hold down Shift and click on the layer that has the sun model in it:

- Scale (S) the puzzle up until it is bigger than the sculpted shape, along the X and Y axes:
Adjusting the view and switching to Wireframe view (Z) can help with this step. The puzzle piece should completely cover a quarter of the sun model with the tab and blank completely inside the face without getting too close to the edge so that it can be a solid connection. If the rays of the sun reach too far to make this possible, the puzzle piece may have to be edited in Edit Mode to extend the edges along the X and Y axes until it fits.
- Apply (Ctrl + A) the scale operation.
It is important to apply the scale operation because the modifiers we'll be using work on the object before scaling, and this project requires some precise control on the final model.
Let's get started with the shaping of the piece into an object:
- With the puzzle shape selected, in the Properties Panel, locate and click on the Modifiers tab (the one that looks like a wrench):
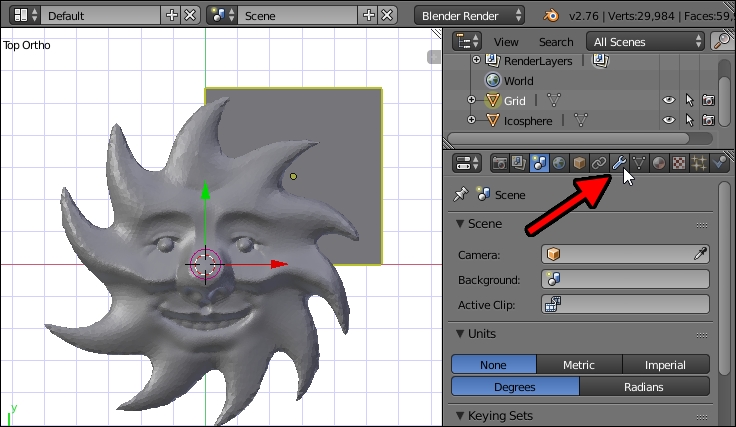
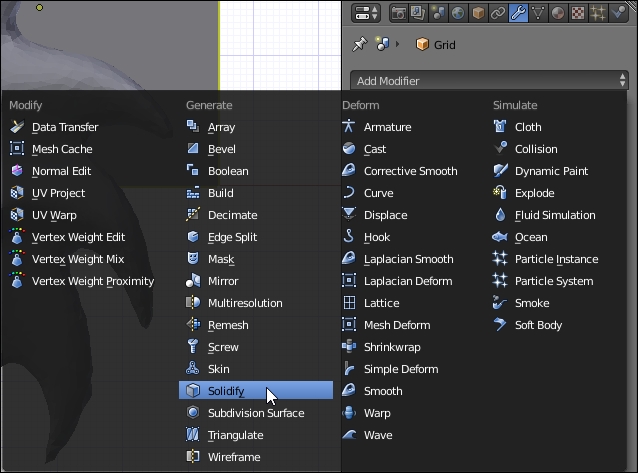
- Click on the Add Modifier button and select the Solidify modifier:
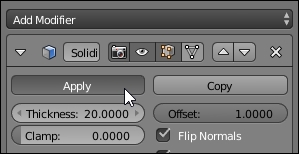
- From the Solidify modifier properties, change the Offset value to
1.Note
The Offset property tells the Solidify modifier where the newly solid shape should be created relative to the original flat shape. An offset of
0creates a solid shape with the original shape in the exact middle. An offset of-1makes the original shape the top of the solid shape, relative to the normal of the flat shape. An offset of1makes the original flat shape the bottom of the solidified shape. - Change the Thickness property to something high enough that makes the puzzle piece thicker than the sun model:

If the view is adjusted to look up from below, it can be seen that the puzzle shape, now a puzzle blank, doesn't extend to the bottom of the model. This is perfect because 3D prints need a flat bottom, and the puzzle blank will define a perfectly flat bottom, essentially cutting the bottom flat. This is nothing to worry about.
When trying to make two objects that will interact with each other, such as the pieces of a puzzle, having pieces that are mathematically perfectly aligned is actually a bad thing. Edges in the design software that overlap perfectly will be too tight when made real to be able to slide past each other. So, the puzzle piece needs to be shrunk, just a little bit, to make it a suitable puzzle piece. Here's how you do it:
- From the Solidify modifier, click on the Apply button:
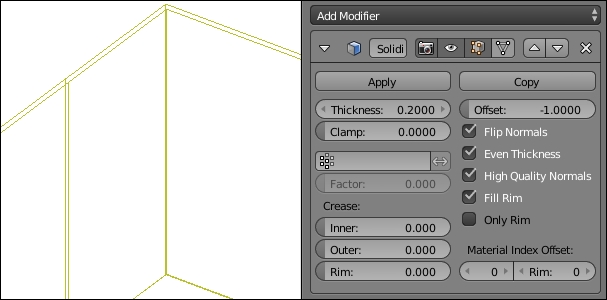
- Click on the Add Modifier button and again select the Solidify modifier. On a flat object, the Solidify modifier turns it into a solid. On a 3D object, the Solidify modifier can be used to create a shell of controlled thickness.
- Make sure the Offset value is
-1. - Adjust the Thickness value to
0.2. - Select the checkbox options for Even Thickness, High Quality Normals, and Flip Normals (leave Fill Rim checked):
Besides the model getting darker in the 3D View, there's no real indication of what the Solidify modifier did. Why did the model get darker? It is because its outside shell's normals are now pointing in the wrong direction as the Flip Normals option was checked. That's just a fancy way of saying that mathematically, the shape is now inside out, but that's okay because the inside-out shape is eventually going to be thrown away, with the inner shell being kept.
In Wireframe view (Z), on zooming in a bit on the edge of the piece, it can be seen that inside the puzzle piece is what looks like another, slightly smaller puzzle piece.
The next step is to get rid of the old, inside-out shell and keep just the slightly smaller puzzle piece.
- Apply the Solidify modifier.
- Enter Edit Mode (Tab).
- In the menu at the bottom of the 3D View, go to Mesh | Vertices | Separate | By loose parts, or press P on the keyboard and choose By loose parts in the menu that pops up:

- Exit Edit Mode (Tab).
There are now two puzzle shapes, one slightly smaller than the other. This can be confirmed by looking at the outliner, like this:
- Deselect everything (A) and select just the outside puzzle blank.
- Delete (X) the outside puzzle blank, leaving just the smaller inside one. You should see something like this: