Kim found a wrench on Thingiverse that she likes for tightening a GoPro camera, but wished the handle was longer. The link to the wrench is http://www.thingiverse.com/thing:185739.
Simply scaling the model is easy to achieve with other programs like Netfabb (www.netfabb.com) or your desktop printer's slicing program. Scaling would make the handle longer, but would also proportionally increase the size of the wrench head, making it too large for its purpose. Using SketchUp she easily lengthened just the handle.
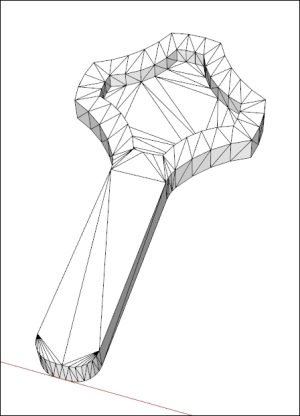
She downloaded the .stl file and opened it in SketchUp. Since she prefers using SketchUp 8, she didn't have the option to merge coplanar faces like we discussed in Chapter 2, Setting Up SketchUp for 3D Printing; the model came in triangulated, which is normal for .stl files. It looked like the following diagram:
Kim checked the dimensions of the imported wrench right away, to see if they made sense with the size of her GoPro. Fortunately, they were correct. If not, she would have gone back to ensure the units were correct in the Import Options, or scaled the model using the Tape Measure tool, as we discussed in Chapter 3, From 2D Drawing to 3D Model.
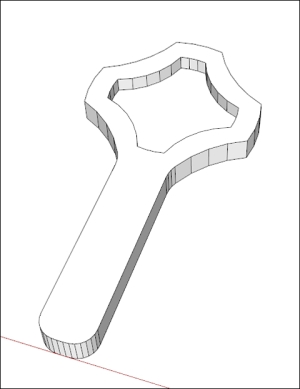
Since it's harder to work with triangulated models, Kim used the CleanUp extension to remove the unnecessary lines. The link to CleanUp is http://extensions.sketchup.com/en/content/cleanup%C2%B3. After running the extension with the Erase Stray Edges option checked, the model looks like the following diagram:
To extend the handle, Kim selected all the edges and faces that form the handle end. This is quickly achieved using the Select tool and a left-to-right selection box, as shown in the following diagram:

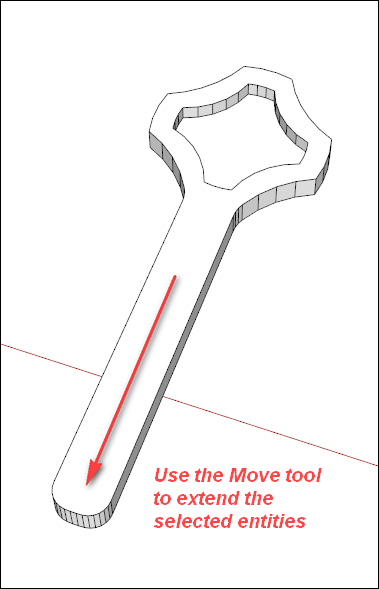
Next, Kim got the Move tool and moved the selected entities along the Green (Y) direction until the handle was as long as she wanted. She used the Tape Measure tool to check the length. The following diagram shows the lengthened handle:
Kim noticed that she can save some weight in the final part by removing some material. Using the Offset tool, she creates a new face in the center of the wrench head, as shown in the following diagram:

She also used the Eraser tool to clean up the extra lines created by the Offset operation, as shown in the following diagram. Leaving the extra lines would prevent her final model from becoming solid.

Using the Push-Pull tool to push the new face through to the back of the model, a neat hole is formed as shown in the following image.
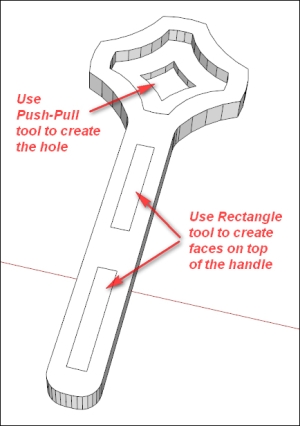
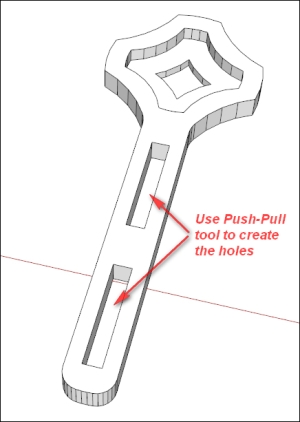
Kim noticed the opportunity to reduce material in the handle as well, so she used the Rectangle tool to create two faces on top of the handle, and the Push-Pull tool to create the holes. Kim was happy at this point, and exported the model as an .STL for 3D printing. The following diagram shows how the final model looks:
