To get the full benefit of the original textured model, we can print this model in color using the same textures applied to render the model. Refer to Chapter 7, Importing Terrain and Printing in Color, for requirements of printing in color.
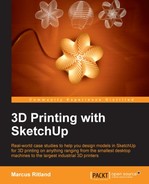
Because the color printers are powder-based, the prints are self-supporting and we can combine the parts into two solids. We want the roof to be removable so that the interior layout is visible, as shown in the following screenshot. By combining the two roof parts together, and the interior and exterior walls together, we can minimize the post-printing assembly work.
Looking at the requirements for this material from the print service i.materialise http://i.materialise.com/materials/multicolor/design-guide, we can see that multiple parts are allowed in one print file, so this approach will work fine.
The i.materialise service is a good choice for beginners printing color SketchUp models because they accept the .SKP format directly. Other print services may require you to convert color models to .DAE or .WRL, and to combine all the textures in the file into a single texture map containing all of the textures in a model.
The next step will be to apply textures to the new model. Since image textures in SketchUp have a real-world scale, for texturing, it's best to scale the model back up to life size. Turning on the original model to use as a reference, apply textures and colors to the model. In this step, SketchUp's (projected textures) may not work for 3D printing.
Tip
Use the eyedropper Sample tool to quickly select a material from the original model. To use the eyedropper, select the Paint Bucket tool, then hold down the Alt key [Windows] or Command key [Mac] and select the material you want. Release the modifier key to paint the new model with that material.
To break a large face such as the floor into multiple textures, simply draw a line across the face where you want to change the texture. The line must be connected to edges on both ends to break the face. Now you can apply a different material on each side of the line.
When you complete texturing, every front face should have a texture applied, and no back face should be textured. To easily check this, change the style to show a bright color on the front face, as we discussed for back faces in Chapter 2, Setting Up SketchUp for 3D Printing. If you see an untextured face, this is the time to fix it. Use Section Plane to check the interior walls.
To check the back faces, simply reverse all of the faces; triple-click on the faces to select all faces, right-click on the model, and click on Reverse Faces. While all the faces are still selected, apply the default material to them to quickly ensure that there are no unwanted textures. Applying the default texture to the back faces will not interfere with the colored textures on the front faces. Now, you can right-click on the faces and click on Reverse Faces a second time to return the textured faces facing out.
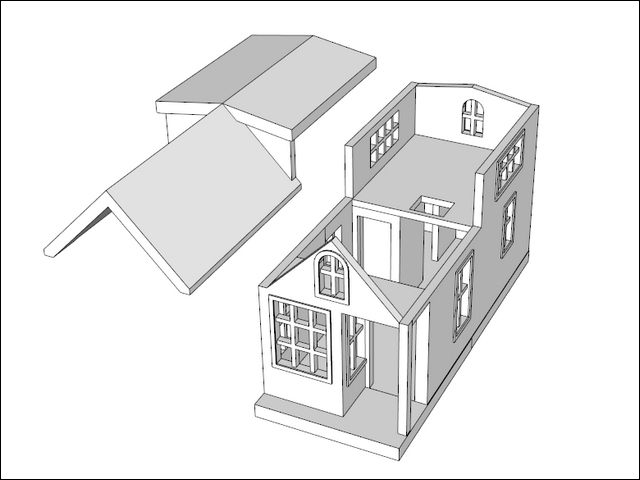
Repeat this process for both the roof and walls' groups, making the model look like the following screenshot:
Check the model one last time to be sure both groups are solid, and fix them if necessary. Now scale the model back down to printing size. Save the model as a new file, and delete everything but the two groups that will be printed. Since i.materialise accepts SketchUp files directly, this is the model we'll upload for printing.