
So, you've gritted your teeth, girded your loins, and opened up the rotoscoping chapter. There's no way to paint an utterly pretty picture, so to speak, of the task you face: Rotoscoping and paint tools are generally a last resort, employed when there is no other way to fix your matte. Rotoscoping is the art of fixing a shot frame by frame, generally using masks. Cloning and filling using paint tools are variations on this task.
To compound matters, After Effects did not gain its fame as a rotoscoping tool. You can get good results with the program, but its interface and tools aren't set up expecting rotoscoping to be your main task, as they are in such dedicated programs as Curious gFx Pro or the no-longer-updated Pinnacle Commotion.
Although sometimes you just can't get around having to clean up footage by hand in After Effects, it's often not as bad as you think if you follow a few basic guidelines:
Ascertain that rotoscoping is definitely necessary. Novices and even pros sometimes will bite the bullet too quickly and assume it's time for frame-by-frame work without looking at other ways to break down the problem at hand. Specifically, make sure that these other tools won't help at least part of your problem:
Keep it simple. This is the number one piece of advice for any rotoscoping the world over. If you're articulating a mask, do it with as few points as possible. When keyframing that mask, use as few keyframes as possible.
Paint is a last resort. It is very hard to re-create realism with paint tools, and they will always be slower than masks. Assume that paint is an option only when you can't achieve a similar result with a mask. There are, of course, exceptions, such as cases in which you can easily track a paint stroke, and cases in which you're rapidly painting holes in an alpha channel.
Review constantly at full speed. Don't waste time heading down the wrong road. Carefully assess your footage via a RAM preview every few frames, and determine if your approach is working. If it's not, be prepared to switch tactics.
Combine strategies. Effective rotoscoping may employ a mixture of keying (whether color keying or a hi-con matte), tracking, animated masks, and paint. Start with the one that protects the most crucial edges, and work your way down to the cruder stuff.
Note
A hi-con, or high-contrast matte, is created by taking luminance data from an image—typically one or all of its color channels—and raising the contrast to create a luminance matte, typically to hold out areas of the same image. Chapter 6 explores this process in greater depth.
With these guidelines in mind and a solid grasp of the fundamentals of creating selections (remember Chapter 3, “Selections: The Key to Compositing”), you're ready to consider some rotoscoping specifics.
I've said it before, and I'm saying it again here: When animating, or articulating, mattes, keep it simple. All of the strategies offered here are for setting up and animating your mattes with as few steps as possible. Not only will this save you time in setup, you'll have fewer elements to fix if something goes wrong. Each new edit you keyframe introduces the possibility for more error. Focus on staying simple.
The first question to decide when starting a roto job is whether you want to mask in the Composition window or in the Layer window. The advantages of the Composition window are that you can see the layer in the composition and that it updates live as you work. This approach, however, does have several potential pitfalls:
On a large scene you may have to wait for the screen to redraw for each point you draw.
If the layer you are masking has been transformed, particularly rotated in 3D, you may find it difficult to edit a mask cleanly.
You may need to select and lock all of the other layers to be sure that you're editing the correct layer, particularly if you're creating more than one mask.
As you create the mask, the masked areas disappear, which can make it impossible to draw complex shapes.
You lose some of the useful selection tools that exist only in the Layer window.
I could go on, but by now, you have probably guessed that opening the Layer window is generally preferable for creating masks. Tweaking mask points in the Composition window is often useful, but I recommended this only as a secondary approach. If you start to create a mask in the Composition window and realize you're in trouble, you can go to the timeline and double-click the layer; your mask will remain live in the Layer window, ready for you to continue drawing and editing wherever you left off.
The Layer window includes a couple of important pull-down menus you should be aware of: View and Target. You select your display mode from the View menu (Figure 7.1), choosing Masks, Anchor Point Path, or any effect you might have applied to this layer. Keep it set to Masks (the default) to be able to edit masks in this window. If Anchor Point Path is selected, you may be unable to edit your masks. If you choose None or any effect, your masks will disappear altogether.
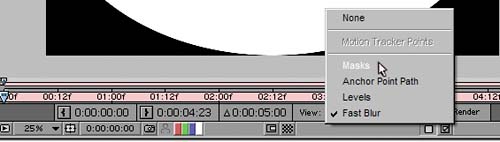
Beside the View menu is a Render check box; with a mask selected, disable it if you want to see the full frame source of your footage without disabling a mask (Figure 7.2).

The Target menu resides along the bottom bar of the Layer window (Figure 7.3) and does one thing. It enables you to select a target mask to replace if you draw (or paste) in a new mask. This would seem to be a boon for rotoscoping, allowing you to draw in a new mask at any time, but there's a gotcha: The first vertex of the mask shape (which you can control) and the direction in which its points are numbered (which you can't) must match the target's.

Figure 7.3. Choose a mask from the Target menu and start drawing a new mask (or paste in a mask shape). The target mask shape will be replaced.
An invention unique to After Effects among Adobe applications, RotoBezier shapes are great for creating a mask that has to change over time because they are much simpler than Bezier shapes (discussed in Chapter 3). Fewer controls, theoretically at least, mean less ability to inadvertently create the pops and bubbles (also known as boiling mattes) that can send your rotoscoping job in the wrong direction (Figure 7.4).

Figure 7.4. With moving footage, Bezier shapes are prone to crimping; managing the length of the handles can lead to error.
Note
The first vertex of the mask is slightly larger than all of the rest. If you're having trouble matching an animation between shapes and need to specify it, context-click on the mask in the Layer window and select Set First Vertex from the resulting menu. More on First Vertex in the Morphing section of this chapter.
There's only one problem: RotoBeziers can look really, really wrong while you're in the midst of setting them up. If this is a problem, you can even try initially setting up your masks as Beziers and then switch them to RotoBeziers for animating. To use RotoBeziers from the start, choose the Pen tool (G key selects it, pressing G repeatedly toggles through the associated variations) and check the RotoBezier box that appears in the Tools menu. To switch a mask shape from Bezier to RotoBezier after, or even while, creating it, context-click on the shape and look for the RotoBezier toggle halfway down the list (Figure 7.5).
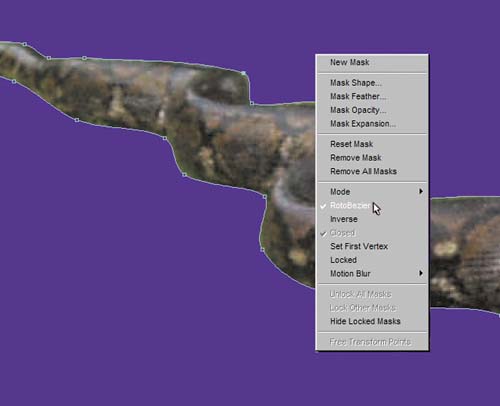
Figure 7.5. There are lots of useful options tucked away in the Mask context menu, including the ability to lock and hide other masks, to close the shape, and to set the first vertex for use with such features as Smart Mask Interpolation and the Reshape tool.
In RotoBezier mode, try drawing a mask around an object. If possible, choose something that has a combination of curved edges and corners. For now, don't worry about how well the mask conforms to the edge, just try following this one instruction: Place a point at the center of any curve and on any corner you can perceive (Figure 7.6). As using Beziers did, this takes practice, so don't worry. The mask isn't initially going to look right until you adjust tension on the points.

Figure 7.6. Your first pass with RotoBeziers should be fast and will have inaccuracies. Just place a point at the apex of each curve you find, as well as at each corner. The next step is to tighten or loosen individual points.
Okay, now how do you edit this RotoBezier? The literal key to your success is the Alt/Option key. After you've drawn your final point, keep the Pen tool and all of the mask points selected and hold down Alt/Option. You will see a double-ended arrow appear. This is the Adjust Tension pointer. Dragging it to the left increases tension (counter-intuitive, but you get used to it quickly). Try this, and all of your points become corners (Figure 7.7). Now slide it in the opposite direction, and all of the points seem to have had their Bezier handles extended to the limits.
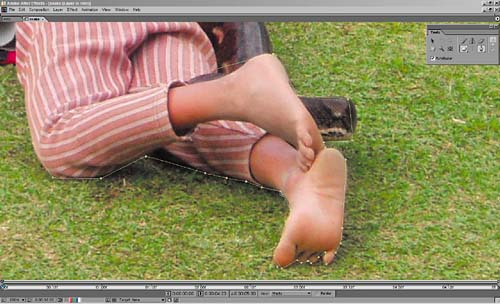
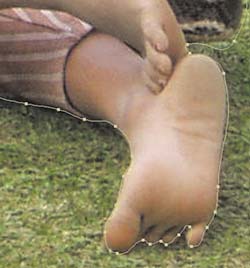
Figure 7.7. Contrast all RotoBezier points at full tension and no tension (inset) to see how easy it is to adjust. Generally you will adjust points one or two at a time, however, not all at once.
Although it does help dispel the myth that Beziers are easier for shapes that consist mostly of corners, dragging the Adjust Tension pointer is not how you will edit RotoBeziers in most cases. Instead, after laying down the initial points of a RotoBezier mask, deselect it (Control+Shift+A/Cmd+Shift+A) and then Alt-drag the Pen tool on each point that needs its tension adjusted.
Note
If the Selection tool (V) is active, use Ctrl+Alt (Cmd+Option) to activate the Adjust Tension pointer.
You can freely add or subtract points where needed by toggling the Pen tool (G key; look for the pen cursor to add a plus or minus sign beside it). With the Pen tool in Add mode you can also simply select a point by clicking on it, and deselect a point by Shift-clicking on it. This means that you never have to switch to another tool—a big advantage over Beziers (Figure 7.8).

Figure 7.8. You can use the Add Vertex tool (one of the Pen tool's modes) simply to select an existing point, without creating a new one. This means that you can always work with the Pen tool active, using the G key to cycle through its variations.
But the thing you probably still don't like about RotoBeziers is that the shape is so dissatisfying when you first lay in your points. So now that you're used to the basics of how RotoBeziers work, try drawing another mask this way: When you place a point on a corner, before moving on to draw the next point, Alt/Option-drag to the left on the corner point. Voila: It's already a corner, and your shape is much closer to final on the first pass (Figure 7.9). As you become more skilled with RotoBeziers you may even become adept at preselecting other tensions, although it's not necessary.

Figure 7.9. While drawing a RotoBezier shape, you can add a corner on the fly. Before moving on to the next point, Alt-drag (Option-drag) to the left to tighten the corner point. Draw the next point or two, and you see clearly that you have a corner and that your shape is already more accurate.
Or you can just draw the initial shape as a Bezier, if you prefer that, and consider context-clicking to change it to RotoBezier once you're done if you think you're going to want to animate that way. The real advantages of RotoBeziers show up when you animate them; you take advantage of their ability to resolve transitions with fewer variables than Beziers.
Whether you've been won over to RotoBeziers for creating animated masks or not, the strategies for masking a complex moving shape are largely the same. Here are the main points:
Start with whatever matte you can pull to keep as much of the edges as you can. If no color key is possible, carefully examine all three channels of the footage for the one with the greatest contrast and pull a hi-con matte.
Note

Although each new mask keeps the same color as its predecessor by default, your life will be made easier with overlapping mattes if you give each one its own color, and if you choose colors that are easy to see against your source. In the Timeline window, select the masked layer and press M to reveal its masks, then click on the colored square beside each mask to edit its color in the user interface.
Narrow down the work area to just the section you need for your shot. Do not rotoscope even one frame more than you need.
Working Quickly

Here are some tips for working more efficiently with masks:
The G key activates the Pen tool and cycles through its modes to add and subtract mask points.
Alt/Option activates the Adjust Tension slider, if the Pen tool is active.
Ctrl+Shift+A deselects the active mask; Ctrl+A activates all masks.
The V key activates the Selection tool. To switch a mask to Translate mode, double-click it with this tool; your mask will transition to Free Transfer mode and be outlined by a gray box with a center that you can offset for rotation and scaling.
With the Selection tool active, context-click on a mask for quick access to most of its editable properties.
If you have a scroll wheel on your mouse, scrolling with the Layer window active zooms in and out of frame. Holding down the spacebar activates the Hand tool for fast panning around the frame.
To replace a Mask shape, select the shape from the Layer window's Target menu and start drawing a new one; whatever you draw replaces the previous shape, creating a Mask Shape keyframe if the stopwatch is enabled. Beware: The first vertex point of the two shapes may not match, creating strange in-between frames. To set the first vertex point, context-click on the mask.
Use multiple overlapping masks instead of a single mask on a complex, moving, organic shape (Figure 7.10).
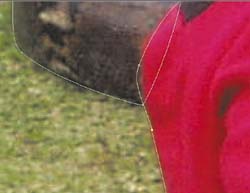
Figure 7.10. One key to working quickly is to intentionally create overlapping, separate mask shapes for different parts of your masked area that you know will move independently of one another. As a guideline, if any one shape has more than 20 or so points, you'll have difficulty retaining accuracy over time.
Go through the clip, and block in the major keyframes for a given shape. This will be the point at which a change of direction, speed, or shape begins or ends.
Start a mask on the frame on which you can draw it with the fewest points, and add points as needed to progressively more complex frames. Be prepared to break down the shot as much as necessary so that each of your masks describes only one part of the shape, and each shape stays simple. Stay under a dozen points if you can.
Block in and refine the first shape, then refine as necessary. Check the result at full speed against a contrasting background, just as you do with color keys. Then move on to the next shape.
In some cases, you can finish the matte this way. In other cases, you'll be left with a few stray holes in your matte here and there that you can go back and clean up with paint strokes. The process for working with paint is detailed in the next section; first, take a look at some of the other strategies at your disposal for masking and evaluate their effectiveness.
At the opening of the chapter I came right out and admitted that After Effects is not most artists' first choice as a dedicated rotoscoping tool. This is not a generalized complaint or simply a matter of taste: Other programs' masking tools perform useful things that are impossible to do with After Effects 6.5. This section will identify some of those holes and focus on the strategies that can help you make the best of the situation. For example
There is no way to apply a tracker directly to an After Effects mask, let alone track individual mask points. That doesn't mean there's no way to track in a mask selection, however.
You can't translate a mask the way you would a layer, by selecting all of the keyframes you want to translate and performing the move; After Effects applies the move to the current keyframe only. The workarounds are similar to those for tracking.
After Effects lacks the ability to specify whether a feather is applied to the inside or outside of a mask, nor can you vary feather settings on a per vertex basis (Figure 7.11).

Figure 7.11. All of the motion blur in this shot is left to right, so the ideal mask for the front of this truck would have heavy feathering on the right edge and none on top. Because After Effects lacks per-vertex mask feather settings, however, you have to handle this with two masks—not so bad in this case because the motion is highly predictable.
Adding points to an animated mask has no adverse effect on other keyframes applying to that mask; the mask retains its shape. Deleting points, however, deforms the other keyframed versions of the mask. Avoid deleting points on a mask animation at all costs. Always start by keyframing the simplest shape, with the fewest points, and work your way up to the most complex.
Note
In General Preferences, there is a preference, on by default, to preserve a constant vertex count when editing masks. Leave this on to prevent inadvertent popping of extra vertices and awkward tweening around missing vertices. But in cases where in-betweening is not an issue (presumably because you're creating a mask on every frame), you can consider unchecking this preference.
There is no dedicated morphing tool in After Effects. The elements to do a morph, however, exist in the program.
In the following sections, you'll explore the above points in depth.
If you cannot apply a tracker directly to a mask, even using expressions, what are your alternatives? The next chapter will concentrate on successful tracking, so here I'll focus on simply getting set up.
One workaround that is effective in limited cases is to stabilize the layer, pre-compose it into a composition large enough not to crop the result, and mask the stabilized element; you would then reapply the stabilization by linking Position keyframes to the stabilized Anchor Point either via expressions or a simple copy and paste. This might simplify matters when the element being rotoscoped is itself relatively static but the camera is moving; however, it would not work so well if the element is moving around enough to generate substantial motion blur. Really, it's just an idea to keep in the back of your mind that might be useful once in a great while.
More likely, you will have luck tracking in a mask when articulating its points with the track isn't so important. One example is tracking an element with a solid surface that doesn't change shape. The workaround in this case is to use the masked layer as a track matte and track the transforms of that. The tracked layer would carry the mask with it and then be applied to the alpha of the same layer (Figure 7.12).

Figure 7.12. if you're creating quick holdout masks of items that don't change shape, such as the windows of this car, you can set the masked frame to be a separate layer and apply your track to that, then use the result as an alpha track matte. It's somewhat of a kludge, but it can be helpful (especially when creating garbage mattes, as seen in the next chapter).
This same not-very-pretty workaround can also get you out of a tight spot in which you have dozens of mask keyframes that simply need to be offset, scaled, or rotated. Duplicate the masked layer and set it as an alpha track matte, offsetting the track matte layer instead of each individual mask keyframe. Here's where you're truly out of luck, however: If only one or some subset of the points of your mask needs to be offset, there is simply no way to get that edit to ripple through all instances of that mask point. Features for future versions, perhaps.
Note
It is possible to apply a tracker to a mask point using scripting, but I've never heard of anyone trying to design a script to do it in any useful way. One problem is that the user interface is beyond what is readily possible with a script, because you would want to be able to apply an arbitrary number of tracks to an arbitrary number of points.
Wouldn't it be great if there were a tool in After Effects that would track masks for you? The good news is there is. The bad news is the cases in which it would be useful are cases in which you should be pulling high-contrast luminance mattes instead. The further bad news is that the process is much slower and more cumbersome than using the techniques from Chapter 6 to create a hi-con matte.
Here's the problem: Auto-trace is a threshold tool that looks either at overall luminance or a specific color channel. You set the threshold (which you can guess reasonably intelligently by sampling pixels using your cursor and the Info palette in Percent 0-100 mode. Next, add a pixel tolerance setting (whole values only), and then let Auto-trace work its magic (Figure 7.13). The result is an arbitrary number of masks, each describing a single area that meets the criteria. Over the course of the shot, some of these masks will reshape, some will disappear, and some new ones will appear.
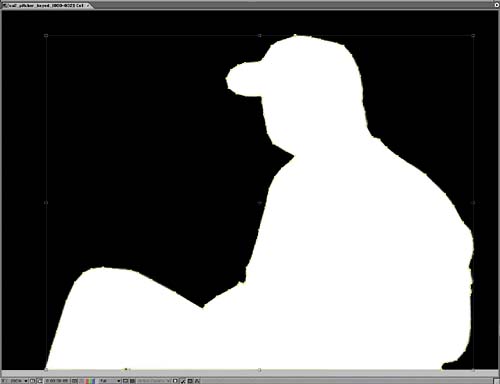
Figure 7.13. For the most success with Auto-trace, apply it to footage that is already high-contrast, such as this keyed matte, which was created with a 50% threshold and a two-pixel blur. Even this clean a result will chatter over time, however, but if you ever find yourself needing a vector shape based on a high-contrast image or alpha channel, this is a way to get it.
It ends up being a pretty unwieldy result, albeit cool for the motion graphics designers who want to play with those masks. For effects work, however, it's largely pointless compared to trackable mask points, which After Effects lacks.
Motion blur happens. That's a good thing; it's a natural artifact of seeing on object in motion captured over a short period of time, and on moving footage it reinforces the persistence of vision required to make a series of still frames look like a moving image (when in fact, a moving image is always just a series of stills). But masking motion blur would seem to be something of a nightmare, as its edges defy careful observation.
Well, true, it's not easy by any means, particularly if the masked object is also articulated—a bird flying through frame, for example. Remember to carefully evaluate whether you can pull any kind key or hi-con matte on a blurred element to get all of those lovely edges before you get out the masking tools.
You can even evaluate whether the blurred element is really enhancing your scene. (Hopefully, we're not talking about the starring element of your shot.) Because you didn't shoot it on a proper color matte, maybe you'd be better off eliminating the element from your scene.
Otherwise, there is one thing to think about. Masks respect the motion blur settings of the composition; a masked element in motion will have motion blurred edges. That means you have a chance of matching the motion blur with a mask whose contours would fit the shape of the object if it were stationary (Figure 7.14). To make the mask work with the moving element is a matter of getting the composition's Shutter Angle and Shutter Phase settings right. For details on doing that, see Chapter 2, “The Timeline.”
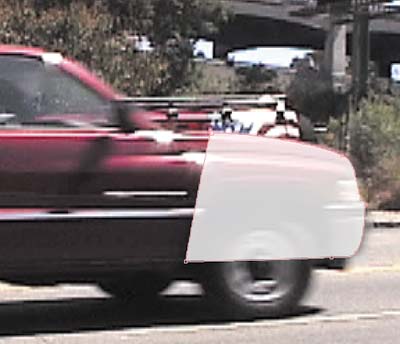
Figure 7.14. Don't forget that putting a rotoscope mask in motion allows motion blur to come along for the ride, simplifying a seemingly difficult masking situation, as was shown in Figure 7.11.
This will probably leave you with edge problems that you will have to cleverly conceal, whether by choking, further blurring the edges, forcing them to the background color, and so on.
Let's talk about morphing—that's right, that craze of the early '90s. Trivia question: What now major studio raised its profile by pulling off the morphing effects in Michael Jackson's “Black or White” video? Hint: It raised its profile quite a bit further a decade later with Shrek.
Thing is, morphing could conceivably come in handy, without being so blatant and obvious. Think of it as a concealing tool, useful when you don't want anyone to notice a transition between two objects or even a transition between one object and itself at a different point in time. Or heck, go crazy morphing together members of your extended family to see if you look anything like the result.
What exactly is a morph? It is, quite simply, a combination of two warps and a dissolve. Given two images, each with a corresponding shape (say, the features of the face), you warp the source image's face shape to the face shape of the target, warp the target from something that matches the source to its face shape, fading the target in over the source.
After Effects has no tool called Morph, and for a long time, the program offered no good way to pull off this effect. In After Effects Professional, you now can use Reshape, a tool that lays the groundwork for simple morphs. You can then build these up into more complex morphs, with separate individual transitions occurring within the overall transition.
Unfortunately, creating a morph with Reshape is nowhere near a one-button process, and the simple formula I just mentioned will not provide enough detail for you to be successful. This book generally steers away from step-by-step recipes in favor of helping you solve larger problems creatively, but in this case, it's easy to get confused. Let me walk you through the creation process, using a demonstration of my own resemblance transitioning to that of my evil twin (Figure 7.15):


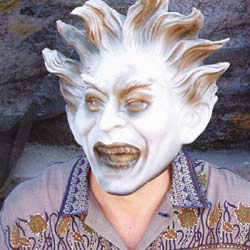
Figure 7.15. This is me and my doppelgänger, and that awkward phase in which Jekyll turns into Hyde.
Start with two elements that have some basic similarities in their relative position of features. The subtler the distortion required, the more you can get away with.
Isolate the two elements you will be morphing from their backgrounds to prevent contamination. If you're working with elements shot against a blue screen, key them out first. Otherwise, mask them. In my example, I have created masks for each layer.
Ascertain that the two layers are the same size in the X and Y dimensions and as closely aligned as possible. If they are not, pre-compose one layer to match the other. This step is important because it will make matching the source and target masks much, much simpler. Name the two layers Source and Target (as they are in the example) if it helps you follow along.
Choose matching sections from your two clips for the duration of your transition (say, 24 frames). If you have still elements, no worries. The closer your moving elements are to still, the more likely you'll get a clean result.
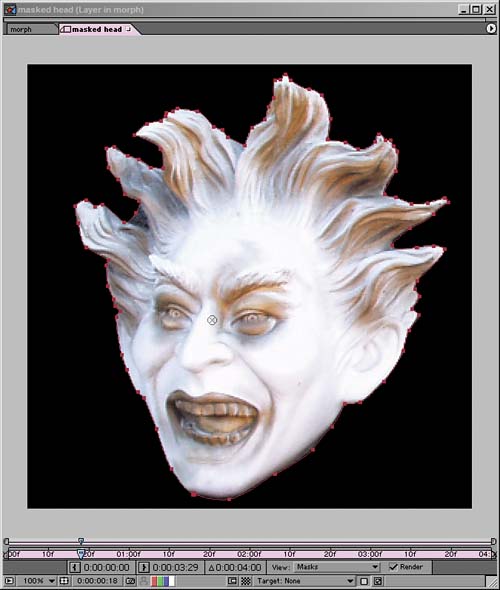
Draw a mask around the boundary that is going to morph in both layers. Be as precise as possible, erring to the inside if at all (Figure 7.16). This could be the masks created in step 2, if you created masks there. It does not have to be active; if you don't need it to mask out the background, you can set it to None. Rename each mask something descriptive like outer (the name used in my example).
Create a mask around the area of the Source layer that is the focus of the morph. In my example, it is the facial features: the eyes, nose, and mouth (Figure 7.17). Make this mask as simple as you can; use RotoBeziers and as few points as will work to outline the features inquestion.
Set the mask mode to None; this mask is your first shape, you don't need it to influence the layer at all; you will use it for the Reshape effect only. Give it a name (mine is called “me”).
Copy this mask shape and paste it in the Target layer. If the two layers are the same dimensions, it should be an identical size and position as it was in the Source layer. The name does not copy with the mask, so you can restore the name (me).
Duplicate the mask. Give it a different color and rename it. In my case, I called the mask “it.”
First scale and rotate, then if necessary move individual points (as little as possible!) so that the it mask surrounds the equivalent area of the Target layer that me does of the source: in my example, the eyes, nose, and mouth.
Copy the resulting it mask shape, and paste it to the Source layer to create a new, third mask. Restore the name “it” for this mask. (Don't ask me why names don't copy with masks—perhaps someone should report it as a bug.)
You now have three masks for each of the Source and Target layers. Now apply the Reshape effect to each layer.
Starting with the Source layer, set the Source Mask (me), the Destination Mask (it), and the Boundary Mask (outer). Set Elasticity to Liquid (you can experiment with other settings later if need be). Set Interpolation to Smooth.
At the first frame of the morph transition, still in Source, set a keyframe for Percent (at the default, 0.0%, meaning no reshaping is occurring). At the last frame, set Percent to, you guessed it, 100.0%. Now sit back and wait for the gruesome transformation. Don't worry about how it looks yet.
Repeat steps 12 and 13 for the Target layer, with the following changes: Set Source Mask to it and Destination Mask to me. The Percent keyframes should be set to 0.0 at the last frame of the transition (where it is keyframed to 100.0 on the Source layer) and, you guessed it, 100.0 at the first frame.
You've created the warps, now you just need the cross dissolve. Set an Opacity keyframe for Target at the last frame of the transition (leaving it at the default 100.0%), and then add a 0.0% Opacity keyframe at the first frame.


You should now be ready to preview. The preview may take a long time to build the first frame; subsequent frames write much more quickly, so be patient. The main question you must now resolve is whether the features lined up properly; if not, you must adjust the source and destination mask shapes accordingly. I'm sorry I can't be more specific, but for example, if the eyes are too low to match the target halfway through the animation, then dragging the destination mask (it in my example) upward a few pixels in the Composition window, for both layers, should help.
At this point my example is looking good in terms of the face transition (Figure 7.17), but, of course, I've made life hard on myself by transitioning from a head of one size to a larger one, and the edges just kind of fade in. Therefore—and this is where it can get really complicated–I add a second morph, using the same steps as before, but all new masks.
Note
The Correspondence Points property in Reshape can be raised from its default of 1 to make the distortion more precise (and in some cases less twisted). That's cool, but the downside is that it makes this slow effect even slower. Better to try to simplify what you're attempting to do with your masks and fix things there, and try raising this value only as a last resort.
Why complicated? Why new masks? These two questions are interrelated. If you set a second Reshape effect, the key is that you don't want it to influence the result of the first Reshape effect whatsoever. Therefore, this time your Boundary mask is going to be the boundary of the object minus the area covered by the original source and destination masks (it and me). Likewise, my new shapes cover the ears and top of the head, but avoid the area of the previous masks completely (Figure 7.18).


Figure 7.18. The full setup to do more than one morph on a single image is pretty gnarly. Renaming masks and effects to specify which is which, with individual colors and judicious use of mask locks and the Caps Lock key, can help a lot.
Because I know this is complicated, I've included the source project and the final result as projects on the book's CD-ROM. Please do me a favor and don't show the results to my mom. Now a quick look at something I left out (by having you duplicate the Source and Destination masks rather than draw them from scratch).
The Reshape tool relies on a concept that was touched upon already, but is now very significant: that of the First Vertex that exists on every mask. Look closely at any mask you draw, and you will see that one vertex on the mask is larger than all the others. This is the First Vertex.
Reshape relies on the First Vertex to determine which point on the source mask corresponds to which on the destination mask. I had you duplicate the source mask to create the destination mask, because this is the easiest way to satisfy two criteria that are essential for a smooth Reshape effect:
Placement of the First Vertex corresponds on both masks
Each mask has the same number of points
If either of these criteria is not fulfilled, Reshape will do some not very pretty things to try and compensate. I mention this just in case you try to customize your own mask transitions and don't like what you see. The easiest approach will always be to duplicate the source mask and edit it, keeping the same number of points. The next easiest method would be to draw a new mask with the same number of points, drawn in the same direction (clockwise or counterclockwise), and set to the First Vertex where you need it (by context-clicking on the mask and choosing Select First Vertex from the menu).
Worrying about this stuff is not fun, which is why I avoided the need to do so in the previous section.
Paint is generally your last resort, and for a simple reason. Paint work is typically more painstaking and more likely to show flaws than approaches involving masks. Of course, there are exceptions. The ability to track clone brushes gives paint work a huge advantage over masks, which are not so easy to track.
Other tasks are just plain tedious no matter how you look at them, but they are sometimes necessary or inevitable. Plate restoration and dust busting are entry-level jobs at many effects facilities; there's no way to get around them on shows whose shooting conditions and standards demand them.
For effects work, you will use the paint controls in After Effects in two predominant ways:
Cleaning up an alpha channel mask by painting directly to it in black and white. This approach is best suited for touching up animated masks.
Using the Clone Stamp tool. This is for cases in which overwriting part of your frame with other source is most effective.
Assuming you're using the Professional version, you're lucky. Prior to version 6.0, paint was a convoluted, tacked-on afterthought in After Effects. It was available only via a licensed effect that was so counterintuitive that most users had to re-read the manual each (infrequent) time they used it. Now the brush tools are more robust and fully integrated with the application.
Activate any of the three brush-based tools in the Tools palette—Brush, Clone Stamp, or Eraser—and the palette that contains the Paint and Brush Tips tabs automatically appears (Figures 7.19a, b, and c).


Figure 7.19a, b, and c. Use the keyboard shortcut Ctrl+B (Cmd+B) to cycle through the three basic brush tools (7.19a) and open the Paint and Brush Tips tabs (7.19b and c).
The After Effects tools are designed with a user interface and functionality patterned after the brushes in Photoshop, but there are a couple of important differences between After Effects brushes and those in Photoshop. After Effects offers fewer customizable options for its brushes (you can't, for example, create your own brush tips) and fewer UI shortcuts for editing brushes on the fly, so don't expect all those nifty tricks you've learned with keyboard shortcuts in Photoshop to work here. Also, After Effects brushes are vector based, while those in Photoshop are raster based. This is generally a good thing, as it makes all paint edits in After Effects editable after you've already drawn with them.
Say that you have an alpha channel that needs some touching up (Figure 7.20). With the Brush tool active, go to the Paint palette and switch Channels to Alpha if it is not there already (this palette remembers the last mode you used); the foreground and background color swatches in the palette will switch to grayscale, and you can switch them to black and white by clicking the tiny black-over-white squares just below the swatches (Figure 7.21). To see what you are painting, switch the view to the Alpha Channel as well (Alt+4/Option+4).
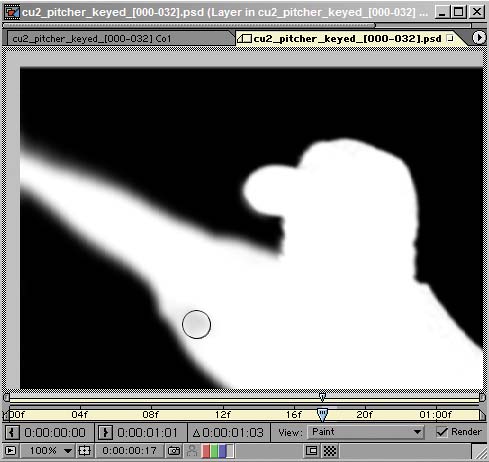
Figure 7.20. To touch up an alpha channel matte, select Alpha in the Channels drop-down menu (in the Paint palette) and then make the alpha channel visible (Alt/Option+4).

Figure 7.21. Ever wonder what those little squares are for? They reset the foreground and background colors. To swap white and black, just as in Photoshop, press the X key; this only works when the Paint palette is visible.
Here are the other things you need to know to make use of the paint tools:
Brush-based tools operate only in the Layer window.
Brushes include a Mode setting (analogous to Transfer Modes). For alpha channels, you'll almost certainly leave this at the default of Normal.
If you use a tablet, you can use the Brush Dynamics settings, at the bottom of the Brush Tips palette, to set how the pressure, angle, and stylus wheel of your pen affect strokes (Figure 7.22).
Brushes are adjusted in the Brush Tips palette, where you can either select a preset brush or customize your own by inputting numerical settings for diameter, hardness (which affects the amount of feather on the edge), and so on.
The Duration setting and the frame where you begin painting are crucial.

By default, the Duration setting in the Paint menu is set to Constant, which means that any paint stroke you create on this frame continues to the end of the layer. For cleaning up an alpha channel, this is typically not the setting you want, because you're presumably using paint only to catch stray holes in your matte here and there. The Single Frame setting confines your stroke to just the current frame on which you're painting, and the Custom setting allows you to enter the number of frames that the stroke will persist.
The other option, Write On, records your stroke in real time, re-creating the motion when you replay the layer; this stylized option is for such motion graphics tricks as handwritten script, and it does not seem to have much of an application for effects work, unless, of course, your effect is re-creating a signature.
You can access various display options available for brushes from the Brush Tips wing menu (Figure 7.23). Here you can add, rename, or delete brushes, as well. You can also do this using the small icons at the bottom of the palette and by double-clicking the brush in question.

Figure 7.23. If you use brushes a lot, you may find it helpful to make your own and list them by name.
For an alpha channel, you typically work with the Brush tool in Single Frame mode, looking only at the alpha channel (Alt+4/Option+4) and progressing frame by frame through the shot (press Page Down). You can switch as needed between painting white into the foreground and black into the background; just use the X key to swap foreground/background colors with the Brush tool active.
You may end up with dozens of paint strokes in your timeline, each of which contains numerous options that you can edit after the fact (Figure 7.24). If you simply want to select a stroke to edit, delete, or redo it, use your Selection tool (V) to directly select it in the Layer or Composition window rather than hunting it down in the Timeline window. You can drag it into place or delete it and start over.

Figure 7.24. The real benefit of nondestructive vector paint strokes is how many properties each one contains that can be edited after the fact.
Note
The biggest downside to the paint tools is that you can do your painting in the Layer window only. To paint in the context of a comp, the Vector Paint effect remains useful, as it operates only in the Composition window. However, it does not include cloning. And beware: It's not always clear in the After Effects online help which is which if you search on paint, so if you're looking for particular information, you can be misled.
The benefit of cloning is that you get all of the grain and other organic peculiarities that go along with using moving footage as a source. There are many cases in which it will be the quickest and most effective solution, particularly if you are cloning out a trackable area of the frame (more on this in the next section).
Cloning in After Effects opens you to several possibilities beyond what would be possible with, say, the same tool in Photoshop. Not only can you clone pixels from a different region of the same frame, you can clone from a different frame of a different clip at a different point in time (Figure 7.25). In Commotion, the tool that could do this was christened the Superclone tool; the After Effects implementation is actually more straightforward in many cases:
To clone from an offset area of the same frame: This works just the same as in Photoshop. Choose a brush, Alt/Option-click on the area of the frame you wish to sample, then paint over the area to be replaced. Remember that by default, Duration is set to Constant. If you want to clone for only one frame, choose Single Frame; for a subset of frames, choose Custom.
To clone from an area of the same clip, offset in time: The offset is specified in the Clone Options, and you enter the offset value in frames. Note that there is also an option for setting spatial offset, so if you want to clone from the exact same position at a different point in time, set the Offset to 0, 0 and change the Source Time.
To clone from a different clip: The source from which you're cloning must be present in the same composition; if you don't want it to display in final output, make it a guide layer and, optionally, turn off its visibility in the timeline. Select the source from the pull-down menu under Clone Options. By default, cloning takes place from the same frame at the current comp time; use Source Time to specify an offset.

Figure 7.25. With Clone Source Overlay checked under Clone Options, you can see a preview of your clone source overlaid on the current frame. Click on the small spheres to the right of the check box, and the overlay is displayed in Difference mode, which makes for easy alignment of matching images. If initially this option doesn't seem to be taking effect, move your cursor into the frame of the Layer window to activate it.
For the most part, cloning is just that straightforward, but of course, nothing about visual effects work is always straightforward.
So, where can cloning trip you up? For example, say that offsetting the time or selecting a different layer causes the clone tool to attempt to sample beyond the last frame of the source clip. What happens? By default, After Effects automatically loops back to the first frame of the clip and keeps going. This is dangerous because you may not even have any idea it has occurred; it is an automatic, default setting.
This is one of several situations where you can get into trouble because of a temporal mismatch. Not only might you not have enough source frames for the target layer, your layers might have different frame rates, or you might want to sample from just one or just a few frames from the source clip.
You can take control of this process by editing the source clip. Time remapping is one potential way to solve these problems, allowing you to stretch a source clip or loop it the way you want to. If you want to sample only one or a few frames from the source, you can time remap it or you can do the even simpler thing: Shorten the layer to just the frame or frames you want to use as source, and take advantage of the automatic looping I referred to as “dangerous” a couple of paragraphs back.
What if your source is a different scale from what it should be for the target? Shockingly, even though temporal edits, including time remapping, in the source show up directly in the target, other types of edits—even simple translations or effects—do not. As always, the solution is to pre-compose with any scaling, rotation, motion tracking, or effects that you want to clone embedded in the subcomposition.
Finally, and perhaps even more shocking: Paint is an effect. Don't believe me? Apply a stroke or two and then take a peek in your Effects Control window. You'll see an effect called Paint with a single check box labeled Paint on Transparent, which causes only the strokes you've painted to show up for that layer.
But there's an extra benefit to doing it this way: You can change the render order of your paint strokes relative to other effects. So, for example, you could do some cloning on your raw footage, then apply an image adjustment, and then add some other cloned strokes that are applied to the adjusted image, all on one layer, no need to precompose (Figure 7.26). To get the new paint strokes to appear in a new Paint effect instead of the previous one, however, you must actually apply the Paint effect before you start painting again.

But this means that you could conceivably touch up a blue-screen background, then apply a keyer, and then apply a second instance of Paint to touch up the resulting alpha channel.
Finally, to help you take control of this process of interleaving paint strokes and effects, note the View pull-down menu in the Layer window (Figure 7.27). It lists, in order, the paint and effects edits you've added to the layer. To see the layer with none of these applied, you can clear the Render box next to the pull-down, and to see a particular stage of the edit—after the first paint strokes, but before the effects, say—you can select a prior stage of the layer edits in the View menu, disabling the steps below it. These settings are for previewing only; they will not enable or disable the rendering of these items.

One really cool thing about paint strokes is that they have their own editable properties. Not only can you change your mind about how they draw later on, which isn't useful as often as you might think, you can apply the motion tracker directly to a paint stroke.
Cases come up all the time where artists can save themselves a ton of work by attaching paint strokes to motion-tracked objects. However, to do so requires use not only of the tracker, which is covered in the next chapter, but also of basic expressions. Thus this topic is fully covered in Chapter 10, “Expressions,” as an excellent example of a simple use of expressions and offsets; look at that chapter if you are dealing with a case where tracking in a cloned paint stroke would help you.
Wire removal and rig removal are two terms often bandied about in the visual effects industry. Generally speaking, wire removal means painting out a wire on a blue-screen shot, a wire usually used to suspend an actor in mid-air. Rig removal, meanwhile, is even less glamorous: It's just garbage masking any equipment that showed up in frame.
Some rotoscoping applications have dedicated wire-removal tools, but in After Effects, you're on your own. However, wire removal need not be a painstaking process in After Effects simply because there's no dedicated tool for it. There are several approaches that could conceivably work; if the ends of the wire are trackable, you could track position and rotation and apply these to a null, which would be the parent of a masked element to replace the wire. More about tracking and applying tracks is found in the following chapter.
Rig removal is often trackable, because rigs don't move. The key is to make a shape that mattes out the rig, then apply that as a track matte to the foreground footage and track the whole matte.
This is as nitty-gritty as rotoscoping gets. For various reasons, even on the highest budget visual effects film, footage digitizes with flaws visible on a frame-by-frame basis: Dust and scratches made their way onto the pristine master sometime between when it was shot and when it was digitized.
Most of these flaws, alas, will be corrected via frame-by-frame cloning, sometimes known as “dust busting.” Large visual effects houses have teams dedicated to this work, a motley crew of mostly entry-level folks who strap on an iPod and lose themselves in the zen of cloning (or a good audio book). I mention this here not because it requires a different approach than what has been previously discussed, but only because neophytes do not always believe that such a job exists, let alone that it could be their entry level job at a major facility.
One final note about this work: Despite its apparent tedium, it's not all done with a single approach. In some cases, cloning with an offset will work. In other cases, you're better off masking out a part of the source to reveal the footage you want to replace by placing that clean version behind it. Never treat any task as utterly mind-numbing, because you might be cheating your brain out of an opportunity to help you think of a better way.
And so, like rain, into every effects artist's life a little rotoscoping must fall. The tools outlined here are mostly sufficient for the type of rotoscoping work that compositors will have to do. Dedicated rotoscope artists would likely choose software other than After Effects to ply their trade, but as long as rotoscoping is in your stock and trade, the After Effects tools will usually let you complete your shot without having to go find other software.
The next chapter completes the picture by adding motion tracking to your areas of expertise. As I mentioned earlier, you can combine motion tracking with rotoscoping as a shortcut around tedious tasks.