4. Signal Processing
Lesson overview
In this lesson, you’ll learn how to do the following:
• Use the Effects Rack to create chains of effects
• Apply effects to audio
• Adjust parameters in various effects to process audio in specific ways
• Alter dynamics, frequency response, ambience, stereo imaging, and many other audio attributes
• Use the Preview Editor to see how a waveform will be altered by an effect before you apply the effect
• Simulate guitar amp and effects setups with Guitar Suite effects
• Load third-party, plug-in effects on Mac or Windows computers
• Apply single effects rapidly without the Effects Rack by using the Effects menu
• Create favorite presets you can apply immediately to audio
This lesson can take several hours to complete, depending on how deeply you want to explore the various processors. Download the project files for this lesson from the Lesson & Update Files tab on your Account page at www.peachpit.com and store them on your computer in a convenient location, as described in the Getting Started section of this book. Your Accounts page is also where you’ll find any updates to the chapters or to the lesson files. Look on the Lesson & Update Files tab to access the most current content.
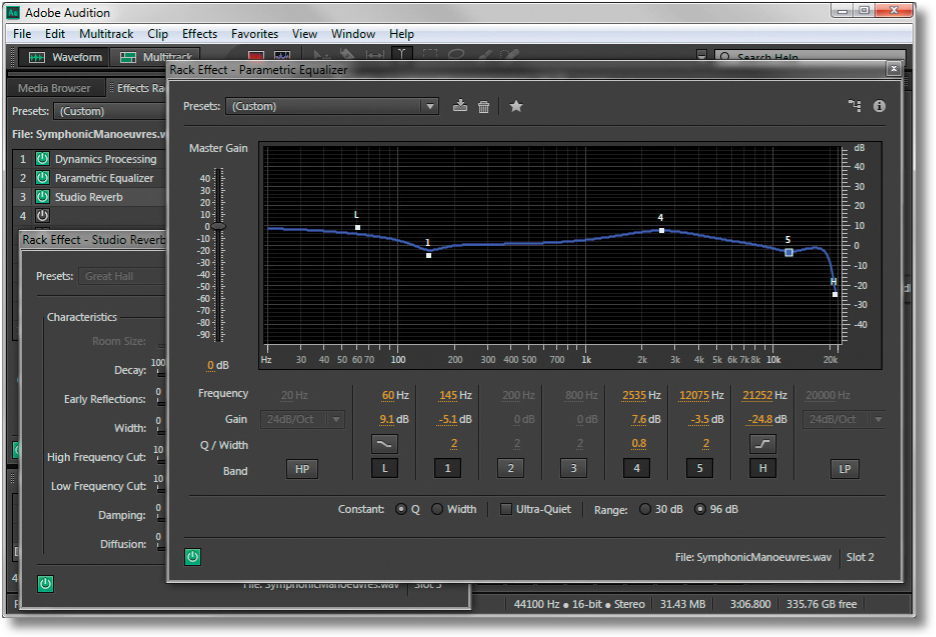
Use signal processors to “sweeten” the audio in multiple ways: fix tonal balance, alter dynamics, add ambience or special effects, and much more. Draw from the extensive collection of effects included in Audition, or use third-party, plug-in processors.
Effects basics
Effects, also called signal processors, can “sweeten” audio as well as fix problems (such as too much treble or bass). They are the audio equivalent of video effects, like contrast, sharpen, color balance, light rays, pixelate, and so on. In fact, sometimes audio engineers even use similar terms, like “brightness,” to describe increased treble.
![]() Note
Note
If you have not already downloaded the project files for this lesson to your computer from your Account page, make sure to do so now. See “Getting Started” at the beginning of the book.
Adobe Audition includes a wide range of effects. Most can work with the Waveform and Multitrack Editors, but some are available only in the Waveform Editor. There are three main ways of working with effects, which are available in the Waveform and Multitrack Editors:
• The Effects Rack allows you to create a chain of up to 16 effects, which you can enable or disable independently. You can add, delete, replace, or reorder effects. The Effects Rack is the most flexible way of working with effects.
• The Effects menu allows you to select an individual effect from the Effects menu bar and apply it to whatever audio is selected. When you need to apply only one specific effect, using this menu is quicker than using the Effects Rack. Some effects available in the Effects menu are not available in the Effects Rack.
• The Favorites menu provides a very quick way to work with effects. If you come up with a particularly useful effects setting, you can save it as a Favorite preset. The preset is then added to a list of Favorites, which you can access with the Favorites menu or the more flexible Favorites panel (as described in Chapter 2, “The Audition Environment”). Selecting a Favorite applies that preset instantly to whatever audio is selected. Note that you cannot change any parameter values before applying the effect, but you can use the Preview Editor to see how the waveform will be altered by the effect prior to applying it.
This chapter initially covers using the Effects Rack, which introduces the majority of effects. The second section covers the Effects menu and discusses the remaining effects that are available only via the Effects menu. The final section describes how to work with presets, including Favorites.
Using the Effects Rack
The screen shots in these lessons were taken using the Classic workspace, so it’s recommended that you select it. Choose File > Window > Workspace > Classic, and then reset it to the default by choosing Window > Workspace > Reset Classic.
1. Choose File > Open, navigate to the Lesson04 folder, and open the file Drums110.wav.
2. Click the Transport Loop button so the drum pattern plays back continuously. Click the Transport Play button to audition the loop, and then click the Transport Stop button.
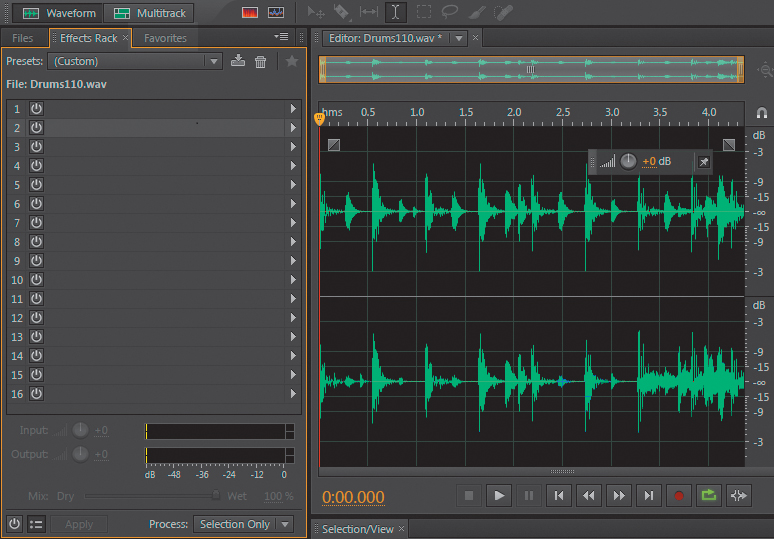
3. Click the Effects Rack tab, and drag the panel’s lower splitter bar downward to extend the panel to its full height. You should see 16 “slots,” called inserts; each can hold an individual effect and also includes a power on/off button. A toolbar is located above the inserts, and meters with a second toolbar are below the inserts.
![]() Note
Note
Although you can’t see any graphical connection among inserts, the effect’s inserts are in series, meaning that the audio file feeds the first effect input, the first effect output feeds the second effect input, the second effect output feeds the third effect input, and so on until the last effect output goes to your audio interface. Effects do not have to go into consecutive inserts. You can leave empty inserts between effects, and then place effects in these inserts later.
4. To add an effect to an insert, click the insert’s right arrow and choose an effect from the drop-down menu. For the first effect, choose Reverb > Studio Reverb. Inserting an effect turns its power button to “on” (green) and opens the effect’s graphic user interface. You may need to move the effect’s graphic user interface window to load more effects. For the second effect, similarly choose Delay and Echo > Analog Delay.
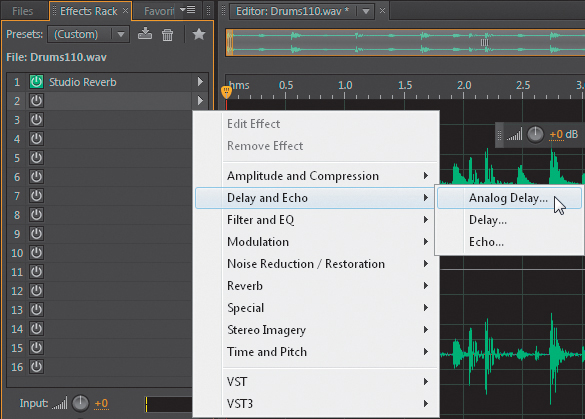
5. Turn off (bypass) the Analog Delay effect by clicking its power button. Press the spacebar to begin playback, and then turn the Studio Reverb insert’s power button on and off to hear how reverb affects the sound.
6. Click the Rack Effect – Studio Reverb graphic user interface window to bring it to the front. Press the spacebar again to stop playback.
7. When playback is stopped, you can choose an effect’s preset. Click the Studio Reverb’s Presets drop-down menu, and select Drum Plate (Large). Begin playback.
You’ll hear a more pronounced reverb sound. Note that the effects’ graphic user interface window has an additional power button in the lower-left corner to make it easy to bypass/compare the processed and unprocessed sound.
8. Click on the Analog Delay effect graphic user interface to bring it to the front, and then turn on its power button.
You’ll hear an echo effect, but it’s not in time with the music.
9. To make the delay follow the rhythm, double-click in the Delay parameter’s numeric field, type 545 in place of 200, and then press Enter (Return). The echoes are now in time with the music. (Later in this chapter we’ll explain how to choose rhythmically correct delay times.)
Keep this audio file open as you continue.
Removing, editing, replacing, and moving an effect
Rather than present a structured exercise, try the various bulleted options that follow to see how they work. After each action, choose Edit > Undo [name of action], or press Ctrl+Z (Command+Z) to restore the project to its previous state:
• To remove a single effect, click the name in the effects’ insert and press the Delete key, or click the insert’s right arrow to choose Remove Effect from the drop-down menu.
• To remove all effects in the rack, right-click (Control-click) anywhere on an effect’s insert, and then choose Remove All Effects.
• To remove some effects in the rack, Ctrl-click (Command-click) in each effect insert containing an effect you want to remove. Then right-click (Control-click) anywhere in any selected effect’s insert, and choose Remove Selected Effects.
• To edit an effect when the effects window is hidden or you closed it, double-click the effect’s insert, click the insert’s right arrow, and then choose Edit Effect from the drop-down menu, or right-click (Control-click) anywhere in an effect’s insert and choose Edit Selected Effect. Any of these actions bring the effects window to the front and open it if it was closed.
• To replace an effect with a different effect, click the insert’s right arrow and choose a different effect from the drop-down menu.
• To move an effect to a different insert, click the name in the effect’s insert and drag to the desired destination insert. If an effect already exists in that insert, the existing effect will be pushed down to the next higher-numbered insert.
Bypassing all or some effects
You can bypass individual effects, groups of effects, or all effects in the Effects Rack by doing any of the following:
• The power button in the lower-left corner of the Effects Rack’s panel bypasses all enabled rack effects. When powered back on, only effects that had been enabled prior to bypassing are turned back on. Bypassed effects remain bypassed regardless of the “all effects” power button setting.
• An alternate way to do the preceding bullet item is to right-click (Control-click) on any effect’s insert and choose Toggle Power State of Effects Rack.
• To bypass some effects, Ctrl-click (Command-click) on each effect’s insert you want to bypass, right-click (Control-click) on any of these inserts, and then choose Toggle Power State of Selected Effects.
“Gain-staging” effects
Sometimes inserting multiple effects in series causes certain frequencies to “add up” and produce levels that may exceed the available headroom. For example, a filter that emphasizes the midrange could create distortion by increasing levels above acceptable limits.
To set levels, in the lower part of the Effects panel use the Input and Output level controls (with associated meters). These controls can reduce or increase levels as needed.
1. Close the project without saving so you can start fresh. Choose File > Open, navigate to the Lesson04 folder, and open the file Drums110.wav. Do not start playback yet.
2. In any effect’s insert, click the right arrow, choose Filter and EQ > Parametric Equalizer from the drop-down menu.
3. When the Parametric EQ window opens, click the small box labeled 3 in the EQ graph and drag it to the top of the graph. Close the Parametric EQ window because it’s no longer necessary to have it open and take up space.
4. Caution: Turn your monitoring levels way down, and then press the spacebar to initiate playback. The excessive levels will trigger the Output meter’s red overload indicators to the meter’s right.
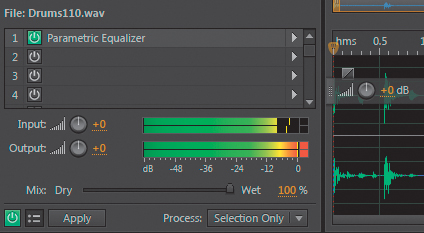
5. Turn up the monitoring level enough so you can hear the distortion this causes. The Input and Output level controls default to +0dB gain, which means neither the signal coming into the Effects Rack, nor the signal leaving it, is amplified or attenuated. However, the massive EQ boost is overloading the output.
![]() Tip
Tip
Once triggered, the red distortion indicators stay lit so if distortion occurs while you’re not looking at the screen, you’ll know that distortion occurred. Click anywhere in the Output meter to reset the red distortion indicators. To reset the Input or Output knob to +0dB, Alt-click (Option-click) on the knob. You can also toggle the Meters/Controls view with the button to the right of the panel’s master on/off switch in the lower left.
6. Reduce the Input level until the peaks no longer trigger the red distortion indicators after the meters have been reset (see the following tip). It’s generally good practice to keep the Output control at +0dB and compensate for the excessive levels by trimming the Input level. This will likely require reducing the Input to -35dB or so.
Keep this project open for the next lesson.
Altering the effect’s wet/dry mix
An unprocessed signal is called dry, whereas one to which effects have been applied is called wet. Sometimes you want a blend of the wet and dry sounds rather than all of one or the other.
1. With the previous project still open and the levels set properly to avoid distortion, click the Mix slider below the meters and drag left.
2. Drag the slider to the right to increase the amount of wet, filtered sound, and drag to the left to increase the amount of dry, unprocessed sound.
![]() Tip
Tip
Using the Mix slider to blend in more dry sound provides an easy way to make an effect more subtle.
Applying effects
Inserting an effect doesn’t change the file but instead plays the original file back through the effect. This is called a nondestructive process using a real-time effect, because the original file remains unaltered.
However, you may want to apply the effect to the entire file, or only a selection, so that saving the file saves the processed version.
1. Close the project without saving so you can start fresh. With the program open, choose File > Open, navigate to the Lesson04 folder, and open the file Drums110.wav.
2. In any effect’s insert, click the right arrow, and choose Reverb > Studio Reverb.
3. When the Studio Reverb window appears, choose the preset Drum Plate (Small) from the presets drop-down menu.
4. The Process drop-down menu, located in the toolbar at the bottom of the Effects Rack panel, allows you to apply the effect to the entire file or just a selection. For this lesson, choose Entire File.
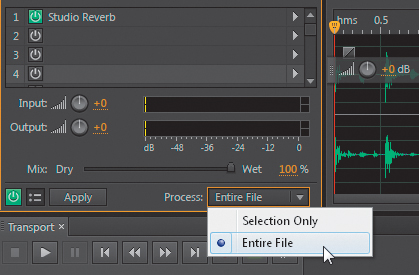
5. Click the Apply button. This not only applies the effect to the file to process it, but removes the effect from the Effects Rack so the file isn’t “double processed” from the effect being embedded in the file and from a processor remaining in the rack.
![]() Note
Note
You can insert additional effects into the Effects Rack to change the sound further, and then apply those effects. The file will then reflect the changes caused by all the effects you’ve applied. Also, note that any changes are still not permanent until you save (using either Save or Save As) the file. At that point, the effects will be embedded permanently in the file.
6. Close the project without saving by choosing File > Close All.
Let’s move on to lessons that show how individual effects change the sound.
Amplitude and Compression effects
Amplitude and Compression effects change levels or alter dynamics. You’ll load each effect separately to hear how each one changes the sound.
Amplify
Amplify can make a file louder or softer. When you’re increasing amplitude to make a file louder, choose an amount of amplification that is low enough so that the file remains undistorted.
1. Choose File > Open, navigate to the Lesson04 folder, and open the file Drums+Bass+Arp110.wav.
2. Click an Effects Rack insert’s right arrow button, and then choose Amplitude and Compression > Amplify.
3. With looping enabled on the Transport, begin playback.
Amplify has only one parameter, Gain, which varies from -96dB (maximum attenuation) to +48dB (maximum amplification). With Link Sliders selected, adjusting gain for one channel changes gain equally in the other channel. Deselecting Link Sliders allows for adjusting each channel independently.
4. With Link Sliders selected, click the Gain slider and drag left (attenuation) or right (amplification). You can also drag up/down or left/right in the numerical field to change gain in integer increments, or double-click on the numerical field and type in a specific number.
5. Using the numerical field, increase the gain to +2dB, and observe the Output meters. They do not go into the red so it is safe to increase the gain by this amount. Now increase the gain to +3dB. One of the Output meters goes into the red, which shows that the gain is too high and is overloading the output. Also, try decreasing the level and listen to the results.
6. Stop playback, click the Amplify effect’s insert, and press the Delete key. Keep Audition and the current file open for the next lesson.
Channel Mixer
The Channel Mixer alters the amount of left and right channel signal present in the left and right channels. Two possible applications are converting stereo to mono and reversing the left and right channels.
1. Click an Effects Rack insert’s right arrow button, and then choose Amplitude and Compression > Channel Mixer.
2. With looping enabled on the Transport, begin playback.
3. Click the Channel Mixer’s L (left) tab. It’s currently set so that the left channel consists entirely of signal from the left channel. You’ll convert this stereo signal into a monaural signal by having equal amounts of left and right channel signals in the left and right channels.
4. With the L tab still selected, move the L and R sliders to 50.
5. Bypass the Channel Mixer using either the Effects Rack’s power on/off button or the one in the Channel Mixer panel’s lower left. When bypassed, the stereo image is wider.
6. Enable the Channel Mixer by making sure the power button is on, and let’s complete converting the signal to mono.
7. Click the R tab and adjust the L and R sliders to 50. Now the signal is monaural. Bypass and enable the Channel Mixer to verify the change.
![]() Note
Note
Converting stereo to mono is a common enough operation that the Channel Mixer preset named All Channels 50% performs this conversion.
8. The Channel Mixer also makes it easy to swap channels. Click the L tab and set the L slider to 0 and the R slider to 100. Now the left channel consists entirely of signal from the right channel.
9. Click the R tab. Set the L slider to 100 and the R slider to 0. Now the right channel consists entirely of signal from the left channel.
10. Bypass and enable the Channel Mixer; doing so reverses the two channels. When bypassed, the hi-hat is in the left channel. When enabled, it’s in the right channel.
11. Stop playback, click the effect’s insert that contains the Channel Mixer, and then press the Delete key.
DeEsser
Audition’s DeEsser reduces vocal sibilants (“ess” sounds). De-essing is a three-step process: Identify the frequencies where sibilants exist, define that range, and then set a threshold, which if exceeded by a sibilant, automatically reduces the gain within the specified range. This makes the sibilant less prominent.
1. Close any open files without saving so you can start fresh. Choose File > Open, navigate to the Lesson04 folder, and open the file DeEsser.wav.
2. Click an Effects Rack insert’s right arrow button, and then choose Amplitude and Compression > DeEsser.
3. Enable looping on the Transport, and then start playback.
4. As the file plays, you’ll see a display of the frequency spectrum. Sibilants are high frequencies. Look carefully at the spectrum and confirm that you see peaks in the range around 10000Hz.
5. To make it easier to find the sibilants, set the Threshold to -40dB and Bandwidth to 7500Hz.
6. Vary the Center Frequency. When set to maximum (12000Hz), you can still hear quite a bit of sibilance because this is higher than the sibilants’ frequency. Similarly, when set to minimum (500Hz), the sibilants are above this range and are still audible. You’ll find a “sweet spot” between 9000 and 10000Hz that reduces sibilants.
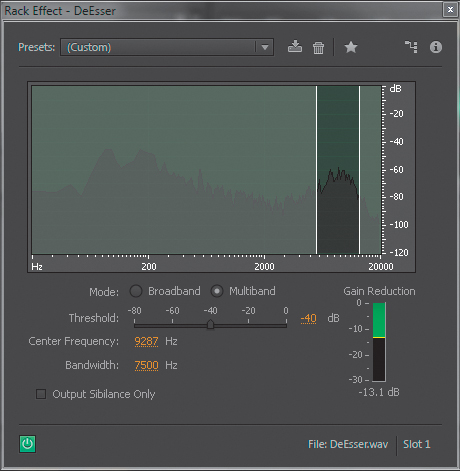
7. To fine-tune this further, select Output Sibilance Only. Now you’ll hear only the sibilants. Adjust the Center Frequency to hear the greatest amount of sibilants and the least amount of the voice, which will be around 10400Hz. The Gain Reduction meter shows the sibilant range’s attenuation.
8. Deselect Output Sibilance Only, and bypass/enable the DeEsser to hear the difference.
9. Stop playback, click the effect’s insert that includes the DeEsser, and press the Delete key.
10. Choose File > Close and don’t save the file. Keep Audition open.
Dynamics processing
With a standard amplifier, the relationship between the input and output is linear. In other words, if there’s a gain of 1, the output signal will be the same as the input signal. If there’s a gain of 2, the output signal will have twice the level of the input signal, whatever the input signal level may be.
A Dynamics Processor changes the relationship of the output to the input. This change is called compression when a large input signal increase produces only a small output signal increase and expansion when a small input signal increase produces a large output signal increase. Both can be present at the same time by expanding signals within one range of levels and compressing signals in a different range of levels. The Dynamics Processor’s graph shows the input signal on the horizontal axis and the output on the vertical axis.
Compression can make a sound subjectively louder and is the tool that makes TV commercials SO MUCH LOUDER THAN EVERYTHING ELSE. Expansion is less common; one application is to expand objectionable low-level signals (like hiss) to reduce their levels further. There are also many uses for both as special effects.
In the following graph, as the input signal changes from -100dB to around -40dB, the output changes from -100dB to only -95dB. As a result, the Dynamics Processor has compressed 60dB of input dynamic range into 5dB of change at the output. But from around -40dB to 0dB, the output changes from -95dB to 0dB. Therefore, the Dynamics Processor has expanded 40dB of input dynamic range into 95dB of output dynamic range.
In the graph these ranges are given a segment number, and the area below the graph provides information about each segment:
• The segment number
• The relationship between output and input expressed as a ratio
• Whether the segment is an Expander or Compressor
• The Threshold (range of levels) where the expansion or compression takes effect
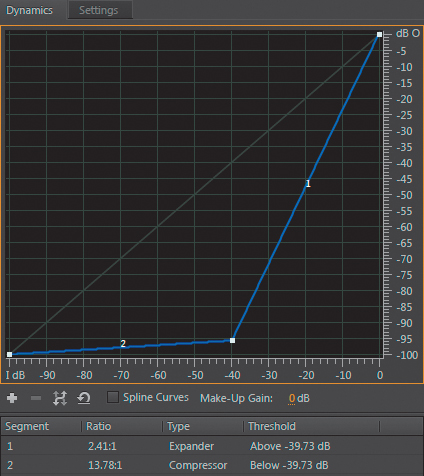
The easiest way to become familiar with dynamics processing is to load various presets, listen to how they affect the sound, and correlate what you hear to what you see on the graph.
1. Choose File > Open, navigate to the Lesson04 folder, and open the file Drums+Bass+Arp110.wav.
2. Click an Effects Rack insert’s right arrow button, and then choose Amplitude and Compression > Dynamics Processing.
3. Enable looping on the Transport, and then start playback.
4. Select various presets. Note that you will need to turn down the Effects Rack’s Output level when you’re using some of the more “aggressive” presets to avoid distortion.
5. Create your own dynamics processing. Choose the (Default) preset, which provides neither compression nor expansion.
6. Click the little white square in the upper right and drag it down slowly to around -10dB. You’ll hear how this brings down peaks and makes the sound less dynamic.
7. Create a less abrupt change. Click in the middle of segment 1 (e.g., where the segment crosses -15dB) to create another square. Drag it up a little bit to around -12dB.
8. Now you’ll use expansion to reduce low-level sounds. Click on the line at -30dB and -40dB to create two more squares. Click the one at -40dB, and drag it all the way down to -100dB. This effect makes the drums sound more percussive.
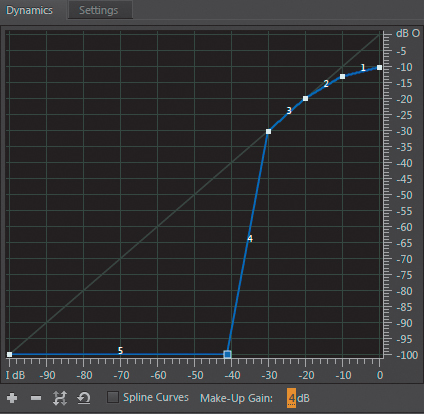
9. Look at the Effects Rack’s Output meter. Bypass the dynamics processing, and you’ll note that the signal is actually a little louder because compression has reduced the peaks. To compensate for this, click in the Dynamics Processor’s Make-Up Gain parameter located just below the curve’s horizontal axis. Increase the gain by +4dB.
10. Bypass and enable the Dynamics Processor. By adding Make-Up gain, the processed signal is now a little bit louder.
11. Stop playback, click the effect’s insert with the Dynamics Processor, and press the Delete key. Don’t close the file, and leave Audition open.
![]() Note
Note
Audition’s Dynamics Processor is extremely sophisticated. Although you’ve just experienced the basic concepts in the dynamics processing exercise, the Settings page allows for further customization and effects. Basic compression and expansion can solve most audio problems that need dynamics control, but please refer to the Audition documentation for detailed information on other Dynamics Processor parameters.
Hard limiter
Like an engine’s governor that limits the maximum number of RPMs, a limiter restricts an audio signal’s maximum output level. For example, if you don’t want an audio file to exceed a level of -10dB, yet there are some peaks that reach -2dB, set the limiter’s Maximum Amplitude for -10dB and it will “absorb” the peaks so they don’t exceed -10dB. This is different from simple attenuation (which lowers the levels of all signals), because in this example of limiting, levels below -10dB remain untouched. Levels above -10dB are compressed with an essentially infinite ratio, so any input level increase produces no output level increase above -10dB.
This limiter also has an Input Boost parameter, which can make a signal subjectively louder. Here’s why: If you set the Maximum Amplitude to 0, you can increase the level of an input signal that already reaches the maximum headroom, because the limiter will prevent it from distorting by “clamping” its output to 0. Let’s listen to how this affects a mix.
1. With the Drums+Bass+Arp110.wav still loaded, click an Effects Rack insert’s right arrow button, and choose Amplitude and Compression > Hard Limiter.
2. Enable looping on the Transport, and then start playback.
3. Look at the Maximum Amplitude numeric field to confirm that the default value is -0.1. This level ensures that the signal won’t hit zero, so the output won’t trigger the red zone in the Effects Rack panel’s Output level meters.
4. Raise the Input Boost amount above 0 while observing the Output level meters. Note that even if you add lots of boost, like 10dB, the output still doesn’t go above -0.1, and the Output meters never go into the red.
5. The Release Time sets how long it takes for the limiter to stop limiting after a signal no longer exceeds the maximum amplitude. In most cases the default is fine. With a fair amount of input boost, shorter Release settings—even though they limit the signal more accurately—produce a “choppy” effect. With the Input Boost set to around +16dB, move the Release Time slider all the way to the left to hear this “choppiness.” When you’re using the Release Time slider, the rule of thumb is to set it for the most natural sound.
6. The Look-Ahead Time allows the limiter to react to fast transients. With no look-ahead time, the limiter has to react instantly to a transient, which is not possible: It has to know a transient exists before it can decide what to do with it. Look-Ahead alerts the limiter when a transient is coming, so the reaction can be instantaneous. Longer settings cause a slight delay through the effect, although in most cases this doesn’t matter. The default setting is fine, but experiment with increasing the Look-Ahead Time slider if the transients sound “mushy.”
7. Stop playback after you’ve finished experimenting with these settings.
![]() Note
Note
It’s easy to overdo hard limiting. Past a certain amount of input boost, the sound will become unnatural. The level at which this will occur varies depending on the input signal source. With solo instruments like voice, you can usually apply more boost than with program material.
Single-Band Compressor
The Single-Band Compressor is a “classic” compressor for dynamic range compression and is an excellent choice for learning about how compression works.
As explained in the “Dynamics processing” section, compression changes the relationship of the output signal to the input signal. The two most important parameters are Threshold (the level above which compression starts to occur) and Ratio, which sets the amount of change in the output signal for a given input signal change. For example, with a 4:1 ratio, a 4dB increase in input level produces a 1dB increase at the output. With an 8:1 ratio, an 8dB increase in input level produces a 1dB increase at the output. In this lesson you’ll hear how compression affects the sound.
1. If the Drums+Bass+Arp110.wav file is not open, close any currently open files and open it. Also, delete any currently loaded effects.
2. Click the Effects Rack insert’s right arrow, and choose Amplitude and Compression > Single-Band Compressor.
3. Enable looping on the Transport, and then start playback.
4. Assuming the Default preset is loaded, move the Threshold slider over its full range. You won’t hear any difference because the Ratio defaults to 1:1, so there’s a linear relationship between the output and input.
5. With Threshold at 0, move the Ratio slider over its full range. Again you won’t hear any difference, because all audio will lie below the Threshold—so there’s nothing above the Threshold that can be affected by the Ratio slider. This shows how the Threshold and Ratio controls interrelate, and explains why you usually need to go back and forth between these two controls to dial in the right amount of compression.
6. Set the Threshold slider to -20dB and the Ratio slider to 1. Slowly increase the Ratio slider by moving it to the right. The farther you move it to the right, the more compressed the sound. Leave the Ratio slider at 10 (i.e., 10:1).
7. Experiment with the Threshold slider. The lower the Threshold, the more compressed the sound; below about -20dB, with a Ratio of 10:1, the sound is so compressed it becomes unusable. Leave the Threshold slider at -10dB for now.
8. Look at the Effects Rack panel’s Output meter. When you bypass the Single-Band Compressor, note that the meters are more animated and have more pronounced peaks. Enable the Single-Band Compressor; the signal’s peaks are less dynamic and more uniform.
9. Note the maximum peak level in bypassed mode. Then with the Single-Band Compressor enabled, adjust its Output Gain control to around 2.5dB, so its peaks match the same level as when bypassed. Now when you compare the bypassed and enabled states, you’ll hear that despite having the same peak levels, the compressed version sounds louder. The reason is that reducing peaks allows for increasing the overall output gain without exceeding the available headroom or causing distortion.
It’s possible to make this difference even more pronounced. Attack sets a delay before the compression occurs after a signal exceeds the threshold.
10. Use the default Attack time of 10ms; this lets through percussive transients up to 10ms in duration before the compression kicks in and retains some of a signal’s natural percussiveness. Now set the Attack time to 0.
Again, observe the Output level meters. With 0 Attack time, the peaks have been reduced even further, which means the Single-Band Compressor Output Gain can go even higher.
11. Set the Single-Band Compressor Output Gain to 6dB, and when you enable/bypass the Single-Band Compressor, the peak levels are the same—yet the compressed version sounds a lot “bigger.”
12. Set the release time subjectively for the smoothest, most natural sound, which will usually lies between 200 and 1000ms. Release determines how long it takes for the compression to stop compressing once the signal falls below the threshold.
13. Keep Audition open and loaded with the same file.
Tube-Modeled Compressor
The Tube-Modeled Compressor has the same control complement as the Single-Band Compressor but offers a slightly different, somewhat less “crisp” sonic character. You can use the same basic steps as in the previous lesson to explore the Tube-Modeled Compressor. The one obvious difference is that the Tube-Modeled Compressor has two meters: the one on the left shows the input signal level, and the one on the right shows how much the gain is being reduced to provide the specified amount of compression.
Multiband Compressor
The Multiband Compressor is another variation on the “classic” Single-Band Compressor. It divides the frequency spectrum into four bands, each with its own compressor. Therefore, it’s possible to compress some frequencies more than others, such as adding lots of compression to bass but only a moderate amount of compression in the upper midrange.
Dividing the signal into four bands also embodies elements of equalization (described later), because you can alter a signal’s frequency response.
If you think adjusting a Single-Band Compressor is complex, a Multiband Compressor with four bands isn’t just four times as complex—all these stages also interact with each other. Rather than describe how to create a multiband compression setting from scratch, you’ll load various presets and analyze why they sound the way they do. Note that each band has an S (Solo) button, so you can hear what that band alone is doing.
1. If the Drums+Bass+Arp110.wav file is not open, close any currently open files and open it. Also, delete any currently loaded effects.
2. Click an Effects Rack insert’s right arrow, and choose Amplitude and Compression > Multiband Compressor.
3. Enable looping on the Transport, and then start playback.
4. The Default preset doesn’t apply any multiband compression, so listen to that first as a point of reference.
5. Load the Broadcast preset, which gives a major boost to the sound. Note that the highest and lowest bands have more gain and a higher compression ratio, which give a little more “sizzle” and “depth,” respectively.
6. Load the Enhance Highs preset. This shows how multiband compression can add an element of equalization to the high frequencies; the output gain for the two upper bands is considerably higher than the two lower bands.
7. Load the Enhance Lows preset. This is the mirror image of the Enhance Highs preset, because it boosts low frequencies. The two lower bands’ output gain is higher than the two higher bands.
8. Load the Hiss Reduction preset, and notice that the overall sound is much duller. The reason is that the highest band has an extremely low threshold of -50dB, so even low-level, high-frequency sounds are compressed.
Speech Volume Leveler
The Speech Volume Leveler incorporates three processors—leveling, compression, and gating—to even out level variations with narration, as well as reduce background noise with some signals.
1. Choose File > Open, navigate to the Lesson04 folder, and open the file NarrationNeedsHelp.wav.
2. Click an Effects Rack insert’s right arrow, and choose Amplitude and Compression > Speech Volume Leveler.
3. Bypass the effect, and listen to the file all the way through. Note the two quiet parts where the narration says, “Most importantly, you need to maintain good backups of your data” and “Recovering that data will be a long and expensive process.” The rest is at a reasonable volume. You’ll use the Speech Volume Leveler to match the levels.
4. Select the audio that says, “Most importantly, you need to maintain good backups of your data.” Move the Speech Volume Leveler sliders for Target Volume Level and Leveling Amount all the way to the left, and then enable the effect.
5. Click the Transport Loop button, and then click Play.
6. Move the Leveling Amount slider to the right while observing the Input and Output meters in the Effects Rack panel. As you move the slider to the right, the output will become louder than the input during softer sections. Choose a value of about 60 for now. The output will peak at around -6dB.
7. Select the audio that says, “If all your precious music is stored on a hard drive,” loop it and play it. Adjust the Target Volume Level until the output peaks match the peaks you saw in step 6. The slider should be around -19dB.
8. Double-click on the waveform to select it all, and then listen. There should be fewer volume variations between the soft and loud sections.
9. Click the disclosure triangle next to the Advanced options to reveal two more settings.
10. To even out levels even further, enable the compressor and move the Threshold to the left (more negative numbers) to produce a consistent, natural sound.
11. High Leveling Amount settings often amplify low-level noise, and the Noise Gate can compensate for this. To best hear how this works, with the Leveling Amount at the default setting of 100, select the audio between 2 and 6 seconds, and loop it. Note that the noise becomes very prominent in the space between “data” and “if.”
12. Select the Noise Gate, and move the Noise Offset slider all the way to the right (25dB). This doesn’t eliminate the noise but reduces it considerably. Move the Leveling Amount back to 60, and the noise goes away.
13. Double-click in the waveform to select the entire file. Click the power button to bypass and enable the Speech Volume Leveler a few times so you can hear how the effect alters the sound. Observe the meters, and see if further tweaking can help create a more consistent output. For this particular file, a setting with Compressor and Noise Gate off, Target Volume Level at -18dB, and a Leveling Amount of 50% seems about optimum.
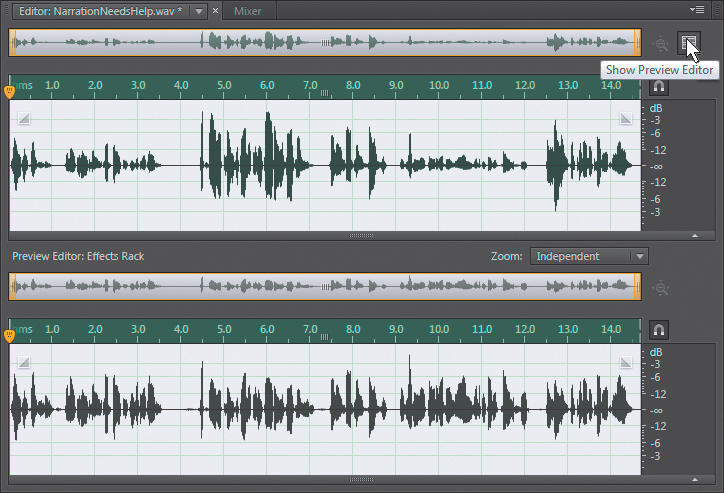
14. To see how this process affects the file’s waveform, click the Show Preview Editor button in the Editor panel’s upper-right corner. This splits the waveform into two views: the upper view is the original file, and the lower view is what the file will look like after being processed. Note that the lower waveform is much more consistent.
15. Click the Show Preview Editor button again to revert to the standard waveform view.
![]() Note
Note
The Boost Low Signal option raises levels for short, low-volume passages by reducing the attack and decay time of the effect so it changes levels more rapidly. You’ll usually want this option off, but try enabling it to determine if there’s an improvement.
Delay and echo effects
Adobe Audition has three echo effects with different capabilities. All delay effects store audio in memory and then play it back later. The time that elapses between storing it and playing it back is the delay time.
Delay
Delay simply repeats the audio, with the repeat’s start time specified by the delay amount.
1. Choose File > Close All. Don’t save any changes. Choose File > Open, navigate to the Lesson04 folder, and open the file Arpeggio110.wav.
2. Click an Effects Rack insert’s right arrow, and then choose Delay and Echo > Delay.
![]() Note
Note
Stereo audio has separate delays for the left and right channels, whereas mono audio has only a single delay.
3. The Mix slider sets the proportion of dry and delayed audio. Set the Right Channel to full Dry and the Left channel to full Wet. This makes it easy to hear the difference between the delayed signal in the left channel and the dry signal in the right channel when the delay effect is enabled.
![]() Note
Note
You can specify delay time (lower-left drop-down menu) in milliseconds, beats, or samples. Beats is most useful in Multitrack view, where the project has a particular tempo. Samples is useful for tuning out short timing differences, because you can specify delays down to 1 sample (at a 44,100Hz sample rate, that’s a delay of 22.67 microseconds or 0.00002267 seconds).
4. Set the left channel Delay Time slider full right (500ms). You’ll now hear the left channel arpeggio delayed by half a second compared to the right channel.
5. Set the left channel Delay Time slider full left (-500ms). You’ll now hear the arpeggio start half a second earlier in the left channel than in the right channel.
6. Set both Mix sliders to 50%, and experiment with different delay times. You’ll hear a mix of delayed and dry sounds in each channel. Leave the project open for the next lesson.
Analog Delay
Before digital technology, delay used tape or analog delay chip technology. These produced a grittier, more colored sound compared to digital delay. Audition’s Analog Delay provides a single delay for stereo or mono signals and offers three different delay modes: Tape (slight distortion), Tape/Tube (crisper version of tape), and Analog (more muffled). Analog Delay simply repeats the audio with the start time of the repeat specified by the delay amount. Unlike the Delay effect, there are separate controls for Dry and Wet levels instead of a single Mix control. The Delay slider provides the same function as the Delay effect except that the maximum delay time is eight seconds.
1. Choose File > Close All. Don’t save any changes. Choose File > Open, navigate to the Lesson04 folder, and open the file Drums110.wav.
2. Click an Effects Rack insert’s right arrow, and then choose Delay and Echo > Analog Delay.
3. Set Dry Out to 60%, Wet Out to 40%, and Delay to 545ms. Feedback determines the number of repeats as they fade out. Start playback. No Feedback (a setting of 0) produces a single echo, values moving toward 100 produce more echoes, and values above 100 produce “runaway echoes” (watch your monitor volume!).
4. With feedback at 40, set the Trash control to 100. Change the different modes (Tape, Tape/Tube, Analog) to hear how each affects the sound. Vary the feedback, being careful to avoid excessive, runaway feedback.
5. Spread at 0% narrows the echoes to mono and at 200% produces a wide stereo effect. Play with the various controls, and you’ll hear anything from dance mix drum effects to 50s sci-fi movie sounds. Keep Audition open for the next lesson.
![]() Tip
Tip
With rhythmic material, correlating delay to the rhythm creates a more “musical” effect. Use the formula 60,000/tempo in bpm (beats per minute) to determine the echo for a quarter note. For example, the drum loop tempo is 110 bpm, so the echo time for a quarter note is 60,000/110 = 545.45ms. An eighth note is half that or 272.72ms, a 16th note is 136.36ms, and so on. The Lesson04 folder includes a file called Period vs. Tempo.xls. Enter a tempo in this spreadsheet to see the number of milliseconds and samples that correspond to particular rhythmic values.
Echo
Audition’s Echo effect allows for tailoring the echoes’ frequency response by inserting a filter in the delay’s feedback loop, where the output feeds back to the input to create additional echoes. As a result, each successive echo processes each echo’s timbre to a greater degree. For example, if the response is set to be brighter than normal, each echo will be brighter than the previous one.
1. With the Drum110.wav file open, assuming the Analog Delay effect is still inserted and Audition is still playing, click its insert’s right arrow, and then choose Delay and Echo > Echo.
2. Compared to the previous delay effects, Echo has yet another way of setting the echo mix; each channel has an Echo Level control that dials in the echo amount. The Dry signal is fixed. When you’re using the echo effect, enter the following values for the left channel: Delay Time 545ms, Feedback 90%, and Echo Level 70%. Enter the following values for the right channel: Delay Time 1090ms, Feedback 70%, and Echo Level 70%.
![]() Tip
Tip
To set both channels to the same Delay Time, enable Lock Left and Right. Adjusting either channel will adjust the other to the same value.
3. Bring all Successive Echo Equalization controls all the way down (-15dB). By doing so, it will be easier to hear the effects of moving each slider.
4. Raise the 1.4kHz control to 0 (values above 0 produce runaway echo), and note how the sound is more “midrangey.”
5. Bring down the 1.4kHz slider, and raise the 7.4kHz slider to 0. Now the echoes are brighter.
6. Return the 7.4kHz slider to -15dB, and raise the 172Hz slider to 0. The echoes are now bassy.
7. You can vary more than one slider at a time to create a more complex equalization curve, as well as enable Echo Bounce to bounce each channel’s echo between the left and right channels.
Filter and EQ effects
Equalization is an extremely important effect for adjusting tonality. For example, you can “brighten” muffled narration by boosting the treble or make tinny, thin-sounding voices sound fuller by increasing the low frequencies. Equalization can also help differentiate among different instruments; for example, bass guitar and a drum kit’s kick drum both occupy the low frequencies and can interact in a way that makes each one less distinct. To solve this problem, some engineers might emphasize the bass’s highs to bring out pick and string noise, whereas others boost highs on the kick to bring out the “thwack” of the beater.
Adobe Audition has five different equalizer effects; each is used for different purposes that can adjust tonality and solve frequency-response related problems: Parametric Equalizer, Graphic Equalizer, FFT (Fast Fourier Transform) Filter, Notch Filter, and Scientific Filter.
Parametric Equalizer
The Parametric Equalizer offers nine stages of equalization. Five stages have a parametric response, which can boost (make more prominent) or cut (make less prominent) specific ranges (“bands”) of the frequency spectrum. Each parametric equalization stage has three parameters.
Caution: In the following lesson, keep monitor levels down as you make adjustments. The Parametric Equalizer is capable of high amounts of gain at the selected frequencies.
1. Choose File > Open, navigate to the Lesson04 folder, and open the file Drums+Bass+Arp110.wav.
2. In any Effects Rack insert, click the right arrow, and choose Filter and EQ > Parametric Equalizer. Start playback.
3. Note the five numbered boxes. Each represents a controllable parametric stage. Click one of them (e.g., 3) and drag up to boost response, or drag down to cut the response. Drag left to affect lower frequencies or right to affect higher frequencies. Listen to how this changes the sound.
4. In the area below the graph, each parametric stage shows the Frequency, Gain, and Q/Width parameters. Click on the selected stage’s Q/Width parameter and drag up to narrow the range affected by the boost or cut, or drag down to widen the range. You can also click on the stage’s number to toggle that stage on or off.
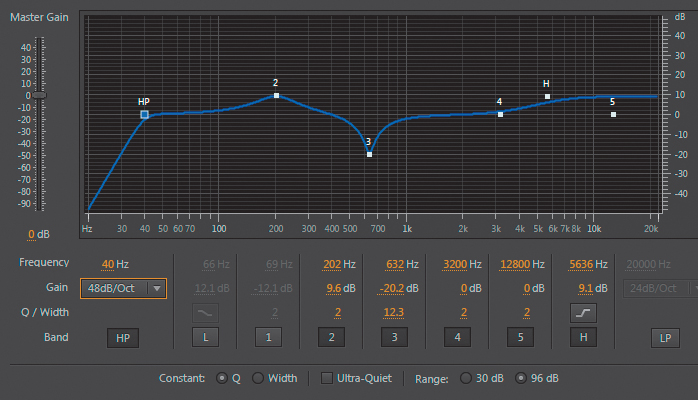
5. Load the Default preset to restore the EQ to having no effect. The L and H squares control a low shelf and high shelf response, respectively. This starts boosting or cutting at the selected frequency, but the boost or cut extends outward toward the extremes of the audio spectrum. Past a certain frequency, the response hits a “shelf” equal to the maximum amount of cut.
6. Click on the H box and drag it up slightly. Note how this increases the treble. Now drag it to the left, and you’ll hear that the boost now affects a wider range of high frequencies. Similarly, click on the L box to hear how this affects the low frequencies. In the Parameter section for the Low and High shelf sections, you can click the Q/Width button to change the steepness of the shelf’s slope.
7. Reload the Default preset so the EQ has no effect. There are two additional stages, Highpass and Lowpass, which you enable by clicking the HP and LP buttons, respectively. Click those buttons now.
A Highpass response progressively reduces response below a certain frequency (called the cutoff frequency); the lower the frequency is below the cutoff, the greater the reduction. A Highpass filter is helpful for removing subsonic (very low-frequency) energy.
8. Click on the HP box and drag it to the right to hear how it affects low frequencies.
9. You can also change the filter slope’s steepness, in other words, the rate of attenuation compared to frequency. In the HP panel that displays its parameters, click the Gain drop-down menu and choose 6dB/octave. Note how this creates a gradual curve. Then select 48dB/octave to produce a steep curve.
10. Similarly, listen to how the Lowpass filter affects the sound by clicking and dragging the LP box left or right, and choosing different curves from the Gain menu. Keep this project open for the next lesson.
All of these responses are available simultaneously. The screen shot shows a steep Highpass slope, a slight parametric boost with stage 2, a narrow parametric cut with stage 3, and a High shelf boost.
![]() Note
Note
The strip along the bottom of the screen has three additional options. Constant Q—Q is a ratio compared to frequency—is most common, whereas Constant Width means the Q is the same regardless of frequency. The Ultra-Quiet option reduces noise and artifacts but requires much more processing power and can usually be deselected. Range sets the maximum amount of boost or cut to 30dB or 96dB. The more common option is 30dB.
Graphic Equalizer (10 Bands)
A Graphic Equalizer can boost or cut with a fixed bandwidth at various fixed frequencies. It gets its name because moving the sliders creates a “graph” of the filter’s frequency response.
Caution: In the following lesson, keep monitor levels down as you make adjustments. The Graphic Equalizer can produce high amounts of gain at specific frequencies.
1. Assuming Audition is still open and the file Drum+Bass+Arp110.wav is still loaded, click the right arrow of the insert that had the Parametric Equalizer loaded, and choose Filter and EQ > Graphic Equalizer (10 Bands).
2. Start playback if necessary. Move the various sliders up and down to hear how each affects the timbre by varying the level within their respective frequency bands. In musical terms, each slider is an octave apart. Keep the project open in preparation for the next lesson.
![]() Note
Note
The strip along the bottom of the Graphic Equalizer screen has three additional parameters. Range sets the maximum available amount of boost or cut up to 120dB (which is a lot!). It’s easier to make fine adjustments with narrower ranges, like 6–12dB. Accuracy affects low-frequency processing (note that it can be adjusted only if the Transport is stopped). If you’re doing significant amounts of low-frequency boost or cut, raise Accuracy if it improves the sound. Otherwise, leave it at the default of 1000 points to reduce CPU loading. Master gain compensates for Output level changes caused by using the EQ. Turn it down if you added lots of boosting; turn it up if you used lots of cutting.
Graphic Equalizer (20 Bands)
The Graphic Equalizer (20 Bands) works identically to the Graphic Equalizer (10 Bands) except the bands are half an octave apart, which provides greater resolution. To hear how it works, follow the same basic procedure as the lesson for the 10 Bands version.
Graphic Equalizer (30 Bands)
The Graphic Equalizer (30 Bands) works identically to the Graphic Equalizer (20 Bands) except the bands are a third of an octave apart, which provides greater resolution. To hear how it works, follow the same basic procedure as the lesson for the 10 Bands version.
FFT Filter
The FFT Filter is an extremely flexible filter that lets you “draw” the frequency response. The default settings are a practical point of departure. FFT is a highly efficient algorithm commonly used for frequency analysis.
1. Click the right arrow of the insert that had a Graphic Equalizer loaded, and choose Filter and EQ > FFT Filter.
2. Start playback. Click on the graph to create a point; the blue line that indicates frequency response will move up or down as needed to “snap” to that point. You can then drag this point up, down, or sideways. You are not limited to the number of points you can add, which allows you to make very complex—and even truly bizarre—EQ curves and shapes.
3. For a smoother curve, enable Spline Curves. The upper screen shot shows Spline Curves deselected and the original placement of points, whereas the lower screen shot shows Spline Curves selected.

![]() Note
Note
Regarding other FFT Filter parameters, for Scale choose Logarithmic when you’re working primarily with low frequencies because this produces the best resolution for drawing in nodes. Linear has the same advantage at high frequencies. As to the Advanced options, for the best accuracy with steep, precise filters, choose higher values like 8192 to 32678. Lower values produce fewer transients with percussive sounds. For Window, Hamming and Blackman are the best overall choices. The choices listed first narrow the shape of the response curve, and subsequent choices progressively widen the shape.
Notch Filter
The Notch Filter is optimized to remove very specific frequencies in an audio file, like a particular resonance or AC hum. However, Audition also has a filter optimized specifically for removing hum; this is covered in Chapter 5, “Audio Restoration.”
1. Choose File > Open, navigate to the Lesson04 folder, and open the file ReduceHum.wav.
2. Start playback. Note the huge amount of hum in the file.
3. Click an effect insert’s right arrow, and choose Filter and EQ > Notch Filter.
4. Enable the Notch Filter as the file plays back. The filter’s default setting is a good start (Europeans should select the 50Hz and Harmonics Removal preset instead of the 60Hz-based default), but note that there’s some ringing and an unnatural quality. You’ll now tweak the settings to reduce hum while retaining a natural sound.
5. There are six notches starting at 60Hz whose frequencies are set to harmonics of 60Hz. Turn off all notches that don’t improve the sound by clicking a notch’s enable button. Turn off notches 3, 4, 5, and 6. Note that this doesn’t increase the amount of hum. Turn off notches 1 and 2. These contribute hum, so re-enable them, and let’s work on optimizing these.
6. Reduce the gain for notches 1 and 2 to around -45dB.
7. Experiment with the Gain parameters for notches 1 and 2. For the most natural sound, you want to use the least amount of reduction consistent with reducing hum. You’ll probably be able to reduce hum sufficiently with about -36dB of cut.
8. Bypass the Notch Filter, and note how the hum increases.
Scientific Filter
Scientific Filters are commonly used for data acquisition, but they have audio applications as well—such as creating extremely steep slopes, narrow notches, ultra-sharp peaks, and other highly precise filter responses. The trade-off is that this precision can compromise other aspects of filtering (for the technically minded, these include phase shift and delay through the filter); however these trade-offs resemble the trade-offs inherent in analog filter technology, and some people prefer this kind of sonic “character.”
There are four different Scientific Filter types, and each type offers four modes. Of these, the Butterworth response is generally the best compromise between quality and precision.
The available parameters depend on the selected filter type and mode. Because the Scientific Filter is computationally intensive, you won’t hear any difference as you alter most parameters; once you stop adjusting the parameter, the Scientific Filter finishes its calculations and you can hear the results of your edits. Also, note that several parameters cannot be adjusted unless playback is stopped.
Because the Scientific Filter is relatively complex, an easy way to find out how it can affect the sound is to load different presets and vary some of the parameters.
1. Choose File > Open, navigate to the Lesson04 folder, and open the file DeepTechHouse.wav.
2. Click an effect insert’s right arrow, and choose Filter and EQ > Scientific Filter.
3. Start playback. Select the Drop Off Below 250Hz preset. Note the steep slope that eliminates all the bass. To make this even steeper, increase Order to 66; the higher the order, the steeper the slope.
4. Stop playback, and then adjust Cutoff to 500Hz. Resume playback. The sound is even “tinnier,” and all the bass is gone.
5. Change Modes to LowPass and you’ll hear the reverse—all bass and no treble. Change Modes again to BandPass, and the Scientific Filter removes all frequencies except for a particular band of frequencies.
6. Stop playback, click on High Cutoff, and type 1000. Start playback, and you’ll hear just a tiny slice of frequencies. Change Modes to BandStop, and the reverse occurs: A slice of frequencies within the band is removed.
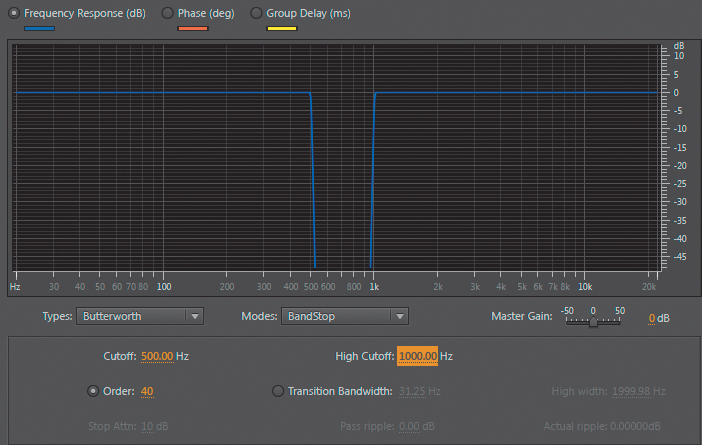
7. Stop playback, and select the Remove Subsonic Rumble preset. Start playback by pressing the spacebar, and you won’t hear any loss of bass because the response drops dramatically below 28Hz. This filter response can be very useful if a signal has subsonic “mud” that interferes with sounds in the audio range.
Modulation effects
Unlike some of the previous effects we’ve discussed, modulation effects aren’t designed to solve problems as much as add “spice” to sounds in the form of special effects. These effects tend to produce very specific sounds, and the presets included with Adobe Audition are a good place to start. Therefore, with most of these effects, you’ll load presets to hear how they affect the sound and also analyze which parameters are most important for editing.
Chorus
Chorus can turn a single sound into what seems like an ensemble. This effect uses short delays to create additional “voices” from the original signal. These delays are modulated so that the delay varies slightly over time, which produces a more “animated” sound.
![]() Note
Note
The Chorus effect works optimally with stereo signals, so if your source is mono, convert it to stereo for the best results. To do this, choose Edit > Convert Sample Type, and from the Channels drop-down menu, choose Stereo. Then click OK.
1. Choose File > Open, navigate to the Lesson04 folder, and open the file FemaleChoir.wav. Play the file to hear what it sounds like.
2. Click an effect insert’s right arrow, and choose Modulation > Chorus.
3. Note how with Chorus enabled the Default preset creates a fuller and bigger sound. Select Highest Quality: Most modern computers can provide the additional processing power this option needs. If the audio crackles or breaks up, deselect this option.
4. Increase Modulation Depth to 8dB or so. Notice how the sound becomes more animated. To make this more obvious, increase the Modulation Rate to 2.5Hz. Modulation Depth and Rate interact; with a higher Rate, you’ll usually want a lower Depth. Return Modulation Depth to 0.
5. To increase the “number of people” in the chorus, click the Voices drop-down menu and choose 16 voices. Because this adds a lot more audio, you may need to bring down the Output control in the Effects Rack panel to avoid distortion.
6. Set the Delay time to around 40ms for now. Increasing the Delay Time can make a bigger sound, but too much Delay Time may produce an “out of tune” effect.
7. Set Spread to around 152ms. Spread increases the stereo image width. Bypass/enable the Chorus to hear the effect of these edits.
8. With Chorus enabled, note the Dry and Wet Output level controls. For a more subtle effect, set a higher Dry value and lower Wet value, or turn up only the Wet sound for the most “diffused” character.
9. Turn up the Feedback parameter but be careful, because even slight amounts can add uncontrolled feedback. Values up to about 10 can produce a more “swirling” sound for the Chorus.
10. The remaining controls apply to stereo imaging. Adjust Stereo Field to make the output narrower or wider. Select Average Left & Right Channel Output and Add Binaural Cues; if you like the sound better, leave them selected. If there’s no audible difference, leave them deselected. Leave Average Left & Right Channel Output deselected if the original signal was mono.
11. To get a sense of how you can also use the Chorus effect for special effects, try selecting other presets, like Chaos Pits and Robotic Bee Attack. Note that some of the more bizarre sounds combine lots of modulation, feedback, or long delay times.
12. Leave the project open in preparation for the next lesson.
Flanger
Like Chorus, Flanger uses short delays, but they’re even shorter to create phase cancellations that result in an animated, moving, resonant sound. This effect was popularized in the 60s due to its “psychedelic” properties.
1. Click the current effect insert’s right arrow, and choose Modulation > Flanger to replace the Chorus effect. Play the file to hear what it sounds like.
2. For a more pronounced effect, set the Mix to 50%. Alter the Feedback setting; more feedback produces a more resonant sound.
3. Set Stereo Phasing, which changes the phase relationship of the modulation, to 0; the modulation is the same in both channels. Increase the Phasing amount to offset the modulation in the two channels, which creates more of a stereo effect. Vary the Modulation Rate to change the modulation speed.
4. Experiment with the Initial Delay Time and Final Delay Time options, which set the Flanger sweep range. The “standard” range is 0 to around 5ms; increasing the final Delay Time produces a sound that’s more like chorusing when the Flanger delay time reaches the longer delay.
5. Use the Mode options for specialized effects. Selecting Inverted changes the tone. Special Effects changes the flanging “character”: Enable it and see if you like what it does. The effect varies depending on the other parameter settings. Sinusoidal changes the modulation waveform to produce a somewhat more “rolling” modulation effect.
6. Load other presets to get a sense of the range of possibilities that the Flanger can offer. Many of the more radical patches use either high Modulation Rates, large amounts of Feedback, longer Initial or Final Delay Times, or a combination of these.
7. Leave this project open in preparation for the next lesson.
Chorus/Flanger
Chorus/Flanger offers a choice of Chorus or Flanger; each is a simpler version of the Chorus and Flanger effects described previously. Width is essentially the same as varying Delay in the Chorus or Flanger, whereas Intensity basically determines the wet/dry mix. Speed provides the same function as Modulation Rate. The only different control is Transience, which emphasizes transients to produce a “sharper” sound.
1. Click the current effect insert’s right arrow, and choose Modulation > Chorus/Flanger to replace the Flanger effect.
2. Load the various presets to hear the types of effects each processor provides.
3. Leave Audition open in preparation for the next lesson.
Phaser
The Phaser effect is similar to Flanging but has a different, and often more subtle, character because it uses a specific type of filtering called an allpass filter instead of delays to accomplish its effect.
1. Assuming that Audition is open and the FemaleChoir.wav file is loaded, click the current effect insert’s right arrow, and choose Modulation > Phaser to replace the Chorus/Flanger effect. Play the file.
2. Phasing tends to be most effective when you’re processing the midrange, so change the Upper Freq to around 2000Hz.
3. Move the Phase Difference away from the center (0) position to widen the stereo image (as with Flanging, you can offset the modulation for the left and right channels). Leave this parameter at 180 for now.
4. Moving Feedback off-center to more positive values increases the phaser’s sharpness, producing a “whistling” sound. More negative values produce a subtler, “hollower” sound. Leave it at 0.
5. Vary the Mod Rate slider. Note how at faster settings the effect is almost like vibrato. Return it to 0.25Hz before proceeding.
6. Experiment with the remaining parameters to set the degree of “drama” in the phased sound:
• More Stages produces a more profound effect.
• Intensity determines how much phase-shifting the Phaser applies (you’ll typically want this above 90 unless you prefer a more “static” sound).
• Depth sets the lower frequency limit that Modulation attains. This complements the Upper Frequency parameter, which is the highest frequency that Modulation attains.
• Mix sets the blend of wet and dry sounds. A 50% value produces the maximum phasing effect by mixing dry and wet signals in equal proportion. Moving the value toward 0 increases the proportion of dry signal to wet signal, whereas moving the value toward 100 increases the proportion of wet signal to dry signal.
7. Load the Phaser’s various presets to hear the different types of effects it can provide.
Noise reduction/restoration
Noise reduction and noise restoration are such important topics that these processors are covered in detail in Chapter 5, which describes Adobe Audition’s many options for audio restoration. These include the ability to remove noise, delete pops and clicks, minimize the sound caused by scratches in vinyl records, reduce tape hiss, and more.
Reverb effects
Reverberation imparts an acoustic space’s characteristics (room, concert hall, garage, plate reverb) to audio. Two common reverb processes are convolution reverb and algorithmic reverb. Audition includes both.
Convolution reverb is generally the more realistic sounding of the two. It loads an impulse, which is an audio signal (typically in WAV file format) that embodies the characteristics of a particular, fixed acoustic space. The effect then performs convolution, a mathematical operation that operates on two functions (the impulse and the audio) to create a third function that combines the impulse and the audio, thus impressing the qualities of the acoustic space onto the audio. The trade-off for realism is a lack of flexibility.
Algorithmic reverb creates an algorithm (mathematical model) of a space with variables that allow for changing the nature of that space. It’s therefore easy to create different rooms and effects with a single algorithm, whereas with convolution reverb, you would need to load different impulses for fundamentally different sounds. All Audition reverbs other than the convolution reverb use algorithmic reverb technology.
Each type of reverb is useful. Some engineers prefer algorithmic reverbs because it’s possible to create “idealized” reverb spaces; others prefer convolution reverb due to its “real” feel.
Convolution reverb
The convolution type of reverb can produce extremely realistic reverberation effects, and as described later, can also be useful for sound design. However, it is a CPU-intensive process.
1. Choose File > Open, navigate to the Lesson04 folder, and open the file Drums110.wav. Play the file to hear what it sounds like.
2. Click an effect insert’s right arrow, and choose Reverb > Convolution Reverb.
3. Load some presets to get a sense of what convolution reverb can do. When you’re done, load the Memory Space preset.
4. Load different impulses from the Impulse drop-down menu. Note how each impulse produces a different reverb character. When you’re done, load the Hall impulse so you can check out how the various parameters affect the sound.
5. Vary Mix to change the ratio of dry to wet sounds.
6. Vary the Room Size control, and listen carefully to how this option changes the size of the hall. You’ll be comparing this to the range available with algorithmic reverb.
7. Move the Damping LF slider to the left to simulate the effect of a room with lots of sound-absorbing material, which absorbs high frequencies more readily than low frequencies. Move the Damping HF slider to the left to remove lower frequencies, creating a “thinner” but also less “muddy” reverb character. Damping LF and Damping HF affect frequency response.
8. Move the Pre-Delay slider (which sets the time before a sound first occurs and when it reflects off a surface) to the right to increase the pre-delay amount. A longer pre-delay implies a longer time for the sound to reflect, hence a bigger space.
9. Move Width farther to the right to create a wider stereo image; move the slider to the left to narrow the image. Adjust Gain to set the overall gain of the composite wet/dry sound. This will typically be at 0 unless you need to compensate for signal level variations caused by adding the reverb effect.
10. Leave Audition open for the next lesson.
![]() Tip
Tip
You can use convolution reverb to load most WAV files by clicking Load and navigating to a WAV file. Online sources offer free impulses that work with standard convolution reverbs, including Audition’s, which make it easy to expand your options. Also, you can load phrases, loops, sound effects, or other “nonacoustic space” files and obtain some pretty wild—and unpredictable—effects. These can be valuable for sound design and special effects.
Studio Reverb
We’re covering these reverbs out of sequence because the Studio Reverb is an algorithmic reverb that’s simple, effective, and works in real time so it’s easy to hear the results of changing parameters. Many of the Full Reverb and Reverb parameters cannot be adjusted during playback, because they are very CPU-intensive.
1. Click the current effect insert’s right arrow, and choose Reverb > Studio Reverb to replace the Convolution Reverb effect.
2. With the Default preset selected, vary the Decay slider. Note how the range is much wider than the Convolution Reverb’s Room Size parameter.
![]() Note
Note
Algorithmic reverbs contain two main components: early reflections and a reverb “tail.” The early reflections simulate the discrete echoes caused when a sound first bounces off multiple room surfaces. The tail is the “wash” of composite echoes that have bounced around the room multiple times.
3. Drag the Decay slider all the way to the left, and then vary the Early Reflections slider. Increasing early reflections creates an effect somewhat like a small acoustic space with hard surfaces.
4. Set Decay to about 6000ms and Early Reflections to 50%. Adjust the Width control to set the stereo imaging, from narrow (0) to wide (100).
5. Move the High Frequency Cut slider more to the left to reduce the high frequencies for a darker sound or more to the right for a brighter sound. High Frequency Cut works similarly to the Convolution Reverb’s Damping LF but covers a wider range.
6. Move the LF Cut slider to the right to reduce low-frequency content, which can “tighten up” the low end and reduce “muddiness,” or more to the left if you want the reverb to affect lower frequencies. Low Frequency Cut resembles the Convolution Reverb’s Damping HF parameter.
7. Experiment with damping. Damping provides the same function as the Convolution Reverb’s Damping LF parameter. The difference between damping and High Frequency Cut is that damping applies progressively more high-frequency attenuation the longer a sound decays, whereas the high frequency cut is constant.
![]() Tip
Tip
Low to moderate Early Reflections settings, with Decay set to minimum, can add a little bit of ambience to otherwise “dry” sounds. This can make narration seem more “real.”
8. Vary the Diffusion control. At 0% the echoes are more discrete. At 100% they’re blended together into a smoother sound. In general, high-diffusion settings are common with percussive sounds; low-diffusion settings are used with sustaining sounds (e.g., voice, strings, organ, etc.).
![]() Tip
Tip
Engineers often reduce the low frequencies on reverb to prevent adding reverb to bass and drums, which can produce a “muddy” sound.
9. Experiment with the Output level options, which vary the amount of dry and wet audio.
10. Leave Audition open for the next lesson.
Reverb
When you call up the Reverb effect, you’ll likely see a warning alerting you that this is a CPU-intensive effect and advising you to apply the effect before playback. You cannot adjust the reverb characteristics in real time—only when playback is stopped. But you can edit the dry and wet levels at anytime.
1. Click the current effect insert’s right arrow, and choose Reverb > Reverb to replace the Studio Reverb effect.
2. Load various presets and vary the dry and wet sliders. Because you’re processing a drum sound, Big Drum Room and Thickener can be very useful; they’re designed specifically to enhance drums.
3. Vary the Perception slider, which is similar to high-frequency damping; at 0 the sound is “duller” and softer, whereas a setting of 200 simulates more irregularities in the listening environment, so the sound is brighter and “harder.” Try different Perception slider settings and listen to the results; the difference is relatively subtle.
4. Leave Audition open for the next lesson.
![]() Note
Note
The remaining parameters (Decay Time, Pre-Delay Time, and Diffusion) perform the same function as the like-named parameters in the Studio Reverb and Convolution Reverb. You’ve already heard the sonic results caused by changing these sliders in the previous lessons, but if you want to hear how they alter the sound in this particular reverb, vary these sliders and listen to how they change the sound.
Full Reverb
Full Reverb is a convolution-based reverb and is the most sophisticated of the various reverbs but also the most impractical to use because of the heavy CPU loading. You cannot adjust parameters other than the level controls for dry, reverb, and early reflections levels during playback, and even then, the level control settings take several seconds to take effect (however, if you stop playback and adjust them, the change occurs immediately on playback). Also, if you change any of the non-level reverb parameters while stopped, it can take several seconds before playback begins. As a result, when you’re using this processor, you’ll probably want to start with a preset that’s as close as possible to what you want and make a few tweaks as needed.
1. Click the current effect insert’s right arrow, and choose Reverb > Full Reverb to replace the Reverb effect.
2. Load some presets to get an idea of the Full Reverb’s sonic potential.
3. With playback stopped, turn the Dry and Reverberation Output Level controls to 0 and Early Reflections to 100 so you can easily hear the results of changing the Reverberation parameters (Decay Time, Pre-Delay Time, Diffusion, and Perception), which are functionally identical to the same controls in the Reverb processor. However, the Early Reflections options are more sophisticated than any of the other reverbs.
4. Use the Room Size and Dimension controls to create a virtual room. Bigger room sizes create longer reverbs. Dimension sets the ratio of width to depth; values below 0.25 can sound unnatural, but try this for special effect-type sounds (reduce the monitor volume first because the volume may increase unexpectedly).
5. Move the High Pass Cutoff slider more to the left to reduce the high frequencies for a darker sound or more to the right for a brighter sound; High Pass Cutoff works the same way as the High Frequency cutoff control in the Studio Reverb. Left/right location moves the early reflections from stereo more toward the left or right by moving the slider more to the left or right, respectively; if you want the source from which the reflections are derived to move with it, select Include Direct.
6. Click the Coloration tab to open a three-band EQ with a high shelf, low shelf, and single parametric stage. You’ve already learned how equalization works, but a Decay parameter is also available. This sets the time before the coloration EQ takes effect. Set it to 0 as you experiment with the parametric parameters so you can hear the results as quickly as possible. As just one example, reducing highs produces a “warmer” reverb sound.
Special effects
Two individual effects—Distortion and Vocal Enhancer—are discussed in this section as well as two “multieffects” for Guitar and Mastering that include several compatible effects designed to work together.
The Special Effects section also allows you to access the TC Electronic ITU Loudness Radar meter, which does not alter sound but is more of a diagnostic or measurement tool. It’s discussed in Chapter 6, “Mastering.”
Distortion
Distortion occurs by clipping a signal’s peaks, which creates harmonics. Audition’s distortion can create different amounts of clipping for positive and negative peaks to produce asymmetrical distortion (which can produce a more “jagged” sound) or link the settings for both peaks to produce symmetrical distortion, which tends to sound somewhat smoother.
1. Choose File > Open, navigate to the Lesson04 folder, and open the file Bass110.wav. Play the file to hear what it sounds like.
2. Click an effect insert’s right arrow, and choose Special > Distortion.
3. Load various presets to get a sense of the sounds this effect can create, and then return to the Default preset. This preset has no distortion, because the curves represent a linear relationship between input and output with no clipping.
4. Now you’ll create some light distortion to give the bass some “crunch.” Click the Link button (under the cursor in the screen shot) between the two graphs so that adjusting one curve affects the other. (Note that clicking one of the two arrows below the Link button transfers one curve’s settings to the other.)
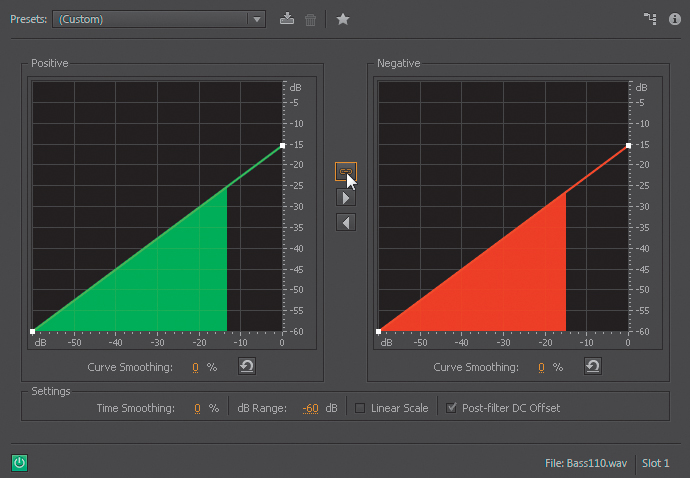
5. With the bass file playing, click the white square in the upper-right corner of a graph’s curve. Drag it down to -15 or so, and you’ll hear the sound become more distorted as you lower the level where the signal clips. Because more clipping leads to lower levels, you’ll need to increase the Effects Rack’s Output control to compensate.
6. Click at the intersection of the two -30 levels on the X and Y axes to create a new node on the curve; you’ll hear more distortion. Boosting lower levels causes them to distort more readily.
7. Drag this new node up to increase the volume of low-level signals, thus creating more distortion. Dragging the node to the left also increases distortion by allowing lower levels to distort.
8. To remove a node, right-click (Control-click) on it. Continue adding and moving nodes to hear how this affects the sound. When there are multiple nodes, you can smooth the curve that incorporates them by increasing the Curve Smoothing parameter value.
9. Click a graph’s reset button (the spiral arrow). If the graphs are still linked, you’ll reset them both simultaneously; otherwise, you’d need to reset them individually. With the graphs unlinked, bring the upper-right square for one of the graphs down to -20dB. This adds crunch but also preserves the “fullness” of the bass by leaving one set of peaks alone.
10. Increase Time Smoothing, and the distortion becomes smoother and less harsh. The reason is that the Time Smoothing parameter changes the distortion’s reaction time to level changes, particularly at lower frequencies. Choose a value of 30%, and then bypass/enable the distortion to compare the distorted and undistorted sound. Note how the smoothing creates a softer kind of distortion quality that gives the bass a bit of “snarl” but still sounds musical. Processing a bass with a hint of distortion can help it stand out more in a mix.
![]() Note
Note
Regarding the other Distortion parameters, dB Range changes the range covered by the graph and limits possible distortion settings to the selected range. Linear scale changes the calibration; logarithmic more closely approximates the way the ear responds. Leave Post-Filter DC Offset selected because it can prevent the addition of a constant offset that can lead to clicks when you’re editing. There’s no disadvantage to leaving it on.
Vocal Enhancer
The Vocal Enhancer effect is one of Audition’s easiest effects to use because it has only three options.
1. Choose File > Open, navigate to the Lesson04 folder, and open the file NarrationNeedsHelp.wav. Play the file by pressing the spacebar.
2. Click an effect insert’s right arrow, and choose Special > Vocal Enhancer.
3. Click Male to reduce the low end somewhat to minimize p-popping and booming; note that it also helps even out the level variations a bit.
4. Load the file Drum+Bass+Arp110.wav, and insert the Vocal Enhancer in the Effects Rack. Select the Vocal Enhancer’s Music option.
5. Bypass the Vocal Enhancer. You’ll hear that the music is brighter, which could potentially interfere with vocal intelligibility. Enabling the Vocal Enhancer’s Music option creates more “space” for voice-over.
6. With the same file playing, click the Male and Female options. You’ll hear how this affects music, which makes the changes in frequency response more obvious.
Guitar Suite
The Guitar Suite is a “channel strip” that emulates a guitar signal processing chain. It includes four main processors; each of which you can bypass or enable individually:
• Compressor. Because guitar is a percussive instrument, many guitar players use compression to even out the dynamic range and produce more sustain.
• Filter. This shapes the guitar’s tone.
• Distortion. This is a “condensed” version of the Distortion processor and offers three popular distortion types.
• Amplifier. A large part of a guitar’s sound is the amplifier through which it plays: The number of speakers and the size of each, as well as the cabinet, have a major effect on the sound. Fifteen types are available, including a cabinet for bass guitar.
![]() Tip
Tip
Because there aren’t any Voice Enhancer variable parameters, try the different options with voice (or background music in the case of the Music setting), and if it does not sound better, simply remove the effect.
Now, let’s walk through working with the Guitar Suite.
1. Choose File > Open, navigate to the Lesson04 folder, and open the file Guitar.wav. Play the file.
2. Click an effect insert’s right arrow, and choose Special > Guitar Suite.
3. Load the preset Big and Dumb, which makes a great start for a classic rock guitar sound.
4. Vary the Compressor Amount slider. The sound will be more percussive to the left and more sustained (with a slight volume drop) to the right. Set the Amount to 70 before proceeding.
5. Vary the Distortion Amount slider. The sound is “cleaner” to the left and “dirtier” to the right. Try the three different distortion types from the Distortion Type drop-down menu, and vary the Amount slider. Garage Fuzz is more punk, Smooth Overdrive more rock, and Straight Fuzz emulates the sound of a distortion effect box rather than an amp. Return to Smooth Overdrive, and set the slider to 90.
6. The sound seems a little harsh, but you can make it smoother by deselecting the Filter bypass check box.
7. Move the Freq slider to around 1500Hz with Resonance at 0. This removes some of the “edge.” Note how increasing Resonance makes the sound “sharper.” Leave Resonance at 0 for now.
![]() Tip
Tip
Many guitar sounds use distortion. However, you want to avoid unintentional distortion caused by overloading within Audition and use only the intentional distortion created by the Guitar Suite processor. Guitar processors can cause wide level swings, so pay close attention to the Effects Rack panel’s Input and Output controls to make sure they don’t go into the red zone.
8. To hear how different amplifiers affect the sound, choose various options from the Amplifier Box drop-down menu—Classic British Stack, Classic Warm, 1960s American, 1970s Hard Rock, and Deep 4x12 are some of the most realistic emulations. Also, note that there are six non-amp and special FX sounds. Bypassing the Amplifier emphasizes just how much speakers and cabinets influence the tone.
9. Load the Big and Dumb preset to return to its original sound, but choose Classic British Stack for the Amplifier Box parameter. Deselect the Filter bypass check box.
10. The Filter precedes the Distortion section. Therefore, reducing signal levels due to filtering will result in less distortion. Often, this is the sound you want, but if you feel the overall level is too low, move the Distortion Amount slider to the right to compensate.
11. With Retro selected as the Filter, choose Bandpass for the Type (this is like a Parametric EQ stage without the boost/cut control). For a big, metal sound, set Freq to around 435Hz and Resonance to 20 to produce a little response peak at that frequency.
12. Feel free to experiment with the Lowpass and Highpass filter, but if you’re impatient to discover some other filter types, proceed to the next step. You’ve already worked with Lowpass and Highpass filters in previous sections on equalizers (Lowpass reduces highs; Highpass reduces lows); Resonance is equivalent to the Q control you used with some of the equalizers.
13. Choose Rez as the Filter and Bandpass as the Type (the other responses work too, but these produce the most obvious effect), and set Resonance to 0. Vary the Freq slider, and you’ll hear a resonant effect like a wah pedal. Turn up Resonance if you really want to go overboard.
14. Change the Freq slider position; note that this doesn’t change the TalkBox filter frequency per se but acts more like a “window” that sweeps across the filter frequency, making it more or less prominent. Each of the remaining five filters has a fixed frequency that corresponds roughly to the mouth’s filtering effect when forming various vowels.
15. Load the TalkBox U filter and select Bandpass for Type. With Resonance at 0, move the Freq slider across its range. The peak level will be around 1kHz; moving the Freq slider to either side reduces the level somewhat and also changes the timbre.
16. Choose File > Open, navigate to the Lesson04 folder, and open the file Drums110.wav. You’ll learn that the Guitar Suite is also suitable for other instruments, particularly drums.
17. Click an effect insert’s right arrow, and choose Special > Guitar Suite. Load the Big And Dumb preset.
18. Enable the Filter, and move the Freq slider to around 3000Hz. Set Resonance to 20%.
19. Although you’ll hear a good “trash” drum sound, you can tame it by moving the Mix Amount slider to the left (try 30%–40%). This adds the dry drum sound in with the “trash” sound so that the overall sound is more defined.
Mastering
Mastering is another effects “suite.” Note that Adobe Audition is an extremely capable mastering program, so including a Mastering suite may seem redundant. However, think of the Mastering effect as a quick way to master material that doesn’t require you to create an à la carte set of mastering processors within Audition.
The suite includes the following effects:
• Equalizer. Includes a low shelf, high shelf, and parametric (peak/notch) stage. Its parameters work similarly to the same parameters in the Parametric Equalizer effect. The Equalizer also includes a real-time graph in the background that shows the current frequency response spectrum. This helps with making EQ adjustments; for example, if you see a huge bass “bump” in the low end, the bass probably needs to be reduced.
• Reverb. Adds ambience if needed.
• Exciter. Creates high-frequency “sparkle” that’s unlike conventional treble-boosting EQ.
• Widener. Allows for widening or narrowing the stereo image.
• Loudness Maximizer. Is a dynamics processor that increases the average level for a louder sound without exceeding the available headroom.
• Output Gain. Can be adjusted to control the effect output and therefore compensate for any level changes due to adding various processes.
Now, let’s walk through working with the Mastering suite.
1. Choose File > Open, navigate to the Lesson04 folder, and open the file DeepTechHouse.wav. Play the file. Note that there are two problems: The bass “booms” a bit too much, and the high end lacks definition.
2. Click an effect insert’s right arrow, and then choose Special > Mastering.
3. Load the preset Subtle Clarity. Toggle the power button to enable/bypass the preset’s effect; note how this indeed produces more clarity.
4. You’ll now fix the bass. Select Low Shelf Enable; a small X appears toward the left, which you click on and drag to change the shelf characteristics. Resume playback.
5. Drag the Low Shelf marker right to around 240Hz. Then drag down to about -2.5dB. Enable/bypass the Mastering effect, and you’ll hear that when Mastering is enabled, the low end is tighter and the high end is more defined.
6. The Reverb parameter is set to 20% in the preset; move it left to 0%, and the sound will be a little “dryer.” A value of 10% seems to work well for this tune. Note that the Mastering reverb effect is not intended to provide big hall effects, but instead adds ambience when used subtly.
7. Drag the Exciter’s slider to the right, and the sound will become way too bright—a little bit of the Exciter effect goes a long way. (Most of the preset’s additional “clarity” is due to the slight, upper-midrange boost around 2033Hz working in conjunction with the Exciter, which affects the highest frequencies.) Because the song is already fairly bright, disable the Exciter effect by dragging its slider all the way to the left. (Note that the sonic difference among the three characters of Retro, Tape, and Tube becomes most noticeable with dull material and high Exciter amounts.)
8. Adjust the Widener to taste; end on a setting around 60.
![]() Tip
Tip
It might seem logical to set the Widener for the widest possible stereo image to create a more dramatic sound. However, emphasizing the extreme left and right areas of the stereo spectrum can deemphasize the center, thus unbalancing a mix. If you listen closely and move the slider between 0 and 100, you’ll usually find a “sweet spot” that provides maximum width without altering the mix’s fundamental balance.
9. For this song, set the Loudness Maximizer to 30 to provide a useful boost without adding a distorted or unnatural sound. Because the Loudness Maximizer will prevent the level from exceeding 0, you can leave the Output Gain at 0.
![]() Note
Note
The Loudness Maximizer can increase the apparent loudness for a more “punchy” sound. However, as with the Exciter, you can have too much of a good thing. Excessive maximization can lead to ear fatigue, as well as make the music less interesting by reducing dynamics.
10. Toggle the power button to enable/bypass the effect and listen to the difference. The mastered version has more sparkle, the bass is in proper proportion with respect to level, the stereo image is wider, and there’s been a subjective overall level boost.
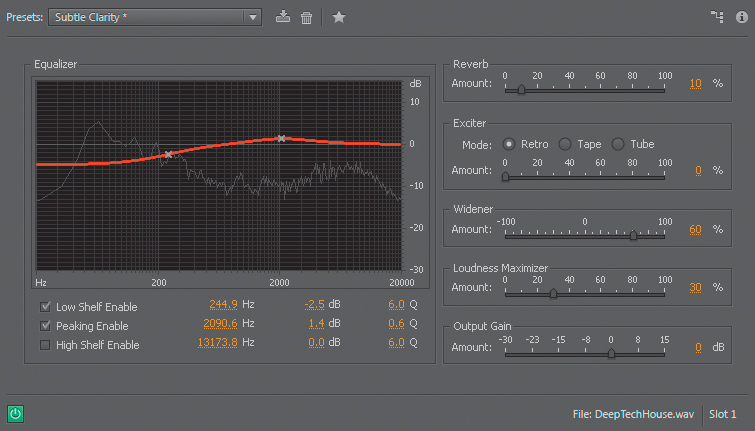
Stereo imagery effects
Stereo imagery effects alter a file’s stereo image. Audition includes three effects for altering stereo image: a Center Channel Extractor, Stereo Expander, and Graphic Phase Shifter. The latter is a very esoteric tool that you will likely not need to use when you’re doing typical audio projects, so we’ll cover only the Center Channel Extractor and Stereo Expander. For further information on these effects, refer to the Help files.
Center Channel Extractor
With stereo signals, some sounds are traditionally mixed to center—particularly vocals, bass, and kick drum. Reversing the phase of one channel cancels out any material panned to center while leaving signals panned left and right alone. This is commonly used for karaoke to remove the vocal. By filtering the channel that’s out of phase to emphasize voice frequencies, bass and kick aren’t affected that much.
However, Audition’s Center Channel Extractor is a very sophisticated implementation of this principle that allows for boosting or cutting the center channel, and also includes precise filtering to help avoid applying the effect where it’s not wanted.
1. Choose File > Open, navigate to the Lesson04 folder, and open the file DeepTechHouse.wav. Don’t start playback yet.
2. Click an effect insert’s right arrow, and choose Stereo Imagery > Center Channel Extractor.
3. Turn down the monitoring level, and then load the preset Boost Center Channel Bass.
4. Start playback and slowly turn up the monitoring level. The bass will be excessively loud, and you’ll need to pull back on the Effects Rack panel’s Output control to around -7dB to avoid distortion.
5. Pull the Center Channel Level control down all the way, and the bass will essentially disappear.
6. Return the Center Channel Level control to 0. Pull the Side Channel Levels control down all the way to isolate the bass.
The next lesson isolates vocals.
1. Choose File > Close. Don’t save any changes.
2. Choose File > Open, navigate to the Lesson04 folder, and open the file ContinentalDrift.wav. Don’t start playback yet.
3. Click an effect insert’s right arrow, and choose Stereo Imagery > Center Channel Extractor.
4. Load the preset Vocal Remove. Start playback around 32 seconds. The lead vocals extend to about 47 seconds, but you won’t hear them because they’re being removed (around 45 seconds you’ll hear some backup vocals that aren’t removed because they aren’t panned to center).
5. Return to around 32 seconds, and start playback. Bring up the Center Channel Level to hear the vocals.
6. Click the Discrimination tab to access several real-time adjustments. Choose the highest possible Crossover Bleed settings and the lowest possible Phase Discrimination, Amplitude Discrimination, and Amplitude Bandwidth settings that are consistent with sound quality and effectiveness. Increasing the Spectral Decay Rate will often improve sound quality as well.
7. Leave this file open in preparation for the next lesson.
You’ve now learned the highlights of the Center Channel Extractor; refer to Audition’s Help file for more details.
![]() Note
Note
Sample Magic produces the Deep Tech House sample library, whereas the Continental Drift sample library is made by Sony. These illustrate the range of music you can create from commercially available sample and loop libraries.
Stereo Expander
The Stereo Expander is a standalone, and more sophisticated, version of the Widener in the Mastering effects suite. The Stereo Expander has the same goal: expand the stereo image outward to make the difference between the left and right channels more obvious and dramatic. However, unlike the Widener you can also shift the center channel left or right. This lets you “weight” the stereo image more toward the left or right.
1. Click the Center Channel Extractor effect insert’s right arrow, and choose Stereo Imagery > Stereo Expander.
2. Start playback. Move the Stereo Expand slider to the left to narrow the image; move it right to widen the image. This effect is most dramatic on headphones, but you’ll hear it on speakers as well. Leave this set to around 150–200 for now.
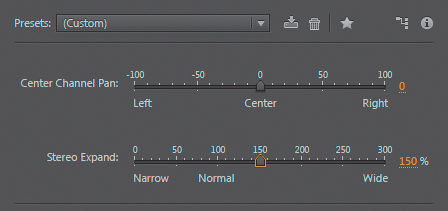
3. Move the Center Channel Pan slider left and right. Note how this moves the vocal toward one side of the stereo image or the other. (There are vocals between about 9 and 20 seconds, and 32 and 48 seconds, that are mixed to the center of the stereo image.)
Time and Pitch effect
There are two effects in the Time and Pitch category: Automatic Pitch Correction and Pitch Shifter. Automatic Pitch Correction is designed for vocals and corrects the pitch of notes so that they are in tune. Pitch Shifter transposes audio upward or downward in pitch without affecting the tempo.
Automatic Pitch Correction
Pitch correction is intended for vocals whose pitch is slightly out of tune. This effect analyzes the vocal to extract the pitch, calculates how far off a note is from the correct pitch, and then corrects the note by raising or lowering the pitch to compensate.
However, be careful when you’re applying this effect; many vocalists deliberately sing some notes a little flat or sharp to add interest or tension to a vocal. Correcting these can remove a vocal’s “human” quality.
1. Choose File > Open, navigate to the Lesson04 folder, and open the file OriginalVocal.wav. Don’t start playback yet.
2. Click an effect insert’s right arrow, and choose Time and Pitch > Automatic Pitch Correction.
3. Bypass the Automatic Pitch Correction effect, and start playback. Observe the correction meter on the right: The red band indicates how far off the pitch is from the ideal. When the meter moves up, the pitch is sharp. When the meter moves down (see screen shot), the pitch is flat. A centered meter indicates that the vocal is on pitch.
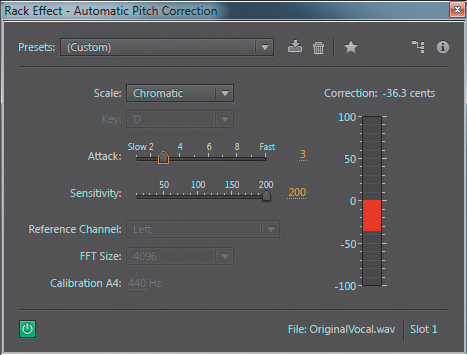
![]() Note
Note
When a vocal has vibrato, the pitch will go somewhat sharp and flat periodically. This is normal and usually desirable; you can adjust the Automatic Pitch Correction to leave natural vibrato uncorrected.
4. You need to know a vocal’s correct scale and key to use the Scale and Key options; choose these from the Scale and Key drop-down menus. If you do not know the Scale and Key, choose Chromatic from the Scale drop-down menu, which simply corrects to the nearest semitone. (The vocal is in D but uses a flatted 7th note that is not part of the major scale. So, choose Chromatic instead.) In most cases, Chromatic will do accurate correction.
![]() Note
Note
The Scale and Key options define the notes to which pitch should be corrected. For example, with a C major scale, the notes will be corrected to C, D, E, F, G, A, and B.
5. Set the Sensitivity slider to 200 to correct all notes. At lower Threshold settings, notes that are off-pitch by more than the pitch threshold will be unaffected.
6. Start playback with Automatic Pitch Correction still bypassed. It’s a good idea to loop this example so you don’t have to keep clicking Play. Listen for a few iterations of the loop, and then enable the effect.
7. Note how all the notes are on pitch. To compare, either bypass the effect or move the Sensitivity Fader to 0.
8. Move the Attack slider to 10. This produces the fastest response, so the Automatic Pitch Correction will attempt to pitch-correct the vibrato. You’ll hear a warbling sound, so use a slow enough setting to allow the vibrato to change pitch naturally. A setting of 2–4 is a good compromise between correcting pitch rapidly on sustained notes but not affecting vibrato.
9. Change the scale to Minor and Key to D. You’ll hear the vocal take on a more minor quality as notes are shifted to the appropriate pitches for a minor scale.
Pitch Shifter
The Pitch Shifter can transpose an audio file up or down in pitch, but unlike some pitch-shifting algorithms, does so without changing tempo. Note that the greater the amount of transposition, the lower the fidelity—although extreme amounts of pitch transposition can produce interesting special effects. Also, some audio signals transpose more elegantly than others; for example, isolated, low-frequency sounds don’t handle transposition particularly well.
1. Choose File > Open, navigate to the Lesson04 folder, and open the file DeepTechHouse.wav.
2. Click an effect insert’s right arrow, and choose Time and Pitch > Automatic Pitch Shifter.
3. For Precision, select High Precision. Under Pitch Settings, select Use appropriate default settings. These settings are almost always the optimum choice for the best audio fidelity.
![]() Note
Note
As for the remaining Automatic Pitch Correction parameters, Reference Channel is useful only with stereo files. It chooses the channel from which the pitch profile should be calculated. FFT size trades off more accuracy (larger numbers) for faster response (smaller numbers). Calculation A4 sets the frequency in Hertz for the note A. In the United States 440 is the standard, but this can be different in other countries and with some types of music.
4. Start playback, and note the file’s pitch. Adjust the Semi-tones slider to change pitch. For example, selecting 2 transposes pitch up two semi-tones. Selecting -2 transposes pitch down two semi-tones. Note that it takes a few seconds for the transposition to occur due to the extensive calculations that are required.
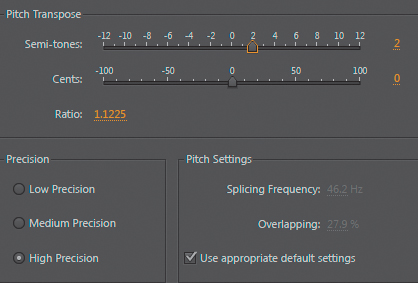
5. Try some extreme transpositions, like -12 or 12, and note how this affects the sound.
6. Vary the Cents slider. This provides “fine-tuning” (a cent is 1/100th of a semi-tone). Despite being a smaller change, it still takes several seconds before you’ll hear the results of any edits.
Third-party effects (VST and AU)
In addition to using Audition’s effects, you can load effects (plug-ins) made by third-party manufacturers. Audition is compatible with the following formats:
![]() Note
Note
Both Windows and Mac offer 64-bit operating systems (Windows Vista, 7, and 8, Mac OS X Lion and Mountain Lion). Audition is a true 64-bit program that takes advantage of the improved performance associated with 64-bit operating systems and is designed to use 64-bit plug-ins. However, some Windows VST plug-ins are available only in 32-bit versions. Although Adobe recommends using 64-bit plug-ins with Audition, an application called jBridge allows for using most 32-bit Windows VST plug-ins, even with 64-bit Windows operating systems. For more information, visit http://jstuff.wordpress.com/jbridge.
• VST (Virtual Studio Technology) is the most common Windows format and is also supported by the Mac. However, you need separate plug-in versions for Mac and Windows. For example, you can’t buy a particular VST plug-in for the Mac and use it with Windows.
• VST3 is an updated version of VST2 that offers more efficient operation and other general improvements. Although not quite as common as standard VST, it’s gaining in popularity.
• AU (Audio Units) is Mac-specific, was introduced with OS X, and is the most common format for the Mac.
On either platform, plug-ins are installed in specific hard drive folders. You need to let Audition know where to find these plug-ins. The information in the following sections applies to both Windows and Macs unless otherwise specified.
The Audio Plug-In Manager
Audition’s Audio Plug-In Manager provides several functions:
• It scans your computer for plug-ins so Audition can use them, and creates a list showing the name, type, status, and file path (where the plug-ins are located on your computer).
![]() Note
Note
Many free, legal plug-ins in a variety of formats are available on the Internet. These range from poorly coded effects made by beginning programmers to plug-ins that are every bit as good—and sometimes better—than commercially available, professional products.
• It allows you to specify additional folders that contain plug-ins and then re-scan these added folders. Most plug-ins install to default folders, and Audition scans these folders first. However, some plug-ins may install into a different folder, or you might want to create more than one folder of plug-ins.
• It lets you enable or disable plug-ins.
Now, let’s walk through working with the Audio Plug-In Manager.
1. From the Effects option in the menu bar, choose Audio Plug-In Manager.
2. Click Scan for Plug-Ins. Audition must inspect your hard drive, so this can take a while.
When scanning is complete, you’ll see the plug-in listing and status, which usually indicates the manager is done. However, if needed, also complete the following steps.
3. To add an additional folder with plug-ins, click Add and navigate to the folder.
4. Select the check box to the left of the plug-in’s name to enable or disable a particular plug-in.
5. Click Re-Scan Existing Plug-Ins to re-scan the existing plug-ins.
Note that you can enable or disable all plug-ins by clicking the appropriate button.
6. When you’re finished with the Plug-In Manager, click OK.
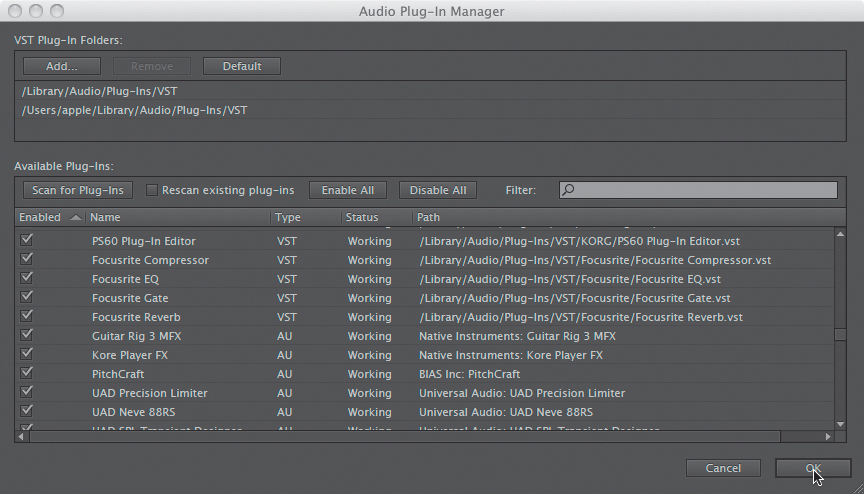
![]() Note
Note
Although rare, some plug-ins may be incompatible with Audition. This could be due to a nonstandard implementation, an older plug-in that was not updated, a bug within the plug-in that shows up only with particular programs, or a proprietary plug-in that’s not intended to work universally. If Audition encounters a plug-in it cannot load, the scanning process stops. If scanning doesn’t resume after a minute or so, click Cancel. Audition will enter the incompatible plug-in in the list of plug-ins, but it will be disabled. Run the scan as many times as necessary until the process completes.
Using VST and AU plug-ins
VST and AU plug-ins appear as part of the same drop-down menu that opens when you click an Effects Rack insert’s right arrow. For example, with Windows you’ll see entries for VST and VST3 effects along with the other entries for Modulation, Filter and EQ, Reverb, and the like; the Mac adds another entry for AU effects. Here’s how to use these effects in Audition.
1. Choose File > Open, navigate to the Lesson04 folder, and open the file DeepTechHouse.wav. Then click an Effects Rack insert’s right arrow.
2. Choose the entry (VST, VST3, or on the Mac, AU) containing the effect you want to insert.
3. Click the effect you want to insert, as you would with any of the effects included with Audition.
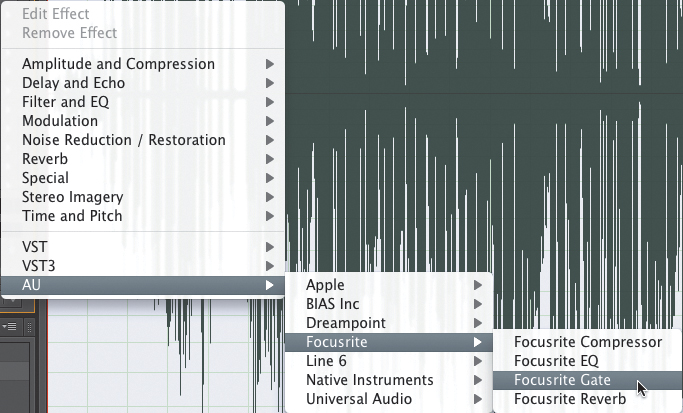
Using the Effects menu
You can process any audio selected in the Waveform or Multitrack Editor by choosing the desired effect from the Effects menu. Unlike the Effects Rack, you can apply only one effect at a time.
This section covers effects that are available exclusively from the Effects menu. Any effects you can also access from the Effects Rack work the same way when opened from the Effects menu, with three exceptions:
• The Invert, Reverse, and Silence effects are applied to the audio as soon as you select them. You can use the Undo command to undo the effects.
• Most effects chosen via the effects categories (Amplitude and Compression, Delay and Echo, etc.) have an Apply and Close button. Clicking Apply applies the effect to the selected audio.
• Unlike the Effects Rack, editing is destructive (although the changes aren’t made permanent unless and until the file is saved). However, you can still audition any changes before applying them, because most effects chosen via the effects categories have a Play and Loop button to the right of the effect’s power on/off button. Loop repeats the selected portion of the audio when you click Play.
Invert, Reverse, and Silence effects
Invert changes the signal’s polarity (commonly called phase) and produces no audible difference. Reverse flips an audio selection so that the beginning occurs at the end and the end at the beginning. Silence replaces the selected audio with silence.
1. Choose File > Open, navigate to the Lesson04 folder, and open the file NarrationNeedsHelp.wav.
2. Play the file to hear what it sounds like, and then select the part at the beginning that says, “Most importantly, you need to maintain good backups of your data.”
3. Choose Effects > Invert. Note that the positive and negative sections are flipped, so the positive peaks are now negative and vice versa. However, if you play this, you’ll hear no audible difference.
4. Choose Effects > Reverse. Play back the selection, and you’ll hear reversed speech.
5. Select the same section. Choose Effects > Silence to convert the audio to silence.
6. Close the File without saving it, and close the project without saving.
Match Volume effect
It’s often helpful to match volume levels among different pieces of music. This is particularly important for broadcasting, where some governments impose regulations defining maximum volume levels.
However, there are many ways to measure “level.” A signal’s peak is one indication of level, but so is a signal’s average level. A drum hit will have a high peak level but a low average level because once hit, the amount of energy decays rapidly. On the other hand, a sustained sound, like distorted guitar, will have a high average level but low peak level.
As a result, the International Telecommunications Union (ITU) has developed standard measurement protocols—the most recent being LUFS (Loudness Units referenced to Full Scale). One application of Audition is to match levels to the broadcasting standard of -23 LUFS.
1. Choose Effects > Match Volume. The Match Volume panel opens.
2. Open the Lesson04 folder. Drag the files ContinentalDrift.wav and DeepTechHouse.wav into the upper half of the Match Volume panel. Audition analyzes the signal and displays readings that relate to different ways to measure loudness.
3. Click the Match To drop-down menu and select ITU-R BS.1770-2 Loudness if it is not already selected.
4. For the Loudness parameter, enter -23.00 LUFS. Leave the Look-Ahead Time and Release Time at their default values (12.0ms and 200ms, respectively).
![]() Note
Note
Matching levels could cause a signal to exceed the maximum available headroom. This is undesirable and should be avoided. However, if you click Use Limiting, Audition will apply limiting to reduce a signal’s maximum level so it doesn’t exceed the allowable headroom. Like any limiting, though, if excessive limiting is required, there will be audible artifacts.
5. Click Run. Audition will adjust both files to an ITU Loudness level of -23dB. The other readings will change to reflect the changes in overall level.
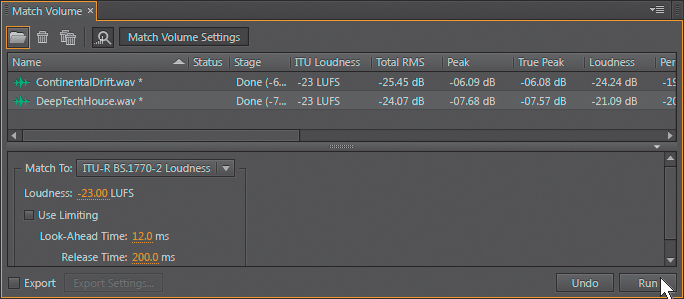
6. Click the Editor panel’s file selector menu, and select ContinentalDrift.wav. Listen to about a minute of it.
7. Click the Editor panel’s file selector menu, select DeepTechHouse.wav, and again, listen to about a minute of it. Note how the subjective levels over time for the two files are very similar.
![]() Note
Note
You can export the matched waveforms by choosing the desired Export Settings and clicking Export prior to clicking Run. For more information on exporting files, refer to Chapter 15, “Mixing.”
Additional Amplitude and Compression effects
Three Effects menu functions are not available with the Effects Rack: Normalize, Fade Envelope, and Gain Envelope.
1. Choose File > Open, navigate to the Lesson04 folder, and open the file Bass110.wav.
2. Select a single bass note, and choose Effects > Amplitude and Compression > Normalize (process). Normalization adjusts a selection’s level so that its peak (highest level) attains a particular percentage of the overall level.
3. Set Normalize to 25% and click OK; the note’s peak will reach 25% of the maximum available level.
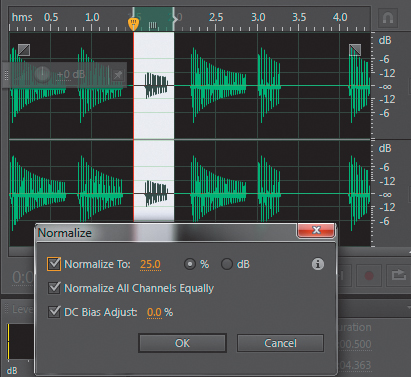
![]() Note
Note
You can show the peak as either a percentage of the signal or the level in dB, referenced to the maximum available headroom. For example, if you select the dB radio button, 25% normalization is equivalent to a peak that reaches -12dB. Normalize All Channels Equally treats the peaks for both channels similarly, and DC Bias Adjust ensures that a level of 0 is truly a value of 0. There’s no practical reason not to select this option.
4. Choose Edit > Undo or press Ctrl+Z (Command+Z) to restore the bass note to its previous level.
5. Select the left half of the waveform (the first three notes), and choose Effects > Amplitude and Compression > Fade Envelope (process).
6. Load the Linear Fade In preset. A line that indicates amplitude appears superimposed on the selection. Play the file, either by clicking the Fade Envelope dialog box’s Play button or by pressing the spacebar, and you’ll hear the bass notes fade in.
7. Adjust the fade shape by clicking on the line to create new nodes, as you did toward the end of Chapter 3, “Basic Editing.” A thumbnail in the Fade Envelope dialog box shows the shape; select the Spline Curves check box to round the fade line.
8. Select a different region. The curve now adapts to fit within the selection. Regardless of the size of the selection, the curve adapts proportionally to fit.
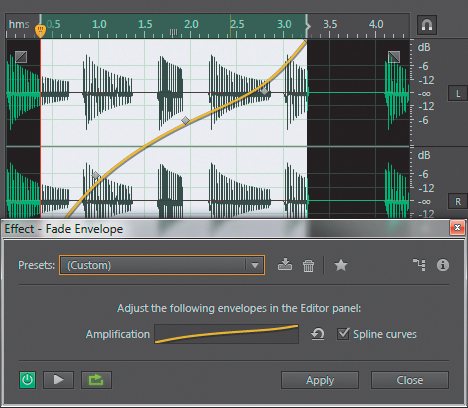
9. Click Close in the Fade Envelope dialog box without applying the fade.
10. Select part of the waveform, choose Effects > Amplitude and Compression > Gain Envelope.
11. Select the +3dB Hard Bump preset. A line that indicates amplitude appears superimposed on the selection. You can adjust the gain curve shape by clicking on the line to create new nodes, and as with the fade, a thumbnail in the Gain Envelope dialog box shows the shape. If desired, select the Spline Curves check box to round the fade line.
12. Select a different region. As with the Fade Envelope, the curve adapts to fit within the selection.
Diagnostic, Noise Reduction, and Restoration effects
Diagnostic, Noise Reduction, and Restoration effects will be covered in Chapter 5 along with the real-time, nondestructive noise reduction and restoration tools. The effects selected from the Effects menu produce the same sonic results but are destructive, DSP-based processes. The Loudness Radar Meter in the Special menu is covered in Chapter 6, “Mastering.”
Doppler Shifter effect
The Doppler Shifter effect (found in the Special menu) is an unusual effect that changes pitch and amplitude to make signals sound “three dimensional” as they circle around you, whiz by from left to right, and do other effects that alter spatial placement. Chapter 7, “Sound Design,” includes more information on using the Doppler Shifter.
Note that opening the Doppler Shifter effect automatically opens the Preview Editor so you can see the effect the Doppler Shifter has on the processed waveform.
1. Choose File > Open, navigate to the Lesson04 folder, and open the file FemaleChoir.wav.
2. Choose Effects > Special > Doppler Shifter (process). Click the dialog box’s Play button to hear the default effect. Like all of the Doppler Shifter presets, this effect is particularly dramatic on headphones.
3. Choose various presets. You will need to stop and restart Play between presets.
4. The best way to understand how this effect works is to choose a Path Type (straight or circular), and then vary the parameters to hear how changes to specific parameters affect the sound. Take a few moments to do this now. You can get some really wild effects with this processor; note that you may need to stop and restart Play with major edits.
5. When you’re finished, close the project without saving anything.
Manual Pitch Correction effect
The Manual Pitch Correction effect is one of three Time and Pitch effects that are available only from the Effects menu.
1. Choose File > Open, navigate to the Lesson04 folder, and open the file Drum+Bass+Arp110.wav.
2. Choose Effects > Time and Pitch > Manual Pitch Correction. The Waveform Editor changes to a spectral view, and the Manual Pitch Correction dialog box appears. Play the file as a reference.
3. The HUD now has an additional control for pitch along with the standard volume control. Click on this control and drag down to lower pitch; drag up to raise pitch. For now, drag down to -200 cents (2 semi-tones). A yellow line superimposed on the Waveform overview shows the amount of pitch change.
4. Click Play to hear the sound transposed down to a lower pitch.
5. Drag the HUD so it’s not on top of the yellow line. Click on the yellow line to create a node, which you can drag up or down to further change pitch. As with other Audition envelopes, you can insert multiple nodes and make complex curves, as well as round them off by selecting the Spline Curves check box.
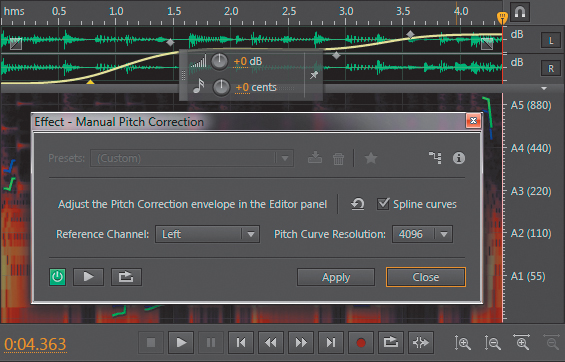
![]() Note
Note
The Pitch Curve Resolution parameter trades off better accuracy (higher numbers) for faster response and lower CPU loading (lower numbers). For the Reference Channel, try both options and use whichever produces the highest-quality sound.
6. Click Close without applying the effect. Leave Audition open for the next lesson.
Pitch Bender effect
The Pitch Bender can change a file’s pitch over time. This effect doesn’t stretch time to compensate for pitch changes, so it takes less time to play through sections with higher pitches and more time to play through sections with lower pitches. The Pitch Bender allows for drawing an envelope for smooth changes.
1. Open the file FemaleChoir.wav, and then choose Effects > Time and Pitch > Pitch Bender. Opening the Pitch Bender effect enables the Preview Editor automatically, so you can see the results of pitch bending on the waveform before you apply it.
2. The upper waveform now displays a blue line. You can adjust the pitch bend shape by clicking on the line to create new nodes; a thumbnail in the Pitch Bender dialog box shows the shape (select the Spline Curves check box to round the fade line). Choose Near Perfect for Quality, and leave the Default range at 48 semi-tones (a lower value allows for making finer adjustments).
3. Create a curve with lots of variations.
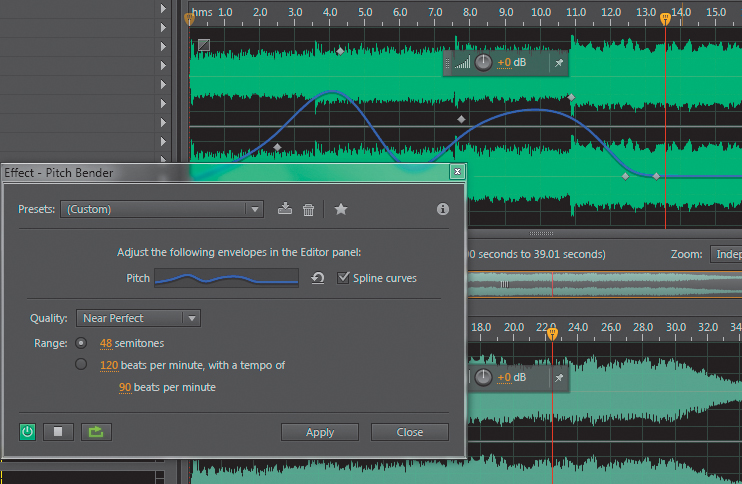
4. Start playback, and you’ll hear some wild pitch variations. Note that the playhead in the upper waveform changes speed as it tracks the pitch variations, whereas the playhead in the lower waveform proceeds at a constant speed because it’s previewing the file after the effect has been applied, resulting in a constant playback rate.
5. Click Close without applying the effect. Leave Audition open for the next lesson.
Stretch and Pitch effect
The Stretch and Pitch effect is the third Time and Pitch effect that’s available only from the Effects menu. It offers high-quality time and pitch stretching.
1. Open the file Drum+Bass+Arp110.wav file, and then choose Effects > Time and Pitch > Stretch and Pitch. This enables the Preview Editor automatically.
2. The default preset changes neither time nor pitch. Set the Stretch slider to 200%, click the dialog box’s Loop button, and then click Play. The file will now play at half speed.
3. Set the Stretch slider to 50%, and then click Play. The file now plays at double-speed. After auditioning this change, reset the Stretch fader to 100%.
4. Vary the Pitch Shift slider and note how this affects the sound. There’s a slight delay before any pitch change takes effect, because Audition has to do a lot of calculations. You can shorten this time by selecting a level of Precision other than the default setting of High.
5. Select Lock Stretch and Pitch Shift. This links the two parameters so that if, for example, you shift pitch up an octave, the speed doubles; shifting pitch down an octave halves the speed. For an interesting “slowdown” effect, set Stretch to 100%. Click Play, and then slowly move the Stretch slider to the right. With Stretch and Pitch Shift still locked, return the Stretch slider to 100% before proceeding.
6. You can also use the Stretch effect to change a file’s length. For example, the current file is 4.363 seconds long. Suppose it needs to be 5.00 seconds long. Select the Lock Stretch Settings to New Duration check box, and enter 5.00 for the New Duration parameter. Click Play; now the loop is exactly 5.00 seconds long.
7. Because the stretch settings are locked to duration, the pitch will be somewhat lower because the file is longer. To preserve the pitch, deselect Lock Stretch Settings to New Duration, make sure Lock Stretch and Pitch Shift are deselected, and then set Pitch Shift to 0 semi-tones. When you’re finished, close Audition without saving the file.
8. The Advanced parameters are mostly important when you’re manipulating voice; make sure the Solo Instrument or Voice and Preserve Speech Characteristics check boxes are selected, and adjust the Pitch Coherence slider for the best sound quality (this will be subtle). You can try deselecting Solo Instrument or Voice and Preserve Speech Characteristics with audio other than voice, but you may not hear much difference.
![]() Note
Note
There are two algorithm choices in the Stretch and Pitch window, iZotope Radius and Audition. The Audition algorithm is less CPU-intensive, but the Radius algorithm has much better fidelity, and most modern computers will have no problem handling the extra CPU load.
9. Click Close.
Managing presets
When you create a particular effect you like, or even a complete Effects Rack configuration with multiple effects, you can save it as a preset for later recall. The preset header is similar for both individual effects and the Effects Rack.
Create and select a preset
Here’s how to create and save a preset for the Amplify effect that boosts gain by +2.5dB.
1. Choose File > Open, navigate to the Lesson04 folder, and open the file Arpeggio110.wav.
2. Choose Effects > Amplitude and Compression > Amplify. Enter +2.5dB in the Left and Right Gain numeric fields.
3. Click the Save Settings as a Preset button to the right of the Presets field. A Save Effect Preset dialog box appears.
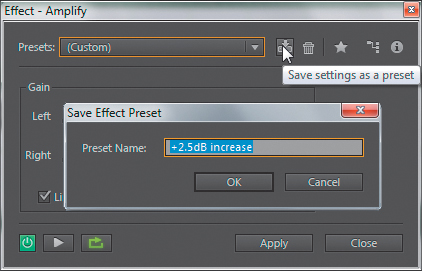
4. Enter a name for the preset, such as +2.5dB increase, and click OK. The preset name then appears in the list of presets.
Delete a preset
To delete a preset, select it, and then click the Trash Can button to the right of the Save Settings as a Preset button.
Create and select a favorite
If you create a preset you expect to use a lot, you can save it as a favorite.
1. When the preset settings are as desired, click the star button toward the upper-right corner of the effect window.
2. Name this favorite preset in the dialog box that appears.
3. Click OK.
4. To access the favorite, select the audio you want to process, and then choose Favorites from the menu bar or access the Favorites panel. Select your favorite to apply the preset settings immediately to the selected audio.
Review questions
1. What are the advantages of the Effects Rack, the Effects menu, and Favorites?
2. Is it possible to expand the roster of effects available to Audition?
3. Why is “gain-staging” important with the Effects Rack?
4. What is the difference between “dry” and “wet” audio?
5. What is the name of the process that allows for transposing pitch or lengthening/shortening files?
Review answers
1. The Effects Rack allows you to make complex effects chains, the Effects menu includes additional effects and can apply single effects rapidly, and the Favorites presets can apply settings to audio immediately upon choosing the preset.
2. Audition can load third-party VST, VST3, and for the Mac, AU effects as well.
3. Effects can increase gain, thus causing distortion within the Effects Rack. By adjusting levels going into and out of the rack, it’s possible to avoid distortion.
4. Dry audio is unprocessed, whereas wet audio has been processed. Many effects let you alter the proportion of the two types of audio.
5. The processes are called high-quality time and pitch-stretching, respectively.
