
10. The Multitrack Mixer View
Lesson overview
In this lesson, you’ll learn how to do the following:
• Switch from the Multitrack Editor to the Mixer view
• Adjust the Mixer fader heights to allow for greater resolution when setting levels
• Show/hide various areas to customize the Mixer size and configuration
• Scroll through different Effects Racks inserts and Sends within their respective areas
• Scroll to view different groups of channels if the Mixer window isn’t wide enough to show them all
• Differentiate among channel types via color coding
• Rearrange the Mixer channel order
This lesson will take about 25 minutes to complete. Download the project files for this lesson from the Lesson & Update Files tab on your Account page at www.peachpit.com and store them on your computer in a convenient location, as described in the Getting Started section of this book. Your Accounts page is also where you’ll find any updates to the chapters or to the lesson files. Look on the Lesson & Update Files tab to access the most current content.
The Mixer view is an alternate way to look at a multi-track project; it’s optimized for mixing rather than editing the multitrack project’s tracks.
Mixer view basics
Multitrack projects can have two different views. So far, you’ve been working with the Multitrack Editor, which as its name implies, is optimized for editing. However, the Mixer tab (to the right of the Multitrack Editor tab in the Classic and Default workspaces) accesses another way to work with multitrack projects and is optimized for mixing.
![]() Note
Note
If you have not already downloaded the project files for this lesson to your computer from your Account page, make sure to do so now. See “Getting Started” at the beginning of the book.
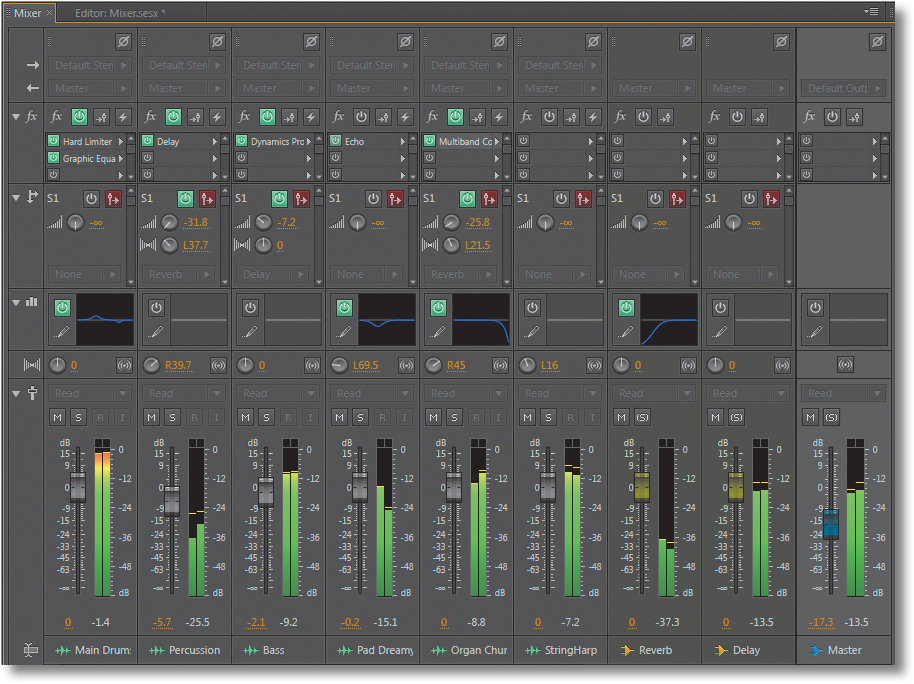
The Multitrack Editor shows the clips within various tracks. The Mixer does not show clips but has a corresponding Mixer channel for each Multitrack Editor track. The reason for calling a Mixer channel a “channel” instead of a track is because hardware mixers use that term; in physical studios, there isn’t necessarily a one-to-one correlation between tracks and channels (e.g., one tape recorder track could feed more than one mixer channel).
Although the Multitrack Editor provides mixing functions, such as altering levels and panning (a track’s position in the stereo field), several mixing functions (sends, EQ, effects, and ins/outs) share a common area and you can see the settings for only one of these functions at a time. With the Mixer, all of these functions are arranged as rows and can be viewed simultaneously.
Mixing typically occurs after the various tracks are recorded and edited, and you’re ready to concentrate solely on blending all the tracks together to create a cohesive listening experience. However, even when editing, there are often times when it makes more sense from a workflow standpoint to temporarily switch over to the Mixer.
1. With Audition open, navigate to the Lesson10 folder, and open the Multitrack Session named Mixer.sesx. The Classic workspace is recommended.
2. After clicking the Multitrack button (if necessary), click the Mixer tab.
3. The Mixer uses faders instead of rotary controls to adjust level. The higher you can extend the Mixer, the longer the faders. Click the splitter bar toward the bottom of the Mixer panel, and drag down as far as possible to make the faders as long as possible.
4. Click on the same splitter bar, and drag up. Note that the faders get shorter. Continue dragging up; eventually the faders will collapse. Return the faders to the longest size allowed by your screen consistent with still being able to access the Transport buttons.
![]() Tip
Tip
Undocking the Mixer window is very convenient, because it can be a consistent size and you don’t have to be concerned about resizing it. Undocking is also natural for two-monitor setups, because you can put the Mixer in its own dedicated monitor and the editor section in the other monitor.
![]() Note
Note
Long-throw hardware faders are desirable in hardware mixers because it’s easier to do precise, “high-resolution” mixing moves. The same is true of “virtual” faders in software. When Audition’s faders are extended to their greatest height, you can edit levels easily in 0.1dB steps. In the Multitrack Editor, the most resolution you can achieve with the rotary Volume controls is 0.3dB, and that requires a very precise touch.
5. Keep the project open in preparation for the next lesson.
Mixer show/hide options
Most rows of Mixer modules have an expand/collapse disclosure triangle. You can customize how much space the Mixer takes up on the screen and automatically change the relative fader height by showing or hiding different parts of the Mixer.
1. When the fx area is closed, you can still see the fx area’s master fx power state button, the FX Pre-Fader/Post-Fader button, and the pre-render track button that’s often used to reduce CPU power when mixing complex projects (pre-rendering is covered in Chapter 15).
![]() Note
Note
Two Mixer sections cannot be hidden: the I/O section at the top (polarity switch, Input Assign drop-down menu, and Output Assign drop-down menu) and the channel’s Pan and Sum to Mono controls.
Click the fx area disclosure triangle to expand its options. Note that the faders become shorter because the fx area now takes up more space.
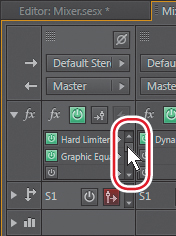
2. In all channels, you can now see three Effects Rack inserts. You cannot drag this area downward to reveal more inserts, but the scroll bar to the right of the inserts lets you see all available inserts. Click the rectangle within the scroll bar and drag up or down to see the other inserts; you can also click the scroll bar’s top and bottom arrows to step up or down, respectively, through one insert at a time.
3. With the Sends area closed, you can see the number of the currently selected send in the upper-left corner, the power state button, and the FX Pre-Fader/Post-Fader button. Click the Sends area disclosure triangle to expand it. Note that again the faders become shorter because the Sends area now takes up more space.
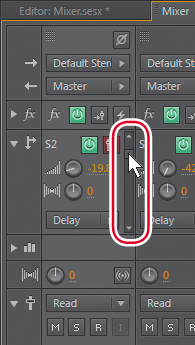
4. One send is shown at a time along with its power state button, FX Pre-Fader/Post-Fader, Send Volume, Stereo Balance controls, and drop-down menu for reassigning the send to a different send (or creating a new send bus or side-chain send). Like the fx area, a scroll bar is available for choosing the current send. In the second channel from the left (labeled Bass), click the rectangle within the scroll bar and drag up or down to see the other sends; you can also click the scroll bar’s top and bottom arrows to step up or down, respectively, through one send at a time.
5. With the EQ area closed, no aspect of the EQ area is visible. Click the EQ area disclosure triangle to expand it. As with expanding the fx and Sends areas, the faders become even shorter to compensate for having less available space.
6. The EQ section works similarly to how it works in the Multitrack Editor. The power state button can enable/bypass the EQ. Click the Show EQ Editor Window button (pencil icon); you’ll open the channel’s Parametric Equalizer (you can also open it by double-clicking on the EQ graph). Click the Parametric EQ’s close box, because you won’t be making any adjustments.
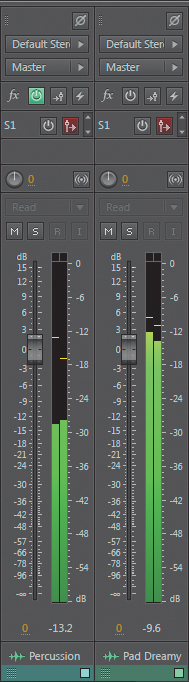
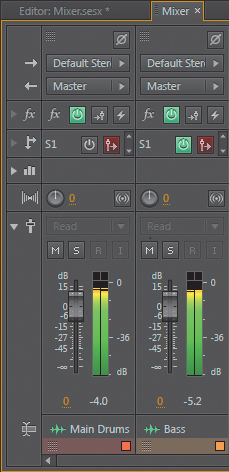
7. Close the fader section by clicking its disclosure triangle. The faders section collapses to show the Mute, Solo, Arm for Record, and Monitor Input buttons, with the track title and track colors also visible. Closing the fader section also reduces the fader to a Volume control identical to the one found in the Multitrack Editor.
Channel scrolling
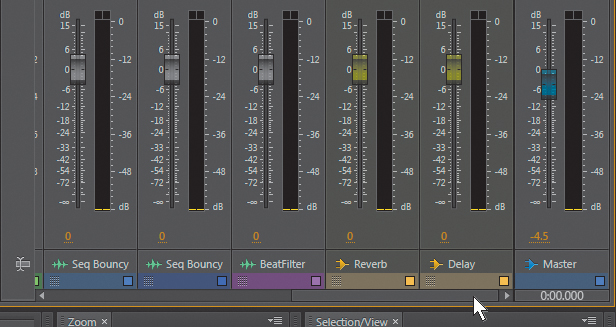
With projects that have many channels, your monitor may not be wide enough to show them all. However, you can scroll though the various channels, as well as see which ones are buses, standard tracks, or the Master Track Output bus.
1. Click on the right edge of the Audition window, and drag left to narrow the Mixer. Make sure that you can’t see all channels in the Mixer.
2. A scroll bar appears along the bottom of the Mixer panel if the panel isn’t wide enough to show all channels. Click the scroll bar rectangle, and drag all the way to the right. Now you can see the rightmost group of channels.
3. Drag the scroll bar rectangle full left in preparation for the next lesson.
![]() Note
Note
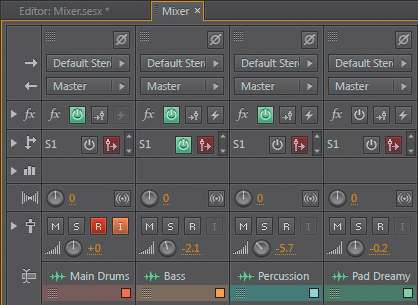
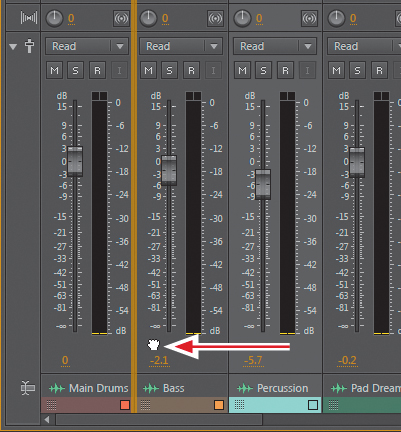
Channel faders have different colors to indicate their function. Standard tracks have gray faders; buses have yellow faders and a yellow Mixer symbol to the left of the bus title. The Master Track Output has a blue fader and a blue Mixer symbol to the left of the Master Track title.
Rearranging Mixer channel order
You’re not limited to an existing left-to-right track order. For example, you may have recorded drums first in Multitrack Editor Track 1 and a percussion part in Multitrack Editor Track 3; these appear in Mixer channels 1 and 3, respectively. However, suppose you’d rather have the Percussion channel next to the Drums channel. You can move channels horizontally to anywhere within the Mixer.
1. Hover the cursor over the channel you want to move (in this case, the Percussion channel) until the cursor turns into a hand. There are several places in the channel where this happens, such as right below the meter.
2. Click and drag left until a yellow line appears to the right of the Main Drums channel. This is where the left side of the Percussion channel will be moved. (Note that if you drag right until you see a yellow line, the right side of the channel will be moved there.)
3. Release the mouse button, and the Percussion channel will relocate to the right of the Main Drums channel.
4. Click the Editor tab to return to the Multitrack Editor. Note that the track order has changed to reflect the channel change you made in the Mixer.
![]() Note
Note
The Mixer view reflects changes in track order made in the Multitrack Editor, and the Multitrack Editor reflects changes in channel order made in the Mixer view.
Using hardware controllers
Although being able to mix onscreen is convenient, many engineers prefer the “human touch” of using physical faders. Audition supports various control surfaces—hardware devices that include faders and can control the onscreen faders. Many control surfaces can also control the Mute and Solo buttons, panning, Transport, arm tracks for record, and more.
Audition supports three control surface protocols: Mackie Control, Avid/Euphonix EUCON, and ADS Tech RedRover. Of these, Mackie Control is the most common, and several control surfaces from multiple manufacturers are compatible with this protocol.
Adding a control surface is easy; the following illustrates how to add a Mackie Control (or compatible) hardware controller.
1. Choose Edit > Preferences > Control Surface.
2. Under Device Class, use the drop-down menu to choose the control surface type (e.g., Mackie for Mackie Control), and then click Configure.
3. A dialog box appears; click Add to add the control surface to the Configuration window.
4. Another dialog box appears. The Device Type drop-down menu shows variations on a standard Mackie control (e.g., the later model Mackie Control XT). However, for virtually all devices that offer Mackie compatibility, the standard Mackie Control is the correct choice. Also, choose the controller in the MIDI Input Device and MIDI Output Device fields, and then click OK. Click OK again to leave the Configuration window.
![]() Tip
Tip
If your MIDI controller doesn’t appear in at least the MIDI Input Device field, close Audition, reopen it, and then try again. If Audition still doesn’t detect the controller, keep in mind that some controllers will appear if you restart the computer with the controller connected, whereas others work best if you restart the computer first, and then connect the controller (particularly with USB controllers). Also, note that some controllers require installing driver software for them to work properly; and for some to emulate a Mackie controller, they may need to load a specific preset or be powered up with certain buttons held down. Refer to the controller’s documentation for details.
5. After returning to the Control Surface window, click Button Assignments. You’ll see an additional dialog box whose upper section shows assignments for the various assignable buttons available in a Mackie Control (however, note that not all Mackie Control-compatible devices incorporate all buttons, and some may not incorporate any). The lower section shows available commands; drag and drop a command next to the button to which you want the command assigned. Once you’ve made all your assignments, click OK, and then click OK again to exit preferences.
Review questions
1. What are the main advantages of the Mixer view compared to the Multitrack Editor?
2. What is the Mixer view’s main limitation?
3. How can you see all the Mixer channels if your monitor isn’t wide enough?
4. How can you differentiate a bus from a track at a glance?
5. Is it possible to rearrange the left-to-right channel order to create a more logical workflow?
Review answers
1. The faders can have extremely high resolution, and if desired, you can see the fx, Sends, and EQ areas simultaneously.
2. You cannot edit clip properties in the Mixer view.
3. A scroll bar along the bottom of the Mixer panel lets you view different groups of channels.
4. The bus has a yellow fader; a standard track has a gray fader.
5. Yes, you can drag and drop channels horizontally anywhere you want within the Mixer.