
2. Getting to Know InDesign
Lesson Overview
In this lesson, you’ll learn how to do the following:
• View layout aids.
• Check on potential production issues with the Preflight panel.
• Type and style text.
• Import text and thread text frames.
• Import, crop, and move graphics.
• Work with objects.
• Automate formatting with paragraph, character, and object styles.
• Preview a document in Presentation mode.
This lesson will take about 1 hour to complete.
Download the project files for this lesson from the Lesson & Update Files tab on your Account page at www.peachpit.com and store them on your computer in a convenient location, as described in the “Getting Started” section of this book.
Your Account page is also where you’ll find any updates to the chapters or to the lesson files. Look on the Lesson & Update Files tab to access the most current content.
The building blocks of an InDesign layout are objects, text, and graphics. Layout aids such as guides help with size and placement, and styles let you format page elements automatically.
Getting started
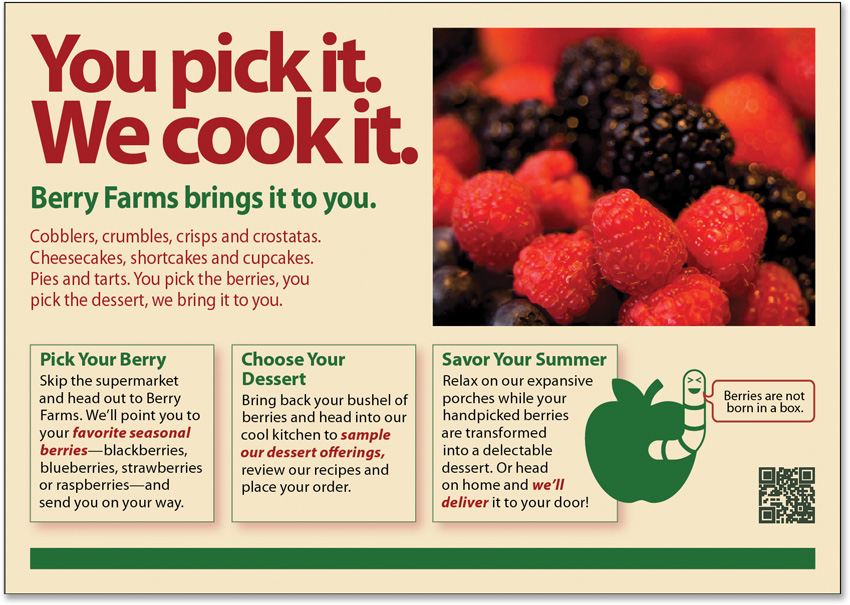
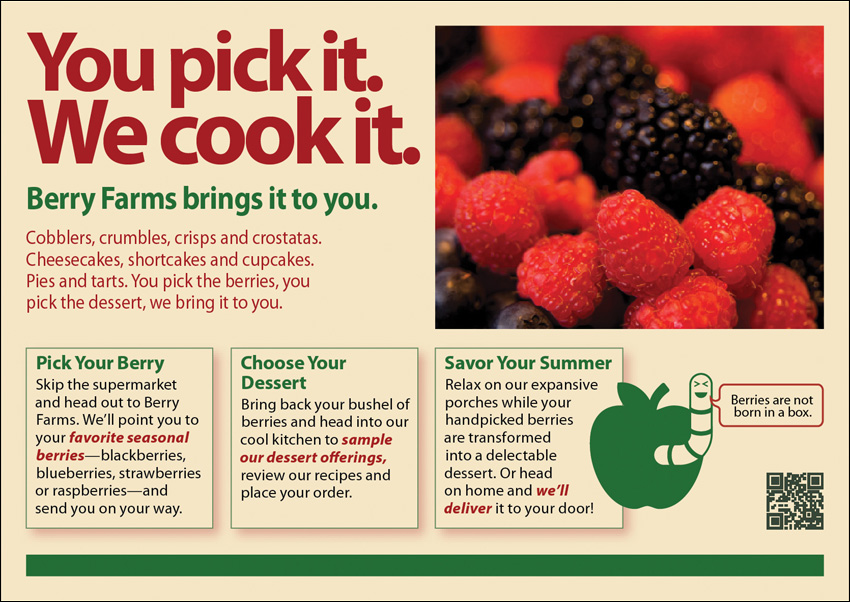
The document for this lesson is a standard-size postcard designed to be printed and mailed. In addition, the postcard can be exported as a PDF to use in email marketing. As you will see in this lesson, the building blocks of an InDesign document are the same, regardless of the output media. In this lesson, you will add the text, images, and formatting necessary to finish the 6″ × 4.25″ postcard.
1. To ensure that the preference and default settings of your Adobe InDesign program match those used in this lesson, move the InDesign Defaults file to a different folder following the procedure in “Saving and restoring the InDesign Defaults file” on page 3.
![]() Note
Note
If you have not already downloaded the project files for this lesson to your computer from your Account page, make sure to do so now. See “Getting Started” at the beginning of the book.
2. Start Adobe InDesign.
3. To ensure that the panels and menu commands match those used in this lesson, choose Window > Workspace > [Advanced], and then choose Window > Workspace > Reset Advanced.
4. Choose File > Open, and open the 02_Start.indd file in the Lesson02 folder, located inside the Lessons folder within the InDesignCIB folder on your hard disk.
5. Choose File > Save As, rename the file 02_Postcard.indd, and save it in the Lesson02 folder.
6. To display the document at a higher resolution, choose View > Display Performance > High Quality Display.
7. If you want to see what the finished document looks like, open the 02_End.indd file in the same folder. You can leave this document open to act as a guide as you work.
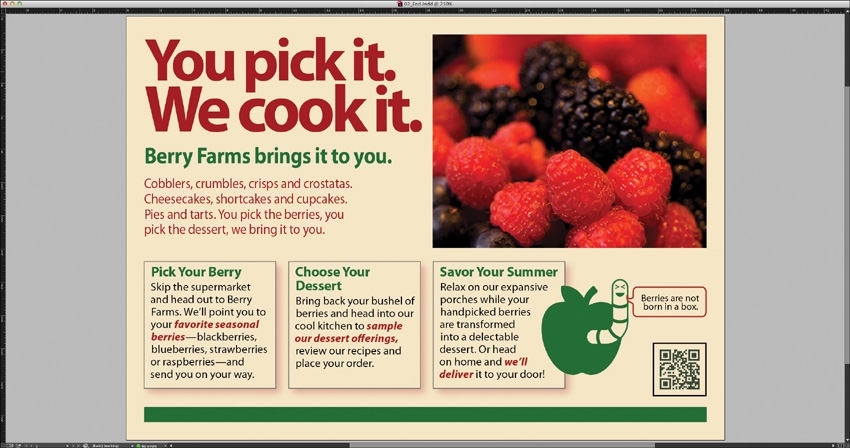
8. When you’re ready to resume working on the lesson document, display it by clicking its tab in the upper-left corner of the document window.
Viewing guides
Revising or completing an existing document, as you will do in this lesson, is very typical work for entry-level InDesign users. Currently, the postcard document is displayed in Preview mode, which displays artwork in a standard window, hiding nonprinting elements such as guides, grids, frame edges, and hidden characters. To work on this document, you will view guides and hidden characters (such as spaces and tabs). As you become comfortable working with InDesign, you will discover which view modes and layout aids work best for you.
![]() Tip
Tip
The other view modes are Bleed, for reviewing the predefined bleed area that extends beyond the page boundaries; Slug, for displaying the area outside the bleed area that can contain information such as printer instructions or job sign-off information; and Presentation, which fills the screen and works well for presenting design ideas to clients.
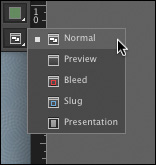
1. Click and hold down the Screen Mode button at the bottom of the Tools panel, and choose Normal (![]() ) from the menu.
) from the menu.
Any layout aids that are enabled now display. For example, light blue, nonprinting lines now indicate existing text frames and objects because Frame Edges were displayed (View > Extras). You will now enable other layout aids.
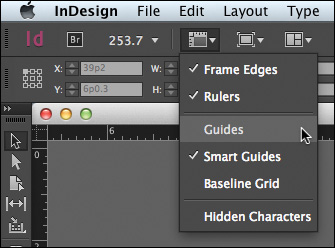
2. In the Application bar, click the View Options menu (![]() ) and select Guides. Be sure Guides is checked in the menu.
) and select Guides. Be sure Guides is checked in the menu.
When guides are displayed, it’s easy to place text and objects with precision, including automatically snapping them into place. The guides do not print and do not limit the print or export area.
![]() Tip
Tip
The commands in the Application bar are available in the main InDesign menus as well. These include View > Grids & Guides > Show Guides and Type > Show Hidden Characters.
3. From the same View Options menu, choose Hidden Characters.
Displaying hidden (nonprinting) characters, such as tabs, spaces, and paragraph returns, helps you precisely select and style text. In general, it’s a good idea to show hidden characters whenever you are editing or formatting text.
4. As you work on this document, use the skills you learned in Lesson 1 to move panels, rearrange panels, scroll, and zoom as necessary.
Preflighting as you work
Anytime you start working on a document for the first time—whether you’re creating a document from scratch or revising an existing document—you will need to keep an eye on output issues. You will learn more about all of these issues throughout the lessons in this book. Common issues include:
• Missing fonts: If a font used in the document is not present or enabled on your system, it is considered missing and the document will not print properly.
• Color models: Colors created in the wrong color model for the intended output device can cause problems. A common problem is that digital camera images often use the RGB color model while offset printing requires CMYK colors.
• Overset text: As text formatting changes and objects are moved and resized during layout, text can accidentally get cut off so it doesn’t display or print. This is referred to as overset text.
In publishing, the process of reviewing a document for output issues is known as preflighting. InDesign provides a Live Preflight feature that lets you monitor documents as you’re working to prevent potential problems from occurring. To customize Live Preflight, you can create or import production rules (called profiles) against which to check your documents. The default profile supplied with InDesign flags issues such as missing fonts and overset text (text that does not fit in its text frame). You will fix an overset text error in this exercise.
1. Choose Window > Output > Preflight to open the Preflight panel.
Using the [Basic] (Working) preflight profile, InDesign finds one error, as indicated by the red Preflight icon (![]() ), which displays in the lower-left corner of the Preflight panel and the document window. According to the Error list in the Preflight panel, the problem is Text.
), which displays in the lower-left corner of the Preflight panel and the document window. According to the Error list in the Preflight panel, the problem is Text.
2. To view the error, click the arrow next to Text in the Preflight panel.
![]() Tip
Tip
You can handle overset text in various ways, including revising the text in the Story Editor, reducing the font size, or expanding the text frame.
3. Click the arrow next to Overset Text, and then click Text Frame.
4. To display details for the error, click the arrow next to Info below.
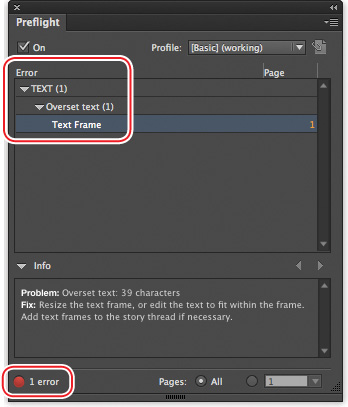
5. Double-click Text Frame to select the problem text frame on the page, or click the page number link to the right in the Page column.
The text frame containing the the headline, subhead, and body text is selected. The overset text is indicated by a red plus sign (+) in the frame’s out port (the small square just above the lower-right corner of the frame).
![]() Tip
Tip
By default, ruler guides are cyan (a blue-green color).
6. Using the Selection tool (![]() ), drag the handle at the bottom of the text frame down until it touches the ruler guide.
), drag the handle at the bottom of the text frame down until it touches the ruler guide.

7. Click the pasteboard to deselect the text frame.
8. Choose View > Fit Page In Window.
![]() Tip
Tip
Keep an eye on the lower-left corner of the document window to see if any errors arise. You can double-click the word “error” to open the Preflight panel for details on any errors.
InDesign now reports No Errors in the Preflight panel and the lower-left corner of the document window.
9. Close the Preflight panel. Choose File > Save to save your work.
Adding text
With InDesign, most text is contained by a text frame. (Text can also be contained in table cells and flow along paths.) You can type text directly into a text frame or import text files from word-processing programs. When importing text files, you can add the text to existing frames or create frames to contain the text. If text doesn’t fit within the same frame, you can “thread,” or link, the text frames.
Typing and styling text
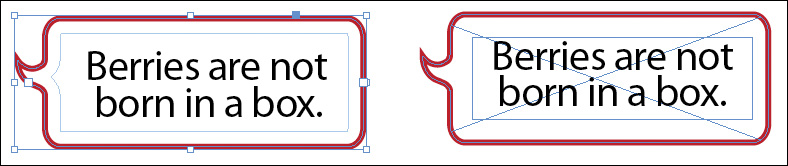
You’re ready to start working on the incomplete postcard. First, you’ll type text in a text frame shaped like a “speech balloon.” Then, you will format the text and adjust its placement within the frame.
1. Select the Type tool (![]() ), and click in the speech balloon at the right.
), and click in the speech balloon at the right.
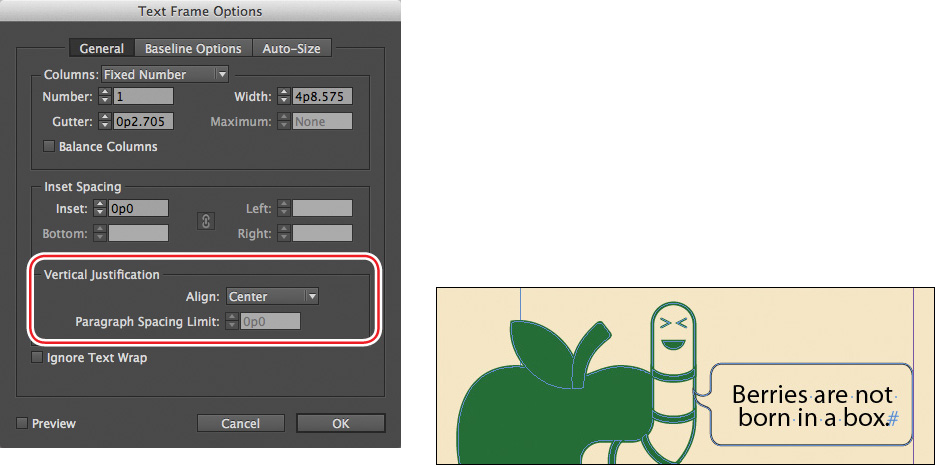
2. Type Berries are not born in a box. in the text frame.

3. With the insertion point still in the text, choose Edit > Select All.
4. If necessary, click the Character Formatting Controls icon (![]() ) in the Control panel. Using the controls at the far left, do the following:
) in the Control panel. Using the controls at the far left, do the following:
• From the Font Family menu, select Myriad Pro.
• From the Font Style menu, select Regular (if necessary).
• Type 7 in the Font Size box to the right of the Font Family menu.
• Type 6 in the Leading box under the Font Size box.

![]() Tip
Tip
Alignments such as Center are paragraph formats, but they still display in the Control panel when Character Formatting Controls are displayed. Select Paragraph Formatting Controls to display paragraph formats more conveniently at left.
5. Toward the middle of the Control panel, click the Align Center button (![]() ).
).
You will now set an option for the text frame to control how the text is positioned vertically within the frame.
6. With the insertion point still in the text, choose Object > Text Frame Options. Select the General tab (if necessary).
7. In the Vertical Justification section, select Center from the Align menu.
Note the location of the Columns and Inset Spacing features, which are helpful for positioning text within a frame as well. You will use these in later lessons.
8. Select the Preview box in the lower-left corner to see the change, and then click OK.
9. Choose File > Save to save your work.
Importing and flowing text
In most publishing workflows, writers and editors use word processors. When the text is almost final, they send the files to graphic designers. To complete the postcard, you will import a Microsoft Word file into a text frame at the bottom of the page using the Place command. You will then link the first text frame to the other two frames using a process called “threading.”
![]() Tip
Tip
In many publishing environments, including marketing and advertising, the text is referred to as “copy,” which is why the writers and editors are called “copywriters” and “copy editors.”
1. Make sure that no objects are selected by clicking a blank area of the pasteboard.
2. Choose File > Place. At the bottom of the Place dialog box, make sure that Show Import Options is not selected.
3. Navigate to the Lesson02 folder, in the Lessons folder, and double-click the BerryFarms.docx file.
![]() Note
Note
To see where to place the body copy text, consult the finished lesson document, 02_End.indd.
The pointer changes to a loaded text icon (![]() ). You’ll add this text to the text frame in the lower-left quadrant of the postcard. (The text frames are outlined by light blue nonprinting lines.)
). You’ll add this text to the text frame in the lower-left quadrant of the postcard. (The text frames are outlined by light blue nonprinting lines.)
4. Position the loaded text icon in the upper-left corner of the text frame, then click.
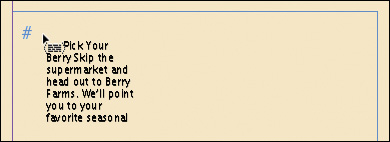
The text in the Word file fills the frame, but it doesn’t all fit. A red plus sign (+) in the out port of the frame indicates overset text. You will thread these text frames so the text flows through them.
5. Using the Selection tool (![]() ), select the text frame that now contains the text.
), select the text frame that now contains the text.
![]() Tip
Tip
When you have a loaded text icon, you have several choices: You can drag to create a new text frame, click inside an existing frame, or click to create a new text frame within the page’s column guides.
6. Click the out port in the lower-right corner of the selected frame. The pointer becomes a loaded text icon. Click in the text frame immediately to the right.
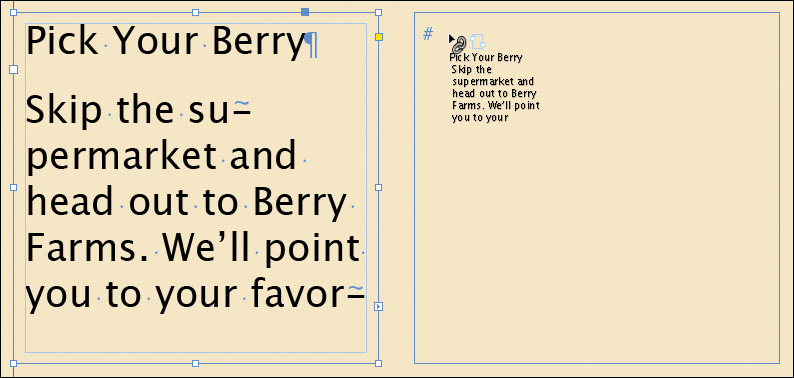
7. Once the text flows into the middle text frame, click that frame’s out port. The pointer again becomes a loaded text icon. Click in the remaining text frame to finish threading the frames.
![]() Note
Note
Due to variations in font versions, you may see slightly different text in your frames.
At this point, text is still overset and the apple-shaped object is overlapping the text. You will resolve these problems by formatting the text with styles and wrapping the text around the apple shape later in this lesson.

8. Choose File > Save.
Working with styles
InDesign provides paragraph styles, character styles, and object styles for quickly and consistently formatting text and objects and—more important—easily making global changes by simply editing the style. Styles work as follows:
![]() Tip
Tip
A paragraph style can include nested styles for the beginning of a paragraph and for lines within a paragraph. This automates common paragraph formatting, such as starting a paragraph with a drop cap followed by all capital letters on the first line.
• A paragraph style includes formatting attributes—such as indents—that apply to all the text in a paragraph. You can select a paragraph by simply clicking in it.
• A character style includes only character attributes—such as font and size—that apply only to selected text.
• An object style lets you apply formatting—such as fill and stroke color, stroke and corner effects, transparency, drop shadows, feathering, text frame options, and text wrap—to selected objects.
You will now format the text with paragraph and character styles.
Applying paragraph styles
Because the postcard is almost finished, all the paragraph styles you need are already created. You will first apply the Body Copy style to all the text in the three threaded text frames, and then you will apply the Subhead style to the box headings.
1. Using the Type tool (![]() ), click in one of the three text frames containing the newly imported text.
), click in one of the three text frames containing the newly imported text.
![]() Tip
Tip
All the text in a series of threaded text frames is called a story.
2. Choose Edit > Select All to select all the text in the threaded frames.
3. Choose Type > Paragraph Styles to display the Paragraph Styles panel.
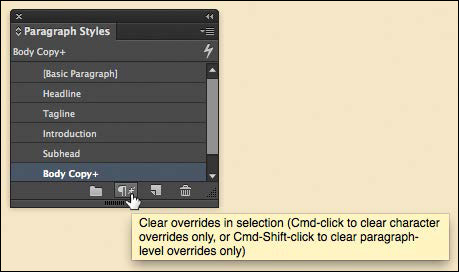
4. In the Paragraph Styles panel, click the Body Copy style to format the entire story with the Body Copy style With the text still selected, click the Clear Overrides button at the bottom of the Paragraph Styles panel..
5. Click a blank area of the pasteboard to deselect all the text.
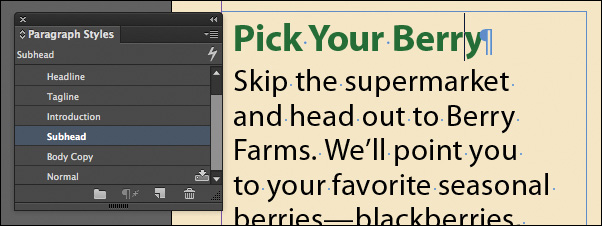
6. Using the Type tool, click in the first line of text in the story: “Pick Your Berry.”
As you can see from the hidden character (the paragraph return) at the end of the line, this line is actually its own paragraph. Therefore, it can be formatted with a paragraph style.
7. Click the Subhead style in the Paragraph Styles panel.
8. Apply the Subhead paragraph style to “Choose Your Dessert” and “Savor Your Summer” as well.
9. Choose File > Save.
Formatting text for the character style
Highlighting a few key words in a paragraph can draw readers into the text. For the postcard copy, you will format a few words to make them “pop,” and then create a character style based on those words. You can then quickly apply the character style to other selected words.
![]() Tip
Tip
Remember that as you work, you can tear off panels, resize them, and move them to suit your needs. The configuration of your panels is largely dependent on the amount of screen space available. Many InDesign users have a second monitor for managing panels.
1. Using the Zoom tool (![]() ), zoom in on the first text frame in the lower-left quadrant of the postcard. This frame contains the head “Pick Your Berry.”
), zoom in on the first text frame in the lower-left quadrant of the postcard. This frame contains the head “Pick Your Berry.”
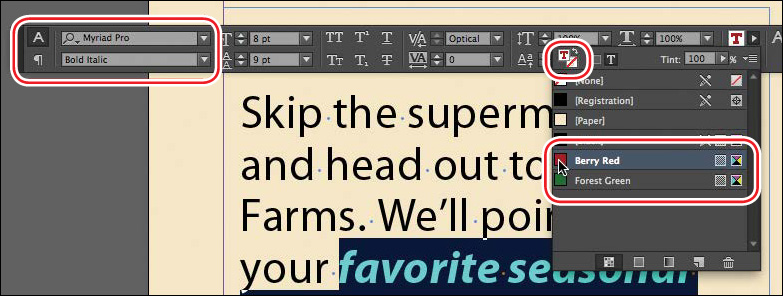
2. Using the Type tool (![]() ), select the words “favorite seasonal berries” in the fourth line of the body copy.
), select the words “favorite seasonal berries” in the fourth line of the body copy.
3. Display the Type Style menu on the far left side of the Control panel. Select Bold Italic, leaving the font as Myriad Pro.
4. If necessary, click the Character Formatting Controls icon (![]() ) in the Control panel. Click the arrow next to the Fill menu and choose Berry Red.
) in the Control panel. Click the arrow next to the Fill menu and choose Berry Red.
5. Click once to deselect the text and view your changes. Choose File > Save.
Creating and applying a character style
Now that you have formatted the text, you are ready to create a character style based on that formatting.
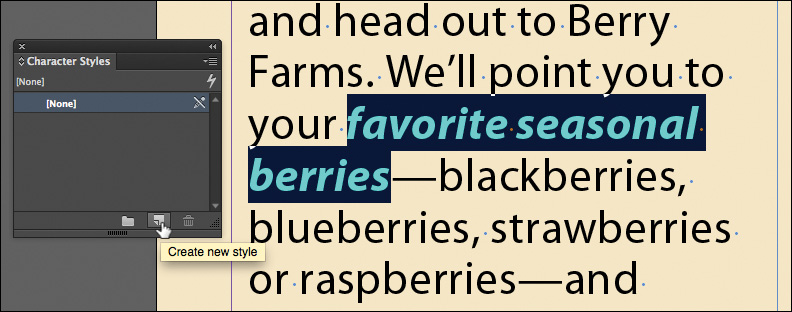
1. Using the Type tool (![]() ), select the words “favorite seasonal berries” again.
), select the words “favorite seasonal berries” again.
2. Choose Type > Character Styles to display the Character Styles panel.
![]() Note
Note
Pressing Alt (Windows) or Option (Mac OS) while you click the Create New Style button opens the New Character Style dialog box so you can immediately name the style. This feature works in the Paragraph Styles and Object Styles panels as well.
3. Hold down the Alt (Windows) or Option (Mac OS) key and click the Create New Style button, at the bottom of the Character Styles panel.
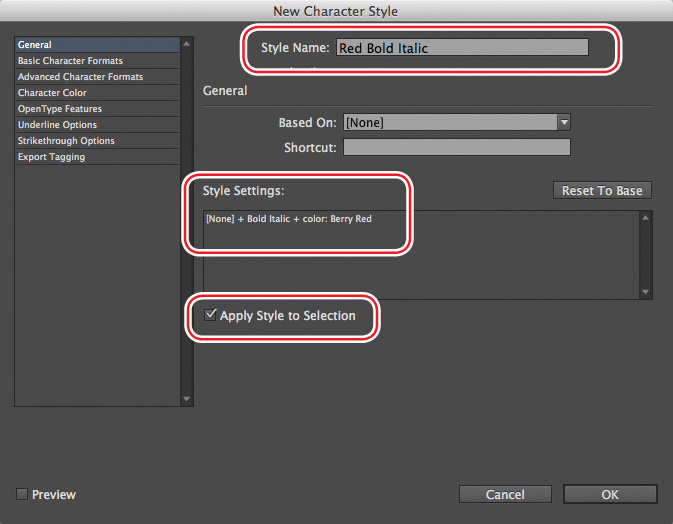
A new character style, named Character Style 1, is created in the New Character Style dialog box. This new style includes the characteristics of the selected text, as indicated in the Style Settings area of the dialog box.
4. In the Style Name box, type Red Bold Italic.
5. At the bottom of the New Character Style dialog box, select Apply Style To Selection, and then click OK.
Typesetters often apply the same style to any punctuation following the styled word. This rule may vary based on design preferences or a publisher’s style guide. The key is to be consistent.
6. Using the Type tool, select the words “sample our dessert offerings” and the comma after “offerings” in the middle text frame. Click Red Bold Italic in the Character Styles panel.
Because you applied a character style instead of a paragraph style, the formatting affected only the selected text, not the entire paragraph.
7. Using the Type tool, select the words “we’ll deliver” in the text frame at the right. (You can drag to select the text even though part of it is obscured by the apple shape.) Click Red Bold Italic in the Character Styles panel.

8. Choose File > Save.
Working with graphics
To add the final design element to the postcard, you’ll import, resize, and position a graphic. Graphics used in InDesign documents are placed inside frames. Use the Selection tool (![]() ) to resize the frame and to position the graphic within the frame. You will learn more about working with graphics in Lesson 10, “Importing and Modifying Graphics.”
) to resize the frame and to position the graphic within the frame. You will learn more about working with graphics in Lesson 10, “Importing and Modifying Graphics.”
![]() Tip
Tip
You can place a graphic into a selected frame or create a frame for the graphic. You can also drag graphic files from the desktop onto an InDesign page or pasteboard.
1. Choose View > Fit Page In Window.
You will position the graphic in the upper-right quadrant of the postcard.
2. Make sure that no objects are selected by choosing Edit > Deselect All.
3. Choose File > Place. In the Place dialog box, make sure that Show Import Options is not selected.
4. Navigate to the Lesson02 folder in the Lessons folder, and double-click the Berries.psd file.
The loaded graphics icon (![]() ) displays a preview of the graphic. If you click on the page, InDesign will create a graphics frame for you and place the graphic in it at full size. In this case, however, you will create a graphics frame to contain this graphic.
) displays a preview of the graphic. If you click on the page, InDesign will create a graphics frame for you and place the graphic in it at full size. In this case, however, you will create a graphics frame to contain this graphic.
5. Position the loaded graphics icon at the intersection of the two guides in the upper-right quadrant of the postcard.
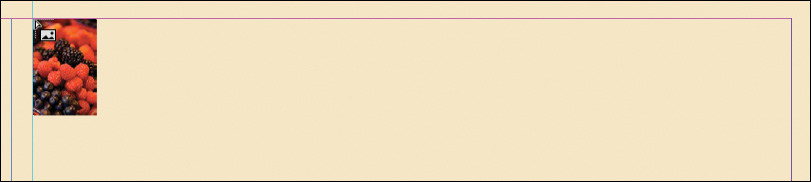
6. Drag down and to the right to create a frame that spans the column width. When you release the mouse button, a graphics frame is created. The length of the graphics frame is determined automatically by the graphic’s proportions.


When you create a picture frame for a graphic, the graphic is automatically scaled to the frame. You can use the scaling controls on the Control panel to precisely adjust the graphic size. You will learn more about that in Lesson 10.
7. Using the Selection tool (![]() ), select the middle handle at the bottom of the graphics frame and drag it up. Align the bottom of the graphics frame with the bottom of the text frame to its left.
), select the middle handle at the bottom of the graphics frame and drag it up. Align the bottom of the graphics frame with the bottom of the text frame to its left.

Use the Selection tool to crop a graphic by reducing the size of its frame.
![]() Tip
Tip
To drag the graphic with more control, press the Shift key. This constrains the movement to horizontal, vertical, and 45 degree angles. If you click and pause briefly before resizing a frame with the Selection tool, or before moving the graphic within a frame, the part of the graphic that is cropped becomes visible outside the frame area.
8. Still using the Selection tool, position the pointer over the graphic to display the content grabber, which looks like a doughnut. Click the content grabber to select the graphic, then drag up to position the berries within the frame as you please.
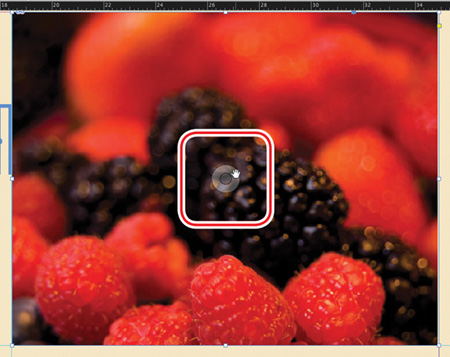
Drag the doughnut to reposition a graphic within its frame.
9. Choose File > Save.

Working with objects
The building blocks of InDesign pages are objects—text frames, graphics frames, rules (lines), tables, and more. In general, you move and resize objects with the Selection tool. Objects can have a fill color (background color), stroke weight (outline or frame thickness), and stroke color. You can move objects around freely, snap them to other objects, or place them with precision according to guides or values you enter. In addition, you can resize and scale objects and specify how text wraps around them. You will learn more about objects in Lesson 4, “Working with Objects.” Here, you will experiment with a few object features.
Wrapping text around an object
To see text wrap in action, you will flow text around the apple shape in the lower-right quadrant of the postcard.
1. Using the Zoom tool (![]() ), zoom in on the lower-right quadrant of the postcard.
), zoom in on the lower-right quadrant of the postcard.
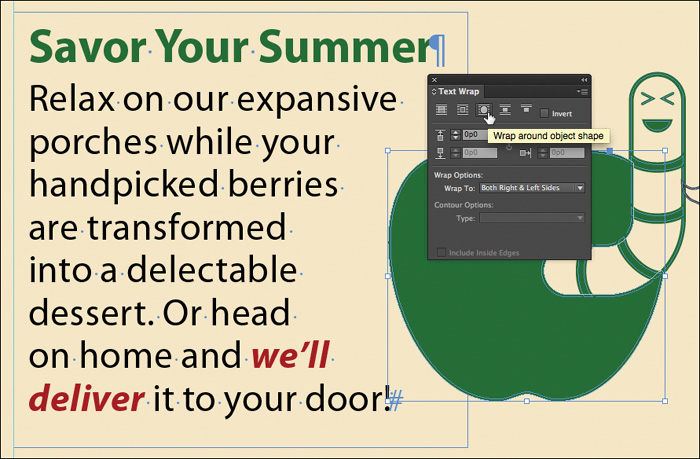
2. Using the Selection tool (![]() ), click the apple shape, which is actually an InDesign object.
), click the apple shape, which is actually an InDesign object.
3. Choose Window > Text Wrap.
![]() Tip
Tip
The Text Wrap panel has many options for controlling precisely how text wraps around objects and images.
4. In the Text Wrap panel, click the Wrap Around Object Shape button (![]() ).
).
5. Close the Text Wrap panel.
6. Choose File > Save.
Moving an object and changing the stroke
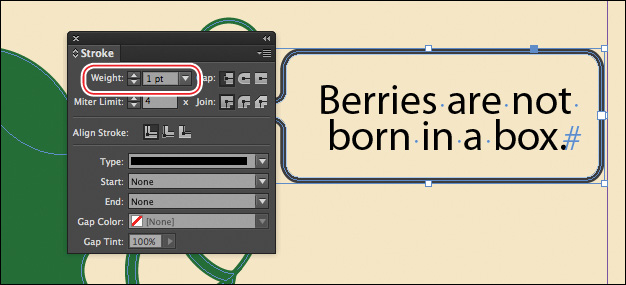
When an object is selected with the Selection tool, you can drag it around to move it and you can change its formatting. Here, you will move the speech bubble at the bottom of the page so the words appear to be coming out of the worm’s mouth. You will then change the stroke weight and color.
1. Using the Selection tool (![]() ), select the speech bubble text frame.
), select the speech bubble text frame.
2. Point at the text frame to display the mover pointer (![]() ), and then drag the frame up to the worm’s mouth as shown. The precise placement doesn’t matter.
), and then drag the frame up to the worm’s mouth as shown. The precise placement doesn’t matter.
![]() Tip
Tip
InDesign provides many options for moving selected objects, including dragging them, “nudging” them with the arrow keys, and entering precise placement values in the X and Y fields on the Control panel.

3. With the text frame still selected, click the Stroke panel icon at the right. In the Stroke panel, choose 1 pt from the Weight menu.
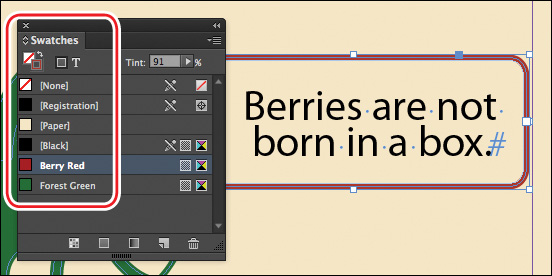
4. With the text frame still selected, click the Swatches panel icon at the right.
5. Click the Stroke box (![]() ) at the top of the panel to indicate that you want to apply color to the text frame’s border.
) at the top of the panel to indicate that you want to apply color to the text frame’s border.
6. Select Berry Red.
7. Click the pasteboard to deselect all objects.
8. Choose File > Save.
Working with object styles
As with paragraph and character styles, you can quickly and consistently format objects by saving attributes as styles. In this exercise, you will apply an existing object style to the three threaded text frames containing the body copy.
1. Choose View > Fit Page In Window.
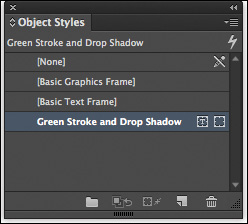
2. Choose Window > Styles > Object Styles to display the Object Styles panel.
3. Using the Selection tool (![]() ), click the text frame at left containing the “Pick Your Berry” subhead.
), click the text frame at left containing the “Pick Your Berry” subhead.
4. Click the Green Stroke And Drop Shadow style in the Object Styles panel.
5. Press the Shift key while you click the remaining two text frames, which contain the “Choose Your Dessert” and “Savor Your Summer” subheads.
6. Click the Green Stroke And Drop Shadow style in the Object Styles panel.
7. Choose File > Save.
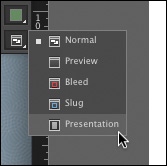
Viewing the document in Presentation mode
In Presentation mode, the InDesign interface is hidden entirely, and the document fills the whole screen. This mode works well for presenting design ideas to clients on a laptop.
![]() Tip
Tip
You cannot edit documents in Presentation mode, but you can make changes in any other screen mode.
1. Click and hold down the Screen Mode button at the bottom of the Tools panel, and select Presentation (![]() ).
).
2. After viewing the document, press Esc (Escape) to exit Presentation mode. The document displays in its previous mode, Normal.
3. To view the document without layout aids, select Preview from the Screen Mode menu on the Application bar.
4. Choose View > Actual Size to see the document at its output size.
5. Choose File > Save.
Congratulations! You’ve completed the InDesign tour.
• Start with preflight. As soon as you receive a document to work on, use the Live Preflight feature to make sure the document will output correctly. For example, if the document is missing a font, you will need to acquire that font right away before you continue working on the document.
• Avoid layering objects. Format one object rather than layering objects. For example, the three text frames containing the postcard’s body text have a text inset, stroke weight, stroke color, and drop shadow applied. An inexperienced InDesign user might be tempted to create this look by layering multiple frames. Using multiple objects creates extra work when moving and aligning objects or changing the formatting.
• Thread text frames. Inexperienced users are often tempted to place or paste text into separate, freestanding text frames. The text in these frames needs to be selected and formatted individually. If you flow the text through threaded frames, it remains as a single body of text called a story. Among other benefits of working with a story as opposed to disjointed frames of text, you can select all the text in a story for formatting and limit the use of Find/Change to the text in a story. When working on a longer document, such as a book, threading text frames is crucial to controlling the text placement and entering revisions.
• Use styles for all formatting. InDesign provides styles for formatting objects, paragraphs, lines within paragraphs, characters, tables, and table cells. With styles, you can quickly and consistently format everything in a document. In addition, if you make a change to a format, all you need to do is change the style. For example, in the postcard, if you wanted to change the font used in the body copy, all you would need to do is edit the Character Formats of the Body Text paragraph style. Styles can easily be updated to reflect new formatting and can be shared among documents as well.
Exploring on your own
To learn more about InDesign, you may want to try the following within the postcard layout:
• Change the text formatting with options in the Control panel or the Paragraph and Character panels (Type menu).
• Apply different paragraph and character styles to text.
• Move and resize objects and graphics.
• Apply different object styles to objects.
• Try out the various Text Wrap options.
• Double-click a paragraph, character, or object style and change its formatting. Notice how the change affects the text or objects to which the style is applied.
• Choose Help > InDesign Help to explore the help system.
• Go through the lessons in the rest of this book.
Review questions
1. How can you tell if an aspect of a layout will cause output problems?
2. What tool allows you to create text frames?
3. What tool allows you to thread text frames?
4. What symbol indicates that a text frame has more text than it can hold—that is, overset text?
5. What tool allows you to move both frames and graphics within frames?
6. What panel provides options for modifying selected frames, graphics, and text?
Review answers
1. The Preflight panel reports errors when something in the layout does not comply with the selected preflight profile. For example, if the preflight profile specifies CMYK output and you import an RGB graphic, an error is reported. Preflight errors are also reported in the lower-left corner of the document window.
2. You create text frames with the Type tool.
3. You thread text frames with the Selection tool.
4. A red plus sign in the lower-right corner of a text frame indicates overset text.
5. The Selection tool lets you drag a frame to move it or move a graphic around within a frame.
6. The Control panel provides options for modifying the current selection: characters, paragraphs, graphics, frames, tables, and more.