
10. Importing and Modifying Graphics
Lesson Overview
In this lesson, you’ll learn how to do the following:
• Distinguish between vector and bitmap graphics.
• Import Adobe Photoshop and Adobe Illustrator graphics.
• Manage imported graphics files using the Links panel.
• Adjust the display quality of graphics.
• Adjust the appearance of graphics by manipulating paths and alpha channels.
• Create an anchored graphics frame that flows with text.
• Create and use libraries of objects.
• Import graphics using Adobe Bridge.
This lesson will take approximately 60 minutes.
Download the project files for this lesson from the Lesson & Update Files tab on your Account page at www.peachpit.com and store them on your computer in a convenient location, as described in the Getting Started section of this book.
Your Account page is also where you’ll find any updates to the chapters or to the lesson files. Look on the Lesson & Update Files tab to access the most current content.

You can easily enhance your document with photographs and artwork imported from Adobe Photoshop, Adobe Illustrator, and other graphics applications. If these imported graphics change, InDesign can notify you that a newer version of a graphic is available. You can update or replace imported graphics at any time.
Getting started
In this lesson, you’ll work on a two-fold, three-panel brochure for a CD by importing, manipulating, and managing graphics from Adobe Photoshop and Adobe Illustrator. The insert is designed so that after printing and trimming it fits into a CD case.
![]() Note
Note
If you have not already downloaded the project files for this lesson to your computer from your Account page, make sure to do so now. See “Getting Started” at the beginning of the book.
This lesson includes steps that you can perform using Adobe Photoshop if you have it installed on your computer.
1. To ensure that the preference and default settings of your Adobe InDesign program match those used in this lesson, move the InDesign Defaults file to a different folder following the procedure in “Saving and restoring the InDesign Defaults file” on page 3.
2. Start Adobe InDesign. To ensure that the panels and menu commands match those used in this lesson, choose Window > Workspace > [Advanced], and then choose Window > Workspace > Reset Advanced.
3. Choose File > Open, and open the 10_a_Start.indd file in the Lesson10 folder, located inside the Lessons folder within the InDesignCIB folder on your hard drive. A message appears saying that the document contains links to sources that have been modified. (If the Adobe Typekit dialog box displays, click Sync Fonts.)
4. Click Don’t Update Links. You will fix the modified links later in the lesson.
5. If necessary, close the Links panel so it doesn’t obscure your view of the document. The Links panel opens automatically whenever you open an InDesign document that contains missing or modified links.
6. To see what the finished document looks like, open the 10_b_End.indd file in the same folder. If you prefer, you can leave the document open as you work to act as a guide. If you leave it open, choose 10_a_Start.indd from the Window menu or click the 10_a_Start.indd document tab to return to that document.
7. Choose File > Save As, rename the file 10_cdinsert.indd, and save it in the Lesson10 folder.
![]() Note
Note
As you work through the lesson, move panels around or change the magnification to a level that works best for you. For more information, see “Changing the magnification of a document” in Lesson 1, “Introducing the Workspace.”
Adding graphics from other programs
InDesign supports many common graphics file formats. While this means that you can use graphics that were created using a wide range of applications, InDesign works best with other Adobe professional graphics applications, such as Photoshop, Illustrator, and Acrobat.
By default, imported graphics are linked to an InDesign document, which means that InDesign displays a preview of the graphics file in your layout without actually copying the entire graphics file into the document.
There are two major advantages to linking graphics files. First, it saves disk space, especially if you reuse the same graphic in many InDesign documents. Second, you can edit a linked graphic in the application you used to create it, and then simply update the link in the InDesign Links panel. Updating a linked file that has been modified maintains the current location and settings for the graphic file and replaces the previous onscreen version with the updated graphic.
All linked graphics and text files are listed in the Links panel (Window > Links), which provides buttons and commands for managing links. When you print an InDesign document or export a document as an Adobe Portable Document Format (PDF) file, InDesign uses the links to produce the highest level of quality available from the original, externally stored versions of the placed graphics.
Comparing vector and bitmap graphics
The drawing tools of Adobe InDesign and Adobe Illustrator create vector graphics, which are made up of shapes based on mathematical expressions. Vector graphics consist of smooth lines that retain their clarity when scaled. They are appropriate for illustrations, type, and graphics such as logos, all of which are typically scaled to different sizes.
Bitmap images are made up of a grid of pixels and are typically created with digital cameras and scanners and then modified using an image-editing application, such as Adobe Photoshop. In working with bitmap images, you edit pixels rather than objects or shapes. Because bitmap graphics can represent subtle gradations of shade and color, they are appropriate for continuous-tone images, such as photographs or artwork created in painting applications. A disadvantage of bitmap graphics is that they lose definition and appear “jagged” when enlarged. Additionally, bitmap images are typically larger in file size than a similar vector graphic.

In general, use vector drawing tools to create art or type with clean lines that look good at any size, such as a logo used on a business card and also on a poster. You can create vector artwork using the InDesign drawing tools, or you might prefer to take advantage of the wider range of vector drawing tools available in Illustrator. You can use Photoshop to create bitmap images that have the soft edges of painted or photographic art and to apply special effects to artwork.
Managing links to imported files
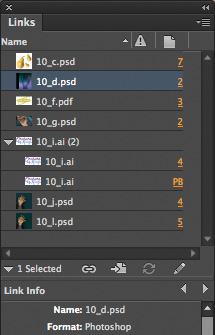
When you opened the lesson file, you saw an alert message about problems with the linked files. You’ll resolve those issues using the Links panel, which provides complete information about the status of all linked text and graphics file in a document.
You can use the Links panel to manage placed graphics and text files in many other ways. For example, you can update graphics and text files that have been modified since they were placed, and you can replace graphics and text files with different files. All of the techniques you learn in this lesson about managing linked files apply equally to graphics files and text files that you place in your documents.
Identifying imported images
To identify some of the images that have already been imported into the document, you’ll use two different techniques involving the Links panel. Later in this lesson, you’ll also use the Links panel to edit and update imported graphics.
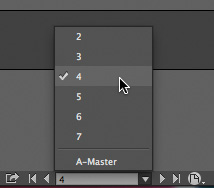
1. Center page 4 in the document window by choosing it from the Page Number box at the lower-left corner of the document window.
2. If the Links panel is not visible, choose Window > Links.
3. Using the Selection tool (![]() ), select the Orchard of Kings logo type on page 4, the far right page of the first spread. (Click outside the content grabber in the center of the frame so you select the frame and not the graphic, though you can select either for this task.) Notice that the graphic’s filename, 10_i.ai, becomes selected in the Links panel when you select the graphic in the layout.
), select the Orchard of Kings logo type on page 4, the far right page of the first spread. (Click outside the content grabber in the center of the frame so you select the frame and not the graphic, though you can select either for this task.) Notice that the graphic’s filename, 10_i.ai, becomes selected in the Links panel when you select the graphic in the layout.
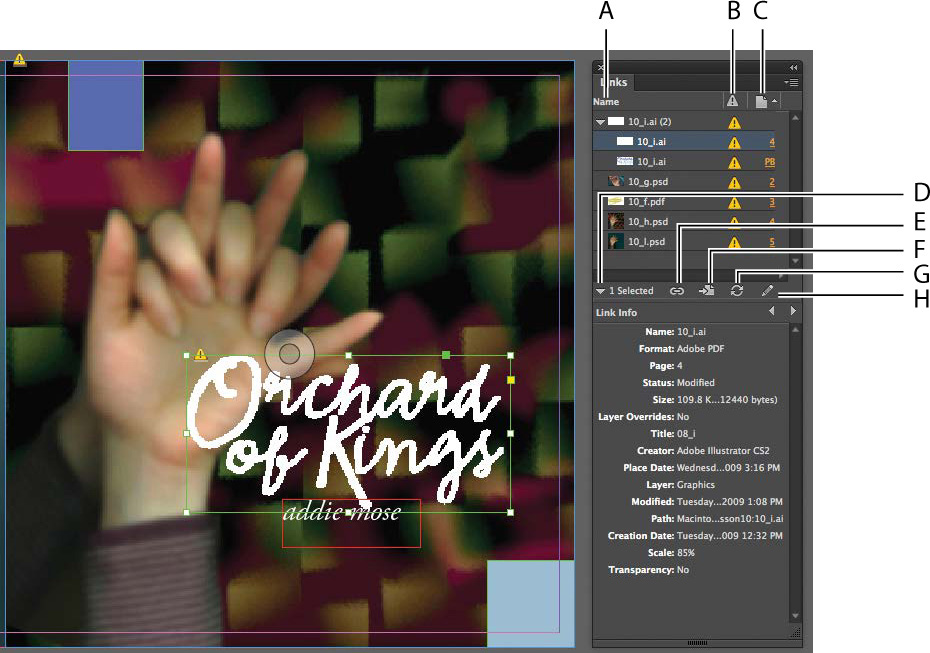
A. Filename column
B. Status column
C. Page column
D. Show/Hide Link Information button
E. Relink button
F. Go To Link button
G. Update Link button
H. Edit Original button
Now you’ll use the Links panel to locate a graphic in the layout.
![]() Tip
Tip
You can click the page number to the right of a filename in the Links panel to go to the link and center it in the document window.
4. In the Links panel, select 10_g.psd, and then click the Go To Link button (![]() ). The graphic becomes selected and centered on the screen. This is a quick way to find a graphic in a document when you know its filename.
). The graphic becomes selected and centered on the screen. This is a quick way to find a graphic in a document when you know its filename.
These techniques for identifying and locating linked graphics are useful throughout this lesson and whenever you work with a large number of imported files.
Viewing information about linked files
The Links panel makes it easy to work with linked graphics and text files and to display additional information about linked files.
![]() Tip
Tip
You can detach the Links panel from its group of panels by dragging its tab. Once you’ve detached the panel, you can resize it by dragging its left or right edge, the bottom edge, or its lower-right or lower-left corner.
1. Make sure that the graphic named 10_g.psd is selected in the Links panel. If you cannot see the names of all the linked files without scrolling, drag the horizontal divider bar in the Links panel downward to enlarge the top half of the panel so that all the links are visible. The Link Info section at the bottom half of the panel displays information about the selected link.
2. Click the Select Next Link In The List triangle (![]() ) to view information about the following file in the Links panel list, 10_f.pdf. You can quickly examine all the links in the list this way. Currently, every link displays an alert icon (
) to view information about the following file in the Links panel list, 10_f.pdf. You can quickly examine all the links in the list this way. Currently, every link displays an alert icon (![]() ) in the Status column. This icon indicates a linking problem, which you’ll address later. After you’ve examined the link information for various images, choose Edit > Deselect All, and then click the Show/Hide Link Information button (
) in the Status column. This icon indicates a linking problem, which you’ll address later. After you’ve examined the link information for various images, choose Edit > Deselect All, and then click the Show/Hide Link Information button (![]() ) above Link Info to hide the Link Info section.
) above Link Info to hide the Link Info section.
By default, files are sorted in the Links panel by page number. You can sort the file list in different ways.
3. Click the Name column heading in the Links panel. The panel now lists the links in alphabetical order. Each time you click a column heading, the list toggles between descending order and ascending order.

Showing files in Explorer (Windows) or Finder (Mac OS)
Although the Links panel gives you information about the attributes and location of a specific imported graphics file, it does not let you make changes to the file or change the name of the file. You can access the original file of an imported graphics file by using the Reveal In Explorer (Windows) or Reveal In Finder (Mac OS) option.
![]() Note
Note
For links that are missing the Reveal In Explorer (Windows) or Reveal In Finder (Mac OS) command is not available.
![]() Tip
Tip
You can also choose Reveal In Bridge from the Links panel menu to locate an imported graphic file and rename it.
1. Select 10_g.psd if it is not currently chosen. From the Links panel menu, choose Reveal In Explorer (Windows) or Reveal In Finder (Mac OS) to open the folder where the linked file is currently stored and select the file. This feature is useful for locating files on your hard drive and renaming them, if necessary.
2. Close the window and return to InDesign.
Updating revised graphics
Even after you place text or graphics files in your InDesign document, you can still use other applications to modify those files. The Links panel indicates which files have been modified outside of InDesign and gives you the choice of updating your document with the latest versions of those files.
In the Links panel, the file 10_i.ai has an alert icon (![]() ), indicating that the original file has been modified. This is one of the files that caused the alert message to appear when you first opened this document. You’ll update the link for this file so that the InDesign document uses the current version.
), indicating that the original file has been modified. This is one of the files that caused the alert message to appear when you first opened this document. You’ll update the link for this file so that the InDesign document uses the current version.
1. If necessary, click the disclosure triangle (![]() ) in the Links panel to the left of the file 10_i.ai to reveal two instances of the imported file. Select the instance of the 10_i.ai file that’s on page 4, and click the Go To Link button (
) in the Links panel to the left of the file 10_i.ai to reveal two instances of the imported file. Select the instance of the 10_i.ai file that’s on page 4, and click the Go To Link button (![]() ) to view the graphic in magnified view. You don’t have to do this step, but it’s a quick way to double-check which imported file you are about to update and see the results.
) to view the graphic in magnified view. You don’t have to do this step, but it’s a quick way to double-check which imported file you are about to update and see the results.

![]() Tip
Tip
You can also double-click the Link Badge in the links panel or click the Link Badge displayed at the upper-left corner of the graphics frame to update the link.
2. Click the Update Link button (![]() ). The appearance of the image in the document changes to represent its newer version, the Modified alert icon is no longer displayed in the Links panel, and the Link Badge near the upper-left corner of the graphics frame changes from Modified (yellow triangle) to OK (linked chain).
). The appearance of the image in the document changes to represent its newer version, the Modified alert icon is no longer displayed in the Links panel, and the Link Badge near the upper-left corner of the graphics frame changes from Modified (yellow triangle) to OK (linked chain).

![]() Tip
Tip
You can also choose Reveal In Bridge from the Links panel menu to locate an imported graphic file and rename it.
3. To update the rest of the modified graphic files, choose Update All Links from the Links panel menu.
Now you’ll replace the image of the hands on the first spread (pages 2–4) with a modified image. You’ll use the Relink button to reassign the link to another graphic.
4. Go to pages 2–4 (the first spread), and choose View > Fit Spread In Window.
5. Use the Selection tool (![]() ) to select the 10_h.psd image on page 4. It’s the photograph of the interlocked hands. (If you click within the content grabber, you’ll select the graphic rather than the frame, but for this task, you can select either.) You can tell when you’ve selected the right image because the filename becomes selected in the Links panel.
) to select the 10_h.psd image on page 4. It’s the photograph of the interlocked hands. (If you click within the content grabber, you’ll select the graphic rather than the frame, but for this task, you can select either.) You can tell when you’ve selected the right image because the filename becomes selected in the Links panel.
6. Click the Relink button (![]() ) in the Links panel.
) in the Links panel.
7. Browse to find the 10_j.psd file in the Lesson10 folder, and then click Open. The new version of the image (which has a different background) replaces the original image, and the Links panel is updated accordingly.
8. Click a blank area of the pasteboard to deselect all of the objects on the spread.
9. Choose File > Save to save your work.
Viewing link status in the Links panel
• An up-to-date graphic displays only the filename and its page in the document.
• A modified file displays a yellow triangle with an exclamation point (![]() ). This alert icon means that the version of the file on disk is more recent than the version in your document. For example, this icon will appear if you import a Photoshop graphic into InDesign, and then another artist edits and saves the original graphic using Photoshop.
). This alert icon means that the version of the file on disk is more recent than the version in your document. For example, this icon will appear if you import a Photoshop graphic into InDesign, and then another artist edits and saves the original graphic using Photoshop.
• A missing file displays a red hexagon with a question mark (![]() ). The file isn’t at the location from which it was originally imported, though the file may still exist somewhere. This can happen if someone moves an original file to a different folder or server after it’s been imported into an InDesign document. You can’t know whether a missing graphic is up to date until its original is located. If you print or export a document when this icon is displayed, the graphic may not print or export at full resolution.
). The file isn’t at the location from which it was originally imported, though the file may still exist somewhere. This can happen if someone moves an original file to a different folder or server after it’s been imported into an InDesign document. You can’t know whether a missing graphic is up to date until its original is located. If you print or export a document when this icon is displayed, the graphic may not print or export at full resolution.
![]() Tip
Tip
You can choose Panel Options from the Links panel menu and customize the columns and information shown in the panel. After adding columns, you can adjust their size and position.
Adjusting display quality
Now that you’ve resolved all of the links, you’re ready to start adding more graphics. But first, you will adjust the view quality of the Illustrator file (10_i.ai) that you updated earlier in this lesson.
When you place an image in a document, InDesign automatically creates a lowresolution (proxy) view of it, corresponding to the current settings in the Display Performance section of the Preferences dialog box. The images in this document are currently low-resolution proxies, which is why they appear to have jagged edges. Reducing the onscreen quality of placed graphics displays pages faster and doesn’t affect the quality of the final output. You can control the degree of detail InDesign uses to display placed graphics.
1. In the Links panel, select the 10_i.ai file you updated in the previous exercise (on page 4). Click the Go To Link button (![]() ) to view the graphic in magnified view.
) to view the graphic in magnified view.
2. Right-click (Windows) or Control-click (Mac OS) the Orchard of Kings graphic, and then choose Display Performance > High Quality Display from the context menu. The image appears at full resolution. You can use this process to confirm the clarity, appearance, and position of a placed graphic in your InDesign layout.

3. Choose View > Display Performance > High Quality Display. This setting changes the display performance for the entire document. All graphics are displayed at the highest quality.
On older computers, or for designs with many imported graphics, this setting can sometimes result in slower screen redraw. In most cases, it is advisable to set your Display Performance to Typical Display, and then change the display quality of individual graphics as needed.
4. Choose File > Save.
Working with clipping paths
You can remove unwanted backgrounds from images using InDesign. You’ll get some experience doing this in the following exercise. In addition to removing the background in InDesign, you can create paths or alpha channels in Photoshop that can be used to silhouette an image that’s been placed in an InDesign layout.
The image you will be placing has a solid, white rectangular background that blocks the view of the area behind it. You can hide unwanted parts of an image using a clipping path—a drawn vector outline that acts as a mask. InDesign can create clipping paths from many kinds of images:
• If you draw a path in Photoshop and save it with the image, InDesign can create a clipping path from it.
• If you paint an alpha channel in Photoshop and save it with the image, InDesign can create a clipping path from it. An alpha channel carries transparent and opaque areas and is commonly created with images used for photo or video compositing.
• If the image has a relatively light or white background (or a relatively dark background if the subject matter is light), InDesign can automatically detect the edge between the subject and the background and create a clipping path.
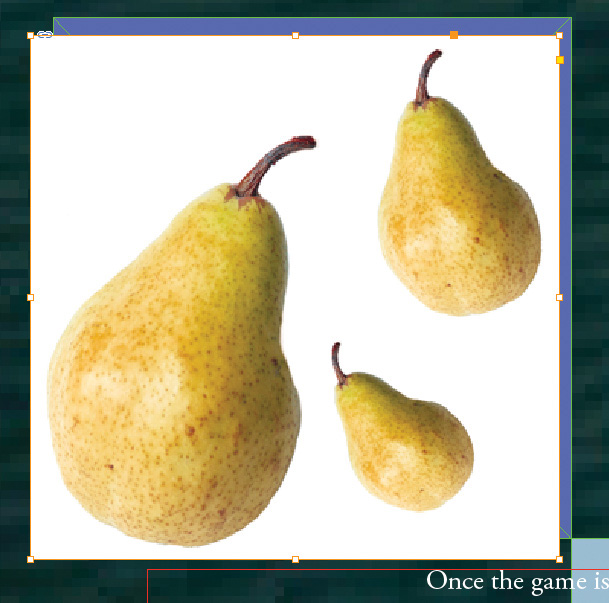
The image you will be placing (of three pears) doesn’t have a clipping path or an alpha channel, but it does have a solid white background that InDesign can remove.
Removing a white background using InDesign
Now you’ll hide the white background that surrounds three pears in an image. You can use the Detect Edges option of the Clipping Path command (Object > Clipping Path) to hide a solid white background that surrounds an image. The Detect Edges option hides areas of an image by creating a separate path around each distinct shape within the image.
1. Navigate to page 7 of the document by double-clicking page 7 in the Pages panel.
2. In the Layers panel, make sure that the Photos layer is selected so that the imported image is placed on that layer. Choose File > Place, and double-click the file 10_c.psd in the Lesson10 folder.
3. Position the loaded graphics icon (![]() ) outside the square on the left—to the left and slightly below the top edge (make sure you are not placing the pointer in the square itself), and click to place an image of three pears on a white background. If you need to reposition the graphics frame to match the image below, do so now.
) outside the square on the left—to the left and slightly below the top edge (make sure you are not placing the pointer in the square itself), and click to place an image of three pears on a white background. If you need to reposition the graphics frame to match the image below, do so now.
4. Choose Object > Clipping Path > Options. Move the Clipping Path dialog box, if necessary, so that you can see the pear image.
5. Choose Detect Edges from the Type menu. If Preview is not selected, select it now. The white background is almost entirely eliminated from the image.
![]() Note
Note
If you can’t find a setting that removes all of the background without affecting the subject, specify a value that leaves the entire subject visible along with small bits of the white background. You’ll eliminate the remaining white background by fine-tuning the clipping path in the following steps.
6. Drag the Threshold slider until the Threshold setting hides as much of the white background as possible without hiding parts of the subject (darker areas). This example uses a Threshold value of 20.
The Threshold setting hides light areas of the image, starting with white. As you drag to the right to choose a higher value, increasingly darker tones are included within the range of tones that become hidden. Don’t try to find a setting that matches the pear perfectly. You’ll learn how to improve the clipping path later.
7. Drag the Tolerance slider slightly to the left until the Tolerance value is approximately 1.
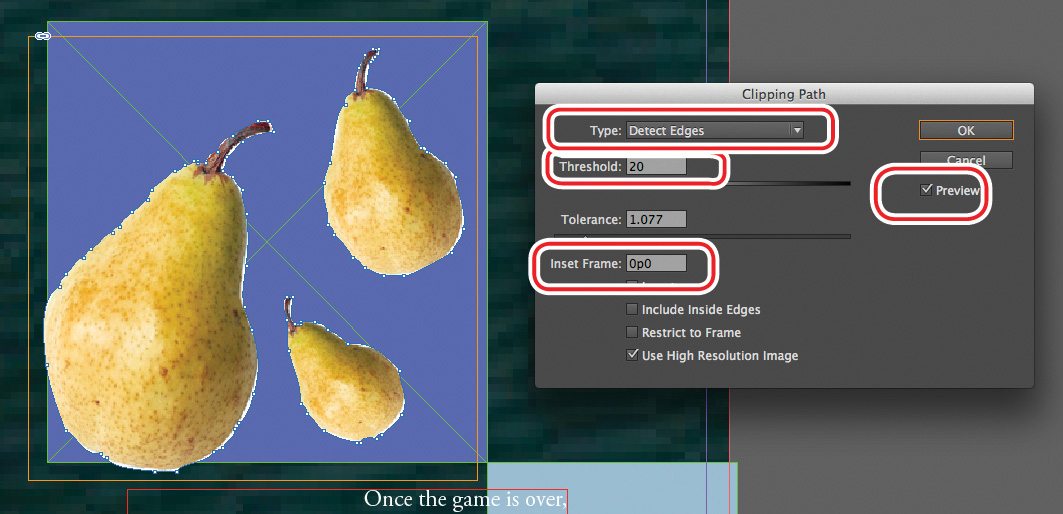
The Tolerance option determines how many points define the clipping path that’s automatically generated. As you drag to the right, InDesign uses fewer points so that the clipping path fits the image more loosely (higher tolerance). Using fewer points on the path may speed up document printing but may also be less accurate.
![]() Note
Note
You can also use Detect Edges to remove a solid black background. Just select the Invert and Include Inside Edges options, and specify a high threshold value (255).
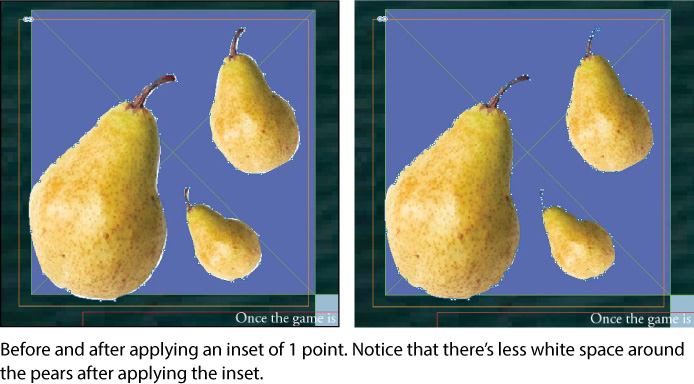
8. In the Inset Frame box, type a value that closes up any remaining background areas. The example below uses 0p1 (zero picas, one point). This option shrinks the current shape of the clipping path uniformly and is not affected by the lightness values in the image. Click OK to close the Clipping Path dialog box.
9. Optionally, you can refine the clipping path manually. With the Direct Selection tool (![]() ), select the pear image. You can now drag individual anchor points and use the drawing tools to edit the clipping path around the pears. With images that have complex edges, magnify the document to work effectively with the anchor points.
), select the pear image. You can now drag individual anchor points and use the drawing tools to edit the clipping path around the pears. With images that have complex edges, magnify the document to work effectively with the anchor points.
10. Choose File > Save to save the file.
Working with alpha channels
When an image has a background that isn’t solid white or black, Detect Edges may not be able to remove the background effectively. With such images, hiding the background’s lightness values may also hide parts of the subject that use the same lightness values. Instead, you can use the advanced background-removal tools in Photoshop to specify transparent areas using paths or alpha channels, and then let InDesign make a clipping path from the path or alpha channel.
![]() Note
Note
If you place a Photoshop (.psd) file that consists of an image with a transparent background, InDesign keeps the transparency without relying on clipping paths or alpha channels. A transparent background can be especially helpful when you place an image with a soft or feathered edge.
Importing a Photoshop file with alpha channels
You imported the previous image using the Place command. This time, you will use an alternate method: dragging a Photoshop image directly onto an InDesign spread. InDesign can use Photoshop paths and alpha channels directly—you don’t need to save the Photoshop file in a different file format.
1. In the Layers panel, make sure that the Photos layer is selected so that the image is placed on that layer.
2. Navigate to page 2 of your document, and choose View > Fit Page In Window.
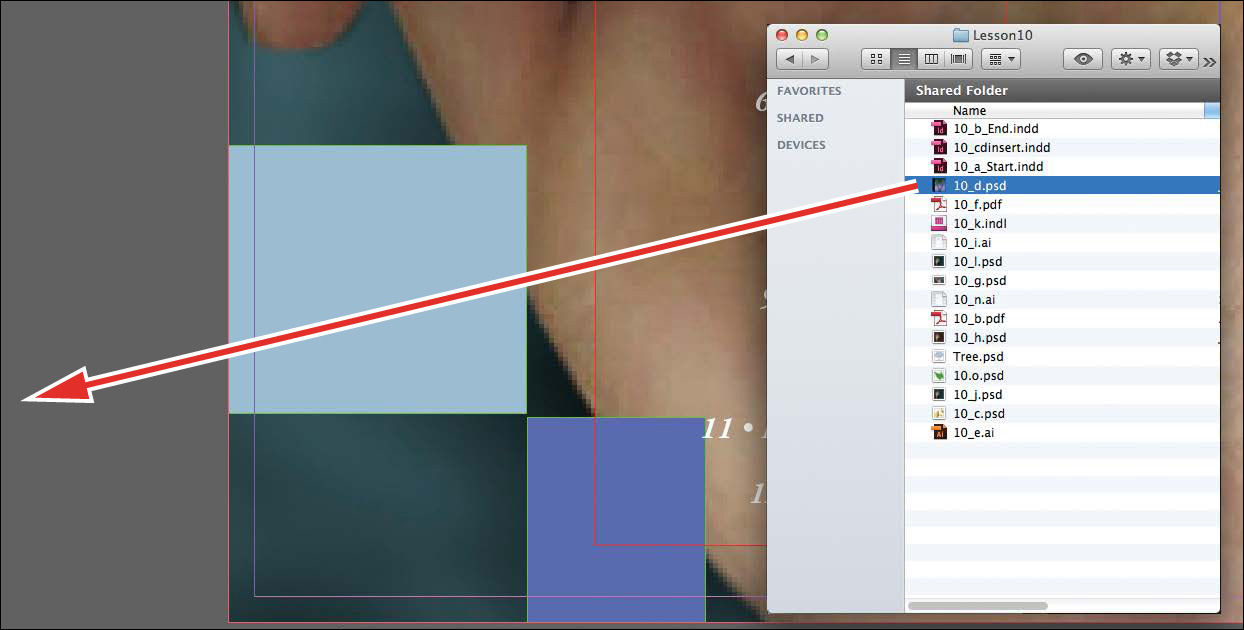
3. Switch to Explorer (Windows) or the Finder (Mac OS), and open the Lesson10 folder, which contains the 10_d.psd file.
Resize and arrange your Explorer window (Windows) or Finder window (Mac OS) and your InDesign window, as needed, so that you can simultaneously see the list of files in the Lesson10 folder and the InDesign document window. Make sure that the lower-left quarter of page 2 in your document is visible.
![]() Note
Note
When you place the file in step 4, be careful to drop it on the pasteboard area to the left of page 2. If you drop it on a preexisting frame, it is placed inside the frame. If this happens, choose Edit > Undo, and try again.
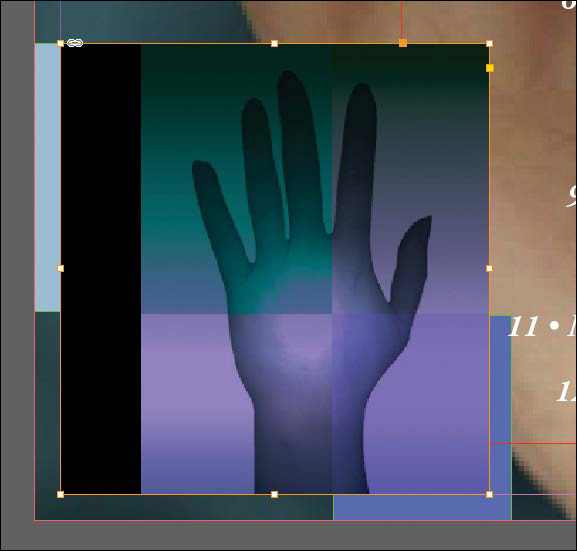
4. Drag the 10_d.psd file to the pasteboard area to the left of page 2 in the InDesign document and release the mouse. Click once on the pasteboard to return to InDesign, and click once again to place the image at full size.
5. Use the Selection tool (![]() ) to reposition the graphic so that it is in the lower-left corner of the page.
) to reposition the graphic so that it is in the lower-left corner of the page.
6. If necessary, maximize the InDesign window to its previous size. You’ve finished importing the file.
Examining Photoshop paths and alpha channels
In the Photoshop image that you just dragged into InDesign, the hand and the background share many of the same lightness values. Therefore, the background can’t easily be isolated using the Detect Edges option in the Clipping Path dialog box.
![]() Note
Note
Adobe Photoshop is an image-editing application that is available to Creative Cloud users and must be installed separately. You can install Photoshop using the Creative Cloud desktop application in the task bar (Windows) or menu bar (Mac OS). You can also download Photoshop CC from the Download Center at creative.adobe.com.
Instead, you’ll set up InDesign to use an alpha channel from the Photoshop image. First, you’ll use the Links panel to open the image directly in Photoshop to see what paths and alpha channels it already includes.
The procedure in this topic requires that you have Photoshop installed on your system and is easier if you have enough RAM available to leave both InDesign and Photoshop open as you work. If your configuration doesn’t include these two conditions, you can still read these steps to help you understand what Photoshop alpha channels look like and do, and you can resume your work in the next section of this lesson.
1. If it’s not still selected, use the Selection tool (![]() ) to select the 10_d.psd image you imported in the previous task.
) to select the 10_d.psd image you imported in the previous task.
In addition to using the Edit Original button in the Links panel to edit the selected graphic, you can choose Edit With from the Links panel menu, and then choose the application you want to use.
2. If the Links panel is not already open, choose Window > Links. The image filename appears selected in the Links panel.
![]() Note
Note
The Edit Original button may open an image in an application other than Photoshop or the application in which it was created. When you install software, some installer utilities change your operating system’s settings for associating files with applications. The Edit Original command uses these settings for associating files with applications. To change these settings, see the documentation for your operating system.
3. In the Links panel, click the Edit Original button (![]() ). This opens the image in an application that can view or edit it. This image was saved from Photoshop, so if Photoshop is installed on your computer, InDesign starts Photoshop and opens the selected file.
). This opens the image in an application that can view or edit it. This image was saved from Photoshop, so if Photoshop is installed on your computer, InDesign starts Photoshop and opens the selected file.
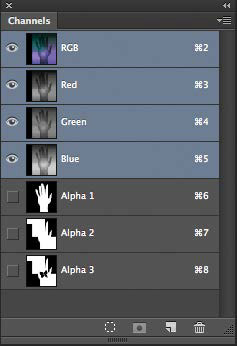
4. In Photoshop, choose Window > Channels to display the Channels panel, or click the Channels panel icon. Click the tab at the top of the Channels panel and drag the panel to the document window.
5. Lengthen the Channels panel, if necessary, to view the three alpha channels (Alpha 1, Alpha 2, and Alpha 3) in addition to the standard RGB channels. These channels were drawn using the masking and painting tools in Photoshop.
Photoshop file saved with three alpha channels.
6. In the Channels panel in Photoshop, click Alpha 1 to see how it looks, and then click Alpha 2 and Alpha 3 to compare them.
7. Click the RGB channel.
8. In Photoshop, choose Window > Paths to open the Paths panel, or click the Paths panel icon.
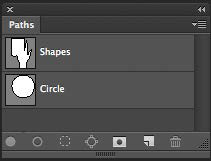
The Paths panel contains two named paths, Shapes and Circle. These were drawn using the Pen tool (![]() ) and other path tools in Photoshop, although they could also be drawn in Illustrator and pasted into Photoshop.
) and other path tools in Photoshop, although they could also be drawn in Illustrator and pasted into Photoshop.
9. In the Photoshop Paths panel, click Shapes to view that path, and then click Circle.
10. Quit Photoshop. You’ve finished using it for this lesson.
Using Photoshop paths and alpha channels in InDesign
Now you’ll return to InDesign and see how you can create different clipping paths from the Photoshop paths and alpha channels.
1. Switch to InDesign. Make sure that the 10_d.psd file is still selected on the page; if necessary, select it using the Selection tool (![]() ).
).
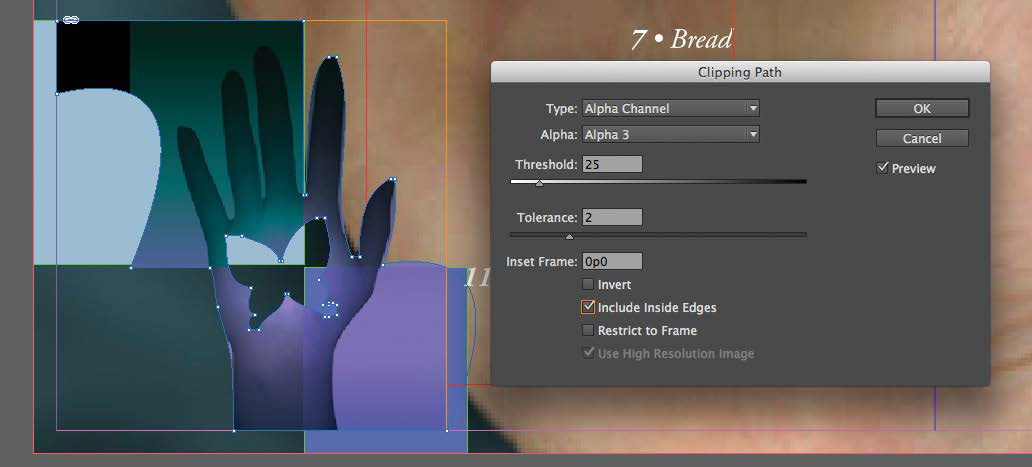
2. With the hand image still selected, choose Object > Clipping Path > Options to open the Clipping Path dialog box. If necessary, move the Clipping Path dialog box so that you can see the image as you work.
3. Make sure that Preview is selected, and then choose Alpha Channel from the Type menu. The Alpha menu becomes available, listing the three alpha channels you saw in Photoshop by the names used in that application.
4. In the Alpha menu, choose Alpha 1. InDesign creates a clipping path from the alpha channel. Then choose Alpha 2 from the same menu, and compare the results.
![]() Tip
Tip
You can fine-tune the clipping path that InDesign creates from an alpha channel by adjusting the Threshold and Tolerance options, as you did in “Removing a white background using InDesign” earlier in this lesson. For alpha channels, start with a low Threshold value, such as 1.
5. Choose Alpha 3 from the Alpha menu, and then select the Include Inside Edges option. Notice the changes in the image.
![]() Tip
Tip
You can see how the butterfly-shaped hole looks in Photoshop by displaying the Alpha 3 channel in the original Photoshop file.
Selecting the Include Inside Edges option makes InDesign recognize a butterfly-shaped hole painted in the Alpha 3 channel and adds it to the clipping path.
6. Choose Photoshop Path from the Type menu, and then choose Shapes from the Path menu. InDesign reshapes the frame of the image to match the Photoshop path.
7. Choose Circle from the Path menu. Click OK.

8. Choose File > Save to save the file.
Importing native Adobe graphics files
InDesign allows you to import native Adobe files such as Photoshop, Illustrator, and Acrobat in unique ways and provides options for controlling how the file is displayed. For example, you can adjust the visibility of Photoshop layers in InDesign, as well as view different layer comps. Similarly, if you import a layered Illustrator file into an InDesign layout, you can vary the illustration by adjusting layer visibility.
Importing a Photoshop file with layers and layer comps
In the previous exercise, you worked with a Photoshop file with saved paths and alpha channels; however, the file had only a single background layer. When you work with a layered Photoshop file, you can adjust the visibility of the individual layers. Additionally, you can view different layer comps.
Created in Photoshop and saved as part of the file, layer comps are often used to make multiple compositions of an image to compare different styles or artwork. When the file is placed in InDesign, you can preview the different comps in relation to your entire layout. You’ll view some layer comps now.
1. In the Links panel, click the link for 10_j.psd, and click the Go To Link button (![]() ) to select the file and center it in your document window. This file, which you relinked in a previous exercise, has four layers and three layer comps.
) to select the file and center it in your document window. This file, which you relinked in a previous exercise, has four layers and three layer comps.
2. Choose Object > Object Layer Options to open the Object Layer Options dialog box. This dialog box allows you to show and hide layers and to switch among layer comps.
3. Move the Object Layer Options dialog box so that you can see as much as possible of the selected image. Select the Preview option to allow you to view changes while keeping the dialog box open.
4. In the Object Layer Options dialog box, click the eye icon (![]() ) to the left of the Hands layer. This turns off the Hands layer, leaving only the Simple Background layer visible. Click the square next to the Hands layer to turn visibility back on.
) to the left of the Hands layer. This turns off the Hands layer, leaving only the Simple Background layer visible. Click the square next to the Hands layer to turn visibility back on.
5. Choose Green Glow from the Layer Comp menu. This layer comp has a different background. Now choose Purple Opacity from the Layer Comp menu. This layer comp has a different background, and the Hands layer is partially transparent. Click OK.
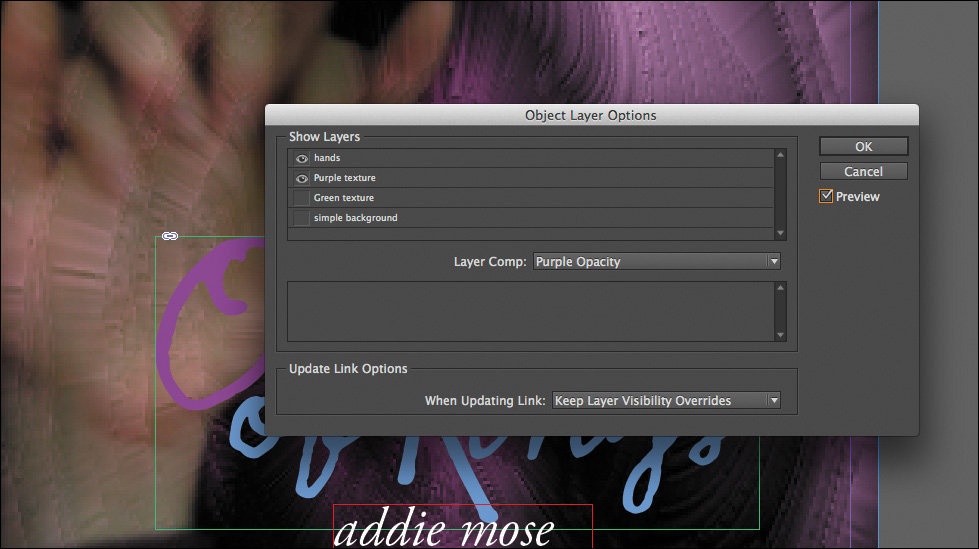
Layer comps are not merely an arrangement of different layers but are able to save Photoshop layer effects, visibility, and position values. When the visibility of a layered file is modified, InDesign informs you in the Link Info section of the Links panel.
6. In the Links panel, select the 10_j.psd graphic, and click the Show/Hide Link Information button (![]() ) to display the Link Info section at the bottom of the panel if it is not already visible. Locate the Layer Overrides listing. “Yes (2)” is displayed for Layer Overrides to let you know that two layers are overridden. “No” is displayed when there are no layer overrides.
) to display the Link Info section at the bottom of the panel if it is not already visible. Locate the Layer Overrides listing. “Yes (2)” is displayed for Layer Overrides to let you know that two layers are overridden. “No” is displayed when there are no layer overrides.
7. Choose File > Save to save your work so far.
Creating an anchored graphics frame
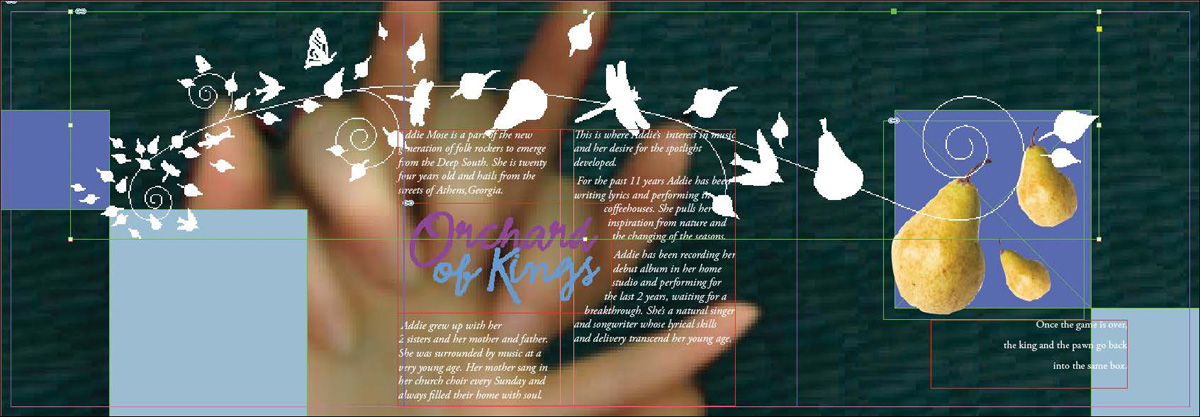
An anchored graphics frame flows with text. In this exercise, you’ll anchor the album logo to a text frame on page 6.
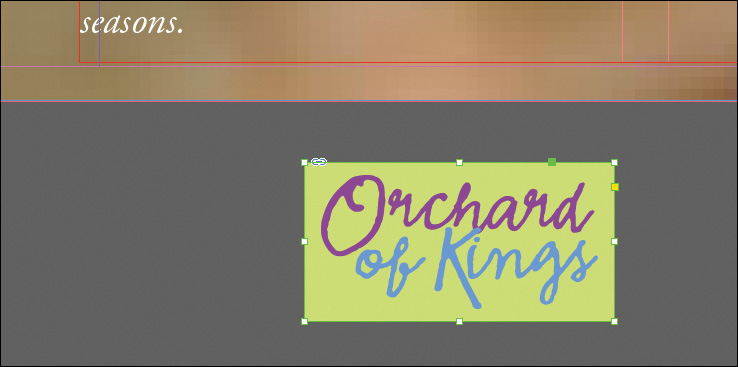
1. In the Pages panel, double-click the second spread and choose View > Fit Spread In Window. Scroll down if necessary. At the bottom of the pasteboard is the Orchard of Kings logo. You’ll insert this graphic into a paragraph in the page.
2. Using the Selection tool (![]() ), click the logo. (Be careful to click outside the content grabber so you select the frame and not the graphic within.) Notice the small green square near the upper-right corner of the frame. You can drag this square into a text frame to anchor an object to text.
), click the logo. (Be careful to click outside the content grabber so you select the frame and not the graphic within.) Notice the small green square near the upper-right corner of the frame. You can drag this square into a text frame to anchor an object to text.
![]() Tip
Tip
If the Anchored Object Control square is not visible when selecting the logo, choose View > Extras > Show Anchored Object Control.
![]() Note
Note
Showing hidden characters is not a necessary step when placing anchored graphics; it is used here to help identify the structure of the text.
3. Press and hold Z to temporarily access the Zoom tool, or select the Zoom tool (![]() ) and click so that you can see the logo and the text frame above it. This exercise uses 150 percent.
) and click so that you can see the logo and the text frame above it. This exercise uses 150 percent.
4. Choose Type > Show Hidden Characters to view the spaces and paragraph returns in the text. This helps you locate where you want to anchor the frame.
5. Hold down the Shift key, and then drag the green square near the upper-right corner of the graphics frame to the left of the second paragraph return below the word “streets.” Holding the Shift key creates an inline graphic between the two paragraphs of text. Notice that the text after the graphic reflows when the image is placed.
Now you’ll create space between the graphic and the surrounding text with the Space Before option.

6. Select the Type tool (![]() ) and then click to the right of the inline graphic to establish the insertion point in that paragraph.
) and then click to the right of the inline graphic to establish the insertion point in that paragraph.
7. Click the Paragraph Formatting Controls button (![]() ) in the Control panel. In the Space Before option (
) in the Control panel. In the Space Before option (![]() ), click the Up Arrow button to change the value to 0p4. As you increase the value, the anchored graphics frame and the text below it shift downward slightly.
), click the Up Arrow button to change the value to 0p4. As you increase the value, the anchored graphics frame and the text below it shift downward slightly.
8. Choose File > Save to save your work so far.

Adding text wrap to an anchored graphics frame
You can easily add text wrap to an anchored graphics frame. Text wrap allows you to experiment with different layouts and see the results immediately.
1. Using the Selection tool (![]() ), select the graphics frame with the Orchard of Kings logo you placed in the previous exercise.
), select the graphics frame with the Orchard of Kings logo you placed in the previous exercise.
2. Press Shift+Ctrl (Windows) or Shift+Command (Mac OS), and drag the upper-right handle of the frame up and to the right until you’ve scaled the graphic roughly 25% across the second column. The key combination lets you proportionally scale the graphic and resize the frame simultaneously.
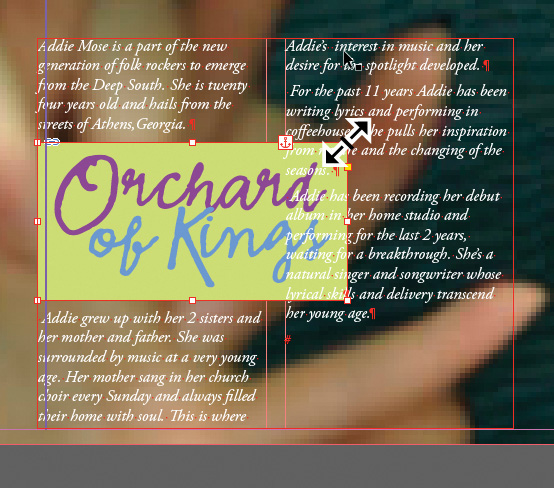
3. Choose Window > Text Wrap to access the Text Wrap panel. Even though the graphic is anchored to the text, it is placed beneath the existing text.
4. In the Text Wrap panel, select Wrap Around Object Shape (![]() ) to add text wrap to the graphic.
) to add text wrap to the graphic.
5. To increase space around the bounding box of the graphic, click the Up Arrow button in the Top Offset option (![]() ) and change the value to 1p0.
) and change the value to 1p0.
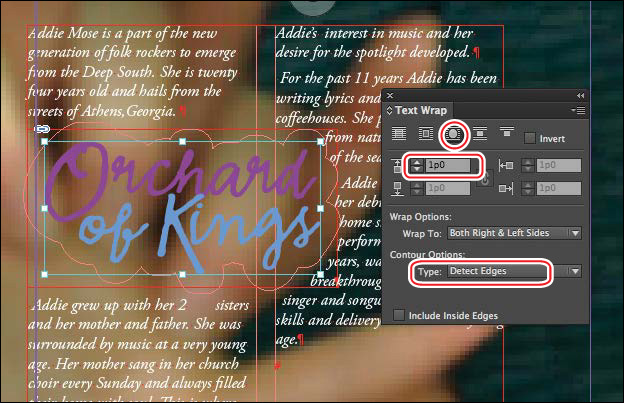
Text can also wrap around a graphic’s shape rather than the rectangular bounding box.
6. To see this more clearly, click the gray pasteboard to deselect all objects, and then click back on the Orchard of Kings logo. Press the Forward Slash key (/) to apply no fill color.
7. In the Text Wrap panel, choose Detect Edges from the Type menu. Because this image is a vector graphic, the text wrap is determined by the shape formed by the letters.
8. To view the document clearly, click the gray pasteboard to deselect the graphic, and choose Type > Hide Hidden Characters to hide the paragraph returns and spaces.
9. Using the Selection tool (![]() ), select the graphics frame with Orchard of Kings logo again.
), select the graphics frame with Orchard of Kings logo again.
10. In the Text Wrap panel, choose these options from the Wrap To menu in turn:
• Right Side. The type moves to the right side of the image, avoiding the area just below the image, even though there is space for it to display beneath the text wrap boundary.
• Both Right & Left Sides. The type moves into all available areas around the image. You’ll notice that a small break in the type appears where the text wrap boundary drops into the type area.
• Largest Area. The text moves into the largest area to one side of the text wrap boundary. Keep this as your final choice.
11. Optionally, select the Direct Selection tool (![]() ), and then click the graphic to view the anchor points used for the text wrap. When using the Detect Edges contour option, you can manually adjust the anchor points that define the text wrap by clicking the anchor points and dragging them to a new position.
), and then click the graphic to view the anchor points used for the text wrap. When using the Detect Edges contour option, you can manually adjust the anchor points that define the text wrap by clicking the anchor points and dragging them to a new position.
12. Close the Text Wrap panel.
13. Choose File > Save.
Importing an Illustrator file
InDesign takes full advantage of the smooth edges of vector graphics, such as those from Adobe Illustrator. When you use high-quality screen display, vector graphics and type appear with smooth edges at any size or magnification. Most vector graphics don’t require a clipping path, because most applications save them with transparent backgrounds. In this section, you’ll place an Illustrator graphic into your InDesign document.
1. In the Layers panel, select the Graphics layer. Choose Edit > Deselect All to make sure nothing is selected in your document.
2. Choose View > Fit Spread In Window to see the entire spread.
3. Choose File > Place and select the Illustrator file 10_e.ai from the Lesson10 folder. Make sure that Show Import Options is not selected. Click Open.
4. Click in the upper-left corner of page 5 with the loaded graphics icon (![]() ) to add the Illustrator file to the page. Use the Selection tool to position it as shown below. Graphics created in Illustrator have transparent backgrounds by default.
) to add the Illustrator file to the page. Use the Selection tool to position it as shown below. Graphics created in Illustrator have transparent backgrounds by default.
5. Choose File > Save to save your work.
Importing an Illustrator file with layers
You can import native Illustrator files with layers into an InDesign layout and control the visibility of the layers and reposition the graphic; however, you cannot edit the paths, objects, or text.
1. Deselect all objects by clicking in the pasteboard of the document window.
2. Choose File > Place. In the lower-left corner of the Place dialog box, select Show Import Options. Select the file 10_n.ai and click Open. The Place PDF dialog box appears when Show Import Options is selected.
3. In the Place PDF dialog box, make sure that Show Preview is selected. In the General section, choose Bounding Box (All Layers) from the Crop To menu and make sure that Transparent Background is selected.
4. Click the Layers tab to view the layers. This file has three layers: a background image of trees (Layer 3), a layer of text in English (English Title), and a layer of text in Spanish (Spanish Title).
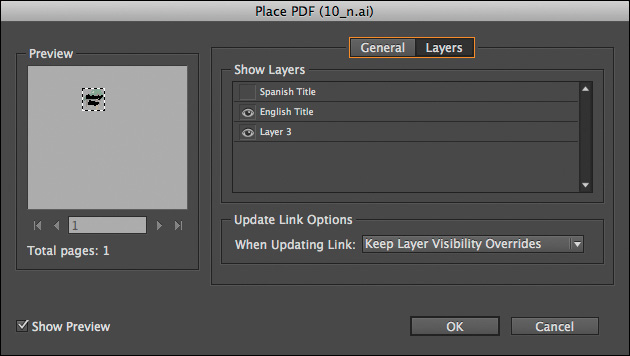
Although you can designate now which layers you would like to display in the imported graphic, the small Preview area makes it difficult to see the results.
5. Click OK. You’ll select the layers to display in the layout itself.
6. With the loaded graphics icon (![]() ), position the cursor to the left of the large blue box on page 5. Do not position the loaded graphics icon within the blue box, because it inserts the graphic into that frame. Click once to place the graphic and then use the Selection tool (
), position the cursor to the left of the large blue box on page 5. Do not position the loaded graphics icon within the blue box, because it inserts the graphic into that frame. Click once to place the graphic and then use the Selection tool (![]() ) to position the graphic so that it is visually centered over the blue box.
) to position the graphic so that it is visually centered over the blue box.
7. Use the Zoom tool (![]() ) to zoom in on the graphic.
) to zoom in on the graphic.
8. With the graphic still selected, choose Object > Object Layer Options. Move the dialog box if necessary so that you can see the graphic in the document.
9. Select Preview, and then click the eye icon (![]() ) next to the English Title layer to turn it off. Now click the empty box next to Spanish Title to turn on that layer. Click OK, and then deselect the graphic by clicking the gray pasteboard.
) next to the English Title layer to turn it off. Now click the empty box next to Spanish Title to turn on that layer. Click OK, and then deselect the graphic by clicking the gray pasteboard.
Using layered Illustrator files allows you to repurpose illustrations without having to create separate files for each variation.
10. Choose File > Save to save your work.
Using a library to manage objects
Object libraries let you store and organize graphics, text, and design elements that you frequently use. Libraries are stored as files on your hard drive. You can also add ruler guides, grids, drawn shapes, and grouped images to a library. Each library appears as a separate panel that you can group with other panels any way you like. You can create as many libraries as you need—for example, different libraries for each of your projects or clients. In this section, you’ll import a graphic currently stored in a library, and then you’ll create your own library.
1. If you’re not already on page 5, type 5 into the Page Number box at the bottom of the document window, and then press Enter or Return to go to that page.
2. Choose View > Fit Page In Window to see the entire page.
3. Choose File > Open, select the file 10_k.indl in the Lesson10 folder, and then click Open to open the library file. Drag the lower-right corner of the 10_k Library panel to reveal all of the items it contains.
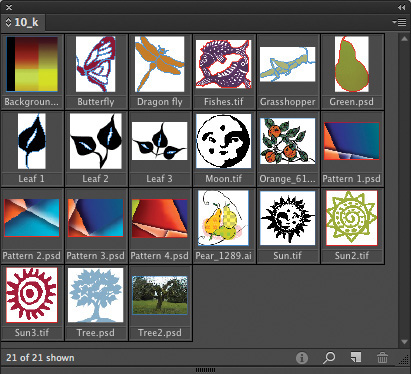
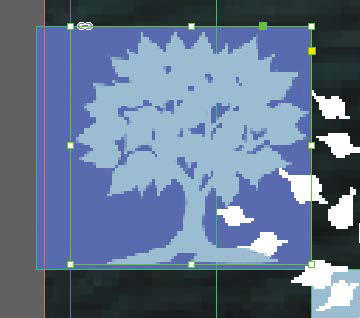
4. In the 10_k Library panel, select the Show Library Subset button (![]() ). In the last box for the Parameters option, type tree, and click OK. This searches the library for all objects that have the word “tree” in their name. Two objects are found.
). In the last box for the Parameters option, type tree, and click OK. This searches the library for all objects that have the word “tree” in their name. Two objects are found.

5. In the Layers panel, make sure the Graphics layer is targeted. Open the Links panel.
![]() Note
Note
After you drag the tree image onto the page, the Links panel may display a missing link icon (![]() ) or a modified link icon (
) or a modified link icon (![]() ) because you copied the Tree.psd file from its original location to your hard drive. To remove the warning, click the Update Link button in the Links panel or click the Relink button in the Links panel and navigate to the Lesson10 folder to find Tree.psd.
) because you copied the Tree.psd file from its original location to your hard drive. To remove the warning, click the Update Link button in the Links panel or click the Relink button in the Links panel and navigate to the Lesson10 folder to find Tree.psd.
6. Of the two objects visible in the 10_k Library panel, drag Tree.psd anywhere on page 5. The file is added to the page. Notice that the filename appears in the Links panel.
7. Using the Selection tool (![]() ), position the Tree.psd image so that the top and right edges of the frame align with the top and right edges of the background frame.
), position the Tree.psd image so that the top and right edges of the frame align with the top and right edges of the background frame.
Creating a library
Now you’ll create your own library and add text and a graphic to it. When adding a graphic to an InDesign library, the original file is not copied into the library; InDesign maintains a link to the original source file. Graphics stored in a library still require the original, high-resolution file for printing.
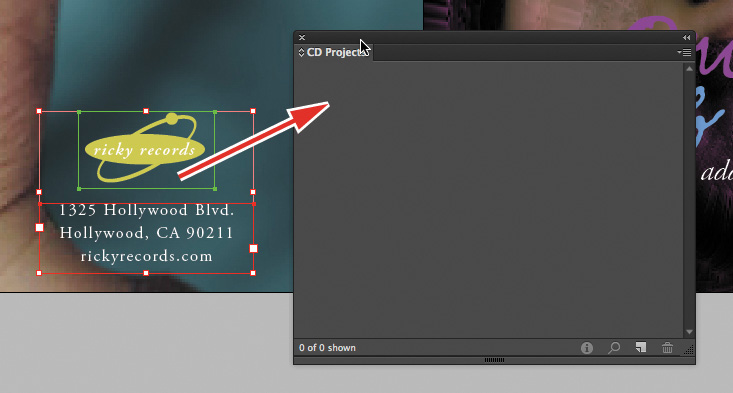
1. Choose File > New > Library. Type CD Projects as the library filename, navigate to the Lesson10 folder, and click Save. The library is displayed in the same panel group as the library you opened earlier.
2. Navigate to page 3. Using the Selection tool (![]() ), drag the Ricky Records logo to the library you just created. The logo is now saved in the library for use in other InDesign documents.
), drag the Ricky Records logo to the library you just created. The logo is now saved in the library for use in other InDesign documents.
![]() Tip
Tip
If you Alt-drag (Windows) or Option-drag (Mac OS) an object into a library, the Item Information dialog box appears, and you can assign a name to the object.
3. In the CD Projects library, double-click the Ricky Records logo. For Item Name, type Logo, and click OK.
4. Using the Selection tool, drag the address text block to the CD Projects library.
5. In the CD Projects library, double-click the address text block. For Item Name, type Address, and click OK.
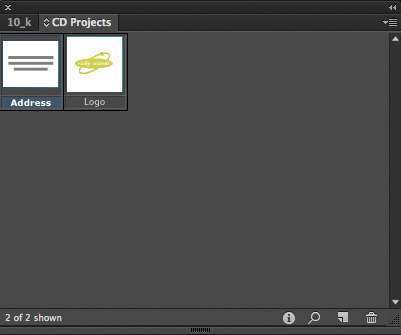
Now your library contains both text and graphics. As soon as you make changes to the library, InDesign saves the changes.
6. Close both libraries by clicking the close button at the top of the library panel group, and choose File > Save.
Using Adobe Bridge to import graphics
Adobe Bridge is a separate application that is available to Creative Cloud users. A cross-platform application, Adobe Bridge lets you browse your local and networked computers for images and then place them into an InDesign layout. This is just one of many features the application provides. (If you don’t have a copy of Bridge installed, you can complete this section using the Place command in the File menu.
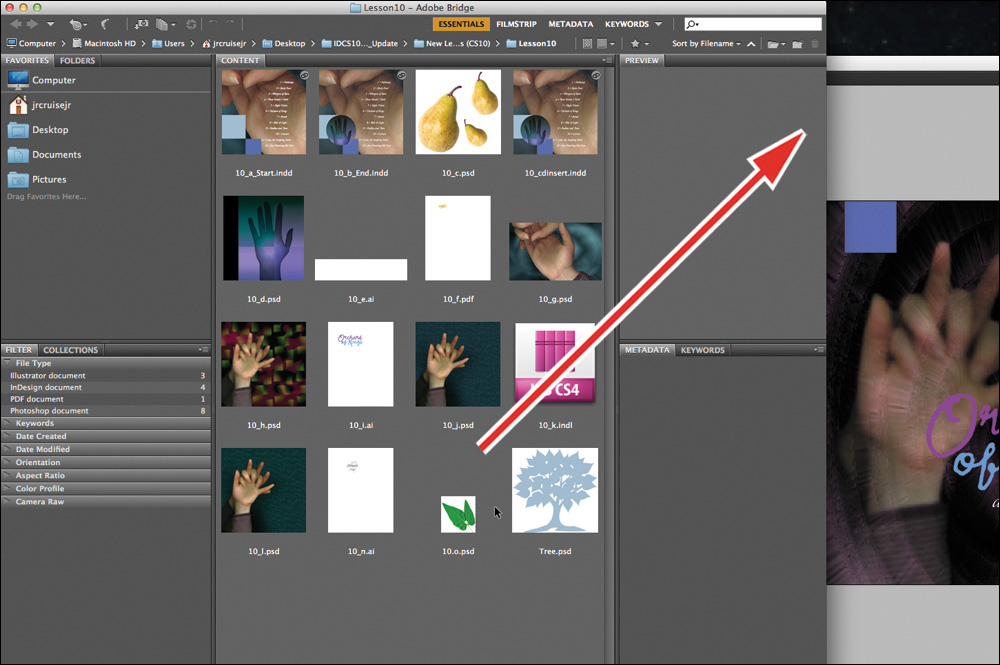
1. Choose File > Browse In Bridge to launch Adobe Bridge. The Content area displays thumbnails of the files in the folder in which the InDesign document you’re currently working on is stored.

Adobe Bridge lets you view the thumbnails of all of your images.
2. Adobe Bridge provides an easy way to locate and rename files. Click the graphic named 10_o.psd once, then click once on the filename to select the filename box. Rename the file Leaf.psd, and press Enter or Return to commit to the change.

3. Make the Bridge window smaller by dragging the lower-right corner, and position it so that you can see page 4 of the InDesign document. Drag the Leaf.psd file into your InDesign document and onto an open area of the pasteboard. Click once within the layout to return to InDesign, then click on an empty area of the pasteboard again to place the graphic.
4. Use the Selection tool (![]() ) to position the leaf graphic in the upper-left corner of page 4, on top of the purple box.
) to position the leaf graphic in the upper-left corner of page 4, on top of the purple box.
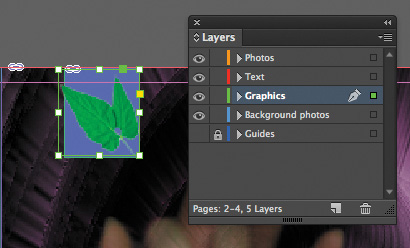
5. Open the Layers panel. The graphic is placed on the Text layer because that’s the last layer you worked on. Drag the small colored square on the right side of the panel to the Graphics layer.
After importing graphics files into InDesign, you can easily locate and access the original files by taking advantage of the integration of Adobe Bridge and Adobe InDesign.
6. Select the Leaf.psd file in the Links panel. Then right-click (Windows) or Control-click (Mac OS) the link, and from the context menu, choose Graphics > Reveal In Bridge.
This action switches you from InDesign to Adobe Bridge and selects the Leaf.psd file.
7. Return to InDesign and save the file.
Congratulations! You’ve created a three-panel brochure for a CD by importing, updating, and managing graphics from several different graphics file formats.
Exploring on your own
Now that you’ve had some practice working with imported graphics, here are some exercises to try on your own.
1. Place different file formats with Show Import Options selected in the Place dialog box, and see what options appear for each format. For a full description of all of the options available for each format, see InDesign Help.
2. Place a multiple-page PDF file or an Adobe Illustrator (.ai) file with multiple artboards with Show Import Options selected in the Place dialog box, and import different pages from the PDF or different artboards from the Illustrator file.
3. Create libraries of text and graphics for your work.
Review questions
1. How can you determine the filename of an imported graphic in your document?
2. What are the four options in the Type menu in the Clipping Path dialog box, and what must an imported graphic contain for each option to work?
3. What is the difference between updating a file’s link and relinking the file?
4. When an updated version of a graphic becomes available, how do you make sure that it’s up to date in your InDesign document?
Review answers
1. Select the graphic, and then choose Window > Links to see if the graphic’s filename is highlighted in the Links panel. The graphic appears in the Links panel if it was imported by choosing File > Place or dragged into the layout from Explorer (Windows), Finder (Mac OS), Bridge, or Mini-Bridge.
2. The Clipping Path dialog box (Object > Clipping Path > Options) in InDesign lets you create a clipping path from an imported graphic by using
• The Detect Edges option when a graphic contains a solid white or solid black background.
• The Alpha Channel option when a graphic contains one or more alpha channels.
• The Photoshop Path option when a Photoshop file contains one or more paths.
• The User-Modified Path option, which is displayed if the selected clipping path has been modified.
3. Updating a file’s link simply uses the Links panel to update the onscreen representation of a graphic so that it represents the most recent version of the original. Relinking a selected graphic uses the Place command to insert a different graphic in place of the selected graphic. If you want to change any of a placed graphic’s import options, you must replace the graphic.
4. In the Links panel, make sure that no alert icon is displayed for the file. If an alert icon appears, you can simply select the link and click the Update Link button. If the file has been moved, you can locate it again using the Relink button.