
3. Working with Master Pages
The Project for this lesson has changed slightly when you use the third-quarter update of Adobe Muse. There have been some additions to functionality, like Browser Fill, states, and the Align panel, but a few changes in the Menu widget necessitate a slight change to the lesson.
Browser Fill Improvements
On page 55, step 6, the difference in terminology on the button in the Import dialog box, Open (Windows) or Select (Mac OS), has now been changed to Open for both platforms.
In Lesson 3, you are introduced to the Browser Fill option in the Control panel on page 55. In the latest release of Muse, you can also apply a gradient color blend to the browser fill area. By inserting steps after step 5 at the top of page 55, you can become familiar with this new option:
1. With the fill options showing, select Gradient from the Fill Type options.
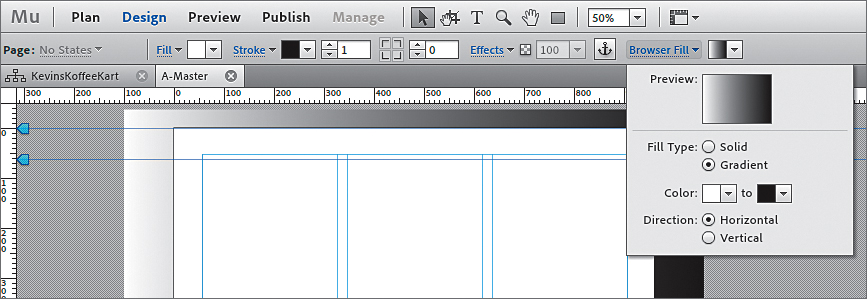
2. Leave the first color (on the left) as White, but click on the second color (on the right) and change the RGB color values to R=153, G=134, B=117 (or another color of your choice).
3. Select Vertical to change the direction of the gradient.

By adding a gradient, you can no longer assign a background image to the browser fill as in step 6 and beyond, starting on page 55. You can opt to keep the gradient, but your site file will not match the rest of the figures in the book, and that’s okay.
4. In the browser fill options, select Solid again, and then follow the steps starting at step 6 on page 55.
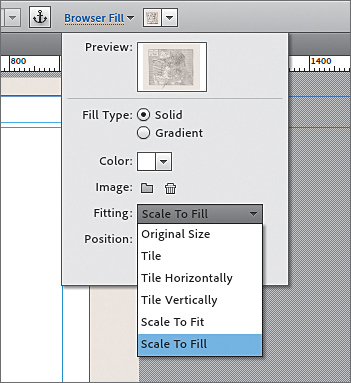
There are also new Fitting options for background images (not just those applied to the browser fill as in this section). There are two new Fitting options to choose from: Scale To Fit and Scale To Fill. Scale To Fit will scale the background image to fit within the bounds of the browser window without distorting the image. This usually leads to gaps showing around two sides of the image where the background color shows through. The Scale To Fill option will always stretch or squish the image to fill up the browser window. This can lead to the image scaling, which can then lead to pixelization (jagged edges or stair steps) in some cases.
On page 55, step 7, instead of choosing Original Size from the Fitting menu in the browser fill options, choose Scale To Fill. The image will now fill the browser window by scaling, no matter how large or small the browser window is.
At the bottom of page 56, step 4, when you change the opacity of the page area, you can more easily see the effects of the Scale To Fill option on the background image.
There were some cross-platform differences in Adobe Muse in the initial release. When placing content using the File > Place command, the button terminology was different on Mac OS and Windows. On page 62, at the bottom of the page, step 2, is a prime example. The button for both platforms in the Place dialog box is now Open.
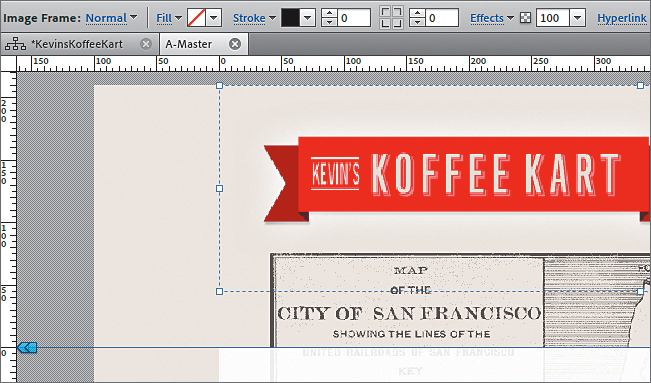
A subtle change between the initial Muse release and the third quarter of 2012 release is the appearance of the containment rectangles of images. On page 63, step 4, after placing the logo.png file, the containment rectangle was solid. In the new release of Muse, the containment rectangles for images are dotted.
Menu Widget Improvements
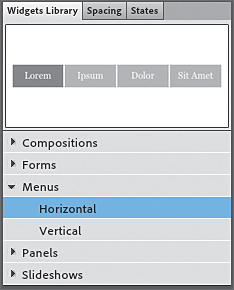
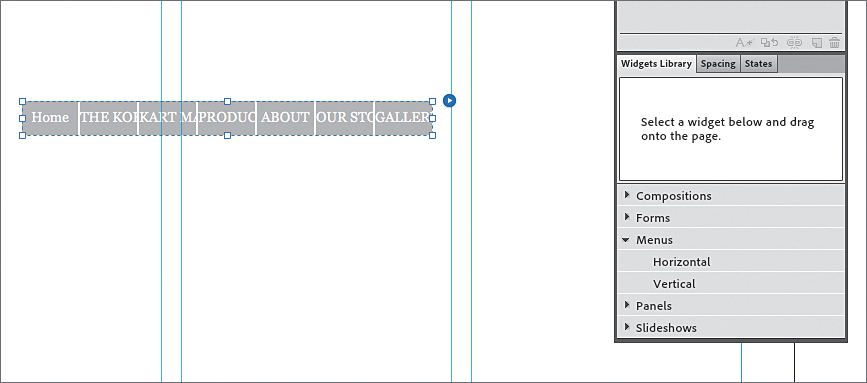
The menu widget has seen some improvements in the third-quarter 2012 release of Muse. In the initial release, there were three menu widgets to choose from, and now there are two: Horizontal and Vertical.
On page 64, the figure in step 3 shows the three previous menu widgets, whereas you will now see only two (along with the inclusion of the Forms category).
On page 65, step 2, you can still drag out the Horizontal menu widget as shown in the Classroom in a Book, but the appearance of the menu has changed. Dragging out the menu widget onto the A-Master page, the fill colors of the menu items are now gray by default, whereas previously they were transparent.
On page 67, step 9 going forward, the menu items in the menu bar will be filled with gray by default, rather than what you see in the figures in the Classroom in a Book. Also, the text color in each menu item will be white, rather than black, in the new release.
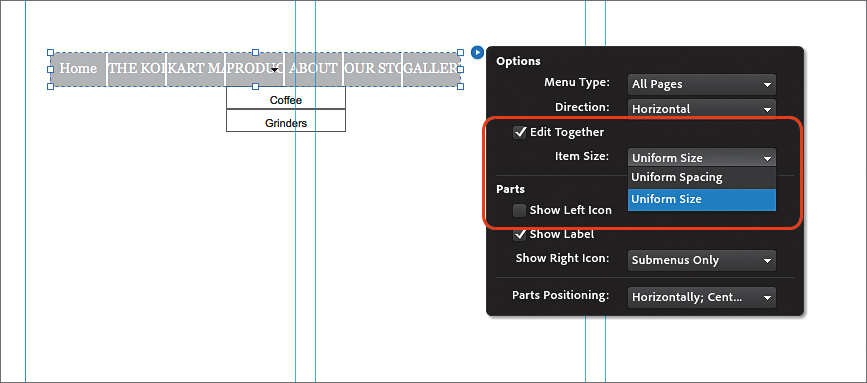
On page 68, step 3, when the menu widget options are explored, there is a change to one of the menu options:
• Item Size: the new values are “Uniform Size” and “Uniform Spacing.” Uniform Size means that all of the menu items are the same width. Uniform Spacing means that the same distance is between all menu items, and each menu item is the width of its content.
For step 3, leave the default option of Uniform Size chosen.
In the figure on page 70 under the heading “Understanding the parts of a menu widget,” a “Text frame” label is now called a “Label.” When you select a label in a menu widget, the word “Label” appears in the Selection Indicator on the left end of the Control panel.
On page 71, step 4, when you select what used to be a text frame, you will now see the “Label” text appear instead.
On page 72, step 5, you are asked to apply a red fill to the menu. This will no longer yield the same result as the figure shown after step 6. This is because the menu items are filled with gray by default. To follow along in the Classroom in a Book, you can insert a step before step 4 on page 72:
With the menu still selected, click once on the HOME link to select the menu item. Click the Fill Color in the Control panel and choose None to remove the gray fill. Press the Escape key to select the menu widget again.
Going forward, the text of the menu widgets is white by default. On page 73, step 9, you are asked to click the word “Home.” This can be difficult because the text is white on a white background.
The latest release of Muse has numerous font menu changes. On page 74, step 3, the menu shown in the figure will differ from what is seen in the new release. The font types have not changed, but the menu functionality and arrangement have changed. The new font menu will be discussed next, in Lesson 4, “Adding and Styling Text.”
Also, in step 3 on page 74, there is a mention of Windows choosing New Gothic Std and then clicking the Bold button. Both platforms, Windows and Mac OS, now have a standardized menu system and treat fonts in a similar manner. Going forward, Windows users can ignore the separate instruction given.
On page 76, step 8, both platforms (Windows and Mac OS) now have the same button (Open) in the Place dialog box, as previously discussed.
On page 79, step 2, after clicking on the submenu, the word “Container” used to appear in the Selection Indicator in the Control panel. In the latest version of Muse, the word “Submenu” appears.
The Align Panel
A welcome new feature in Adobe Muse is the Align panel. The Align panel adds much needed alignment power to your pages. In previous versions of Muse, the Smart Guides were used to help align content. To become familiar with the Align panel, on page 76, replace steps 10 to 12 with the following:
1. With the new image selected, choose Object > Send Backward to put the new image behind the menu.
Visually, nothing will change. When you drag the menu on top of the image, however, you’ll see that the menu is now on top of the image.
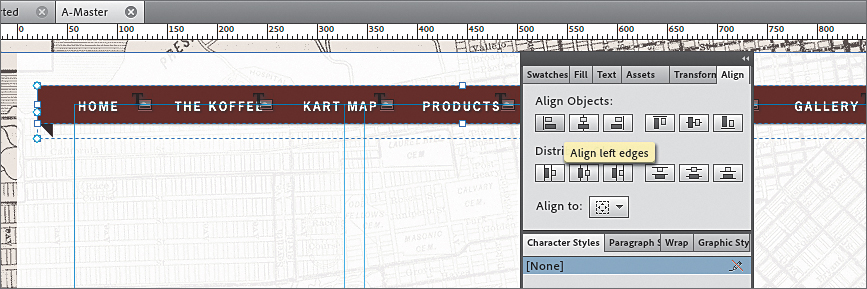
2. Shift-click the menu bar widget on the page to select both.
3. Click the Align panel tab to reveal the panel (Window > Align). Ensure that Align To Selection is chosen from the Align To menu. Click the Align Top Edges button (![]() ), and then the Align Left Edges button (
), and then the Align Left Edges button (![]() ) to align the two objects to each other.
) to align the two objects to each other.
4. Choose Object > Group to temporarily group the two objects together.
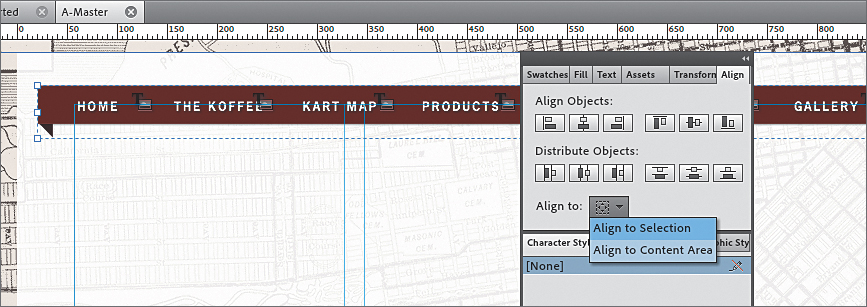
5. In the Align panel, choose Align To Content Area from the Align To menu. Click the Align Horizontal Centers button (![]() ).
).
6. Press and hold the Shift key, and then drag the group until the bottom of the content snaps to the top of the page area. Release the mouse button and then the Shift key. A red line appears along the bottom edge of the image when it is snapped.
7. With the group still selected, choose Object > Ungroup.
8. Click away from the objects to deselect them, and then click the menu again to select it.
Continue on to step 13 on page 77 in the Classroom in a Book.
States Panel Enhancement
Another feature in the previous release of Adobe Muse that has changed is the Reset To Default button at the bottom of the States panel. Clicking the Reset To Default button (![]() ) at the bottom of the States panel now applies the state change to all menu items in the top level. The Note below step 5 on page 78 no longer applies.
) at the bottom of the States panel now applies the state change to all menu items in the top level. The Note below step 5 on page 78 no longer applies.
On page 78, steps 4–6 can be replaced with the following:
1. After clicking the Rollover state, click the Reset To Default button (![]() ) at the bottom of the States panel.
) at the bottom of the States panel.
2. Click the Mouse Down state, and then click the Reset To Default button (![]() ) at the bottom of the States panel.
) at the bottom of the States panel.
3. Click the Active (Normal) state, and then click the Reset To Default button (![]() ) at the bottom of the States panel. (Continue on to step 7).
) at the bottom of the States panel. (Continue on to step 7).
In Lesson 7 of this document, you will learn about another enhancement to the states in the States panel.