
You will probably have a certain custom look that you want to have in your pictures. Even if not, there are settings you want to apply to every RAW image that you edit. For example, you might not want to use the default sharpening but would prefer to use the Wavelet Sharpen plugin. Also, you will definitely want to have all your images marked with your name and contact details in the IPTC tags.
Tip
IPTC tags are, by the way, pretty nifty things. They were originally created by the International Press Telecommunications Council (hence the acronym) to be added to texts, images, and other media. They really took flight with photographers because with them you can add information about the photographer, copyright information, contact details as well as detailed descriptions and captions to every image.
AfterShot Pro offers to save every tool setting in either a RAW or camera default. These defaults are loaded and applied to every new RAW file that you edit with AfterShot Pro (in the case of RAW defaults) or every new RAW file of a certain camera model (in the case of a camera default). We'll now have a look at creating them.
The first thing to do is to open an image you have not edited before. This way the default settings are loaded and we can be sure that we have a fresh start. Now change the settings you would like to add to your RAW or camera default.
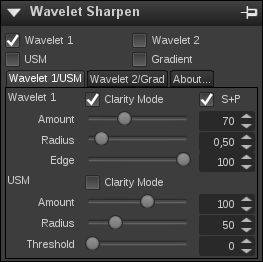
As you can see, we have deselected AfterShot Pro's Sharpening tool.
Instead, we prefer to use the Wavelet Sharpen plugin, which we have turned on as you can easily see. Additionally we've increased Amount to 70. Together with Clarity Mode and S+P, this gives us a good start when sharpening our images.
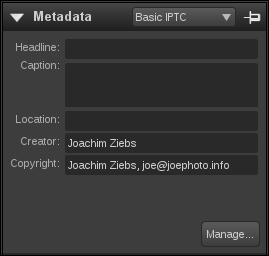
Now it is time to add IPTC information to the image. We use the Metadata tab for this. In the Metadata tool, switch the view to Basic IPTC and enter your name and a copyright tag. You should leave the other fields blank at this time, because we are going to save these values as default values.
Now, change the view to Photographer and enter your full details. AfterShot Pro will put all of this data into the exported images. And because we will save the information in a RAW or camera default, we only need to enter them once. That is, unless you move or change your contact details. In that case, it would be a smart idea to change the RAW or camera defaults accordingly.
To save these settings, right-click on the edited image's thumbnail. In the context menu, choose Settings. A second menu will pop up where you have the choice between Save as RAW default... and Save as camera default....
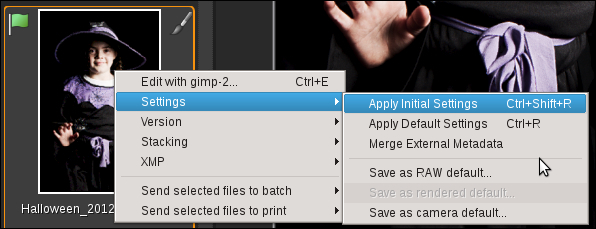
As I explained earlier, if you use different cameras and they need different adjustments you probably want to create a camera default for each of them. If you only use one camera or all your cameras have the same sensor and therefore need the same adjustments, create a RAW default instead.
Pick the one you need and a settings window will open.
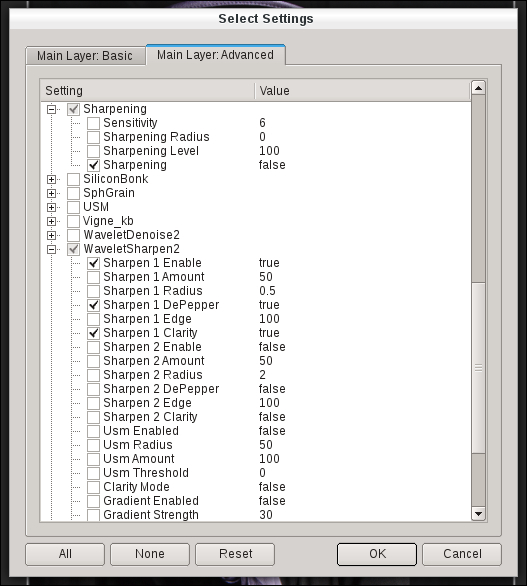
Here, especially in the Main Layer: Advanced tab, you can select which settings will end up in your RAW or camera default. The settings you changed while editing are already ticked. As you can see, Sharpening has the value of false and WaveletSharpen2 is clearly enabled. The button All selects all settings, the button None clears them. A click on Reset will reset the values to the ones the dialog opened with. Leave the dialog by clicking on OK to save.
Your new defaults will be applied to all images that are imported from now on. If you want to use the defaults on images that are already in the database, you can do so by right-clicking on the corresponding thumbnail, selecting Settings, and then selecting Apply Default Settings . Be warned that this will remove all edits you have made to the image so far (which is, as you will agree, rather logical and easily derived from the phrase Apply Default Settings).