9. Cameras and Views
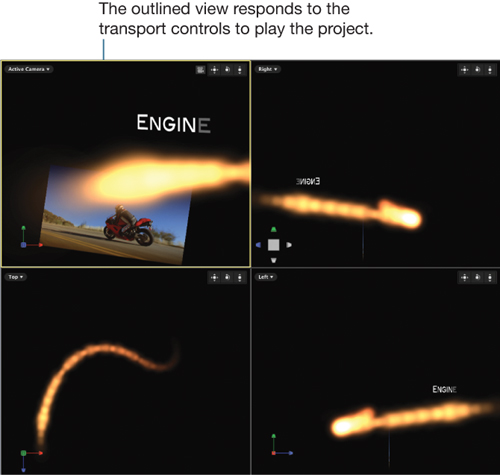
Motion 2D projects have a default view—the active view—that shows what you see in the Canvas and what the exported file will contain. Adding a camera or cameras to your project creates many view options.
Adding a Camera
You can add a camera to any project from the Toolbar.
- In the Toolbar, click the New Camera icon.

- If your project contains only 2D groups, a dialog appears.

Tip
You can add multiple cameras to a project. With each camera placed at a different spatial location within the Canvas, you can cut between the camera angles during project playback.

Modifying a Camera
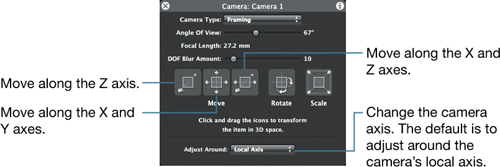
A camera has a few parameters to adjust in both the Inspector and the HUD. You can “change the lens” of the camera by modifying these settings.
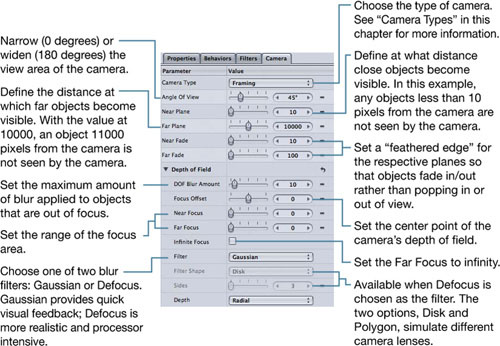
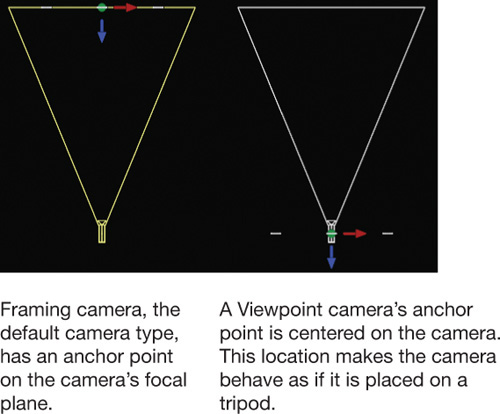
Camera Types
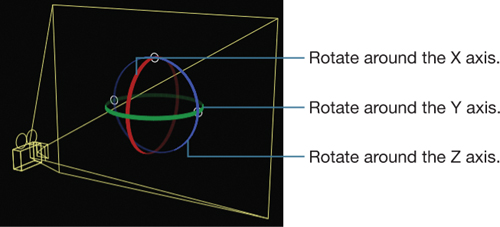
The two camera types, Framing and Viewpoint, are differentiated by their anchor points. The anchor point affects how the camera responds when you move the camera and is particularly important when rotating the camera.
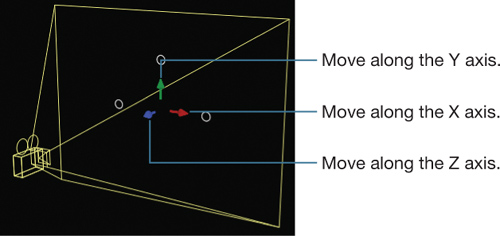
Positioning a Camera
As with any other object in a 3D group, a camera may be moved using the Transform controls. Moving the camera with these controls requires using a view other than the camera view.
- Select a camera in the Layers tab.
- Choose the Adjust 3D Transform tool.
- From the Camera menu, choose a different view, such as Perspective.
- Drag the Canvas controls to adjust the camera’s orientation.
These camera adjustments also may be performed using the HUD controls.
Walk Camera Tool
An alternative to using the mouse to position a camera is the Walk Camera tool. Although you can drag in the Canvas with the tool, you can also perform camera adjustments using the keyboard.
- In the Layers tab, select the camera.
- From the Toolbar, choose the Walk Camera tool.
- Press the Up, Down, Left, and Right Arrow keys to move the camera.
Tip
Hold down the Option key while pressing the arrow keys to move the camera in smaller increments.
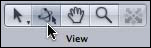
3D View Tools
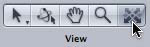
A third method of moving a camera also adjusts the selected view. To use these tools, you must drag the pointer on the tool itself.

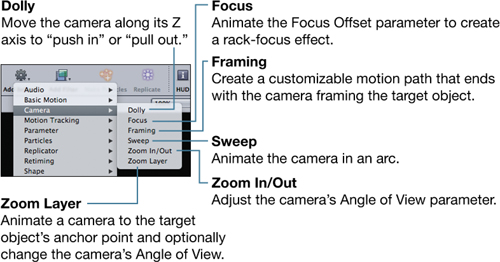
Camera Behaviors
In addition to using basic behaviors, such as Throw and Motion Path, cameras can receive behaviors specifically for animation. You can add behaviors to a camera as you would add a behavior to any object. (See Chapter 7, “Behaviors,” for more information.)
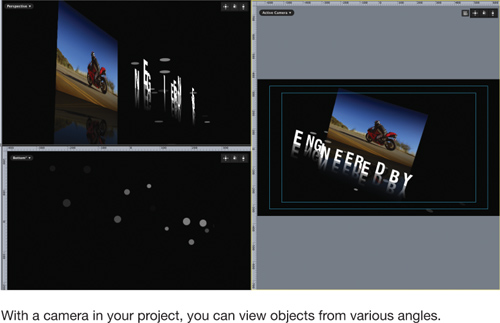
Views
When a camera exists in your 3D project, several view options become available: Camera Menu, 3D View Tools, 3D Compass, and 3D Overlays.
Note
If these items do not appear, choose Show 3D Overlays from the View & Overlay Options pop-up menu.
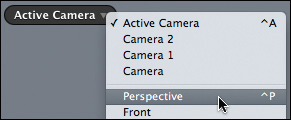
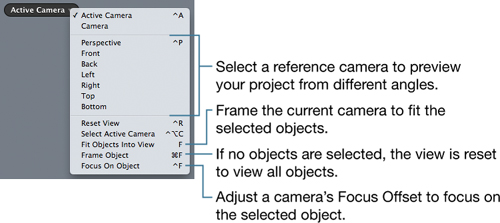
Camera Menu
In the Camera menu, you can choose the view displayed in the Canvas.
Note
No matter which view is chosen, exporting the project uses the active cameras according to their time positions and durations in the Timeline.
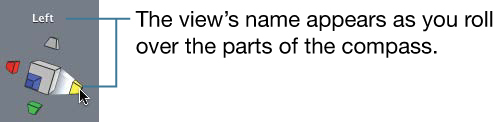
3D Compass
Using the 3D Compass, you can quickly jump between the active camera and the reference camera views by clicking the desired view.
View Layouts
You can create various split-screen views by using the View Layouts pop-up menu.

After selecting a split view, click the compass in each view to change the reference view displayed.