8. Filters
Filters allow you to create unique looks when applied to objects. They can be used to blur, sharpen, glow, key, matte, distort, and color correct objects, and much more. You can apply filters to one or more objects or entire groups. Filters are among the most often used creative tools in motion graphics.
Note
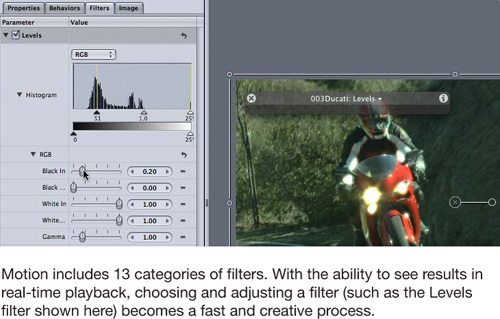
Apply and modify filters judiciously. With 13 categories of filters that have a wide variety of parameters, it’s easy to use too many filters or adjust them to extremes.
Applying Filters
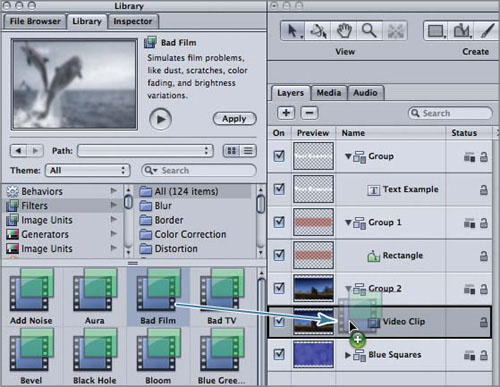
You may apply filters to objects in many ways. When you want to preview filters, however, you should apply filters in the Library tab.
- In the Layers tab or Canvas, select the destination object.
- In the Library tab, select a filter.
- Apply the filter using one of these two options:
• Click the Apply button at the top of the Inspector.
• Drag the filter to the destination object in the Layers tab or Canvas.
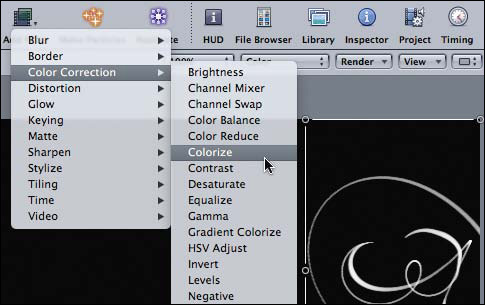
When you already know which filter you need, you can use the Toolbar to get fast access to a specific filter.
- Select the destination object.
- In the Toolbar, click the Filters button, and then choose the desired filter.
Modifying Filters
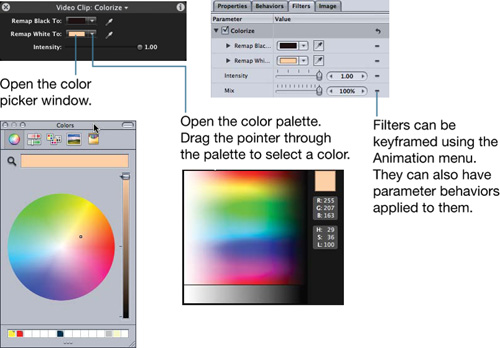
You can adjust a filter’s parameters in the Filters subtab of the Inspector or in the HUD. The HUD usually contains a subset of a filter’s available parameters. However, some filters, such as Levels, have no parameters displayed in the HUD.
While tweaking the look of an object, use the HUD to cycle between the object and applied behaviors and filters to make adjustments more quickly.

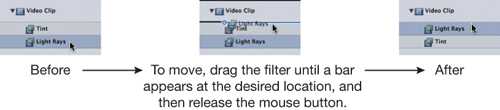
When applying multiple filters to an object, the order in which they are applied can yield different results. For instance, if you apply a Tint filter before a Light Rays filter, you’ll get a different result than if you apply the Light Rays filter first. To change filter order, drag a filter to a new position in the Layers tab.
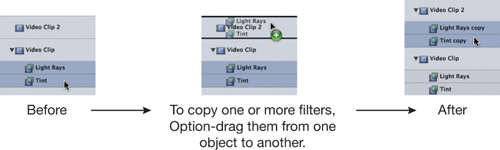
After you’ve applied and adjusted one or more filters for an object, you may need to apply the same filter configuration to another object. Rather than redoing your work, you can copy filters and their settings.
The timing and duration of filters can be adjusted in the mini-Timeline or Timeline, just as you would adjust other objects.
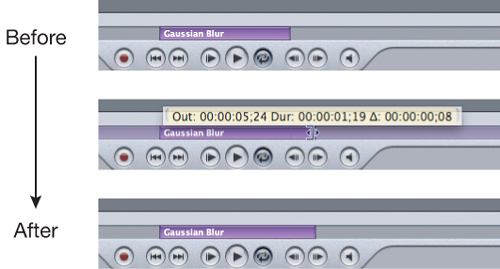
To change a filter’s duration:
- Place the Select/Transform tool on the filter’s In or Out point.
- Drag to change the duration.
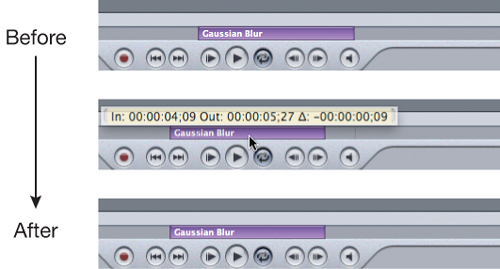
To alter the timing of a filter relative to the applied or other objects:
- Place the Select/Transform tool in the middle of the filter.
- Drag to change the filter timing.
Filter Crop Parameter
When applying certain filters, you may notice that black is introduced around the edges of the Canvas area. This is because the filter is being applied at the source object’s original boundaries.
If you notice dark edges around an object after applying a filter, go to the Filters Inspector and look for the Crop option. The filter’s effect is limited to pixels within the object’s frame size.

Example Filters
Motion ships with filters that can be considered static or dynamic. Static filters may simply adjust the color of an object; dynamic filters modify pixels within the object over time. All filter types can be animated using keyframes and parameter behaviors. See Chapter 6, “Keyframes” and Chapter 7, “Behaviors,” for more information on animating filters.
Here are a few of the filters included with Motion:
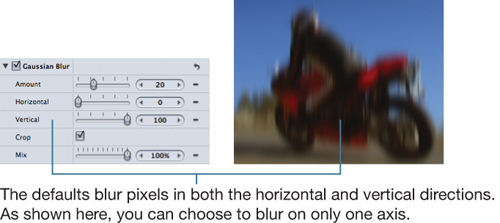
Gaussian Blur
The Gaussian Blur filter blurs the pixels of an object. Considered a static effect at its defaults, applying keyframes or parameter behaviors turns this filter into a dynamic effect.
Earthquake
The Earthquake filter is a dynamic effect found in the Distortion category. As the name implies, this filter makes the object appear as if shaken by an earthquake.

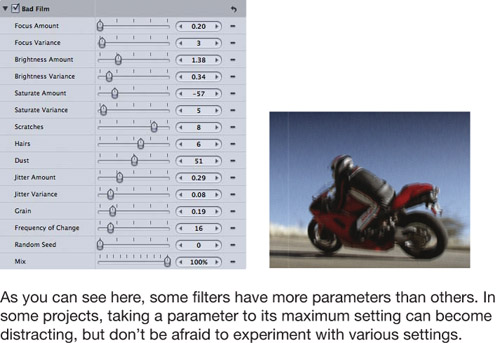
Bad Film
From the Stylize category, the Bad Film filter “grunges” your video to make it look like old or damaged film. As with any other dynamic effect, you will need to watch the filter’s entire duration to ensure that the desired look is achieved. Setting a few or even one parameter too high could stylize your video beyond the desired effect.