6. Keyframes
While behaviors and parameter behaviors permit a tremendous amount of control over animation in Motion, at times an object’s parameters can be more precisely animated using keyframes. Whether changing an object’s color or animating a filter or light, keyframes can create very specific animations quickly and easily, with additional control provided by the Motion Keyframe Editor.
Setting Keyframes Manually
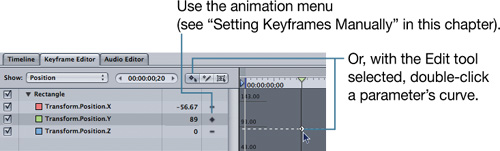
When a project requires only a few keyframes, it may be easiest to create them manually from the Animation menu. This process also uses the playhead and the Inspector.
- Place the playhead where a keyframe is needed.
- In the Inspector, click the Animation menu next to the parameter that needs to be keyframed.
- From the pop-up menu, choose Add Keyframe.
- Repeat steps 2 and 3 for any additional parameters that require a keyframe at the playhead’s position, and then proceed to step 5.
- Move the playhead to the next position where you want to apply keyframes.
- From the Animation menu, choose Add Keyframe for any parameters that require a keyframe at the playhead’s current position.
- After setting the keyframes, adjust the parameter settings as desired.
- Repeat steps 5 through 7 as necessary to further define your animation.

The Animation menu’s icon indicates the keyframed status of a parameter.

Tip
Option-click the Animation menu to create a keyframe at the playhead position without opening the pop-up menu.
Using Record Animation to Create Keyframes
The Record Animation feature allows for keyframes to be recorded automatically when making changes to a project—in other words, a hybrid version of manual and automatic keyframing. Although this can make animating extremely fast, knowing how to use the feature will prevent a lot of unwanted keyframes in your projects.
- Double-click the Record button.
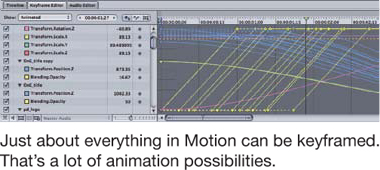
- In the Recording Options window that appears, set the desired options.
- Ensure that recording is activated. The Record button will pulsate red.
- Now you have two options: advance the playhead manually or start playback.
• If you want to advance manually, cue the playhead and then adjust an object’s parameters in the Canvas, Inspector, HUD, Timeline, or Keyframe Editor. Cue the playhead to the next frame that needs keyframes, and then adjust the parameters. Keyframes are recorded for each change.
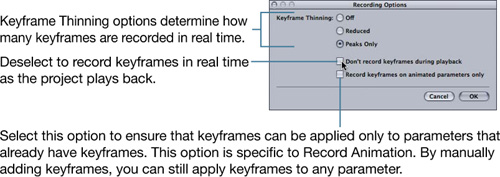
• Alternatively, you could start playback and then adjust an object’s parameters in the Canvas, Inspector, Timeline, or Keyframe Editor during playback. Keyframes are recorded for each change.
- Click the Record button to stop recording.
Using the Keyframe Editor
The Keyframe Editor acts as command central when applying and working with keyframes in Motion. It allows precise control over animation curves.
Creating Keyframes
To keyframe a parameter:
Editing Keyframes
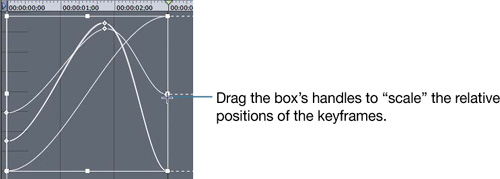
In addition to editing single keyframes with the Edit tool, you can edit multiple keyframes using the Box tool.
- Choose the Box tool.

- Drag within the Keyframe Editor to select the keyframes you want to modify.
- Drag the selected keyframes left or right to adjust their timings. Drag keyframes up or down to change their parameters’ values.
Tip
To modify a single keyframe, you can drag the keyframe vertically or double-click the keyframe and type a parameter value.
Setting a Keyframe’s Interpolation
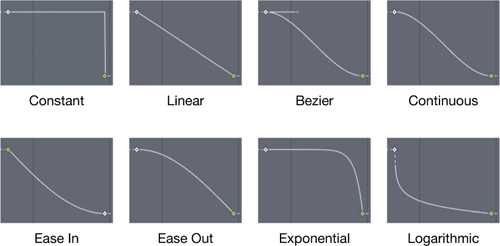
Interpolation determines the transition that occurs between and through keyframes, and it creates the “feel” of animated parameters. For example, if the interpolation for a keyframe is set to Ease Out, the animation will begin more slowly as it comes out of a keyframe, whereas an Ease In interpolation will make an animation end more slowly going into a keyframe.
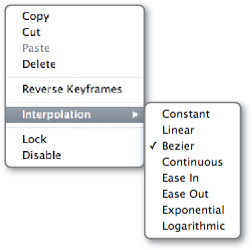
To change interpolation, Control-click (or right-click) a keyframe and choose an interpolation from the shortcut menu. Here are some examples of interpolation options:
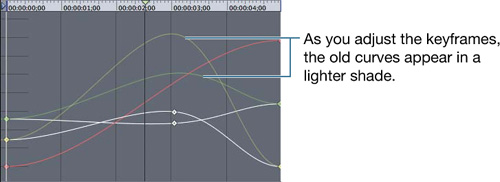
Taking Curve Snapshots
Curve snapshots maintain a record of original animation curves when you change keyframe positions in the curve graph. By taking a curve snapshot, you not only preserve a reference to the original curve, but you also enable the ability to restore that curve.
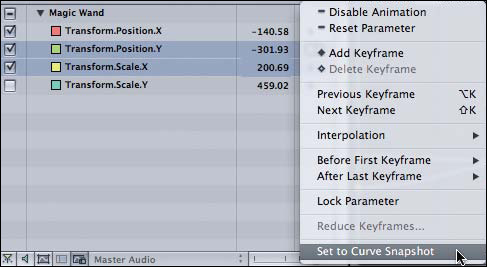
- At the lower left of the Keyframe Editor, click the “Take/Show Curve Snapshot” button.
- Adjust the curves to the new values.
- If you want to revert to the previous values, select the parameters of the modified curves, and from the Animation menu, choose Set to Curve Snapshot.

Note
Exiting the Keyframe Editor or changing to another set of curves will dispose of the previous snapshot.
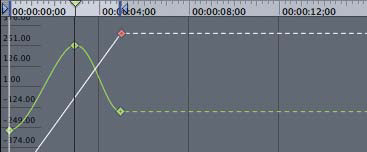
Applying Extrapolation
Extrapolation determines the animation that occurs before the first keyframe and after the last keyframe of a parameter—as opposed to interpolation, which determines behavior between the keyframes.
Extrapolation can be especially useful to loop (repeat), extend, or ping-pong the animation in a project.
- Create the first loop for a parameter.
- From the parameter’s Animation menu, choose the desired extrapolation.

Motion creates the additional keyframes.

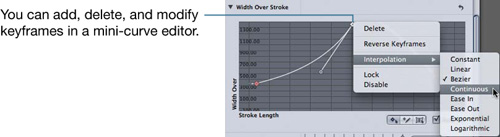
Using a Mini-Curve Editor
Motion’s mini-curve editors are scaled-down versions of the Keyframe Editor. The mini-curve editors let you modify animation curves for certain parameters and appear for a few parameters when working with paint strokes and particle systems.
Modifying Keyframes in the Timeline
After creating keyframes, you may need to adjust their timings or even their parameters. In the Timeline, you can easily compare keyframes of multiple layers to adjust their relative timings.
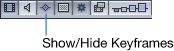
- Click the Show/Hide Keyframes button.
- Adjust the keyframe as desired.

- While you are editing in the Timeline:
• Hold down Shift to enable snapping.
• Control-click (or right-click) a keyframe, and from the shortcut menu, choose the value you want to change. Then enter a new value and press Return.
• You may also Control-click a keyframe and choose Delete Keyframes from the shortcut menu to remove the keyframe.
Converting Behaviors to Keyframes
Sometimes you apply behaviors to an object that don’t offer the level of control you need over certain parameters. By converting those behaviors to keyframes, you can modify and edit the interpolation between keyframes and their curves.
- Select the object (or group or layer) to which behaviors have been applied.
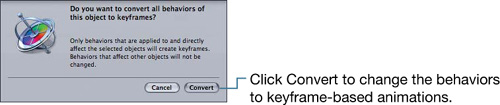
- Choose Object > Convert to Keyframes.
- From the Convert to Keyframes dialog, choose Convert.
Because this conversion may yield many more keyframes than you want to deal with, you may need to reduce the number of keyframes.
- In the Keyframe Editor, click the Animation menu for the parameter with extra keyframes.
- From the Animation menu, choose Reduce Keyframes and enter values for keyframe reduction.
