
Lesson 3. Rating and Finding Photos
Lesson Files
Desktop > APTS iPhoto Book Files > APTS iPhoto Library > Mediterranean Vacation event
Desktop > APTS iPhoto Book Files > APTS iPhoto Library > Greg and Caren’s Wedding event
Time
This lesson takes approximately 60 minutes to complete.
Goals
Sort photos
Use the rating system
Set a flag
Compare photos
Assign keywords
Search your photo library
Make albums and Smart Albums
Transfer photos to your iPad, iPhone, and iPod
Between the photos you take and those that people send you, your library usually grows to a point where finding the standout photos takes time. The cream-of-the-crop images in your library are probably the ones you want to keep on your iPad, iPhone, or iPod touch, so singling them out becomes important. In this lesson, you’ll learn how to rate your photos, group them into categories, and transfer them to your iOS mobile device.
Sorting Photos
When you double-click an event, the photos appear sorted with the earliest dated photo first and the most recent photo in the event last. Reversing the sort order is easy:
1. In the Source list, select Events, and double-click the Mediterranean Vacation event to view all of its photos.
2. In the lower left of the viewing area, drag the Zoom slider so that four photos fit across the top in the window, if necessary.
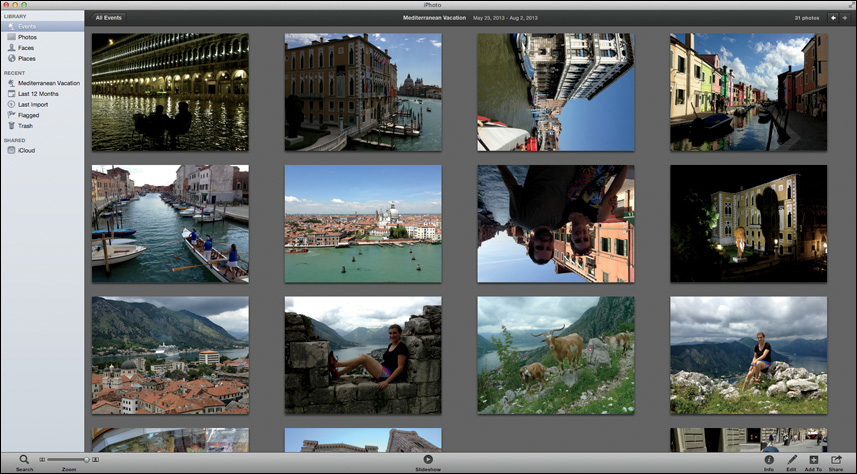
3. Choose View > Sort Photos > Descending.
The photo you now see in the upper-left corner was the last photo taken in this event. Does this technique help you find your favorite photos quickly? Probably not, but it lets you choose how photos in events are displayed.
Rating Photos
Assigning ratings to photos, however, actually will help you find your favorite photos quickly.
iPhoto uses a five-star rating scale to help you identify your lesser pictures (one star), your favorite pictures (five stars), and all the pictures in between.
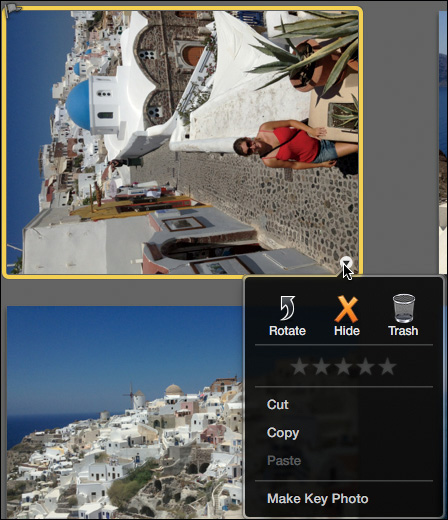
1. In the Mediterranean Vacation event, position the mouse pointer over the first photo in the upper-left corner of the event.

2. In the lower-right corner of the photo, click the disclosure triangle to display the Photo pop-up menu. In this menu, you can access several commonly used features, including ratings and, thankfully, rotation, which you’ll use later in this lesson.
Tip
You can open the Photo pop-up menu by Control-clicking (or right-clicking) the photo.
This picture is your basic Greek village tourist photo. It’s pretty, but you’ve seen better, so give it a three-star rating.
3. Click the third star.
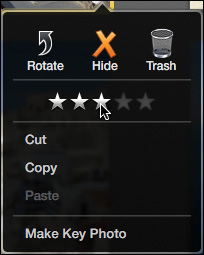
The Photo pop-up menu disappears, but rest assured, you’ve just rated this photo with three stars. To view the ratings, you can display the stars under each photo.
4. Choose View > Ratings.
The ratings now appear under each photo. A blank space appears under unrated photos. You can now browse photo ratings more easily, but you can also use this display to apply the ratings.
5. Select the second photo in the event, a pleasant picture of the Greek church bells.

6. It’s much nicer than the previous photo, so click the fourth star under the photo to assign a four-star rating.
Most of the time you should take a close look at photos to evaluate them.
7. Double-click the third photo to view it full size in the viewing area.
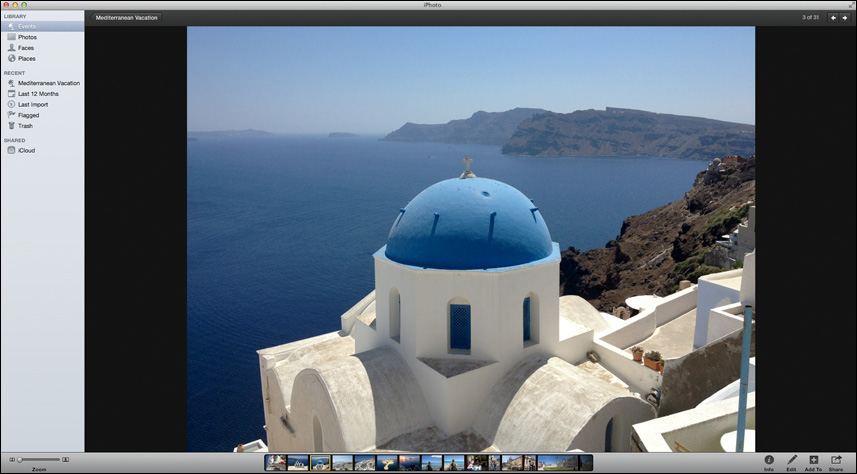
This is a beautiful photo, a favorite. But when viewing a single photo in the window, the ratings are obscured. Luckily, you can use keyboard shortcuts to rate photos. Holding down the Command key and pressing any number from 1 to 5 assigns that number of stars to the photo. Pressing Command-0 removes a star rating from the photo.
8. On this beautiful Greek village photo, press Command-5 to assign a five-star rating.
Note
To see all the ratings and their keyboard shortcuts, choose Photos > My Rating. You can also apply ratings in this menu.
If you later want to change a rating, you can reselect a photo and assign a new rating using the methods you just learned. Ratings can be modified and updated as often as you like.
Flagging Photos
Now you have an event with a few rated photos. As you browse through the event, you’ll see that some photos are just fine the way they are, while others have the potential to be really good but need some help getting there. Those of you with photographic memories will be able to recall precisely which photos have potential. For the rest of us, flagging those photos in some way comes in handy so we can recall them at a later time.
A flag is a visual indicator that marks a photo for further scrutiny. You can use flags to mark photos you want to sync to your iPad or post to Facebook, or in this case, identify it as needing a little editing.
1. While still viewing the five-star blue dome photo, in the thumbnail display click the next photo to the right, or press the Right Arrow key.
This photo of the white seaside patio is very nice, but it’s a little faded and the wires detract from it. Flag this photo to indicate that you may want to fix these two issues later.
2. Position your mouse pointer in the upper left of the photo.
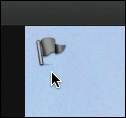
A small, dimmed flag icon appears.
3. Click the flag to apply it to the photo.
That was easy enough, but instead of flagging photos one by one, you can use a shortcut to flag multiple photos at once.
4. Double-click the photo to once again view the entire event.
5. Click the first photo on the second row. On the third row, Shift-click the first photo.
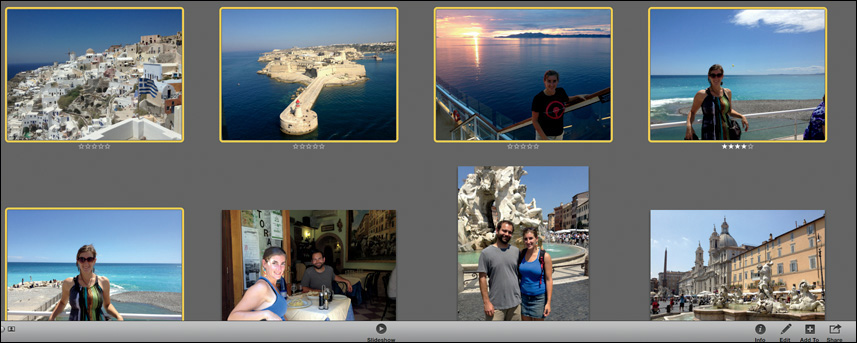
All five photos, four on the second row and one on the third row, are selected.
If the photos you want to select are not next to each other, hold down the Command key and click each photo in the event to select it.
6. Choose Photos > Flag Photos, or press Command-. (period) to flag all five photos.
After your photos are flagged, iPhoto can display just the flagged photos.
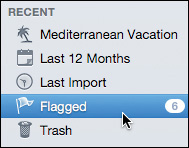
7. In the Source list, select Flagged to show an album of only the flagged photos in your library.
Tip
You can remove a flag by clicking a photo’s flag icon, or by selecting the photo, and choosing Photos > Unflag Photo.
You’ve now added flags to identify a few photos with problems, but don’t be surprised if you find you have more flagged photos than you selected. The Flagged album shows all flagged photos across your entire library, not just this one event.
Comparing Photos
When you have two, three, or four photos that are very similar, you should try to narrow down which is the best of the group. You can do this by viewing and rating them one by one; but when the differences are subtle, comparing them side by side is usually easier.
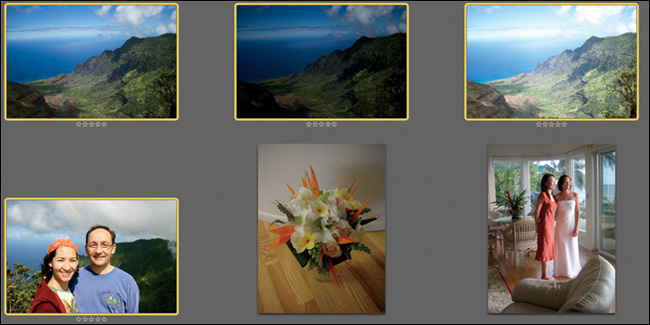
1. While still viewing the Flagged album, click the first photo of the woman standing in the Mediterranean sunshine.

2. Shift-click the similar photo to the right.
The two similar photos are selected. You now need a larger view of both photos side by side to better evaluate them.
3. In the iPhoto window, click the Edit button.

In edit view the selected photos fill the viewing area, and other photos from the event or album are shown below as thumbnails.
Edit view is primarily used to change the brightness, color, and framing of photos using the Edit pane on the right, but it is also used to compare up to four photos at a time.
The photos are similar, but the photo on the left has people and an ugly fence in the background. Although the photo on the right isn’t perfect, it has more potential.
A white outline appears around it.
5. Choose Photos > Unflag Photos, or press Command-. (period), to unflag the newly highlighted photo on the left.
The photo is unflagged and disappears from the Flagged album. You are returned to the album with the photo you chose to keep. You’ll return to the Flagged album in Lesson 5 to fix those flagged photos. For now, let’s uncover another method of marking photos to quickly find them in the future.
Assigning Keywords to Photos
Every now and again you may need to search your photos based on the contents of the picture rather than a simple flag or rating. To add more advanced types of information, you can use keywords: text labels you assign to help describe photos. Then you can search your photos based on those keywords.
1. In the Source list, select Events.
2. Double-click the Greg and Caren’s Wedding event.
These wedding photos are in reverse order because you previously changed the sort order. Let’s return to an ascending order.
3. Choose View > Sort Photos > Ascending.
4. Select the flower bouquet photo.

This is the first photo you have of the wedding ceremony, so add a keyword to it identifying it as part of the ceremony. To add keywords, you use the Info pane.
5. In the toolbar, click the Info button.
6. Choose View > Keywords to add the Keywords field to the Info pane.
7. In the Info pane, click “Add a keyword,” and type ceremony. Press Return.

The new keyword appears in the Info pane and is assigned to that photo.
Tip
You can select the keyword in the Info pane and press Delete to remove that keyword from a photo.
To assign a keyword to more than one photo, you can select multiple photos and type a single keyword as you did in step 7.
8. Click the next photo of the bride and the maid of honor standing near the window.
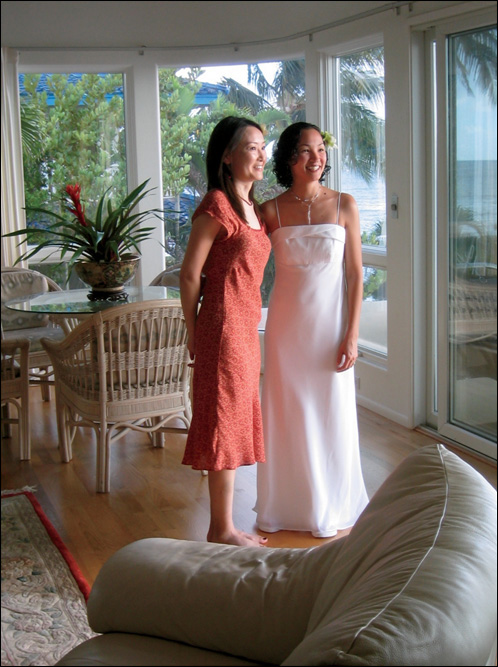
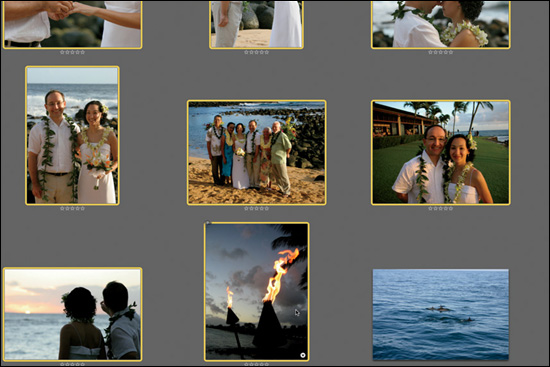
9. Scroll the window until you see a photo of the tiki torches at night.
This is the last photo of the ceremony, so let’s select all the photos between the selected bride and maid of honor shot and this shot and mark them with the ceremony keyword.
10. Shift-click the tiki torches photo to select those photos.
11. With all the ceremony photos selected, in the Info pane, click the “Add a keyword” text and type ceremony. Press Return.
12. Click the Info button to close the Info pane.
The photos with the ceremony keyword added are outlined in blue to indicate the applied keyword.
Using the Manage My Keywords Window
When you add the same keyword to multiple photos, you can ensure that the words are typed consistently by using the Manage My Keywords window.
1. Select the first four photos in the Greg and Caren’s Wedding event.
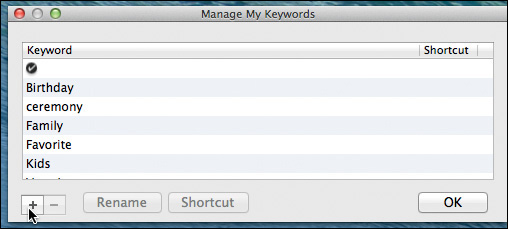
2. Choose Window > Manage My Keywords.
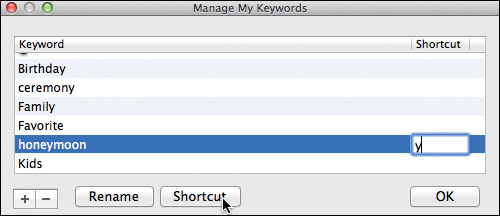
The Keywords window appears. It already has several keywords that iPhoto provides, as well as the ceremony keyword you entered.
3. In the Keywords window, click Edit Keywords. The window displays a list of keywords you can edit and a button to add a new keyword.
Tip
Click the Remove (–) button to remove a keyword from the list and from any photo that uses it.
A new Untitled entry appears near the bottom of the keyword list with the keyword selected and ready for you to enter.
5. Type honeymoon, and then click OK.
6. To add the keyword to the selected photos, click it in the Manage My Keywords window.
The keyword is added, but you are probably thinking that wasn’t any easier than using the Info pane. The Manage My Keywords window can do more than create and assign a consistently typed keyword to multiple photos. It also allows you to assign a keyboard shortcut to your favorite keywords.
The new honeymoon keyword appears in the Quick Group area of the window. Notice that iPhoto has assigned the shortcut letter “h” so you can quickly apply the keyword to any selected photo by typing it when the Manage My Keywords window is open. However, you aren’t stuck with that shortcut letter.
7. In the Manage My Keywords window, click the Edit Keywords button.
8. Select the honeymoon keyword, and click the shortcut field.
The shortcut highlights, ready for you to enter a new letter. You can enter any single letter or character.
9. Type y into the shortcut field, and click OK.
With the Manage My Keywords window open, you can now type the letter “y” to assign the honeymoon keyword to any selected photos.
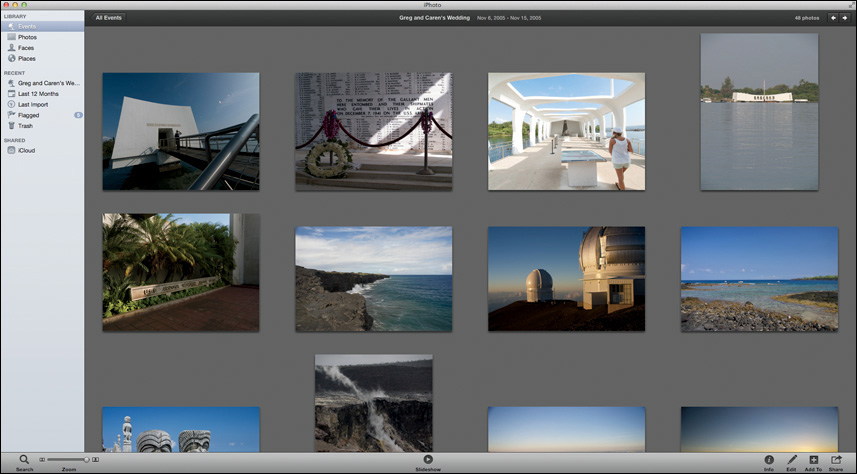
10. In the viewing area, scroll down to find the first picture of dolphins (the one after the tiki torches), and click that picture to select it.

11. Hold down the Shift key and scroll down to the last photo in the event, the USS Arizona war memorial. Click that photo to select it and all the photos leading up to it.
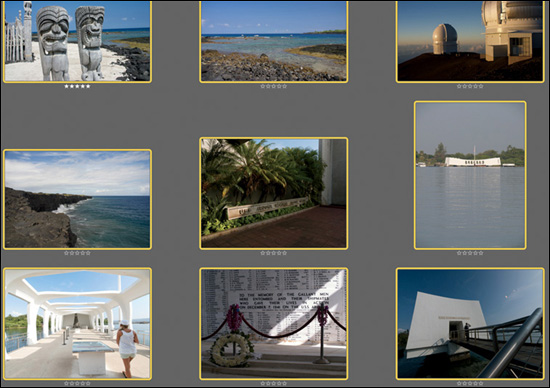
12. Type y to assign the honeymoon keyword.
Tip
Existing keywords can be dragged into the Quick Group window to be assigned a keyboard shortcut.
13. Close the Manage My Keywords window.
The selected pictures all have the honeymoon keyword assigned to them.
Searching Your iPhoto Library
One of the payoffs for adding keywords to your photos is the ability to search your library for those keywords.
1. In the Source list, select Photos to view all the photos in your library.
2. In the iPhoto window, click the Search button to open the search field.

Although you could begin typing a keyword directly into the search field, you can also choose one from the Keyword pane.
3. In the search field, click the magnifying glass icon, and from the pop-up menu, choose Keyword.
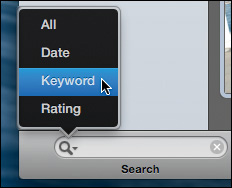
4. In the Keyword pane, choose ceremony. The photos to which you have added the ceremony keyword appear in the viewing area.
5. To clear the search field and return to viewing all your photos, click the search field’s Reset button.

6. Click the Reset button again to close the search field.
Once again, you’re looking at all the photos in your library. Keywords can be very powerful search tools, but they do require some planning. Before you begin adding keywords, think about the types of information you might be interested in searching, and check in the Manage My Keywords window to see if those keywords already exist. Then be consistent about adding keywords to photos. If you add keywords to only a few photos, the keywords won’t be much help because the point of adding keywords is to help you find all the photos that match your keyword search.
Working with Albums
Albums allow you to group selected photos from one or more events—a quick way to organize and locate specific groups of photos. The photos in an album are not moved out of their events; they are just referenced into an album and displayed in both places.
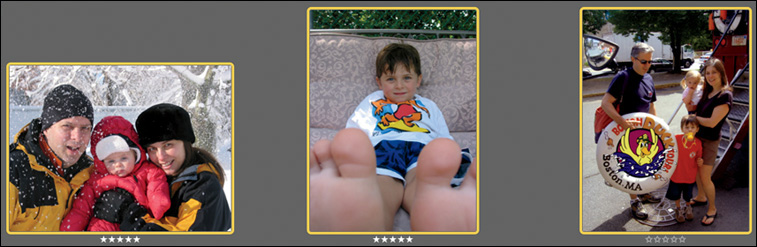
1. In the Source list, select Events, and double-click The Krupps Family event.
2. Select the first photo in the viewing area of mom, dad, and the baby.

3. Shift-click the third photo in the viewing area, the four family members with the life preserver.
4. Choose File > New > Album, or press Command-N.
The new album appears in the Source list, and the three selected photos are displayed in the album viewing area.
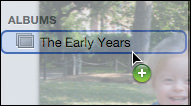
5. With the Untitled album highlighted blue in the Source list, type The Early Years, and press Return.
You can add photos to an album at any time by dragging them from an event.
6. In the Source list, select Events, and double-click The Krupps Family event.
7. Select the fourth photo of the girl sitting on the duck.
8. Drag the girl’s photo over to the album in the Source list. A green mouse pointer with a plus sign indicates that you are adding a photo to the album.
9. Click The Early Years album to view its contents.
You can also remove photos from an album by selecting them and pressing Delete. Deleting a photo in an album doesn’t delete it from your event; it just removes it from the album.
Working with Smart Albums
In the previous exercise, you manually added photos to an album by selecting them.
Smart Albums use information contained in the photos to automatically create an album. For instance, you could create a Smart Album that included photos taken by a specific camera or that used any of the keywords you applied earlier. Any time you import photos taken by that camera model or that use the specific keyword, they are automatically added to that Smart Album.
Creating Smart Albums
To become familiar with Smart Albums, you’ll create one that contains only the four-star or better photos that you rated earlier.
1. Choose File > New > Smart Album, or press Command-Option-N.
The Smart Album conditions dialog appears. Like creating rules in an email application, you choose conditions that photos must match to be included in the album.
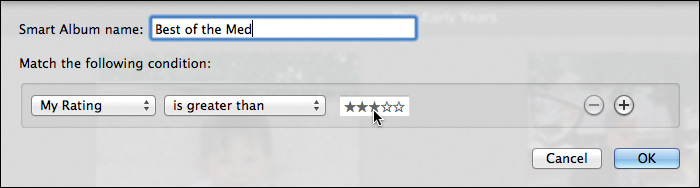
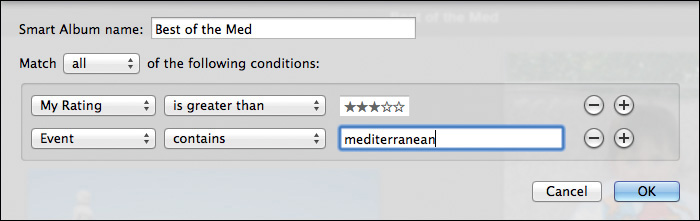
2. In the “Smart Album name” field, type Best of the Med.
3. Use the pop-up menus to create the following condition: My Rating is greater than three stars (***). This condition will place all photos rated with more than three stars in the “Best of the Med” Smart Album.
4. Click OK to create the Smart Album and add it to the Source list.
The “Best of the Med” Smart Album appears in the Source list. Smart Album icons in the Source list include a small gear to differentiate them from regular albums.
In the viewing area, the Smart Album is dynamically populated with photos. You’ll see a lot more photos than you specifically rated with greater than three stars because your conditions included photos from your entire iPhoto library, rather than just the Mediterranean Vacation event. Let’s address that.
5. Choose File > Edit Smart Album.
The Smart Album conditions window reappears. You can add as many conditions as you want, and these conditions will update the existing Smart Album.
6. Click the Add Condition (+) button.
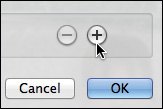
A new condition is added under the My Rating condition, and a new Match pop-up menu, set to “all”, appears. You could change the Match conditions menu to “any” if you wanted to add photos that matched any of these conditions. In this exercise, however, you do want to match all your conditions
7. To create the new condition, set the second set of pop-up menus to “Event contains ‘Mediterranean’”.
8. Click OK.
The photos matching all those conditions appear in the viewing area. If you change the conditions or import new photos that match the existing conditions, the Smart Album dynamically updates.
Transferring Photos to Mobile Devices
You can transfer photos directly to an iPad, iPhone, or iPod by selecting the albums and events in iTunes when the mobile device is connected to your Mac. That way you’ll have all your favorite photos to show family members and friends no matter where you are.
Note
To perform the following steps, you’ll need an iPod, iPad, or iPhone.
1. Connect your iOS device to your Mac. iTunes opens automatically.
2. In the iTunes window, select your connected device.

3. In the iTunes window, click the Photos button.
The settings window for syncing photos appears in the main iTunes window. iTunes can examine your iPhoto library and locate all the photos, albums, and events without the need to export or share anything.
4. Select the “Sync Photos from iPhoto” option.

You have the choice to sync all your photos, albums, and events onto your mobile device. If you intend to transfer your entire iPhoto library, make sure you have enough free storage space on your device. Otherwise, you can sync just selected albums and events, which is why you rated the photos in the first place, isn’t it?
5. Select the “Selected albums, Events, and Faces, and automatically include” option.
Because your events contain many photos that aren’t rated highly, you may not want to devote precious mobile storage space to your lesser-quality photos. That’s where albums and Smart Albums come in handy. You can sync only those albums that contain your favorite, highly rated photos.
By default, the associated pop-up menu is set to “no Events” to exclude events from syncing to your device. You’ll keep that setting.
6. From the Albums list, select “Best of the Med.”

7. Click Apply.
Note
A warning dialog may appear if you already have photos on your device and are syncing it with a new library. It’s your choice to replace the photos on your device or cancel the sync operation.
iTunes automatically syncs and transfers the photos to your connected device. When the process is done, you can disconnect your mobile device and use its Photos app to view the album.
Lesson Review
1. When viewing all the photos in an event, how do you view ratings on all the photos?
2. Where can you view all the flagged photos in your library?
3. Where do you enter a single keyword for a single photo?
4. True or false? You must export albums and photos into iTunes to sync them to your Apple mobile device.
5. What is the difference between albums and Smart Albums?
Answers
1. Choose View > Ratings.
2. Select the Flagged album in the Source list.
3. In the Info panel
4. False. You do not need to export items. iTunes locates your iPhoto library and transfers the albums and photos directly from iPhoto onto your mobile device.
5. Albums enable you to group photos manually by dragging them into the album. Smart Albums are dynamically populated and updated with photos based on conditions you choose.