
![]()
As you start building your games, you’ll be loading in several graphical assets prepared externally in other graphics and drawing applications. However, EaselJS comes bundled with a Graphics class that is built up of a drawing API that you can use to create on-the-fly graphics.
In this chapter, we’ll be taking a close look at how you can accomplish these graphics and the kinds of things you can do with them when building your games. But before you start drawing, you need to get a bit more acquainted with what you are drawing them to. In the previous chapter, you saw the use of a stage object in many situations, but you don’t yet know what it is and how to set it up. Let’s do that now.
Stage is the root level of your EaselJS application. Any display object you add directly to stage becomes a child of the stage’s display list. You’ve seen this in action already with your butterflies.
Before you can start using EaselJS, you need to set up your stage. This is done by creating an instance of Stage and assigning it to an existing canvas element within your document. The following are some examples of how you set up a stage instance for your games:
stage = new createjs.Stage(document.getElementById('canvas'));
Alternatively, you can simply pass in the id of the canvas element.
stage = new createjs.Stage('canvas'),
These examples are really all there is to setting up your stage. You’re now ready to start adding display objects to it and start building your game. But before anything will be rendered to it and displayed, you need to invoke its update method.
stage.update();
This method will render all descendants of the stage to the display list. Any time you add or update a child to the stage, or any of its descendants, you need to update the stage to see the changes. Of course, calling this method every time you make an update to a display object would quickly become tedious. It’s a much better idea to centralize the stage updates in one function. A typical approach to this would be a timer that would constantly do this at a specified rate. You can accomplish this by utilizing the built-in Ticker class.
The Ticker class provides a main interval that is crucial to games development. Its primary purpose is to be that centralized area that calls your code to update the stage, which will reflect upon all added, deleted, and updated sprites that exist in the game. The frequency in which this occurs is referred to as the game’s frame rate.
A typical desirable frame rate is around 60 frames per second, or 60fps. This means that the stage would need to be updated 60 times every second. This rate can be adjusted accordingly depending on the complexity and speed of your game. You typically want to get away with the smallest fps as you can without visually hampering the look and feel of the gameplay. Just remember that the higher your frame rate is, the more taxing it will be on the memory of your computer or device, which can be detrimental to the performance of your game.
Let’s take a look at Listing 2-1 to see this in action.
Listing 2-1. Setting Up the Stage and Ticker
var stage;

// called when the body is loaded
function setupStage() {
   stage = new createjs.Stage(document.getElementById('canvas'));
   createjs.Ticker.setFPS(60);
   createjs.Ticker.addEventListener("tick", tick);
}

function tick(e) {
   stage.update();
}
This is the bare-bones setup that you’ll be using for most of the upcoming examples and games you’ll be building in this book. This Ticker function can also be used to manage what is known as a game loop and can be used for other things such as managing game states. You’ll be getting into those game techniques later in the book, but for now you’ll use this simple approach to assure that your graphics will render appropriately when updating your children in the stage’s display list.
![]() Note When using TweenJS, it is essential that the stage is constantly updated by using this or a similar approach.
Note When using TweenJS, it is essential that the stage is constantly updated by using this or a similar approach.
Before you finally move on to creating graphics and adding them to the stage, let’s consider one more performance technique. As convenient as it may be for you to update the stage at a constant rate, it might not always be necessary. If nothing is changing on the screen, such as a static Game Over screen, why clear and redraw it on every tick? The fact is you really don’t need to. There is no internal management within the Easel framework to prevent redrawing unchanged properties on any existing display objects so you need to manage this yourself. This can easily be achieved by setting the Ticker to paused.
Take a look at the following example, which sets the Ticker to paused, and how it’s handled in the Ticker’s handler function:
createjs.Ticker.setPaused(false);

function runGame(e){
   if(!e.paused){
      stage.update();
   }
}
As you can see, this paused property can be accessed via the event passed into the event handler. You simply only update the stage when the Ticker is not set to paused. This is a handy feature to prevent unnecessary rendering in static moments in your game, or when you simply want to pause the level.
You can also retrieve this property directly from the Ticker class.
var paused = createjs.Ticker.getPaused();
Now that you see how the stage is set up you can finally move on to creating fun and exciting things to add on to it. Unlike the main game chapters in this book, many examples will assume that you have a global stage set up and are running its updates. If at any time you try to replicate an example and nothing shows up, there’s a good chance your stage is either not set up correctly or it’s not being updated.
Creating Graphics
Now that you’ve got your stage properly set up, let’s start adding some graphics to it. Graphics in EaselJS are either vector or bitmaps. Vectors can be easily drawn with code and used in many gaming and application scenarios. In this section, you’ll learn how to create and animate vector graphics. You’ll also explore a handy tool that can convert your Illustrator drawings into code, which can then easily be brought into your application.
Graphics
The Graphics class consists of an API for generating vector drawings. It’s extremely easy to use and comes with shape drawing methods as well as path building functionality. The following example shows how easy it is to create a red square with a black stroke:
var g = new createjs.Graphics();
g.beginStroke('#000'),
g.beginFill('#FF0000'),
g.drawRect(0,0,100,100);
Much like the previous Tween examples, the Graphics methods all return the instance so you can conveniently chain them together.
var g = new createjs.Graphics().beginStroke('#000').beginFill('#FF0000').drawRect(0,0,100,100);
Once you have your graphics constructed, you need to display them. Since Graphics is not a display object, you are not able to simply add it to the stage. The vessel used to hold and display your created graphics is a simple display object called Shape.
Shapes
The Shape class is used to display vector graphics in the display list. Once you’ve created a graphics instance, you can pass it directly into the constructor of Shape. The following code creates a square and passes it in through the constructor of a new Shape object, which then gets added to the stage. Figure 2-1 shows the result.
var g = new createjs.Graphics().beginStroke('#000').beginFill('#FF0000').drawRect(0,0,100,100);

var square = new createjs.Shape(g);
square.x = square.y = 100;
stage.addChild(square);
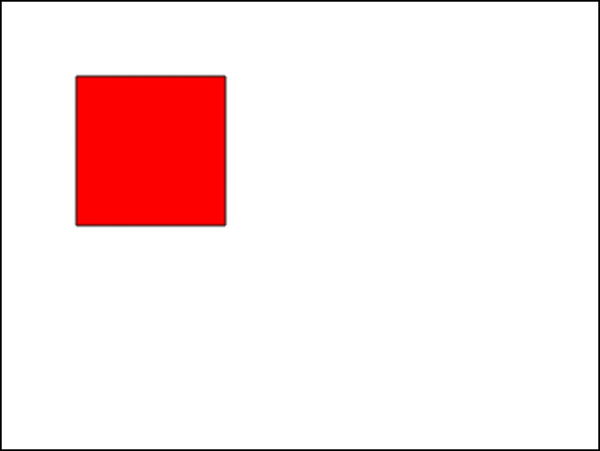
Figure 2-1. Square drawn with the Graphics API
Now that your graphic is in a display object, you can add it to the stage and move it around appropriately. Any instance of Shape will have a Graphics instance named graphics, whether you pass one in through its constructor or not.
You can alternatively create graphics and display them via Shape objects by directly accessing its graphics property, as opposed to passing a new instance into it. The following code demonstrates how you can use this approach by creating a semi-transparent screen that covers the entire stage:
var screen = new createjs.Shape();
screen.graphics.beginFill(createjs.Graphics.getRGB(0, 0, 0, .6));
screen.graphics.drawRect(0, 0, stage.canvas.width, stage.canvas.height);
stage.addChild(screen);
Notice that you can control the transparency of any color by using the getRGB static method, allowing you to also specify an alpha property. You’ll also notice that the stage itself doesn’t have any properties specifying its size so you access its width and height via its canvas property, which is a reference to the HTML Canvas element that it is tied to.
Let’s take a look at some of the other shapes that you can quickly build via the Graphics class (see Listing 2-2). The shapes are shown in Figure 2-2.
Listing 2-2. Various Shapes Drawn with the EaselJS Graphics Class
//RECTANGLE
var rectangle = new createjs.Shape();
rectangle.graphics.beginStroke('#000'),
rectangle.graphics.beginFill('#FF0000'),
rectangle.graphics.drawRect(0, 0, 150, 100);
rectangle.x = rectangle.y = 20;
stage.addChild(rectangle);

//CIRCLE
var circle = new createjs.Shape();
circle.graphics.beginStroke('#000'),
circle.graphics.beginFill('#FFF000'),
circle.graphics.drawCircle(0, 0, 50);
circle.x = 250;
circle.y = 70;
stage.addChild(circle);

//STAR
var poly = new createjs.Shape();
poly.graphics.beginStroke('#000'),
poly.graphics.beginFill('#90ABC2'),
poly.graphics.drawPolyStar(0, 0, 60, 6, 0.6);
poly.x = 400;
poly.y = 70;
stage.addChild(poly);

//TRIANGLE
var tri = new createjs.Shape();
tri.graphics.beginStroke('#000'),
tri.graphics.beginFill('#00FF00'),
tri.graphics.moveTo(50, 0)
   .lineTo(0, 100)
   .lineTo(100, 100)
   .lineTo(50, 0);
tri.x = 20;
tri.y = 150;
stage.addChild(tri);

//ROUNDED RECTANGLE
var roundedRectangle = new createjs.Shape();
roundedRectangle.graphics.beginStroke('#000'),
roundedRectangle.graphics.beginFill('#F7D0D1'),
roundedRectangle.graphics.drawRoundRect(0,0,400,100,10);
roundedRectangle.x = roundedRectangle.y = 150;
stage.addChild(roundedRectangle);

stage.update();

Figure 2-2. Various shapes using Graphics API
Some of the shapes in Listing 2-2 are drawn via the built-in shape-drawing methods, but the triangle shows how you can build custom shapes by creating paths. The moveTo method positions your path’s starting point and the lineTo draws the path to the specified x and y positions. Closing a path will use your previously defined fill color to fill it in.
You can essentially draw any shape you can imagine, but manually drawing these path coordinates can be pretty tedious and complicated. If you plan on using some more interesting shapes in your game, you might want to check out this really neat tool that will do the graphics code for you.
Drawscript is an extension that can be used to export graphics code from vector shapes drawn in Illustrator. It was developed by Adobe gaming evangelist Tom Krcha and can be downloaded for free via the web site drawscri.pt (see Figure 2-3). At the time of writing this book, Drawscript is in beta and is actively being updated with more features.
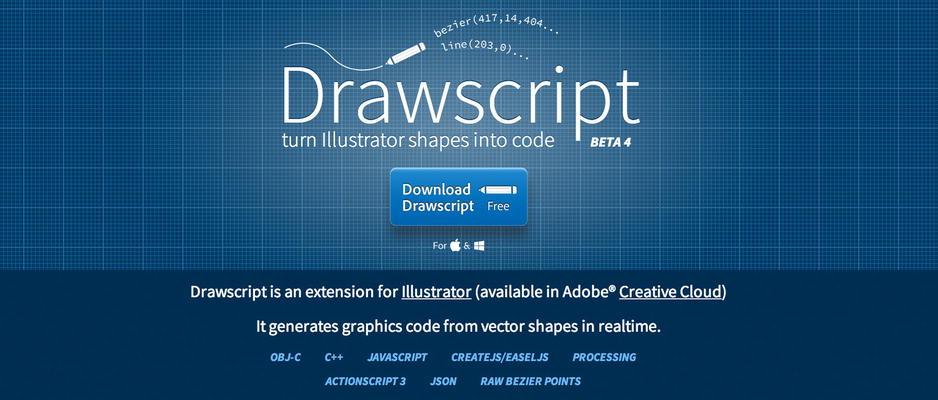
Figure 2-3. Web site for Drawscript, an Ilustrator extenstion
Drawscript exports code for several platforms, including EaselJS. Because it handles the complex math and code needed for drawing detailed shapes, you aren’t as limited as you might be if you were to write the code yourself.
After you install the extension, open the Drawscript window under Extensions. With it open, make sure you select the shape you’ve drawn and click Generate in the Drawscript window. This will generate the necessary code that you can then copy and bring into your EaselJS project (see Figure 2-4).
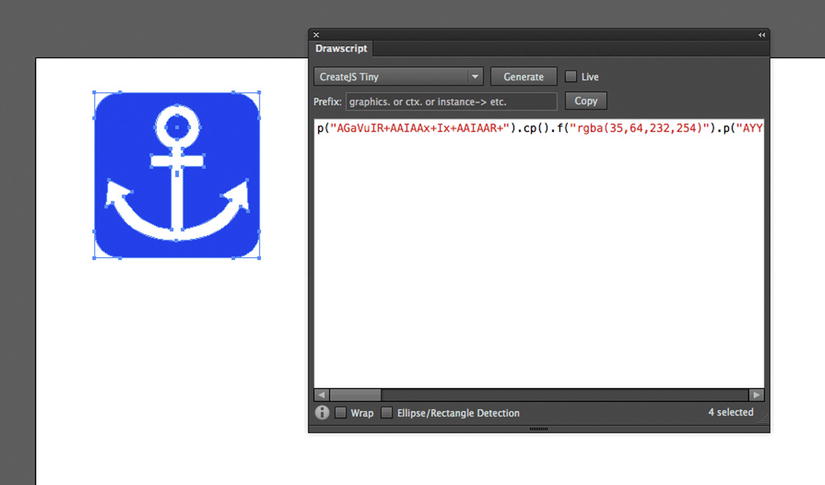
Figure 2-4. Drawscript in use in Illustrator
The code generated looks a bit different than what you’ve seen so far when creating graphics. For starters, it utilizes an API called tiny API that is included in the Graphics class. This is essentially one- or two-letter method names that act as shortcuts when writing graphics code (see Figure 2-5). You can find the complete chart of shortcuts in the documentation for Graphics.
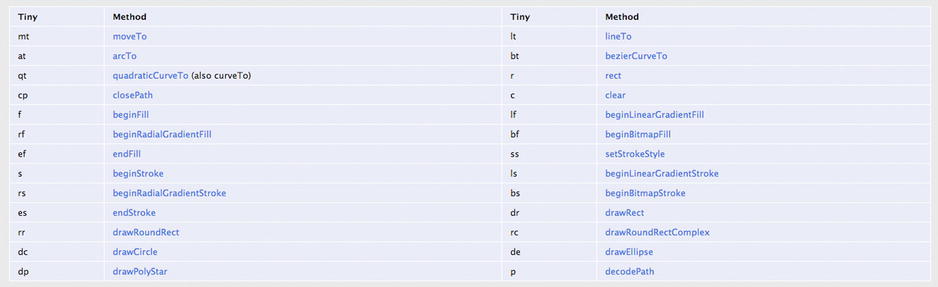
Figure 2-5. Graphics Tiny API cheat sheet
Along with utilizing this tiny API, Drawscript uses the decodePath API also included in Graphics. This dramatically shortens and encodes the code needed for drawing paths. The following example shows the code generated by the anchor shape in Illustrator:
p("AGaVuIR+AAIAAx+Ix+AAIAAR+").p().f("rgba(35,64,232,254)").p("AYYS6YAABkhaBQhkAAIsMAAYhkAAhQhQAAhkIAAsWYAAhkBQhQBkAAIMMAAYBkAABaBQAABkIAAMW").cp().ef().f("rgba(255,255,255,254)").p("AOsLuIiMAAIAAhQICMAAIAAAAIAAgoYg8gUgyg8AAhGYAAhaBGhGBQAAYBaAABGBGAABaYAABGgyA8hGAUIAAAoIAAAAICWAAIAABQIiWAAIAAAAIAAG4YAAAADmgUBki0Ig8goIC0hkIAKDSIg8geYAAAAhQDwloAAYloAAhQkOAAAAIg8AeIAei+ICgBQIg8AoYAAAABaDSDwAUIAAm4IAAAA").cp().ef().f("rgba(35,64,232,254)").p("AQuHgYAAAogoAogyAAYgoAAgogoAAgoYAAgyAogeAoAAYAyAAAoAeAAAy").cp().ef();
The generated code begins a series of chained methods, which are intended to be called from a Graphics object. You then pass that along to a Shape object and add it to the stage as you would with any other graphics example that you’ve learned so far. Figure 2-6 shows the image after its been exported.
var g = new createjs.Graphics();

g.p("AGaVuIR+AAIAAx+Ix+AAIAAR+").cp().f......... .ef();
var s = new createjs.Shape(g);
stage.addChild(s);

Figure 2-6. Anchor shape drawn in Illustrator and exported via Drawscript
The result is a vector shape, completely drawn with code. Because of this, you can scale and manipulate this shape in many ways without pixelating it. Although this approach can be useful in some situations, the overuse of vector shapes can be extremely taxing for your processor. Bitmap graphics, which will be fully explored in Chapter 5, are the preferred format for complex graphics in most gaming environments. Be sure to weigh your options when deciding on the graphics format for your game or application.
You’ve now successfully drawn and added shapes to the stage, but shapes that just sit there are no fun. This is a games book, after all. As with the Bitmap example in the previous chapter, you can use the same tweening methods to a shape because it too is a display object. Let’s tween a square by rotating it 360 degrees (see Listing 2-3). The rotating shape is shown in Figure 2-7.
Listing 2-3. Rotating a Square 360 Degrees Using Tween
var g = new createjs.Graphics();
g.beginStroke('#000').beginFill('#FF0000').drawRect(0, 0, 100, 100);
var square = new createjs.Shape(g);
square.x = 150;
square.y = 100;
stage.addChild(square);
createjs.Tween.get(square).to({rotation:360},3000);
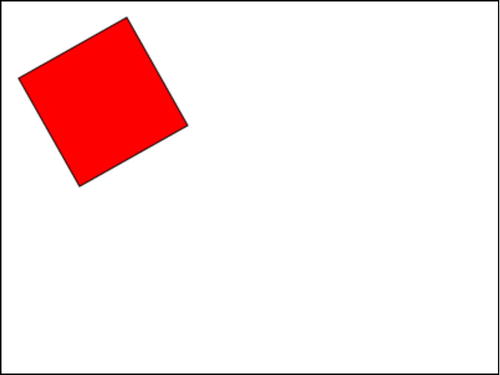
Figure 2-7. Square rotating on upper left axis
You first draw your square and center it on the stage. You are able to quickly rotate it just fine but there is a clear problem. Your goal is to have your square spin dead center in the middle of the stage. The issue is that the registration point defaults to the upper left corner of the square, which acts as its axis point for the rotation. This can be an undesirable effect on many of your game sprites so it’s best in most situations to have your registration points in the center (see Listing 2-4). This results in a centered rotating shape like the one in Figure 2-8.
Listing 2-4. Rotating a Square with a Centered Registration Point
var g = new createjs.Graphics();
g.beginStroke('#000').beginFill('#FF0000').drawRect(0, 0, 100, 100);
var square = new createjs.Shape(g);
square.regX = square.regY = 50;
square.x = stage.canvas.width / 2;
square.y = stage.canvas.height / 2;
stage.addChild(square);
createjs.Tween.get(square).to({rotation:360},3000);

Figure 2-8. Square rotating on center axis
Using regX and regYon your shape object forces the graphics registration point to be where you specify it. In this case, you know that your square is 100 pixels tall and 100 pixels wide, so hard-coding its new registration point is easy to accomplish.
![]() Note When it comes to drawing shapes, you can alternatively accomplish this by offsetting the x and y position of where you start drawing your graphics.
Note When it comes to drawing shapes, you can alternatively accomplish this by offsetting the x and y position of where you start drawing your graphics.
This gives you a much better result. You also have a more exact measurement on where you want to position your sprites. Because your 0 x and y values are now in the center, you can easily position the sprite in the center of the stage by factoring in the width and height of the canvas.
You’ve just seen how easy and convenient tweening custom shapes can be but it’s not always an ideal situation when animating game sprites around the stage. For example, imagine that you have several random power pellets bouncing around your level. A tween is great for one-off animations but not for the continual motion needed for many game elements.
A typical technique for animating game sprites is to utilize the game loop by setting up an update/render process. This technique usually first calls some sort of update method that evaluates your sprites’ current positions and sets them up with new properties for rendering to the next desired locations. The render method then simply renders the sprites by using the new temporary properties, typically assigned to each sprite during the update process.
You can use the tick method created by Ticker to call on these two functions. In this example, you have a circle that simply moves across the stage.
function updateCircle () {
   var nextX = circle.x + 5;
   circle.nextX = nextX;
}

function renderCircle () {
   circle.x = nextX;
}

function tick(e) {
   if(!e.paused){
      updateCircle();
      renderCircle();
      stage.update();
}
This simple game loop example will gradually move the circle across the screen horizontally. The update and render methods get called on each game tick, followed by the update call on stage to finalize the actual rendering of your graphics.
![]() Note Because of the dynamic nature of JavaScript, you can easily “dynamically inject” properties and methods into any object. In the previous example, nextX is a custom property injected into your circle shape. This approach will be used many times in this book as a way to quickly extend display objects by giving them extra, useful values.
Note Because of the dynamic nature of JavaScript, you can easily “dynamically inject” properties and methods into any object. In the previous example, nextX is a custom property injected into your circle shape. This approach will be used many times in this book as a way to quickly extend display objects by giving them extra, useful values.
You might be wondering why you didn’t simply change the x position in your update method. The reason you want to keep these calls separated is because you rarely change the sprite’s next position without first evaluating its current locations and/or the game’s current situation. You handle all of your physics logic within these update methods, separated from the function that ultimately moves them. In an even more complex game loop, you might call on several otherupdate methods from here as well, where sprites or containers might handle calculations within themselves.
Listing 2-5 shows an example of this process in action. Albeit a simple demonstration, it should give you an idea on how the update/render cycle is executed within a game loop.
Listing 2-5. Bouncing a Ball Against the Walls Using a Simple Update/Render Cycle
var stage = new createjs.Stage(document.getElementById('canvas'));
var direction = 1;
var speed = 10;
var circle = new createjs.Shape();
circle.graphics.beginStroke('#000'),
circle.graphics.beginFill('#FFF000'),
circle.graphics.drawCircle(0, 0, 50);
circle.radius = 50;
circle.x = 100;
circle.y = 300;

stage.addChild(circle);

createjs.Ticker.addEventListener("tick", tick);
createjs.Ticker.setFPS(60);

function updateCircle() {
   var nextX = circle.x + (speed * direction);
   if (nextX > stage.canvas.width - circle.radius) {
       nextX = stage.canvas.width - circle.radius;
       direction *= -1;
   }
   else if (nextX < circle.radius) {
       nextX = circle.radius;
       direction *= -1;
   }
   circle.nextX = nextX;
}
function renderCircle() {
   circle.x = circle.nextX;
}

function tick(e) {
   updateCircle();
   renderCircle();
   stage.update();
}
Here you have a ball that bounces back and forth between the walls of the stage. In the update function, you first check what the location of the ball will be if you were to change its x position by factoring in the current speed and direction. You set this value to a temporary variable. If this value is beyond the bounds of either side of the stage, you set that value so that it would set the ball directly against the wall in its path; in other words, it won’t let it extend past your boundaries. You then assign your ball a variable that stores what its new location should be the next time it’s rendered. The render function is then called, where you then assign the new x position to the ball.
Another great way you can use the power of the drawing API is for drawing UI elements in your games and applications. This can be useful when creating screens, modals, buttons, and a lot more.
A common use for drawing graphics on the fly is for building a preloader bar. You’ll need to show some sort of indication that your game is loading as it takes more and more time for your assets to load. PreloadJS provides events that you can use to indicate progress in your load process so drawing a preloader to accompany that process is ideal.
Let’s wrap up this chapter by building a quick prototype of how this might be accomplished. You’ll be building a self-contained, encapsulated preloader object in Chapter 8, but before you learn some of those advanced coding techniques, you can manually call an update function on the preloader. This will allow you to see how this UI component is drawn and how it works.
Preloader Prototype will be built to demonstrate how you can use code-written graphics to create UI elements, and how you can use animation for updating them. This preloader will consist of an outline graphic with a fill, which will animate to simulate a load progress.
- Draw a preloader bar with an outline and fill shape to represent load progress.
- Manually update the bar with a statically incremented value.
- Remove preloader when load has reached 100%.
Start by creating an HTML file that includes the necessary CreateJS libraries, and a canvas element. You’ll be writing your JavaScript right in the document so you don’t need to include any custom scripts. Listing 2-6 shows the HTML file so far.
Listing 2-6. HTML Elements for the Preloader
<!DOCTYPE html>
<html>
<head>
   <title></title>
   <script src="lib/easeljs-0.7.1.min.js"></script>
   <script src="lib/tweenjs-0.5.1.min.js"></script>
</head>
<body onload="init()" style="margin: 20px">
<canvas id="canvas" width="1024" height="768" style="border: black solid 1px"></canvas>
</body>
</html>
Next, open a script block by adding a script element. You will write all of your code here. A few variables are first declared, as shown in Listing 2-7.
Listing 2-7. Variables Declared for the Preloader
<script>
   const LOADER_WIDTH = 400;
   var stage, loaderBar, loadInterval;
   var percentLoaded = 0;
A constant is created to hold the size of the preloader. Then the stage reference is declared, along with a few other variables. A final value of 0 is set to percentLoaded so that the bar graphic starts out at a width of 0. The first function that is called is init, which is triggered when the body is finished loading (see Listing 2-8).
Listing 2-8. The init Function, Called when Body is Loaded
function init() {
   setupStage();
   buildLoaderBar();
   startLoad();
}
The init function initializes the application by calling a series of functions. The first few are used for preparing the stage and drawing your preloader graphics to it (see Listing 2-9).
Listing 2-9. Setting Up the Stage and Drawing an Empty Loader
function setupStage() {
   stage = new createjs.Stage(document.getElementById('canvas'));
   createjs.Ticker.setFPS(60);
   createjs.Ticker.addEventListener("tick", function(e){
      stage.update();
   });
}
function buildLoaderBar() {
   loaderBar = new createjs.Shape();
   loaderBar.x = loaderBar.y = 100;
   loaderBar.graphics.setStrokeStyle(2);
   loaderBar.graphics.beginStroke("#000");
   loaderBar.graphics.drawRect(0, 0, LOADER_WIDTH, 40);
   stage.addChild(loaderBar);
}
The setupStage function does your typical stage setup. The stage variable is set for global reference, and the Ticker is set to fire 60 times per second, which will update the stage on every tick. The next function, buildLoaderBar, draws an empty loader bar to the stage, which is now just a black stroke with no fill. These graphics will be cleared and redrawn each time you have a progress update. This is done in the updateLoaderBar function, shown in Listing 2-10.
Listing 2-10. Rotating a Square 360 Degrees Using Tween
function updateLoaderBar() {
   loaderBar.graphics.clear();
   loaderBar.graphics.beginFill('#00ff00'),
   loaderBar.graphics.drawRect(0, 0, LOADER_WIDTH * percentLoaded, 40);
   loaderBar.graphics.endFill();
   loaderBar.graphics.setStrokeStyle(2);
   loaderBar.graphics.beginStroke("#000");
   loaderBar.graphics.drawRect(0, 0, LOADER_WIDTH, 40);
   loaderBar.graphics.endStroke();
}
The first thing that is done in this function is the clearing of all existing graphics. Next, you start with creating the loader fill by using the current percentLoaded value. This percentage is multiplied against the predetermined width of the preloader. You create the stroke afterwards so it sits nicely on top of the fill.
In this prototype, you are manually updating the load percentage in an interval, which is set up in the final function called in the init function startLoad. This interval will repeatedly update your percentage in the function updateLoad. Both functions are shown in Listing 2-11.
Listing 2-11. An Interval is Created to Update the Percentange for the Preloader Graphics
   function startLoad() {
      loadInterval = setInterval(updateLoad, 50);
   }
   function updateLoad() {
      percentLoaded += .005;
      updateLoaderBar();
      if (percentLoaded >= 1) {
         clearInterval(loadInterval);
         stage.removeChild(loaderBar);
      }
   }

</script>
The interval function updateLoad simply updates the percentage by .005 and calls on the updateLoaderBar function to update the graphics. If you’ve reached the end of the load, you clear the interval and remove the graphics from the stage. Finally, you close your script block. The final result, shown in Figure 2-9, demonstrates the load progress at about 60 percent.
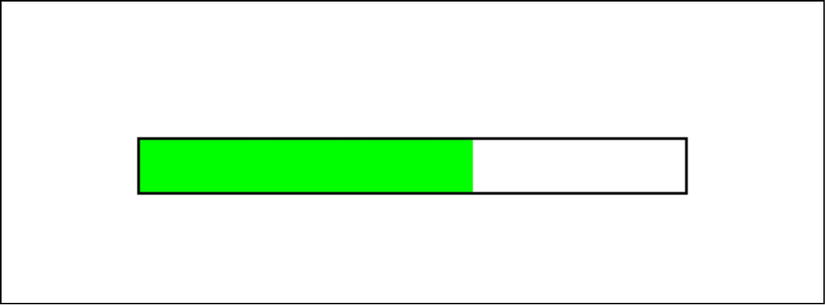
Figure 2-9. Preloader animating to mimic load progress
This preloader is a nice, practical example of what you can do with graphics in EaselJS. You managed to create a visually rich feature using nothing but a little math and the built-in drawing API. You’ll be wrapping this preloader up nicely in its own reusable object in Chapter 8, but the drawing techniques will remain the same.
Summary
This chapter demonstrates the amount of visual development that you can accomplish without loading a single asset. The drawing API gives you the power to create visuals, from primitive shapes to complex paths and gradients. With a little help from Drawscript, your shapes and colors can get even more detailed by allowing you to draw them inside of Illustrator and pasting the code into your application. We also took a quick look at animations using both TweenJS and more advanced, manual approaches achieved by tapping into the interval fired from the Ticker class.
Lastly, you used your newly learned drawing skills to create a practical UI element that will give visual feedback that can be used with PreloadJS or other situations where the user needs to wait for action.
Now that you have custom graphics added to the stage, the next logical step in game development is making them react to user input, as well as give the user feedback on their progress.