![]()
Now that you have a solid understanding of how graphics are created and how you can animate them, some player interaction is in order to turn your visuals into playable, interactive content.
I’ll discuss using both mouse and keyboard controls to capture user input, and you’ll view a few practical examples that show how to accomplish some common gaming features. Text will also be introduced to display the necessary messaging to provide feedback to the player.
EaselJS not only handles your canvas drawing, but also the management of mouse positions and actions, and whether they intersect with any of your display objects. This allows you to mimic mouse interactions. Starting with the utmost basics of all interactivity, we’ll start by handling some clicks on some simple shape objects.
Mouse Clicks
A mouse event is set up and handled like many other typical interactive environments you might already be used to, such as Flash or HMTL DOM. An event listener is applied to the display object for a specific type of mouse interaction, and an event handler is written to accept and handle it.
troll.addEventListener('click',trollAttacked);

function trollAttacked(e){
   alert('ouch'),
}
In this troll attacking example, you add the event listener directly on your display object, and you write your function to handle it.
Another way to achieve this would be to use an anonymous function as your event handler.
troll.addEventListener('click', function (e) {
   alert('ouch'),
});
This approach is typical in JavaScript development. Depending on the length and complexity of your function’s code, there will be times when you’ll want to keep your handler function explicitly defined, but anonymous functions can be handy for many reasons. Not only can they simplify the flow of your code for management and readability, but they can also be crucial when managing scope in many situations.
As previously promised, you’ll be diving deep into scope management as your games become more difficult, but for now you can simply take a look at how you can obtain a reference to the object that triggered the event.
troll.addEventListener('click', function (e) {
   stage.removeChild(e.target);
});
This approach uses the event object passed into the handler. This event object contains many properties that can help you identify what was clicked and where on the stage, or on the object, the mouse pointer was when the event was fired. You are able to kill the appropriate troll by using the target property in the event object, which is a reference to the clicked display object.
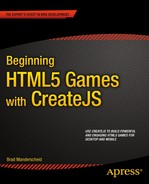
You can similarly use the dblclick event to achieve the same effect for double-clicks. Listing 3-1 is an example that uses this event to alert a message when the circle was double-clicked (see Figure 3-1).
Listing 3-1. Registering for Double-Click Events
var circle = new createjs.Shape();
circle.graphics.beginFill('#0000FF').drawCircle(0, 0, 50);
circle.x = stage.canvas.width / 2;
circle.y = stage.canvas.height / 2;
circle.name = 'Blue Circle';
stage.addChild(circle);
stage.update();

circle.addEventListener('dblclick', function (e) {
   alert(e.target + ' was double clicked!'),
});
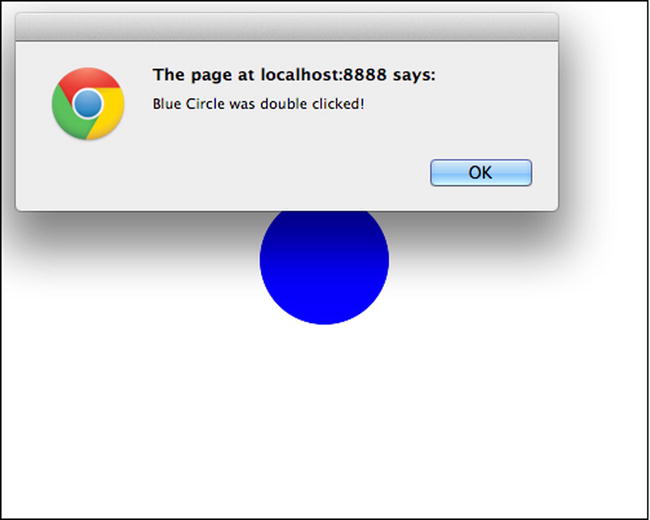
Figure 3-1. Alert message when the circle was double-clicked
You can also register for rollover and rollout events on display objects. As you can probably imagine, the legwork needed to constantly monitor the mouse location and compare it to the position of any display object can be taxing. Therefore, it should probably be used as sparingly as possible in the Canvas environment. Because of this, EaselJS doesn’t allow this functionality by default. You can turn it on by calling the following method:
stage.enableMouseOver();
After invoking this method on stage, you can now register and properly handle mouseover and mouseout events. Notice that you can also easily change the cursor of the mouse by using any valid CSS style. Figure 3-2 shows your circle’s alpha value decrease when the mouse is hovering it.
circle.cursor = 'pointer';

circle.addEventListener("mouseover", function (e) {
   circle.alpha = 1;
});

circle.addEventListener("mouseout", function (e) {
   circle.alpha = .5;
});
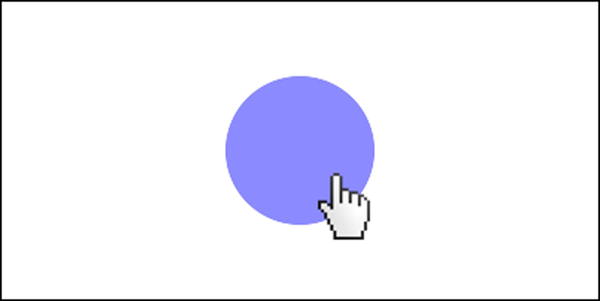
Figure 3-2. Display object rollover effect and cursor change
Drag and Drop
EaselJS does not come with built-in functionality for dragging and dropping display objects but you can easily set this up with a combination of a few mouse events. Take a look at the code in Listing 3-2, which accomplishes drag-and-drop functionality.
Listing 3-2. Creating Drag-and-Drop Functionality
circle.addEventListener('mousedown',function(e){
   stage.addEventListener('stagemousemove',function(e){
      circle.x = stage.mouseX;
      circle.y = stage.mouseY;
   });

   stage.addEventListener('stagemouseup',function(e){
      e.target.removeAllEventListeners();
   });
});
First, you register for a mousedown event on your circle. This differs from the click event as it is fired as soon as you click down, where the click event will fire only after quickly releasing your mouse button over the object. Once you press down on the circle, you immediately listen for every update of the mouse position by setting a listener for stagemousemove, directly on the stage.
In the stagemousemove handler, you change the position of your circle to match that of the mouse, which will give you the illusion of grabbing and dragging that item. In addition to registering for these mouse updates, you also want to listen for when you let go of your circle (i.e., drop it). The stagemouseup will work nicely for this, as it will be triggered as soon as you let go of the mouse button.
Once you do this, you can easily remove both the mousemove and mouseup event listeners on your stage by calling its removeAllEventListeners. Since you are no longer registered for mouse move events, the circle ceases to follow your mouse and is dropped when you let go.
With this drag-and-drop approach with display objects, let’s put together a full example that puts this into action, and then add a little bit of game logic to determine if you are dropping your shapes in the appropriate, predetermined locations.
![]() Note As some of the examples get longer and more complex, I’ll be taking a function-by-function approach to explaining the code.
Note As some of the examples get longer and more complex, I’ll be taking a function-by-function approach to explaining the code.
Color Drop
Color Drop is a simple color-matching game where the player must drop each game piece in the correct slot by matching their colors.
- Four square slots are displayed on the top of the screen.
- Four blocks are randomly placed on the bottom of the screen, each with a color that matches a slot at the top of the screen.
- The player must drag each block into its corresponding slot, which is accomplished by matching their colors.
- If a player drops it in the wrong slot, the block will animate back to where it was grabbed.
- If a player drops it in the correct slot, it should animate to snap in place of the slot.
- Once the player fills all four slots, alert the user that they have won the game.
First, set up the HTML document that includes a Canvas element and the necessary CreateJS file includes (see Listing 3-3). The game code will be written in a separate script (see Listing 3-4), so be sure to create this file and include it in the document.
Listing 3-3. HTML Document for Color Drop
<!DOCTYPE html>
<html>
<head>
<title>Color Drop Game</title>

<script src="js/lib/easeljs-0.7.1.min.js"></script>
<script src="js/lib/tweenjs-0.5.1.min.js"></script>
<script src="js/colorDrop.js"></script>
</head>

<body onload="init()">

<canvas id="canvas" width="1000" height="800" style="border: black solid 1px"></canvas>

</body>

</html>
Listing 3-4. colorDrop.js - Game Variables and init Function
var stage;
var shapes = [];
var slots = [];
var score = 0;

function init() {
   stage = new createjs.Stage("canvas");
   buildShapes();
   setBlocks();
   startGame();
}
First, some variables are declared to hold values that you’ll need throughout your game code. The first is the stage reference and the second two are arrays that will hold the blocks you drag, as well as the slots that you drop them on. Lastly, a score variable is declared to hold the game score.
The init function is called when your body loads and kicks off your game. The Stage object is created and set to the stage variable.
Next is a series of functions that set up and start the game, the first being a function (see Listing 3-5) used to create all of the shape objects that you will be using in the game.
Listing 3-5. colorDrop.js – buildShapes Function
function buildShapes() {
   var colors = ['blue', 'red', 'green', 'yellow'];
   var i, shape, slot;
   for (i = 0; i < colors.length; i++) {
      //slots
      slot = new createjs.Shape();
      slot.graphics.beginStroke(colors[i]);
      slot.graphics.beginFill('#FFF'),
      slot.graphics.drawRect(0, 0, 100, 100);
      slot.regX = slot.regY = 50;
      slot.key = i;
      slot.y = 80;
      slot.x = (i * 130) + 100;
      stage.addChild(slot);
      slots.push(slot);
      //shapes
      shape = new createjs.Shape();
      shape.graphics.beginFill(colors[i]);
      shape.graphics.drawRect(0, 0, 100, 100);
      shape.regX = shape.regY = 50;
      shape.key = i;
      shapes.push(shape);
   }
}
The buildShapes function creates all of the visual assets needed for the game. You start by creating an array that holds the colors used for building the blocks. A series of reusable variables are also declared for loop iterations, as well as the display objects that you’ll create throughout the function.
![]() Note It’s good practice to declare reusable variables to prevent unnecessarily creating new ones each time you simply need a temporary holder to represent an object. It’s also a good idea to declare all local variables at the top of your function for easy reference.
Note It’s good practice to declare reusable variables to prevent unnecessarily creating new ones each time you simply need a temporary holder to represent an object. It’s also a good idea to declare all local variables at the top of your function for easy reference.
The rest of the function will consist of one loop that creates the game assets and assigns them their necessary properties, for both display and logic. Using the loop’s iterator value you can both build and position the slots in a horizontal line at the top of the stage. While the slots are actually drawn to the stage in this loop, the blocks are simply instantiated and pushed to an array so you can draw them later at random positions.
A key property is assigned to each slot and block using the iterator value, and can be used later in the game to determine matches when you drop blocks on the slots.
With the slots drawn on the stage and your block objects instantiated, you are ready to draw the blocks in random positions (see Listing 3-6).
Listing 3-6. colorDrop.js – setBlocks Function
function setBlocks() {
   var i, r, shape;
   var l = shapes.length;
   for (i = 0; i < l; i++) {
      r = Math.floor(Math.random() * shapes.length);
      shape = shapes[r];
      shape.homeY = 320;
      shape.homeX = (i * 130) + 100;
      shape.y = shape.homeY;
      shape.x = shape.homeX;
      shape.addEventListener("mousedown", startDrag);
      stage.addChild(shape);
      shapes.splice(r, 1);
   }
}
A similar loop is created to position the blocks, this time along the bottom. Each iteration grabs a random index out of the shapes array before placing it on the screen. After you add it, you remove it from the array so you don’t grab the same object again. This makes the array length shorter so it’s imperative that you first declare that initial array length and use it to write your loop. Otherwise, you would get undesired results.
As you randomly choose and draw each block, you also set a few properties to them for reference on where it was initially drawn. This lets you put it back to this position if you incorrectly drop it somewhere else on the stage.
Finally, a mousedown event listener is registered to each shape so you can create its dragging functionality. This handler has a good amount of code so you’ll avoid writing this function anonymously to preserve legibility.
The last function you call from init sets up a simple game loop to continuously update the stage (see Listing 3-7). At this point, your game objects are drawn on the stage and registered to fire a function for handling their drags. Figure 3-3 shows the game elements drawn on the stage and ready for interaction.
Listing 3-7. colorDrop.js – startGame Function
function startGame() {
   createjs.Ticker.setFPS(60);
   createjs.Ticker.addEventListener("tick", function(e){
      stage.update();
   });
}
Figure 3-3. All boxes and slots added to the stage
Now that all game elements are added to the stage and the mouse event listeners are attached to the boxes, you need to write the game logic that will fire when the pieces are grabbed. Listing 3-8 shows this function and how you use it to handle dragging, dropping, and determining if the player’s moves are correct.
Listing 3-8. colorDrop.js – startDrag Function Used to Set Up Your Game Logic
function startDrag(e) {
   var shape = e.target;
   var slot = slots[shape.key];

   stage.setChildIndex(shape, stage.getNumChildren() - 1);
   stage.addEventListener('stagemousemove', function (e) {
      shape.x = e.stageX;
      shape.y = e.stageY;
   });

   stage.addEventListener('stagemouseup', function (e) {
      stage.removeAllEventListeners();
      var pt = slot.globalToLocal(stage.mouseX, stage.mouseY);
      if (shape.hitTest(pt.x, pt.y)) {
         shape.removeEventListener("mousedown",startDrag);
         score++;
         createjs.Tween.get(shape).to({x:slot.x, y:slot.y}, 200,
            createjs.Ease.quadOut).call(checkGame);
      }
      else {
         createjs.Tween.get(shape).to({x:shape.homeX, y:shape.homeY}, 200,
            createjs.Ease.quadOut);
      }
   });
}
This function acts as the event handler when a block has been grabbed and also handles the entirety of the game logic. Let’s break this down to examine what is going on.
A variable is first created to hold a reference to the instance of the block that was grabbed, as well as a reference to the slot that it actually belongs to by using its key property. Since the slots were never shuffled, their keys match their index in the array that holds the reference to them.
The next line uses a method that lets you assign objects in the display list to a specific display index. In other words, you can reorder the layers of displays object by using this handy function:
stage.setChildIndex(shape, stage.getNumChildren() - 1);
Since all of the blocks are directly in the stage’s display list, you call this method on stage. The first parameter is the child you want to access, and the second is the “layer” in which you want to move it to. You can access the top layer by referencing the number of children the stage currently has and forcing your grabbed block to take that place. Similar to arrays, the display list is zero-based so you need to subtract 1 from the length returned to reference the desired index. The object it replaces in the list is then pushed down one index and the others beneath it follow suit. This assures you that the blocks won’t render underneath any other shapes as you drag them around the stage.
You then proceed with the drag-and-drop functionality that was covered earlier. The drop function removes the dragging of the block and then moves right into the game logic to determine if it was dropped on the appropriate slot. A Point object is first assigned to a variable to hold the x and y values of where your mouse cursor was when you released the mouse button. You’ll need this to determine if the correct slot was under the mouse when you dropped the block. In a drag-and-drop scenario, you can get away with simply evaluating your mouse point, which is also the center of your dragged object, to determine if it was over a drop target. You then invoke the hitTest method on the slot to determine if any of its displayable area intersected with the mouse point when it was let go. If it did, you know you have dropped it on the correct slot and you increase the score. You also take away its dragging functionality by removing its mousedown listener. It is then tweened to snap in place with the slot by using the slot’s x and y positions. If the hit test was not passed, you tween the block back to its original position where the player can pick it up and try again. Both tween callbacks are assigned to your last function, checkGame (see Listing 3-9).
Listing 3-9. colorDrop.js – checkGame Function
function checkGame(){
   if(score == 4){
      alert('You Win!'),
   }
}
The final function checks if the player has reached four matches, and if they have, alerts them that they have won. Figure 3-4 shows the alert window displayed when the player wins the game.
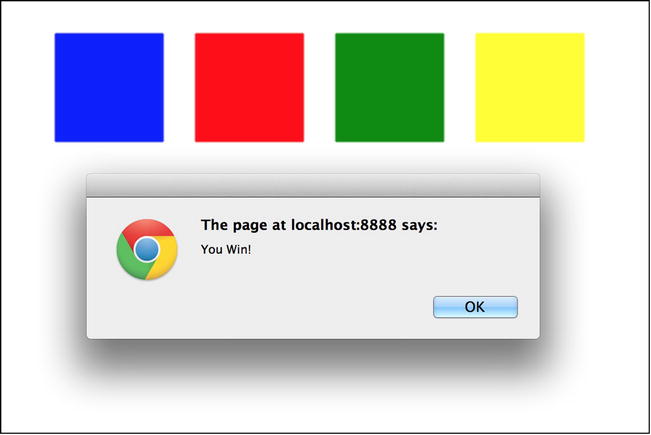
Figure 3-4. Color Drop win message
This was your first real game-like example so far, and although extremely basic, you’re starting use your newly learned skills to create interactive content. You have a few more things to learn to improve the interactive experience in games, one of which is the keyboard and how you can use it to control game objects.
The keyboard is a crucial component to computer game development. It’s the next best, tactical piece of hardware after the video game controller. Many would argue it’s even better.
Many of the games in this book will be mobile friendly so mouse events, which double as tap events, will often times be your only choice in creating an interactive experience. Desktop games, however, don’t have that limitation and plenty of game developers have no desire to even reach the mobile space at all. That developer might be you, so let’s dive into the keyboard controls that you’ll be using in the game project in the next chapter.
Keyboard events are similar to mouse events and you set them up pretty much identically. The difference is that you typically add the keyboard event listeners to the HTML document or window object, as opposed to display objects directly. The following are two approaches to handling keyboard events:
//approach 1
window.addEventListener('keydown',function(e){
   //move hero
});

//approach 2
window.onkeydown = moveHero;

function moveHero(e){
   //move hero
};
A crucial piece of information needed is to determine what key was pressed so you can take the appropriate actions. You can access this by the keyboard event passed into the handler, which holds a reference to the key that triggered it.
window.onkeydown = moveHero;

function moveHero(e){
   alert(e.keyCode + ' was pressed!'),
}
It’s your job to decipher what key code corresponds with what key and how to react to it. To make this a bit more readable, creating some string constants for the key codes you need can be worth the setup. Listing 3-10 is an example of a simple directional pad using the keyboard arrow keys and constants to represent the key codes.
Listing 3-10. Determining Key Pressed by keyCode
const ARROW_KEY_LEFT = 37;
const ARROW_KEY_UP = 38;
const ARROW_KEY_RIGHT = 39;
const ARROW_KEY_DOWN = 40;

window.onkeydown = onDPad;

function onDPad(e){
   switch (e.keyCode){
      case ARROW_KEY_LEFT:
         console.log('move left'),
         break;
      case ARROW_KEY_UP:
         console.log('move up'),
         break;
      case ARROW_KEY_RIGHT:
         console.log('move right'),
         break;
      case ARROW_KEY_DOWN:
         console.log('move down'),
         break;
   }
}
![]() Note The const keyword is not supported in all browsers, primarily Internet Explorer. Although this keyword is extremely helpful, you may need to simply declare these values as variables, knowing that the all-caps naming convention means they should never be altered.
Note The const keyword is not supported in all browsers, primarily Internet Explorer. Although this keyword is extremely helpful, you may need to simply declare these values as variables, knowing that the all-caps naming convention means they should never be altered.
Let’s put this to use in an example with a bit more detail. You’ll draw a paddle that the player can control with the arrow keys by moving it left and right along the bottom of the screen (see Listing 3-11).
Listing 3-11. Controlling a Game Paddle Using Arrow Keys
const ARROW_KEY_LEFT = 37;
const ARROW_KEY_RIGHT = 39;

var stage,padel;
var leftKeyDown,rightKeyDown = false;

function init() {
   stage = new createjs.Stage(document.getElementById('canvas'));
   createjs.Ticker.addEventListener("tick", tick);
   createjs.Ticker.setFPS(60);
   startGame();
}

function startGame() {
   padel = new createjs.Shape();
   padel.width = 100;
   padel.graphics.beginFill('#0000FF').drawRect(0, 0, padel.width, 20);
   padel.x = padel.nextX = 0;
   padel.y = stage.canvas.height - 20;
   stage.addChild(padel);
   //handle keys
   window.onkeydown = movePadel;
   window.onkeyup = stopPadel;
}

function movePadel(e) {
   e = !e ? window.event : e;
   switch (e.keyCode) {
      case ARROW_KEY_LEFT:
         leftKeyDown = true;
         break;
      case ARROW_KEY_RIGHT:
         rightKeyDown = true;
         break;
      }
}

function stopPadel(e) {
   e = !e ? window.event : e;
   switch (e.keyCode) {
      case 37:
         leftKeyDown = false;
         break;
      case 39:
         rightKeyDown = false;
         break;
   }
}

function update() {
   var nextX = padel.x;
   if (leftKeyDown) {
      nextX = padel.x - 10;
      if(nextX < 0){
         nextX = 0;
      }
   }
   else if (rightKeyDown) {
      nextX = padel.x + 10;
      if(nextX > stage.canvas.width - padel.width){
         nextX = stage.canvas.width - padel.width;
      }
   }
   padel.nextX = nextX;
}

function render() {
   padel.x = padel.nextX;
}

function tick(e) {
   update();
   render();
   stage.update();
}
To keep the movement more smooth while holding down your arrow keys, a few variables are used to store the current direction based on what key was pressed. When you let go, you remove that value to prevent the paddle from moving on the next update cycle. This makes for a much more fluid movement by using the update/render cycle to move the sprites as opposed to moving them directly in the keyboard event handlers. Figure 3-5 shows the paddle drawn and moved on the bottom of the stage.
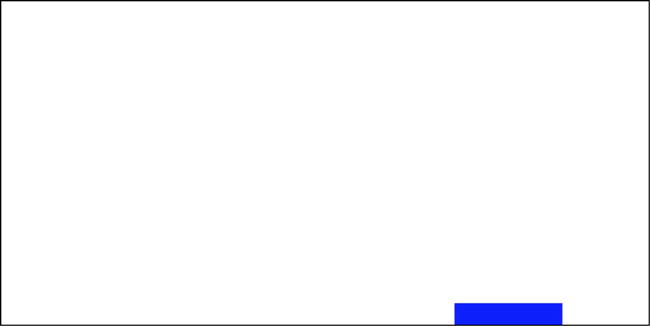
Figure 3-5. A game paddle drawn and controlled with arrow keys
Now that some interactivity has been accomplished by user input, some output will be necessary to give your players some feedback on how they are doing.
In your games, you’ll often need to provide messaging to the player. Whether as simple as static instructions, or dynamic text for scoreboards, it is essential that you provide the player with textual feedback. EaselJS comes bundled with a Text class that allows you to easily draw and manipulate text on the canvas.
Creating Text
Creating text with EaselJS is done by creating a new Text object and optionally passing it some initial values for its appearance. The following code is an example of how you create a new Text object:
var txt = new createjs.Text("Game Over", "20px Arial", "#ff7700");
Three parameters can be initially passed into the constructor. The first is the text value you want to set to it. The second is any style you wish to add to the font, such as font family, size, bold, etc. Any valid CSS style for font will be accepted. You can also use non-system fonts if they are properly embedded into your document. The third is the color of your font; again, any valid CSS property for color will work.
Since Text is a display object, you can position and add it to the stage like you can with graphics. There are also a few alignment properties (see Listing 3-12) on Text to help you properly position text on the stage, which is demonstrated in Figure 3-6.
Listing 3-12. Using a Text Object to Display a Game Over Message
var txt = new createjs.Text("Game Over", "20px Arial", "#ff7700");
txt.textBaseline = "middle";
txt.textAlign = "center";
txt.x = stage.canvas.width / 2;
txt.y = stage.canvas.height / 2;
stage.addChild(txt);
stage.update();

Figure 3-6. A Game Over message drawn on the screen using a Text object
You can later change or concatenate the text value by accessing its text property.
var txt = new createjs.Text("0", "20px Arial", "#ff7700");
txt.text = "Score: ";
txt.text += 1000;
stage.addChild(txt);
stage.update();
An important thing to remember when working with EaselJS text is that it is basically no different than drawing any other type of graphic to the Canvas. Once it’s drawn, there is no direct way of selecting it. Inline styles are also impossible with EaselJS text, so if you need to format specific words or characters within your text, you’ll have to create new text objects and position them appropriately.
This type of formatting is not often needed with game elements, so for the most part you’ll get by just fine with Text. However, if you need more control over formatting, EaselJS provides a cool way to build and position a DOM element within your application.
DOMElement Class
The DOMElement class can be added to the stage and act as if it were an actual child of the parent. Since it’s actually a DOM element, it is placed above your canvas and positioned relative to the container you added it to.
var domElement = new createjs.DOMElement(htmlElementID);
domElement.x = domElement.y = 50;
stage.addChild(domElement);
As you can see, you treat this object like any other display object when adding to the stage in EaselJS. This can be handy when coding tooltips that need to extend past the canvas, or in an instructions screen for a game.
Let’s look at this in action by building some HTML text, shown in Listing 3-13, which can be added to a game screen within an Easel application, shown in Listing 3-14.
Listing 3-13. HTML Elements to be Displayed Within Your Easel Application
<div id="gameHolder">

   <div id="instructions" style="width: 400px;height: 300px;border: dashed 2
         #008b8b;text-align: center;">
      <h3 style="font-family:arial;">Game Instructions</h3>
      <p><strong>Click</strong> on the <span style="color:red">RED</span>
         balloons as they fall from the sky.</p>
      <p>Make sure you click them <span style="text-decoration:
         underline">all</span> before time runs out!</p>
      <p>Rack up <i>as many points</i> as you can to reach the <span
         style="color:blue">BLUE</span> level.</p>
      <h2 style="font-weight: bold;margin-top:30px">GOOD LUCK!</h2>
   </div>

   <canvas id="canvas" width="500" height="400" style="border: black solid
      1px"></canvas>

</div>
Listing 3-14. DOMElement Class Used to Add HTML Text to Your Game Screen
var el = new createjs.DOMElement(instructions);
el.alpha = 0;
el.regX = 200;
el.x = stage.canvas.width / 2;
stage.addChild(el);
createjs.Tween.get(el).wait(1000).to({y:40, alpha:1},2000,
   createjs.Ease.quadOut);
The id of the div is what gets passed into the DOMElement constructor. Notice that the visibility style for this div is set to hidden. This is done so it is initially hidden and you don’t get any unwanted flickers before it’s “added” to the stage and positioned. Once you update the DOMElement’s alpha property, the DOM element will adhere and become visible. In the example here, the alpha is tweened up while it animates slightly down the screen.
Figure 3-7 shows how much more control you have over text formatting by using HTML elements and the DOMElement class.

Figure 3-7. HTML elements using HTMLElement
![]() Note It is recommended that you wrap any elements you wish to include using DOMElement within the same div as your EaselJS Canvas element. This will ensure best results for positioning in your application.
Note It is recommended that you wrap any elements you wish to include using DOMElement within the same div as your EaselJS Canvas element. This will ensure best results for positioning in your application.
Let’s wrap up the chapter with another simple game example. Using interaction and text objects, a Hangman-like game will make a perfect demonstration of utilizing the skills you’ve learn in this chapter.
Word Game is a game similar to Hangman, where the player must choose letters to guess a phrase displayed as hidden letters.
- A series of empty slots that represent blank letters are positioned on the screen.
- These letters form a phrase that the player needs to guess.
- A board of letter buttons are available for choosing a letter.
- Fill in all slots of the puzzle before losing your five lives to win the game.
Create an HTML file and include your canvas, CreateJS scripts, and a JavaScript file for your game code. Name this JavaScript file, wordGame.js. Be sure to fire the init function on body load. Open the wordGame.js file and start by declaring the game variables and init function (see Listing 3-15).
Listing 3-15. wordGame.js – Game Variables and init Function
var stage, livesTxt, gameOverTxt, win;
var answer = "CREATEJS IS&AWESOME"
var abc = "ABCDEFGHIJKLMNOPQRSTUVWXYZ";
var lives = 5;
var lettersNeeded = 0;

function init() {
   stage = new createjs.Stage(document.getElementById('canvas'));
   drawBoard();
   drawLetters();
   drawMessages();
   startGame();
}
As usual, you declare a stage variable to use throughout the game. Others are declared as well, including a few that will be used to reference some text objects. These are followed by a list of variables that contain some initial values, such as how many lives the player has left and how many matches are needed to win the game. The actual answer to the puzzle is also created. An ampersand symbol is used to indicate when there should be a line break when creating the empty letter slots.
![]() Note It’s pretty easy to cheat when playing word games for the browser—one only needs to view the page source to get the answers to the puzzle. Although this is true, it doesn’t take away from the techniques learned in this lesson. If you decide to get serious about a game of this nature, you’ll want to handle some of your game logic on a web server.
Note It’s pretty easy to cheat when playing word games for the browser—one only needs to view the page source to get the answers to the puzzle. Although this is true, it doesn’t take away from the techniques learned in this lesson. If you decide to get serious about a game of this nature, you’ll want to handle some of your game logic on a web server.
In typical fashion, the init function sets up the stage and calls a series of functions to start the game. Let’s take a look at the first three functions, which are laid out in Listing 3-16.
Listing 3-16. wordGame.js – drawBoard, drawLetters, and drawMessages Functions Used to Draw and Position Your Game Display Objects
function drawBoard() {
   var i, char, box;
   var xPos = 20;
   var yPos = 90;
   for (i = 0; i < answer.length; i++) {
      char = answer[i];
      if (char != ' ' && char != '&') {
         lettersNeeded++;
         box = new createjs.Shape();
         box.graphics.beginStroke("#000");
         box.graphics.drawRect(0, 0, 20, 24);
         box.regX = 10;
         box.regY = 12;
         box.x = xPos;
         box.y = yPos;
         box.name = 'box_' + i;
         box.key = char;
         stage.addChild(box);
      }
      xPos += 26;
      if (char == '&') {
         yPos += 40;
           xPos = 20;
        }
    }
}

function drawLetters() {
   var i, char, txt, btn;
   var cnt = 0;
   var xPos = 20;
   var yPos = 200;
   for (i = 0; i < abc.length; i++) {
      char = abc[i];
      btn = new createjs.Shape();
      btn.graphics.beginFill("#000");
      btn.graphics.beginStroke("#000");
      btn.graphics.drawRect(0, 0, 20, 24);
      btn.regX = 10;
      btn.regY = 12;
      btn.x = xPos;
      btn.y = yPos;
      stage.addChild(btn);
      //create text
      txt = new createjs.Text(char);
      txt.color = "#FFF";
      txt.textAlign = 'center';
      txt.textBaseline = 'middle';
      txt.x = xPos;
      txt.y = yPos;
      stage.addChild(txt);
      btn.txt = txt;
      btn.addEventListener('click', onLetterClick);
      //adjust positions
         xPos += 24;
         cnt++;
         if (cnt == 13) {
            yPos += 30;
            xPos = 20;
        }
    }
}

function drawMessages() {
   var txt = new createjs.Text("WORD GAME", "26px Arial");
   txt.color = "#99000";
   txt.x = txt.y = 10;
   stage.addChild(txt);
   livesTxt = new createjs.Text("LIVES: " + lives, "16px Arial");
   livesTxt.textAlign = 'right';
   livesTxt.y = 16;
   livesTxt.x = stage.canvas.width - 10;
   stage.addChild(livesTxt);
}
The drawBoard function is used to build the empty letter slots by using the answer variable. A loop runs through each letter in the answer and builds simple box shapes in the process. Some positioning is determined in each iteration, and you use the ampersand character to know when to start a new line for the slots. A letter value stores what letter it represents, and a name is given to each slot so you can easily reference it when checking for matches later.
Next, the drawLetters function is used to build the letter buttons for guessing letters in the puzzle. It draws and positions boxes similar to your previous function, while also creating text labels as you loop through the abc variable. The abc variable is a string that simply has every letter in the alphabet. Since you are assigning the click events to each button, a reference to these corresponding text objects are assigned to them. You do this so you can use them later in the handler function to evaluate the puzzle.
Finally, drawMessages adds simple text objects to the stage. One displays the title of the game, and another displays the number of lives the player has during gameplay.
Figure 3-8 shows the results on the stage after you call the drawing functions.
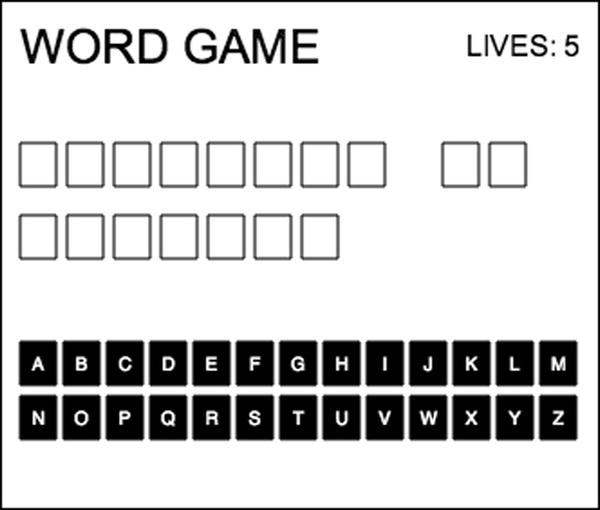
Figure 3-8. Messages and game objects added to your stage
Now that each button has been registered for a mouse click event, you need to create the handler function that will determine what action is needed when a player chooses a letter. Listing 3-17 shows this handler function.
Listing 3-17. wordGame.js – onLetterClick Function to Handle Button Clicks
function onLetterClick(e) {
   var btn = e.target;
   var txt = btn.txt;
   btn.removeEventListener('click', onLetterClick);
   checkForMatches(txt);
   checkGame();
}
A reference to both the button that was clicked and the text object that it’s tied to are held in local variables. The mouse events are immediately removed to prevent the player from clicking the same letter twice, and a few functions (see Listing 3-18) are then called to factor the result of the latest letter choice.
Listing 3-18. wordGame.js – checkForMatches and checkGame Functions Used to Check Letter Matches and Game Status
function checkForMatches(txt) {
   var letter = txt.text
   var i, char, box, txtClone;
   var match = false;
   var l = answer.length;
   for (i = 0; i < l; i++) {
      char = answer[i];
      if (char == ' ' || char == '&') {
         continue;
      }
      box = stage.getChildByName('box_' + i);
      if (box.key == letter) {
         lettersNeeded--;
         match = true;
         txtClone= txt.clone();
         txtClone.color = "#000";
         txtClone.x = box.x;
         txtClone.y = box.y;
         stage.addChild(txtClone);
        }
    }
    stage.removeChild(txt);
    if (!match) {
       lives--;
       livesTxt.text = "LIVES: " + lives;
   }
}

function checkGame() {
   if (lettersNeeded == 0) {
      win = true;
      gameOver();
   }
   else if (lives == 0) {
      win = false;
      gameOver();
   }
}
A reference to the button’s corresponding text object is passed to checkForMatches, and its text value will be used to check for matches in the puzzle. You then create a variable defaulted to false that will be updated to true if you find any matches in the function’s loop. This loop is set up to iterate through each letter in the answer while checking for a match in each puzzle box. If that character is either a space or a symbol used for formatting, you ignore it and continue on with the loop. Using your iterator, you can reference each box in the puzzle and the keys you assigned to them.
If you find a match, you first subtract the amount of letters needed to win the game and set the match variable to true. You need to then display this letter on the appropriate box to indicate that a match was made and further reveal the secret phrase (see Figure 3-9). The Text object has a clone method that will create a new text instance, using all of the same properties assigned to it. This is much faster than having to create a new one from scratch. After changing its color and coordinates, it’s added to the stage in the center of the appropriate box.

Figure 3-9. Correct letters chosen and placed in empty boxes
After the loop, you remove the button’s text object from the stage to indicate that this letter is no longer available to choose from. If you made it through the loop with no matches, you subtract the player’s lives and update the livesTxt text object.
At this point, your checkGame function is called to check on the player’s progress. If the player got all of the letters, win is set to true and gameOver is called. Similarly, if the player is out of lives, win is set to false and gameOver is fired.
If the game is declared over after checking on the game’s progress, you end the game by calling the gameOver function to determine the game’s outcome (see Listing 3-19).
Listing 3-19. wordGame.js – gameOver Function for Winning or Losing the Game
function gameOver() {
   stage.removeAllChildren();
   var msg = win ? "YOU WIN!" : "YOU LOSE";
   gameOverTxt = new createjs.Text(msg, "36px Arial");
   gameOverTxt.alpha = 0;
   gameOverTxt.color = win ? 'blue' : 'red';
   gameOverTxt.textAlign = 'center';
   gameOverTxt.textBaseline = 'middle';
   gameOverTxt.x = stage.canvas.width / 2;
   gameOverTxt.y = stage.canvas.height / 2;
   stage.addChild(gameOverTxt);
   createjs.Tween.get(gameOverTxt).to({alpha:1},1000);
}
This final game logic function is used to handle the end of the game, whether the player wins or loses. All display objects can easily be removed by calling removeAllChildren on the stage. A message string is then created, based on if the puzzle was solved or if all lives were lost. This message is displayed with a new text object that is formatted, positioned, and faded up on the stage. Figure 3-10 shows the outcome when a player wins the game.

Figure 3-10. Game Win message
Finally, the startGame function is written to set up the Ticker and stage updates; it is the last function called in the init function. Listing 3-20 shows this final function that is used as the heartbeat of the game.
Listing 3-20. wordGame.js – startGame Function to Set Up Ticker and Stage Updates
function startGame() {
   createjs.Ticker.setFPS(60);
   createjs.Ticker.addEventListener("tick", function (e) {
       stage.update();
   });
}
Summary
In this chapter, you started to see your game graphics really come alive by adding interactivity with user input. You learned how to use both mouse and keyboard events to control game elements on the stage. You also started creating messages by using the EaselJS Text and DOMElement classes. A few examples and short games demonstrated how quickly you can build canvas games using the EaselJS drawing API and its core interaction model.
User input and messaging are crucial aspects to any game, and the lessons learned in this chapter should already give you the ground needed to start building engaging games using EaselJS graphics. Now that you can create, animate, and control graphics and text, the next chapter will be a full game project using the skills you’ve learned so far.