![]()
A typical game will include multiple states during its existence. A state can be one of many different scenes in a game, including a home screen, a leaderboard, a settings menu, the game itself, and many others. A game can consist of a few or many states, and the management system to assure that only one state is running at a time is an important technique in game development. The collective components that make up this management system are referred to as a state machine.
This chapter will take a close look at each area that makes up a state machine, and then you’ll put your new knowledge into practice by creating a simple game that will implement one. This game will consist of a title screen, the game level, and a game over screen. These scenes will all be written outside of the global scope, which will provide better code structure, but will introduce more of those pesky scope issues. I will further address those issues in this chapter.
Deconstructing a State Machine
So far, the games in this book have all been built within one screen. In other words, they have had only one state during the entire game. The Break-It game in Chapter 4 used a Boolean variable to determine if the game was in play; if not, it fell into a waiting state for the user to take action. This approach is a simple technique to manage state, but it’s not practical once you start tacking on more states and scenes to your game. This section will break down the process of building a state machine to properly run and manage your game scenes.
Declaring States
States are typically stored in constants that can easily be accessed and readable within the code of your game. This approach was used in Chapter 9 when declaring assets in an asset manager. These values will be used to determine what state the game should switch to or continue to run in. Listing 10-1 shows an example of a few states being declared and stored inside an object.
Listing 10-1. Example of State Ids Being Declared
var GameStates = {
   MAIN_MENU:0,
   RUN_SCENE:10,
   GAME:20,
   GAME_OVER:30
}
The states listed in this object can now be access in following way:
currentGameState = GameStates.MAIN_MENU;
The state machine will most often run within the main class of your application, and will be used to load and unload scenes. The current state of the application will be held in a variable so it can be accessed at any time.
Setting the Game State
The game state is typically set within a function that is called when the state should change. It should accept a parameter, which will be used to set the new game state. This function will also contain a switch statement to evaluate the current state and appropriately change the game’s behavior.
The behavior of the game is determined by the function that will run on each tick of the game loop. This function should also be stored in a variable so it can be continuously called while the game is running. Listing 10-2 demonstrates an example of this important function.
Listing 10-2. A State Machine Function, Used for Changing Game State
function changeState (state) {
   currentGameState = state;
   switch (currentGameState) {
      case GameStates.MAIN_MENU:
         currentGameStateFunction = gameStateMainMenu;
         break;
      case GameStates.GAME:
         currentGameStateFunction = gameStateGame;
         break;
      case GameStates.RUN_SCENE:
         currentGameStateFunction = gameStateRunScene;
         break;
      case GameStates.GAME_OVER:
         currentGameStateFunction = gameStateGameOver;
         break;
   }
}

//change game state
changeState(GameStates.GAME_OVER);
Running the Game
When the game state and game state functions have been set, the game loop will react by firing the current game state function. Listing 10-3 creates the ticker handler, which will call the current game state function before updating the stage.
Listing 10-3. The Current Game State Function Is Called Within Each tick Event
createjs.Ticker.on('tick', onTick);

function onTick(e){
   currentGameStateFunction(e);
   stage.update();
}
There are various patterns when it comes to setting up a state machine, all slightly different, but all should accomplish the same goal in managing state. In the approach I’ve decided to use in this book, these game functions will typically do one of two actions. When the state changes, a new scene should be initiated, while disposing of the previous one. A scene is a collection of both code and visuals that should take over the screen when called upon to do so. In EaselJS, this will most often be done within a custom container class.
The second type of action used in game state functions is to simply update the current scene. In the approach used in this book, the same function will be used for every scene that has been initiated, and will try to call a run method on the current scene (see Listing 10-4). The tick event from the game loop is also passed into this run method. The tick event carries useful properties that might be used within the game scene, such as delta and time. You will be using these properties for the Space Hero game in Chapter 11.
Listing 10-4. A Run Scene State Will Run the Current Scene if Needed
function gameStateRunScene (tickEvent) {
   if (currentScene.run) {
      currentScene.run(tickEvent);
   }
}
Not all scenes will need this type of constant updating, nor will it have a run method to execute, so this call will be wrapped in a conditional. This RUN_SCENE state will be immediately set after a new scene has been created. Listing 10-5 shows an example of a game state function that is called on to start a new game.
Listing 10-5. An Example of a State Function Creating a New Scene
function gameStateGame () {
   var scene = new game.Game();
   stage.addChild(scene);
   stage.removeChild(currentScene);
   currentScene = scene;
   changeState(game.GameStates.RUN_SCENE);
}
Notice that this state only exists for a single tick, and is used to simply change the current scene before changing to the RUN_SCENE state.
Setting Up Game State Events
The changing of a state will most often be decided within the current running scene. This might happen from the click of a button or the destruction of all lives in a game level. Similar to declaring game states, the game state events are declared in the same fashion (see Listing 10-6).
Listing 10-6. Game State Event Ids Declared in an Object
var GameStateEvents = {
   MAIN_MENU:'main-menu-event',
   GAME_OVER:'game-over-event',
   MAIN_MENU_SELECT:'game-menu-select-event',
   GAME:'game-event',
   SCORE_SCREEN:'score-screen-event'
}
Because the base of each scene will most likely extend a display object, dispatching events is a great way to communicate back to the main application that something needs to happen. Listing 10-7 shows an example of this being done within a game menu screen.
Listing 10-7. A Button that Dispatches a State Event
function onStartButton(e){
   dispatchEvent(GameStateEvents.GAME);
}
This example demonstrates the action that happens when a player clicks a button to play the game. Because this menu resides in a container class, dispatching this event is possible. Back in the state function that added this menu screen is where the listener is set up (see Listing 10-8).
Listing 10-8. Setting a State Event Listener on a New Scene
p.gameStateMainMenu = function () {
   var scene = new game.GameMenu();
   scene.on(game.GameStateEvents.GAME, this.onStateEvent, this, false,
      {state:game.GameStates.GAME});
   stage.addChild(scene);
   stage.removeChild(currentScene);
   this.currentScene = scene;
   this.changeState(game.GameStates.RUN_SCENE);
}
The changeState function is written to be called from anywhere by passing it the state you wish to change to. In the case of an event, a handler function needs to be set up as an intermediate step in the state changing process. By utilizing the on method to listen for these events, an object can be passed into the handler. You’ll also notice the use of the third parameter, which is used to keep the scope to this within the handler function. You used this same approach with PreloadJS when building the asset manager in Chapter 9.
![]() Note In order to reach the fifth parameter in the on method, you need to fill out all proceeding options, even if you don’t need them. This is done in most cases by simply assigning the default value for all properties you need to bypass.
Note In order to reach the fifth parameter in the on method, you need to fill out all proceeding options, even if you don’t need them. This is done in most cases by simply assigning the default value for all properties you need to bypass.
A generic object is created as the data you wish to pass into the onStateEvent function. The object will contain one property, state, and will hold the value of the state you wish to change to. Listing 10-9 shows this intermediate function for state changing.
Listing 10-9. The Handler Function for All State Events
function onStateEvent (e, data) {
   this.changeState(data.state);
}
The first parameter of any event handler will be the event object that invoked it. This object is not needed in this case, but must be entered so the second parameter can be declared and accessed.
This concludes the major components of a working state machine. The next exercise, Orb Destroyer, will fully utilize these procedures to build a state machine for a simple game.
Orb Destroyer is a very simple game, but it will be used to put the state machine pattern into practice. You will complete the following procedures in this exercise:
- Create an application that consists of two menus and a game level.
- Use a state machine to control the state of the application.
- Create and dispatch events within the scenes to communicate back to the main application, which will change states.
- Keep the entire application out of global scope by utilizing the on method to control scope and pass values.
Setting Up the Game Files
Set up the HTML document that includes a canvas element, the necessary CreateJS files, the PulsingOrb class, and the SimpleButon component. You’ll also create the following JavaScript files:
- state.js
- GameMenu.js
- Game.js
- GameOver.js
- OrbDestroyer.js
Listing 10-10 shows the inclusion of all JavaScript files and their locations, as well as the HTML and init function that fires when the body has loaded.
Listing 10-10. The index.html for Orb Destroyer Includes All JavaScript Files and Initializes the Application
<!DOCTYPE html>
<html>
<head>
   <title></title>
   <script src="js/lib/easeljs-0.7.1.min.js"></script>
   <script src="js/lib/soundjs-0.5.2.min.js"></script>
   <script src="js/lib/preloadjs-0.4.1.min.js"></script>
   <script src="js/state.js"></script>
   <script src="js/SimpleButton.js"></script>
   <script src="js/PulsingOrb.js"></script>
   <script src="js/scenes/GameMenu.js"></script>
   <script src="js/scenes/Game.js"></script>
   <script src="js/scenes/GameOver.js"></script>
   <script src="js/OrbDestroyer.js"></script>
</head>

<body onload="init();">

<canvas id="canvas" width="800" height="600" style="border: black solid
   1px"></canvas>

</body>

<script>
   var stage;
   var canvas;

   function init() {
      window.game = window.game || {};
      game.main = new game.OrbDestroyer();
   }
</script>
</html>
Building the States and State Events
The states and state events will be declared in a separate JavaScript file, which will hold both objects to hold these properties. Listing 10-11 shows these two objects, written in state.js.
Listing 10-11. The State and State Event Ids Both Declared in state.js
(function () {

   window.game = window.game || {};

   var GameStates = {
      MAIN_MENU:0,
      RUN_SCENE:1,
      GAME:10,
      GAME_OVER:20
   }

   var GameStateEvents = {
      MAIN_MENU:'main-menu-event',
      GAME_OVER:'game-over-event',
      GAME:'game-event',
   }

   window.game.GameStates = GameStates;
   window.game.GameStateEvents = GameStateEvents;

}());
As you can see, you can easily declare and organize crucial objects within one separate file. For smaller, related objects such as these, combining them into a single script is often a good approach.
![]() Note Because this JavaScript file contains more than one object, I’ve opted to not use the uppercase naming convention for its file name, which derives from other class-based programming languages. This uppercase naming convention should be used only when creating single complex classes. Remember, JavaScript does not technically have classes, but following these classic conventions helps keep your code organized and easy to follow.
Note Because this JavaScript file contains more than one object, I’ve opted to not use the uppercase naming convention for its file name, which derives from other class-based programming languages. This uppercase naming convention should be used only when creating single complex classes. Remember, JavaScript does not technically have classes, but following these classic conventions helps keep your code organized and easy to follow.
Building the Game Menu
The menu screen will be the first scene loaded into the application. It will extend Container; it also will contain a simple play button, which will call back to the application and change the state. Listing 10-12 shows the entire GameMenu class.
Listing 10-12. GameMenu.js - The Main Game Menu Class
(function (window) {

   window.game = window.game || {}

   function GameMenu() {
      this.initialize();
   }

   var p = GameMenu.prototype = new createjs.Container();

   p.Container_initialize = p.initialize;

   p.titleTxt = null;
   p.count = 0;

   p.initialize = function () {
      this.Container_initialize();
      this.addBG();
      this.addTitle();
      this.addOrbs();
      this.addButton();
   }
   p.addBG = function () {
      var bg = new createjs.Shape();
      bg.graphics.beginFill('0').drawRect(0, 0, canvas.width, canvas.height);
      this.addChild(bg);
   }
   p.addTitle = function () {
      this.titleTxt = new createjs.Text("ORB DESTROYER!", '40px Arial',
         '#FFF'),
      this.titleTxt.x = canvas.width / 2;
      this.titleTxt.y = 200;
      this.titleTxt.textAlign = 'center';
      this.addChild(this.titleTxt);
   }
   p.addOrbs = function () {
      var i, orb;
      var orbContainer = new createjs.Container();
      var numOrbs = 5;
      var orbSize = 20;
      var orbPadding = 10;
      var orbsPosition = 300;
      for (i = 0; i < numOrbs; i++) {
         orb = new PulsingOrb('#FFF', orbSize);
         orb.x = i * ((orbSize * 2) + orbPadding);
         orbContainer.addChild(orb);
      }
      orbContainer.x = orbContainer.y = orbsPosition;
      this.addChild(orbContainer);
   }
   p.addButton = function () {
      var btn, event;
      btn = new ui.SimpleButton('Play Game'),
      btn.on('click',this.playGame,this);
      btn.regX = btn.width / 2;
      btn.x = canvas.width / 2;
      btn.y = 400;
      btn.setButton({upColor:'#FF0000', color:'#FFF', borderColor:'#FFF',
         overColor:'#900'});
      this.addChild(btn);
   }
   p.playGame = function (e) {
      this.dispatchEvent(game.GameStateEvents.GAME);
   }
   p.run = function (tickEvent) {
      this.titleTxt.alpha = Math.cos(this.count++ * 0.1) * 0.4 + 0.6;
   }
   window.game.GameMenu = GameMenu;

}(window));
This menu contains a simple text object, which is the title to the game. Under that are five small PulsingOrb objects that are created to add some visuals to the screen. Finally, a button, using the SimpleButton component, is added below. The important thing to notice in this class is the button click handler, which dispatches the GameStateEvents.GAME event. When this menu is added to the application, a listener will be set on it for this event, which will take the appropriate action when it is dispatched. The main game menu is shown in Figure 10-1.
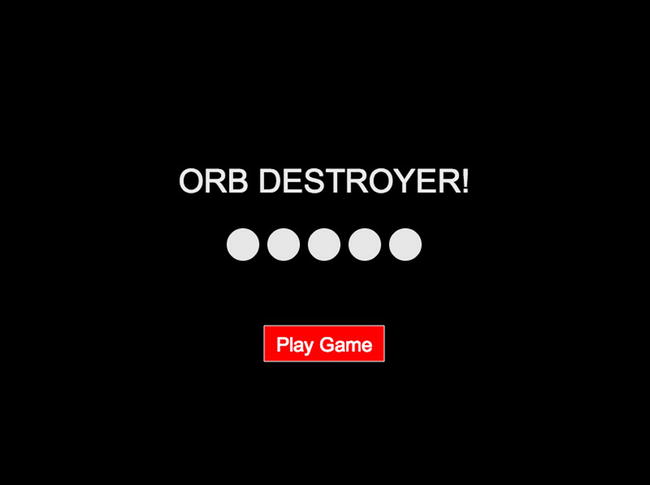
Figure 10-1. The main game menu includes the title, graphics, and a play button
Building the Game
The game in this exercise really isn’t much of a game, but it will demonstrate a working example of a state machine and how the game will communicate back to the main application. The key concept to take from the game in this exercise is that it is encapsulated within a class. This drastically alters the approach that is taken when handling scope.
The games written in this book so far have been written in the global scope of window, meaning the functions and variables were accessible from anywhere. This prevented us from running into scope issues when writing the game logic, but working directly within window is widely frowned upon for a variety of reasons. It becomes extremely easy to override properties and functionality throughout your application, and your code will quickly becomes messy and hard to debug.
The game class will simply be named Game and will extend Container (see Listing 10-13).
Listing 10-13. Game.js – The Game Scene
(function (window) {

   window.game = window.game || {}

   function Game() {
      this.initialize();
   }

   var p = Game.prototype = new createjs.Container();

   p.Container_initialize = p.initialize;

   p.msgTxt = null;
   p.orbContainer = null;

   p.initialize = function () {
      this.Container_initialize();
      this.addBG();
      this.addMessages();
      this.createOrbContainer();
      this.createOrbs();
   }
   p.addBG = function () {
      var bg = new createjs.Shape();
      bg.graphics.beginFill('#92CBD6').drawRect(0, 0, canvas.width,
         canvas.height);
      this.addChild(bg);
   }
   p.addMessages = function () {
      this.msgTxt = new createjs.Text("", '24px Arial', '#FFF'),
      this.addChild(this.msgTxt);
   }
   p.createOrbContainer = function () {
      this.orbContainer = new createjs.Container();
      this.addChild(this.orbContainer);
   }
   p.createOrbs = function () {
      var i, orb, color;
      var orbs = this.orbContainer;
      var numOrbs = 12;
      var orbSize = 25;
      for (i = 0; i < numOrbs; i++) {
         color = '#' + Math.floor(Math.random() * 16777215).toString(16)
         orb = new PulsingOrb(color, orbSize);
         orb.speed = Math.random() * 4;
         orb.size = orbSize;
         orb.x = orbSize;
         orb.y = orbSize + (i * orbSize * 2);
         orb.on('click',this.onOrbClick,this);
         orbs.addChild(orb);
      }
   }
   p.onOrbClick = function (e) {
      this.orbContainer.removeChild(e.target);
   }
   p.update = function () {
      var i, orb, nextX;
      var len = this.orbContainer.getNumChildren();
      for (i = 0; i < len; i++) {
         orb = this.orbContainer.getChildAt(i);
         nextX = orb.x + orb.speed;
         if (nextX + orb.size > canvas.width) {
            nextX = canvas.width - orb.size;
            orb.speed *= -1;
         }
         else if (nextX - orb.size < 0) {
            nextX = orb.size;
            orb.speed *= -1;
         }
         orb.nextX = nextX;
      }
   }
   p.render = function () {
      var i, orb;
      var len = this.orbContainer.getNumChildren();
      for (i = 0; i < len; i++) {
         orb = this.orbContainer.getChildAt(i);
         orb.x = orb.nextX;
      }
      this.msgTxt.text = "ORBS LEFT: " +
         this.orbContainer.getNumChildren();
   }
   p.checkGame = function () {
      if (!this.orbContainer.getNumChildren()) {
         this.dispatchEvent(game.GameStateEvents.GAME_OVER);
      }
   }
   p.run = function (tickEvent) {
      this.update();
      this.render();
      this.checkGame();
   }

   window.game.Game = Game;
}(window));
You’ll notice that like the game menu, the game class utilizes the run function, which is called from the game loop in the main application. This is used to constantly animate all orbs in the container. The msgTxt text object is updated within the render function, and will reflect the number of remaining children in orbContainer. Figure 10-2 shows the game in action.
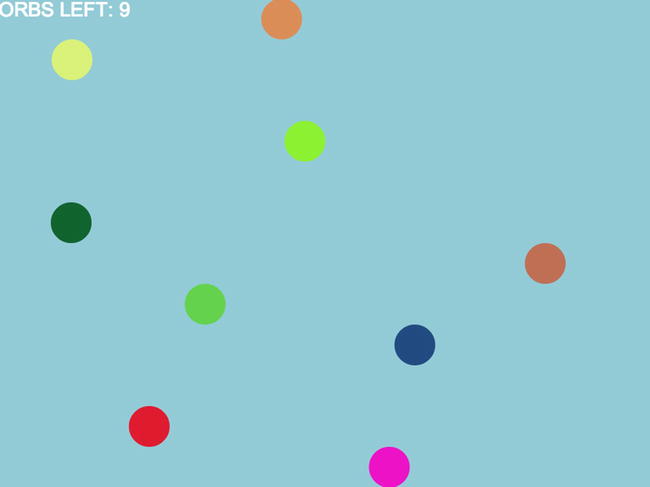
Figure 10-2. Orb Destroyer game in action
The final function in the run method is used to check on the progress of the game. When all orbs have been destroyed, the GameStateEvents.GAME_OVER event is dispatched.
The PulsingOrb sprite from Chapter 8 will be reused for the orbs in the game class. For the purposes of this game, one more property needs to be added to hold the speed of each orb (see Listing 10-14).
Listing 10-14. PulsingOrb.js – The Orb for Orb Destroyer Uses the PulsingOrb Class (Built in Chapter 8)
(function () {

   var PulsingOrb = function (color, size) {
      this.initialize(color, size);
   }

   var p = PulsingOrb.prototype = new createjs.Shape();

   p.count = 0;
   p.speed = 0;
   p.size = 0;

   p.Shape_initialize = p.initialize;

   PulsingOrb.prototype.initialize = function (color, size) {
      size = size != undefined ? size : 20;
      color = color != undefined ? color : '#F00';
      this.size = size;
      this.Shape_initialize();
      this.alpha = Math.random();
      this.graphics.beginFill(color).drawCircle(0, 0, size);
      this.on('tick', this.pulse);
   }
   PulsingOrb.prototype.pulse = function () {
      this.alpha = Math.cos(this.count++ * 0.1) * 0.4 + 0.6;
   }
   window.PulsingOrb = PulsingOrb;
}());
One more scene is needed before getting into the main application code. When the game is over, a game over screen should appear, with an option to replay the game or go back to the main menu screen. The GameOver container class is shown in Listing 10-15.
Listing 10-15. GameOver.js – The Game Over Scene
(function (window) {

   window.game = window.game || {}

   function GameOver() {
      this.initialize();
   }

   var p = GameOver.prototype = new createjs.Container();

   p.Container_initialize = p.initialize;

   p.initialize = function () {
      this.Container_initialize();
      this.addBG();
      this.addMessage();
      this.addButton();
   }
   p.addBG = function () {
      var bg = new createjs.Shape();
      bg.graphics.beginFill('#09E').drawRect(0, 0, canvas.width,
         canvas.height);
      this.addChild(bg);
   }
   p.addMessage = function () {
      this.titleTxt = new createjs.Text("YOU DESTROYED THE ORBS!", '40px
         Arial','#FFF'),
      this.titleTxt.x = canvas.width / 2;
      this.titleTxt.y = 200;
      this.titleTxt.textAlign = 'center';
      this.addChild(this.titleTxt);
   }
   p.addButton = function () {
      var btn;
      btn = new ui.SimpleButton('Main Menu'),
      btn.regX = btn.width / 2;
      btn.x = canvas.width / 2;
      btn.y = 280;
      btn.on('click',this.mainMenu, this);
      this.addChild(btn);
      btn = new ui.SimpleButton('Play Again'),
      btn.regX = btn.width / 2;
      btn.x = canvas.width / 2;
      btn.y = 350;
      btn.on('click',this.playGame, this);
      this.addChild(btn);
   }
   p.mainMenu = function (e) {
      this.dispatchEvent(game.GameStateEvents.MAIN_MENU);
   }
   p.playGame = function (e) {
      this.dispatchEvent(game.GameStateEvents.GAME);
   }

   window.game.GameOver = GameOver;

}(window));
The GameOver screen is similar to the main menu, except it has two buttons instead of one and does not utilize a run method. Each button will dispatch the events GameStateEvents.MAIN_MENU and GameStateEvents.GAME, respectively. Figure 10-3 demonstrates the game over screen.
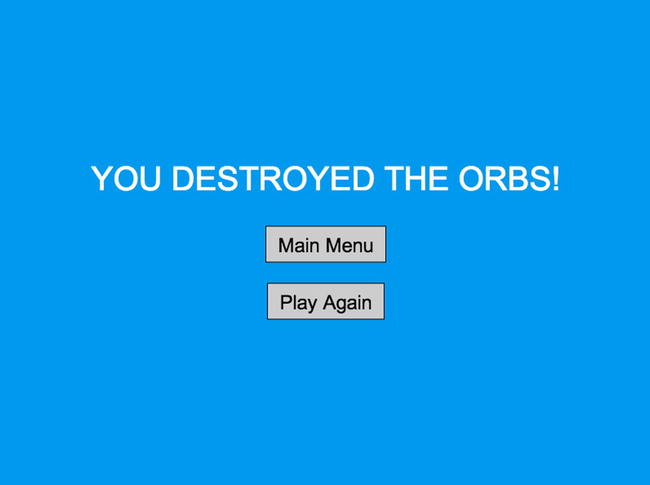
Figure 10-3. The game over screen lets players play again or go to the main menu
With all scenes created and ready to use, the main application class will next be created.
Building the Main Application with State Machine
The main application code for the Orb Destroyer game will be encapsulated into a class, but does not need to extend anything from EaselJS. It will handle the stage setup and the state machine itself. All scene instantiations will be added directly to the main stage, which will be one of the few properties that will actually be left in global space. A reference to the canvas will also remain global for easy access across the game scenes. Listing 10-16 shows the initial setup of the main application.
Listing 10-16. OrbDestroyer.js – The Main Application Class That Runs the State Machine
(function (window) {

    window.game = window.game || {}

    function OrbDestroyer() {
       this.initialize();
    }

    var p = OrbDestroyer.prototype;

    p.initialize = function () {
       canvas = document.getElementById('canvas'),
       stage = new createjs.Stage(canvas);
       createjs.Ticker.setFPS(60);
       createjs.Ticker.on('tick', this.onTick, this);
       this.changeState(game.GameStates.MAIN_MENU);
    }

    window.game.OrbDestroyer = OrbDestroyer;

}(window));
The initialize method also sets up the ticker, and starts the game with the state MAIN_MENU, which will create the main menu. Next, the state machine to make this work will be set up with a few functions, which will be used to change the current state in the game (see Listing 10-17).
Listing 10-17. OrbDestroyer.js – The Functions Used for Changing States
   p.changeState = function (state) {
      this.currentGameState = state;
      switch (this.currentGameState) {
         case game.GameStates.MAIN_MENU:
            this.currentGameStateFunction = this.gameStateMainMenu;
            break;
         case game.GameStates.GAME:
            this.currentGameStateFunction = this.gameStateGame;
            break;
         case game.GameStates.RUN_SCENE:
            this.currentGameStateFunction = this.gameStateRunScene;
            break;
         case game.GameStates.GAME_OVER:
            this.currentGameStateFunction = this.gameStateGameOver;
            break;
      }
   }
   p.onStateEvent = function (e, data) {
      this.changeState(data.state);
   }
There are four states in this exercise: two for the menu scenes, one for the game, and finally the RUN_SCENE state, which will continuously run the current scene. All state functions are seen in Listing 10-18.
Listing 10-18. OrbDestroyer.js – The State Functions that Run According to the Current Game State
p.gameStateMainMenu = function () {
   var scene = new game.GameMenu();
   scene.on(game.GameStateEvents.GAME, this.onStateEvent, this,
      false, {state:game.GameStates.GAME});
   stage.addChild(scene);
   stage.removeChild(this.currentScene);
   this.currentScene = scene;
   this.changeState(game.GameStates.RUN_SCENE);
}
p.gameStateGame = function () {
   var scene = new game.Game();
   scene.on(game.GameStateEvents.GAME_OVER, this.onStateEvent, this,
      false, {state:game.GameStates.GAME_OVER});
   stage.addChild(scene);
   stage.removeChild(this.currentScene);
   this.currentScene = scene;
   this.changeState(game.GameStates.RUN_SCENE);
}
p.gameStateGameOver = function () {
   var scene = new game.GameOver();
   stage.addChild(scene);
   scene.on(game.GameStateEvents.MAIN_MENU, this.onStateEvent, this,
      false, {state:game.GameStates.MAIN_MENU});
   scene.on(game.GameStateEvents.GAME, this.onStateEvent, this,
      false, {state:game.GameStates.GAME});
   stage.removeChild(this.currentScene);
   this.currentScene = scene;
   this.changeState(game.GameStates.RUN_SCENE);
}
p.gameStateRunScene = function (tickEvent) {
   if (this.currentScene.run) {
      this.currentScene.run(tickEvent);
   }
}
Most of these functions share a pretty common pattern. For this exercise, with the exception of gameStateRunScene, the major task of each state function is to create new scenes and dispose of the old. After creating each new scene, a listener is set on them to notify the application that the current state should change. Each of these functions ultimately changes the state to RUN_SCENE when it’s finished with its scene management tasks. This state will run the newly created scene on each subsequent game tick.
You will notice that the majority of these game state functions only last for one tick, so why bother making them states at all? In this exercise, the state machine is pretty simple, so a simple, repeating pattern is recognized. However, as your games start to grow and involve more states, these state functions will likely have a much larger responsibility.
Finally, the heartbeat of the game, and the state machine itself, is run from each game tick in the onTick handler that is set up on the Ticker, seen in Listing 10-19.
Listing 10-19. OrbDestroyer.js – The Tick Handler Runs the State Machine
p.onTick = function (e) {
   if (this.currentGameStateFunction != null) {
      this.currentGameStateFunction(e);
   }
   stage.update();
}
Although the game itself is extremely simple, this exercise outlines the state machine template that will be used for the remaining games in this book. You should have a good understanding of how more states could easily be added by adjusting the parts that make up the state machine.
Summary
In this chapter, a crucial procedure in game development was introduced. Centralizing the logic that creates and removes scenes assures that the game will only run in one state at a time, and allows the addition of new states to be easily accomplished. As you build more games, the patterns I introduced for state machines might change to fit your personal needs or preferences, but the underlying goal to manage game state will remain the same.
The last three chapters introduced three major development techniques. Extending EaselJS to create custom classes, the management of assets, and the utilization of a state machine will make your next game project a well-oiled machine. In the next chapter, these techniques will be used to create a high-action space shooter game.