![]()
With sprite sheets and containers now in your toolset, let’s put them into action by building another complete game. In this chapter, you’ll be writing quite a bit of code to accompany your newly learned skills, which will result in a game that is not only fun, but looks good.
Fakezee
Fakezee is based on the widely popular game Yahtzee. Although its name is different, the rules are pretty much the same. This version will be similar, but a solitary version. Listed below are the technical procedures needed to complete the game.
- Preload all game graphics.
- Put the game background graphic under the stage, keeping it out of the drawing cycle.
- Use animated sprites to add cool effects for the scorecard buttons.
- Use containers to group similar elements into separate, manageable objects.
- Reveal all groups when a new game begins in a fancy, animated manner.
- Write a separate class to handle all scoring calculations.
- Allow the player to easily play again when the game is complete.
- Display a simple scoreboard for all section scores.
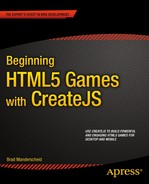
Figure 7-1 shows the game being played in its complete state.

Figure 7-1. The complete game of Fakezee
Before diving into the development of the game, let’s take a moment to go over the rules of Yahtzee.
As previously mentioned, Fakezee in a clone of the game Yahtzee, so the original rules will apply. The idea is to get as many points as you can by using the combination of five dice to fill in the 13 categories available on your scorecard. These categories and their score values are as follows:
- Ones: The sum of all dice with a value of 1.
- Twos: The sum of all dice with a value of 2.
- Threes: The sum of all dice with a value of 3.
- Fours: The sum of all dice with a value of 4.
- Fives: The sum of all dice with a value of 5.
- Sixes: The sum of all dice with a value of 6.
- Three of a Kind: The sum of all dice if three are alike.
- Four of a Kind: The sum of all dice if four are alike.
- Small Straight: 30 points if any four dice form a sequence.
- Large Straight: 40 points if all five dice form a sequence.
- Full House: 25 points if dice show two of one kind and three of another.
- Chance: The sum of all dice.
- Yahtzee: 50 points if all dice are of the same value.
- Bonus Yahtzee: 100 extra points for all subsequent Yahtzees.
The player gets three rolls during their turn. They may hold dice between rolls, and if they wish, can mark their score in the appropriate category before all three rolls are used up. The game continues until all 13 categories are scored.
These rules will be periodically reiterated as the development evolves throughout the chapter. Let’s start by setting up the project files.
With an understanding of the game that will be built, start by creating your project directory, and adding an index.html file that includes the appropriate CreateJS library files (see Listing 7-1). You’ll also be writing code in three separate JavaScript files. Create these files in a new directory named js, and name these files ssData.js, Scoring.js, and fakezee.js.
Listing 7-1. index.html for the Fakezee Game
<!DOCTYPE html>
<html>
<head>
   <title>Fakezee</title>
   <script src="lib/easeljs-0.7.1.min.js"></script>
   <script src="lib/tweenjs-0.5.1.min.js"></script>
   <script src="lib/soundjs-0.5.2.min.js"></script>
   <script src="lib/preloadjs-0.4.1.min.js"></script>
   <script src="js/ssData.js"></script>
   <script src="js/Scoring.js"></script>
   <script src="js/fakezee.js"></script>
</head>

<body onload="init()">

   <div style="width:550px;margin: 40px auto">
      <img src="img/bg.jpg" style="position: absolute;">
      <canvas id="canvas" width="550" height="500" style="position: absolute"></canvas>
</div>

</body>

</html>
Reviewing the Sprite Sheet Files
The sprite sheet files for this chapter are available with the book’s source code download. The animation frames for this sprite sheet were created in FlashCC and imported into TexturePacker using the same procedures learned in Chapter 6. Start by opening up the sprite sheet image, fakezee.png.
Reviewing the Sprite Sheet Image
The fakezee.png sprite sheet file contains all graphics needed for the game, with the exception of the background image, which was added to the DOM under the canvas element. Figure 7-2 shows the amount of graphics needed for the animations and static sprites.

Figure 7-2. The full sprite sheet image for all graphics and animations in Fakezee
Setting Up the Sprite Sheet Data
As you can imagine from the size of the image, there is quite a bit of data that corresponds with it. As your games increase in graphical size, the data object will likely be large as well. Polluting the game logic code with giant data objects will quickly become messy, so it’s a good idea to simply load in the data as JSON files within PreloadJS.
The sprite sheet data object generated by most sprite sheet tools will be saved as a JSON file in JSON format when exporting for EaselJS. Accessing this data for your sprite sheet will be done in the following way, after loaded in with PreloadJS:
var spritesheet = new createjs.Sprite(queue.getResult('manifestID'));
The Fakezee sprite sheet data object has nearly 300 frames and over 35 sprites, both animated and static. This will be loaded in the preload process, but take a look at the data to get an idea of how it is formatted, and the amount of sprites you’ll be using in the game (see Listing 7-2).
Listing 7-2. The Sprite Sheet Data for All Sprites in Fakezee
{
      "images":["img/fakezee.png"],
      "frames":[...],
      "animations":{
            "diceHold":[63],
            "diceTray":{frames:[64]},
            "die":{frames:[65, 66, 67, 68, 69, 70]},
            "fakezee":{frames:[71]},
            "fakezee_score":{frames:[72]},
            "logoSmall":{frames:[157]},
            "ones":{frames:[158, 159, 160 ... 177] },
            "ones_score":{frames:[178] },
            "twos":{frames:[275, 276, 277 ... 294] },
            "twos_score":{frames:[295] },
            "threes":{frames:[253, 254, 255 ... 272] },
            "threes_score":{frames:[273] },
            "fours":{frames:[94, 95, 96 ... 113] },
            "fours_score":{frames:[114] },
            "fives":{frames:[73, 74, 75 ... 92] },
            "fives_score":{frames:[93] },
            "sixes":{frames:[184, 185, 186 ... 203] },
            "sixes_score":{frames:[204] },
            "threeKind":{frames:[0, 1, 2, 3 ... 19] },
            "threeKind_score":{frames:[20] },
            "fourKind":{frames:[21, 22, 23 ... 40] },
            "fourKind_score":{frames:[41] },
            "small":{frames:[205, 206, 207 ... 224] },
            "small_score":{frames:[225] },
            "large":{frames:[136, 137, 138 ... 155] },
            "large_score":{frames:[156] },
            "fullHouse":{frames:[115, 116, 117 ... 134] },
            "fullHouse_score":{frames:[135] },
            "chance":{frames:[42, 43, 44 ... 61] },
            "chance_score":{frames:[62] },
            "playAgain":[179],
            "playGame":[180],
            "rollButton":[181],
            "rollMessage":[182],
            "scoreBar":[183],
            "totalScoreLabel":[274]
}
With the sprite sheet data set up and ready to load, the game programming can begin.
As usual, the game code begins by declaring a series of constants and variables, the preloading of assets, and the initializing functions that will begin building the elements that make your game. The fakezee.js file will be used to program the game logic.
Declaring the Game Constants and Variables
The constants in Fakezee are used to position the main containers and store values needed to make up the game. Listing 7-3 shows these constants.
Listing 7-3. Constants Used in fakezee.js for Counts and Positioning
const TITLE_YPOS = 15;
const DICE_TRAY_POSITION = {x:78, y:78};
const SCORE_CARD_POSITION = {x:20, y:155};
const SCOREBOARD_POSITION = {x:75, y:460};
const NUM_DICE = 5;
const NUM_SCORES = 13;
const NUM_ROLLS = 3;
Next is a group of variables that hold various CreateJS objects, and a list of EaselJS display objects that will make up the main groups of game elements (see Listing 7-4).
Listing 7-4. First Set of Variables in fakezee.js, Used to Hold the CreateJS objects for the Game
// createjs
var canvas, stage, queue, spritesheet;

// display objects
var title, diceTray, scoreboard, scoreCard;
Lastly, a few groups of variables are set with initial values (see Listing 7-5).
Listing 7-5. Arrays for Building Scorecard Buttons and Variables for Storing Game Progress
// scorecard buttons
var scorecardButtons = ['ones', 'twos', 'threes', 'fours', 'fives', 'sixes', 'threeKind',
   'fourKind', 'small', 'large', 'fullHouse', 'chance'];
var scorecardButtonKeys = [1, 2, 3, 4, 5, 6, 2, 3, 3, 4, 0, 0];

// game values to reset
var section1Score = 0;
var section2Score = 0;
var bonusScore = 0;
var totalScore = 0;
var rollsLeft = 3;
var numScored = 0;
var diceValues = [];
var scoredFakezee = false;
The first group of variables is used to build the category buttons in the scorecard. These buttons will be used when the player is ready to submit the score after their turn is complete. The scorecardButtons array is used for the loop when creating the buttons. These values are the strings used to name each button and they are needed in a few scenarios. Each string dictates what animation to use from the sprite sheet, and is also used to decide how to evaluate the dice when calculating the category’s score.
The scorecardButtonKeys array holds numbers that will be injected into each button and is used to further help the score calculating process. For example, a single function is used to score all of the categories, ones through sixes. This value is used to decide what dice values should be added to the score returned. This process will be covered in much more depth in the “Calculating the Scores” section.
The last series of values are the set of game variables that will be adjusted as the game is played. This is also the set of values that needs to be reset when restarting the game. These values include scores, how many rolls the player has left during their turn, the number of scores taken all together, and the value of each die after every roll. The last variable, scoredFakezee, is used to determine bonus Fakezee points.
When the body is loaded, the init function is called, which sets up the stage.
Setting Up the Stage and Preloader
The init function is used to set up the stage. Unlike other examples, you won’t be initializing the game itself at this point. The game initialization will begin after a few setup functions are first complete, and are kicked off by the init function (see Listing 7-6).
Listing 7-6. Stage and Preload Setup
function init() {
   canvas = document.getElementById('canvas'),
   stage = new createjs.Stage(canvas);
   createjs.Ticker.setFPS(60);
   createjs.Ticker.on('tick', stage);
   preload();
}

function preload() {
   queue = new createjs.LoadQueue();
   queue.addEventListener('complete', setupSpritesheet);
   queue.loadManifest([
      {id:"fakezeeSpritesheet", src:"img/fakezee.png"},
      {id:"fakezeeSpritesheetData", src:"js/fakezee.json "}
   ]);
}
The canvas element is stored away so you can access the stage’s size when positioning game elements. The stage is then created using this value, and the ticker is set up to run 60 frames per second.
The nature of Fakezee is low action and turn-based, so there is no need to set up an update/render cycle. Because of this, the shortcut for the ticker can be used to update the stage.
createjs.Ticker.on('tick', stage);
Finally, the preload function is called. Once all files are loaded the SpriteSheet object is set up in the setUpSpritesheet function.
Setting Up the Sprite Sheet
As you saw earlier, there are quite a few sprites contained in the sprite sheet that was created for Fakezee. This one and only SpriteSheet object will be used for all graphics, and is created next in the setUpSpritesheet function, shown in Listing 7-7.
Listing 7-7. The Game’s Single Sprite Sheet Created from Loaded Data
function setupSpritesheet() {
   spritesheet = new createjs.SpriteSheetqueue.getResult('fakezeeSpritesheetData'),
   initGame();
}
The spritesheet game variable is created and will be available for creating all sprites throughout the game. Finally, the initGame function is called and will initialize the game.
Initializing the Game
Initializing the game consists primarily of building the elements that will make the game. The game is split up into four major areas, most being containers that hold several display objects. The initGame function calls each of these game-building functions (see Listing 7-8).
Listing 7-8. The initGame Function Kicks Off a Series of Game-Building Functions
function initGame() {
   buildTitle();
   buildDiceTray();
   buildScoreCard();
   buildScoreboard();
}
Each function will create each of the four areas of the game, which include the game title, the dice traywhere the player will roll and hold dice, the scorecard where the player will choose categories to score in, and finally, the scoreboard that displays the section scores.
Building the Game Title
The game title is a simple sprite that sits on top of the screen. This sprite is created in the buildTitle function, shown in Listing 7-9.
Listing 7-9. The Fakezee Title Sprite
function buildTitle() {
   title = new createjs.Sprite(spritesheet, 'logoSmall'),
   title.regX = title.getBounds().width / 2;
   title.x = canvas.width / 2;
   title.y = TITLE_YPOS;
   //title.alpha = 0;
   stage.addChild(title);
}
After the title is created, the getBounds method is used to retrieve the width of the sprite and is used to set its registration point and centered on the stage. The title’s alpha is set to 0 before added to the stage.
![]() Note Visibility and alpha values for various objects will be set to hidden, but commented out as you build the game elements. These will eventually be uncommented when it comes time to write their reveal animations.
Note Visibility and alpha values for various objects will be set to hidden, but commented out as you build the game elements. These will eventually be uncommented when it comes time to write their reveal animations.
Figure 7-3 shows the Fakezee title screen on the stage.

Figure 7-3. The title sprite sdded to the stage
Building the Dice Tray
The dice tray holds all five dice, the button to trigger the roll, and a few other graphical elements. These will all be contained within the diceTray container and are all built in the buildDiceTray function. Listing 7-10 shows the first third of this function, which declares some variables and creates the tray container and graphics.
Listing 7-10. The buildDiceTray Function Creates the Dice Tray Container
function buildDiceTray() {
   var trayBG, rollMsg, rollBtn, rollBG, rollsTxt, i, die;
   var rollBtnOffset = -27;
   var hGap = 60;
   var xPos = 37;
   var yPos = 37
   //dice tray container
   diceTray = new createjs.Container();
   diceTray.x = DICE_TRAY_POSITION.x;
   diceTray.y = DICE_TRAY_POSITION.y;
   //diceTray.alpha = 0;
   //tray bg
   trayBG = new createjs.Sprite(spritesheet, 'diceTray'),
   diceTray.addChild(trayBG);
   rollMsg = new createjs.Sprite(spritesheet, 'rollMessage'),
   rollMsg.x = trayBG.getBounds().width;
   rollMsg.y = rollBtnOffset;
   rollMsg.name = 'rollMsg';
   //rollMsg.visible = false;
   diceTray.addChild(rollMsg);
   ...
Some variables that will be used for display objects and loops are first created. Then some position values are set that will be used for various placements during the function. The dice tray container is then created, set to the game variable diceTray, and positioned using some of the game constants that were declared earlier.
The background image for the tray is created as a sprite and added as the tray container’s first child. A simple “roll” message graphic is also added and positioned to the container. Next, the dice are created (see Listing 7-11).
Listing 7-11. The buildDiceTray Function Continued: Creating the Dice
...
//dice
for (i = 0; i < NUM_DICE; i++) {
   die = new createjs.Sprite(spritesheet, 'die'),
   die.name = 'die' + i;
   die.paused = true;
   // die.visible = false;
   die.mouseEnabled = false;
   die.regX = die.getBounds().width / 2;
   die.regY = die.getBounds().height / 2;
   die.x = xPos;
   die.y = yPos;
   die.hold = false;
   die.on('click', holdDie);
   xPos += hGap;
   diceTray.addChild(die);
}
...
With a loop, the dice are each created using the animation die that is declared in the sprite sheet data. Figure 7-4 shows the six frames used for this sprite.

Figure 7-4. The six frames that make up a die sprite
Each die is given a sequential name so it can be easily accessed later when evaluating their values. The dice are also set to paused so they don’t start spinning as soon as they are created. Each die will also be initially hidden by setting its visible property to false. For now, this line will be commented out so the dice can be seen while positioning. Their mouseEnabled property is set to false to prevent them from being interactive before a player makes an actual roll.
The registration points for the dice sprites are set to the center. This is so you can create an interesting bounce effect when you initially reveal them at the start of a game. Using xPos and yPos values, they are placed horizontally across the tray (see Figure 7-5).

Figure 7-5. Five die sprites added to the dice tray container
When the player rolls the dice, they are allowed to hold dice before making another roll. To hold this value, you assign the sprite the custom property, hold, and default it to false. This will be used to determine if you should spin the die when making a roll. This property will be toggled using the function holdDie when the player clicks the die. This function will be written in the “Holding Dice” section later in this chapter.
![]() Note The on method is used in this project as a shortcut to addEventListener. This method is jam-packed with useful parameters, including scope control. Since you are still working in the global space, only the event type and listener are needed when using this method. However, its power will be reviewed in-depth in the upcoming chapters and used almost exclusively when adding event listeners.
Note The on method is used in this project as a shortcut to addEventListener. This method is jam-packed with useful parameters, including scope control. Since you are still working in the global space, only the event type and listener are needed when using this method. However, its power will be reviewed in-depth in the upcoming chapters and used almost exclusively when adding event listeners.
Finally, the xPos value is increased and the die is added to the tray container. There’s one more thing needed for the dice tray, the Roll button, which triggers the roll of the dice (see Listing 7-12).
Listing 7-12. The buildDiceTray Function Continued: Creating the Roll Button That Will Roll the Dice
   ...
   //roll button
   rollBtn = new createjs.Container();
   rollBtn.name = 'rollBtn';
   //rollBtn.visible = false;
   rollBtn.x = xPos;
   rollBtn.y = yPos;
   rollBG = new createjs.Sprite(spritesheet, 'rollButton'),
   rollBtn.addChild(rollBG);
   //roll text
   rollsTxt = new createjs.Text(rollsLeft, '27px Calibri', '#FFF'),
   rollsTxt.name = 'rollsTxt';
   rollsTxt.textAlign = 'center';
   rollsTxt.textBaseline = 'middle';
   rollsTxt.x = rollBtn.getBounds().width / 2;
   rollsTxt.y = rollBtn.getBounds().height / 2;
   //add roll button
   rollBtn.regX = rollBtn.getBounds().width / 2;
   rollBtn.regY = rollBtn.getBounds().height / 2;
   rollBtn.addChild(rollsTxt);
   rollBtn.on('click', rollDice);
   diceTray.addChild(rollBtn);
   stage.addChild(diceTray);
}
The Roll button is a container, and it is set to the game variable rollBtn. It’s named and positioned using the values from the previous loop so it falls in line with the five dice.
This container will hold two display objects: a graphic for its background, and a text object to display the number of rolls left in the player’s current turn. The background is a sprite and it is added to the container. Next, a text object is created to display the current value of rollsLeft, which was initially declared as 3. The text is given a name and some styles, and is then positioned using the bounds of the background sprite. The rollButton container’s registration points are set to the center before adding the text object as its second child.
An event listener is set to the Roll button and assigned the handler rollDice, which will be covered in the “Rolling the Dice” section. Finally, the button is added to the diceTray container. Figure 7-6 shows the complete dice tray added to the game.

Figure 7-6. The complete dice tray container added to the stage
Building the Scorecard
Next up is the scorecard, which takes up most of the screen in Fakezee. It contains all of the category options, the total score, and eventually the Play Again button, which will start a brand new game. The buildScoreCard function creates all of these assets and places them into a single container. Listing 7-13 kicks off this function with several variables for display objects and positioning.
Listing 7-13. The buildScoreCard Function Builds the Scoreboard Container
function buildScoreCard() {
   var i, btn, scoreMsg, scoreTxt;
   var xPos = 0;
   var yPos = 0;
   var row = 0;
   var hGap = 49;
   var vGap = 390;
   var btnsPerRow = 6;
   var fakezeeBtnYPos = 75;
   var scoreMsgYPos = 150;
   var section = 1;
   scoreCard = new createjs.Container();
   scoreCard.mouseEnabled = false;
   scoreCard.x = SCORE_CARD_POSITION.x;
   scoreCard.y = SCORE_CARD_POSITION.y;
   ...
After the long set of local variables, the scorecard container is created and set to the game variable scoreCard. The scorecard’s buttons won’t always be enabled during gameplay so you can quickly disable them by setting mouseEnabled to false for entire container. It’s then positioned using some game constants declared earlier. Next, the score buttons are added to the container (see Listing 7-14).
Listing 7-14. The buildScoreCard Function Continued: Creating the Category Buttons
...
// score buttons
for (i = 0; i < scorecardButtons.length; i++) {
   btn = new createjs.Sprite(spritesheet, scorecardButtons[i]);
   //btn.paused = true;
   btn.name = scorecardButtons[i];
   btn.key = scorecardButtonKeys[i];
   btn.section = section;
   btn.y = yPos;
   btn.x = xPos;
   btn.framerate = 30;
   btn.on('animationend', function (e) {
      this.stop();
   });
   btn.on('click', onScoreCardBtnClick);
   scoreCard.addChild(btn);
   yPos += hGap;
   row++;
   if (row === btnsPerRow) {
      section++;
      row = 0;
      yPos = 0;
      xPos += vGap;
   }
}
...
Each score button is a sprite with multiple frames for its revealing animation. As mentioned earlier, the scorecardButtons game array will dictate what animation object to use for each sprite. The loop is used to access those values. Figure 7-7 shows the frames in one of the scorecard category buttons.

Figure 7-7. The frames for the large straight category sprite
Each category button will start paused so you can dictate when you want to actually reveal each one. This is now commented out in the same manner as many other visual properties to help position each element as you create them.
The buttons are given a name and the two custom properties, key and section. Their keys come from the scorebuttonKeys game array, and are helpers to decide how to evaluate the dice when calculating the category score.
Its section value does a few things. In traditional Yahtzee, the categories are split up into two sections, upper score and lower score. The upper section (in this case, section one) consists of the categories, ones through sixes. The rest falls into section two. This section property tells you which section to append the given score to. It’s also used for positioning, since the score buttons will be displayed in two columns, one on each side of the stage.
The buttons are positioned using the typical, incremented xPos and yPos values. Their frame rate is also explicitly set to control the speed in which their revealing animations are played.
A few event listeners are set next. By default, the animation will loop forever, but it needs to stop on its last frame. You can prevent an animation from looping by using the animation object’s next property in the sprite sheet data. This property can be set using Zoe when building your sprite sheets. However, sometimes it’s easier to simply listen for it to end and force it to stop in code, like so:
   btn.on('animationend', function (e) {
      this.stop();
   });
The next listener is for the click, and will fire the onScoreCardBtnClick handler function, which will be covered in the section “Scoring on Categories.” Finally, each button is added to the container. Some positioning calculations are then executed, which also determines if a new row should be started.
Along with some messaging, there is one more button to be added, the Fakezee score button (See Listing 7-15).
Listing 7-15. The buildScoreCard Function Continued: the Fakezee Category Button and Score Messaging
   ...
   // fakezee button
   btn = new createjs.Sprite(spritesheet, 'fakezee'),
   btn.paused = true;
   btn.name = btn.key = 'fakezee';
   btn.section = 2;
   btn.regX = btn.getBounds().width / 2;
   btn.regY = btn.getBounds().height / 2;
   btn.x = scoreCard.getBounds().width / 2;
   btn.y = 75;
   //  btn.alpha = 0;
   btn.on('click', onScoreCardBtnClick);
   scoreCard.addChild(btn);
   //score message
   scoreMsg = new createjs.Sprite(spritesheet, 'totalScoreLabel'),
   scoreMsg.name = 'scoreMsg';
   scoreMsg.regX = scoreMsg.getBounds().width / 2;
   scoreMsg.x = scoreCard.getBounds().width / 2;
   scoreMsg.y = scoreMsgYPos;
   // scoreMsg.alpha = 0;
   scoreCard.addChild(scoreMsg);
   // score
   scoreTxt = new createjs.Text('0', '50px Calibri', '#FFF'),
   scoreTxt.name = 'scoreTxt';
   scoreTxt.textAlign = 'center';
   scoreTxt.x = scoreCard.getBounds().width / 2;
   scoreTxt.y = scoreMsg.y + 30;
   // scoreTxt.alpha = 0;
   scoreCard.addChild(scoreTxt);
   stage.addChild(scoreCard);
}
The Fakezee button is for the best score you can get, so it’s large and placed in the center of the two columns of buttons. It’s positioned and given the same custom properties as the rest of the score buttons, and it will be used in the same ways. Its score will be added to section two, and clicking it will also call the onScoreCardBtnClick function.
The scoreMsg sprite is simply a graphical message that will sit on top of the text object scoreTxt, which will hold the total score. Both are positioned and added to the stage. Figure 7-8 shows the stage with the scorecard added.
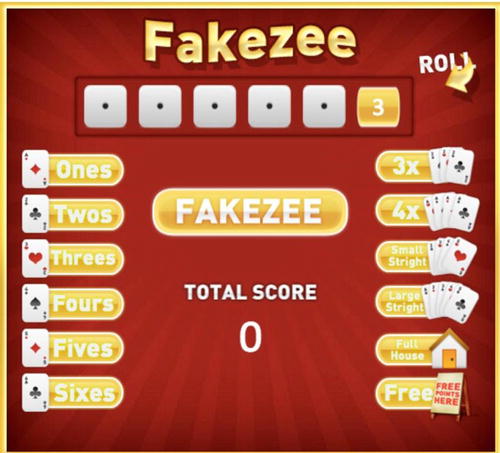
Figure 7-8. The complete scorecard container added to the stage
Building the Scoreboard
The scoreboard is the final group needed for the game. It will also be a container and will hold the scores for both sections and bonus points scored when scoring multiple Fakezees (see Listing 7-16).
Listing 7-16. The buildScoreBoard Function Builds the Container to Hold the Game Scores
function buildScoreboard() {
   var scoreBar, txt, xPos;
   var padding = 5;
   var sec1XPos = 12;
   var sec2XPos = 145;
   var bonusXPos = 280;
   scoreboard = new createjs.Container();
   scoreboard.x = SCOREBOARD_POSITION.x;
   scoreboard.y = SCOREBOARD_POSITION.y;
   //scoreboard.alpha = 0;
   scoreBar = new createjs.Sprite(spritesheet, 'scoreBar'),
   scoreBar.name = 'scoreBar';
   scoreboard.addChild(scoreBar);
   //section 1
   txt = createScoreboardText('Section 1 Score:', sec1XPos, padding)
   scoreboard.addChild(txt);
   xPos = txt.getMeasuredWidth() + txt.x + padding;
   txt = createScoreboardText(section1Score, xPos, padding,
      'section1Txt'),
   scoreboard.addChild(txt);
   //section 2
   txt = createScoreboardText('Section 2 Score:', sec2XPos, padding);
   scoreboard.addChild(txt);
   xPos = txt.getMeasuredWidth() + txt.x + padding;
   txt = createScoreboardText(section2Score, xPos, padding,
      'section2Txt'),
   scoreboard.addChild(txt);
   //bonus
   txt = createScoreboardText('Bonus Score:', bonusXPos, padding);
   scoreboard.addChild(txt);
   xPos = txt.getMeasuredWidth() + txt.x + padding;
   txt = createScoreboardText(bonusScore, xPos, padding, 'bonusTxt'),
   scoreboard.addChild(txt);
   stage.addChild(scoreboard);
}
function createScoreboardText(label, x, y, name) {
   var txt = new createjs.Text(label, '16px Calibri', '#FFF'),
   txt.x = x;
   txt.y = y;
   txt.name = name;
   return txt;
}
The scoreboard game variable is used to create the scoreboard container. It contains one background sprite and six text objects. Three of the text objects are labels, and the other three will be updated with scores after each turn.
This function builds and places each text object horizontally across the board. The text objects that need to be updated are given names so they are easily accessible when updating them. The actual creation of each text object is built and returned in a separate function named createScoreboardText. All text uses the same styling, so this function is used to split up the code and make things a little easier to read. The text-creating function is passed the necessary values to create the text, and passes back the new text object. Figure 7-9 shows the scoreboard added to the stage.
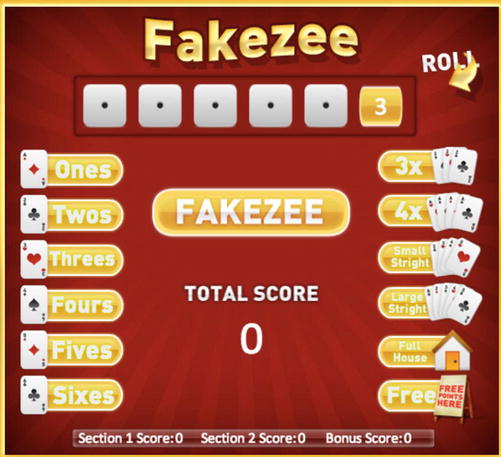
Figure 7-9. The scoreboard container completes the graphical elements needed for the game
A lot of sprites, containers, and text were just created to make up the necessary elements of Fakezee. With each asset in place, let’s backtrack a bit to hide the containers and sprites so you can give them all a fancy entrance.
As the game elements were being built, several display objects were set to be initially hidden, either by given an alpha value of 0, a visibility of false, or set as paused when first created. These lines of code were all commented out so you could see what was being created and where things were being placed. In this section, each element will be revealed, either by fading, sliding, or bouncing.
Go back and uncomment the necessary lines of code so the game will start with an empty stage. The lines of code and their functions are as follows:
- Under the buildTitle function, uncomment
- title.alpha = 0;
- Under the buildDiceTray function, uncomment
- diceTray.alpha = 0;
- rollMsg.alpha = 0;
- die.visible = false; (in dice creating loop)
- rollBtn.visible = false;
- Under the buildScoreCard function, uncomment
- btn.paused = true; (in button creating loop)
- btn.alpha = 0; (fakezee button)
- scoreMsg.alpha = 0;
- scoreTxt.alpha = 0;
- Under the buildScoreboard function, uncomment
- scoreboard.alpha = 0;
Now when you run your game, you should get an empty stage, showing nothing but the background image in the DOM element behind it (see Figure 7-10).
Figure 7-10. The game’s sprites and containers are initially hidden and ready for a grand entrance
Now that everything is hidden, the revealGame function needs to be called to fire each revealing animation. A series of timeouts are chained together by utilizing TweenJS. This will create a short delay before each section starts their animations (see Listing 7-17).
Listing 7-17. Each Section Holds its Own Revealing Function
function revealGame() {
   createjs.Tween.get(this)
        .wait(100).call(revealTitle)
        .wait(400).call(revealDiceTray)
        .wait(1400).call(revealScoreCard)
        .wait(2000).call(revealScoreboard);
}
For this function to work, it needs to be called. Revisit the initGame function and one final function call at the end.
function initGame() {
   buildTitle();
   buildDiceTray();
   buildScoreCard();
   buildScoreboard();
   revealGame();
}
Revealing the Title and Dice Tray
The first areas of the game that are animated in are the title and dice tray. Listing 7-18 shows this being accomplished with two functions, one for each section.
Listing 7-18. The revealTitle and revealDiceTray Functions
function revealTitle() {
   createjs.Tween.get(title).to({alpha:1}, 400);
}
function revealDiceTray() {
   var i, die, delay, btn, rollMessage;
   createjs.Tween.get(diceTray).to({alpha:1}, 500);
   for (i = 0; i < NUM_DICE; i++) {
      die = diceTray.getChildByName('die' + i);
      die.scaleX = die.scaleY = 0;
      die.visible = true;
      delay = (i * 150) + 500;
      createjs.Tween.get(die).wait(delay)
         .to({scaleX:1, scaleY:1}, 1000, createjs.Ease.elasticOut);
   }
   btn = diceTray.getChildByName('rollBtn'),
   btn.scaleX = btn.scaleY = 0;
   btn.visible = true;
   delay += 150;
   createjs.Tween.get(btn).wait(delay)
      .to({scaleX:1, scaleY:1}, 1000, createjs.Ease.elasticOut);
   rollMsg = diceTray.getChildByName('rollMsg'),
   createjs.Tween.get(rollMsg).wait(delay).to({alpha:1},1000);
}
The title shouldn’t need much explanation. A simple fade is accomplished using a tween. Revealing the dice tray is a bit more exciting. At first, only the tray’s background is revealed as the entire container is faded in using a tween. Next, each die is handled.
A loop is created to access each die in the tray. Using getChildByName and the loop iterator value, each die is found. The scaleX and scaleY of each die is set to 0, which will essentially give it a size of nothing, and the visibility is then turned back on. By gradually incrementing the delay local variable, an offset to each die animation is accomplished. This value is used in the tween call, which scales each die back up with a bounce effect. Using the same approach, the roll button follows suit, and bounces in line with the dice. Finally, the roll message sprite is faded in, and the dice tray is then fully revealed. Figure 7-11 shows the dice tray revealing, mid animation.
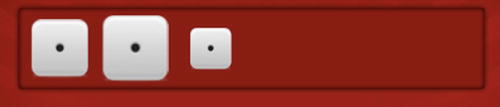
Figure 7-11. The dice animating in sequentially with a bounce effect
Revealing the Scorecard
The scorecard is revealed in a similar fashion as the dice tray. The scorecard container holds several animated sprites that will play their frames to reveal themselves, each starting their animation with a slight offset from the proceeding one. In this case, an interval is set to play each sprite (see Listing 7-19).
Listing 7-19. The scoreCard Function Plays all Category Button Sprites
function revealScoreCard() {
   var btn, timer;
   var len = scorecardButtons.length;
   var i = 0;
   timer = setInterval(function () {
      btn = scoreCard.getChildAt(i);
      btn.play();
      i++;
      if (i === len) {
         clearInterval(timer);
         btn = scoreCard.getChildByName('fakezee'),
         btn.y -= 10;
         createjs.Tween.get(btn).to({alpha:1, y:btn.y + 10}, 500);
      }
   }, 100);
}
During each interval, the appropriate sprite animation is played by using getChildAt and the incremented variable i. These buttons were the first things to be added to the container, so this method will work fine. The interval should stop when the interval counter i has reached the length of the scorecardButtons array. The interval is then cleared, and a simple fade-in-and-slide-down effect is applied to the large Fakezee button in the middle.
Revealing the Scoreboard
The scoreboard is simply revealed by fading up. The scorecard’s total score sprite and its corresponding text object are handled in this function as well (see Listing 7-20).
Listing 7-20. All Scores’ Messages Are Revealed with the revealScoreBoard Function
function revealScoreboard() {
   var totalScoreMsg = scoreCard.getChildByName('scoreMsg'),
   var totalScoreTxt = scoreCard.getChildByName('scoreTxt'),
   createjs.Tween.get(totalScoreTxt).to({alpha:1}, 500);
   createjs.Tween.get(totalScoreMsg).to({alpha:1}, 500);
   createjs.Tween.get(scoreboard).to({alpha:1}, 500);
}
All objects are simultaneously faded in, and the entire game is now visible and ready to play.
Playing the Rounds
It’s now time to program the game logic for Fakezee. There were a few listeners that were set on display objects as as they were built, which will roll and hold the dice, and choose sections to score on. Each round starts with rolling and holding dice, which will be covered in this section.
Rolling the Dice
Rolling the dice is triggered by clicking on the rollBtn container. This container holds a text object that displays the number of rolls available, which will be three at the beginning of each round. Listing 7-21 shows the handler function that is called when clicking the Roll button.
Listing 7-21. The rollDice Function Rolls the Dice by Playing the Dice Sprites
function rollDice(e) {
   var i, die;
   var rollBtn = e.currentTarget;
   var rollsTxt = rollBtn.getChildByName('rollsTxt'),
   enableDice(false);
   scoreCard.mouseEnabled = false;
   rollBtn.mouseEnabled = false;
   rollBtn.alpha = .7;
   rollsLeft -= 1;
   rollsTxt.text = rollsLeft;
   for (i = 0; i < NUM_DICE; i++) {
      die = diceTray.getChildByName('die' + i);
      if (die.hold) {
         continue;
      }
      die.framerate = Math.floor(Math.random() * 10) + 20;
      die.play();
   }
   setTimeout(stopDice, 1000);
}
A reference to the roll button is stored by accessing the currentTarget property of the event passed into the function.
var rollBtn = e.currentTarget;
![]() Note You should always use currentTarget as opposed to target when accessing a container that triggered the event. The target property will usually refer to the child inside of the container that was clicked, as opposed to the actual container object itself.
Note You should always use currentTarget as opposed to target when accessing a container that triggered the event. The target property will usually refer to the child inside of the container that was clicked, as opposed to the actual container object itself.
The text object inside the roll button is also stored away so you can update it later in the function. A function named enableDice is then called and passed a value of false. This will disable all dice while they are spinning. This function will be covered in the next section, “Holding Dice.” The scorecard and the Roll button both need to be disabled during a roll as well, which is done by disabling mouse events on each of them.
When the Roll button is hit, its disabled state is visually represented by setting its alpha to 0.7. The rollsLeft game variable is decreased by 1, and the text object inside the Roll button is immediately updated to display this. Next, a loop is set to roll each die.
The die sprites are created with a custom property called hold, which is set to false. When these values get updated during the holding process, they will be skipped and not set to roll in the loop. If they are not held, each die is given a random frame rate value and then played. After one second, the stopDice function is called, which will stop each die from playing its frames. The random frame rates result in the random frame each die lands on.
Holding Dice
After the dice are rolled, the next step in the round is to select or deselect the dice you wish to hold during your next roll. Before you can choose these dice, the spinning needs to stop, and several objects need to become active and clickable. This is all handled in the stopDice function, shown in Listing 7-22.
Listing 7-22. The stopDice Stops the Dice on Random Frames, Based on Their Frame Rate
function stopDice() {
   var i, die;
   diceValues = [];
   for (i = 0; i < NUM_DICE; i++) {
      die = diceTray.getChildByName('die' + i);
      die.stop();
      diceValues[i] = Math.floor(die.currentAnimationFrame) + 1;
   }
   if (rollsLeft > 0) {
      enableDice(true);
      var rollBtn = diceTray.getChildByName('rollBtn'),
      rollBtn.alpha = 1;
      rollBtn.mouseEnabled = true;
   }
   scoreCard.mouseEnabled = true;
}
The game variable diceValues is used to store the current values of all dice after each roll. This array is emptied before setting up the dice loop. Each die is accessed via its name and stopped by calling stop(). The value of each die is pushed to diceValues and is determined by the frame it stopped on. You can access this by the currentAnimationFrame on a sprite. This value is not a whole number, so you need to floor it. These animation frame numbers start at 0, so adding a 1 will give you the values that match the dice graphics. Figure 7-12 shows the dice stopped after the first roll.
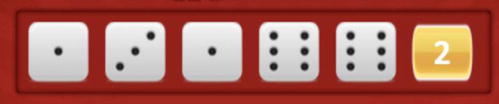
Figure 7-12. The state of the dice tray after a player roll
Next, the number of rolls left in the current round is checked. If the number is greater than 0, the dice and roll button are enabled so both dice holding and dice rolling can continue.
One more thing needs to happen when the dice stop. A player can choose a category in the middle of a round, so the scorecard needs to become enabled every time the dice stop, regardless of how many rolls are left.
You’ve seen the enableDice and holdDie functions called on in a few different cases so far in the code. You most likely have a pretty good idea of what these functions are doing. Listing 7-23 shows how these functions are written.
Listing 7-23. The holdDie Function Toggles the Hold Value on the Die Clicked
function enableDice(enable) {
   var die, i;
   for (i = 0; i < NUM_DICE; i++) {
      die = diceTray.getChildByName('die' + i);
      die.mouseEnabled = enable;
   }
}
function holdDie(e) {
   var die = e.target;
   if (!die.hold) {
      die.hold = true;
      die.alpha = .7;
   }
   else {
      die.hold = false;
      die.alpha = 1;
   }
}
The enableDice function accepts one parameter, which is a Boolean and will be used to set the mouseEnabled of each die. This allows you to write one function for handling both the enabling and disabling of the dice.
The dice are held by calling the holdDie function, which is the click handler set on each die sprite. A simple conditional is written to toggle its hold value, as well as its alpha value to visually represent its state.
Scoring on Categories
When a player is out of rolls, or is happy with the current roll they are on, the next step in a round is to choose a category to apply a score to. This section will cover score messaging for the category buttons, as well as the scoreboard section scores and total score message, respectively.
Choosing a Category
A player chooses a category to score on by clicking an available category button in the scorecard container. These event listeners are already set on each button, and their handler function is shown in Listing 7-24.
Listing 7-24. The onScoreCardBtnClick Marks the Score in the Appropriate Category
function onScoreCardBtnClick(e) {
   var btn = e.target;
   btn.mouseEnabled = false;
   scoreCard.mouseEnabled = false;
   var score = 100;
   btn.gotoAndStop(btn.name + '_score'),
   updateScore(btn, score);
   updateScoreboard();
   evalGame();
}
The category clicked is first referenced and set to btn. It is immediately disabled to prevent it from being clicked on for the remainder of the game. The scorecard itself is then disabled to prevent any other category from also being pressed.
This next line is temporary. Every score will be set to 100 for the time being. There is quite a bit of scoring logic to determine the category score, but you can hold off on that now and finish the game logic first. This score will be accessed by calling on a Scoring object, or class, that will be built during the “Calculating the Scores” section later in this chapter.
With the score statically set, the value needs to be displayed in the category to which it belongs. As you know, each category button is a sprite with multiple frames. In the sprite sheet object, each animation has a corresponding frame that uses its same name with an appended _score at the end.
"ones":{frames:[158, 159, 160, 161, ...177] },
"ones_score":{frames:[178] }
This extra frame is a clone of the animation’s last frame, only without the text in the graphic. This leaves room to place a text object on top with the score value. Figure 7-13 shows this frame.
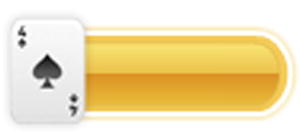
Figure 7-13. The frame used for the fours category button when chosen to score on
A series of functions are next called, which will add text objects to each category, update the scoreboard, and evaluate the game.
Updating the Score
When a score is determined, the category needs to display it, and the score messaging inside the scoreboard and scorecard should be updated. The sprite frame for the selected category is now updated to make room for text and is added using the udpateScore function, shown in Listing 7-25.
Listing 7-25. The udpateScore Function Creates a Text Object and Places It Above the Chosen Category
function updateScore(btn, score) {
   var label = new createjs.Text(score, '27px Calibri', '#FFF'),
   var labelXOffset;
   var labelYOffset;
   switch (btn.section) {
      case 1:
         section1Score += score;
         labelXOffset = 70;
         labelYOffset = 11;
         break;
      case 2:
         section2Score += score;
         if (btn.name == 'fakezee') {
            labelXOffset = 0;
            labelYOffset = -15;

         }
         else {
            labelXOffset = 35;
            labelYOffset = 10;
         }
         break;
   }
   label.name = 'label';
   label.textAlign = 'center';
   label.x = btn.x + labelXOffset;
   label.y = btn.y + labelYOffset;
   scoreCard.addChild(label);
}
A text object is created and given a value of the score passed into the function. A few positioning variables are then declared and will be given values based on the section of the category button selected. The appropriate score is also updated using this same section value.
Because the buttons in section one are graphically different than those in section two, the text offset position needs to be different. Using the section value of the button passed into the function, the offset values are set. The giant Fakezee button in the middle has its own layout as well, and is considered in the case of section two.
      case 2:
         section2Score += score;
         if (btn.name == 'fakezee') {
            labelXOffset = 0;
            labelYOffset = -15;

         }
         else {
            labelXOffset = 35;
            labelYOffset = 10;
         }
         break;
The text is then appropriately positioned above its corresponding section and added to the scorecard container. Figure 7-14 demonstrates the ones and threes sections updated after being clicking.
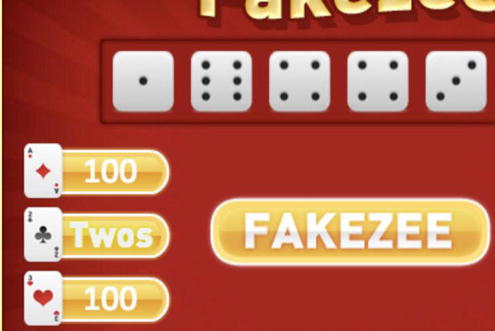
Figure 7-14. The category buttons when scores are applied
After a category is scored, the rest of the scoring messages need to update as well. The updateScoreboard function updates the appropriate text objects (see Listing 7-26).
Listing 7-26. All Score Messaging is Updated in the updateScoreboard Function
function updateScoreboard() {
   var section1Txt = scoreboard.getChildByName('section1Txt'),
   var section2Txt = scoreboard.getChildByName('section2Txt'),
   var bonusTxt = scoreboard.getChildByName('bonusTxt'),
   var totalScoreTxt = scoreCard.getChildByName('scoreTxt'),
   section1Txt.text = section1Score;
   section2Txt.text = section2Score;
   bonusTxt.text = bonusScore;
   totalScoreTxt.text = totalScore =  (section1Score + section2Score + bonusScore);
}
Each text object is referenced by its name and accessed via the container to which it belongs. The game variables that hold the scores were updated in the previous function, so their values are simply assigned to their corresponding text object. The total score message is then updated to be the sum of all scores.
Evaluating the Game
When a score is made, the game will either carry on or end. This section will cover both scenarios, which are determined by the function evalGame (see Listing 7-27).
Listing 7-27. The evalGame Function Determines if the Game Should End
function evalGame() {
   numScored++;
   if (numScored == NUM_SCORES) {
      setTimeout(gameOver, 1500);
   }
   else {
      resetDiceTray();
   }
}
The numScored game variable is increased and then evaluated to see if it has reached the predetermined number of scores per game. The gameOver function is called if the player has scored on all categories, or the resetDiceTray function is called to resume the game.
Resetting the Dice Tray
For the game to continue, the dice and roll button need to be reset to their appropriate states to start a new round. Listing 7-28 shows the process of preparing a new round.
Listing 7-28. Resetting the Dice Tray so the Player Can Start a New Round
function resetDiceTray() {
   var die, i;
   var rollBtn = diceTray.getChildByName('rollBtn'),
   var rollsTxt = rollBtn.getChildByName('rollsTxt'),
   for (i = 0; i < NUM_DICE; i++) {
      die = diceTray.getChildByName('die' + i);
      die.alpha = 1;
      die.mouseEnabled = false;
      die.hold = false;
   }
   rollBtn.alpha = 1;
   rollBtn.mouseEnabled = true;
   rollsLeft = rollsTxt.text = NUM_ROLLS;
}
The Roll button and its text is first accessed and set to local variables. Next, a loop is set up to access each of the dice. The alpha of each die is restored, mouse interaction is disabled, and their hold properties are all reset to false. Lastly, the Roll button is enabled, the rollsLeft game variable is reset to 3, and the Roll button’s text object is updated to match.
Ending and Replaying the Game
The final game logic is to end the game and restart it. The game over state will simply add a Play Again button, which is done in the function gameOver, shown in Listing 7-29.
Listing 7-29. The gameOver Function Creates a Play Again Button and Puts It in Place of the Fakezee Category Button
function gameOver() {
   var playAgainBtn = new createjs.Sprite(spritesheet, 'playAgain'),
   var fakezeeBtn = scoreCard.getChildByName('fakezee'),
   playAgainBtn.regX = fakezeeBtn.regX;
   playAgainBtn.regY = fakezeeBtn.regY;
   playAgainBtn.x = fakezeeBtn.x;
   playAgainBtn.y = fakezeeBtn.y;
   playAgainBtn.on('click', replayGame);
   scoreCard.addChild(playAgainBtn);
   scoreCard.removeChild(fakezeeBtn);
   scoreCard.mouseEnabled = true;
}
The Play Again button is a sprite and will completely replace the Fakezee button (see Figure 7-15).
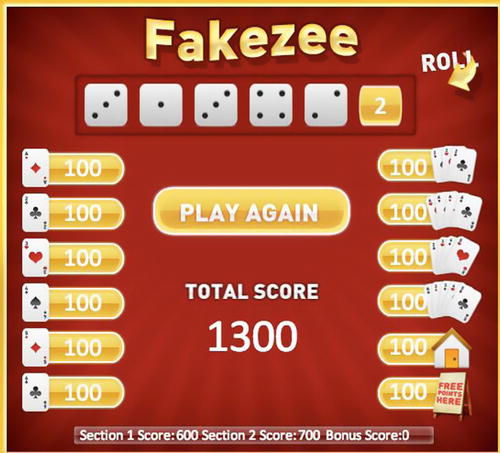
Figure 7-15. The game Fakezee when all scores are counted and the game is complete
Its click handler is the function replayGame, shown in Listing 7-30.
Listing 7-30. Game Variables Are Reset and All Display Objects Are Removed from the Stage
function replayGame() {
   section1Score = section2Score = bonusScore = numScored = 0;
   rollsLeft = NUM_ROLLS;
   stage.removeAllChildren();
   initGame();
}
To reset the game, a list of game variables is reset to 0 and rollsLeft is set back to 3. Next, all four display objects on the stage are completely removed, and initGame is called, which will start the whole process over and make a new game.
The game should be completely playable at this point, minus the actual score calculations. After confirming that you can get to the end of the game and restart it, the Scoring class will be built next.
The scoring functions will be built in a separate object in a separate JavaScript file. Moving functionality into self-contained objects is a common practice in JavaScript, and makes larger games much more manageable. Building more complex JavaScript objects as classes will be discussed further in Chapter 8.
To get started with scoring, open the Scoring.js file that was created and added to the document at the beginning of the chapter. This file will contain only the Scoring object.
Setting Up the Scoring Class
Objects in JavaScript can be set up in several ways and can very much act as working classes. In the case of scoring, the class will be called statically. In other words, instances of the object will not be created. An example of this would be the Math object that is built into JavaScript.
var num = Math.floor(123.45);
The object Math has a method named floor that takes one parameter and returns a result. The Scoring class will be utilized in the same way. Listing 7-31 shows how the object is set up.
Listing 7-31. Settng Up the Scoring Class
var Scoring = {
   dice:[],
   btnKey:null
};

Scoring.getScore = function (type, dice, key) {
   dice.sort();
   this.dice = dice;
   this.btnKey = key;
}
The object is set up similar to your typical JavaScript object literal and contains two properties, dice and btnKey. The methods to this object are added directly on the object after it has been declared.
The getScore method is the only method called from within the game. It needs three values, the first being the type of category, such as ones or fullHouse. This determines what scoring function to call. The second is an array of the dice values, and lastly is the button key, which is a number used in certain types of calculations.
To make things easier in certain scoring functions, the dice array is sorted so the dice are in order sequentially. Next, the dice and btnKey properties are set so you can access them in each function.
![]() Note Since you are in the scope of Scoring, this can be used to access all properties and methods that belong to it.
Note Since you are in the scope of Scoring, this can be used to access all properties and methods that belong to it.
Next, the type parameter is used to find the appropriate function to execute. A switch statement is added to the end the getScore function (see Listing 7-32).
Listing 7-32. A Switch Statement Is Added to Determine the Scoring Function to Run
Scoring.getScore = function (type, dice, key) {
   dice.sort();
   this.dice = dice;
   this. btnKey = key;
   switch (type) {
      case 'ones':
      case 'twos':
      case 'threes':
      case 'fours':
      case 'fives':
      case 'sixes':
         return this.getNumberScore();
         break;
      case 'threeKind':
      case 'fourKind':
         return this.getKinds();
         break;
      case 'small':
      case 'large':
         this.dice = this.uniqueArray(this.dice);
         return this.getStraights();
         break;
      case 'fullHouse':
         return this.getFullHouse();
         break;
      case 'chance':
         return this.getChance();
         break;
      case 'fakezee':
         return this.getFakezee();
         break;
      case 'bonus':
         return this.getFakezee() * 2;
         break;
   }
}
Each scoring calculation function returns the score, which is then immediately returned back to the game, where the method was called.
// from game with static values
var score = Scoring.getScore('sixes',[2,4,6,6,1],6);  // returns 12
You can see how only one line of code is needed within your game logic to retrieve each score. You’ll see next, in the “Scoring for Number Categories” section, where the button key 6 came into play in the previous example.
Scoring for Number Categories
All six categories in section one use this next function. The scoring for this category works by adding the total of all dice with the number that the category represents. For instance, if the category type is threes, the sum of all dice with the value of 3 is returned (see Listing 7-33).
Listing 7-33. The Ones Through Sixes Categories Used the getNumberScore
Scoring.getNumberScore = function () {
   var i, value;
   var score = 0;
   var len = this.dice.length;
   for (i = 0; i < len; i++) {
      if (this.dice[i] == this.btnKey) {
         score += this.dice[i];
      }
   }
   return score;
}
In this function, you loop through each die value and append its value to the score variable, but only if its value is equal to btnKey. In this case, this is how the button key is used. Finally, the score is returned.
Scoring for Kinds
Two categories use this next function. For a three of a kind, a score is rewarded if three of the dice have equal values. The awarded score is the sum all dice. The same scoring is used for four-of-a-kinds as well (see Listing 7-34).
Listing 7-34. Scoring for Three- and Four-of-a-kinds
Scoring.getKinds = function () {
   var i;
   var match = 0;
   var score = 0;
   var pass = false;
   var matchesNeeded = this.btnKey;
   var len = this.dice.length;
   for (i = 0; i < len; i++) {
      score += this.dice[i];
      if (this.dice[i] == this.dice[i + 1]) {
         if (i != this.dice.length) {
            match++;
            if (match >= matchesNeeded) {
               pass = true;
            }
         }
      }
      else {
         match = 0;
      }
   }
   score = pass ? score : 0;
   return score;
}
Scoring for kinds is one of the functions that take advantage of the dice being sorted. Looping through the dice, each die is compared to the die in front of it. When matches are found, the local variable match is incremented.
Along with match being declared as 0, a few more variables are set. The score variable starts at 0 and is incremented with each iteration of the loop by the value of each die. At the end of the loop, the score variable will contain the sum of all dice. The pass value is set to true as soon as the appropriate consecutive matches are found. This pass variable is determined by comparing matches against the button key and will be used to determine if the player is awarded the score or not.
Scoring for Straights
Two categories use this next function. Thirty points are awarded for four dice that form a sequence. Forty points are given if all dice form a sequence (see Listing 7-35).
Listing 7-35. Small and Large Straight Scores
Scoring.getStraights = function () {
   var i;
   var match = 0;
   var score = this.btnValue == 4 ? 30 : 40;
   var matchesNeeded = this.btnValue;
   var pass = false;
   var len = this.dice.length - 1;
   for (i = 0; i < len ; i++) {
      if (this.dice[i] == (this.dice[i + 1] - 1)) {
         match++;
         if (match >= matchesNeeded) {
            pass = true;
            break;
         }
      }
      else {
         match = 0;
      }
   }
   score = pass ? score : 0;
   return score;
}
This function basically works the same way as the getKinds; however, when comparing two dice for equal values in the loop, the next die value is subtracted by one. If they match in value, then you know that they are in sequence. This continues on and either increments matches or resets it back to 0. The button key is also used in this function as the necessary goal for matches.
Before running this function, a function was called to extract any duplicate values in the dice values array. Since it is quite possible for two dice to be of the same value and still achieve a small straight, this could break the match count in the middle of a run. Consider the following dice values:
[1,2,3,3,4];
During the loop, the third and fourth dice will not pass the conditional, and this will result in a reset of the match count. Therefore it is necessary to make this array a unique array.
[1,2,3,4];
This procedure is accomplished by adding the utility function, uniqueArray to the Scoring object (see Listing 7-36).
Listing 7-36. The uniqueArray Utility Function Removes All Duplicates in an Array
Scoring.uniqueArray = function (a) {
   var temp = {};
   for (var i = 0; i < a.length; i++) {
      temp[a[i]] = true;
   }
   var r = [];
   for (var k in temp) {
      r.push(k / 1);
   }
   return r;
}
This simple utility function loops through the dice values and assigns each as a property name in a temporary, local object. When coming across a value that has already been added to the object, it simply overrides it. You would end up with this object, using the previous example array:
{1:true,2:true,3:true,4:true}
This object can now be used in a loop to create and return a unique array.
Scoring for a Full House
A full house is used for only one category, so the button’s key is not needed. Listing 7-37 shows how to check the dice for a full house.
Listing 7-37. Scoring for the Full House Category
Scoring.getFullHouse = function () {
   var pass = false;
   var score = 0;
   if (this.dice[0] == this.dice[1] && this.dice[1] != this.dice[2] &&
         this.dice[2] == this.dice[3] && this.dice[3] == this.dice[4]) {
      pass = true;
   }
   else if (this.dice[0] == this.dice[1] && this.dice[1] == this.dice[2] &&
         this.dice[2] != this.dice[3] && this.dice[3] == this.dice[4]) {
      pass = true;
   }
   score = (pass ? 25 : 0);
   return score;
}
A full house is awarded if one of two possible scenarios occurs. If the first two dice are of equal value, and the last three are equal of a different value, 25 points are awarded. The only other possible scenario is checked in a similar way, only the first three are evaluated, and then the last two. If neither of these is true, a score of 0 is returned.
Scoring for Chance
Chance is usually chosen when your dice won’t give you a particularly good score, given the available choices. The getChance function is shown in Listing 7-38.
Listing 7-38. The Sum of All Dice for the Chance Category
Scoring.getChance = function () {
   var score = 0;
   var len = this.dice.length;
   for (var i = 0; i < len; i++) {
      score += this.dice[i];
   }
   return score;
}
Chance is simply the sum of all dice. A loop is created to increment the score variable, which is then returned at the end of the function.
Scoring for Fakezee and Bonus Fakezee
A Fakezee is a five of a kind. Listing 7-39 loops through all dice to check for a valid Fakezee.
Listing 7-39. The getFakezee Function Checks if All Dice Are of the Same Value
Scoring.getFakezee = function () {
   var pass = false;
   var score = 0;
   if (this.dice[0] == this.dice[1] && this.dice[1] == this.dice[2] &&
         this.dice[2] == this.dice[3] && this.dice[3] == this.dice[4]) {
      pass = true;
   }
   score = (pass ? 50 : 0);
   return score;
}
Fifty points are rewarded for a Fakezee. This same function is used to check for bonus Fakezees. To receive a bonus Fakezee, the player must have previously rolled a Fakezee and scored on the Fakezee category, respectively. In the getScore function, a case for the type bonus calls on this same function to check the dice. The result is multiplied by 2 and returned back to the game. This gives a score of either 100 or 0. Later, in the section “Using the Scoring Class,” this bonus check will be added to the game logic.
The Complete Scoring Class
The Scoring class is now complete and ready to be used in the game. Listing 7-40 shows the entire Scoring object, which resides in the file Scoring.js.
Listing 7-40. Scoring.js, the Complete Scoring Class
var Scoring = {
   dice:[],
   btnKey:null
};

Scoring.getScore = function (type, dice, key) {
   dice.sort();
   this.dice = dice;
   this.btnKey = key;
   switch (type) {
      case 'ones':
      case 'twos':
      case 'threes':
      case 'fours':
      case 'fives':
      case 'sixes':
         return this.getNumberScore();
         break;
      case 'threeKind':
      case 'fourKind':
         return this.getKinds();
         break;
      case 'small':
      case 'large':
         this.dice = this.uniqueArray(this.dice);
         return this.getStraights();
         break;
      case 'fullHouse':
         return this.getFullHouse();
         break;
      case 'chance':
         return this.getChance();
         break;
      case 'fakezee':
         return this.getFakezee();
         break;
      case 'bonus':
         return this.getFakezee() * 2;
         break;
   }
}
Scoring.getNumberScore = function () {
   var i, value;
   var score = 0;
   var len = this.dice.length;
   for (i = 0; i < len; i++) {
      if (this.dice[i] == this.btnKey) {
         score += this.dice[i];
      }
   }
   return score;
}
Scoring.getKinds = function () {
   var i;
   var match = 0;
   var score = 0;
   var pass = false;
   var matchesNeeded = this.btnKey;
   var len = this.dice.length;
   for (i = 0; i < len; i++) {
      score += this.dice[i];
      if (this.dice[i] == this.dice[i + 1]) {
         if (i != this.dice.length) {
            match++;
            if (match >= matchesNeeded) {
               pass = true;
            }
         }
      }
      else {
         match = 0;
      }
   }
   score = (pass ? score : 0);
   return score;
}
Scoring.getStraights = function () {
   var i;
   var match = 0;
   var score = this.btnKey == 3 ? 30 : 40;
   var matchesNeeded = this.btnKey;
   var pass = false;
   var len = this.dice.length;
   for (i = 0; i < len - 1; i++) {
      if (this.dice[i] == (this.dice[i + 1] - 1)) {
         match++;
         if (match >= matchesNeeded) {
            pass = true;
            break;
         }
      }
      else {
         match = 0;
      }
   }
   score = pass ? score : 0;
   return score;
}
Scoring.getFullHouse = function () {
   var pass = false;
   var score = 0;
   if (this.dice[0] == this.dice[1] && this.dice[1] != this.dice[2] &&
         this.dice[2] == this.dice[3] && this.dice[3] == this.dice[4]) {
      pass = true;
   }
   else if (this.dice[0] == this.dice[1] && this.dice[1] == this.dice[2] &&
         this.dice[2] != this.dice[3] && this.dice[3] == this.dice[4]) {
      pass = true;
   }
   score = pass ? 25 : 0;
   return score;
}
Scoring.getChance = function () {
   var score = 0;
   for (var i = 0; i < this.dice.length; i++) {
      score += this.dice[i];
   }
   return score;
}
Scoring.getFakezee = function () {
   var pass = false;
   var score = 0;
   if (this.dice[0] == this.dice[1] && this.dice[1] == this.dice[2] &&
         this.dice[2] == this.dice[3] && this.dice[3] == this.dice[4]) {
      pass = true;
   }
   score = (pass ? 50 : 0);
   return score;
}
//UTIL
Scoring.uniqueArray = function (a) {
   var temp = {};
   for (var i = 0; i < a.length; i++) {
      temp[a[i]] = true;
   }
   var r = [];
   for (var k in temp) {
      r.push(k / 1);
   }
   return r;
}
Using the Scoring Class
A temporary value of 100 is currently used when scoring on categories. Now that the Scoring class is complete, it can be used in the game logic. Moving back into fakezee.js, a few additions are needed for the onScoreCardBtnClick function (see Listing 7-41).
Listing 7-41. Using the Scoring Class in the Game
function onScoreCardBtnClick(e) {
   var btn = e.target;
   btn.mouseEnabled = false;
   scoreCard.mouseEnabled = false;
   var score = Scoring.getScore(btn.name, diceValues, btn.key);
   if (scoredFakezee) {
      bonusScore += Scoring.getScore('bonus', diceValues, null);
   }
   if (btn.name == 'fakezee'&& score == 50) {
      scoredFakezee = true;
   }
   btn.gotoAndStop(btn.name + '_score'),
   updateScore(btn, score);
   updateScoreboard();
   evalGame();
}
First, delete the temporary line that sets the score to 100 and replace it with the following code that utilizes the new scoring class:
var score = Scoring.getScore(btn.name, diceValues, btn.key);
The name of the clicked category button is used for the type parameter, the diceValues game variable is used for dice, and the button’s key is used for key. Now the scoring is fully functional, but there is one more topic to cover: bonus Fakezee.
The scoredFakezee game variable is used to determine if a Fakezee roll has been scored. If so, bonus is passed into a quick call on the getScore function, which will return 100 or 0, which will be added to the game variable bonusScore.
if (scoredFakezee) {
   bonusScore += Scoring.getScore('bonus', diceValues, null);
}
After this bonus code, a check is used to see if bonusScore should be set to true for future scoring. The result will be true in only one scenario, when the current category button’s name is “fakezee” and it resulted in a score of 50.
This brings us to the end of the code for Fakezee. For your convenience, the entire game logic is available in the fakezee.js file available with the other source code from the Source Code/Downloads tab on this book’s Apress product page (www.apress.com/9781430263401).
Summary
With the power of CreateJS, a fully enjoyable game, complete with polished graphics and animations was built with a fairly small amount of code. By using a sprite sheet, several graphics, including animated ones, were added to the game, each with only a single line of code. This sprite sheet’s large, corresponding object was tucked away into its own JSON file and loaded in to keep from polluting the game logic code. The extensive scoring logic was also written separately in a highly organized, self-contained manner by encapsulating it into a class-like object.
At this point in the book, a major portion of the EaselJS API and how it pertains to games has been covered. For the second half of the book, we’ll be taking this further with better programming techniques, performance optimizations, and the extra polish that will take your games to the next level. In the next chapter, you’ll learn to further organize your game by creating custom containers and sprites that contain custom behaviors.