
CREATING A PROVISIONING PROFILE
In order for your application to be able to execute on a device, the device must be provisioned with a file known as a provisioning profile. A provisioning profile contains one or more device IDs, and it must be installed on all the devices to which you want to deploy your applications.
On the iOS Provisioning Portal page, click the Provisioning item displayed on the left (see Figure A-17). Click the New Profile button to create a new provisioning profile.

Under the Development tab, shown in Figure A-18, provide a name for your provisioning profile, check the certificate name, select the App ID created in the previous section, and then check all the device names that you want to test on. Click Submit.
The provisioning profile that you have created will now be pending issuance, as shown in the Status field in Figure A-19.
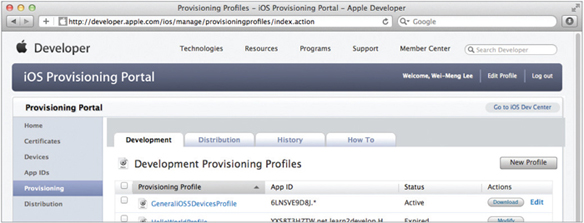
Refresh the page or click the Development tab again and the provisioning profile should now be ready for download (see Figure A-20). Download the generated provisioning profile onto your Mac by clicking the Download button.


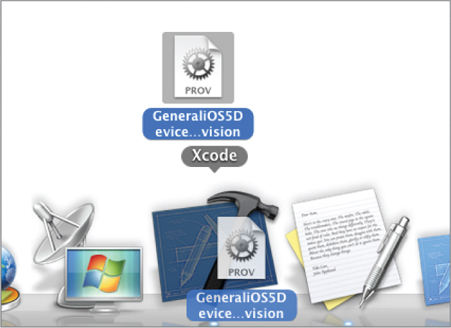
Drag and drop the downloaded provisioning profile onto the Xcode icon that is on the Dock (see Figure A-21). Alternatively, double-click the provisioning profile.
This installs the provisioning profile onto the Organizer application (part of Xcode). It also installs the provisioning profile onto your connected iPhone, iPod touch, or iPad device. To verify that the provisioning profile is indeed installed on your device, select the device that is currently connected to your Mac and view the Provisioning Profiles item (see Figure A-22).

![]() NOTE If you don't see the provisioning profile, simply disconnect your device and connect again. If, after reconnecting the device, the provisioning profile is not there, click the plus (+) button to manually add the provisioning profile to your device.
NOTE If you don't see the provisioning profile, simply disconnect your device and connect again. If, after reconnecting the device, the provisioning profile is not there, click the plus (+) button to manually add the provisioning profile to your device.
You are now almost ready to deploy your iPhone application onto your iPhone, iPod touch, or iPad. In Xcode, select the project name. Then, in the Build Settings page, go to the Code Signing Identity section. Under the Debug/Any iOS SDK key, select the GeneraliOS5DeviceProfile profile that you have just installed (see Figure A-23). Select the device to deploy to and then press Command-R.
The application should now be deployed onto the device.
