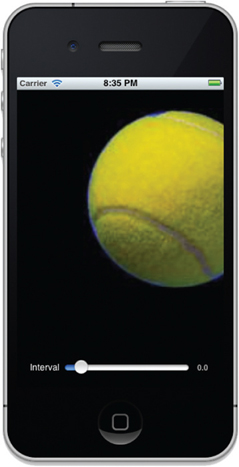
TRANSFORMING VIEWS
You can use the NSTimer class to simulate a simple animation by continuously changing the position of the Image View, but you can also use the transformation techniques supported by the iOS SDK to achieve the same effect.
Transforms are defined in Core Graphics (a C-based API that is based on the Quartz advanced drawing engine; you use this framework to handle things such as drawings, transformations, image creation, etc.), and the iOS SDK supports standard affine 2D transforms. You can use the iOS SDK to perform the following affine 2D transforms:
- Translation — Moves the origin of the view by the amount specified using the x and y axes
- Rotation — Moves the view by the angle specified
- Scaling — Changes the scale of the view by the x and y factors specified
![]() NOTE An affine transformation is a linear transformation that preserves co-linearity and ratio of distances. This means that all the points lying on a line initially will remain in a line after the transformation, with the respective distance ratios between them maintained.
NOTE An affine transformation is a linear transformation that preserves co-linearity and ratio of distances. This means that all the points lying on a line initially will remain in a line after the transformation, with the respective distance ratios between them maintained.
Figure 13-7 shows the effects of the various transformations.
Translation
To perform an affine transform on a view, simply use its transform property. Recall that in the previous example, you set the new position of the view through its center property:
imageView.center = CGPointMake(imageView.center.x + delta.x,
                               imageView.center.y + delta.y);

Using 2D transformation, you can use its transform property and set it to a CGAffineTransform data structure returned by the CGAffineTransformMakeTranslation() function, like this:
//---add the following bold line in the AnimationViewController.h file---
#import <UIKit/UIKit.h>

@interface AnimationViewController : UIViewController
{
    IBOutlet UIImageView *imageView;
    IBOutlet UISlider *slider;
    CGPoint delta;
    NSTimer *timer;
float ballRadius;

    //---add this line---
    CGPoint translation;
}

@property (nonatomic, retain) UIImageView *imageView;
@property (nonatomic, retain) UISlider *slider;

-(IBAction) sliderMoved:(id) sender;

@end


//---add the following bold lines in the AnimationViewController.m file---
- (void)viewDidLoad {
    ballRadius = imageView.bounds.size.width / 2;
    [slider setShowValue:YES];
    delta = CGPointMake(12.0,4.0);

    translation = CGPointMake(0.0,0.0);

    timer = [NSTimer scheduledTimerWithTimeInterval:slider.value
                                         target : self
                                       selector:@selector(onTimer)
                                       userInfo:nil
                                        repeats : YES];
    [super viewDidLoad];
}

-(void) onTimer {
    [UIView animateWithDuration:slider.value
                          delay:0.0f
                        options:UIViewAnimationOptionAllowUserInteraction |
                             UIViewAnimationOptionCurveLinear
                    animations:^{
        imageView.transform =
            CGAffineTransformMakeTranslation(translation.x, translation.y);
                    }
                    completion:nil];

translation.x += delta.x;
translation.y += delta.y;

if (imageView.center.x + translation.x >
    self.view.bounds.size.width - ballRadius ||
    imageView.center.x + translation.x < ballRadius)
    delta.x = -delta.x;

if (imageView.center.y + translation.y >
    self.view.bounds.size.height - ballRadius ||
    imageView.center.y + translation.y < ballRadius)
    delta.y = -delta.y;
}
The CGAffineTransformMakeTranslation() function takes two arguments: the value to move for the x axis and the value to move for the y axis.
The preceding code achieves the same effect as setting the center property of the Image View.
Rotation
The rotation transformation enables you to rotate a view using the angle you specify. In the following Try It Out, you modify the code from the previous example so that the tennis ball rotates as it bounces across the screen.
TRY IT OUT: Rotating the Tennis Ball
- In the AnimationViewController.h file, add the declaration for the angle variable as shown in bold:
#import <UIKit/UIKit.h> @interface AnimationViewController : UIViewController { IBOutlet UIImageView *imageView; IBOutlet UISlider *slider; CGPoint delta; NSTimer *timer; float ballRadius; CGPoint translation; //---add this line--- float angle; } @property (nonatomic, retain) UIImageView *imageView; @property (nonatomic, retain) UISlider *slider; -(IBAction) sliderMoved:(id) sender; @end - In the AnimationViewController.m file, add the following bold statements:
- (void)viewDidLoad {

    //---set the angle to 0---
    angle = 0;

    ballRadius = imageView.bounds.size.width / 2;
    [slider setShowValue:YES];
    delta = CGPointMake(12.0,4.0);

    translation = CGPointMake(0.0,0.0);

    timer = [NSTimer scheduledTimerWithTimeInterval:slider.value
target : self selector:@selector(onTimer) userInfo:nil repeats : YES]; [super viewDidLoad]; } -(void) onTimer { [UIView animateWithDuration:slider.value delay:0.0f options:UIViewAnimationOptionAllowUserInteraction || UIViewAnimationOptionCurveLinear animations:∧{ imageView.transform = CGAffineTransformMakeRotation(angle); } completion:nil]; angle += 0.02; if (angle>6.2857) angle = 0; imageView.center = CGPointMake(imageView.center.x + delta.x, imageView.center.y + delta.y); if (imageView.center.x > self.view.bounds.size.width - ballRadius || imageView.center.x > ballRadius) delta.x = -delta.x; if (imageView.center.y > self.view.bounds.size.height - ballRadius || imageView.center.y < ballRadius) delta.y = -delta.y; }
- Press Command-R to test the application. The tennis ball now rotates as it bounces across the screen.
How It Works
To rotate a view, set its transform property using a CGAffineTransform data structure returned by the CGAffineTransformMakeRotation() function. The CGAffineTransformMakeRotation() function takes a single argument, which contains the angle to rotate (in radians). After each rotation, you increment the angle by 0.02:
//---rotation---
imageView.transform = CGAffineTransformMakeRotation(angle);
. . .
angle += 0.02;
A full rotation takes 360 degrees, which works out to be 2PI radians (recall that PI is equal to 22/7, which is approximately 3.142857). If the angle exceeds 6.2857 (=2*3.142857), you reset angle to 0:
if (angle>6.2857) angle = 0;
Interestingly, you can combine multiple transformations into one, using the CGAffineTransformConcat function:
[UIView animateWithDuration:slider.value
                     delay:0.0f
                   options:UIViewAnimationOptionAllowUserInteraction ||
                           UIViewAnimationOptionCurveLinear
                animations:∧{
                    imageView.transform =
                        CGAffineTransformConcat(
                            CGAffineTransformMakeRotation(angle),
                            CGAffineTransformMakeTranslation(
                                translation.x, translation.y));
                }
                completion:nil];
The above code snippet applies a rotation and translation transformation to the Image View.
Scaling
To scale views, you use the CGAffineTransformMakeScale() function to return a CGAffineTransform data structure and set it to the transform property of the view:
imageView.transform = CGAffineTransformMakeScale(angle,angle);
CGAffineTransformMakeScale() takes two arguments: the factor to scale for the x axis and the factor to scale for the y axis. For simplicity, I have used the angle variable for the scale factor for both the x and y axes.
If you modify the previous Try It Out with the preceding statement, the tennis ball gets bigger as it bounces on the screen (see Figure 13-8). It then resets back to its original size and grows again.

